Boig Motorsports

Visit our community sponsor

Thanks Thanks:  0
Likes Likes:  0
Page 1 of 8 123 ... LastLast
Results 1 to 40 of 307

Thread: Boz's 33

  1. #1
    Senior Member Boz1911's Avatar
    Join Date
    May 2013
    Location
    Peachtree City
    Posts
    344
    Post Thanks / Like

    Boz's 33

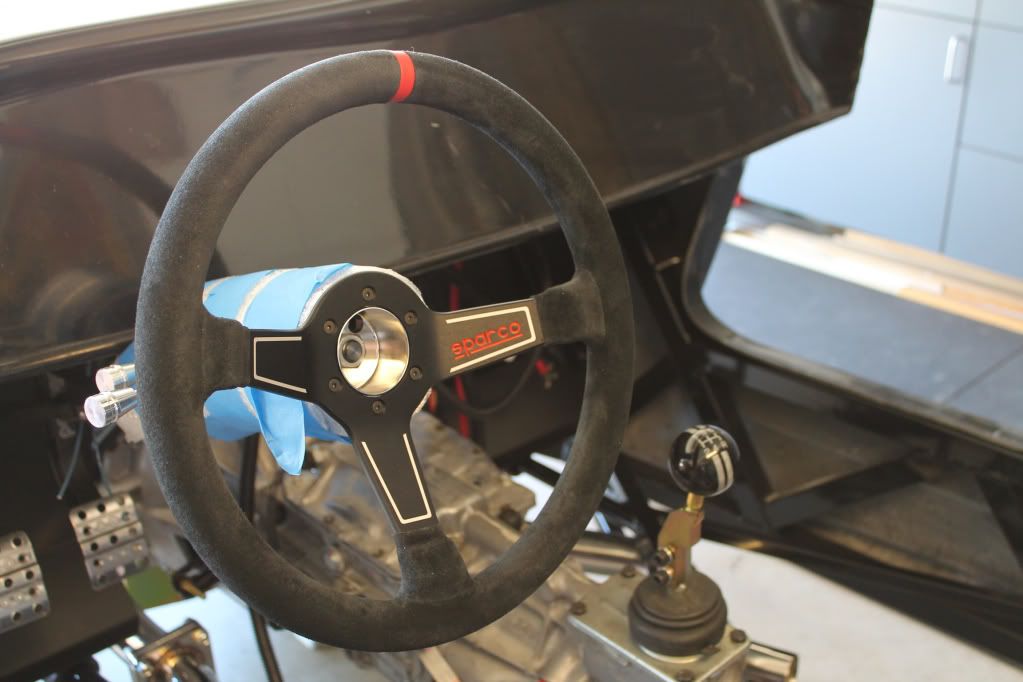
    Got my car last Saturday. Been organizing and trying to be diligent about a parts inventory. Still couldn't help but work on her since I've been off a couple of days. Probably won't do a full-on build thread but I'll update as we go along. I had almost a full page of items not shipped but got most of them yesterday. Got the front suspension mostly done along with the rear (waiting on rear springs). Did quite a bit of panel work while I was waiting on parts. To day I tackled and I believe conquered the pedal box assembly. I was short a couple of items but once I understood the concept I was able to adapt and finish. P7240051.JPGP7240052.JPGP7260001.JPGP7260004.JPG

  2. #2
    Senior Member ehansen007's Avatar
    Join Date
    Mar 2011
    Location
    Aliso Viejo, CA
    Posts
    1,625
    Post Thanks / Like
    I would highly recommend a build thread. You'll look back on it and be amazed at all the pictures, comments, and help you'll get and you'll even be surprised by some of the things you said when trying to figure things out. I go back and look at mine from time to time.

  3. #3
    Senior Member Boz1911's Avatar
    Join Date
    May 2013
    Location
    Peachtree City
    Posts
    344
    Post Thanks / Like
    Got a few things done today. Really wish I had my firewall and steering column. Ran some of the brake lines and finally decided to mount the front brakes low and avoid drilling the front center round bar between the shocks. I may have to make the last couple of pieces and since I have to mount the rear brakes I'll finish the rear brake lines then. Mounted the fuel tank but the pickup assembly seems a tad long?? Any ideas? Also loosely threw the power steering on since I know it will need to be clocked after the motor install.P7270006.JPGP7270007.JPGP7270008.JPGP7270009.JPGP7270011.JPG

  4. #4
    Senior Member Boz1911's Avatar
    Join Date
    May 2013
    Location
    Peachtree City
    Posts
    344
    Post Thanks / Like
    Damn , I need a firewall and steering column.......

  5. #5
    Senior Member Boz1911's Avatar
    Join Date
    May 2013
    Location
    Peachtree City
    Posts
    344
    Post Thanks / Like
    Got the front wheels today and plumbed/mounted the fuel pump and fuel filter. Rear wheels won't be shipped until late next week. Already have the tires 285/30r20 rear, 245/35r18 front. Bought a tool to cut the braided hose with, sure wish I had it in the old days when I was drag racing. Haven't decided whether to go up the left frame rail or cut diagonally across the car. Either way I need to end up at the regulator which will be slightly offset to the passenger side on the firewall.

    P7300001.JPGP7300002.JPGP7300003.JPGP7300004.JPGP7300005.JPGP7300006.JPGP7300007.JPG

  6. #6
    PLATNUM Supporting Member
    wallace18's Avatar
    Join Date
    Apr 2012
    Location
    Trenton, Florida
    Posts
    5,381
    Post Thanks / Like
    Nice looking wheels. You may want to mount that fuel pump with rubber isolaters. I had to redo mine. Way too noisey mounted right to the frame.

  7. #7
    Senior Member Boz1911's Avatar
    Join Date
    May 2013
    Location
    Peachtree City
    Posts
    344
    Post Thanks / Like
    Quote Originally Posted by wallace18 View Post
    Nice looking wheels. You may want to mount that fuel pump with rubber isolaters. I had to redo mine. Way too noisey mounted right to the frame.
    Thanks. I'll find some isolators today especially since it is right behind the driver.

  8. #8
    Senior Member maczter's Avatar
    Join Date
    Feb 2013
    Location
    Xenia, OH
    Posts
    277
    Post Thanks / Like
    Blog Entries
    1
    Did you buy a cable cutter for the lines? It was a great investment for mine. Also, take a look at Koul Tools (http://www.summitracing.com/search/b...w=Koul%20Tools) for doing the ends, especially if you are doing them on the car not in a vice, they will save your fingers, and was money well spent in my opinion.
    FFR HR #530
    Race car theme, Tim Whitaker roll bar, Autometer Autolite Gauges, Satin Black, SBC 383/700R4, 8.8 rear with Cobra Brakes, 3.29 gear, Boyd Tank, QA1 springs and shocks,

    My build blog: http://jacks33hotrod.blogspot.com/

  9. #9
    Senior Member riptide motorsport's Avatar
    Join Date
    Feb 2011
    Location
    Fort Lauderdale Fl.
    Posts
    3,296
    Post Thanks / Like
    Congrats on the purchase ..................fantastic start!
    FFR Daytona Type 65 Coupe
    67 427 Cobra
    57' Belair
    72 Pinto Wagon ,306" 1/4 miler
    34 5 window coupe Ford
    2003 Mustang GT
    99' ZX9
    85 Goldwing

    All toys still in the Scuderia!


    Every Saint has a past..................every sinner a future

    Don't take yourself so seriously........no one else does.

    You never see a motorcycle parked outside a Psychiatrists office.

  10. #10
    Senior Member Boz1911's Avatar
    Join Date
    May 2013
    Location
    Peachtree City
    Posts
    344
    Post Thanks / Like
    Quote Originally Posted by maczter View Post
    Did you buy a cable cutter for the lines? It was a great investment for mine. Also, take a look at Koul Tools (http://www.summitracing.com/search/b...w=Koul%20Tools) for doing the ends, especially if you are doing them on the car not in a vice, they will save your fingers, and was money well spent in my opinion.
    Wow, I hadn't even seen those, may be a future purchase for sure.
    I bought the cable cutter tool and have been using a vice I bought at a yard sale. The vice has plastic V-shaped inserts that work perfectly. I was sort of dreading this job, all I could remember from the old days was using a hack saw, duct tape, a lot of cussing and some painful cuts.
    I did run the fuel line up the inside frame rail on the drivers side but that is as far as I can go until the firewall arrives and I install the engine.
    Also made and installed a pretty mount for the power steering module.

    P7140009.JPG

  11. #11
    Senior Member Boz1911's Avatar
    Join Date
    May 2013
    Location
    Peachtree City
    Posts
    344
    Post Thanks / Like
    Quote Originally Posted by riptide motorsport View Post
    Congrats on the purchase ..................fantastic start!
    Thanks, been on vacation for a week, don't think I've had this much fun in a while. It's back to work tomorrow, where I'll be thinking of what I can accomplish next.
    Since this is my first build I've been content with most of the parts supplied although I try to use cool hardware whenever possible. The build threads on these forums have been absolutely invaluable.

  12. #12
    Senior Member Boz1911's Avatar
    Join Date
    May 2013
    Location
    Peachtree City
    Posts
    344
    Post Thanks / Like
    Good news, firewall and rear springs were shipped today. Maybe I'll at least have a "roller" next week. My rear wheels arrive tomorrow so I can mount the tires Saturday. Guess after I get the firewall I'll start the wiring. Any tips ??

  13. #13
    PLATNUM Supporting Member
    wallace18's Avatar
    Join Date
    Apr 2012
    Location
    Trenton, Florida
    Posts
    5,381
    Post Thanks / Like
    Plan out any modifications you want to the harness. Speakers, ect. And run the wires in the looms ahead of time.

  14. #14
    Senior Member Boz1911's Avatar
    Join Date
    May 2013
    Location
    Peachtree City
    Posts
    344
    Post Thanks / Like
    Quote Originally Posted by wallace18 View Post
    Plan out any modifications you want to the harness. Speakers, ect. And run the wires in the looms ahead of time.
    Good advice, I do plan on a radio and maybe a couple of speakers. I'm not a big music kind of guy so basic stuff will be all I need. Maybe I'll check into one of the classic - styled radios.

  15. #15
    Senior Member Boz1911's Avatar
    Join Date
    May 2013
    Location
    Peachtree City
    Posts
    344
    Post Thanks / Like
    Got the rear wheels yesterday and mounted the tires today. For me I love them and think they have an old/new school blend. Also a pic of the power steering module bracket I made and a very useful new angle drill.

    P8030006.JPGP8020001.JPGP8020004.JPGP8020003.JPGP8020005.JPG

  16. #16
    Senior Member Boz1911's Avatar
    Join Date
    May 2013
    Location
    Peachtree City
    Posts
    344
    Post Thanks / Like
    Unpacked the wiring harness box today and read the directions several times, including the online version. Very difficult to get started as it seems the mounting bracket had the angle bent the wrong way. I checked every photo I could and finally just bent it the opposite way and mounted the harness. Loosely ran the rear and the front harnesses but everything else will have to wait until I get the firewall installed, which is due to arrive Tuesday. Mounted the horns in the front center location. Would have been a lot easier to drill a mounting hole without the shocks in the way. I used a 12 inch bit, but it took forever. Also trimmed the gauge panel and made sure they all fit, then installed the temp and oil sending units in the engine. This is a blast and actually no where near as difficult as I imagined.

  17. #17
    Senior Member Boz1911's Avatar
    Join Date
    May 2013
    Location
    Peachtree City
    Posts
    344
    Post Thanks / Like
    Looked for 30 minutes for the headlight switch which I knew was here cause I saw the darn thing......

    Gotta ask, why would it be packed in the radiator fan motor/coolant hose box????

    That's okay, after today the only big boxes I have left contain two windshields and the radiator.

  18. #18
    Senior Member Boz1911's Avatar
    Join Date
    May 2013
    Location
    Peachtree City
    Posts
    344
    Post Thanks / Like
    P8070016.JPGP8070017.JPG Got my firewall, rear springs, and the fuel tank vent yesterday and since I was off today I feel like I got a lot done, including setting her on the ground for the first time. I did the 10-32 button head bolt thing to install the firewall and stole the idea of one set of bolts to overlap the top and bottom pieces. I mounted the master cylinder reservoir also. Anybody got an extra one their not using? I would feel more comfortable with separate reservoirs. My transmission will be here tomorrow so the next goal is to install the engine and trans. Even though I started the wiring harness I feel having the engine installed will dictate where a lot of stuff ends up and is routed. I also do not have my steering column yet.
    My overall impression so far is the car is basically a 33 body sitting on a race-car chassis. Personally I think it's a great combo. The frame is a work of art and the majority of the parts are better than adequate. I wish there were a few less "imported" parts, but guess the cost would be higher. With the manual, online manual and the build threads things have been relatively easy so far. The build threads have saved me a lot of headaches and prevented some mistakes. I've been using upgraded hardware when I think it's needed but that's about it as far as "customizing" goes so far. My main goal is to build a good solid car to start with, I figure I can customize later on. I really hope I can do this again, I've learned a lot and enjoyed almost every minute.
    P8070010.JPGP8070011.JPGP8070012.JPGP8070013.JPGP8070014.JPGP8070015.JPG
    Last edited by Boz1911; 08-07-2013 at 06:47 PM.

  19. #19
    Senior Member 68GT500MAN's Avatar
    Join Date
    Feb 2011
    Location
    Fresno, CA
    Posts
    1,808
    Post Thanks / Like
    Looking like you are making great progress.

  20. #20
    Senior Member Boz1911's Avatar
    Join Date
    May 2013
    Location
    Peachtree City
    Posts
    344
    Post Thanks / Like
    Quote Originally Posted by 68GT500MAN View Post
    Looking like you are making great progress.
    Thanks, even though she arrived less than three weeks ago, I had a week's vacation in there, so in actuality I have a good bit of time already invested. Today was a good photo day since this was the first day I could let her walk a little.

  21. #21
    Senior Member Boz1911's Avatar
    Join Date
    May 2013
    Location
    Peachtree City
    Posts
    344
    Post Thanks / Like
    P8080018.JPGP8080021.JPG

    FedEx was very good to me today and left me a brand new Tremec 600. I fitted the bellhousing. knowing it would very tight the first install. Hopefully it will be easier the second time.
    One observation and one question. First, these things are heavy, or I'm gettin' old because I've been on my back and installed manual transmissions in the driveway by myself without too much strain. Of course that was 30 years ago. Second any suggestion for a shifter??

  22. #22
    Senior Member esff32's Avatar
    Join Date
    Oct 2012
    Location
    La Verne, Ca
    Posts
    560
    Post Thanks / Like
    Hey Boz1911, i went with this item. It was just a replacement lever and i got a shift knob from Speeddawg. I think it puts the knob in a decent position and i believe that Tremec is already equipped with a short throw shifter. It was fairly inexpensive. You build is coming along nicely. Hope this helps.

    Evan

    http://www.ebay.com/itm/Pro-5-0-Gold...sories&vxp=mtr


  23. #23
    Senior Member Boz1911's Avatar
    Join Date
    May 2013
    Location
    Peachtree City
    Posts
    344
    Post Thanks / Like
    Well, got the engine and trans installed, got a very tight oil pan to cross bar clearance issue on the drivers side but I think I have a solution.
    P8110022.JPGP8110023.JPGP8110024.JPGP8110025.JPG
    P8110026.JPGP8110027.JPGP8110028.JPGP8110029.JPG

    Now the real work begins.....

  24. #24
    Senior Member maczter's Avatar
    Join Date
    Feb 2013
    Location
    Xenia, OH
    Posts
    277
    Post Thanks / Like
    Blog Entries
    1
    Did you still need an extra reservoir?
    FFR HR #530
    Race car theme, Tim Whitaker roll bar, Autometer Autolite Gauges, Satin Black, SBC 383/700R4, 8.8 rear with Cobra Brakes, 3.29 gear, Boyd Tank, QA1 springs and shocks,

    My build blog: http://jacks33hotrod.blogspot.com/

  25. #25
    Senior Member Boz1911's Avatar
    Join Date
    May 2013
    Location
    Peachtree City
    Posts
    344
    Post Thanks / Like
    Quote Originally Posted by maczter View Post
    Did you still need an extra reservoir?
    Yes, I would prefer to have two on the car. Send me a message.

    Thanks, Brian

  26. #26
    PLATNUM Supporting Member
    wallace18's Avatar
    Join Date
    Apr 2012
    Location
    Trenton, Florida
    Posts
    5,381
    Post Thanks / Like
    Boy! that is looking good! I like how you tie all the red together with the shocks, calipers, wires and coil.

  27. #27
    Senior Member Boz1911's Avatar
    Join Date
    May 2013
    Location
    Peachtree City
    Posts
    344
    Post Thanks / Like
    Quote Originally Posted by wallace18 View Post
    Boy! that is looking good! I like how you tie all the red together with the shocks, calipers, wires and coil.
    Thanks, you forgot about my roll around stool.

  28. #28
    Senior Member Boz1911's Avatar
    Join Date
    May 2013
    Location
    Peachtree City
    Posts
    344
    Post Thanks / Like
    Installed the inner firewall and ignition box. Had quite a few things wired up then undid all of them to work on the tunnel. My tunnel doesn't want to fit flush on the right side so I need to figure out why. Any suggestions? Also ended up mounting my alternator upside down.

    P8140030.JPGP8140031.JPG
    Last edited by Boz1911; 08-15-2013 at 04:52 AM.

  29. #29
    PLATNUM Supporting Member
    wallace18's Avatar
    Join Date
    Apr 2012
    Location
    Trenton, Florida
    Posts
    5,381
    Post Thanks / Like
    My firewall to tunnel on the right side was off 1/4" on the verticle part. I ended up making spacers out of scrap fiberglass I had. I just traced the outline of the tunnel and made spacers. I shifted my tunnel as far to the right as I could for extra foot room for the driver.

  30. #30
    Senior Member Boz1911's Avatar
    Join Date
    May 2013
    Location
    Peachtree City
    Posts
    344
    Post Thanks / Like
    Figured out the tunnel problem. It wouldn't fit flush because the top left was hitting the fuse panel mount so the whole thing was cocked to the right. Not going to be a lot of foot clearance on the go pedal. I would like to keep the tunnel removable. Other than the few hard points to drill and tap, anyone have any ideas?

  31. #31
    PLATNUM Supporting Member
    wallace18's Avatar
    Join Date
    Apr 2012
    Location
    Trenton, Florida
    Posts
    5,381
    Post Thanks / Like
    I installed my tunnel with rivnuts so I can remove it if I want to easy.

  32. #32
    Senior Member jayguy's Avatar
    Join Date
    Feb 2011
    Location
    Las Vegas
    Posts
    234
    Post Thanks / Like
    For gas pedal clearance, several builders have cut a relief into the side of the tunnel. I vaguely remember FF offering a kit to do that even, or maybe it was someone else.

  33. #33
    Senior Member Boz1911's Avatar
    Join Date
    May 2013
    Location
    Peachtree City
    Posts
    344
    Post Thanks / Like
    Quote Originally Posted by jayguy View Post
    For gas pedal clearance, several builders have cut a relief into the side of the tunnel. I vaguely remember FF offering a kit to do that even, or maybe it was someone else.
    In the manual they show installing a piece of aluminum but I'm not sure I have that piece. I only have one unidentified part that may be that piece they are indicating. Regardless looks like I'll have to do something. I squeezed the left side of the tunnel in about a half an inch. Really can't go much further without interfering with the clutch fork.
    Anyone have pics showing where they passed the main harnesses through the tunnel or firewall?

  34. #34
    Senior Member Boz1911's Avatar
    Join Date
    May 2013
    Location
    Peachtree City
    Posts
    344
    Post Thanks / Like
    Quote Originally Posted by wallace18 View Post
    I installed my tunnel with rivnuts so I can remove it if I want to easy.
    Even though I've always been a car guy I have never installed a rivnut, guess it's time to learn.

  35. #35
    Senior Member maczter's Avatar
    Join Date
    Feb 2013
    Location
    Xenia, OH
    Posts
    277
    Post Thanks / Like
    Blog Entries
    1
    I could not find the instructions for the gun, so it took a ton of browsing on the web to figure out how to get it right.
    FFR HR #530
    Race car theme, Tim Whitaker roll bar, Autometer Autolite Gauges, Satin Black, SBC 383/700R4, 8.8 rear with Cobra Brakes, 3.29 gear, Boyd Tank, QA1 springs and shocks,

    My build blog: http://jacks33hotrod.blogspot.com/

  36. #36
    Senior Member maczter's Avatar
    Join Date
    Feb 2013
    Location
    Xenia, OH
    Posts
    277
    Post Thanks / Like
    Blog Entries
    1
    Does anyone have pics of the relief they cut in?
    FFR HR #530
    Race car theme, Tim Whitaker roll bar, Autometer Autolite Gauges, Satin Black, SBC 383/700R4, 8.8 rear with Cobra Brakes, 3.29 gear, Boyd Tank, QA1 springs and shocks,

    My build blog: http://jacks33hotrod.blogspot.com/

  37. #37
    PLATNUM Supporting Member
    wallace18's Avatar
    Join Date
    Apr 2012
    Location
    Trenton, Florida
    Posts
    5,381
    Post Thanks / Like
    I cut the relief as per page 543 in the manual.

  38. #38
    Senior Member Boz1911's Avatar
    Join Date
    May 2013
    Location
    Peachtree City
    Posts
    344
    Post Thanks / Like
    Quote Originally Posted by wallace18 View Post
    I cut the relief as per page 543 in the manual.
    Did your kit have the aluminum piece included? I checked my parts list and there is nothing shown. I wonder if the tunnel has been changed, mine is the two piece unit and after shifting the left side I only have about 1/4 inch clearance to the shift fork. Just wondering if I could even get any more foot clearance??

  39. #39
    Moderator
    Join Date
    Feb 2011
    Location
    Milton,DE
    Posts
    656
    Post Thanks / Like
    Definitely make the tunnel removable. I did and I am glad that I did as I had to remove the trans twice already. It is easier to remove the trans from inside the car then pulling the engine /trans combo from the front..

    That trans tunnel in your picture is something that I have never seen before. When did FFR start sending those out???


    Olli

  40. #40
    Senior Member Boz1911's Avatar
    Join Date
    May 2013
    Location
    Peachtree City
    Posts
    344
    Post Thanks / Like
    Got some stuff done today. Mounted the coolant reservoir, finished the trans tunnel. Mounted the grill first, then dismounted and reinstalled with the radiator, cooling fan and the radiator shroud. Learned how to use the rivnut tool. Pretty cool tool.

    P8180001.JPGP8180002.JPGP8180003.JPGP8180004.JPGP8180005.JPGP8180006.JPGP8180007.JPGP8180008.JPGP8180012.JPGP8180013.JPG
    Last edited by Boz1911; 08-18-2013 at 04:54 PM.

Page 1 of 8 123 ... LastLast

Posting Permissions

  • You may not post new threads
  • You may not post replies
  • You may not post attachments
  • You may not edit your posts
  •  

Replica Parts

Visit our community sponsor