Very Cool Parts

Visit our community sponsor

Thanks Thanks:  0
Likes Likes:  0
Page 6 of 6 FirstFirst ... 456
Results 201 to 227 of 227

Thread: Replicaparts.com 818 build thread

  1. #201
    Senior Member RM1SepEx's Avatar
    Join Date
    Jul 2011
    Location
    Freeport, ME
    Posts
    3,801
    Post Thanks / Like
    because if you don't you can't get an even space, the hood touches on both sides... Aloha818 did the same thing
    Dan

    818S #17 Picked up 8/1/13 First start 11/1/13 Go Kart 3/28/14

  2. #202
    818 builder metalmaker12's Avatar
    Join Date
    Mar 2012
    Location
    Exeter R.I
    Posts
    2,834
    Post Thanks / Like
    Blog Entries
    1
    I didn't have an issue, I am really unsure of why it's needed, though I like it too.
    818S frame #13 Jdm version 8 ej207

  3. #203

    Join Date
    Feb 2011
    Location
    Norton, MA USA earth
    Posts
    3,340
    Post Thanks / Like
    I did it so that I could hinge it. If you look back thruogh my build site, you will see it.
    Mike

  4. #204
    818 builder metalmaker12's Avatar
    Join Date
    Mar 2012
    Location
    Exeter R.I
    Posts
    2,834
    Post Thanks / Like
    Blog Entries
    1
    Quote Originally Posted by michael everson View Post
    I did it so that I could hinge it. If you look back thruogh my build site, you will see it.
    Mike
    I know why you did it mike, just trying to understand what Dan means. What up man, weather breaks I am driving my 818 up to ya to check out what your doing.
    818S frame #13 Jdm version 8 ej207

  5. #205
    Senior Member RM1SepEx's Avatar
    Join Date
    Jul 2011
    Location
    Freeport, ME
    Posts
    3,801
    Post Thanks / Like
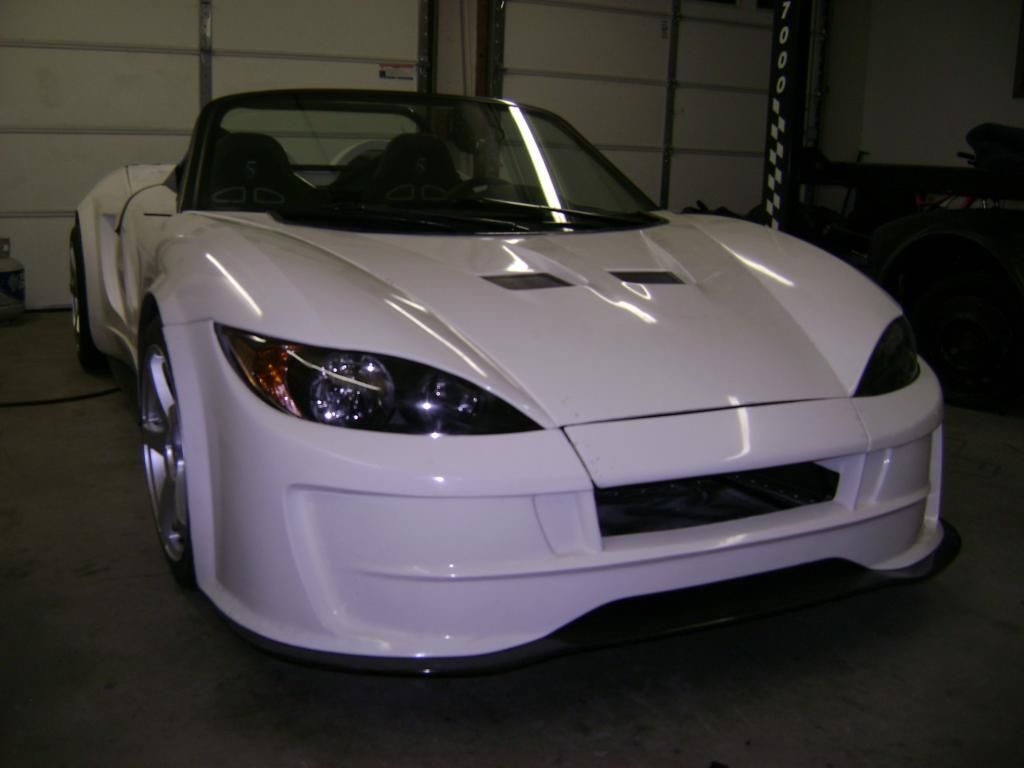
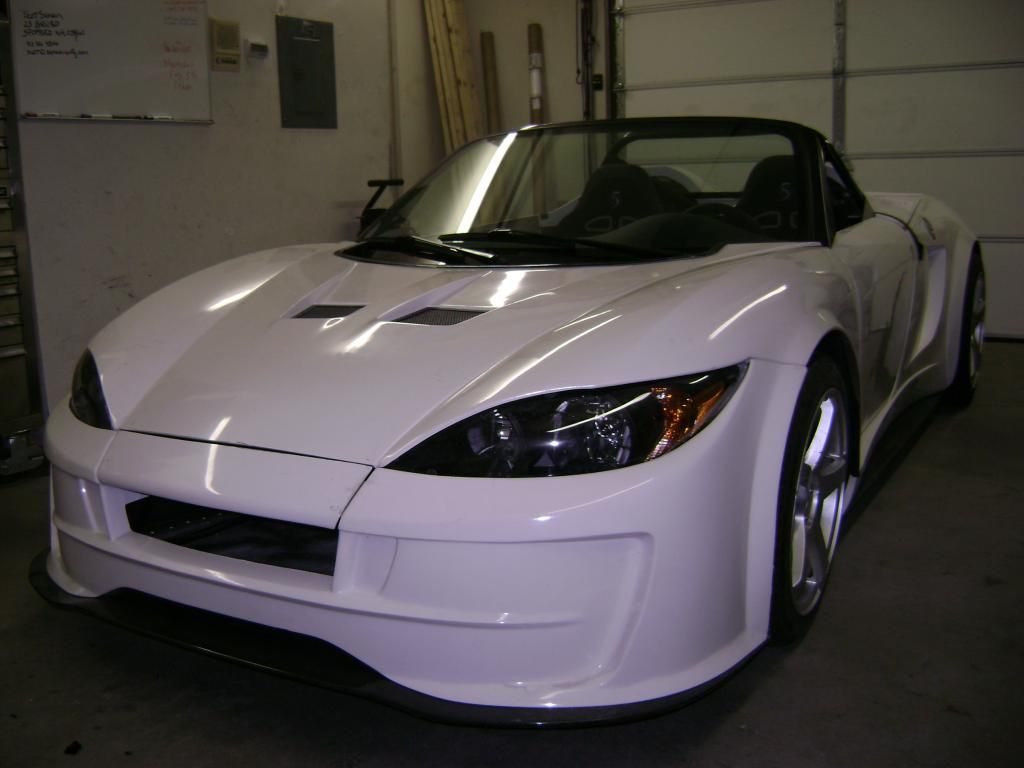
    He cut the hood to make it shorter to not hinge it at the front edge. There is very tight clearance because of how the nose is molded too narrow and as it hinges the hood interferes with the nose.

    Check Aloha818 build thread, I found the same thing, if you mount the hood so that it is even with the front of the car it is too wide and you can't hold a consistent 1/8 gap EVERY FFR car has the hood mounted a little bit back to avoid any interference with the hood and nose. I'm hinging mine, but with my new panels I'm going to get a bit fancier than what I did with the hood that now resides at FFR. My new hood and nose have the exact same issue as the originals. The returns under the hood hit the sides of the nose. Aloha split his nose panel a wee bit to add hood clearance. I'm not sure exactly how I'm going to do rev II

    I like your pegs Chris, I can see how the hood could either hinge or be lifted off with some shoulder bolts sticking out of the side.

    I just put it back on jack stands today to start seriously working on remounting my new panels.
    Last edited by RM1SepEx; 02-28-2015 at 05:07 PM.
    Dan

    818S #17 Picked up 8/1/13 First start 11/1/13 Go Kart 3/28/14

  6. #206
    Senior Member AZPete's Avatar
    Join Date
    Feb 2011
    Location
    Scottsdale, AZ
    Posts
    2,374
    Post Thanks / Like
    As Dan wrote, I think Mike cut the front of his hood so he could hinge it. But, I don't see any detail in this build thread so, Mike, could you please explain or post photos of your front hood hinge?
    Dan, Aloha didn't hinge the front hood but made internal brackets to hold it on. I found this on Aloha Build Thread, page 13, post #490. Maybe I'll do that but ideally someone (Mike?) will come out with a front hood hinge for sale.
    818S/C : Chassis #25 with 06 WRX 2.5 turbo, ABS, cruise, PS, A/C, Apple CarPlay, rear camera, power windows & locks, leather & other complexities. Sold 10/19 with 5,800 miles.
    Mk3 Roadster #6228 4.6L, T45, IRS, PS, PB, ABS, Cruise, Koni's, 17" Halibrands, red w/ silver - 9K miles then sold @ Barrett-Jackson Jan 2011 (got back cash spent).

  7. #207
    Senior Member
    Join Date
    Jan 2012
    Posts
    1,112
    Post Thanks / Like
    Front hood hinge for sale done deal. Take my money
    Last edited by 07FIREBLADE; 03-01-2015 at 04:48 PM.

  8. #208
    Senior Member RM1SepEx's Avatar
    Join Date
    Jul 2011
    Location
    Freeport, ME
    Posts
    3,801
    Post Thanks / Like
    Aloha818 didn't hinge it but he cut the sides of the front nose to keep even gaps, as molded, the hood is too wide at the front where it meets the nose. If you try to hinge it at the front point it rubs due to the interference and the angles of the return of the hood. Rather than deal with that Mike cut off the front of his hood and spliced it into the nose. Notice that it leaves a consistent gap. Then he hinged it in back of the place where he cut it. It does show some shots of his custom bent hinges in his thread
    Dan

    818S #17 Picked up 8/1/13 First start 11/1/13 Go Kart 3/28/14

  9. #209

    Join Date
    Feb 2011
    Location
    Norton, MA USA earth
    Posts
    3,340
    Post Thanks / Like
    Here is a link to the hood hinge thread. I didn't realize I had a separate thread for that.
    http://thefactoryfiveforum.com/showt...ght=hood+hinge

  10. #210
    Senior Member AZPete's Avatar
    Join Date
    Feb 2011
    Location
    Scottsdale, AZ
    Posts
    2,374
    Post Thanks / Like
    Thanks, Mike, for the link to the hood hinge thread. I had forgotten about that as it was past my limited memory span, I guess.
    I repeat: Get to work on a front hinge for sale! There's so much demand that you'll be able to retire to Monte Carlo and own an F1 team! Really.
    818S/C : Chassis #25 with 06 WRX 2.5 turbo, ABS, cruise, PS, A/C, Apple CarPlay, rear camera, power windows & locks, leather & other complexities. Sold 10/19 with 5,800 miles.
    Mk3 Roadster #6228 4.6L, T45, IRS, PS, PB, ABS, Cruise, Koni's, 17" Halibrands, red w/ silver - 9K miles then sold @ Barrett-Jackson Jan 2011 (got back cash spent).

  11. #211
    Senior Member Frank818's Avatar
    Join Date
    Jun 2013
    Location
    QC, Canada
    Posts
    5,732
    Post Thanks / Like
    Quote Originally Posted by AZPete View Post
    I repeat: Get to work on a front hinge for sale!
    I second that!!

    Quote Originally Posted by AZPete View Post
    There's so much demand that you'll be able to retire to Monte Carlo and own an F1 team! Really.
    Marussia?
    Frank
    818 chassis #181 powered by a '93 VW VR6 Turbo GT3582R
    Go-karted Aug 5, 2016 - Then May 19+21, 2017
    Tracked May 27/July 26, 2017
    Build time before being driveable on Sep 27, 2019: over 6000h
    Build Completed Winter 2021

  12. #212

    Join Date
    Feb 2011
    Location
    Norton, MA USA earth
    Posts
    3,340
    Post Thanks / Like
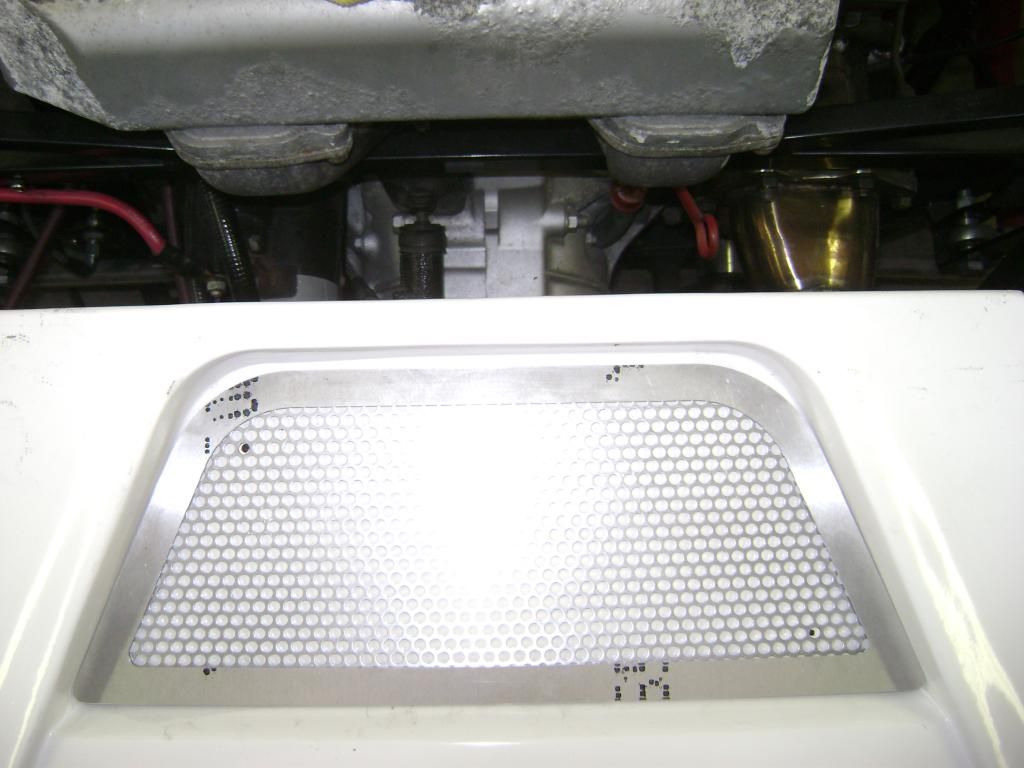
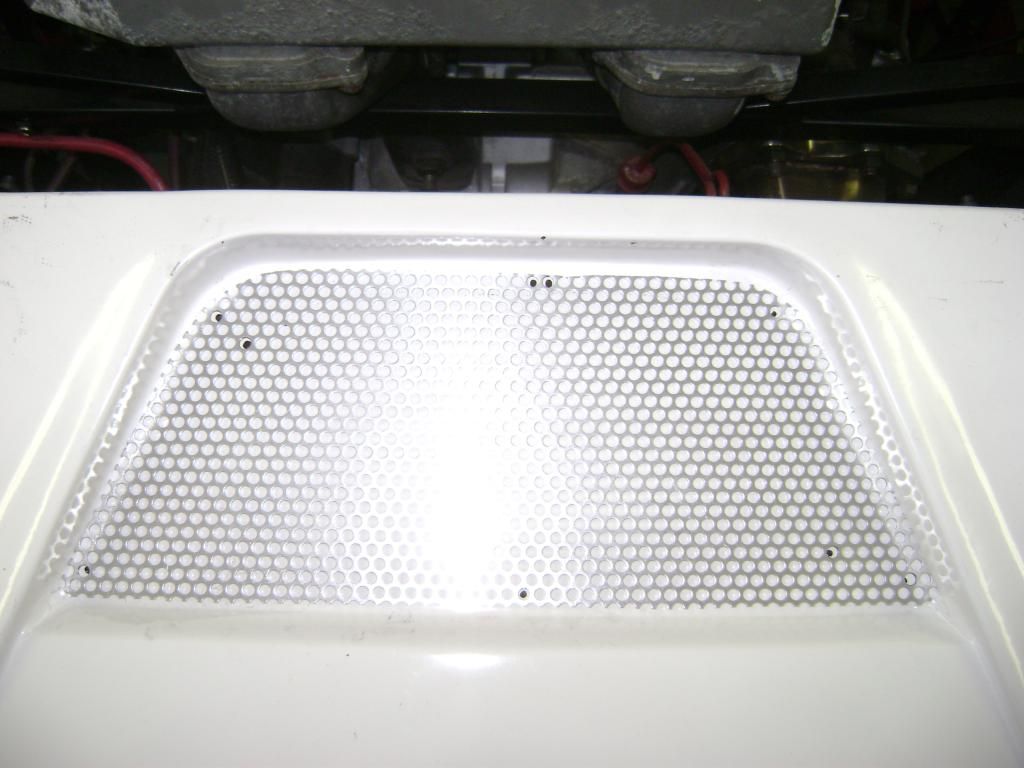
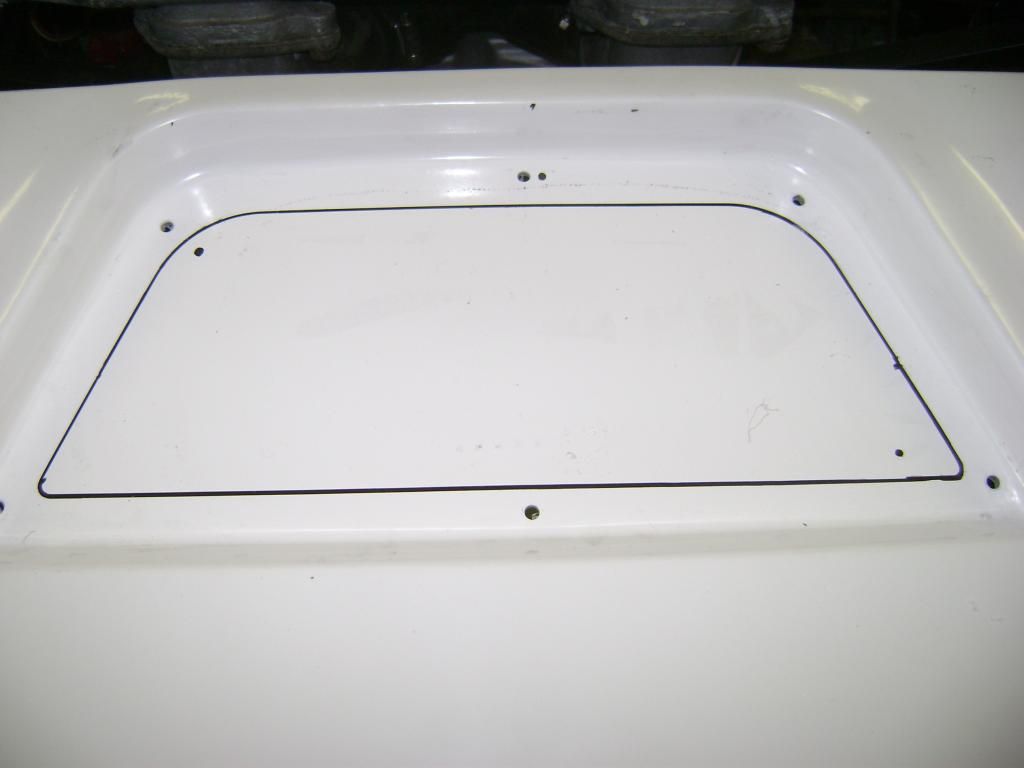
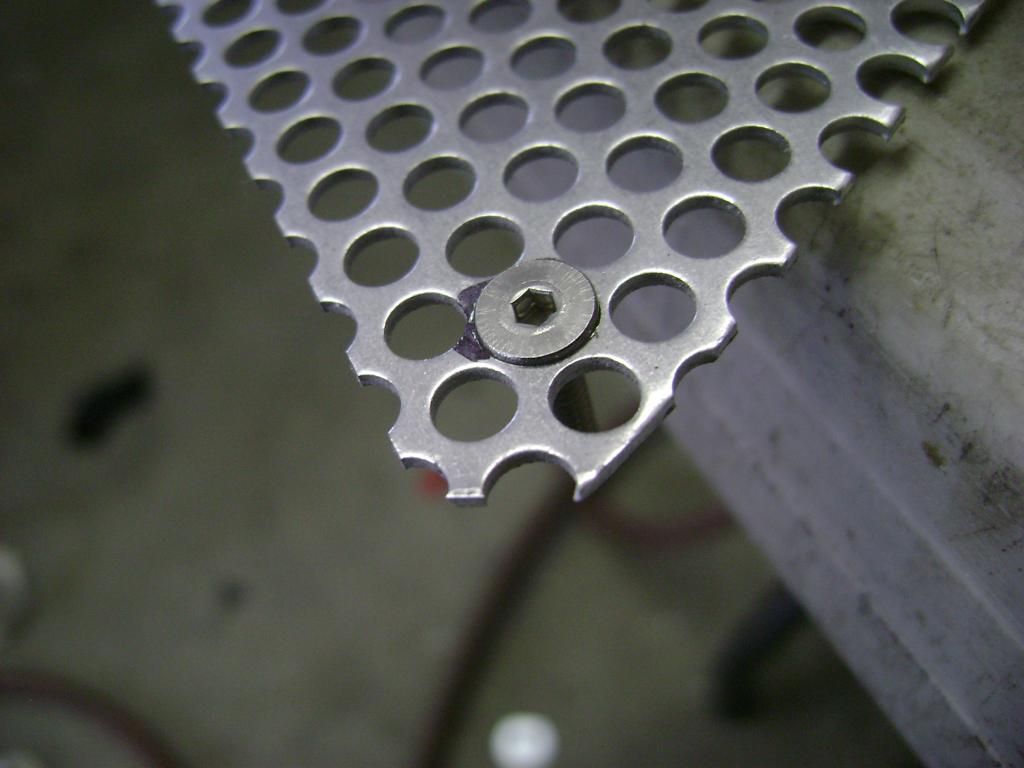
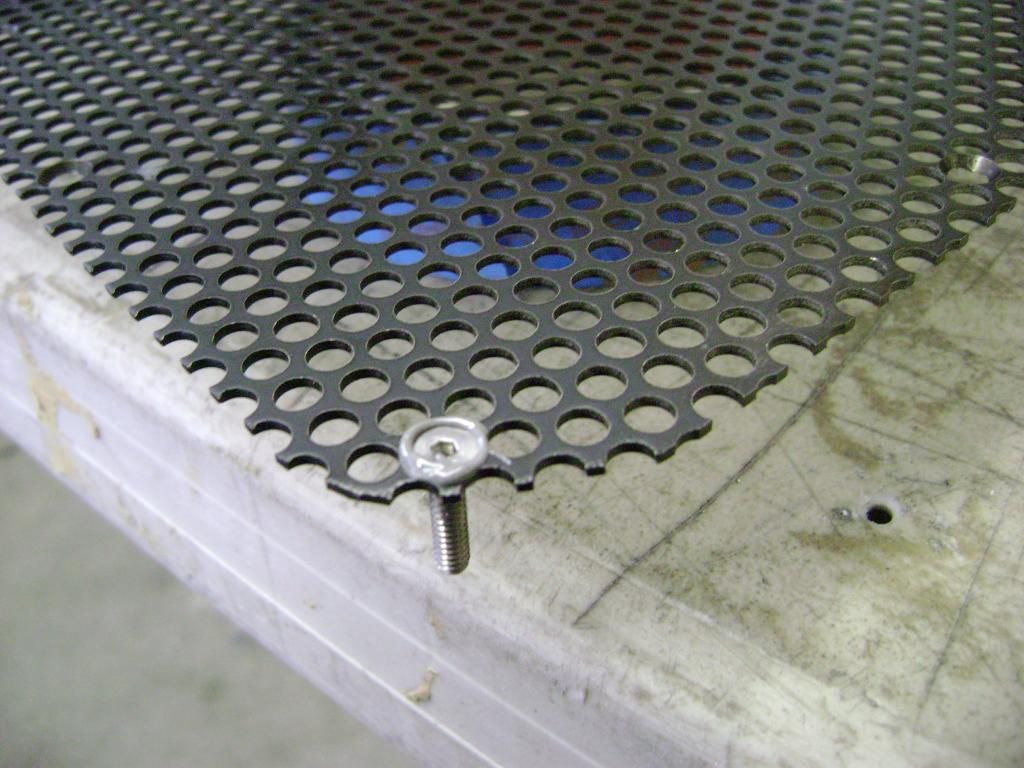
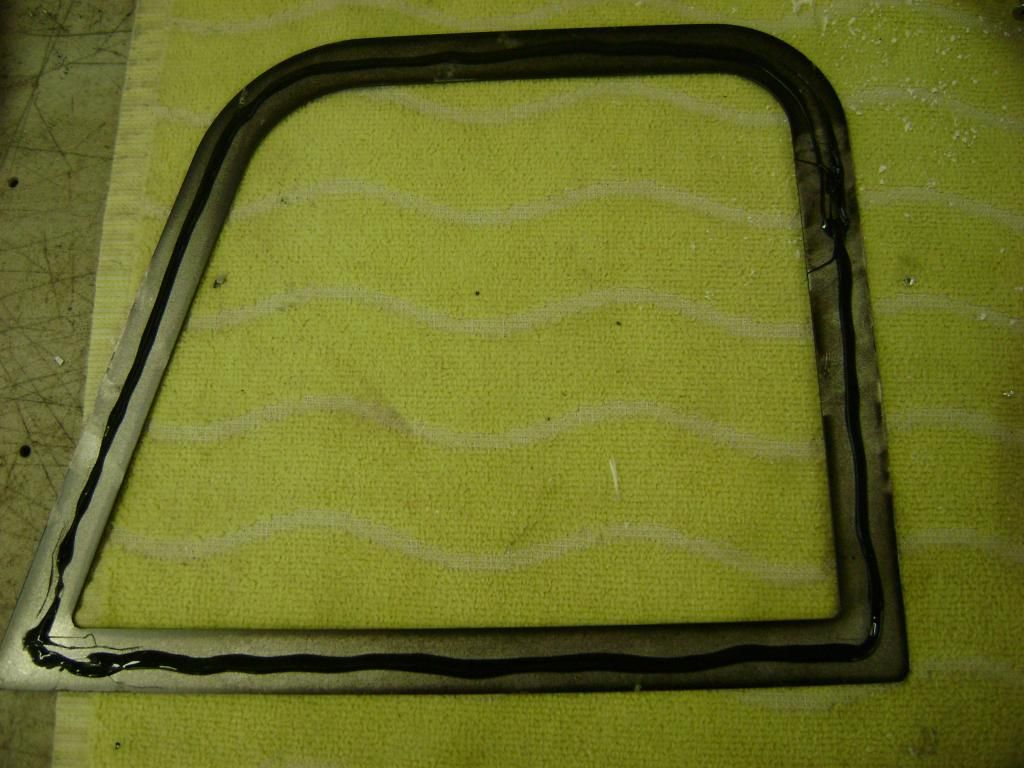
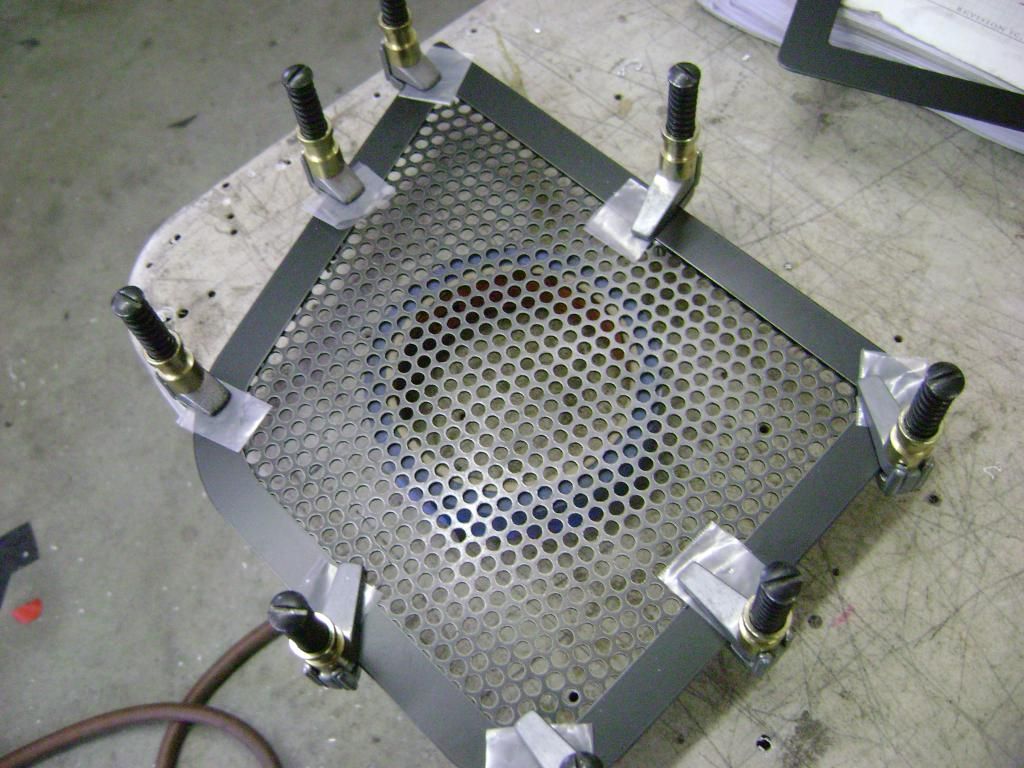
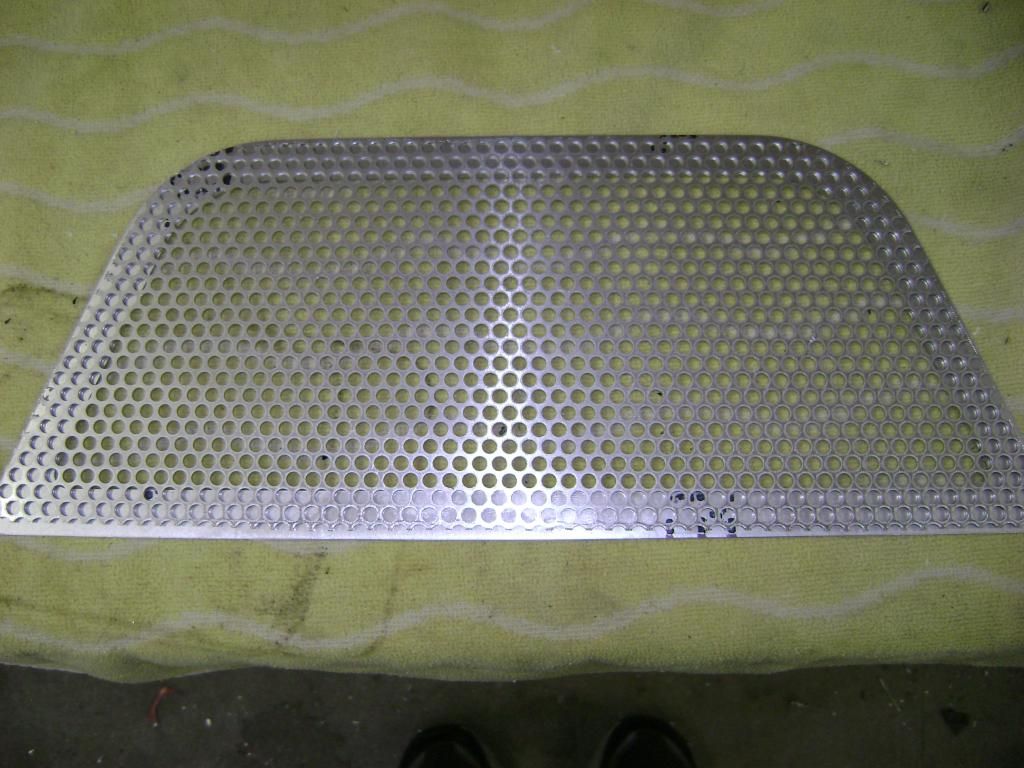
    Here is a step by step of how I am mounting my grilles. This will allow me to remove them for paint if I ever get that far.


    First step is to cut the perforated material a little smaller than the trim ring.


    Next lay both pieces in the recess and line them up so that they fit well and no perforated material is shown around the edges. Mark any 2 holes through the perforated material.


    Remove the trim ring and drill the holes you plan to use to bolt it down. I drilled them the same size as the existing holes. 3/16 diameter.


    Put the trim ring back in and mark where the body needs to be cut.


    Next counter sink the holes that you transferred to the body. I used 6-32 flat head screws.


    After all the holes were countersunk, I powder coated both pieces semi gloss black

  13. #213

    Join Date
    Feb 2011
    Location
    Norton, MA USA earth
    Posts
    3,340
    Post Thanks / Like


    After the powder coating has cooled, epoxy the 6-32 screws in the holes you counter sunk.


    Run a bead of black silicone around the perimeter of the trim ring and place it on top of the perforated material and clamp in place.


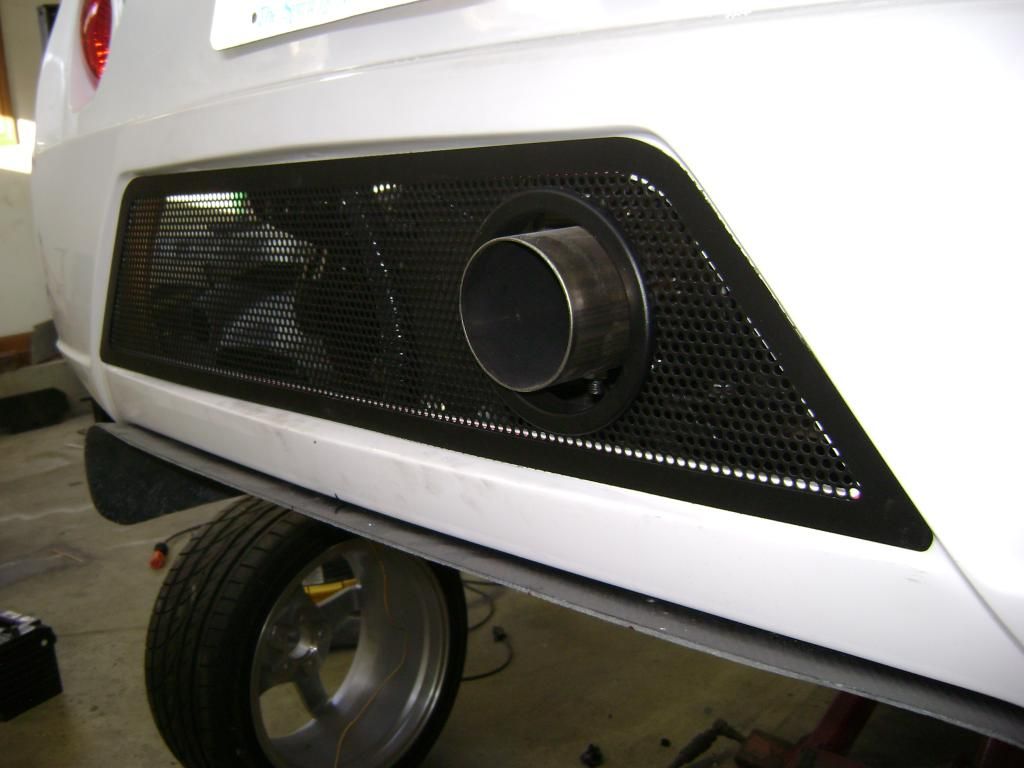
    Here is a different panel installed on the car. Just unbolt and remove if needed.
    This opening still needs final trimming.
    Mike

  14. #214
    Tazio Nuvolari wannabe Scargo's Avatar
    Join Date
    Nov 2013
    Location
    south-central CT
    Posts
    1,611
    Post Thanks / Like
    I like this a lot. Looks good! Do you mind sharing the perforation size/spacing or whatever you call the spec of the material?

  15. #215

    Join Date
    Feb 2011
    Location
    Norton, MA USA earth
    Posts
    3,340
    Post Thanks / Like
    Scargo, it just the stuff that comes with the kit.
    mike

  16. #216
    Tazio Nuvolari wannabe Scargo's Avatar
    Join Date
    Nov 2013
    Location
    south-central CT
    Posts
    1,611
    Post Thanks / Like
    I guess I should unpack all my stuff!
    In my defense, I think that the S is very different from an R. I don't know what those differences are.

  17. #217
    Senior Member matteo92065's Avatar
    Join Date
    Feb 2014
    Location
    Ramona, CA
    Posts
    417
    Post Thanks / Like
    Thanks for the tips. I'll do this to my rear vent this weekend.

  18. #218

    Join Date
    Feb 2011
    Location
    Norton, MA USA earth
    Posts
    3,340
    Post Thanks / Like
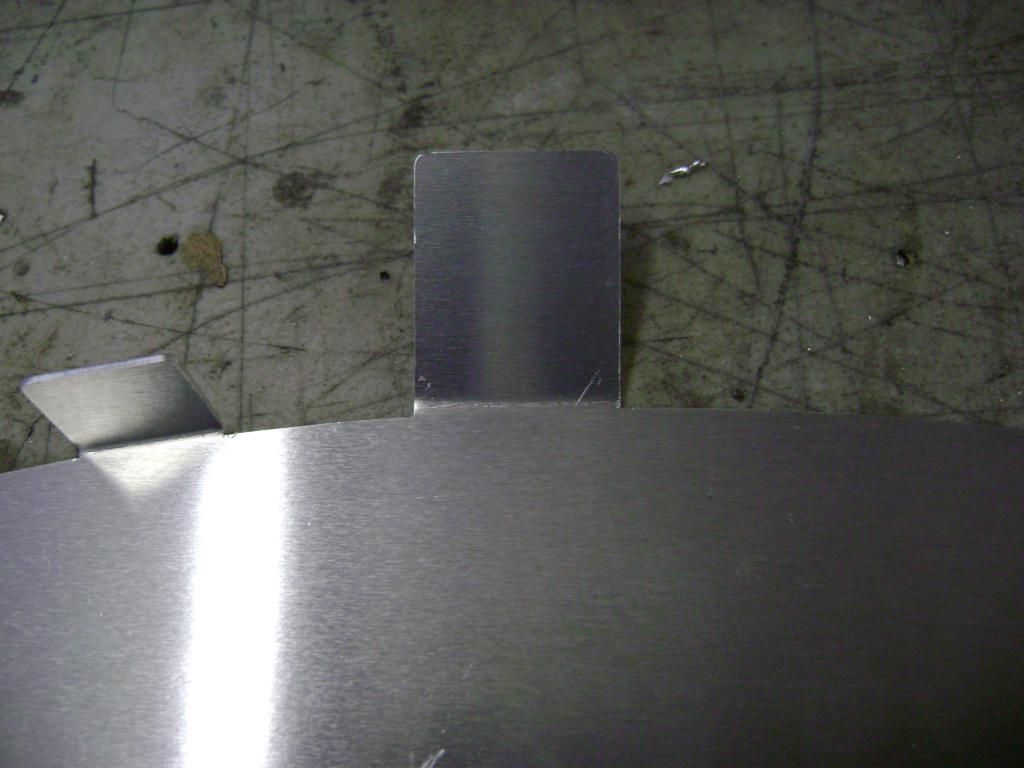
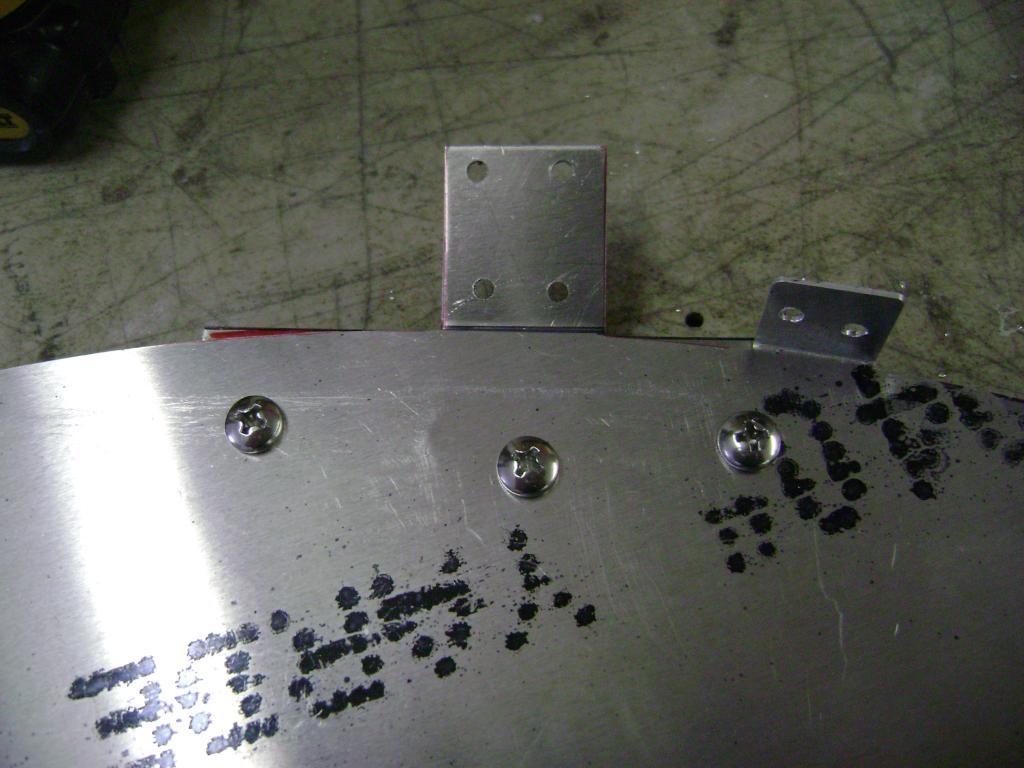
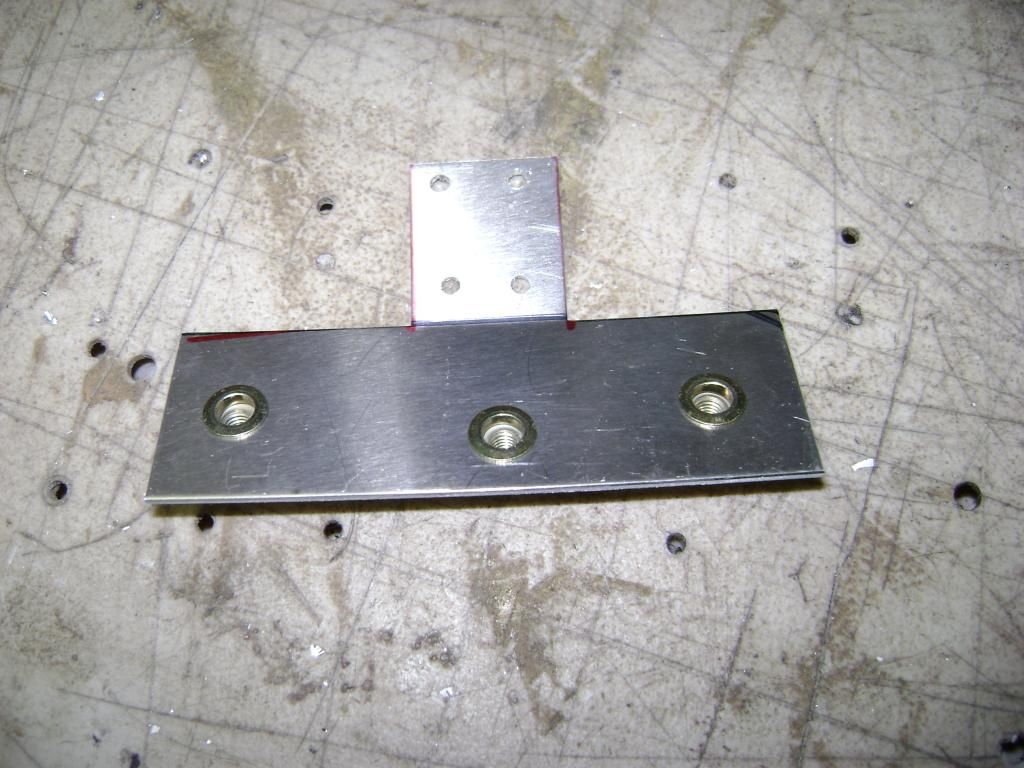
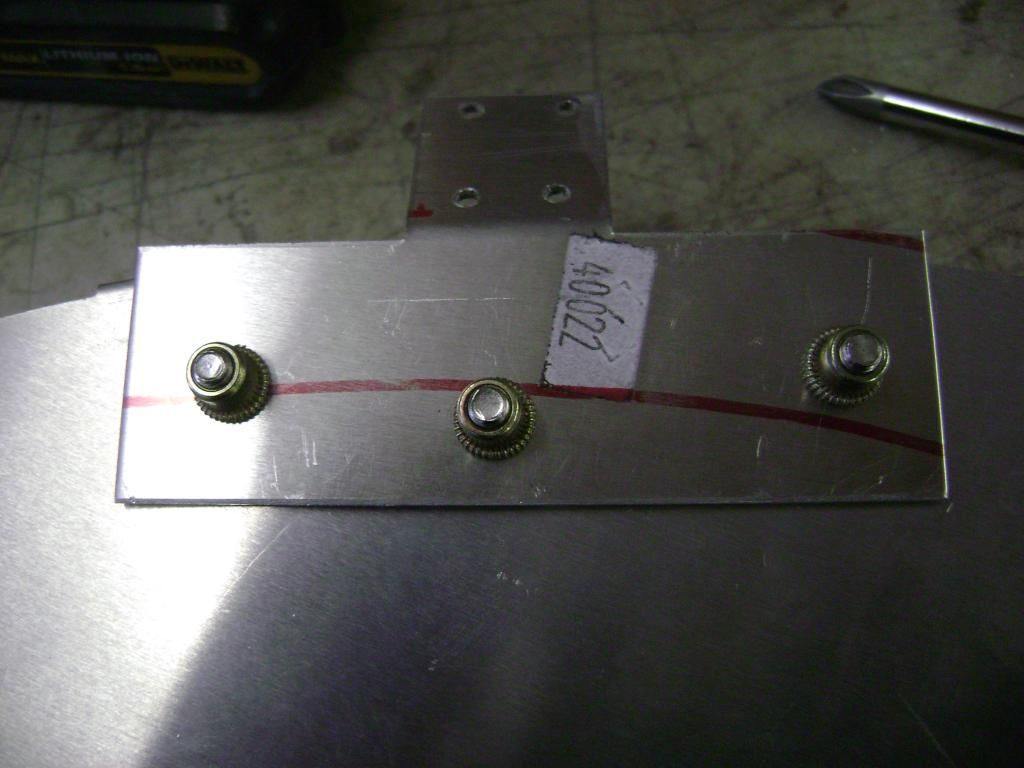
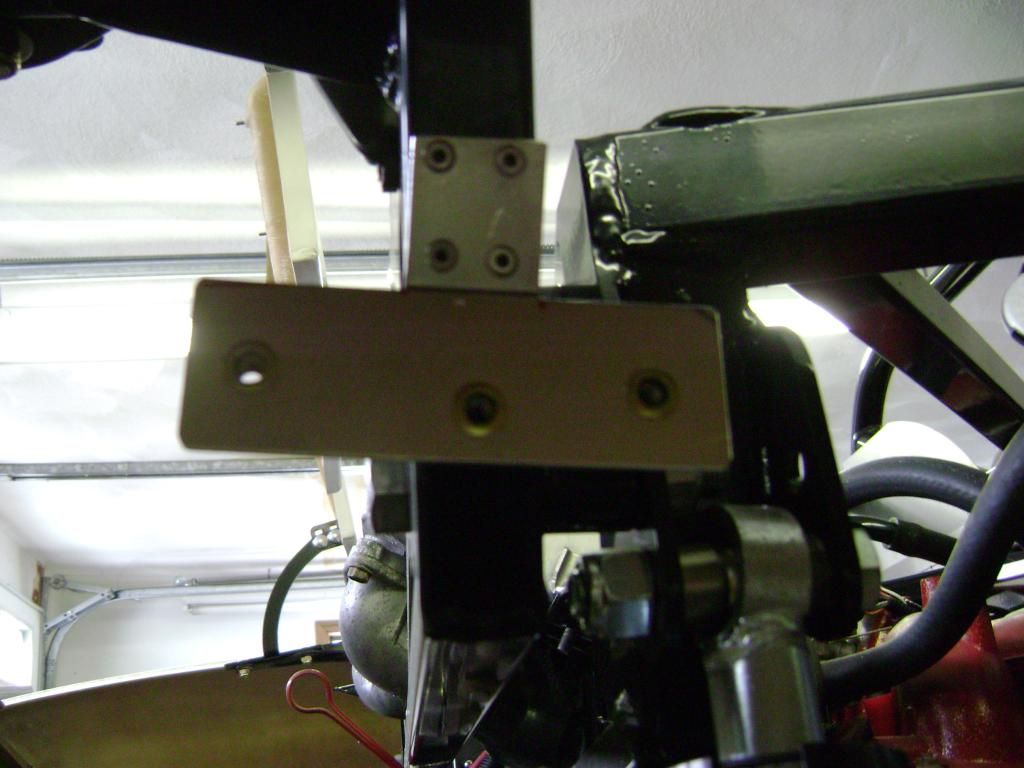
    Started working on the rear wheel wells today. Once these are riveted and installed, there is no way to remove them. The upper mounting tab will be inaccessible once riveted together. I decided to cut the tab off and make a removable mount.


    Now I can remove the wheel well as one piece if ever needed.


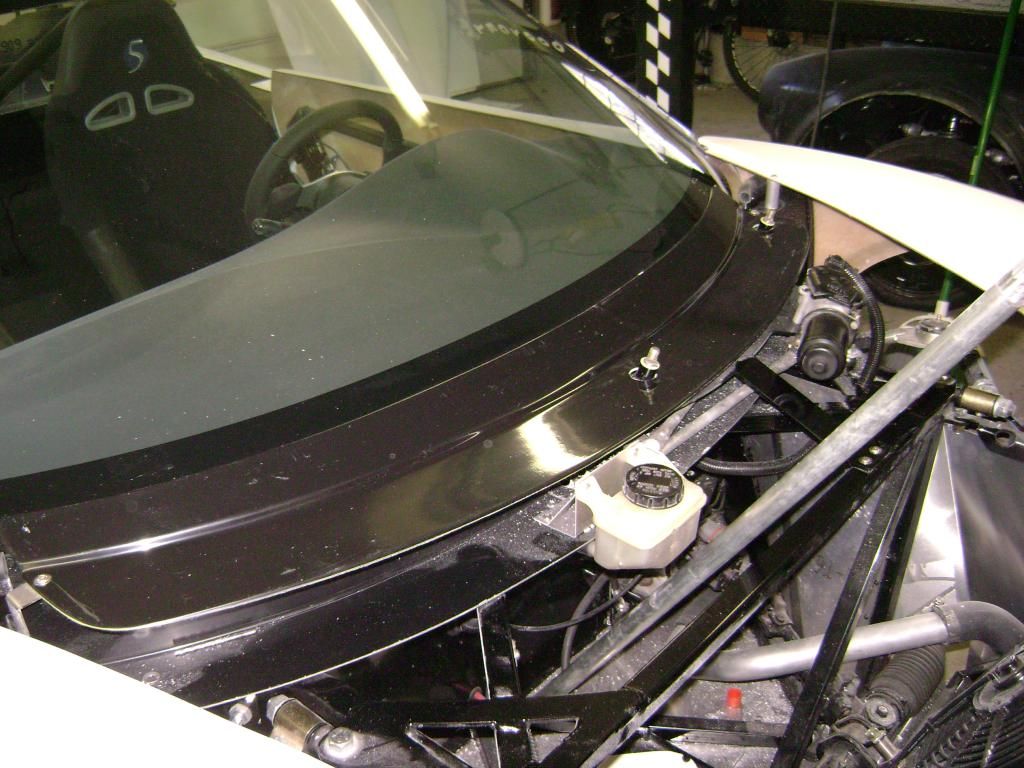
    I have the wiper kit completely installed and working. Works pretty good.

  19. #219

    Join Date
    Feb 2011
    Location
    Norton, MA USA earth
    Posts
    3,340
    Post Thanks / Like
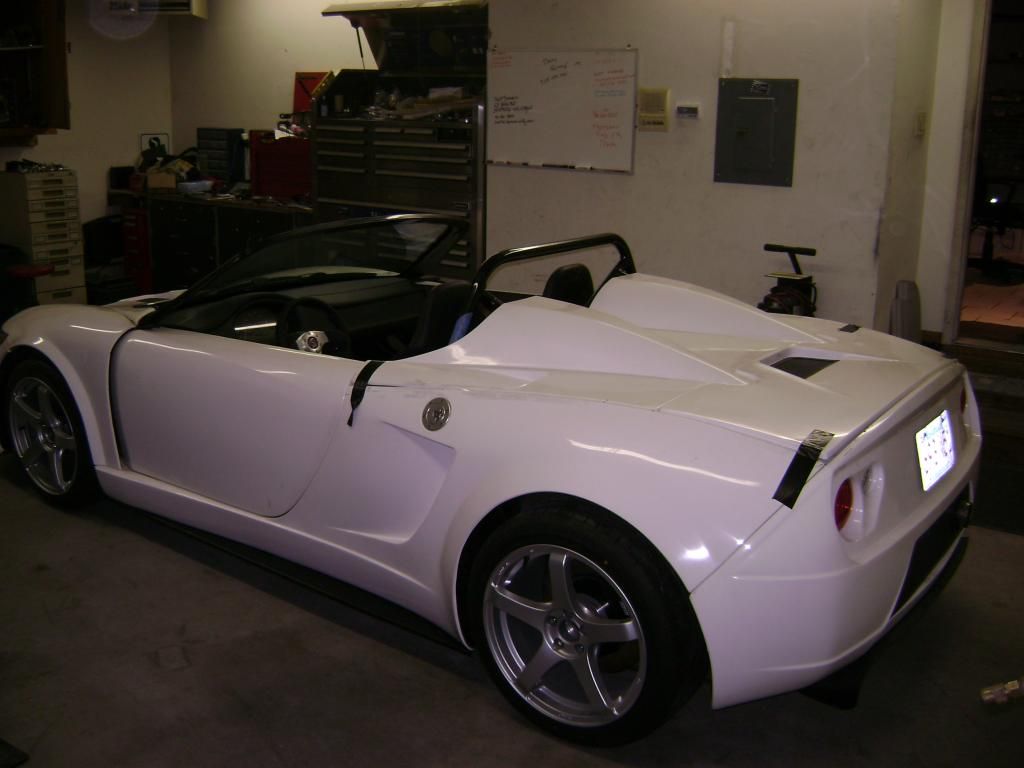
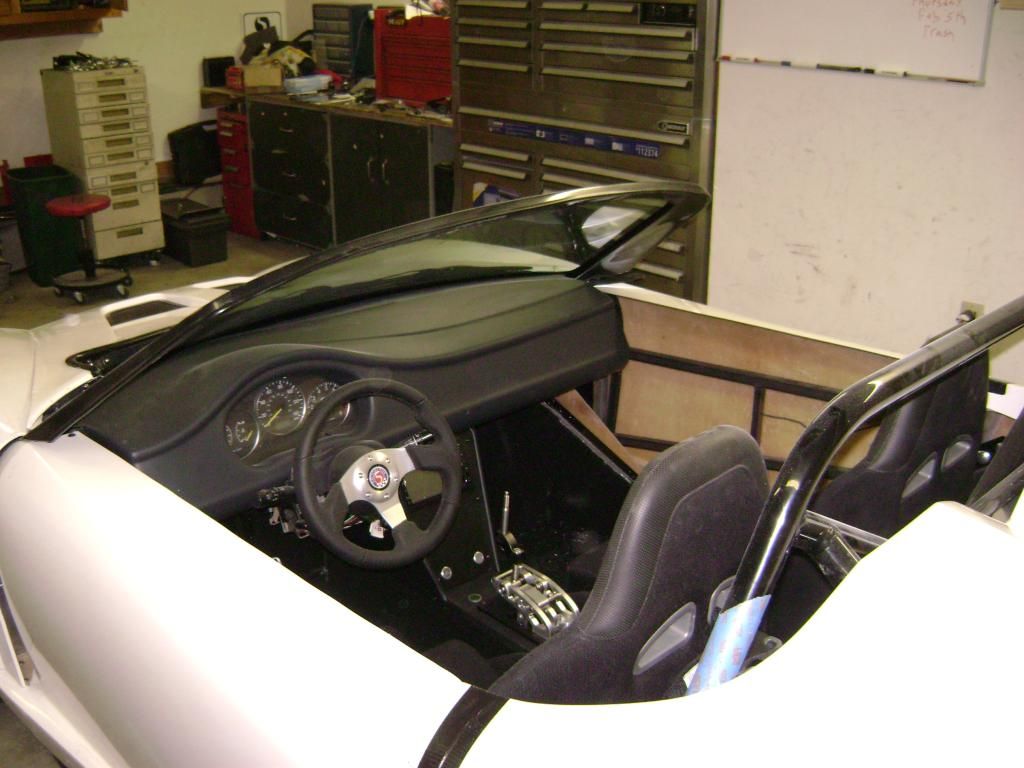
    Here are some pics of how the car looks today. Not too much left to do. Pretty short list.

    Install door panels
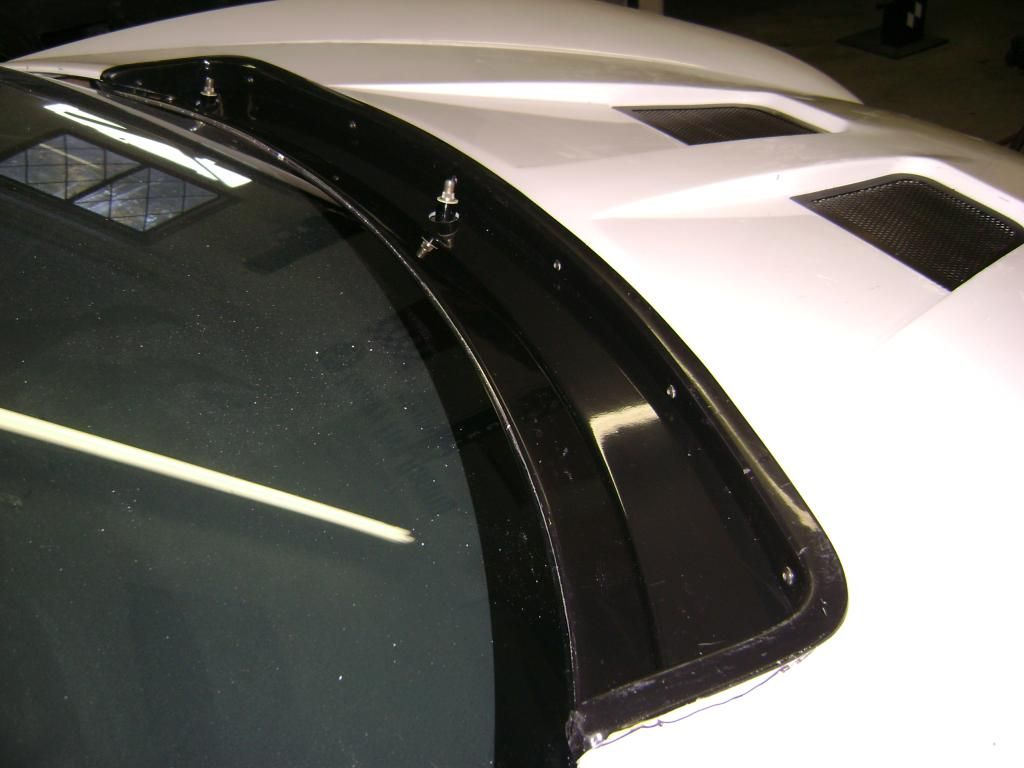
    install hood pins on both rear decks
    Install pins on back of hood.
    Install outside mirrors
    Install inside mirror.
    I think that's about it.
    My plan is to put it up for sale as soon as its finished. I will sell it unpainted, and let the next person decide the color. The reason I am going to do this, is because I really want to build a hard top version.
    I think it might be easier to start from scratch and make it a permanent hardtop.
    Mike


  20. #220
    Senior Member Kalstar's Avatar
    Join Date
    Feb 2011
    Location
    Cape Cod
    Posts
    1,300
    Post Thanks / Like
    Still love those wheels.

  21. #221

    Join Date
    Feb 2011
    Location
    Norton, MA USA earth
    Posts
    3,340
    Post Thanks / Like
    I am not a big fan of them. Especially once I accidently knocked one over. The spokes stick out so far that when I knocked it over, it scraped all the paint off them. Hitting a curb would do some serious damage to them.
    Mike
    Last edited by michael everson; 03-06-2015 at 05:16 AM.

  22. #222
    PLATNUM Supporting Member
    wallace18's Avatar
    Join Date
    Apr 2012
    Location
    Trenton, Florida
    Posts
    5,381
    Post Thanks / Like
    Nice job Mike.

  23. #223
    Senior Member
    Join Date
    Oct 2012
    Posts
    556
    Post Thanks / Like
    Mike. Is your remote brake reservoir kit now available with the mount to adapt to the wiper kit (as shown in your pic.)? If so I want it.

  24. #224

    Join Date
    Feb 2011
    Location
    Norton, MA USA earth
    Posts
    3,340
    Post Thanks / Like
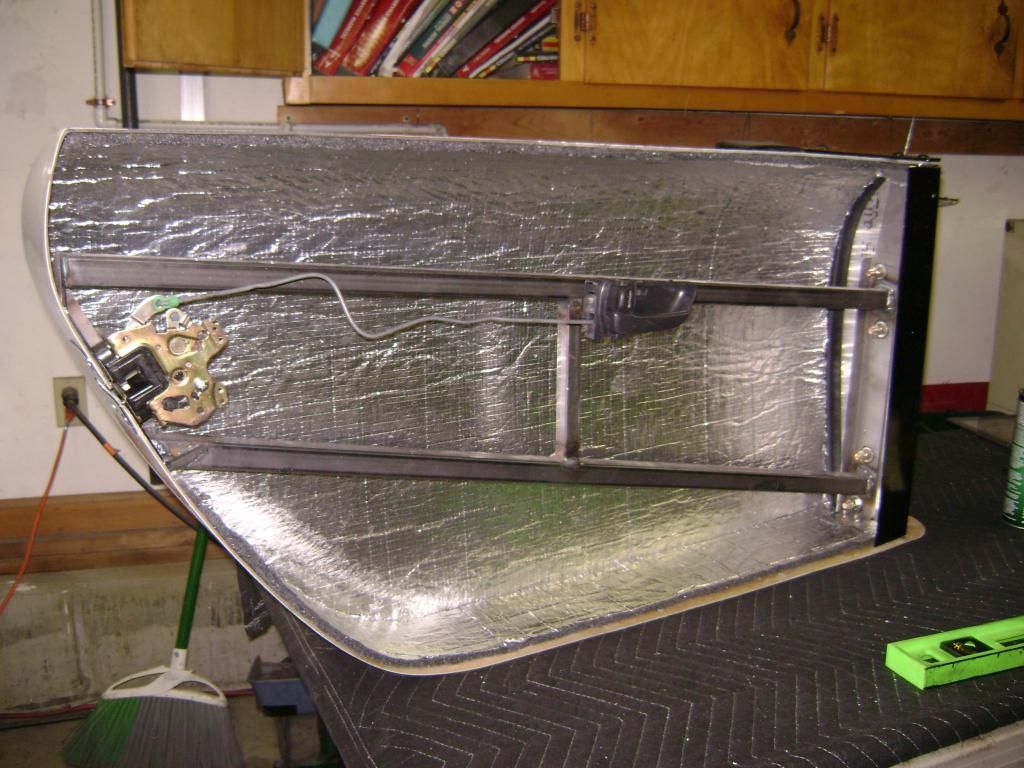
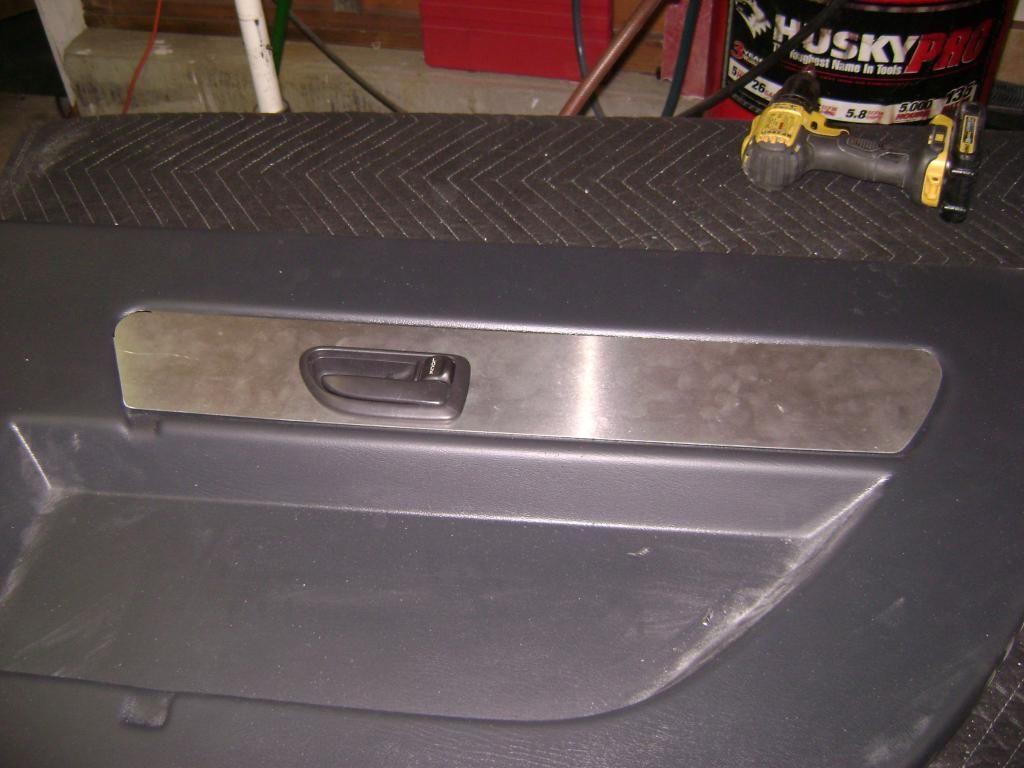
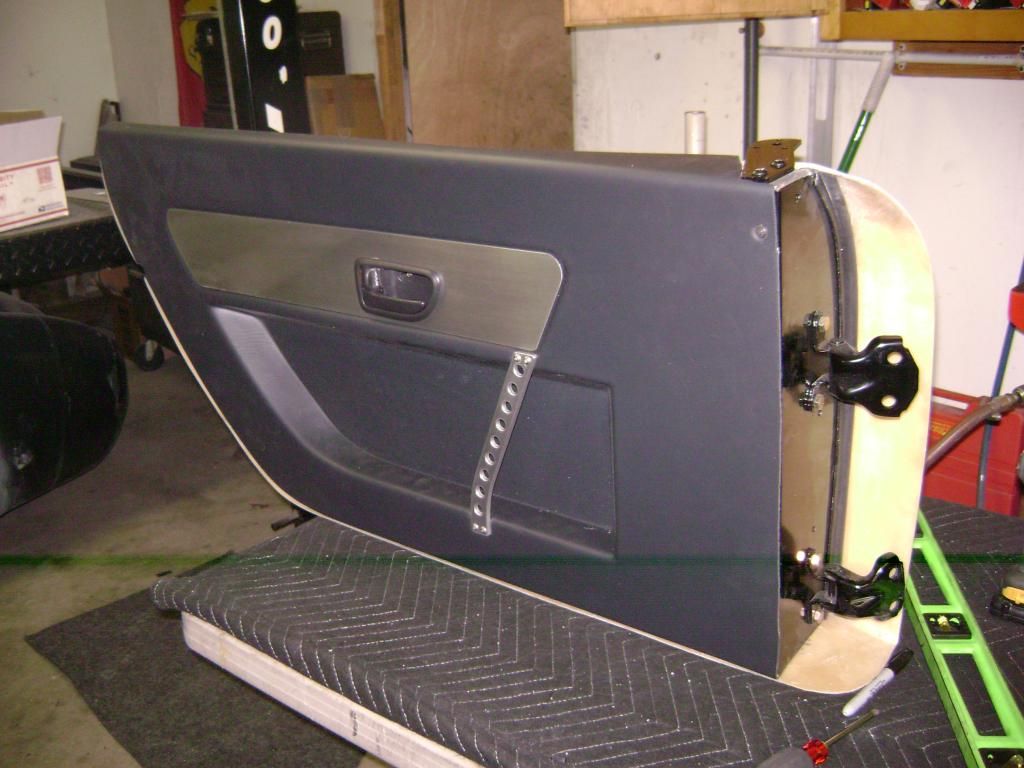
    Started working on the interior door panels.


    I started by insulating the inside of the doors. I did this for road noise. It also gives the door I nice solid feel when you close them.

    Trial fit the door panel and drill the mounting holes.

    Check the fit of your aluminum inserts. If you have the padded panels your aluminum probably wont fit. I had to trim all fours sides to get them just right.


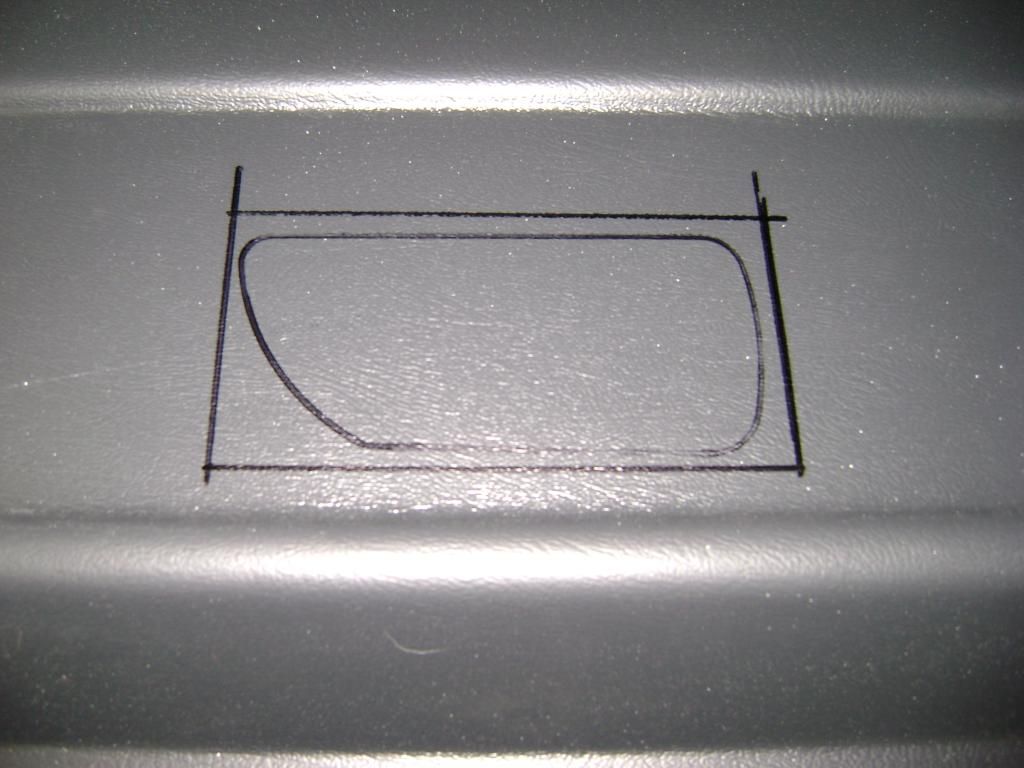
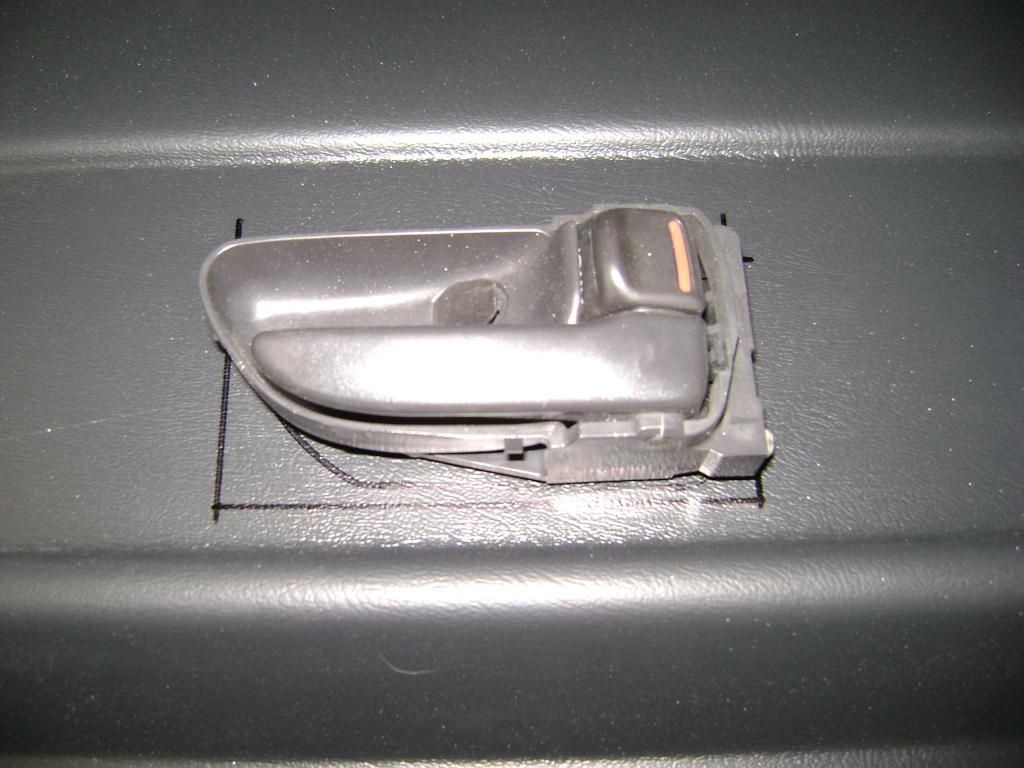
    Use the aluminum insert to mark the location of the door handles.
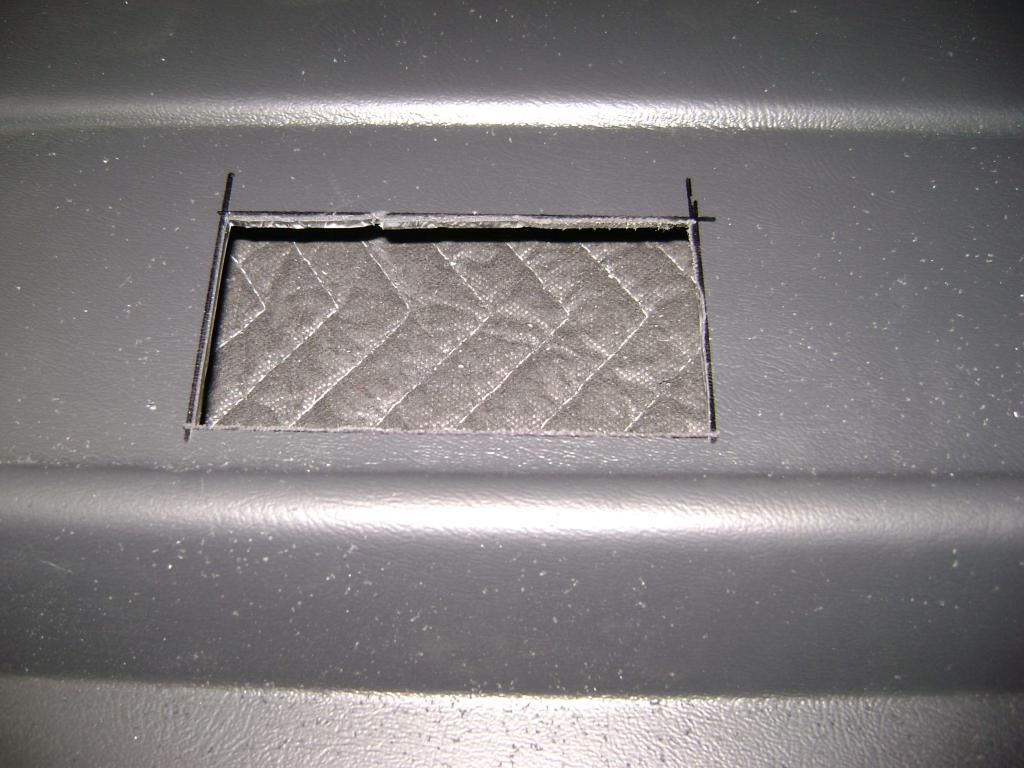
    Once this is marked. Use the actual door handle and make the opening bigger so that you can get the door panel off without removing the handle. You will thank yourself for this later. The aluminum panel will cover the hole.


    Here is the handle with aluminum insert installed in the panel.


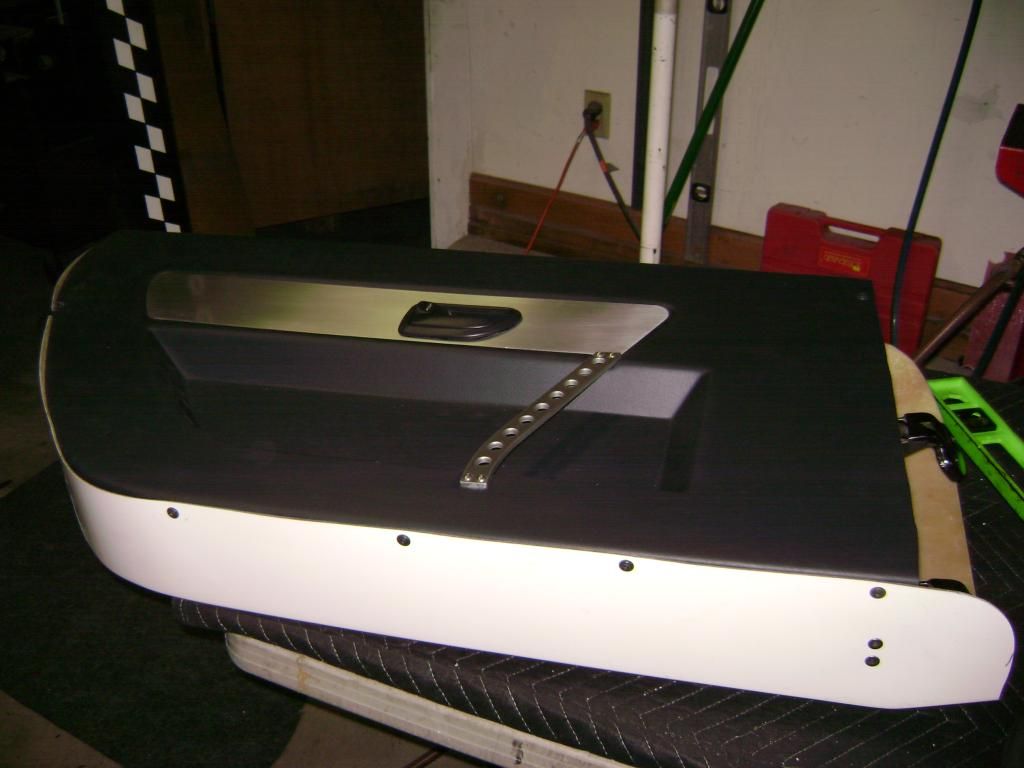
    Here is the finished product. Start to finish was probably 6 hours. I suspect the second side will take half that.
    I decided to hit the insert and the door pull with a scuffing pad and then clear powder coat them.
    Last edited by michael everson; 03-05-2015 at 06:05 AM.

  25. #225
    Moonlight Performance
    Hindsight's Avatar
    Join Date
    May 2014
    Location
    Atlanta
    Posts
    3,402
    Post Thanks / Like
    Looks nice Mike!

  26. #226
    Senior Member svanlare's Avatar
    Join Date
    Feb 2012
    Location
    San Jose, CA
    Posts
    545
    Post Thanks / Like
    Looking very good. Thanks for posting all the details!
    -Steve

  27. #227
    Senior Member Frank818's Avatar
    Join Date
    Jun 2013
    Location
    QC, Canada
    Posts
    5,732
    Post Thanks / Like
    6h for one door?? Wow that's pretty quick! I think it'll take me 25h for one door.

    That reminds I haven't saved the donor's rear door hinges. Gotta call my Subaru dealer and order 4. Damn it.
    Frank
    818 chassis #181 powered by a '93 VW VR6 Turbo GT3582R
    Go-karted Aug 5, 2016 - Then May 19+21, 2017
    Tracked May 27/July 26, 2017
    Build time before being driveable on Sep 27, 2019: over 6000h
    Build Completed Winter 2021

Page 6 of 6 FirstFirst ... 456

Posting Permissions

  • You may not post new threads
  • You may not post replies
  • You may not post attachments
  • You may not edit your posts
  •  

Stewart Transport

Visit our community sponsor