BluePrint Engines

Visit our community sponsor

Thanks Thanks:  2
Likes Likes:  4
Page 6 of 7 FirstFirst ... 4567 LastLast
Results 201 to 240 of 261

Thread: Eric's 33 Build #583

  1. #201
    PLATNUM Supporting Member
    wallace18's Avatar
    Join Date
    Apr 2012
    Location
    Trenton, Florida
    Posts
    5,382
    Post Thanks / Like
    Quote Originally Posted by kraftee View Post
    Hey Tom. The mesh came from a company called Custom Car Grills. www.customcargrills.com. How much do you need as I have some left over that you are welcome to.
    Not the mesh but the stuff you used to glue it in place. Thanks.

  2. #202
    Senior Member kraftee's Avatar
    Join Date
    May 2013
    Location
    Gainesville, Florida
    Posts
    288
    Post Thanks / Like
    Ah. No problem. We can sell you a tube set with mixer and loan you the gun (need it back in a couple days though - we glue the roofs onto the boats with it!) I think that a tube set is about $40. Enough to do a 3/8" bead maybe 25' long. I used one entire set of tubes for the six sections of mesh in my hood sides. Give me a call if you want to come by the boat factory to pick up - or I could bring it out one evening. Up to you. We're out by the airport, behind the original Sonny's.
    "If everything seems to be coming your way, you're probably in the wrong lane."

  3. #203
    Ol Skool
    Join Date
    Oct 2013
    Location
    upstate NY
    Posts
    816
    Post Thanks / Like
    Nice job!! A little syntactic foam under the body and you can go amphibious...

  4. #204
    PLATNUM Supporting Member
    wallace18's Avatar
    Join Date
    Apr 2012
    Location
    Trenton, Florida
    Posts
    5,382
    Post Thanks / Like
    Quote Originally Posted by kraftee View Post
    Ah. No problem. We can sell you a tube set with mixer and loan you the gun (need it back in a couple days though - we glue the roofs onto the boats with it!) I think that a tube set is about $40. Enough to do a 3/8" bead maybe 25' long. I used one entire set of tubes for the six sections of mesh in my hood sides. Give me a call if you want to come by the boat factory to pick up - or I could bring it out one evening. Up to you. We're out by the airport, behind the original Sonny's.
    10/4 I won't need it for some time. I thought I could buy the stuff. I will contact you at a later date. Car is looking fantastic! I want to see it in person when done. Looks Like I may be doing a customer 33 build in next few weeks.

  5. #205
    Senior Member kraftee's Avatar
    Join Date
    May 2013
    Location
    Gainesville, Florida
    Posts
    288
    Post Thanks / Like
    Just let me know. I'd be happy to bring it up to your shop (that way I get to see the GTM project!) As far as completing my 33 goes, I expect to have the hood and deck lid today or tomorrow - and the last of the fuel injection pieces by Friday. So hopefully, the car will be drive-able this weekend! Then I just need to take it to L&S Upholstery so that they can make the soft top "parade boot".
    "If everything seems to be coming your way, you're probably in the wrong lane."

  6. #206
    Senior Member kraftee's Avatar
    Join Date
    May 2013
    Location
    Gainesville, Florida
    Posts
    288
    Post Thanks / Like
    Picked up the hood and deck lid today and bolted them up. Finally finished with bodywork! Just have to re-hang driver door when I finish working under the dash.
    Attached Images Attached Images
    "If everything seems to be coming your way, you're probably in the wrong lane."

  7. #207
    Senior Member kraftee's Avatar
    Join Date
    May 2013
    Location
    Gainesville, Florida
    Posts
    288
    Post Thanks / Like
    A few more pictures as we close in on completing this long-term project. FINALLY got the new EEC-IV for the mass air system upgrade. Allowed me to button up the dashboard. Now I am just waiting for a few small pieces from Summit (hopefully today) to complete the plumbing on the mass air intake system. Then a few little items at the upholsterer's and I am DONE!
    Attached Images Attached Images
    "If everything seems to be coming your way, you're probably in the wrong lane."

  8. #208
    Senior Member kraftee's Avatar
    Join Date
    May 2013
    Location
    Gainesville, Florida
    Posts
    288
    Post Thanks / Like
    Well, UPS seems to have lost my aluminum elbows and tubes for my mass air conversion (they claim severe weather. Where?) No matter, had plenty of things to do. Followed Dr. Ruth's instructions and did a quickie garage floor alignment. Also changed out my springs. About a year ago, I bought a set of 9" 250 lb. QA1 springs for my rear Konis. The plan was to replace the front 500 lb. springs with the 350 lb. take-offs from the rear. I have been dreading this operation - but it was actually pretty straightforward, with one BIG exception: DO NOT install the front upper shock bolt the way FFR recommends. If you put it through from the front, you will have a heck of a time trying to remove the bolt to change springs (or shocks) once the radiator is in. Especially if you use a fan shroud and tend to lean your grille back a bit farther than normal (like I did.) Instead, put it through with the NUT end closest to the fan. Obviously, that's the way I re-installed everything. Took a couple hours to take apart - and only 15 minutes to reassemble. If that is not clear, I would be happy to post pics tomorrow. But right now, I'm tired and need a beer...
    "If everything seems to be coming your way, you're probably in the wrong lane."

  9. #209
    Senior Member kraftee's Avatar
    Join Date
    May 2013
    Location
    Gainesville, Florida
    Posts
    288
    Post Thanks / Like
    Mass Air conversion is almost complete. Still waiting for the Idle Air Control. Supposedly shipped from Rhode Island today. Maybe I'll be driving this weekend!
    Attached Images Attached Images
    "If everything seems to be coming your way, you're probably in the wrong lane."

  10. #210
    PLATNUM Supporting Member
    wallace18's Avatar
    Join Date
    Apr 2012
    Location
    Trenton, Florida
    Posts
    5,382
    Post Thanks / Like
    Hope you get some good weather to drive in.

  11. #211
    Senior Member kraftee's Avatar
    Join Date
    May 2013
    Location
    Gainesville, Florida
    Posts
    288
    Post Thanks / Like

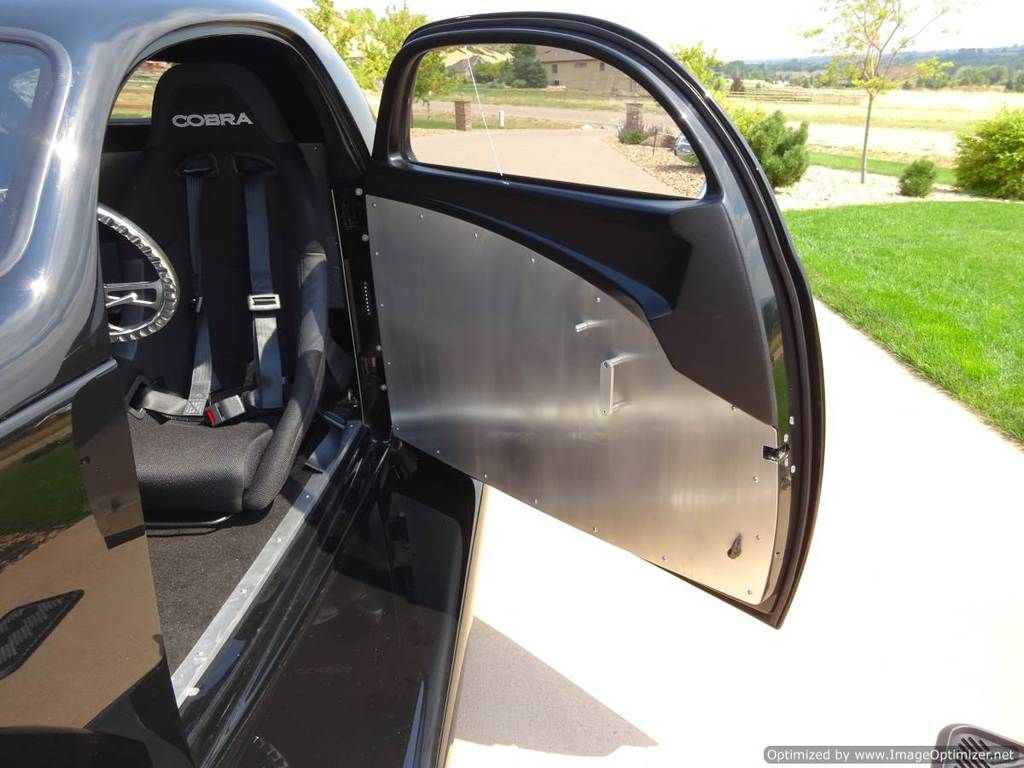
    Inside door handle solution

    One of the little details that I have been trying to figure out, is how to get out of the car. The little chrome nubs that FFR calls inside door handles work fine from outside - since you're just reaching in and pushing them down. However, when seated inside the car, you have to stretch forward and awkwardly try to push down on the button. I can do it, but my wife has shorter arms and just can't manage it. She doesn't have enough strength in her hand to push down on the tiny button.

    I found these cool little 3" levers on eBay for $21 - including shipping. They come with three adapters (splined, square, and round.) I just drilled out the round adapters so that they slip over the little chrome door handle nubs, tighten all the set screws, and a slight push down on the handle pops the door right open! Works way better than I ever thought it would. Looks pretty trick too. I'll now need to polish my billet suicide pin levers though..
    Attached Images Attached Images
    Last edited by kraftee; 06-17-2017 at 08:46 PM.
    "If everything seems to be coming your way, you're probably in the wrong lane."

  12. #212
    Senior Member
    Join Date
    Aug 2015
    Posts
    1,217
    Post Thanks / Like
    That is what I was looking for much nicer than my current solution

  13. #213
    Banned
    Join Date
    Apr 2017
    Location
    Loveland, CO
    Posts
    318
    Post Thanks / Like
    Try a neat-knob setup from Watson's. There are many styles of knobs and with a cable, they can be placed anywhere. With the right leverage setup, very little effort is required to unlatch. On my car, it's a one finger job. Sometimes, the latch is the problem. I had autoloc brand bear claw latches that were both difficult to open and prone to opening by themselves. A change to Tri-mark latches fixed that. Most hot rod latches are either a 2-rotor or single rotor style that are interchangeable.

    Once the door panels have been drilled, it will require new ones to change the setup. That's one reason I chose to use aluminum for all of my upholstery panels. Any of them can be made from a 2' x 4' piece of 3003 aluminum that costs under $30.

    http://www.watsons-streetworks.com/l...eleases?page=2

    http://www.onlinemetals.com/merchant...753&top_cat=60


  14. #214
    Senior Member kraftee's Avatar
    Join Date
    May 2013
    Location
    Gainesville, Florida
    Posts
    288
    Post Thanks / Like
    Okay, I am sure that worked great for your non FFR hot rod with a cable release, but for the NON-CABLE direct knob setup on FFR 33s built after mid-year 2013, this $21 solution looks great and works with one finger also.
    "If everything seems to be coming your way, you're probably in the wrong lane."

  15. #215
    Senior Member kraftee's Avatar
    Join Date
    May 2013
    Location
    Gainesville, Florida
    Posts
    288
    Post Thanks / Like
    Finally.
    Attached Images Attached Images
    "If everything seems to be coming your way, you're probably in the wrong lane."

  16. #216
    Banned
    Join Date
    Apr 2017
    Location
    Loveland, CO
    Posts
    318
    Post Thanks / Like
    You can change any latch to work with a cable. Even a handle like yours can have a short lever arm and a cable connected to it. I have both an electric operator and the cable hooked to my latch.

    Your finished car looks great!
    Last edited by DaveS53; 06-18-2017 at 01:28 PM.

  17. #217
    Senior Member
    Join Date
    Aug 2015
    Posts
    1,217
    Post Thanks / Like
    Quote Originally Posted by kraftee View Post
    Okay, I am sure that worked great for your non FFR hot rod with a cable release, but for the NON-CABLE direct knob setup on FFR 33s built after mid-year 2013, this $21 solution looks great and works with one finger also.
    I agree

  18. #218
    PLATNUM Supporting Member
    wallace18's Avatar
    Join Date
    Apr 2012
    Location
    Trenton, Florida
    Posts
    5,382
    Post Thanks / Like
    Car came out fantastic!
    You should be proud.

  19. #219
    Senior Member crspdsk8's Avatar
    Join Date
    May 2011
    Location
    Antelope, Ca
    Posts
    155
    Post Thanks / Like
    Car turned out awesome! Great Job!

  20. #220
    Senior Member H R Lucky's Avatar
    Join Date
    Jun 2012
    Location
    CrossRoads, Pa.
    Posts
    272
    Post Thanks / Like
    Looks great Eric, only thing I would add is wipers (since they are mandatory in Pa.)
    Now put some miles on it and SMILE!
    Nevin, AKA H. R. Lucky
    33 Hot Rod sn 524 build started 3/18/2013, First Start-5/09/2015, Go Cart-6/01/2015
    5.0 Coyote engine, 9in. Ford rear, 4 Link, Wilwood 12in. front brakes
    AC, power steering, FFR 17/18in. Hot Rod wheels

  21. #221
    Senior Member kraftee's Avatar
    Join Date
    May 2013
    Location
    Gainesville, Florida
    Posts
    288
    Post Thanks / Like
    Thanks Tom, Charles, and Nevin!
    "If everything seems to be coming your way, you're probably in the wrong lane."

  22. #222
    Senior Member CVOBill's Avatar
    Join Date
    Oct 2014
    Location
    Vermilion, OH
    Posts
    440
    Post Thanks / Like
    Looks great Eric!

    CVOBill

  23. #223
    Consummate Learner TxMike64's Avatar
    Join Date
    May 2017
    Location
    Kingsland, TX
    Posts
    406
    Post Thanks / Like
    Blog Entries
    1

    Looks great! How do you like the soft top? Is there much buffeting inside at speed?

  24. #224
    Senior Member kraftee's Avatar
    Join Date
    May 2013
    Location
    Gainesville, Florida
    Posts
    288
    Post Thanks / Like
    Thanks again guys. The soft top does not seem to generate any buffeting and actually, surprisingly little wind. So my wife's hair doesn't get blown around. Which means she is happy to ride in it. Which makes me very happy!
    "If everything seems to be coming your way, you're probably in the wrong lane."

  25. #225
    Senior Member kraftee's Avatar
    Join Date
    May 2013
    Location
    Gainesville, Florida
    Posts
    288
    Post Thanks / Like
    First local Cruise-In this past Saturday evening. It was #583's actual "debut", but since it wasn't actually a "show" - there were no trophies. But I did win the 50/50 drawing! Plus, Tom Wallace was there with his incredible FFR Roadster. Perfect night all around.
    Attached Images Attached Images
    Last edited by kraftee; 07-11-2017 at 09:23 AM.
    "If everything seems to be coming your way, you're probably in the wrong lane."

  26. #226
    PLATNUM Supporting Member
    wallace18's Avatar
    Join Date
    Apr 2012
    Location
    Trenton, Florida
    Posts
    5,382
    Post Thanks / Like
    I was there and Eric's 33 is better in person than pictures. He should be proud of such a great job done. Super car!

  27. #227
    Senior Member kraftee's Avatar
    Join Date
    May 2013
    Location
    Gainesville, Florida
    Posts
    288
    Post Thanks / Like
    I have been driving the 33 quite a bit - and it steers straight, doesn't vibrate, pull, or do anything bad. But still, the only alignment it has had is one I did on the floor with string, tape measure, and level as per Dan Ruth's instructions. He says, if done carefully, this can give you every bit as good an alignment as one on an actual alignment rack. However, I still doubted myself. Well, today I finally took it to "The Alignment Guy", who put it on his Hunter alignment machine - and said it was just about perfect! Go figure. I had him tweak the settings just a bit to make it even closer to "perfect", but the fact remains, it would have been just fine. The only issue is that my 4-link rear is a bit out of whack. One wheel is toed slightly in and, of course, the other is toed out. He said it's not enough to worry about - but I still might splurge and buy some of the adjustable links with spherical ends. Anyone have any recommendations on which are the best way to go? Breeze? Gordon Levy? Spohn?
    "If everything seems to be coming your way, you're probably in the wrong lane."

  28. #228
    Junior Member
    Join Date
    Nov 2016
    Posts
    14
    Post Thanks / Like
    Great job Eric. Awesome looking 33, enjoy it!

  29. #229
    Senior Member Tampa33Build's Avatar
    Join Date
    Feb 2017
    Location
    Lutz, Florida
    Posts
    160
    Post Thanks / Like
    Drove up from Tampa yesterday to see Eric's car. As Tom stated pictures do not do it justice, great looking 33. Eric also gave me many tips for my build.
    Thanks again Eric.

  30. #230
    Senior Member H R Lucky's Avatar
    Join Date
    Jun 2012
    Location
    CrossRoads, Pa.
    Posts
    272
    Post Thanks / Like
    Eric,
    Dan Ruth also sells adjustable upper & lower control arms, I have a set on my Hot Rod & was able to get the rear wheels centered in the wheel wells rather easily.

    Nevin
    Nevin, AKA H. R. Lucky
    33 Hot Rod sn 524 build started 3/18/2013, First Start-5/09/2015, Go Cart-6/01/2015
    5.0 Coyote engine, 9in. Ford rear, 4 Link, Wilwood 12in. front brakes
    AC, power steering, FFR 17/18in. Hot Rod wheels

  31. #231
    Senior Member kraftee's Avatar
    Join Date
    May 2013
    Location
    Gainesville, Florida
    Posts
    288
    Post Thanks / Like
    Thanks for reminding me about Dan's adjustable links, Nevin. I'll call him this week.

    And thanks for the kind words Neil and partsman. Neil, it was great meeting you and your wife on Sunday. I will enjoy watching your build progress!

    Eric
    "If everything seems to be coming your way, you're probably in the wrong lane."

  32. #232
    Senior Member kraftee's Avatar
    Join Date
    May 2013
    Location
    Gainesville, Florida
    Posts
    288
    Post Thanks / Like
    I mentioned awhile back that I was unhappy with the throttle cable - both the pressure it took to "pop" it past idle and, well, the length of the thing - about 48" - looped around under the plenum and back against firewall. The throttle plate itself fits into the throttle body perfectly with a very smooth actuation and no "tight" spot coming off fully closed. I considered upgrading to a linkage - but the thought of pulling the engine to drill mounting holes in the firewall did not appeal to me. So I spent $54 and purchased a Lokar Hi-Tech braided throttle cable assembly from Jeg's. The part number is 625-TC-1000HT and it is designed to fit early EFI Mustangs. The cable housing is braided SS and lined with nylon. The cable itself is nylon coated. Slick as ice on glass. It's a significantly larger diameter cable and has much more robust ends on it. Nice billet clevis for the throttle pedal, billet firewall pass-through, billet three-adjustment mount, and billet snap-on ball-end mount. Plus, the EFI-end set screw assembly is much better thought-out and more robust. So it is less likely to fray and make the cable unusable if you decide it's too long and need to cut it again. Finally, the cable housing is about 24" long - which is perfect. Makes a nice smooth S-bend between firewall and throttle mount.

    It works GREAT. I recommend this upgrade to any builder. Obviously, the part number I quoted is perfect for anyone using an 80's-early 90's five liter Ford with factory EFI, but they sell lots of different configurations. The peace of mind that comes with having such a robust set-up WAY overcomes the additional purchase price.
    "If everything seems to be coming your way, you're probably in the wrong lane."

  33. #233
    Senior Member HVACMAN's Avatar
    Join Date
    May 2017
    Location
    Village Mills, Texas
    Posts
    674
    Post Thanks / Like
    Quote Originally Posted by kraftee View Post
    I have been driving the 33 quite a bit - and it steers straight, doesn't vibrate, pull, or do anything bad. But still, the only alignment it has had is one I did on the floor with string, tape measure, and level as per Dan Ruth's instructions. He says, if done carefully, this can give you every bit as good an alignment as one on an actual alignment rack. However, I still doubted myself. Well, today I finally took it to "The Alignment Guy", who put it on his Hunter alignment machine - and said it was just about perfect! Go figure. I had him tweak the settings just a bit to make it even closer to "perfect", but the fact remains, it would have been just fine. The only issue is that my 4-link rear is a bit out of whack. One wheel is toed slightly in and, of course, the other is toed out. He said it's not enough to worry about - but I still might splurge and buy some of the adjustable links with spherical ends. Anyone have any recommendations on which are the best way to go? Breeze? Gordon Levy? Spohn?
    I also went with the set that Dan sells. They fit like a dream.

  34. #234
    Senior Member kraftee's Avatar
    Join Date
    May 2013
    Location
    Gainesville, Florida
    Posts
    288
    Post Thanks / Like
    As I have said before, I really love the Rod Tops soft top. However, with my Optima battery in the way, that long header bow and attached soft top just will not fit into the trunk. Even if there was some way to make it fit, that would leave exactly zero room in the trunk for chairs, coolers, etc. That means I just can't go far from home with the top off - since I live in Florida - and it rains here pretty much every afternoon!

    So I had my favorite local trim shop make me a really clever (their idea, actually) little boot/bag that the top and header bow roll up and zip into. Then this boot/bag simply snaps to the belt bows that stay on the car also. Looks great IMHO, and means I only have the two side bow stacks, bows, and side curtains in the trunk. Leaves PLENTY of room for two folding chairs and a small cooler!

    I also did not like the way the top of the waterfall is finished with all those screws - and basically a raw edge. I tried putting some welting there, but it still was not a satisfactory solution. The FFR-supplied padded trim piece is okay, but I would have to remove it and store it somewhere in order to put the top up! It also results in being able to see that unfinished waterfall top again from inside the car. Besides, it is notched for the 4-point racing harnesses (which I deleted on my order) and my 3-point retractable harnesses exit the waterfall in a different place! So I had the trim shop cut that little sucker down and modify it so the gap was correct for my seat belts. Then they ripped the 1-inch padding off of it and re-padded it with more reasonable 1/2" foam, finally re-covering it with a nice pebble-grain vinyl that matches the seats. Velcro'ed on, it looks incredible and never has to be removed!

    I am really happy with the results. Now I can drive my car with the top down and put the top up anytime weather threatens (as long as I have about 10-minutes warning - or a bridge to hide under while I assemble the top!) At a show I can either leave the top in its boot on the car - or remove it and set it on the ground with my stuff.
    Attached Images Attached Images
    Last edited by kraftee; 08-24-2017 at 06:01 AM.
    "If everything seems to be coming your way, you're probably in the wrong lane."

  35. #235
    Senior Member H R Lucky's Avatar
    Join Date
    Jun 2012
    Location
    CrossRoads, Pa.
    Posts
    272
    Post Thanks / Like
    Looks awesome Eric, and practical also.


    Nevin
    Nevin, AKA H. R. Lucky
    33 Hot Rod sn 524 build started 3/18/2013, First Start-5/09/2015, Go Cart-6/01/2015
    5.0 Coyote engine, 9in. Ford rear, 4 Link, Wilwood 12in. front brakes
    AC, power steering, FFR 17/18in. Hot Rod wheels

  36. #236
    PLATNUM Supporting Member
    wallace18's Avatar
    Join Date
    Apr 2012
    Location
    Trenton, Florida
    Posts
    5,382
    Post Thanks / Like
    Very Nice!

  37. #237
    Senior Member TDSapp's Avatar
    Join Date
    Jul 2015
    Location
    Frisco, TX
    Posts
    580
    Post Thanks / Like
    Kraftee,


    Did you also install A\C on your car? Someone said something in another thread and it got me wondering about the effectiveness of the A\C units with the rag tops. My wife used to have a 93 Cavalier that had a rag top and when up and the A\C was going there was no problem here in the Texas heat. The A\C was good enough and the top was insulated well.


    Considering the heat here in the DFW area I just want to know what to expect.
    Tim Sapp
    11110001101
    Build Blog: http://hotrod.sapp-family.com/blog/

    33 Hot Rod
    Delivered 5/31/2017

  38. #238
    Senior Member
    Join Date
    Feb 2011
    Location
    Myrtle Beach, SC
    Posts
    2,108
    Post Thanks / Like
    Eric-

    That's a great looking solution! I really like the practicality of having the top always with you, especially as you pointed out the almost daily rainfall you experience.

    It also looks terrific, which I am sure pleases you a great deal. Thanks so much for sharing, and well done!

    Regards,

    Steve

  39. #239
    Member
    Join Date
    Aug 2017
    Location
    MIA, Florida
    Posts
    32
    Post Thanks / Like
    That boot cover is a great solution...looks great!

  40. #240
    Senior Member kraftee's Avatar
    Join Date
    May 2013
    Location
    Gainesville, Florida
    Posts
    288
    Post Thanks / Like
    Thanks guys,

    Appreciate the encouragement. It came out much better than i even hoped.

    Tim, I have lived in Florida for almost 45 years and ALL my convertibles must have air conditioning! True, the AC has to work a bit harder than it would with an insulated hardtop, but (even with the side curtains out) my wife is much happier with some cold air blowing on her! I even like running the air conditioning with the top down. Again, that cold air blowing on your body helps a LOT. I wouldn't have a convertible without AC in Florida (or Texas, or Georgia, or...pretty much anywhere!)

    One other thing; The Vintage Air system also gives you HEAT for those cold winter days (yeah, we get some cold days here in North Florida.)

    Eric
    Last edited by kraftee; 08-24-2017 at 12:27 PM.
    "If everything seems to be coming your way, you're probably in the wrong lane."

Page 6 of 7 FirstFirst ... 4567 LastLast

Posting Permissions

  • You may not post new threads
  • You may not post replies
  • You may not post attachments
  • You may not edit your posts
  •  

Stewart Transport

Visit our community sponsor