Forte's

Visit our community sponsor

Thanks Thanks:  0
Likes Likes:  0
Page 9 of 13 FirstFirst ... 7891011 ... LastLast
Results 321 to 360 of 484

Thread: 33 Machine electric 818e build- Sold! Headed to China!

  1. #321
    Senior Member ehansen007's Avatar
    Join Date
    Mar 2011
    Location
    Aliso Viejo, CA
    Posts
    1,625
    Post Thanks / Like
    Quote Originally Posted by waruaki View Post
    On my build I have some gaps between the buckets and the headlights. Some you can't notice and other's not so nice. What type of trim did you add on the edge of the fiberglass to the close the gaps?
    Attachment 31446

    Brett
    At first I used some of the "D" gasket to close the gap and it worked fine but then I found something better.


  2. #322
    Senior Member ehansen007's Avatar
    Join Date
    Mar 2011
    Location
    Aliso Viejo, CA
    Posts
    1,625
    Post Thanks / Like
    Quote Originally Posted by Bob_n_Cincy View Post
    Hi Erik,
    Everything looks great.
    Will they have recharge facilities on sight?
    Good luck.
    Bob
    Yes they will have 220 in the pits and the campgrounds. No supercharging yet though!!! . I've taken the car out on a few midnight runs already and it's doing great.

    Couple of things: Like Brando, I doesn't like to stay in 5th. To me it seems like the shift linkage does not allow for that long notch you feel when shifting into any gear. Is this a result of the play in the cables? Shifts are not confidence inspiring for sure.

    Also, thanks for the design RPsepex
    More pics to come.

  3. #323
    Senior Member RM1SepEx's Avatar
    Join Date
    Jul 2011
    Location
    Freeport, ME
    Posts
    3,801
    Post Thanks / Like
    That's what the forum is for, cross polinization makes for a better breed. I did use a couple little bronze bushings, are your hinges just aluminum?
    Last edited by RM1SepEx; 07-18-2014 at 06:10 AM.
    Dan

    818S #17 Picked up 8/1/13 First start 11/1/13 Go Kart 3/28/14

  4. #324
    Senior Member
    Join Date
    Jan 2012
    Posts
    1,112
    Post Thanks / Like
    What headlights are those again? Did you get them off ebay or something and will you be able to pass Brake and Light inspection with that DRL strip flashing too? Love the hood hindge idea.

  5. #325
    Senior Member
    Join Date
    Jan 2014
    Location
    USA
    Posts
    587
    Post Thanks / Like
    Those headlights look slick. They definitely make the car look more modern.

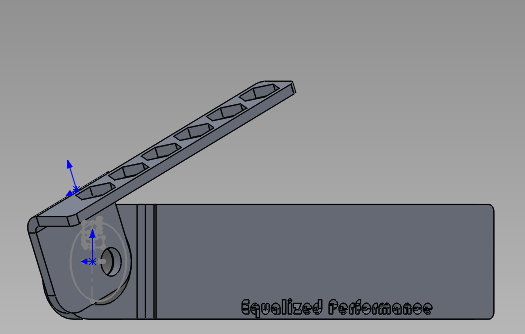
    Do you have any drawings for your front hinge setup or did you just make them on the fly?

    Your weld in spacer inspired me to come up with this low buck solution to quik latch pins being a bit short and unstable. It's a 1/2" bolt drilled and tapped to 1/4-20. I did everything on the lathe, but it could be done carefully on a drill press. A relieved tap is necessary to go the whole depth of the bolt.


  6. #326
    Senior Member ehansen007's Avatar
    Join Date
    Mar 2011
    Location
    Aliso Viejo, CA
    Posts
    1,625
    Post Thanks / Like
    The headlights are Spyder with the DRL LEDs built in but the headlights sit so low the DRLs couldn't be seen. Imagine my DOH! So I found these "switchback" LED strips and Ordered them from Ali express. It took a few weeks but I got them and just silicones them to the outside as a gasket and I have them on T connectors so I can disable them for brake and lamp inspection. My only regret is that I shroud have ordered the 90cm instead of the 60cm. Oh well!

    I made the hinges on the fly all out of aluminum and it was a pain taking that hood on and off over and over!! . Glad that's done.

  7. #327
    Senior Member C.Plavan's Avatar
    Join Date
    Mar 2011
    Location
    Clovis, Ca
    Posts
    2,225
    Post Thanks / Like
    Quote Originally Posted by Aero STI View Post
    Those headlights look slick. They definitely make the car look more modern.

    Do you have any drawings for your front hinge setup or did you just make them on the fly?

    Your weld in spacer inspired me to come up with this low buck solution to quik latch pins being a bit short and unstable. It's a 1/2" bolt drilled and tapped to 1/4-20. I did everything on the lathe, but it could be done carefully on a drill press. A relieved tap is necessary to go the whole depth of the bolt.

    Nice solution. Do you guys know the height of that whole assembly?

    I have those same headlights darn it. I bought them for the DRL's..... I love your solution though.
    Thanks- Chad
    818R-SOLD!!!- Go Karted 7/20/14/ Officially raced NASA ST2- 2/28/15
    2016 Elan NP01 Prototype Racecar Chassis #20
    1969 Porsche 911ST Vintage Race Car
    1972 Porsche 911T (#'s matching undergoing nut & bolt resto in my garage)

  8. #328
    Senior Member ehansen007's Avatar
    Join Date
    Mar 2011
    Location
    Aliso Viejo, CA
    Posts
    1,625
    Post Thanks / Like
    Chad, $40 here solves the problem! They have internal switchery already wired in! Besides the singular LEDs are so 2013. These are the future! (for at least another 3 months or so)

    http://www.aliexpress.com/item/2x-Wh...647016778.html

    They should hit amazon and ebay shortly as well.

  9. #329
    Senior Member ehansen007's Avatar
    Join Date
    Mar 2011
    Location
    Aliso Viejo, CA
    Posts
    1,625
    Post Thanks / Like
    Quote Originally Posted by RM1SepEx View Post
    That's what the forum is for, cross polinization makes for a better breed. I did use a couple little bronze bushings, are your hinges just aluminum?
    Yes, I believe the mounts are 7075 for more support and I used 6061 for the brackets since they had to bend more. I used 1/2" OD 3/8" ID bronze bushings as well. To square it, I put a 3/8" rod through the body as a guide just as you did. The one thing I'm really pissed about is that as hard as I tried to get that front nose of the hood to match the line on the bumper, it still came out way off. That whole front end is way out of whack from the molds.

  10. #330
    Senior Member ehansen007's Avatar
    Join Date
    Mar 2011
    Location
    Aliso Viejo, CA
    Posts
    1,625
    Post Thanks / Like
    Question, how are you guys lining your headlights up? Mine are down and pointed at the center. Don't see any adjustment available. Also, any input on 5th gear? I'm calling FFR on that one.

  11. #331
    Senior Member C.Plavan's Avatar
    Join Date
    Mar 2011
    Location
    Clovis, Ca
    Posts
    2,225
    Post Thanks / Like
    Quote Originally Posted by ehansen007 View Post
    Chad, $40 here solves the problem! They have internal switchery already wired in! Besides the singular LEDs are so 2013. These are the future! (for at least another 3 months or so)

    http://www.aliexpress.com/item/2x-Wh...647016778.html

    They should hit amazon and ebay shortly as well.
    I bought the 85mm ones right after I saw yours.
    Thanks- Chad
    818R-SOLD!!!- Go Karted 7/20/14/ Officially raced NASA ST2- 2/28/15
    2016 Elan NP01 Prototype Racecar Chassis #20
    1969 Porsche 911ST Vintage Race Car
    1972 Porsche 911T (#'s matching undergoing nut & bolt resto in my garage)

  12. #332
    Senior Member Brando's Avatar
    Join Date
    Oct 2013
    Location
    Irvine, Ca
    Posts
    566
    Post Thanks / Like
    Blog Entries
    1
    Quote Originally Posted by ehansen007 View Post
    any input on 5th gear?
    Aside from shift linkage issues I have been told it could be due to a few different things. Synchros, a mount or shifter bushing, or the nut on the end of the mainshaft has loosened up a bit.
    I am opening up my trans and will let you know what was found. It won't be for a few weeks though.

    EDIT: Most the people I have found with the same issue online were due to the mainshaft nut coming loose.

    http://www.wrxtuners.com/forums/f69/...ut-gear-17631/
    Last edited by Brando; 07-18-2014 at 05:34 PM.

  13. #333
    Senior Member ehansen007's Avatar
    Join Date
    Mar 2011
    Location
    Aliso Viejo, CA
    Posts
    1,625
    Post Thanks / Like
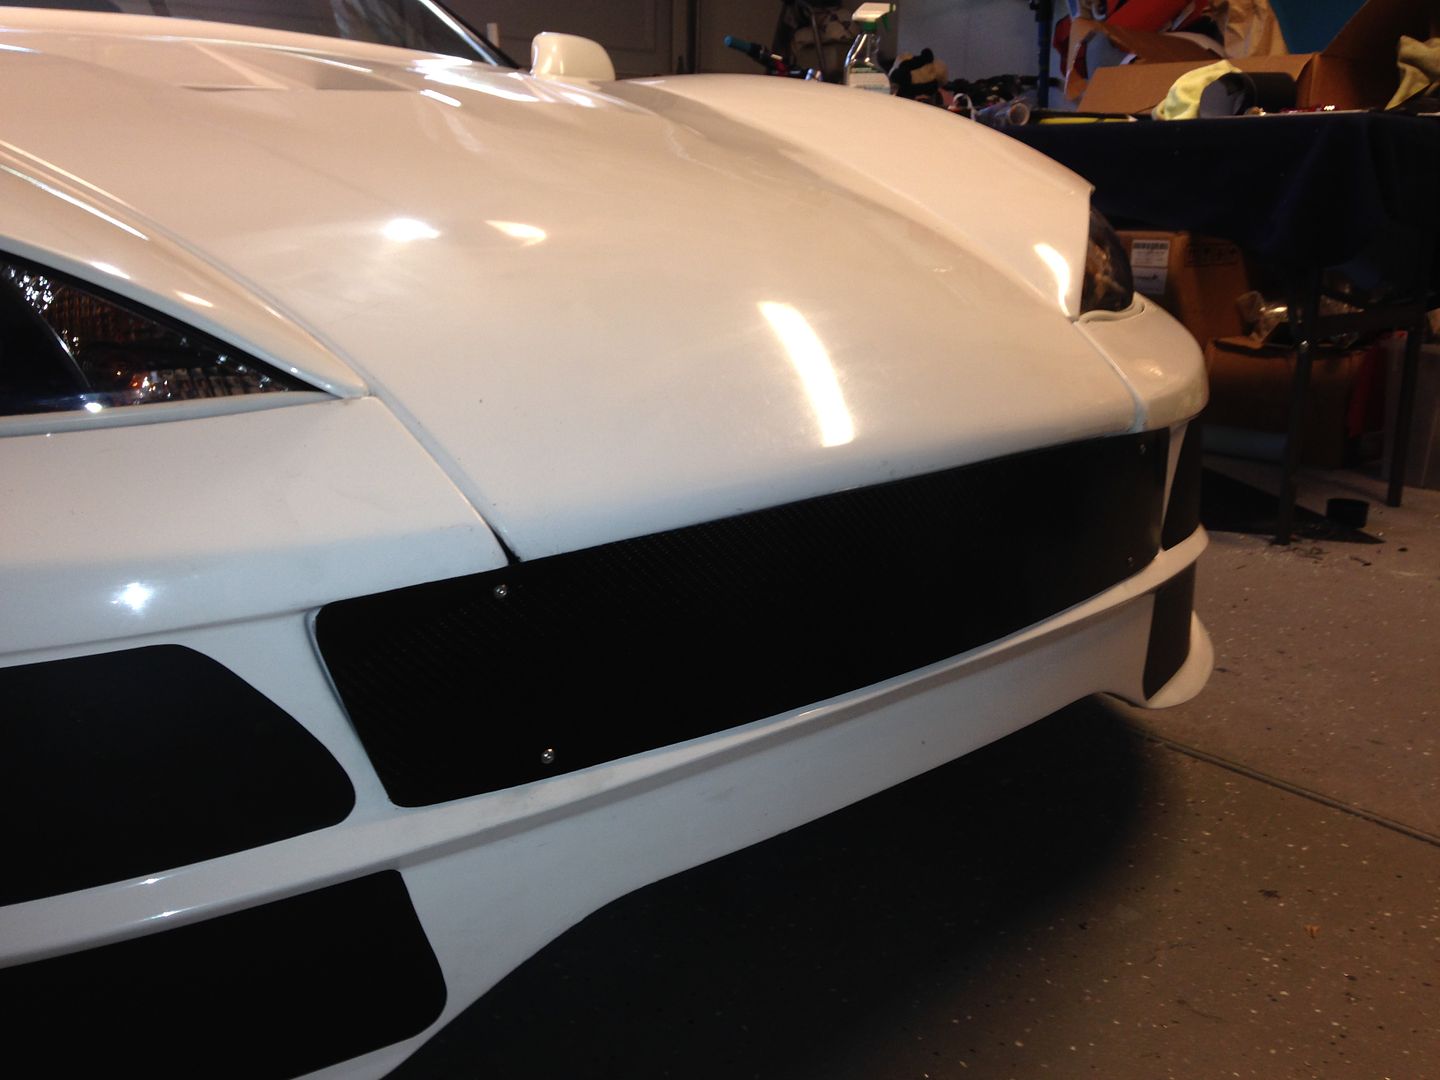
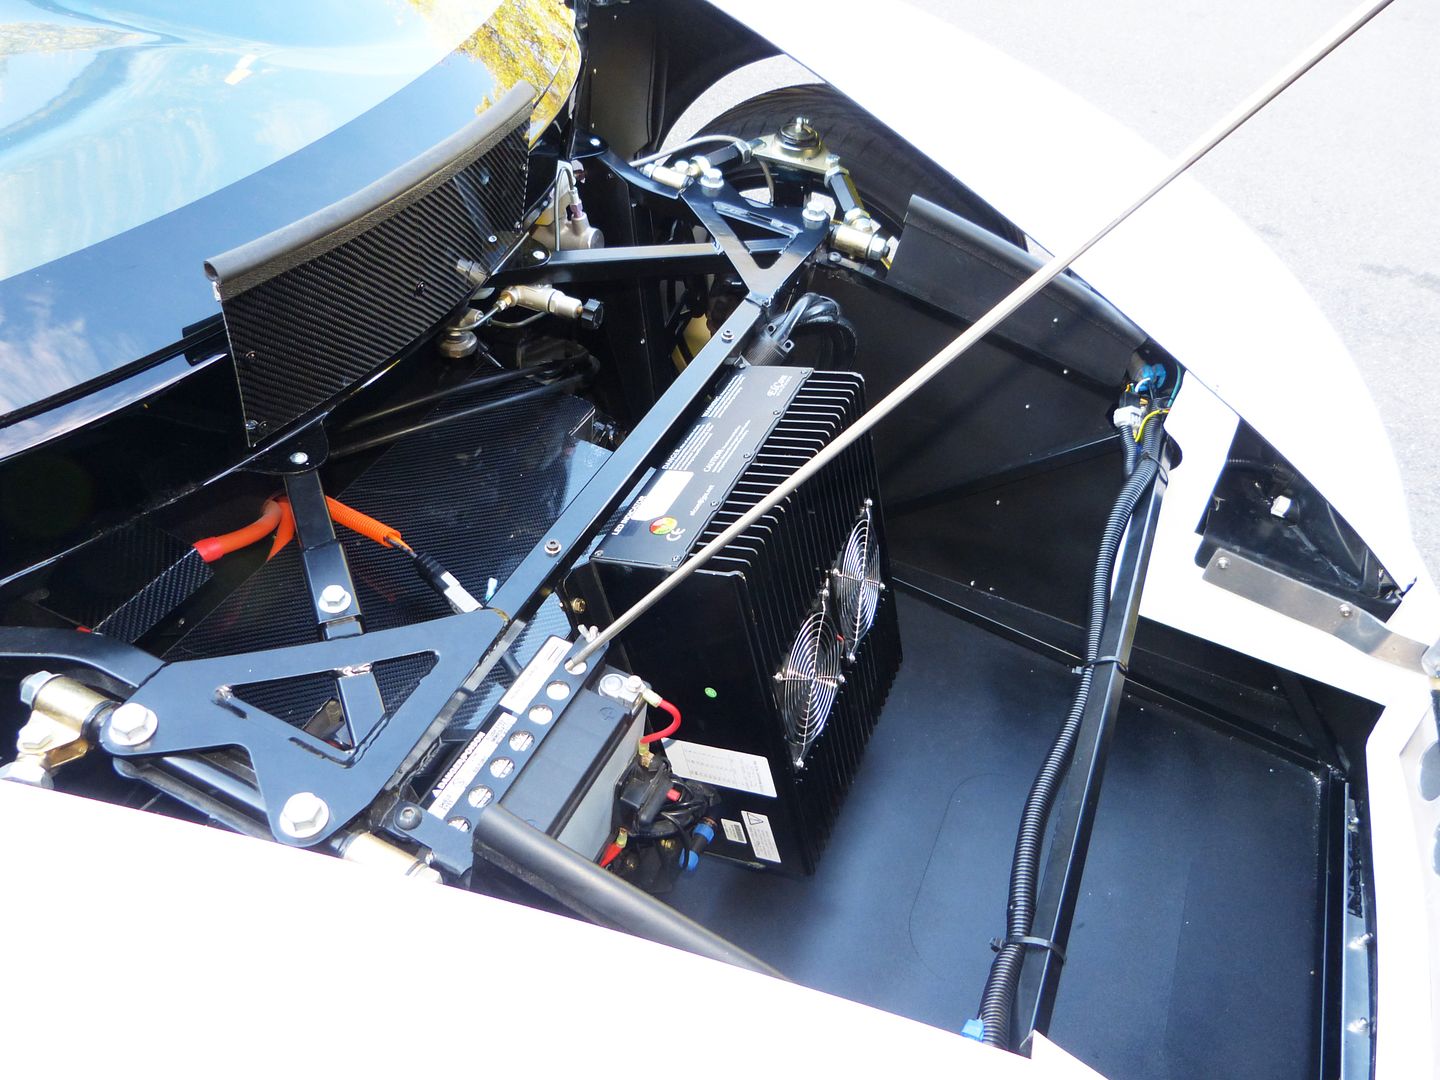
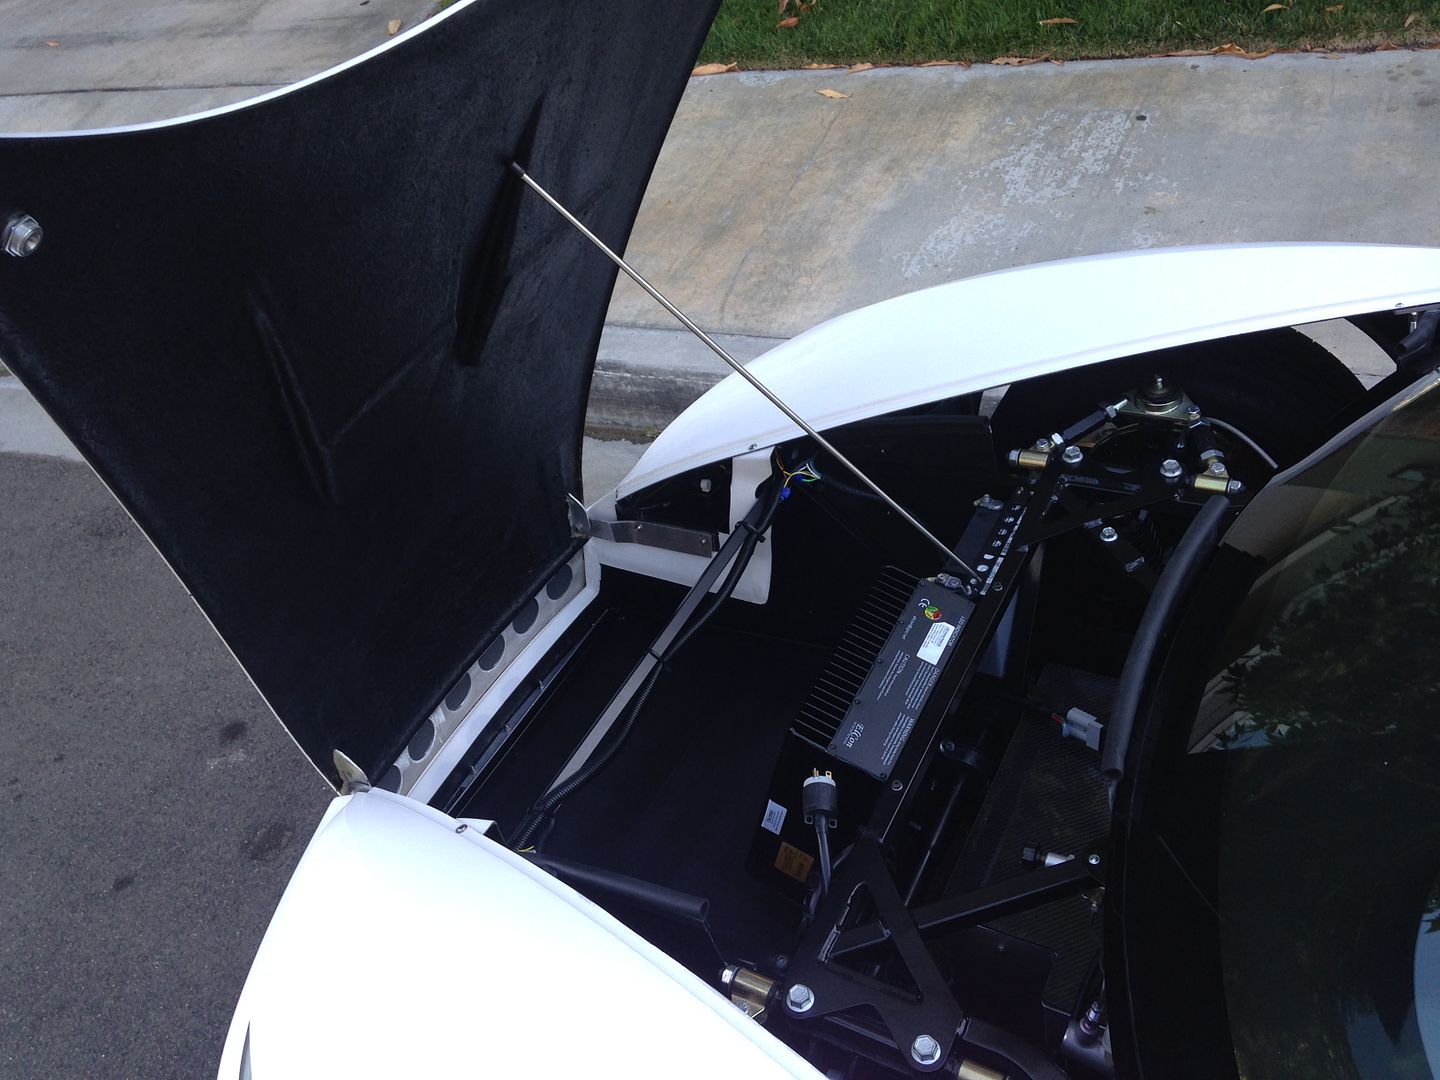
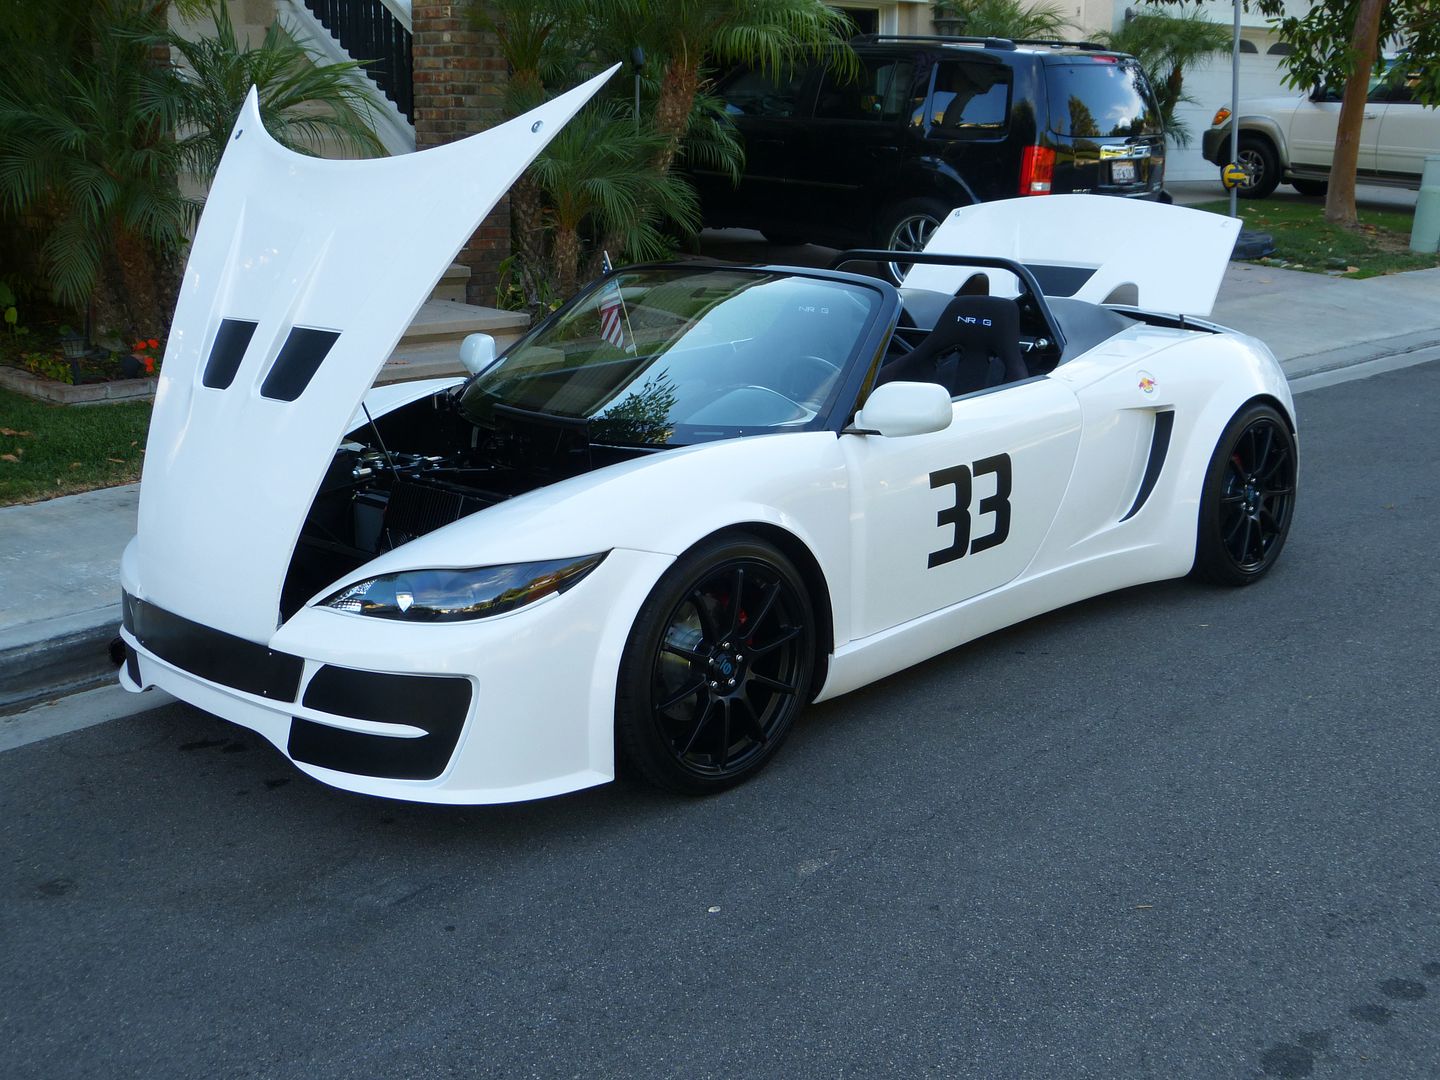
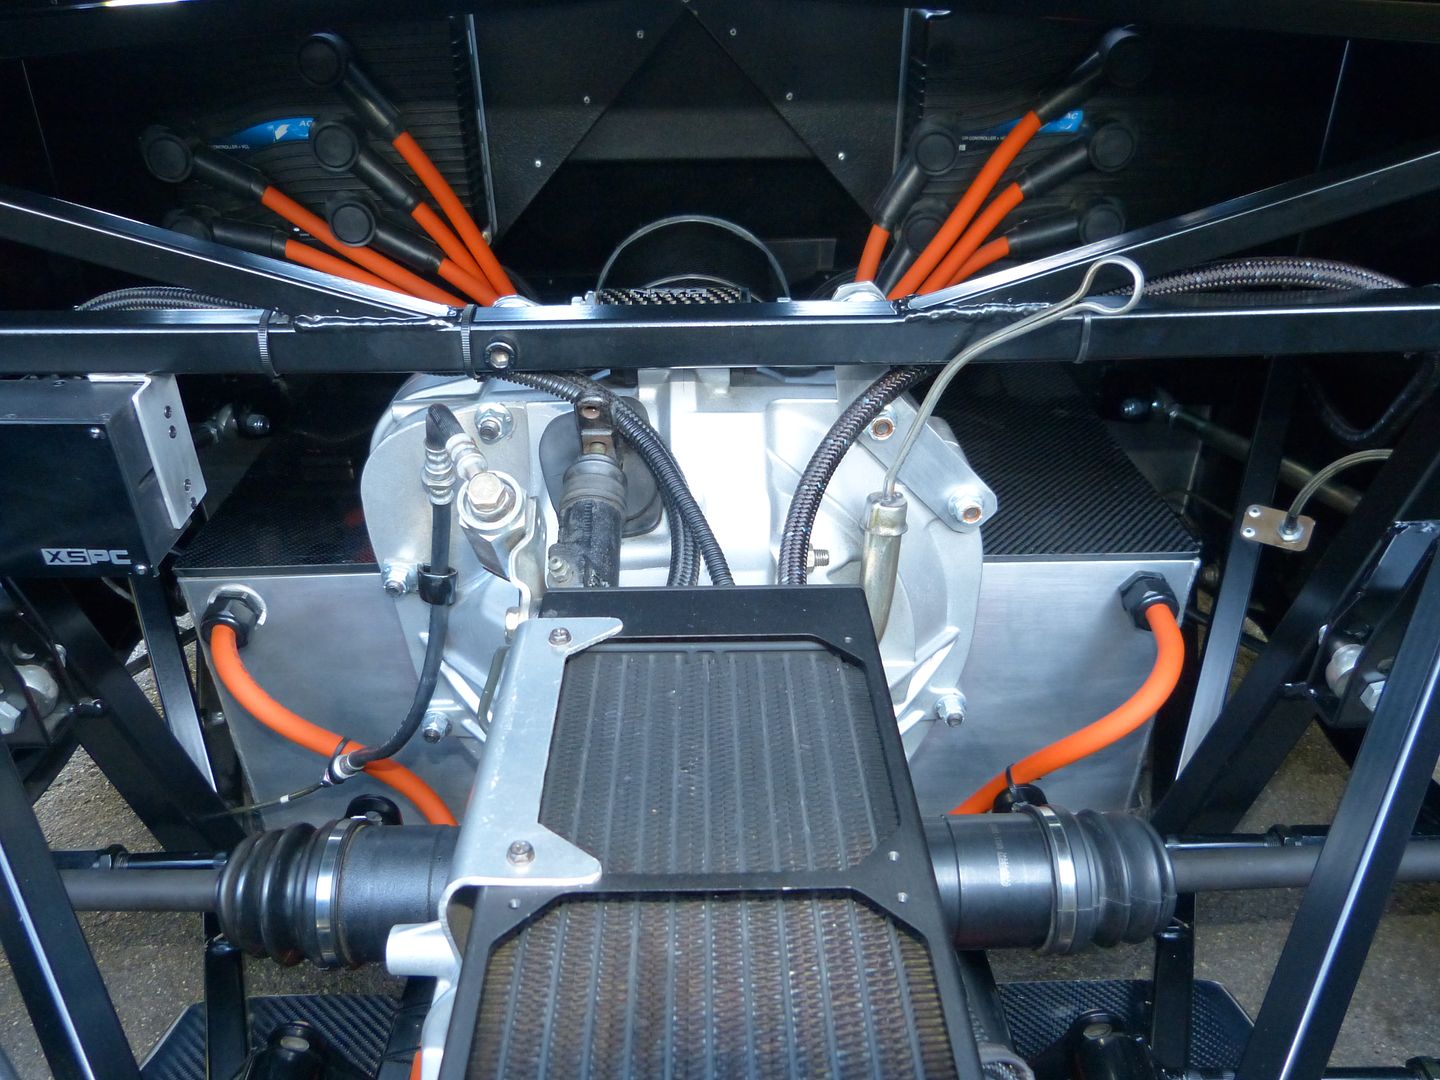
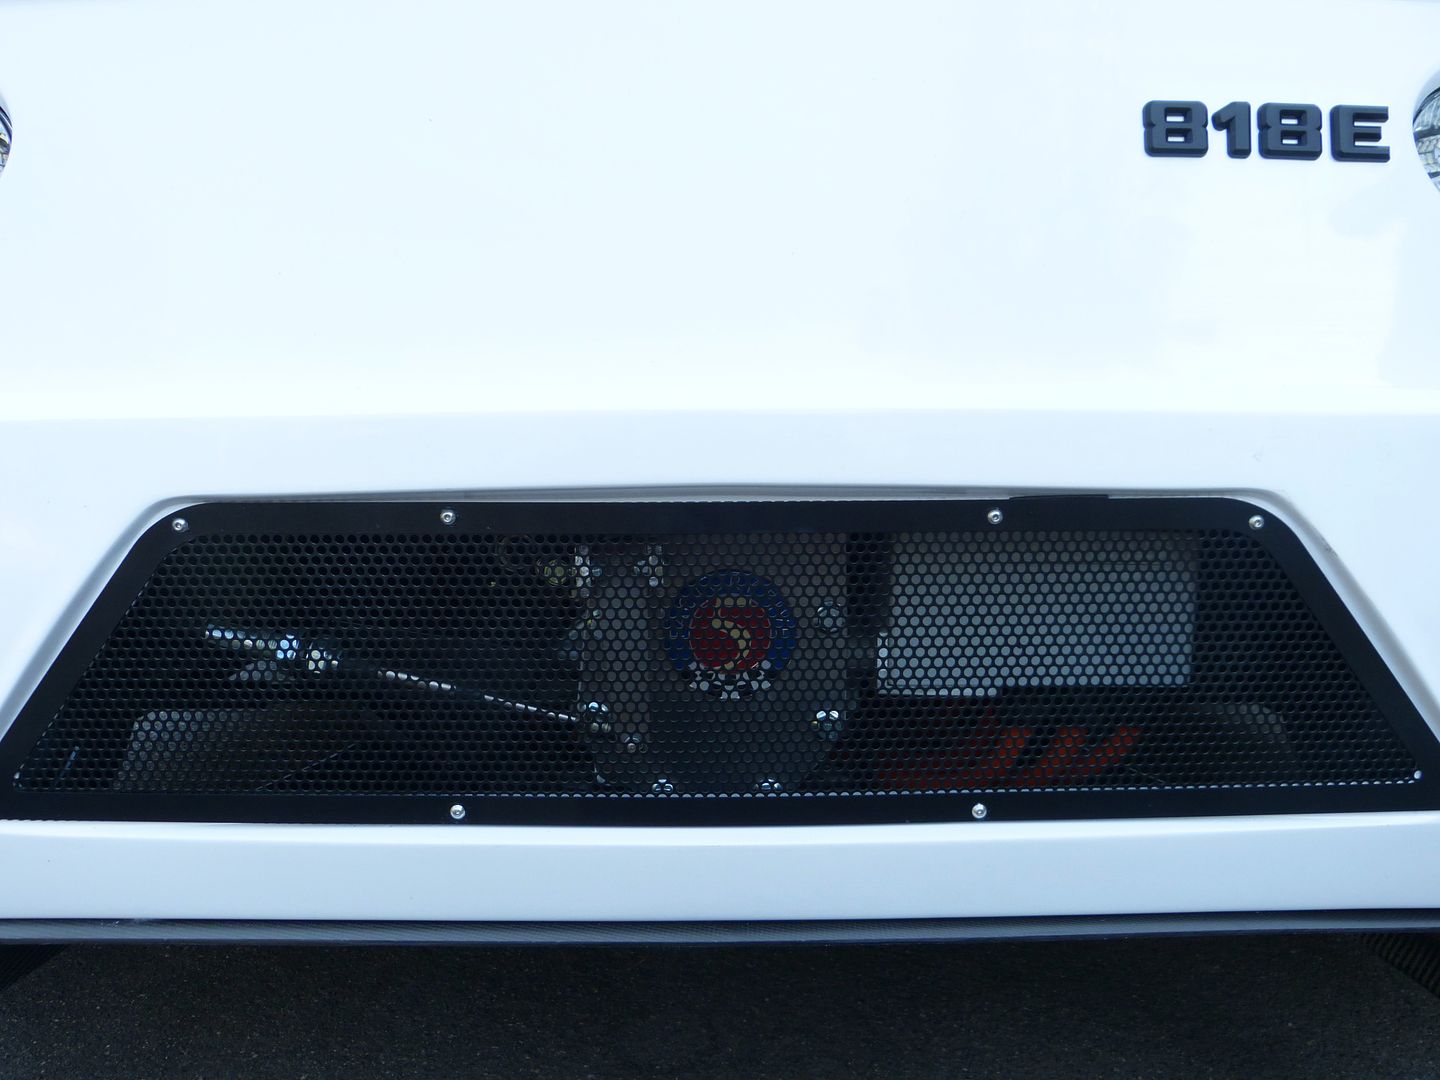
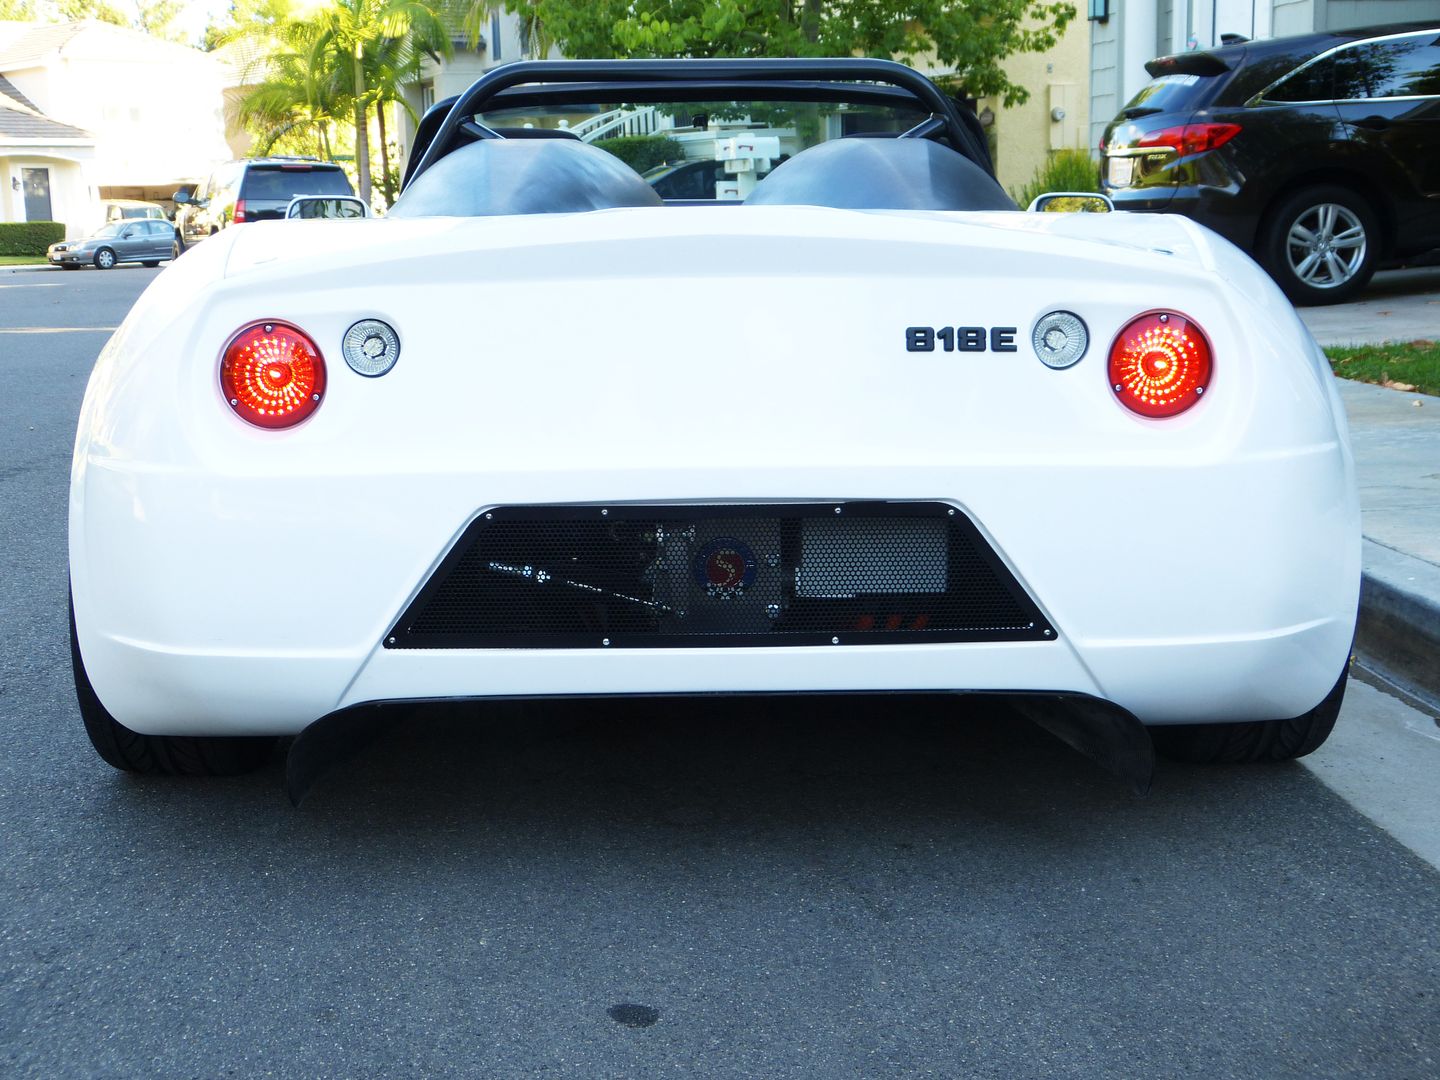
    In getting ready for the track, I secured the hood, painted the underside, and made a wind blocker for the radiator opening. The good news is, I have a Frunk!


  14. #334
    Senior Member ehansen007's Avatar
    Join Date
    Mar 2011
    Location
    Aliso Viejo, CA
    Posts
    1,625
    Post Thanks / Like
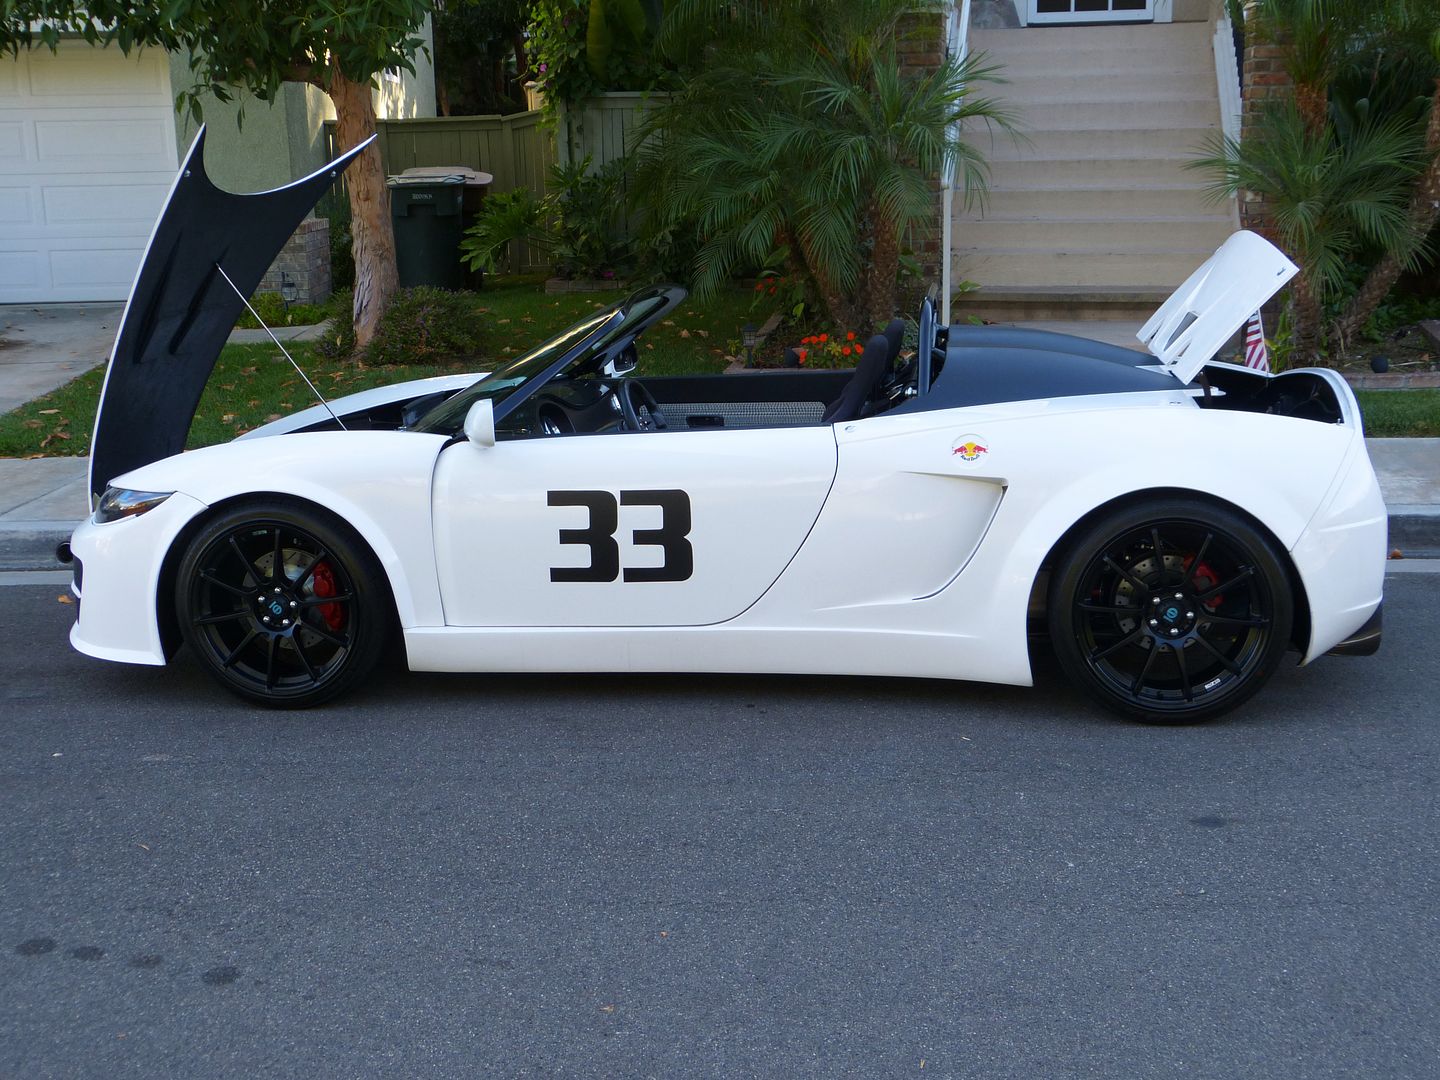
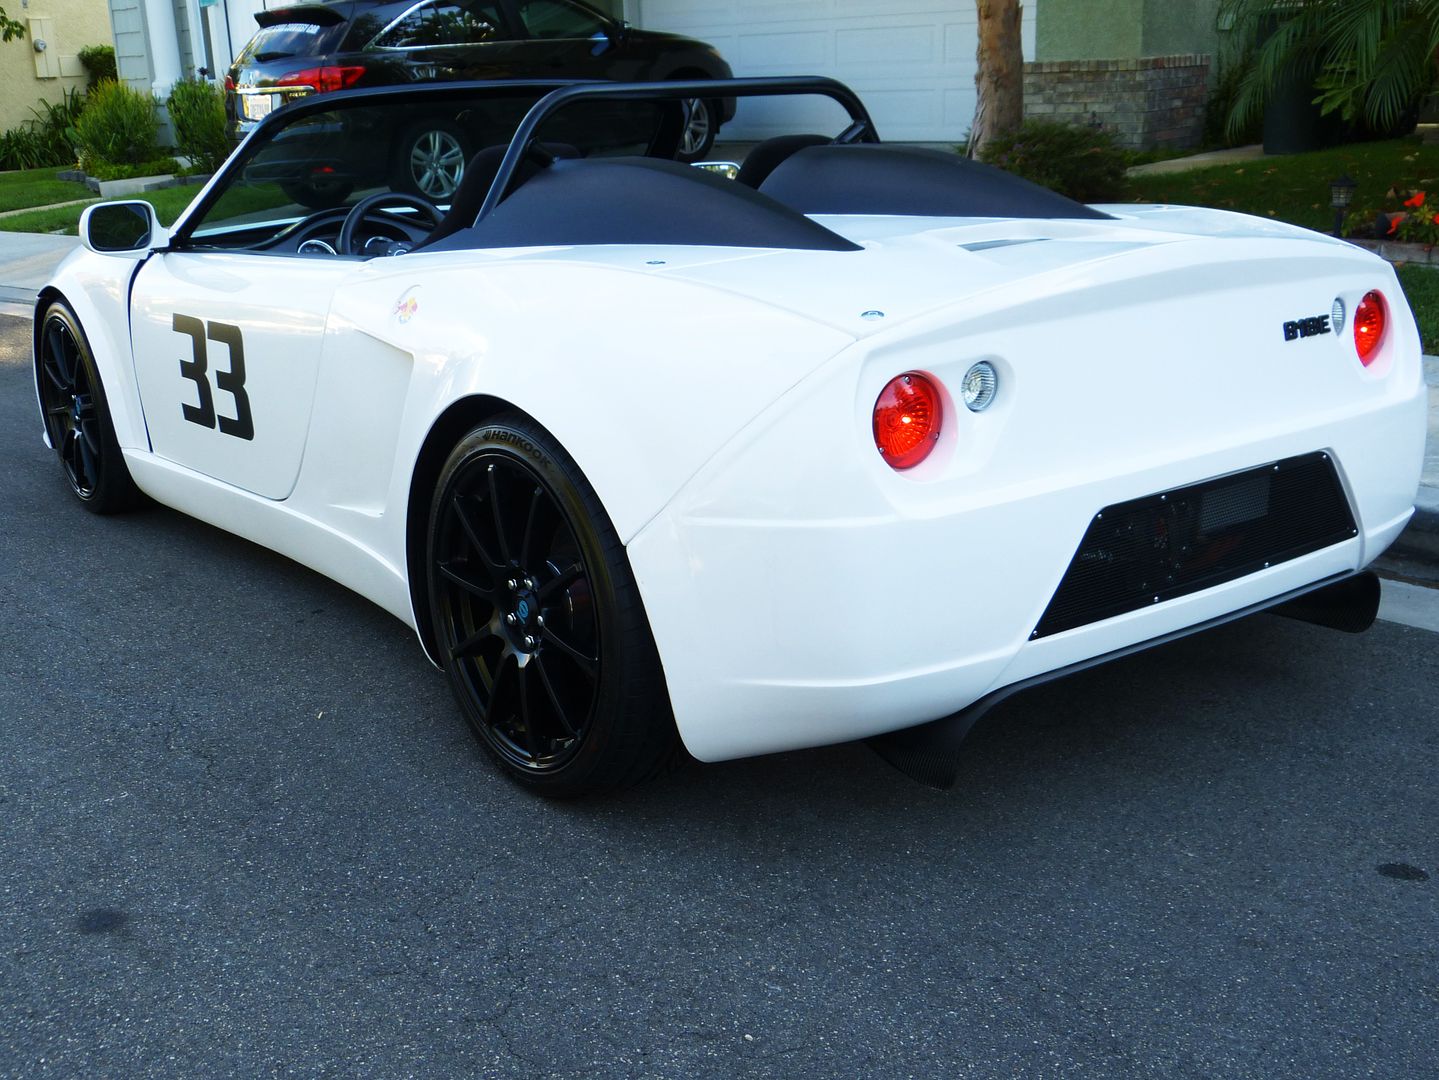
    Dead tired....but here she is.. Interior yet to come as I'm expecting some new parts in...


  15. #335
    Administrator
    Wayne Presley's Avatar
    Join Date
    Feb 2011
    Location
    Enterprise Alabama
    Posts
    2,804
    Post Thanks / Like
    Blog Entries
    3
    Looks ok I guess.... Congrats Erik!
    Wayne Presley www.verycoolparts.com
    Xterminator 705 RWHP supercharged 4.6 DOHC with twin turbos

  16. #336
    Senior Member
    Join Date
    Jan 2012
    Posts
    1,112
    Post Thanks / Like
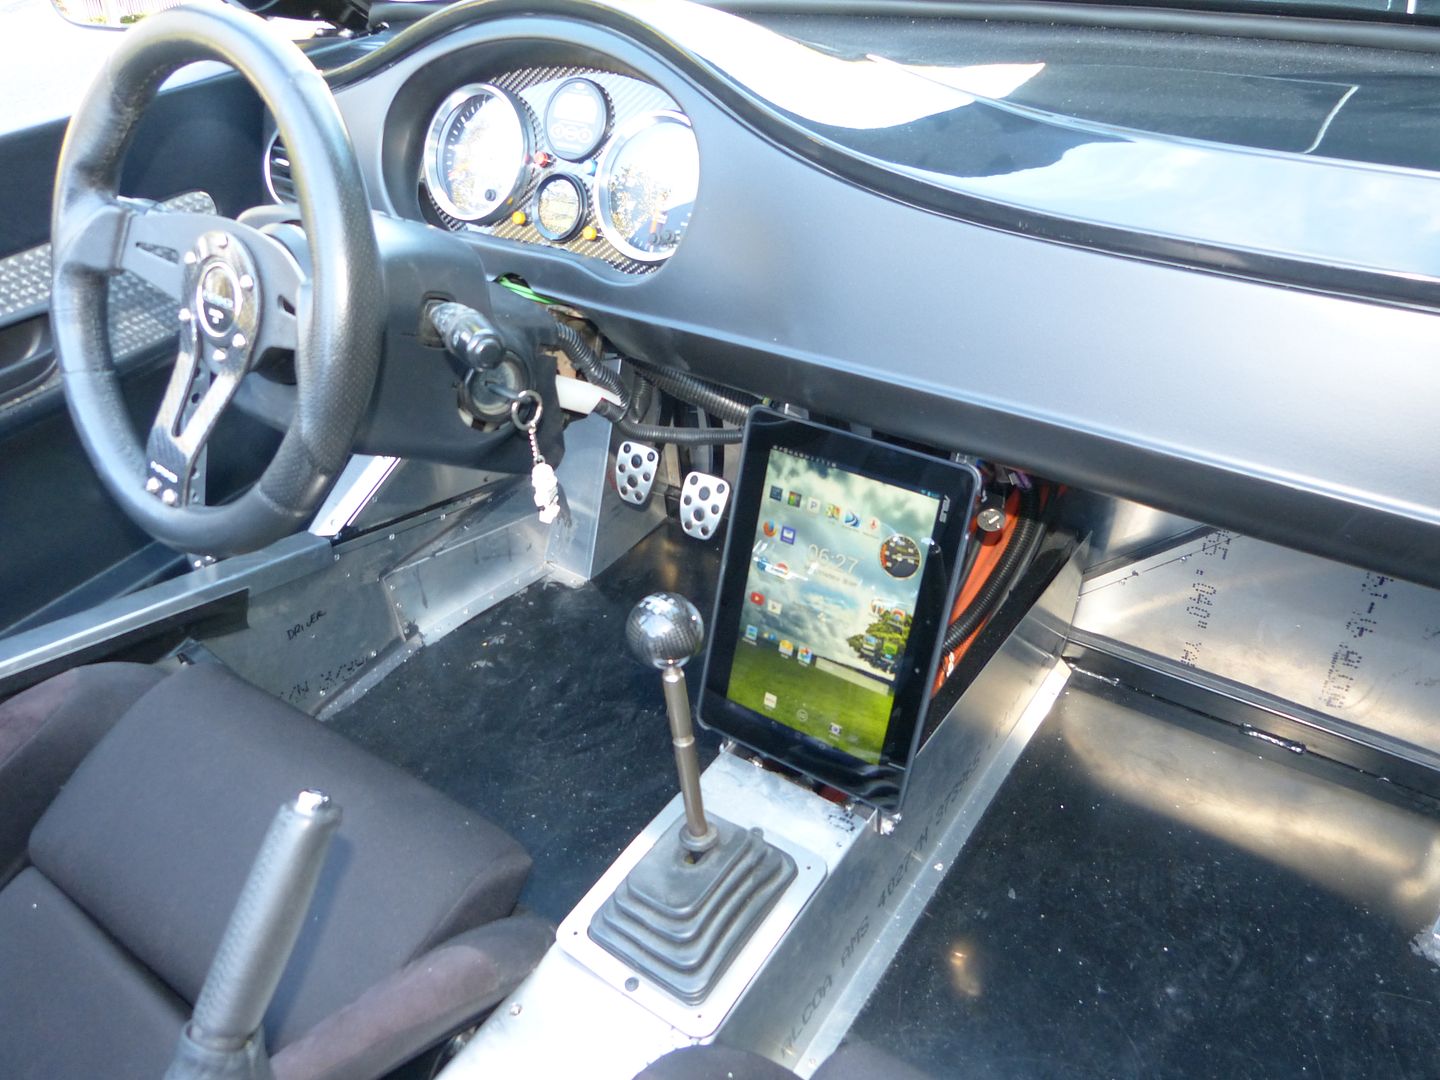
    Nice frunk!!! Where did you get the LEDs for your instrument cluster and what data does the iPad display?

  17. #337
    Senior Member
    Join Date
    Feb 2011
    Posts
    607
    Post Thanks / Like
    Dude, well done! I can't wait to see how it does on the track!

  18. #338
    Senior Member
    Join Date
    Jan 2014
    Location
    USA
    Posts
    587
    Post Thanks / Like
    Your car looks fantastic. I'm definitely going to need to copy the hood hinge design.

  19. #339
    Senior Member Frank818's Avatar
    Join Date
    Jun 2013
    Location
    QC, Canada
    Posts
    5,732
    Post Thanks / Like
    Freakin great!!!
    Frank
    818 chassis #181 powered by a '93 VW VR6 Turbo GT3582R
    Go-karted Aug 5, 2016 - Then May 19+21, 2017
    Tracked May 27/July 26, 2017
    Build time before being driveable on Sep 27, 2019: over 6000h
    Build Completed Winter 2021

  20. #340
    Senior Member ehansen007's Avatar
    Join Date
    Mar 2011
    Location
    Aliso Viejo, CA
    Posts
    1,625
    Post Thanks / Like
    I got the LEDS from a local electronics store. They looked like the F1 type and I forgot I had ordered the indicators on the speedo but stayed with them anyway. The Android Tablet isn't displaying anything yet but I'm working on it. It will be mostly for stereo and some battery readout info. Working on registration right now.

  21. #341
    PLATNUM Supporting Member
    wallace18's Avatar
    Join Date
    Apr 2012
    Location
    Trenton, Florida
    Posts
    5,381
    Post Thanks / Like
    Very nice job! You should be proud.

  22. #342
    Senior Member esff32's Avatar
    Join Date
    Oct 2012
    Location
    La Verne, Ca
    Posts
    560
    Post Thanks / Like
    Looks amazing Erik, very cool. Cant wait to hear it…Lol!

  23. #343
    Senior Member Aloha818's Avatar
    Join Date
    Jul 2013
    Location
    Waikiki
    Posts
    544
    Post Thanks / Like
    Looks great! Good job! Good luck with the registration process.
    "In wine there is wisdom, in beer there is strength, in water there is bacteria."

    818 (Chassis #34) Delivered 9/25/2013, First start 3/2/2014, First drive 4/5/2014, Registered 8/28/2015, First Dyno 3/18/2016, First SCCA event 4/3/2016, First car show HIN Honolulu 4/23/2016

  24. #344
    Senior Member Brando's Avatar
    Join Date
    Oct 2013
    Location
    Irvine, Ca
    Posts
    566
    Post Thanks / Like
    Blog Entries
    1
    Quote Originally Posted by esff32 View Post
    Cant wait to hear it
    Nice whip. Heard she purrs like a sewing machine

  25. #345
    Senior Member
    Join Date
    May 2013
    Location
    Colombia
    Posts
    222
    Post Thanks / Like
    First of all, awesome!! The whole car came out prrty clean. Maybe you need a little work on the interior but that's it.

    Erik, do you have final numbers on the weight of the car at each corner? you posted the weight pre-body. I'm just wondering how much the fiberglass stuff weighs. Is there any part that weighs enough to be made out of carbon fiber for a weight advantage?

    Speedy G
    Last edited by Speedy G; 07-30-2014 at 10:10 AM.

  26. #346
    Senior Member ehansen007's Avatar
    Join Date
    Mar 2011
    Location
    Aliso Viejo, CA
    Posts
    1,625
    Post Thanks / Like
    Hey speedy, I'm about to do just that if I can get the scales from my friends today. I'm interested to find out as well.

    Also I spoke to Jim Schenck yesterday about rear suspension setup and how the rear wheel sits so far back in the fender well. Basically the body is on and it's lined up per the manual so I couldn't have moved the body any further forward. When I look at the suspension setup I can see that the lower trailing arm is fixed and if I shorten the upper link to compensate I'm creating roll steer and also moving the upper later link closer to the spring where it will hit. It doesn't seem like it will work out. Anyone else have this issue? (probably, I've been too busy to read all the posts!) If so how did you fix it?


  27. #347
    Senior Member RM1SepEx's Avatar
    Join Date
    Jul 2011
    Location
    Freeport, ME
    Posts
    3,801
    Post Thanks / Like
    mine's the same as yours... My car is not aligned yet so I'm not sure where they will be when the rear suspension is aligned properly
    Dan

    818S #17 Picked up 8/1/13 First start 11/1/13 Go Kart 3/28/14

  28. #348
    Senior Member ehansen007's Avatar
    Join Date
    Mar 2011
    Location
    Aliso Viejo, CA
    Posts
    1,625
    Post Thanks / Like
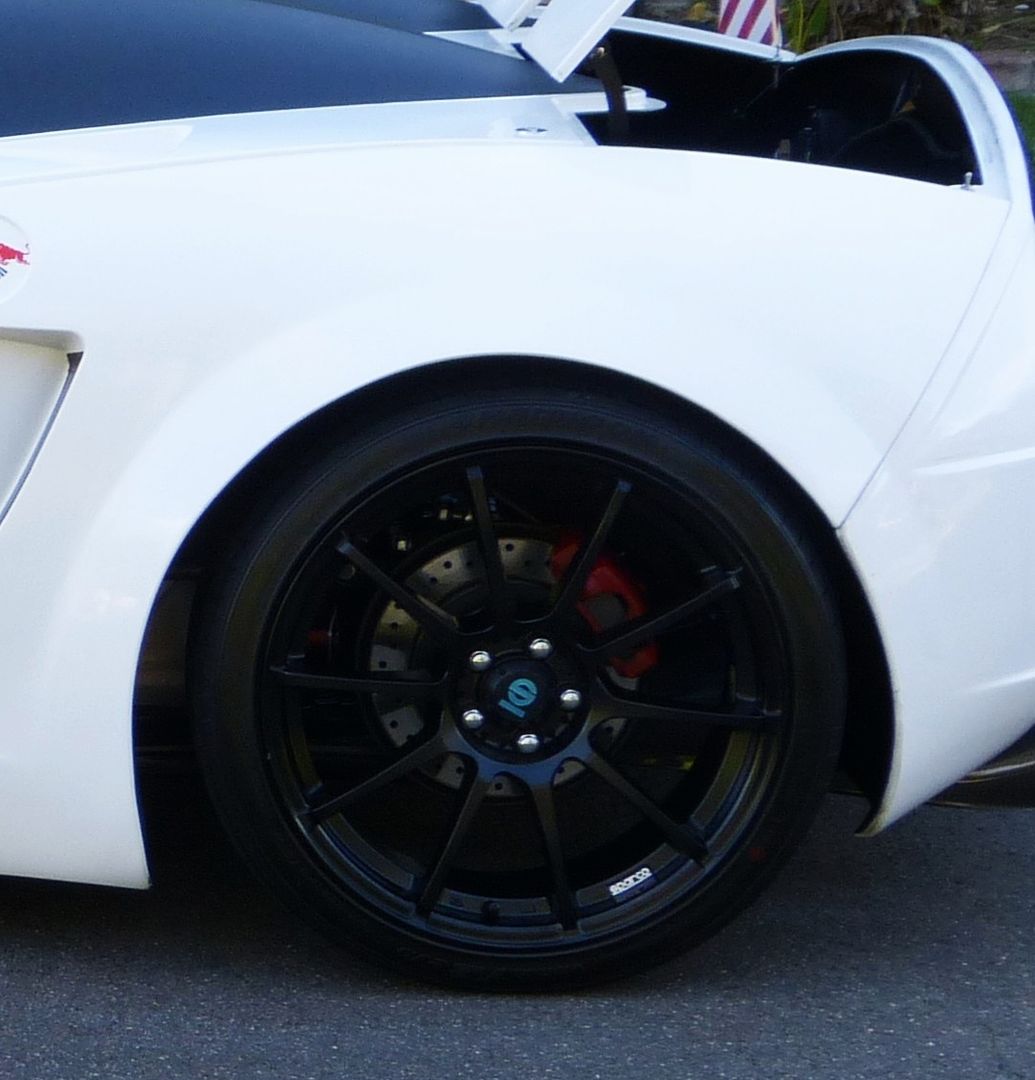
    Yeah, I was afraid of that. What's crazy is that it's an issue with the Hot Rod too (with some people but not all). Check these pics out. The original SEMA car is a bit forward and then the candy red car is back in the well like ours. I'm considering pulling the bottom of the bumper out a bit and see if it helps. I don't like stressing the body like that though.

    OH4A2785.JPG

    0_1DPM22780.jpg
    Last edited by ehansen007; 07-31-2014 at 11:41 AM.

  29. #349
    Senior Member
    Join Date
    Feb 2011
    Location
    Myrtle Beach, SC
    Posts
    2,108
    Post Thanks / Like
    Erik-

    Car looks fantastic. I have enjoyed following your build. Thanks for the great build details.

    I hope it exceeds your expectations on the track!

    Regards,

    Steve

  30. #350
    Senior Member
    Join Date
    Apr 2011
    Location
    Shawnee KS< KC Burb
    Posts
    844
    Post Thanks / Like
    Quote Originally Posted by ehansen007 View Post
    Yeah, I was afraid of that. What's crazy is that it's an issue with the Hot Rod too. .
    ]
    Erik
    JS is very touchy about that issue. He says it's not true about the 33.
    I tried to have a polite convo with him about the 33 and he got irate, so I just apologized for making him angry and thanked him for his time.
    Nice whip
    DB
    Last edited by myjones; 07-31-2014 at 06:05 AM.

  31. #351
    Senior Member Frank818's Avatar
    Join Date
    Jun 2013
    Location
    QC, Canada
    Posts
    5,732
    Post Thanks / Like
    Quote Originally Posted by ehansen007 View Post
    the lower trailing arm is fixed
    What trailing arms are you using, OEM non-adjustable?

    You are the first one I see this misalignment, I don't know if adjustable trailing arms can fix this. Usually if you change the length of one of these multiple arms we have there, it screws up adjustment and you have to move one or more of the others to balance everything out.
    Frank
    818 chassis #181 powered by a '93 VW VR6 Turbo GT3582R
    Go-karted Aug 5, 2016 - Then May 19+21, 2017
    Tracked May 27/July 26, 2017
    Build time before being driveable on Sep 27, 2019: over 6000h
    Build Completed Winter 2021

  32. #352
    Senior Member ehansen007's Avatar
    Join Date
    Mar 2011
    Location
    Aliso Viejo, CA
    Posts
    1,625
    Post Thanks / Like
    Quote Originally Posted by myjones View Post
    Erik
    JS is very touchy about that issue. He says it's not true about the 33.
    I tried to have a polite convo with him about the 33 and he got irate, so I just apologized for making him angry and thanked him for his time.
    Nice whip
    DB
    Okay, well, I know others as well as Dan Ruth who have worked to get the wheel centered in the fender well. It could just be a preference thing so I may be wrong. It may also be that without the fenders, it looks off but the fender doesn't follow the rear of the car all the way back. Not sure. I just know my was off at recommended setup and ride height.


    As for the 818, I'm not the only one, we've got two others mentioned above including a FFR SEMA car that have the same issue. I don't want to buy adjustable trailing arms (if I don't have to) and moving the wheel forward may cause the upper transverse link to hit the springs. I may just need to work it around a little. That's typical with these cars and I was on the phone with FFR we walked through it and came to a similar conclusion. It's a beta kit so I'm okay with these issues. My point was to try and find out how others who have had this situation fixed it or overcame it. Thanks guys.
    Last edited by ehansen007; 07-31-2014 at 11:40 AM.

  33. #353
    Senior Member
    Join Date
    Apr 2011
    Location
    Shawnee KS< KC Burb
    Posts
    844
    Post Thanks / Like
    Quote Originally Posted by ehansen007 View Post
    Okay, well, I know others as well as Dan Ruth who have worked to get the wheel centered in the fender well. It could just be a preference thing so I may be wrong. It may also be that without the fenders, it looks off but the fender doesn't follow the rear of the car all the way back. Not sure. I just know my was off at recommended setup and ride height.
    My point was to try and find out how others who have had this situation fixed it or overcame it. Thanks guys.
    Erik
    For clarity Mine on the full fender 33 was way off too and I had custom adjustable 4 links made to put it right. I have seen lots of pictures of completed cars that were obviously way off. I was hoping to discuss an updated 33 having that addressed. 33 MK2
    On your 818 since it's a BETA, IF it is wrong they will likely improve the components, They do seem to listen to you and that's good for all of us.
    I have enjoyed watching your build.
    DB
    Hemi33

  34. #354
    Senior Member Frank818's Avatar
    Join Date
    Jun 2013
    Location
    QC, Canada
    Posts
    5,732
    Post Thanks / Like
    Quote Originally Posted by ehansen007 View Post
    It's a beta kit so I'm okay with these issues.
    I don't disagree with that. The question is "when did the beta production stop, giving place for real production kits?"
    Frank
    818 chassis #181 powered by a '93 VW VR6 Turbo GT3582R
    Go-karted Aug 5, 2016 - Then May 19+21, 2017
    Tracked May 27/July 26, 2017
    Build time before being driveable on Sep 27, 2019: over 6000h
    Build Completed Winter 2021

  35. #355
    Senior Member RM1SepEx's Avatar
    Join Date
    Jul 2011
    Location
    Freeport, ME
    Posts
    3,801
    Post Thanks / Like
    I think the correct terminology is early kit, there were no 818 beta builds

    Erik what is your serial #? mine is 17 and I'll be tweaking, mine look like your's. I think one issue is the 5/8 measurement for the sides/rear fenders. That measurement is made after riveting an aluminum panel over the frame. When you piece together 8 major 3D body panels to control gaps there is some variability that results, it doesn't take much for the gaps to look "off"

    Look at the issues some are having in the front. Between rear bushing mounts that are off, early steering rack mounts being off center, any misalignment of the holes through the brackets can cause you to twist and distort the rubber bushings a bit. It all results in slightly differnt wheel positions.

    I think that long term it is the nature of the beast. We would be well served however if FFR could give us some hard and fast measurements so that we could work them while building it up vs after everything is mounted and the body is on casuing us to redo everything.

    I've done some browsing on the forum of other FFR models and every model has similar issues. So... many... variables...
    Dan

    818S #17 Picked up 8/1/13 First start 11/1/13 Go Kart 3/28/14

  36. #356
    818 builder metalmaker12's Avatar
    Join Date
    Mar 2012
    Location
    Exeter R.I
    Posts
    2,834
    Post Thanks / Like
    Blog Entries
    1
    I just centered the quarters and fenders over the wheels the best I could make it all centered and look correct. image.jpg
    818S frame #13 Jdm version 8 ej207

  37. #357
    Senior Member ehansen007's Avatar
    Join Date
    Mar 2011
    Location
    Aliso Viejo, CA
    Posts
    1,625
    Post Thanks / Like
    Quote Originally Posted by metalmaker12 View Post
    I just centered the quarters and fenders over the wheels the best I could make it all centered and look correct. image.jpg
    Yup and it looks good. You can see where the front fender is hanging over a bit in the front though. I felt those lines needed to be matched up and I could work with the back. But I'm finding I can't. It's minor though and I'm not complaining about it. Just trying to find a solution..

    RM1: As for the beta reference, you're right; there technically were no betas but make no mistake, we were the betas guys. Maybe call us the "First Builders," I don't know...whatever works. I'm not sure of the first production run but I would have to say the first 30-50 were rolled out while changes were still be made as well as adjustments. Door panels, hood standoffs, poorly filled out fiberglass voids, etc. I was actually very surprised they didn't do betas on these cars and handed them to so many first time builders. It opened them up to a lot scrutiny and from a new demographic that's used to things happening much faster than their current customer base. Let's face it. Subaru guys are younger, more tech savy, and used to getting Amazon packages the day before they ordered it! So patience can be a tough virtue. And you my friend, got one of the roughest kits I've seen. These are the things beta builders deal with and that's okay. It's how apple does things when a new OS comes out because no one dev team can find all of these issues without building and deploying a large amount of products into the field and waiting to hear back... and burn money doing it. So, as I've written before, we are all part of the team, helping them build a new product so take pride in being a "first builder!" I know I do. By the way, I have kit 19E (for electric...NOT) Not sure what the e stands for.

  38. #358
    Senior Member Turboguy's Avatar
    Join Date
    Feb 2011
    Location
    Canada
    Posts
    416
    Post Thanks / Like
    Quote Originally Posted by ehansen007 View Post
    At first I used some of the "D" gasket to close the gap and it worked fine but then I found something better.

    Erik-

    Do you have some closeup pics of the headlight and DRL strip? I'm curious how it's mounted and the level of finish you can obtain with something like this.

    Is the LED strip mounted inside the bucket or is it sitting on the surface?

  39. #359
    Senior Member ehansen007's Avatar
    Join Date
    Mar 2011
    Location
    Aliso Viejo, CA
    Posts
    1,625
    Post Thanks / Like
    It just sits on the surface of the headlight on the outside. They actually come with small clamps that you can screw in if you want to mount on the inside. I just figured it closed the gap nicely and filled two purposes.

  40. #360
    Senior Member
    Join Date
    Jan 2014
    Location
    USA
    Posts
    587
    Post Thanks / Like
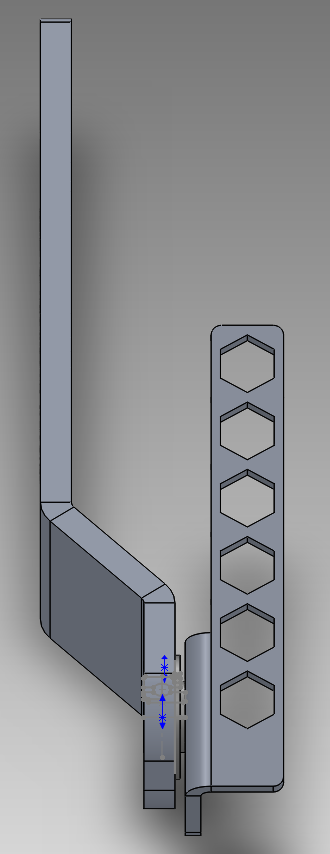
    Erik, any input on this copy of your hood hinge design?


Page 9 of 13 FirstFirst ... 7891011 ... LastLast

Posting Permissions

  • You may not post new threads
  • You may not post replies
  • You may not post attachments
  • You may not edit your posts
  •  

Stewart Transport

Visit our community sponsor