FormaCars

Visit our community sponsor

Thanks Thanks:  10
Likes Likes:  65

View Poll Results: How to finish the mesh panels?

Voters
57. You may not vote on this poll
  • Gloss Black

    47 82.46%
  • Unfinished Aluminum

    10 17.54%
Page 7 of 16 FirstFirst ... 56789 ... LastLast
Results 241 to 280 of 619

Thread: mikeb75's build thread

  1. #241
    Moonlight Performance
    Hindsight's Avatar
    Join Date
    May 2014
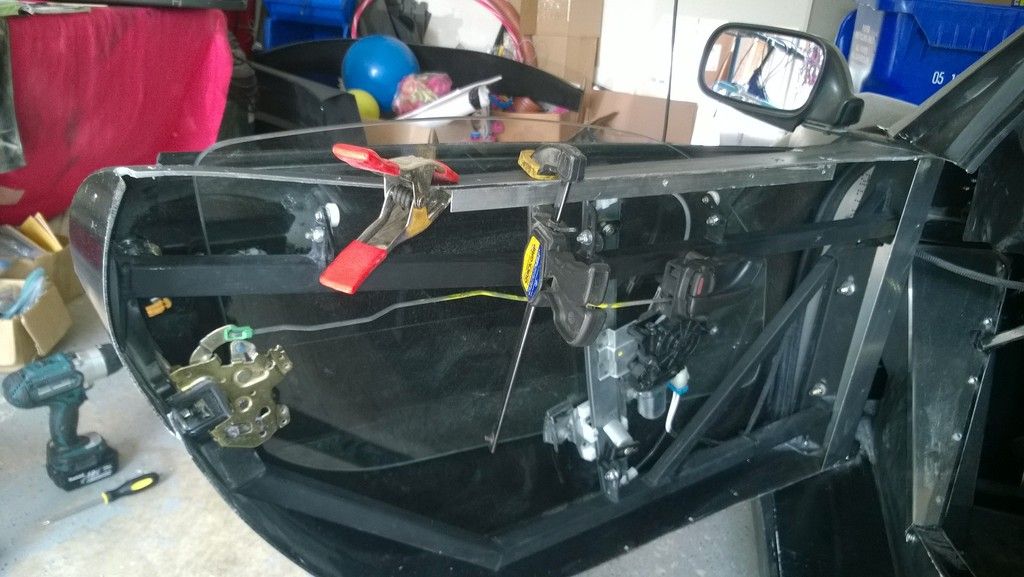
    Location
    Atlanta
    Posts
    3,402
    Post Thanks / Like
    Looks good. I see there is a decent sized gap between the rear of the roof and the top of the bumper. I, and many others have that same gap on the S version of the 818. kind of strange. I plan on fixing mine by extending the rear of the trunk as much as is needed. Will either do it with fiberglass or Evercoat's high-strength fiberglass-strand filler. How are you planning on addressing it?

  2. #242
    Senior Member AZPete's Avatar
    Join Date
    Feb 2011
    Location
    Scottsdale, AZ
    Posts
    2,374
    Post Thanks / Like
    Thanks, Mike, for the pics and details. I'm waiting to get my hard top & front end soon so I'm drooling and learning from your work.
    Where you have AeroCatch latches would it be possible to have hidden mounts, like threaded studs bolted to the frame? Like you, I'll be 100% hard top.
    Is the inside of the hard top finished smooth or rough like the inside of the body panels? Are you adding a headliner?
    The GPS transceiver for my NAV system is inside my hood and it gets good reception so perhaps yours would be okay inside?
    818S/C : Chassis #25 with 06 WRX 2.5 turbo, ABS, cruise, PS, A/C, Apple CarPlay, rear camera, power windows & locks, leather & other complexities. Sold 10/19 with 5,800 miles.
    Mk3 Roadster #6228 4.6L, T45, IRS, PS, PB, ABS, Cruise, Koni's, 17" Halibrands, red w/ silver - 9K miles then sold @ Barrett-Jackson Jan 2011 (got back cash spent).

  3. #243
    Senior Member mikeb75's Avatar
    Join Date
    Sep 2013
    Posts
    685
    Post Thanks / Like
    Quote Originally Posted by Hindsight View Post
    Looks good. I see there is a decent sized gap between the rear of the roof and the top of the bumper. I, and many others have that same gap on the S version of the 818. kind of strange. I plan on fixing mine by extending the rear of the trunk as much as is needed. Will either do it with fiberglass or Evercoat's high-strength fiberglass-strand filler. How are you planning on addressing it?
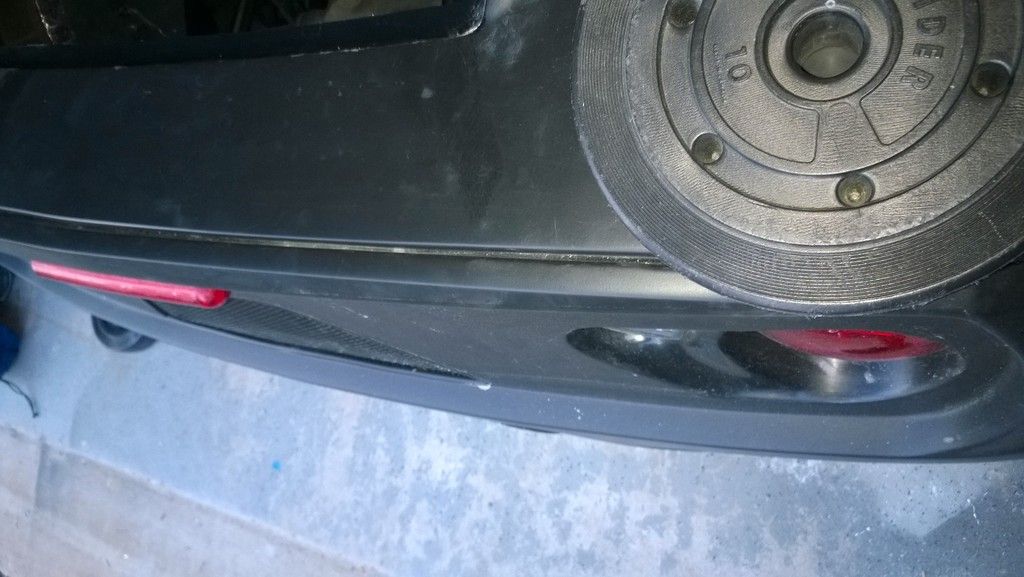
    I can close up the gap with just a little finger pressure on the bumper top, so maybe just a bolt & locknut or two. The drivers rear corner has a small gap from the side-top-rear junction, that might need some more aggressive filler/body work.

    Quote Originally Posted by AZPete View Post
    Thanks, Mike, for the pics and details. I'm waiting to get my hard top & front end soon so I'm drooling and learning from your work.
    Where you have AeroCatch latches would it be possible to have hidden mounts, like threaded studs bolted to the frame? Like you, I'll be 100% hard top.
    Is the inside of the hard top finished smooth or rough like the inside of the body panels? Are you adding a headliner?
    The GPS transceiver for my NAV system is inside my hood and it gets good reception so perhaps yours would be okay inside?
    Threaded studs should work, there is between 1"-2" between the stock location pad for the hood pin and the body.

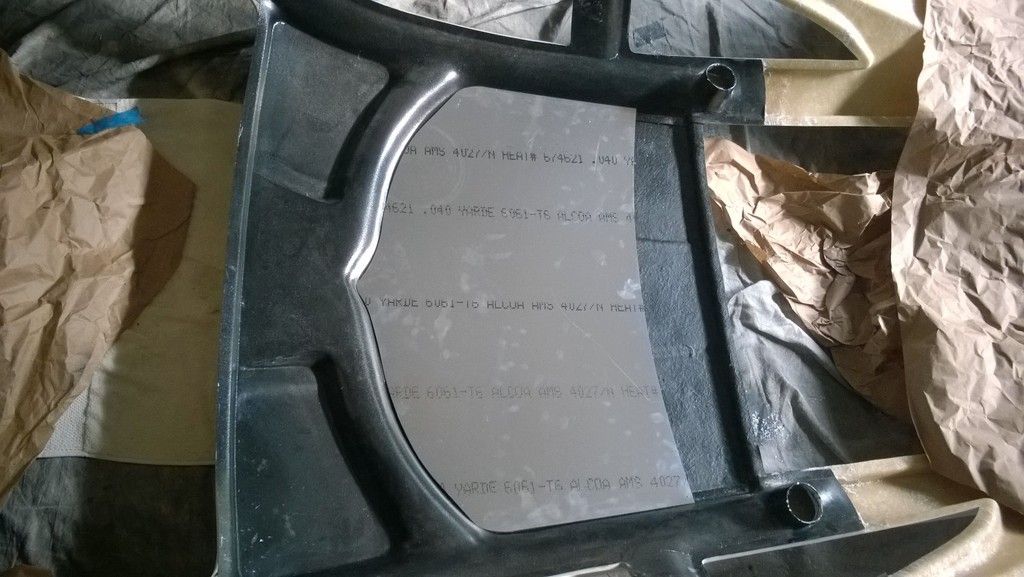
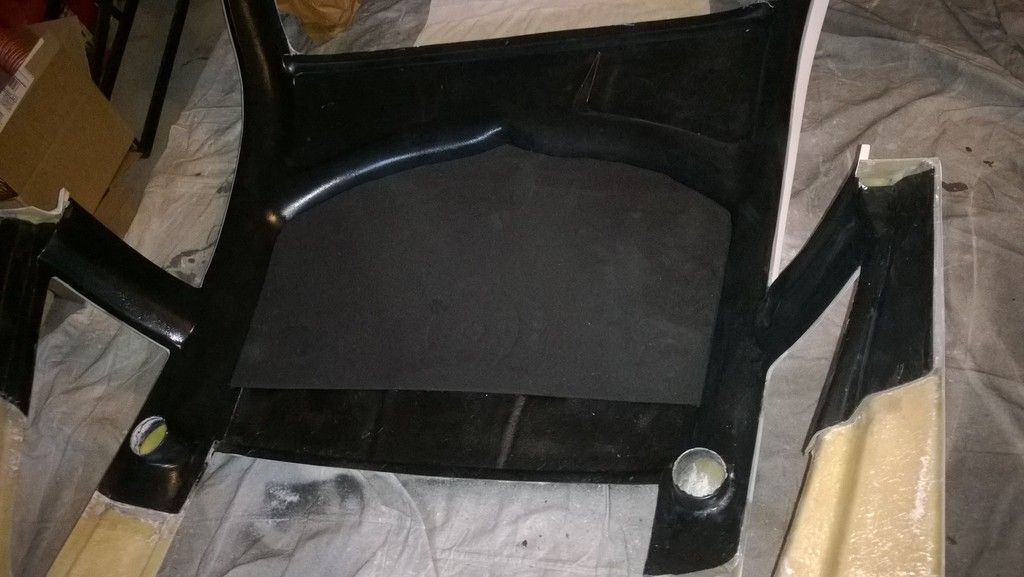
    There is a plastic panel bonded to the inside of the HT that gives the front of it the venting for the inlet. There is also an aluminum sheet & headliner material provided by FFR, but no instructions in the user manual.


    So far I can tell you that black silicone, contact cement and outdoor double-sided concrete/carpet tape don't hold it up very well... probably doesn't help that the way I wrapped the headliner on the aluminum (and the aluminum being slightly too wide) creates just enough bow/ not fit to push the headliner down and stresses the adhesive. A bit of trimming would probably fix it - and note it's a ton easier to install when the top is off the car and upside-down over when installed!
    818SC chassis #206 EJ207 2.0L VF37 twin scroll || Cusco type RS 1.5 LSD || Wilwood pedal box (firewall attach) || Wilwood superlite front calipers
    BUILD Phase 1: 6/6/2014 car delivered || 5/24/2015 first start || 6/7/2015 go karted || 4/20/2016 hard-top-topped || 10/25/2016 registered || 11/18/2016 inspected & complete
    BUILD Phase 2: 3/8/2017 EJ207v8 || 5/29/2017 re-first re-start || 7/17/2017 re-assembled with race car bits

  4. #244
    Senior Member AZPete's Avatar
    Join Date
    Feb 2011
    Location
    Scottsdale, AZ
    Posts
    2,374
    Post Thanks / Like
    Thanks, Mike. All looks good to me and I'm getting more excited about the retro-fit! I just talked to Courtney and then Jolene at Stewart so perhaps I'll have the hard top and front end next week. Now I really need to get the A/C finished! Thanks.
    Pete
    818S/C : Chassis #25 with 06 WRX 2.5 turbo, ABS, cruise, PS, A/C, Apple CarPlay, rear camera, power windows & locks, leather & other complexities. Sold 10/19 with 5,800 miles.
    Mk3 Roadster #6228 4.6L, T45, IRS, PS, PB, ABS, Cruise, Koni's, 17" Halibrands, red w/ silver - 9K miles then sold @ Barrett-Jackson Jan 2011 (got back cash spent).

  5. #245
    Senior Member mikeb75's Avatar
    Join Date
    Sep 2013
    Posts
    685
    Post Thanks / Like
    Sweet, Pete. Shouldn't take you too long to get it installed after you received it, there isn't a ton of work to do.

    Can't wait to read about your AC install. I just took a test drive around the neighborhood for about 20 minutes, and yea - there is quite a bit of heat coming from the engine compartment... and having a black car doesn't help all that much.
    818SC chassis #206 EJ207 2.0L VF37 twin scroll || Cusco type RS 1.5 LSD || Wilwood pedal box (firewall attach) || Wilwood superlite front calipers
    BUILD Phase 1: 6/6/2014 car delivered || 5/24/2015 first start || 6/7/2015 go karted || 4/20/2016 hard-top-topped || 10/25/2016 registered || 11/18/2016 inspected & complete
    BUILD Phase 2: 3/8/2017 EJ207v8 || 5/29/2017 re-first re-start || 7/17/2017 re-assembled with race car bits

  6. #246
    Senior Member mikeb75's Avatar
    Join Date
    Sep 2013
    Posts
    685
    Post Thanks / Like

    Cribbing from the Best Part 2

    Hindsight is a freaking genius!

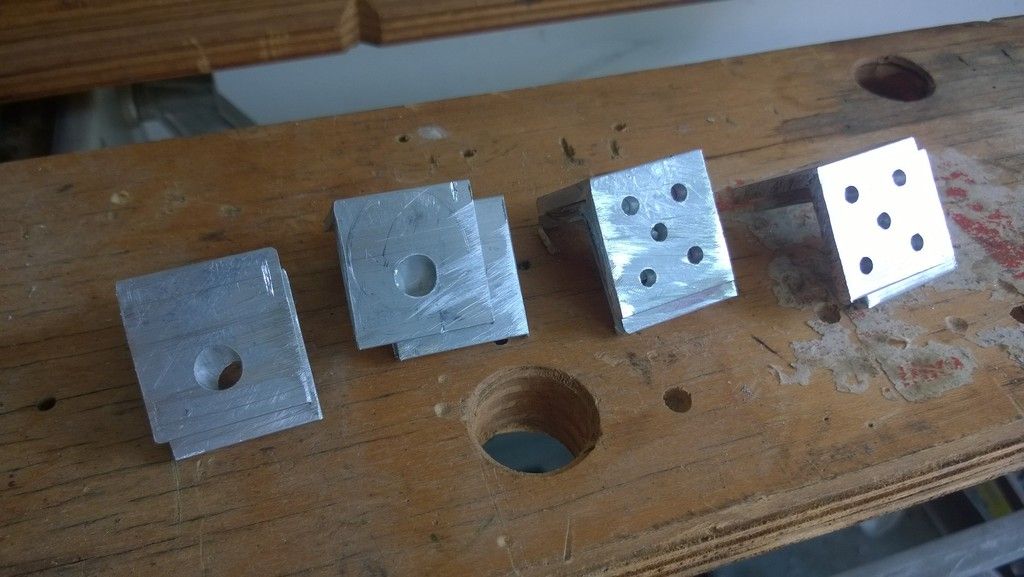
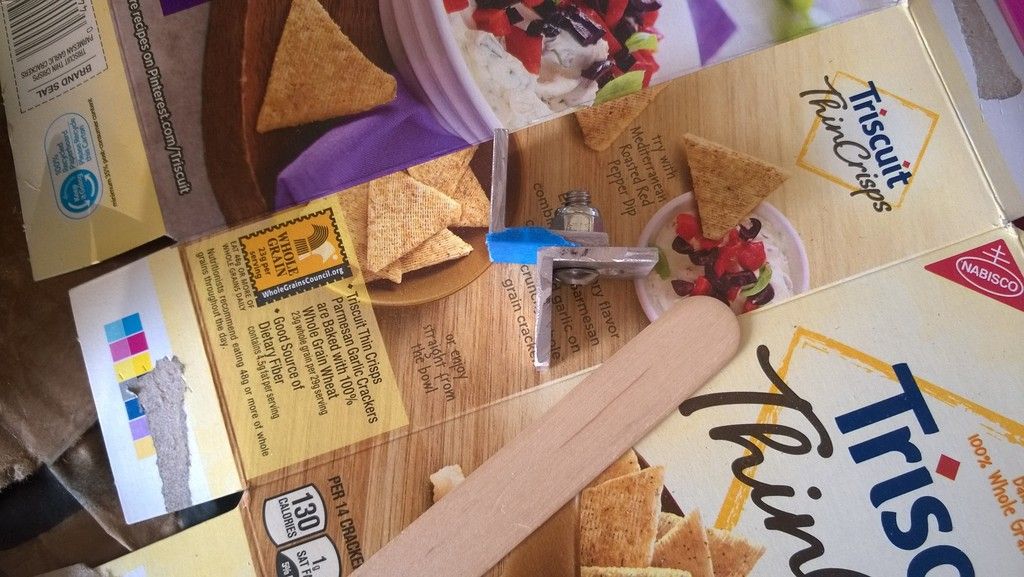
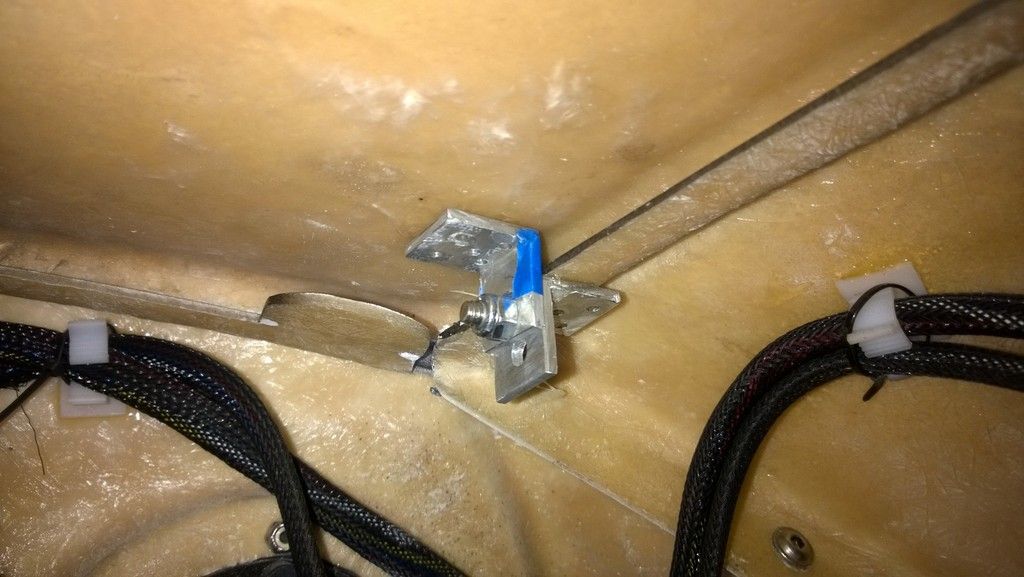
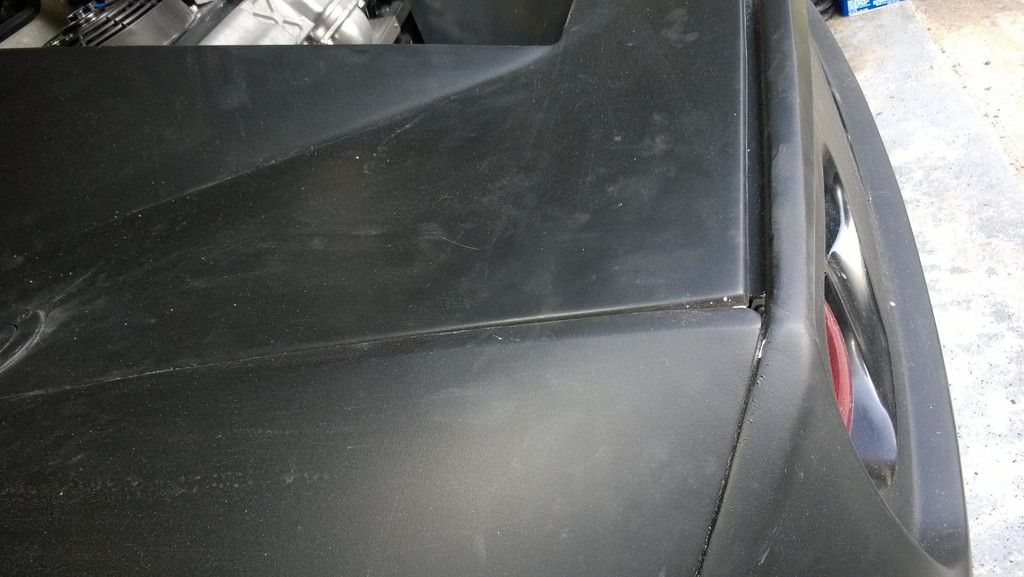
    I saw his door reinforcement idea and have used it to pull the corners and rear bumper cover gap together. I bought probably the same angle aluminum, cut it into 1” sections, paired the sections, drilled them and epoxied them to the offending areas. Add 1 button head screw and lock-nut and some torque, and voila: the panel gaps shrink like magic!


    This corner used to pop-up, but now it sits correctly aligned:

    After installing the first bracket the bumper cover seam shrank a bit. The second and third are gluing on now.
    818SC chassis #206 EJ207 2.0L VF37 twin scroll || Cusco type RS 1.5 LSD || Wilwood pedal box (firewall attach) || Wilwood superlite front calipers
    BUILD Phase 1: 6/6/2014 car delivered || 5/24/2015 first start || 6/7/2015 go karted || 4/20/2016 hard-top-topped || 10/25/2016 registered || 11/18/2016 inspected & complete
    BUILD Phase 2: 3/8/2017 EJ207v8 || 5/29/2017 re-first re-start || 7/17/2017 re-assembled with race car bits

  7. #247
    Moonlight Performance
    Hindsight's Avatar
    Join Date
    May 2014
    Location
    Atlanta
    Posts
    3,402
    Post Thanks / Like
    Awesome Mike! Glad it helped you.

  8. #248
    Senior Member
    Join Date
    Jan 2012
    Posts
    1,112
    Post Thanks / Like
    The aluminum for the headliner is also not symmetrical. If you don't install in correctly it doesn't fit well. I did the same thing you did and my headliner kept falling. So I took it off for the HB show and haven't fixed it yet. How do you plan on taking the top off later if the brackets bolted together? Hold pins? Just using the brackets to bend it back into shape?

  9. #249
    Senior Member
    Join Date
    Jan 2012
    Posts
    1,112
    Post Thanks / Like
    I also don't want to burst your bubble but your top might be slightly to far forward and low. I took pretty good note of ffr car at the HB show and the top is offset back a bit so the window works properly with the door latches. You might want to address this before you make any permanent mounts. Also lay your rear hatch glass on the top and trace out where it fits. If there is any overhanging fiberglass do your self a favor and trim this away prior to install your hatch glass. Ask me how I know.

  10. #250
    Senior Member AZPete's Avatar
    Join Date
    Feb 2011
    Location
    Scottsdale, AZ
    Posts
    2,374
    Post Thanks / Like
    X2: Hindsight is a freaking genius!
    and, thanks Robert for the hard top tips.
    818S/C : Chassis #25 with 06 WRX 2.5 turbo, ABS, cruise, PS, A/C, Apple CarPlay, rear camera, power windows & locks, leather & other complexities. Sold 10/19 with 5,800 miles.
    Mk3 Roadster #6228 4.6L, T45, IRS, PS, PB, ABS, Cruise, Koni's, 17" Halibrands, red w/ silver - 9K miles then sold @ Barrett-Jackson Jan 2011 (got back cash spent).

  11. #251
    Senior Member
    Join Date
    Jan 2012
    Posts
    1,112
    Post Thanks / Like
    No problem. Im fighting the new door frames and door latches trying to get the window to roll up and down all the way. It's not fun easily going to be the hardest part of the build outside of my initial diy harness diet. Now wiring harness are a cake walk. Got to love iWire.

    Put here's a quick pic of what you want the door/hardtop gap to look
    Last edited by 07FIREBLADE; 06-01-2016 at 11:01 PM.

  12. #252
    Senior Member mikeb75's Avatar
    Join Date
    Sep 2013
    Posts
    685
    Post Thanks / Like
    Thanks for the HT alignment tips Fireblade. I'll confirm the alignment today.

    I did check the headliner aluminum orientation, and I agree it's asymmetrical. I used the better fitting orientation, but am still having issues because of how I wrapped the headliner material around the aluminum sheet. A small trim on the passenger side (1/2") should allow it to fit better and make better contact for gluing. And speaking of glue... was using 3M 77 adhesive... piker.... found type 90 yesterday, it's got to be better

    Hatch glass: yup, been there, done that.

    Lastly, the brackets can be unbolted to remove the hardtop. That's why I used a pair of "L" pieces back to back.
    818SC chassis #206 EJ207 2.0L VF37 twin scroll || Cusco type RS 1.5 LSD || Wilwood pedal box (firewall attach) || Wilwood superlite front calipers
    BUILD Phase 1: 6/6/2014 car delivered || 5/24/2015 first start || 6/7/2015 go karted || 4/20/2016 hard-top-topped || 10/25/2016 registered || 11/18/2016 inspected & complete
    BUILD Phase 2: 3/8/2017 EJ207v8 || 5/29/2017 re-first re-start || 7/17/2017 re-assembled with race car bits

  13. #253
    Senior Member
    Join Date
    Jan 2012
    Posts
    1,112
    Post Thanks / Like
    Got it. I just want to let you know. Have you gotten to the rear struts yet? I'm still trying to figure those out and ffr has no idea where they go yet. It wasn't installed on their car and they're not going to release another manual revision for awhile. I've been asking.

  14. #254
    Junior Member
    Join Date
    Jun 2016
    Posts
    4
    Post Thanks / Like
    The rust information is helpful. I took a look at a WRX that had lived most of its life in Vermont and I don't think I've ever seen such rusty brake calipers. Could only imagine what the rest of the undercarriage was like.

  15. #255
    Senior Member mikeb75's Avatar
    Join Date
    Sep 2013
    Posts
    685
    Post Thanks / Like
    Yea, gas struts are sitting on a table next to the car... so far the 2x4's been working just fine

    Actually, since there is no mention of them in the manual revision I was kind of intimidated, but I've been looking at the hatch propped open for a few days and I think its just a matter of setting the hatch to a 'good' open angle with said trusty 2x4, then marking where the gas struts should go.

    I've had a setback with the "L" braces... Loctite epoxy holds like crap... maybe just the humidity in the air when I'm setting up, but the epoxy doesn't harden well, nor does it hold the fiberglass strongly, so the brackets have pulled off after tightening down the bolts.

    Anyone have a recommendation of a good structural epoxy? I'm thinking of using an instant holding Krazy type glue to position the brackets, then putting a layer of fiberglass cloth and epoxy over them.
    818SC chassis #206 EJ207 2.0L VF37 twin scroll || Cusco type RS 1.5 LSD || Wilwood pedal box (firewall attach) || Wilwood superlite front calipers
    BUILD Phase 1: 6/6/2014 car delivered || 5/24/2015 first start || 6/7/2015 go karted || 4/20/2016 hard-top-topped || 10/25/2016 registered || 11/18/2016 inspected & complete
    BUILD Phase 2: 3/8/2017 EJ207v8 || 5/29/2017 re-first re-start || 7/17/2017 re-assembled with race car bits

  16. #256
    Moonlight Performance
    Hindsight's Avatar
    Join Date
    May 2014
    Location
    Atlanta
    Posts
    3,402
    Post Thanks / Like
    For gluing brackets, I just use clear JBweld quick cure (5 minute epoxy). It's very strong and comes in the twin tubes so it's easy. Wayne sent a link to some stuff a while back but it's $50 and you need a special gun to dispense it. For when I'm patient and need a lot of strength (especially when adding glass cloth), I use West System epoxy which is VERY strong but expensive and their fastest cure is still pretty slow. When you use West System, you get their 105 epoxy in whatever size, and then you choose the hardener based on cure time and what you are working on. eBay usually has the best prices. Ensure you get the pump kit (300 pump kit they call it) - you just screw one pump on the epoxy and one on the hardener and it puts out exact amounts needed. You can store it with the pumps attached - they double as a lid. Also EXCELLENT epoxy for laminating fiberglass.

    http://imgur.com/rlVaKNY
    Last edited by Hindsight; 06-02-2016 at 08:32 PM.

  17. #257
    Senior Member
    Join Date
    Jan 2012
    Posts
    1,112
    Post Thanks / Like
    I did what hindsight did. Also you can glass for a permeate bond after you get everything in place with the epoxy. That's my plan at least. I know the trusty 2x4 works but you cant carry it with you.

  18. #258
    Moonlight Performance
    Hindsight's Avatar
    Join Date
    May 2014
    Location
    Atlanta
    Posts
    3,402
    Post Thanks / Like
    Oh one other tip if you didnt do this already: make sure to 60 or 80 grit sand the aluminum, and also sand the fiberglass enough to take the gloss off. Also drill some holes in the aluminum to help give the epoxy something the grip on. Lastly, most epoxies dont reach full strength right away so I always wait overnight before putting much pressure on it.

  19. #259
    Senior Member mikeb75's Avatar
    Join Date
    Sep 2013
    Posts
    685
    Post Thanks / Like

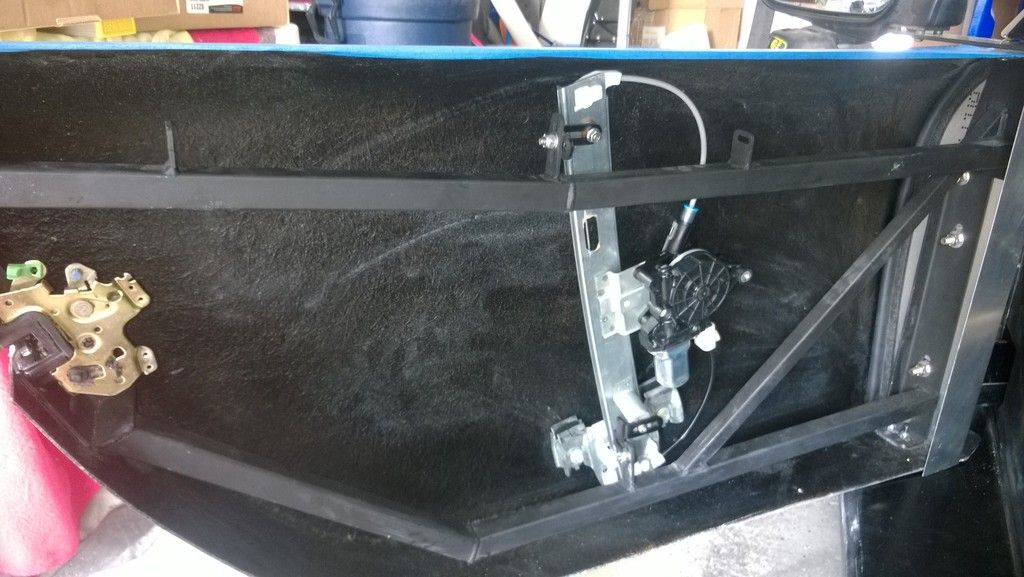
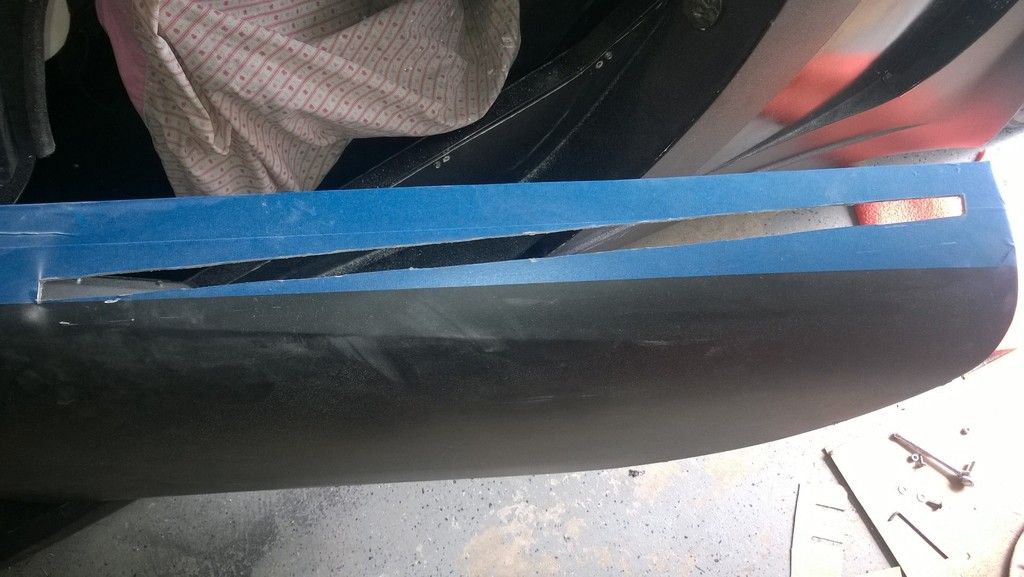
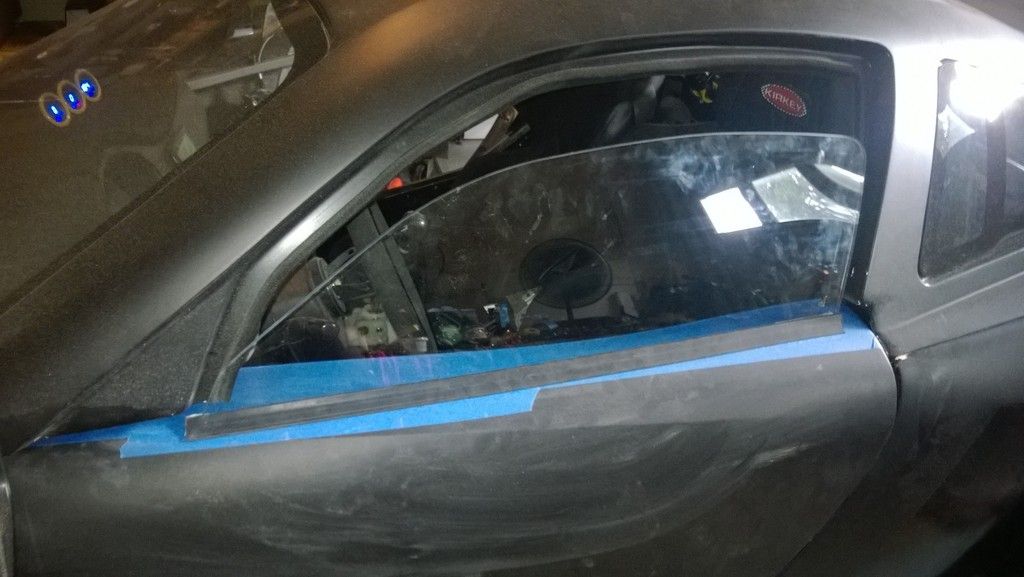
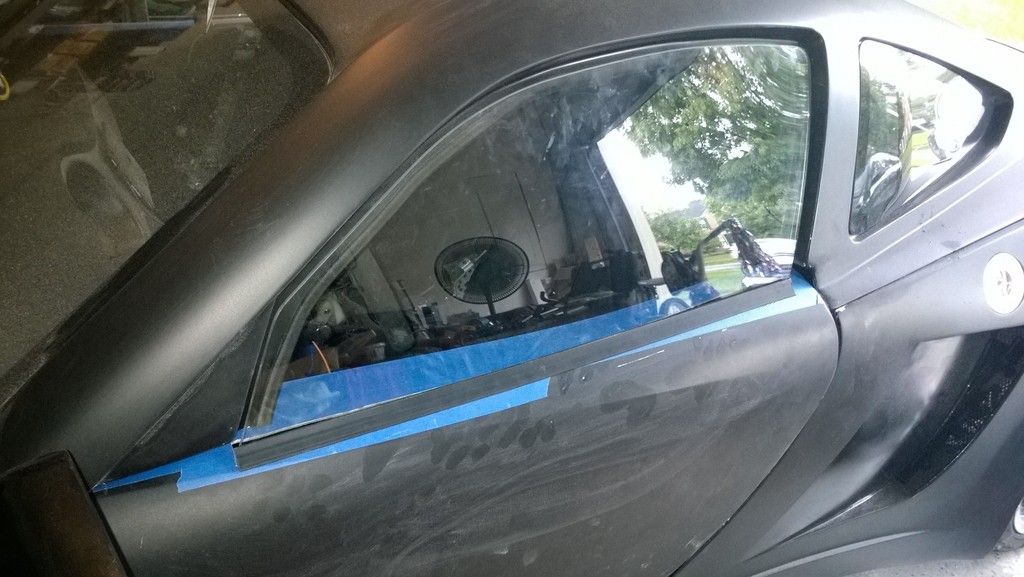
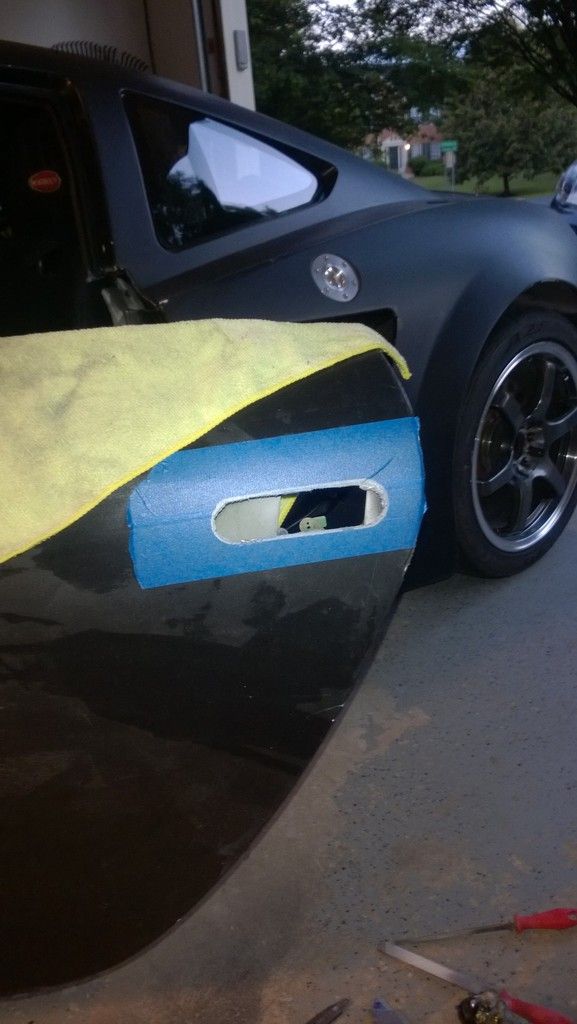
    Window of Opportunity

    The hardest thing about installing the side windows is cutting the holes in the door skins. If you remember the scene from Indiana Jones and the Last Crusade where Indy has to make the leap of faith… pretty much the same thing.

    Now that I’ve done it I can say a few things:

    The manual is useless. It says:
    Code:
    With the door closed, measure 0.50” forward from the hardtop and mark the tape. Also mark
    Cut the top of the door.
    Push the hard flocked weatherstrip onto the outside of the window slot.
    And shows a close up of the back edge of the slot. If you look really close and squint (and sit upside down) you might also see that the weatherstrip extends over the first crease in the door skin.

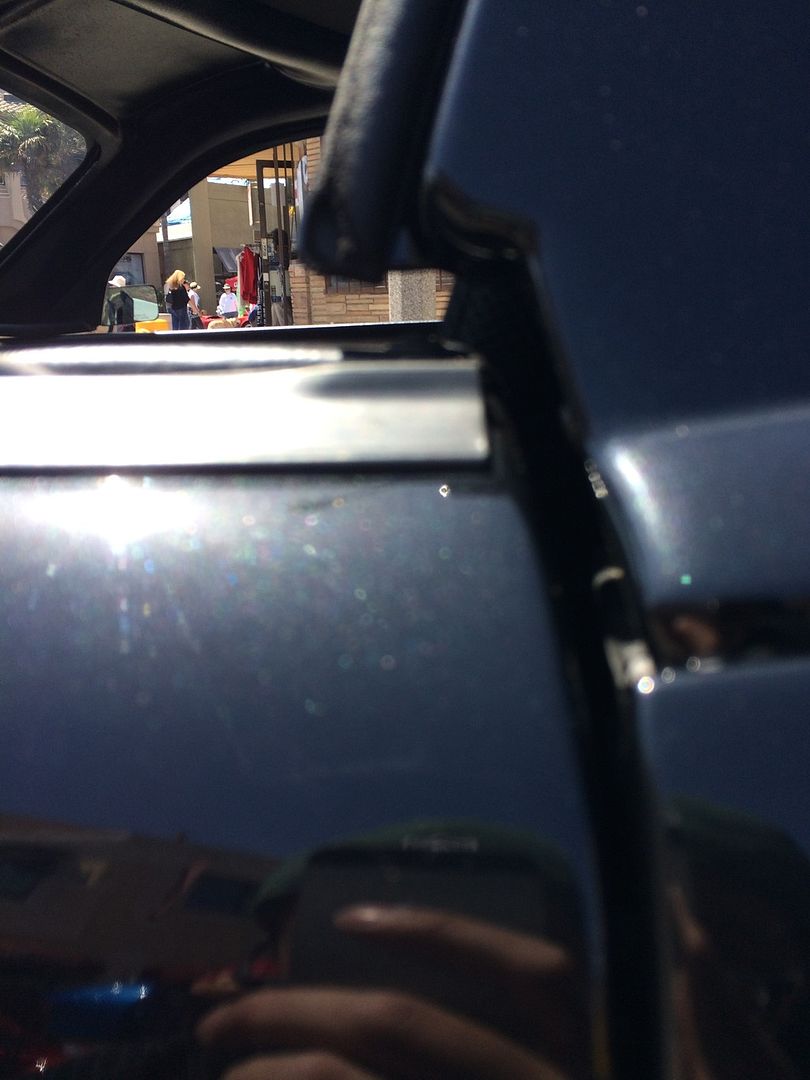
    The hole needs to be further outside than I initially thought. I marked the door skin 1/8” inside where the hard top edge met the door and continued out for ¾”. Not enough. Took 1 1/8” inches to get a big enough opening, and could probably use a bit more to allow the weatherstrip to relax a bit more.

    You can not install the window without the slot cut in the door skin unless you totally disassemble the door. I tried.

    Every door is different so YMMV.

    Still need to do the final up and down adjustments and figure out where I want the control installed. But for now it’s pretty freaking amazing to have a windows installed that goes up and down.


    818SC chassis #206 EJ207 2.0L VF37 twin scroll || Cusco type RS 1.5 LSD || Wilwood pedal box (firewall attach) || Wilwood superlite front calipers
    BUILD Phase 1: 6/6/2014 car delivered || 5/24/2015 first start || 6/7/2015 go karted || 4/20/2016 hard-top-topped || 10/25/2016 registered || 11/18/2016 inspected & complete
    BUILD Phase 2: 3/8/2017 EJ207v8 || 5/29/2017 re-first re-start || 7/17/2017 re-assembled with race car bits

  20. #260
    Senior Member Frank818's Avatar
    Join Date
    Jun 2013
    Location
    QC, Canada
    Posts
    5,732
    Post Thanks / Like
    Wow, that must have taken a while to cut that looooooong straight line on the door. Your car is going to be so awesome with this top. Not that it's not without, it is awesome, just not "so awesome" yet. lolll
    Last edited by Frank818; 06-05-2016 at 07:57 PM.
    Frank
    818 chassis #181 powered by a '93 VW VR6 Turbo GT3582R
    Go-karted Aug 5, 2016 - Then May 19+21, 2017
    Tracked May 27/July 26, 2017
    Build time before being driveable on Sep 27, 2019: over 6000h
    Build Completed Winter 2021

  21. #261
    Senior Member
    Join Date
    Jan 2014
    Location
    USA
    Posts
    587
    Post Thanks / Like
    Cutting that slot has got to be nerve racking. Did the inner door frame come with the coupe retrofit?

  22. #262
    Senior Member mikeb75's Avatar
    Join Date
    Sep 2013
    Posts
    685
    Post Thanks / Like
    Quote Originally Posted by Aero STI View Post
    Cutting that slot has got to be nerve racking. Did the inner door frame come with the coupe retrofit?
    Yes, the coupe refit has the different door frame that accepts the window rack. I preferred the old frame since I figure it was stronger, but want windows need this frame...

    Quote Originally Posted by Frank818 View Post
    Wow, that must have taken a while to cut that looooooong straight line on the door. Your car is going to be so awesome with this top. Not that it's not without, it is awesome, just not "so awesome" yet. lolll
    Took a little while, just using a Dremel - not more than a few minutes. Was a bit of a nervous moment, but after the first plunge cut was committed, so just got on with the program
    818SC chassis #206 EJ207 2.0L VF37 twin scroll || Cusco type RS 1.5 LSD || Wilwood pedal box (firewall attach) || Wilwood superlite front calipers
    BUILD Phase 1: 6/6/2014 car delivered || 5/24/2015 first start || 6/7/2015 go karted || 4/20/2016 hard-top-topped || 10/25/2016 registered || 11/18/2016 inspected & complete
    BUILD Phase 2: 3/8/2017 EJ207v8 || 5/29/2017 re-first re-start || 7/17/2017 re-assembled with race car bits

  23. #263
    Senior Member
    Join Date
    Mar 2011
    Location
    Denver, CO
    Posts
    1,362
    Post Thanks / Like
    Looking good. Thank you for doing this before me

  24. #264
    Senior Member AZPete's Avatar
    Join Date
    Feb 2011
    Location
    Scottsdale, AZ
    Posts
    2,374
    Post Thanks / Like
    Yes! Also thanks for the pics and tips. Since my retrofit top and new nose should be on a truck this week I'm studying your work over and over. Nicely done.
    818S/C : Chassis #25 with 06 WRX 2.5 turbo, ABS, cruise, PS, A/C, Apple CarPlay, rear camera, power windows & locks, leather & other complexities. Sold 10/19 with 5,800 miles.
    Mk3 Roadster #6228 4.6L, T45, IRS, PS, PB, ABS, Cruise, Koni's, 17" Halibrands, red w/ silver - 9K miles then sold @ Barrett-Jackson Jan 2011 (got back cash spent).

  25. #265
    Senior Member mikeb75's Avatar
    Join Date
    Sep 2013
    Posts
    685
    Post Thanks / Like

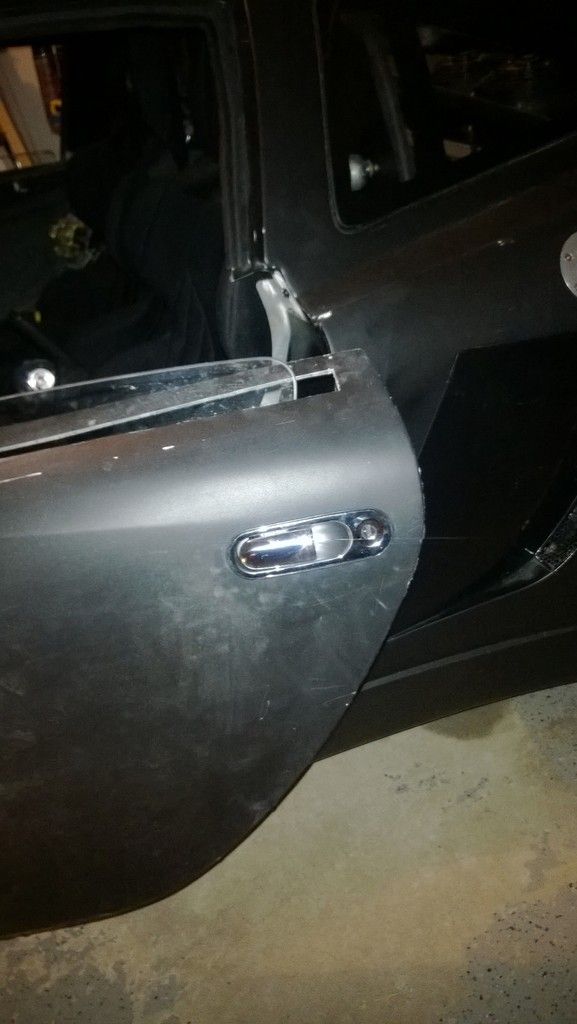
    Angry Door Handles…

    A couple of observations on installation of the driver’s outer door handle:

    Another hole in the door skins. Take a deep breath. The template helps… but ->

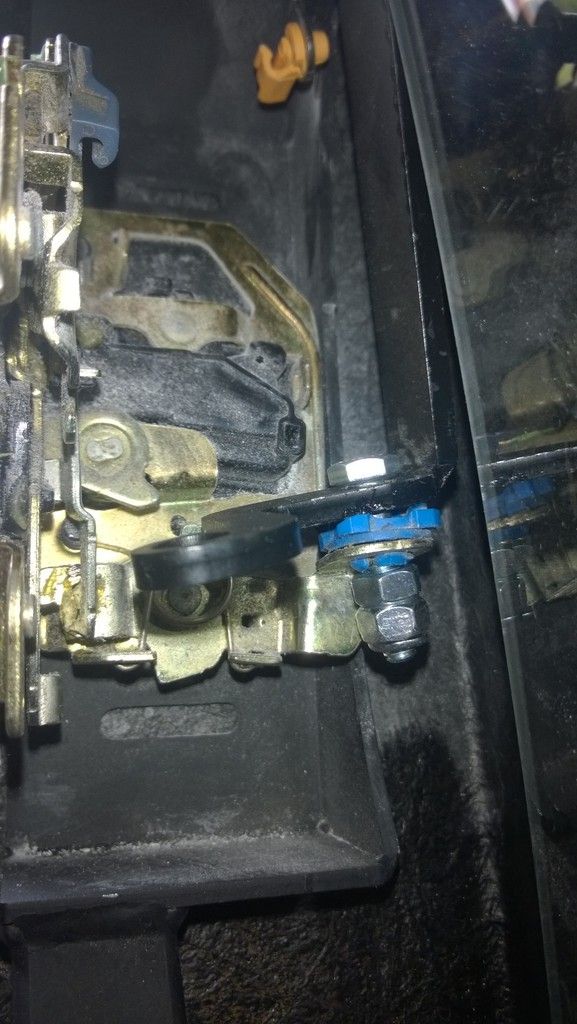
    The template positions the opening too far back towards the rear edge of the door IMO. The door bars have a different – larger area around the latch that interferes with the lock cylinder. It’s close, but I’d recommend moving the template forward ¼” to get a bit more clearance for the lock cylinder.

    Unless you are better at Rubik Cube puzzles than I am you are going to have to disassemble the inner pivot on the door handle to get the backing plate from FFR onto the threaded posts. Don’t lose the spring! And position the spring before attaching the M6 nuts (it'll make more sense when you look at the handle & FFR mounting plate).

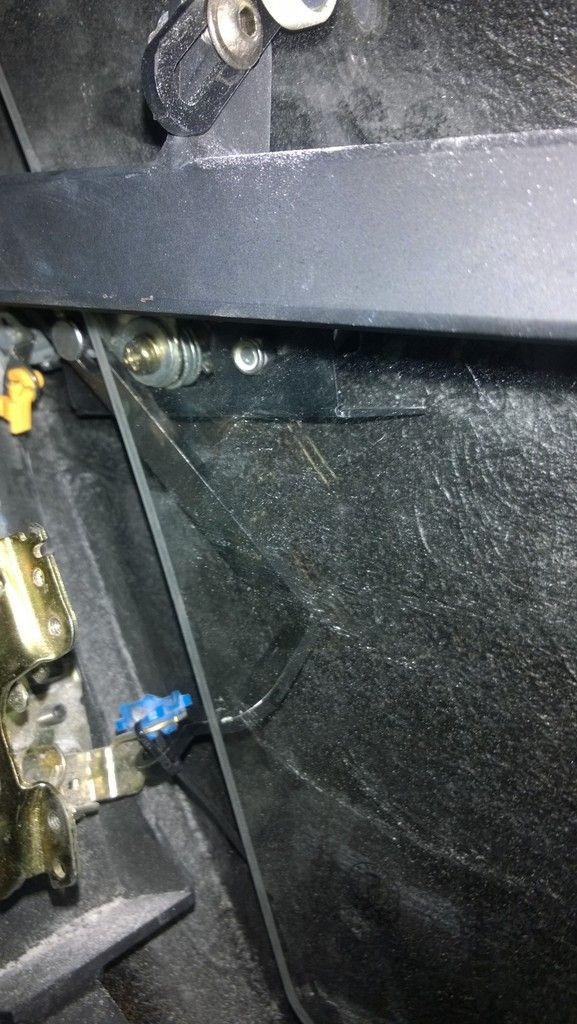
    The FFR door connection between the outer door handler and the door striker/latch isn’t even close. Whatever revision I have doesn’t align well and presses against the window glass. Technically it opens the door, but no way can I use it like it is. Actually, the original Mazda threaded rod that the instructions say to cut off was actually much closer than the FFR piece – just a heads up before you cut yours off like I did…

    Don't get too hung up on the lock connector referenced in manual-P. I didn't get one because (If I remember correctly) they're still working out how to get the lock to actually work.


    I guess I will spend tomorrow trying to find a better position for the latch connection and maybe modifying the FFR piece.
    818SC chassis #206 EJ207 2.0L VF37 twin scroll || Cusco type RS 1.5 LSD || Wilwood pedal box (firewall attach) || Wilwood superlite front calipers
    BUILD Phase 1: 6/6/2014 car delivered || 5/24/2015 first start || 6/7/2015 go karted || 4/20/2016 hard-top-topped || 10/25/2016 registered || 11/18/2016 inspected & complete
    BUILD Phase 2: 3/8/2017 EJ207v8 || 5/29/2017 re-first re-start || 7/17/2017 re-assembled with race car bits

  26. #266
    Senior Member
    Join Date
    Jan 2012
    Posts
    1,112
    Post Thanks / Like
    There is a revision to that bracket. That was the original one and they redesigned it. I modified those to begin with but was having trouble with the window rolling down and clearing the the door mechicism. I'll post a photo later tonight

  27. #267
    Senior Member mikeb75's Avatar
    Join Date
    Sep 2013
    Posts
    685
    Post Thanks / Like

    Doors, More.

    Switched to the other door handle actuator bar and lightly modified it and everything works well (enough), clears window and the door opens from the outside. I’ll probably trim the ear off to save the 2 grams.


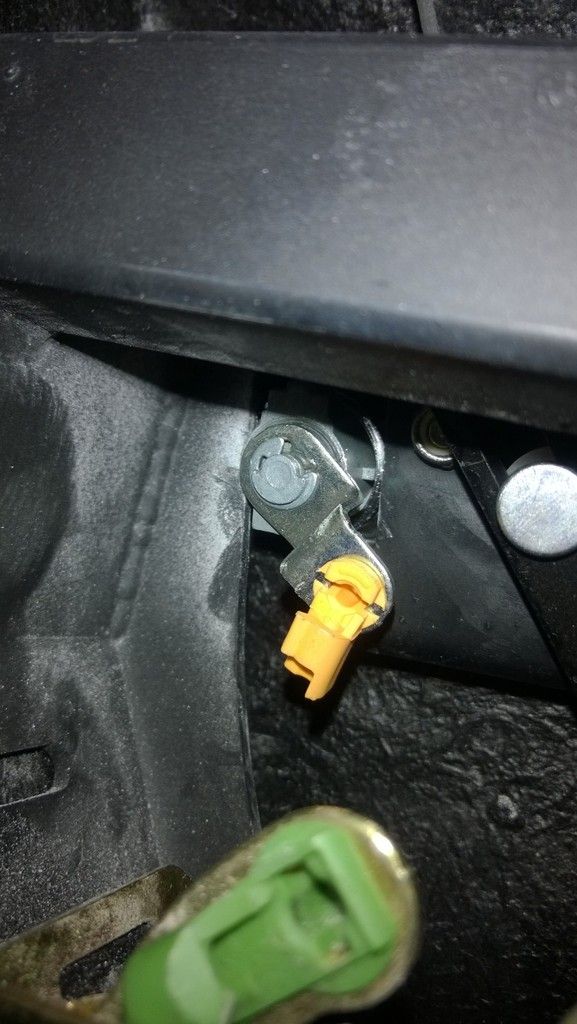
    Also, here is a picture of the interference between the lock cylinder and the door frame. If it wasn’t in such a crappy location I’d cut the door bar part down slightly. But for now the lock turns via the key, so good enough. Still, just saying, ¼” will save you a headache!
    818SC chassis #206 EJ207 2.0L VF37 twin scroll || Cusco type RS 1.5 LSD || Wilwood pedal box (firewall attach) || Wilwood superlite front calipers
    BUILD Phase 1: 6/6/2014 car delivered || 5/24/2015 first start || 6/7/2015 go karted || 4/20/2016 hard-top-topped || 10/25/2016 registered || 11/18/2016 inspected & complete
    BUILD Phase 2: 3/8/2017 EJ207v8 || 5/29/2017 re-first re-start || 7/17/2017 re-assembled with race car bits

  28. #268
    Senior Member Frank818's Avatar
    Join Date
    Jun 2013
    Location
    QC, Canada
    Posts
    5,732
    Post Thanks / Like
    Those little details are always frustrating, but in the end your car will be so beautiful and functional!
    Frank
    818 chassis #181 powered by a '93 VW VR6 Turbo GT3582R
    Go-karted Aug 5, 2016 - Then May 19+21, 2017
    Tracked May 27/July 26, 2017
    Build time before being driveable on Sep 27, 2019: over 6000h
    Build Completed Winter 2021

  29. #269
    Senior Member mikeb75's Avatar
    Join Date
    Sep 2013
    Posts
    685
    Post Thanks / Like

    Doors, part 3

    A few more details that may help other door finishers:

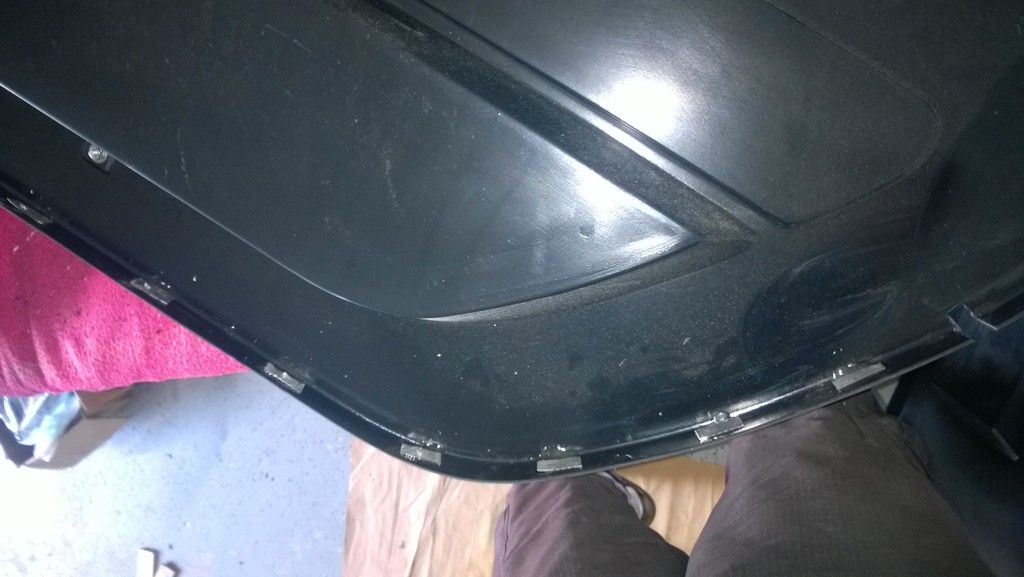
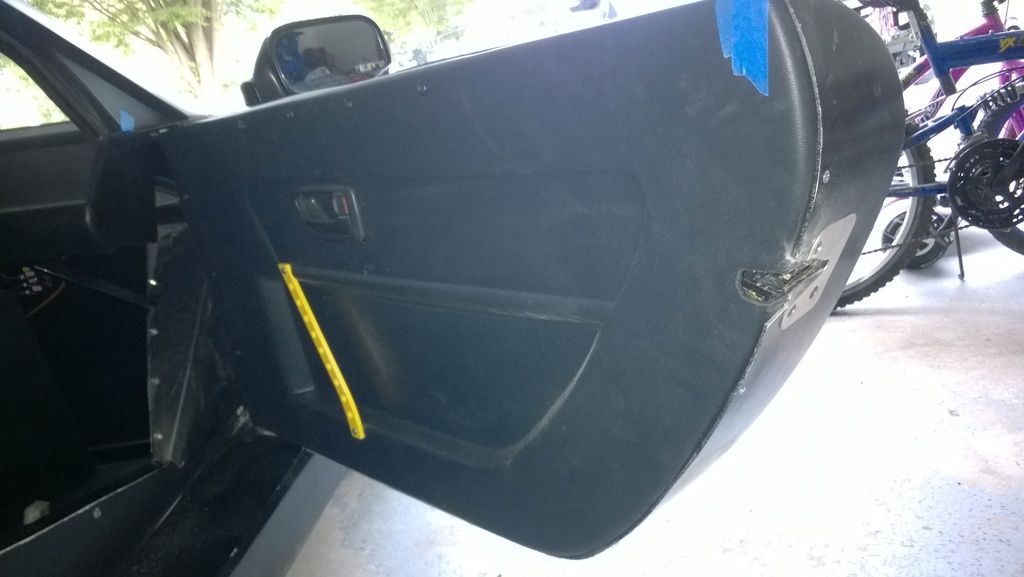
    Using the Tamara/Andrew thread I had a bunch of small tapered screws to attach the lower part of the door skin to the inner door panel. However, it was very easy to strip the plastic inner panel when applying enough force to bring both together. So I epoxied little aluminum rectangles to the inner door skin where the holes were located. This gives enough extra purchase to pull the two door skins together quite well.


    Used a ¾” aluminum L epoxied to the top of the outer door skin to firm up the flimsiness and give a backing to the inner door skin on the upper part. This method was first described by Hindsight (I think) and is highly recommended. Really firms up the door upper part, which is especially important if you cut the outer skin for the window.


    Watch the gaps at the front and rear of the hard top if you’ve got one. They can be really tight, especially with the padded inner door panels. I didn’t notice at first and tore up a bit of the rear corner of the padded panel on one side. The other side I knew what was coming and spent time clearancing and used tape to protect.

    The aluminum trim panels are completely wrong for the padded door skins with the window door bars, they would put the handles too low to be able to attach to the door bar.

    Depending on how tight you pull the two door skins, I bowed the fiberglass outer slightly which added to the rubbing on the driver’s door. I actually had to make a relief cut to relax the fiberglass. Over the winter I need to spend time correcting this, but for now it works.

    If you pull the skins tight the inner door handles will stick out too far using more than 1/4” spacers. I had to trim down the 2” screw, but no big task there. The handle still protrudes a little too far at the front, I may have to profile the spacer to give the correct angle. Again, winter task.

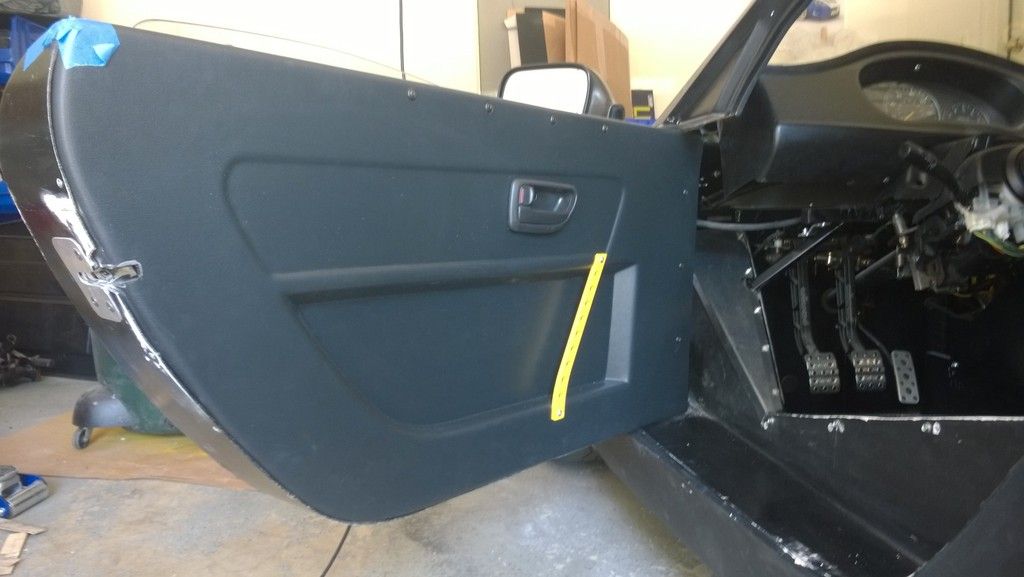
    Overall, the doors aren’t too hard to finish, as long as everything before them is correct. Setting the door bars, outer door skins and windows took a lot more time. The doors are fairly solid feeling now that they’re complete. A bit more sound-deadening and maybe some more stiffening on the plastic panels would do good here.

    818SC chassis #206 EJ207 2.0L VF37 twin scroll || Cusco type RS 1.5 LSD || Wilwood pedal box (firewall attach) || Wilwood superlite front calipers
    BUILD Phase 1: 6/6/2014 car delivered || 5/24/2015 first start || 6/7/2015 go karted || 4/20/2016 hard-top-topped || 10/25/2016 registered || 11/18/2016 inspected & complete
    BUILD Phase 2: 3/8/2017 EJ207v8 || 5/29/2017 re-first re-start || 7/17/2017 re-assembled with race car bits

  30. #270
    Senior Member
    Join Date
    Jan 2012
    Posts
    1,112
    Post Thanks / Like
    Very nice. I've been fighting the windows on my car for the longest time. I had one side working well and took the top off to do some repairs and tweaks now I can't get it back together for the life of me.

  31. #271
    Moonlight Performance
    Hindsight's Avatar
    Join Date
    May 2014
    Location
    Atlanta
    Posts
    3,402
    Post Thanks / Like
    Nice work! If you have rubbing on the door against the side sail when you go to close the door, one trick I have done is to loosen the hinge bolts a bit, move the door until the striker is very close to the latch, but not touching it, then wedge a wooden shim (like you'd use when framing a door in your house) between the rear bottom of the door and the side sail. Snug up the hinge bolts, remove the wedge, then slowly push the door in. If the latch BARELY clears the striker and is closer to the top of it than the bottom, that means the door is as high as it can possibly be and have the latch still working. This gives you as much clearance as possible between the trouble point of the door and the side sail. It ended up working for me.

    I like your idea about the rectangles to give the screws something to grip on to. I stripped one of the holes in my door panel without applying much pressure at all so I will definitely use your idea the next time I have the panels out.

  32. #272
    Senior Member Frank818's Avatar
    Join Date
    Jun 2013
    Location
    QC, Canada
    Posts
    5,732
    Post Thanks / Like
    There's a lot more space than one could think inside those doors. Good thing, it looks superb with the window and mechanism!
    Frank
    818 chassis #181 powered by a '93 VW VR6 Turbo GT3582R
    Go-karted Aug 5, 2016 - Then May 19+21, 2017
    Tracked May 27/July 26, 2017
    Build time before being driveable on Sep 27, 2019: over 6000h
    Build Completed Winter 2021

  33. #273
    Senior Member mikeb75's Avatar
    Join Date
    Sep 2013
    Posts
    685
    Post Thanks / Like

    A2AIC: Will it blend?

    First: Happy 4th to everyone!

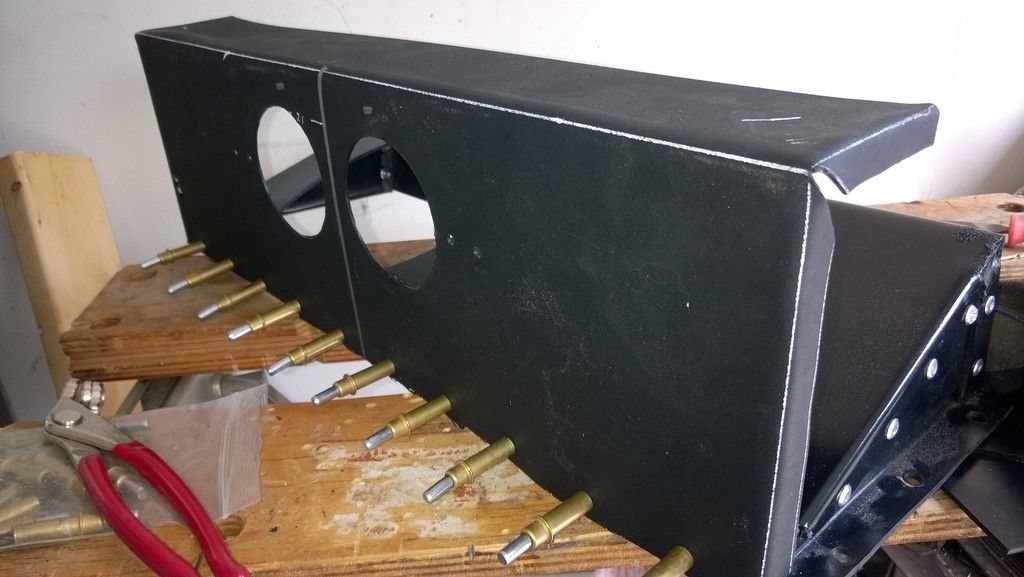
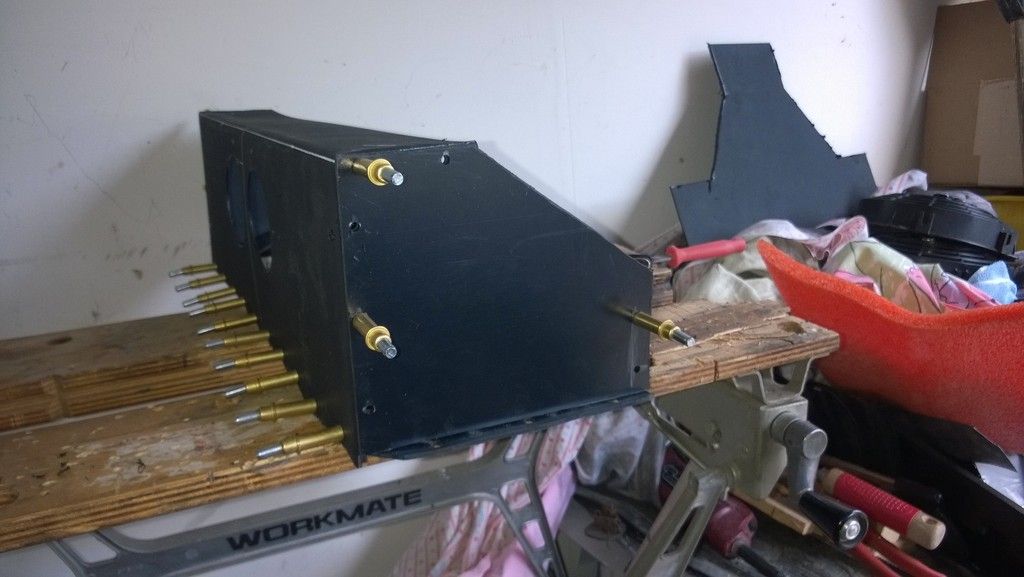
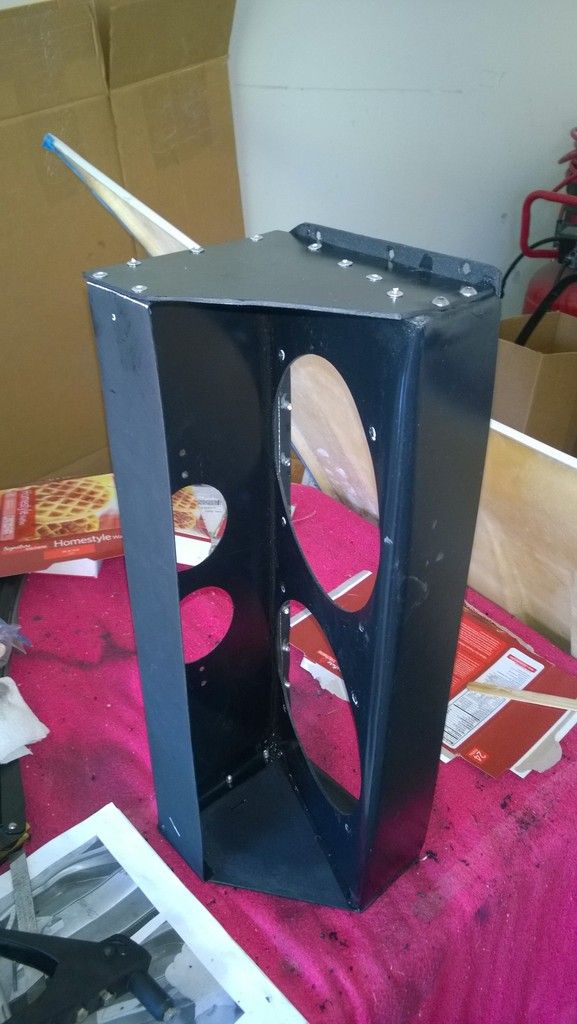
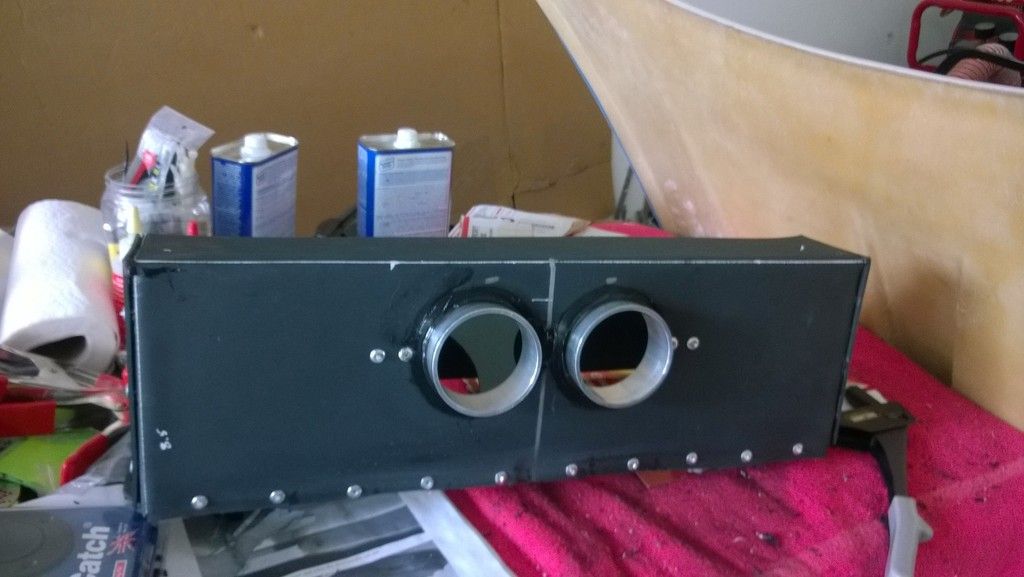
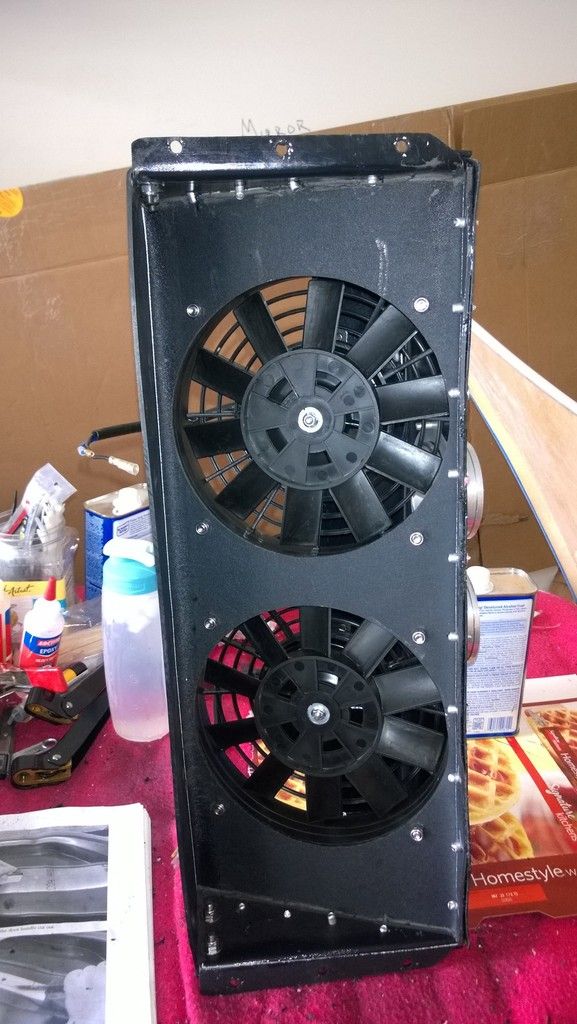
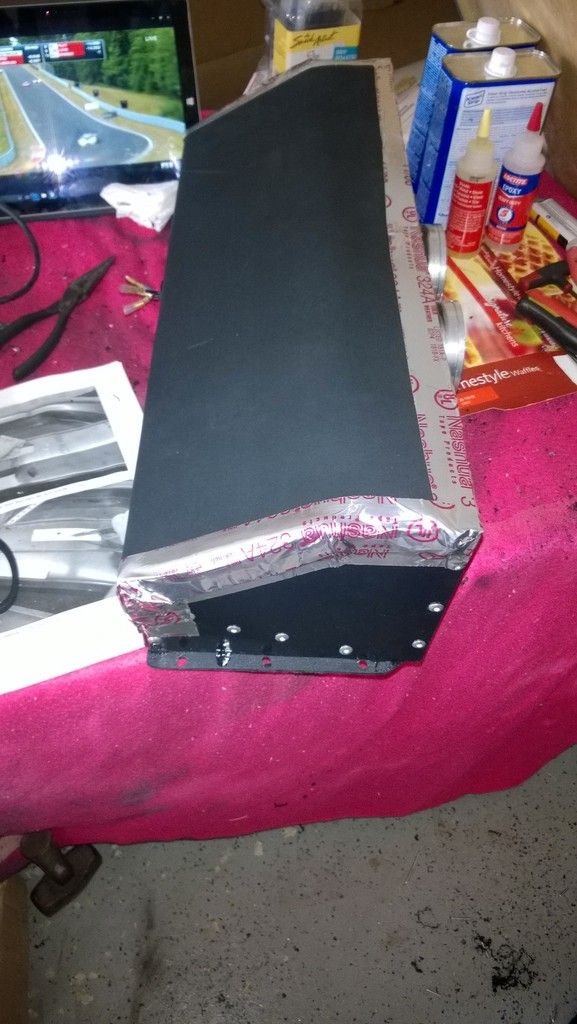
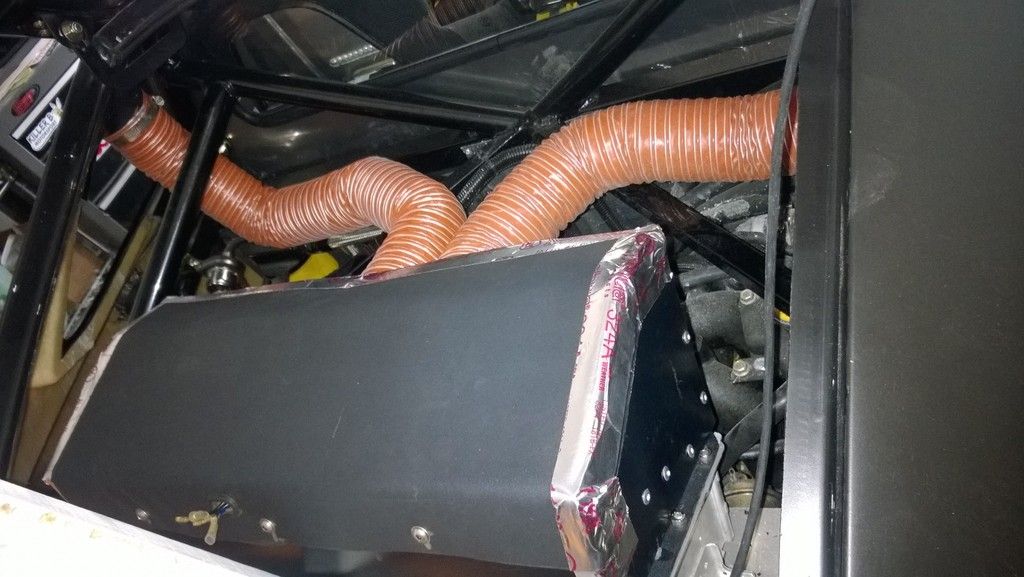
    We’ve been committed to keeping an air to air intercooler for this build. Since the plan has always been to go hardtop we didn’t have to futz with the engine cover & weird IC ducting from FFR. Instead we built a fan shroud to sit on top of a late model STI IC. Knowing the limitations of the stock type IC we went with pusher type fans and a pretty good seal between the shroud and the IC.

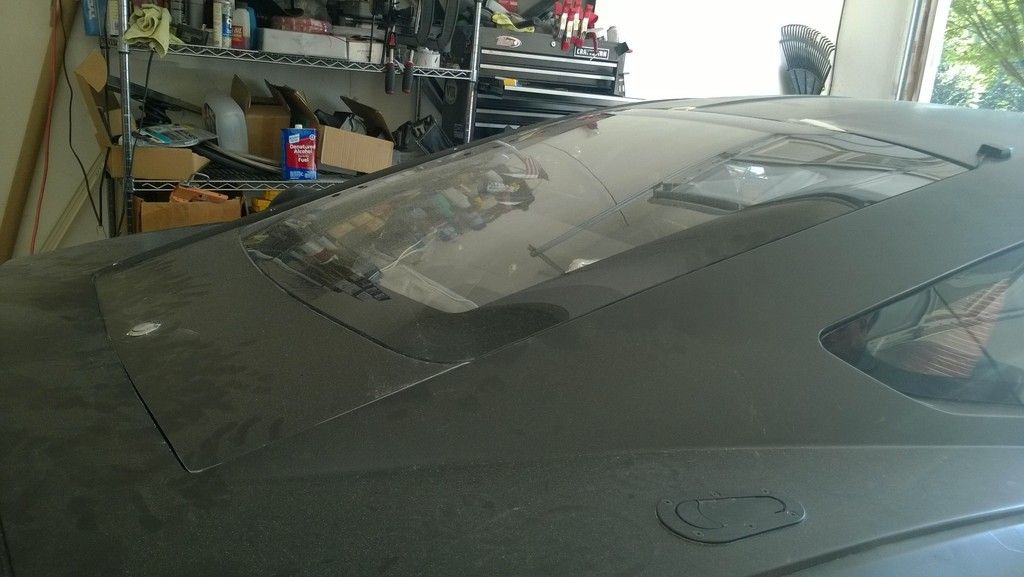
    The second part of the plan was to use the roof scoop to vent cold/pressurized air to an upper plenum on the IC/fan shroud. We’ve used Kydex (a heat shapeable plastic) to build the first version. Epoxy, rivets and silicone hold the structure together with some weather stripping and aluminum tape to seal it so the high pressure air is forced through the IC core.

    The prelim testing will be run with thermocouples before and after the IC to watch temperatures under load. Will report back results when we get some. If this works well I want to fab up a ‘better’ system using carbon fiber sheets (saw a really sweet CNC router I’d like to get my hands on).


    818SC chassis #206 EJ207 2.0L VF37 twin scroll || Cusco type RS 1.5 LSD || Wilwood pedal box (firewall attach) || Wilwood superlite front calipers
    BUILD Phase 1: 6/6/2014 car delivered || 5/24/2015 first start || 6/7/2015 go karted || 4/20/2016 hard-top-topped || 10/25/2016 registered || 11/18/2016 inspected & complete
    BUILD Phase 2: 3/8/2017 EJ207v8 || 5/29/2017 re-first re-start || 7/17/2017 re-assembled with race car bits

  34. #274
    Senior Member mikeb75's Avatar
    Join Date
    Sep 2013
    Posts
    685
    Post Thanks / Like

    Rear Hatch Refit

    Just back from vacation and a package is delivered from FFR – double happy day! It contains refit parts for the inner door handles and the rear hatch gas struts. To be honest, I took one look at the new door pulls and put them back in the box… they’re a bit ghastly.

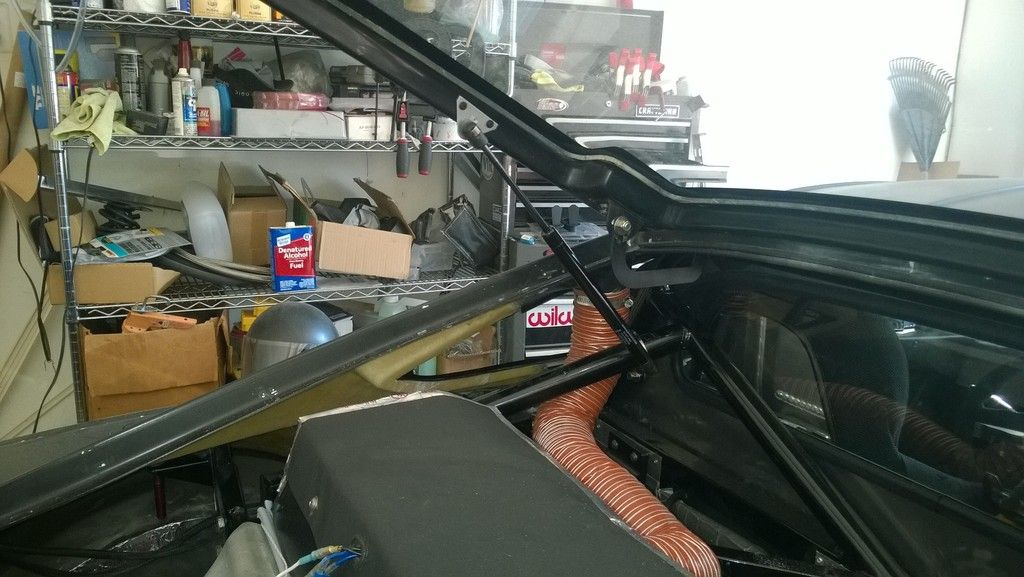
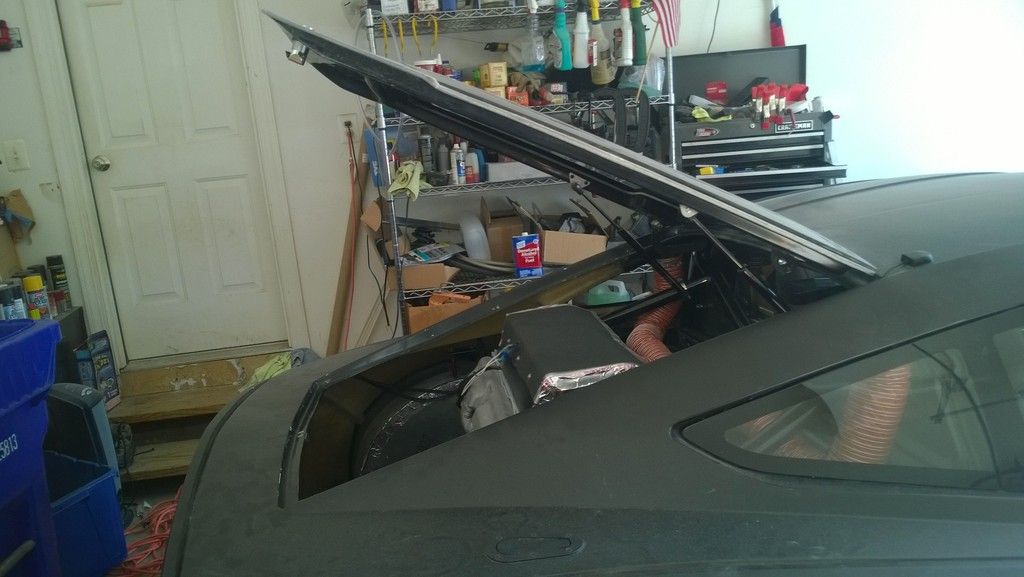
    The gas strut refit however – come to papa! No instructions available yet (on the website or in the box)… but I’m tanned, rested and ready – let’s do this. Actually the install is pretty simple. There is a round split collar that goes around the triangulating supports for the roll bar that a ball joint threads into for one end of the gas strut. The other gets a plate that screws into the side rail of the hatch.

    There isn’t a ton of support for the screws… feels like they only just go into plastic and fiberglass. I may look at reinforcing this later or switching to the original plates that are drilled to accept button head screw/riv-nuts.

    Loosely attach the collars, attach the gas struts and close the hatch. I measured about 2” from the outside part of the collar to the square tube and the gas struts have ¼” travel left when the hatch is fully closed – and it opens a good amount.

    This makes me hugely happy… 1 less thing on the to-do list and I don’t need to pack a 2x4 everywhere I go!


    818SC chassis #206 EJ207 2.0L VF37 twin scroll || Cusco type RS 1.5 LSD || Wilwood pedal box (firewall attach) || Wilwood superlite front calipers
    BUILD Phase 1: 6/6/2014 car delivered || 5/24/2015 first start || 6/7/2015 go karted || 4/20/2016 hard-top-topped || 10/25/2016 registered || 11/18/2016 inspected & complete
    BUILD Phase 2: 3/8/2017 EJ207v8 || 5/29/2017 re-first re-start || 7/17/2017 re-assembled with race car bits

  35. #275
    Senior Member STiPWRD's Avatar
    Join Date
    Jan 2014
    Location
    Leesburg, VA
    Posts
    1,624
    Post Thanks / Like
    Looking good, I like your IC duct design. I gotta get a set of those gas struts for the engine lid on my S, I'm still using a 1/2" aluminum tube to prop it up.

  36. #276
    Senior Member
    Join Date
    Apr 2015
    Location
    Andover, MA
    Posts
    530
    Post Thanks / Like
    Your car looks great! I have never been through your build thread before....dont know how I missed it, but it was definitely worth finding!

  37. #277
    Senior Member Frank818's Avatar
    Join Date
    Jun 2013
    Location
    QC, Canada
    Posts
    5,732
    Post Thanks / Like
    Gas shocks look cool! Your IC ducting/box too!
    Frank
    818 chassis #181 powered by a '93 VW VR6 Turbo GT3582R
    Go-karted Aug 5, 2016 - Then May 19+21, 2017
    Tracked May 27/July 26, 2017
    Build time before being driveable on Sep 27, 2019: over 6000h
    Build Completed Winter 2021

  38. #278
    Senior Member AZPete's Avatar
    Join Date
    Feb 2011
    Location
    Scottsdale, AZ
    Posts
    2,374
    Post Thanks / Like
    Thanks, Mike, for the posting how the hatch struts fit. I've got back from Jackson Hole last night to find a box from FFR with Hardtop Update Pack - stuff for hatch struts, inside & outside door handles. I already bought nice inside handles and agree that the plastic handles in the update Pack are cheap looking. Hey FRR, some instructions would be nice.
    818S/C : Chassis #25 with 06 WRX 2.5 turbo, ABS, cruise, PS, A/C, Apple CarPlay, rear camera, power windows & locks, leather & other complexities. Sold 10/19 with 5,800 miles.
    Mk3 Roadster #6228 4.6L, T45, IRS, PS, PB, ABS, Cruise, Koni's, 17" Halibrands, red w/ silver - 9K miles then sold @ Barrett-Jackson Jan 2011 (got back cash spent).

  39. #279
    Senior Member
    Join Date
    Mar 2011
    Location
    Denver, CO
    Posts
    1,362
    Post Thanks / Like
    Quote Originally Posted by AZPete View Post
    Thanks, Mike, for the posting how the hatch struts fit. I've got back from Jackson Hole last night to find a box from FFR with Hardtop Update Pack - stuff for hatch struts, inside & outside door handles. I already bought nice inside handles and agree that the plastic handles in the update Pack are cheap looking. Hey FRR, some instructions would be nice.
    What handles did you get for inside?

  40. #280
    Senior Member mikeb75's Avatar
    Join Date
    Sep 2013
    Posts
    685
    Post Thanks / Like
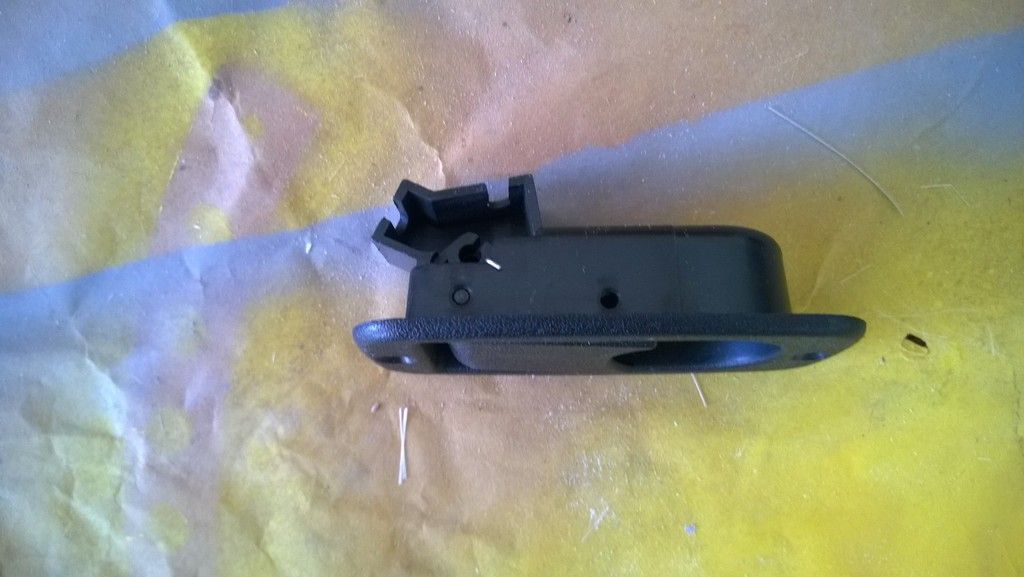
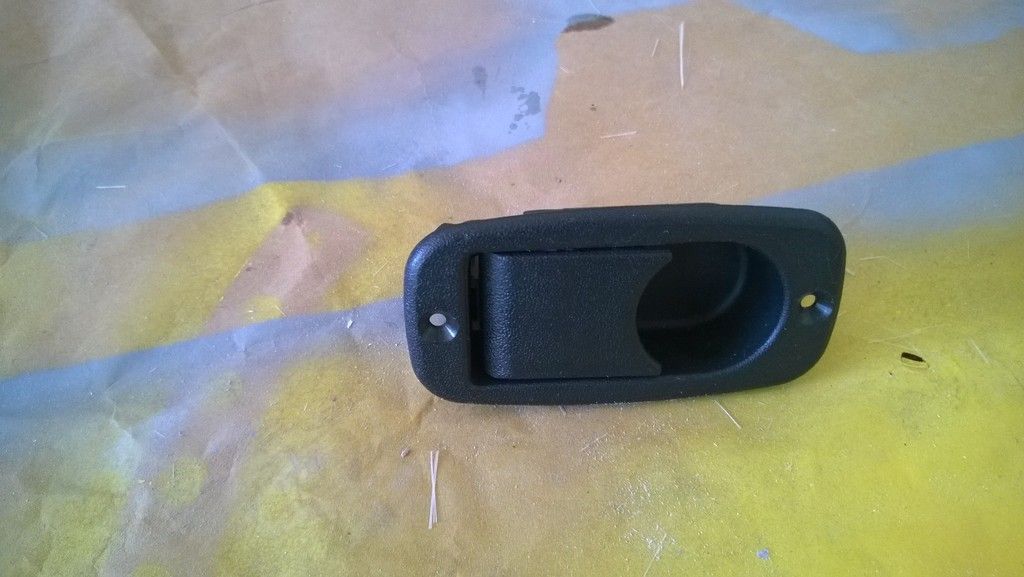
    they look like this:


    They seem to have been included because FFR changed to some nice pull cables to open the latch/striker which don't work with the original door hardware. They're SMALL -like 1 finger pull small.

    I was able to use the original door handles and hard lines without much issue; though there is a small fitment problem with the Subaru handles.
    818SC chassis #206 EJ207 2.0L VF37 twin scroll || Cusco type RS 1.5 LSD || Wilwood pedal box (firewall attach) || Wilwood superlite front calipers
    BUILD Phase 1: 6/6/2014 car delivered || 5/24/2015 first start || 6/7/2015 go karted || 4/20/2016 hard-top-topped || 10/25/2016 registered || 11/18/2016 inspected & complete
    BUILD Phase 2: 3/8/2017 EJ207v8 || 5/29/2017 re-first re-start || 7/17/2017 re-assembled with race car bits

Page 7 of 16 FirstFirst ... 56789 ... LastLast

Posting Permissions

  • You may not post new threads
  • You may not post replies
  • You may not post attachments
  • You may not edit your posts
  •  

Replica Parts

Visit our community sponsor