BluePrint Engines

Visit our community sponsor

Thanks Thanks:  10
Likes Likes:  65

View Poll Results: How to finish the mesh panels?

Voters
57. You may not vote on this poll
  • Gloss Black

    47 82.46%
  • Unfinished Aluminum

    10 17.54%
Page 6 of 16 FirstFirst ... 45678 ... LastLast
Results 201 to 240 of 619

Thread: mikeb75's build thread

  1. #201
    Senior Member mikeb75's Avatar
    Join Date
    Sep 2013
    Posts
    685
    Post Thanks / Like

    Prelim Aero Work

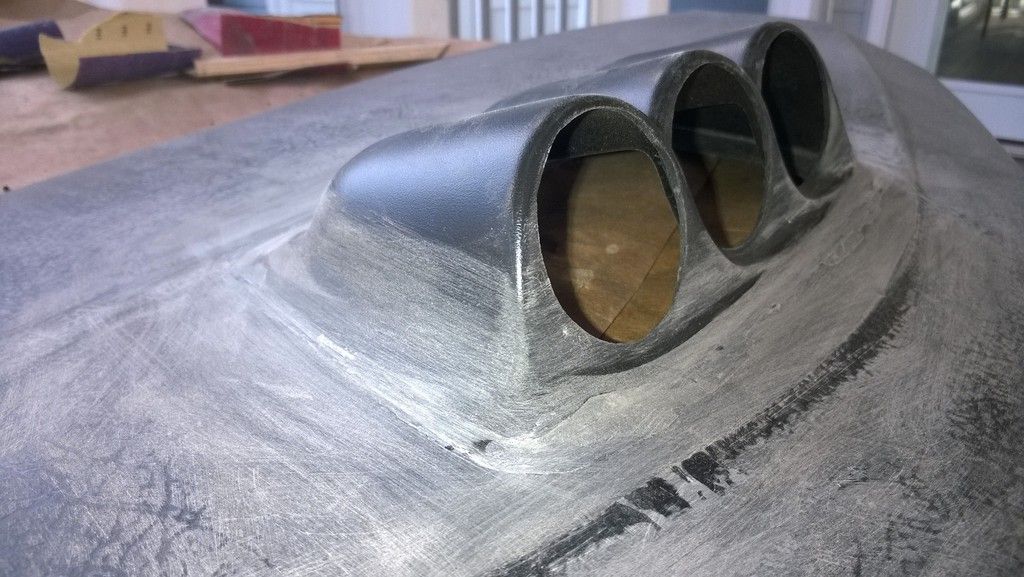
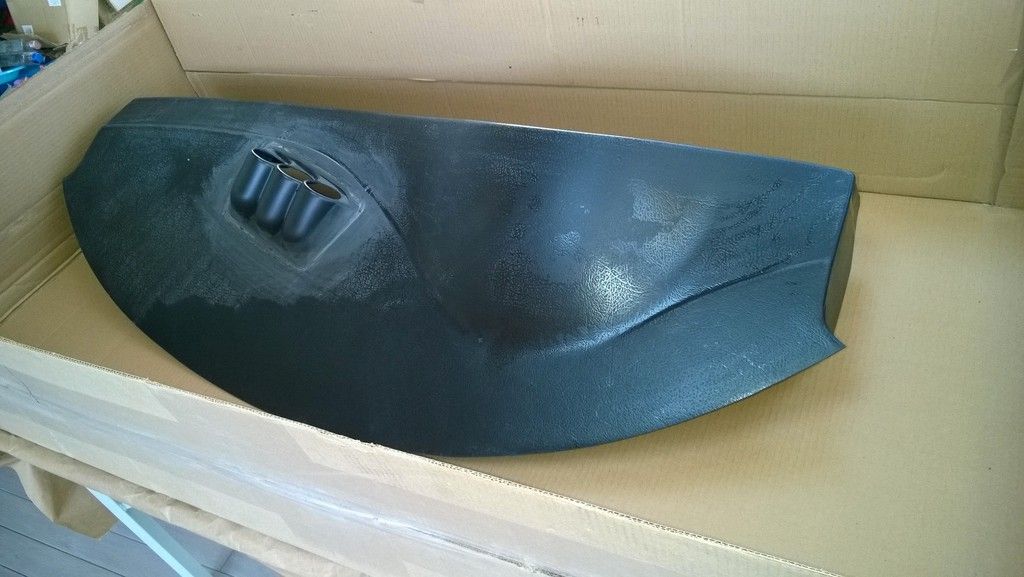
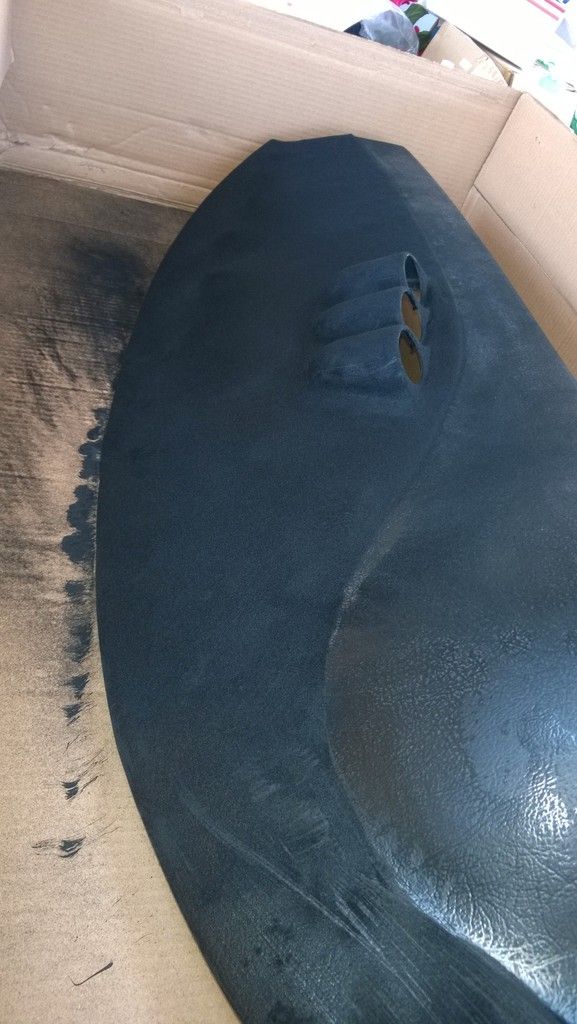
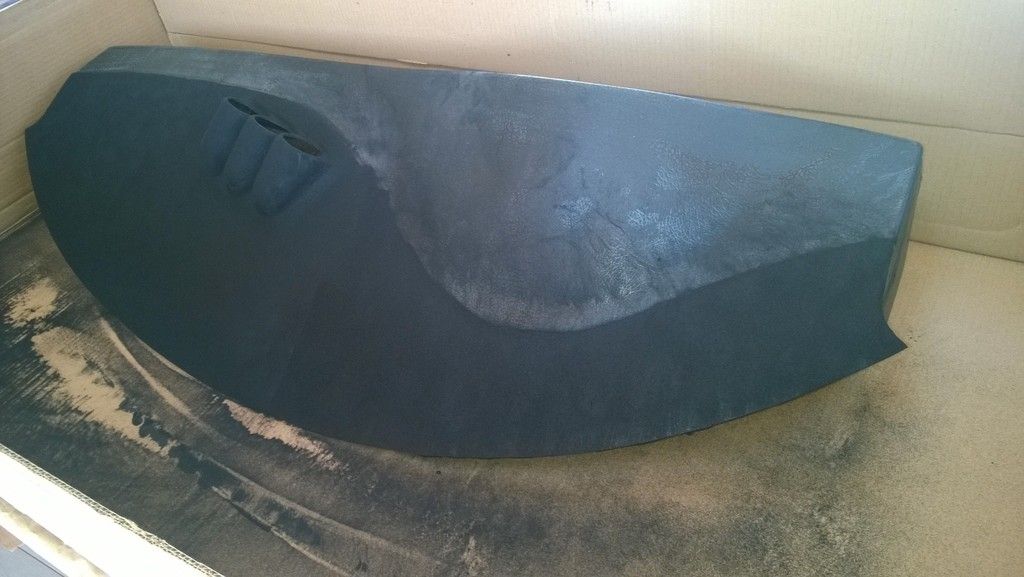
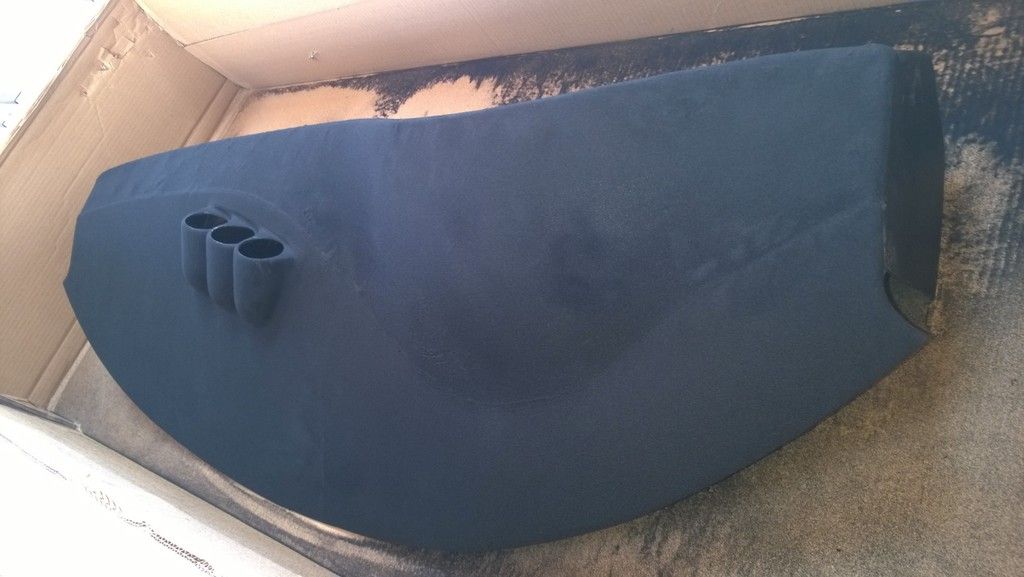
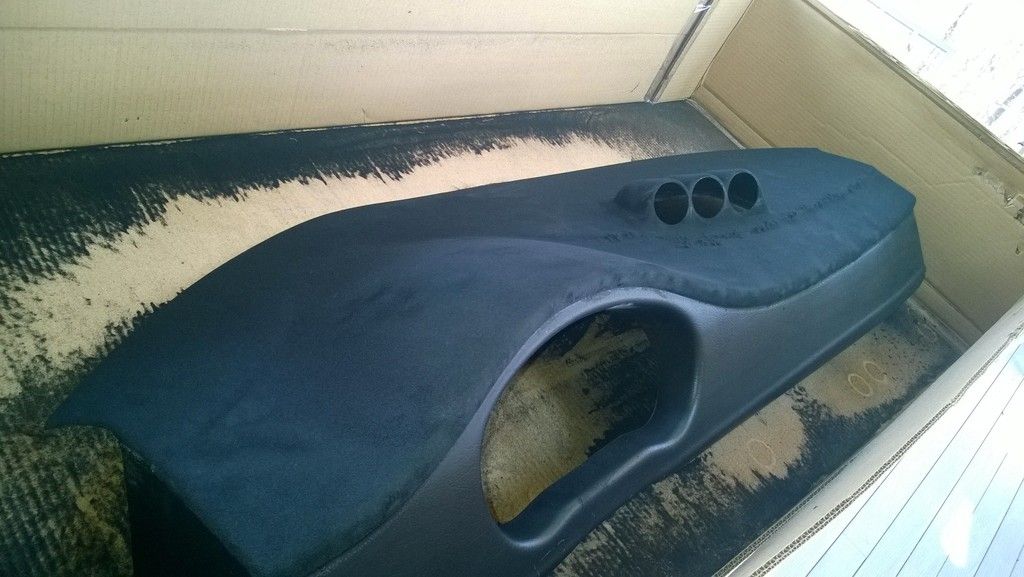
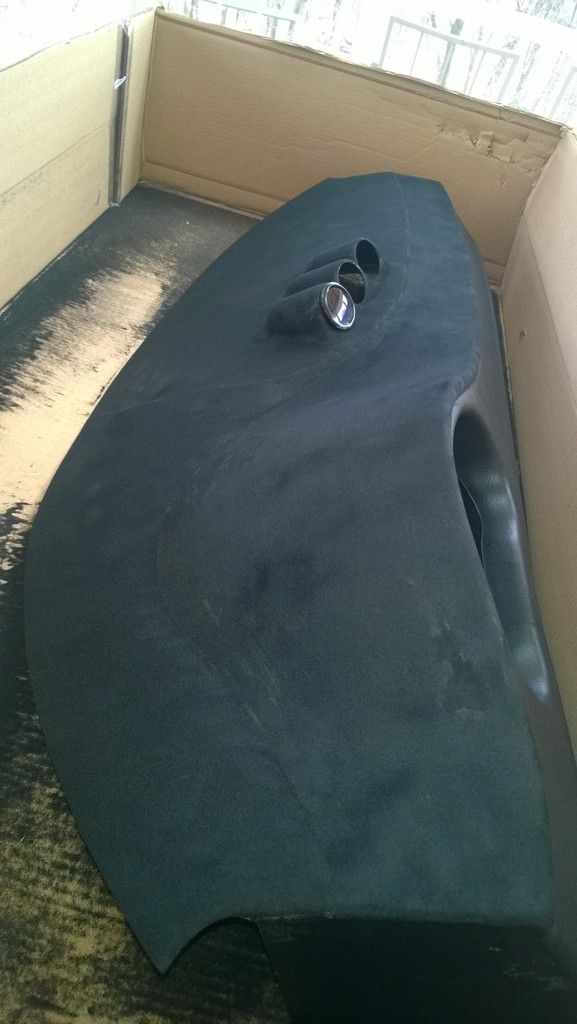
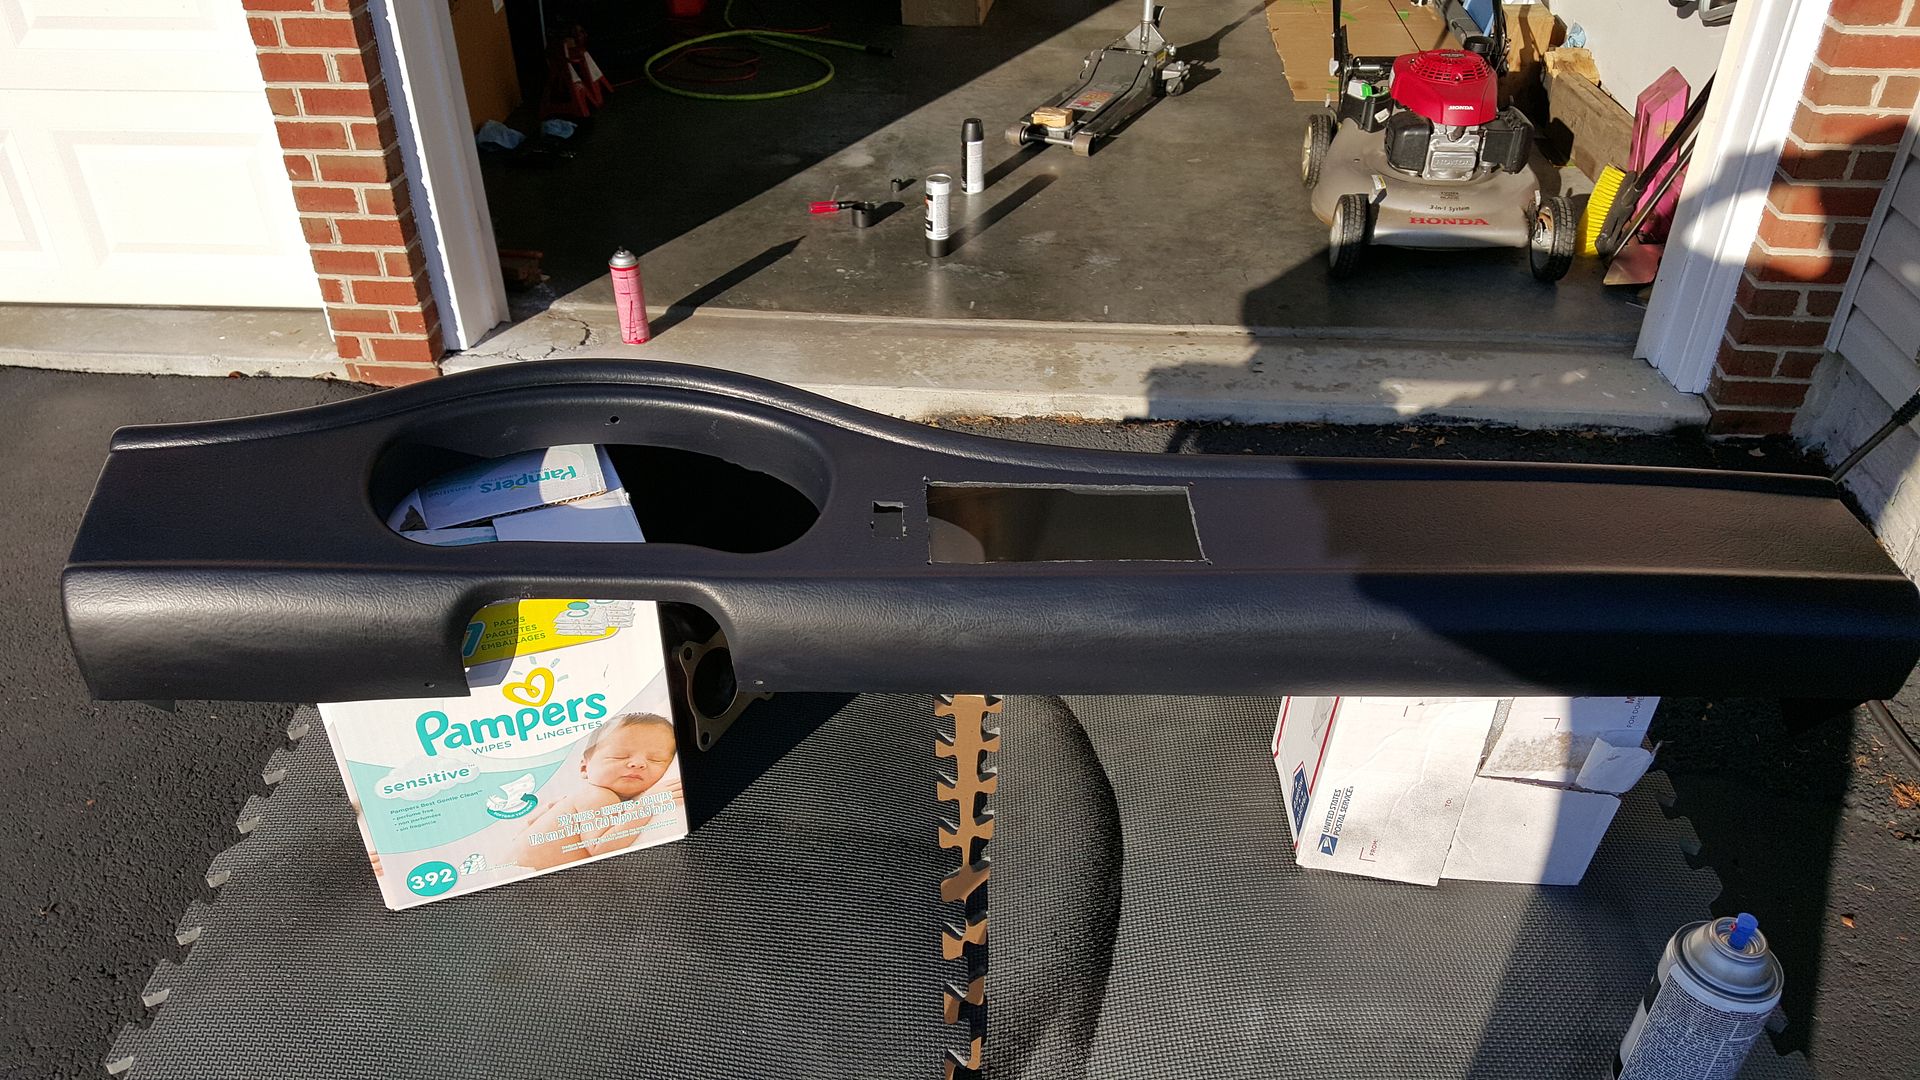
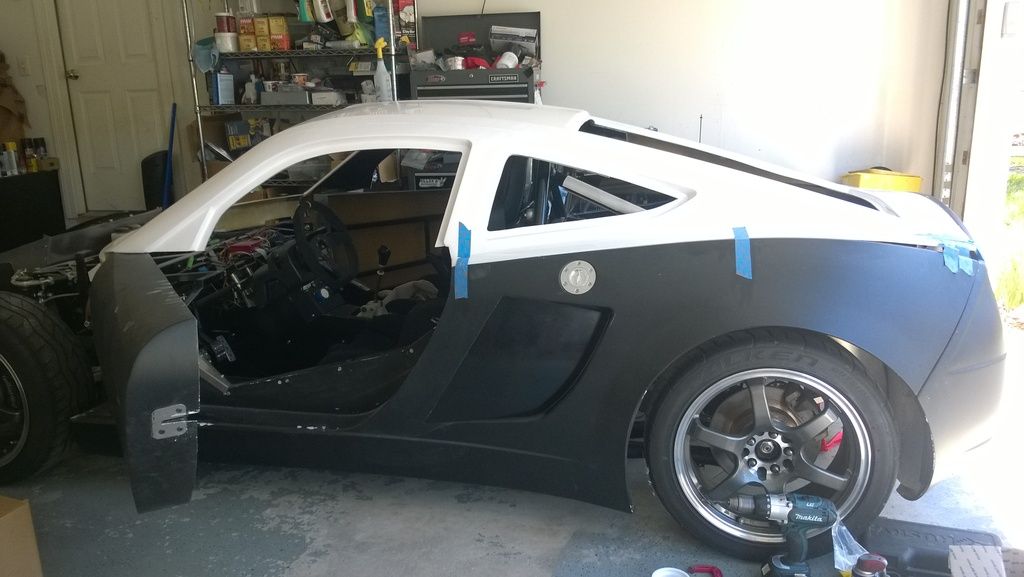
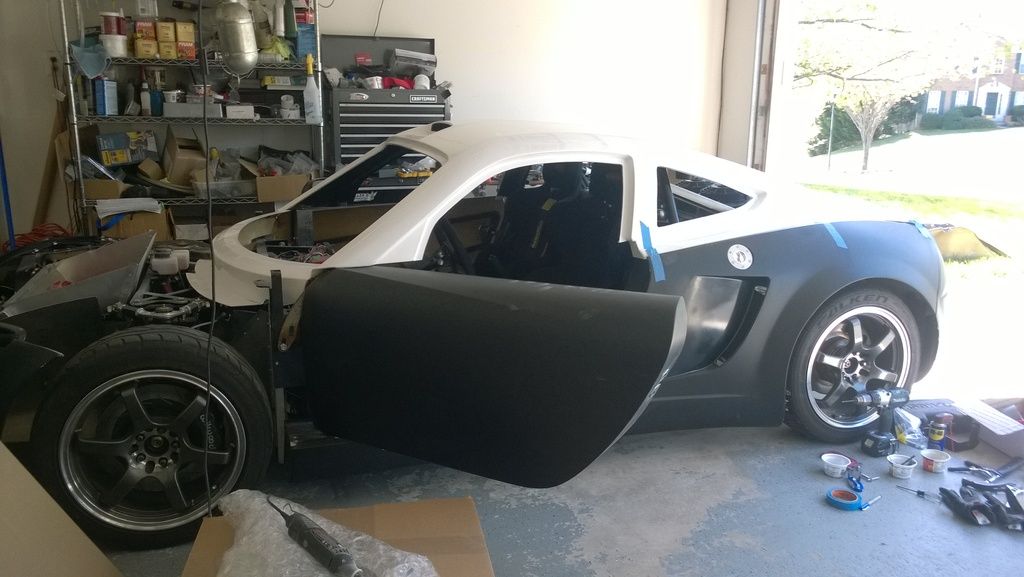
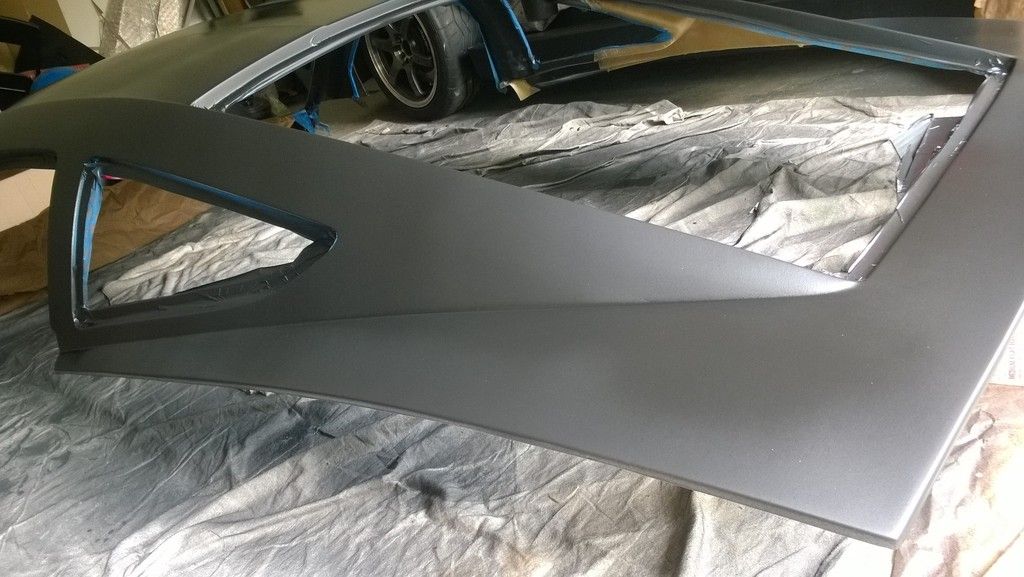
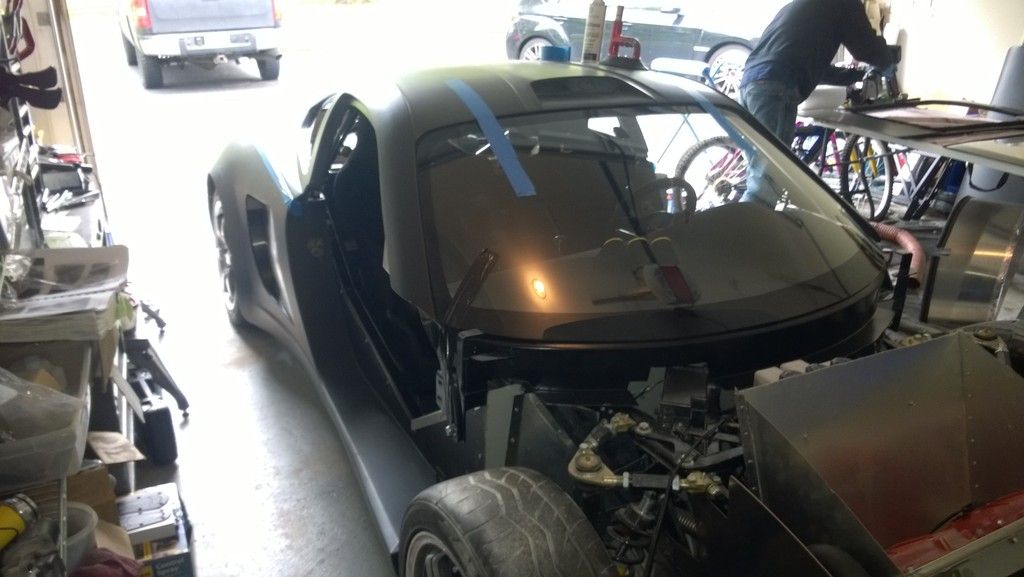
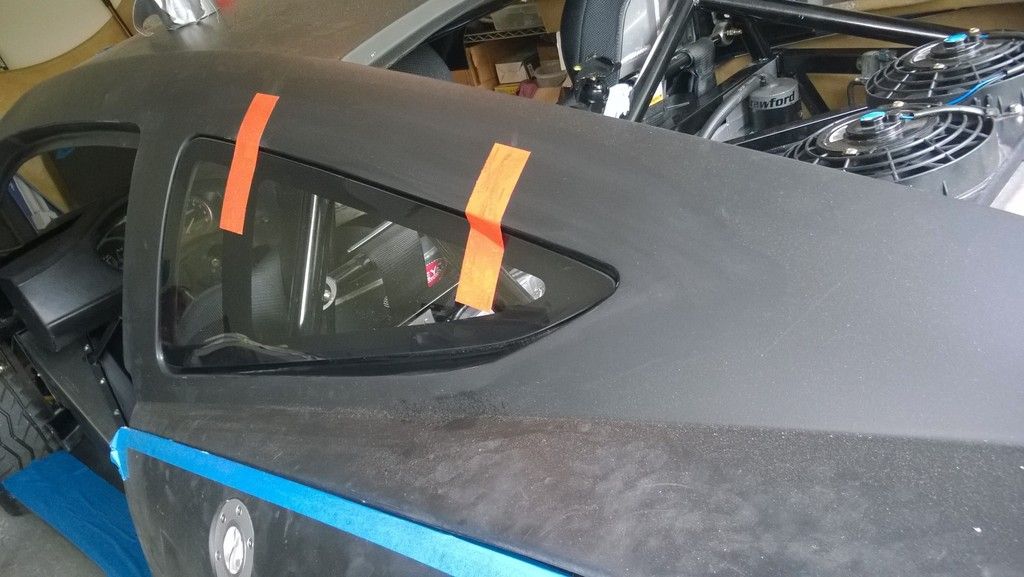
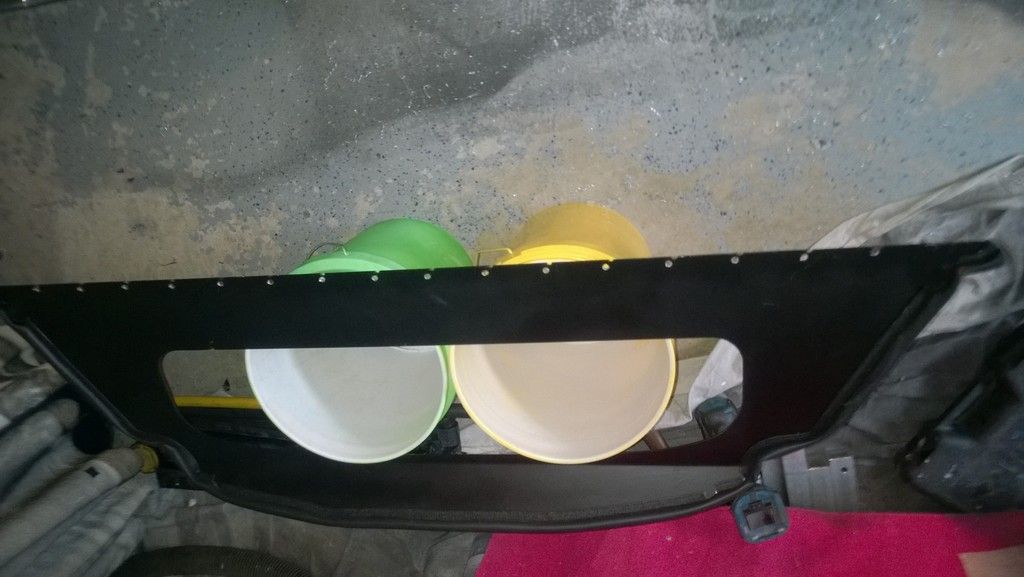
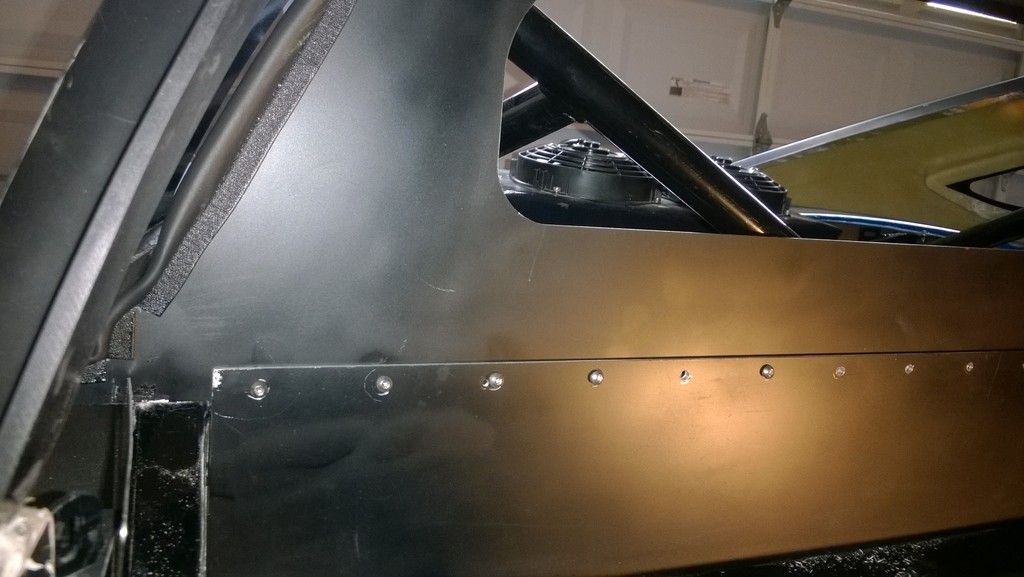
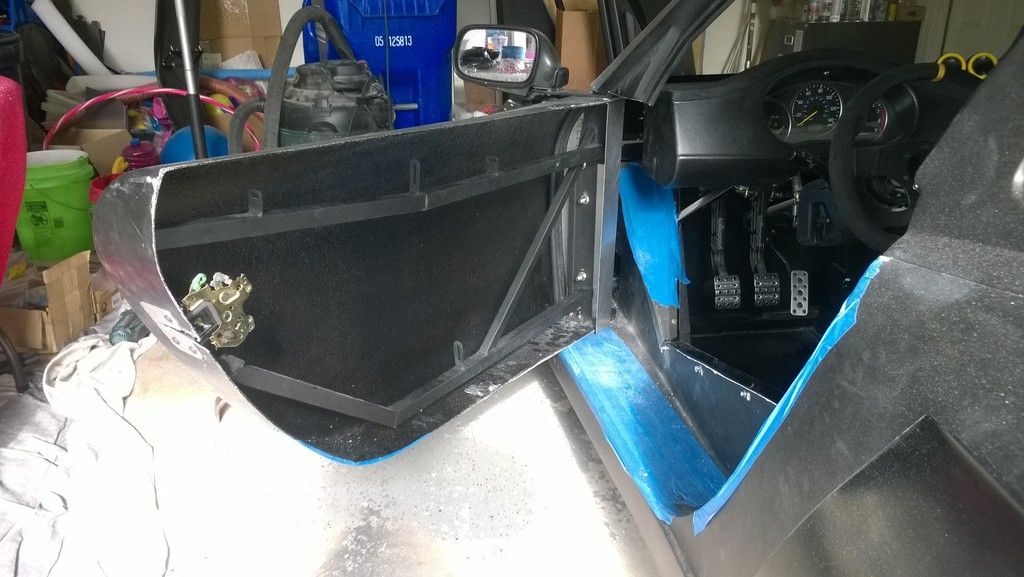
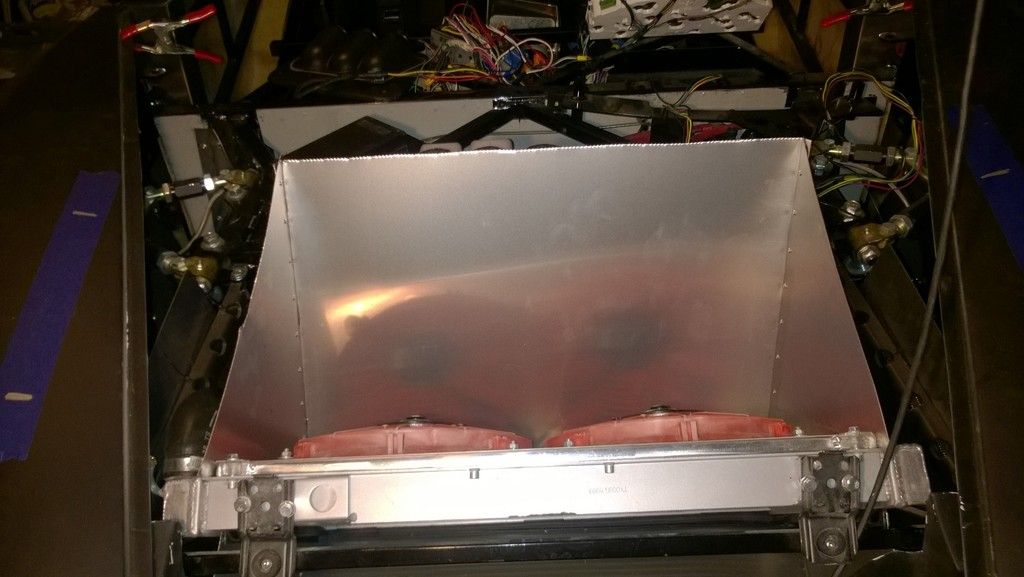
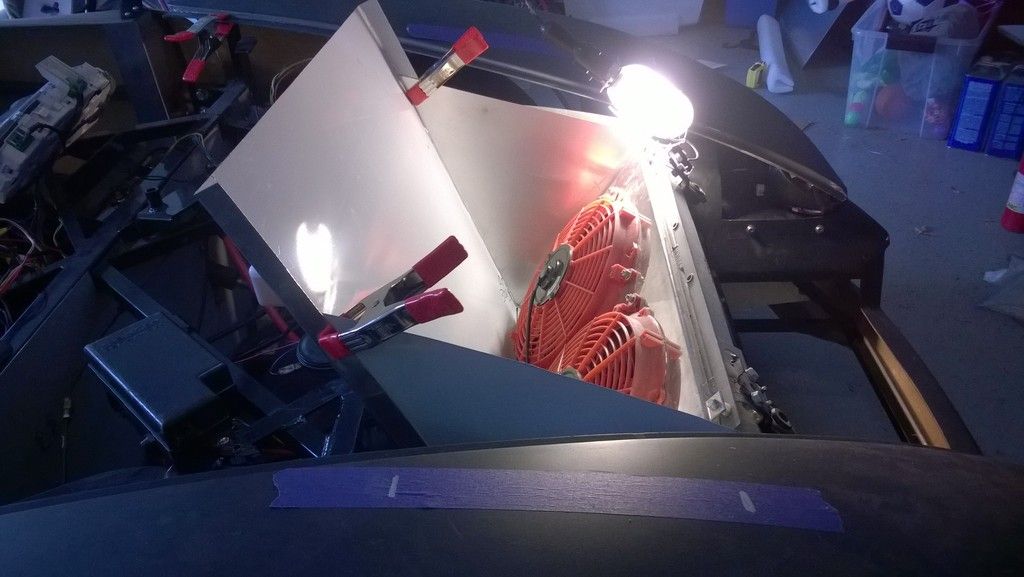
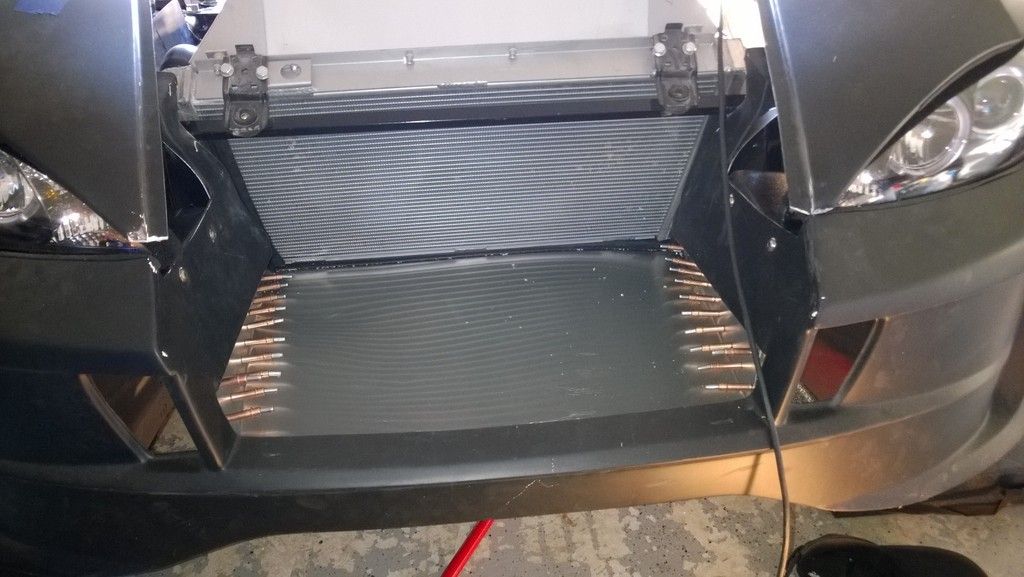
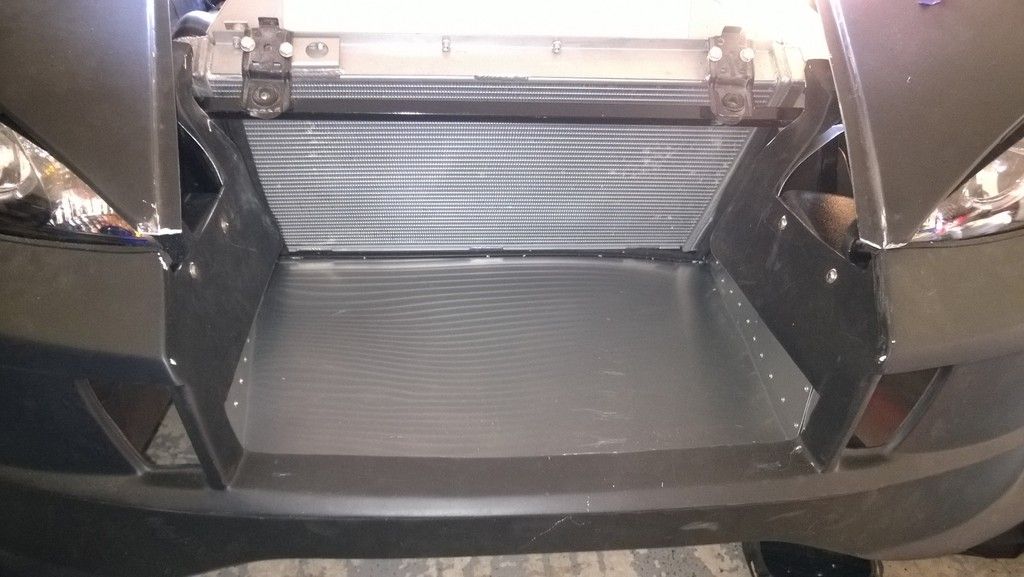
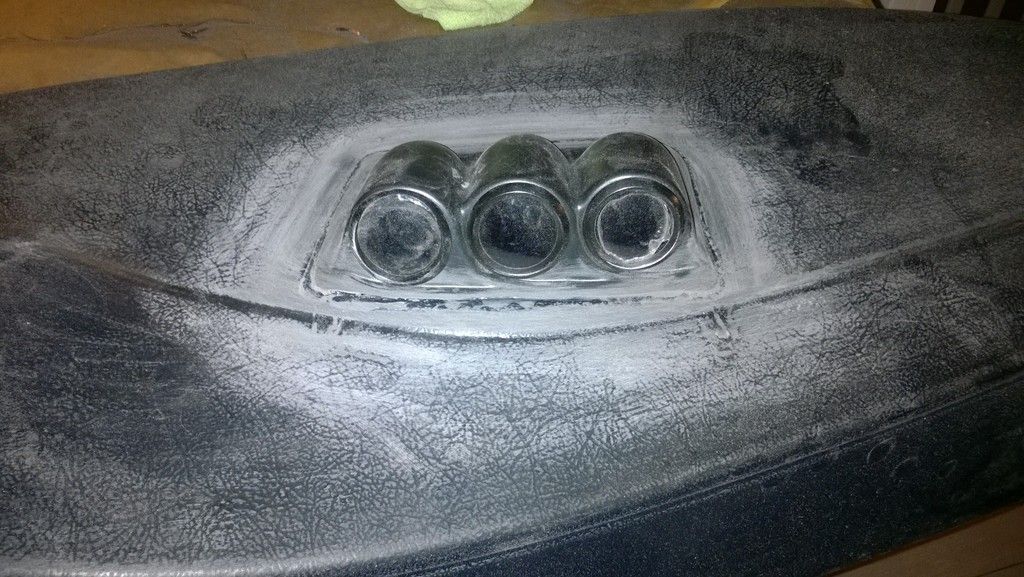
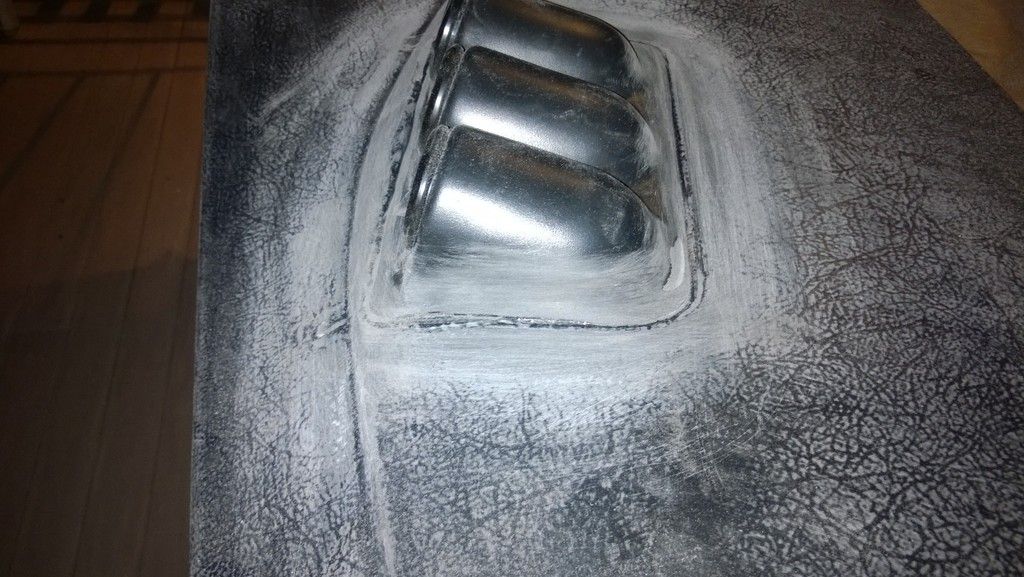
    Still missing a bunch of things to complete this phase of the build. It isn’t going to get done in time to get on the track this year… pretty much knew that in August. So, I’m waiting on some things that are going to push this build past an ‘S’. Until they arrive I’m kinda shooting in the dark, but some radiator ducting was called for. It’s nowhere as nice as the work RetroRacing just posted, but it should do for now.


    818SC chassis #206 EJ207 2.0L VF37 twin scroll || Cusco type RS 1.5 LSD || Wilwood pedal box (firewall attach) || Wilwood superlite front calipers
    BUILD Phase 1: 6/6/2014 car delivered || 5/24/2015 first start || 6/7/2015 go karted || 4/20/2016 hard-top-topped || 10/25/2016 registered || 11/18/2016 inspected & complete
    BUILD Phase 2: 3/8/2017 EJ207v8 || 5/29/2017 re-first re-start || 7/17/2017 re-assembled with race car bits

  2. #202
    Senior Member Frank818's Avatar
    Join Date
    Jun 2013
    Location
    QC, Canada
    Posts
    5,732
    Post Thanks / Like
    Great!! No limit to improvement!
    Frank
    818 chassis #181 powered by a '93 VW VR6 Turbo GT3582R
    Go-karted Aug 5, 2016 - Then May 19+21, 2017
    Tracked May 27/July 26, 2017
    Build time before being driveable on Sep 27, 2019: over 6000h
    Build Completed Winter 2021

  3. #203
    Moonlight Performance
    Hindsight's Avatar
    Join Date
    May 2014
    Location
    Atlanta
    Posts
    3,402
    Post Thanks / Like
    Very nice! Do you think the hood vents are big enough to provide a good negative pressure source for the exhaust? I have been pondering do this same thing myself but the radiator inlet size in the front bumper is very large compared to the small hood exhaust vents, so I worry about them actually becoming a restriction. The 66 coupe, for example, has a very large hood duct. You'll have to post some results when you get it going.

  4. #204
    Senior Member mikeb75's Avatar
    Join Date
    Sep 2013
    Posts
    685
    Post Thanks / Like
    Quote Originally Posted by Hindsight View Post
    Very nice! Do you think the hood vents are big enough to provide a good negative pressure source for the exhaust? I have been pondering do this same thing myself but the radiator inlet size in the front bumper is very large compared to the small hood exhaust vents, so I worry about them actually becoming a restriction. The 66 coupe, for example, has a very large hood duct. You'll have to post some results when you get it going.
    Yes, and yes. Just looking at the hood openings I've had some concerns about being able to vent enough air in the stock configuration. One of the things I plan on addressing over the winter. Not to tease, but I'm keeping the cards close to the vest on this one, so I don't look lame (more lame, lamer? than usual) if it doesn't work out.
    818SC chassis #206 EJ207 2.0L VF37 twin scroll || Cusco type RS 1.5 LSD || Wilwood pedal box (firewall attach) || Wilwood superlite front calipers
    BUILD Phase 1: 6/6/2014 car delivered || 5/24/2015 first start || 6/7/2015 go karted || 4/20/2016 hard-top-topped || 10/25/2016 registered || 11/18/2016 inspected & complete
    BUILD Phase 2: 3/8/2017 EJ207v8 || 5/29/2017 re-first re-start || 7/17/2017 re-assembled with race car bits

  5. #205
    Moonlight Performance
    Hindsight's Avatar
    Join Date
    May 2014
    Location
    Atlanta
    Posts
    3,402
    Post Thanks / Like
    On the contrary, even if for some reason it doesn't work, you did a great thing by trying something different and sharing the results with all of us.

    Mechie's larger hood vent louvers may be a good idea to extend that exhaust opening a bit.

  6. #206
    Senior Member flynntuna's Avatar
    Join Date
    Apr 2011
    Location
    San Diego Ca 92106
    Posts
    1,972
    Post Thanks / Like
    Quote Originally Posted by mikeb75 View Post
    Yes, and yes. Just looking at the hood openings I've had some concerns about being able to vent enough air in the stock configuration. One of the things I plan on addressing over the winter. Not to tease, but I'm keeping the cards close to the vest on this one, so I don't look lame (more lame, lamer? than usual) if it doesn't work out.
    If you make a mold to copy the hood, you can "practice" to your heart content.

  7. #207
    Senior Member mikeb75's Avatar
    Join Date
    Sep 2013
    Posts
    685
    Post Thanks / Like
    Quote Originally Posted by flynntuna View Post
    If you make a mold to copy the hood, you can "practice" to your heart content.
    Shhhhh, what do you mean the secret sauce is 1000 island dressing
    818SC chassis #206 EJ207 2.0L VF37 twin scroll || Cusco type RS 1.5 LSD || Wilwood pedal box (firewall attach) || Wilwood superlite front calipers
    BUILD Phase 1: 6/6/2014 car delivered || 5/24/2015 first start || 6/7/2015 go karted || 4/20/2016 hard-top-topped || 10/25/2016 registered || 11/18/2016 inspected & complete
    BUILD Phase 2: 3/8/2017 EJ207v8 || 5/29/2017 re-first re-start || 7/17/2017 re-assembled with race car bits

  8. #208
    Mechie3's Avatar
    Join Date
    May 2012
    Location
    Indianapolis
    Posts
    5,174
    Post Thanks / Like
    I imagine a daytona coupe/C6R/Single large vent style hood opening . It'd be cool to see that, beyond my capabilities at this point. I understand keeping it hush hush so when it doesn't work there isn't a big letdown. I see too many threads on the Subaru forum that start out "OMG Biggest build ever!" and then they do a downpipe, hang onto the car for two years, then sell it. lol.
    Zero Decibel Motorsports
    Check out my new website!
    www.zerodecibelmotorsports.com
    www.facebook.com/zero.decibel.motorsports

  9. #209
    Senior Member mikeb75's Avatar
    Join Date
    Sep 2013
    Posts
    685
    Post Thanks / Like

    Logger

    Santa brought me a RaceCapture/Pro 2 this year (well, wife-Santa anyway)! Lots of fun here. First steps are to get the unit installed and early wiring complete.

    I put it on a shelf behind the dash, close but not exactly centered in the car. Had also considered under the seat, but dash is easier to wire, and the gyro/sensors do better the closer to center it is. Maybe I could relocate it to the floor of the center tunnel later. The Bluetooth transceiver is attached under the logger to the shelf.


    Power was easy, I have a 6 position fuse box in the passenger foot-well for switches & accessories. I’ll run a second line from that fuse box for hard wire an el-cheap-o Kindle Fire tablet next.

    I’ve tapped the 3 existing sensors/gauges I had installed: boost/manifold pressure, oil temperature, oil pressure. Just need to insure those sensors test properly with the 5v signal.


    Next, I’ve completed the pressure transducer wiring I had installed onto the brake master cylinders. Each cylinder Tee’s into a 500 PSI 5v automotive gauge. These will give some data about brake pressure & bias front to rear, could be helpful.

    Because the logger will be behind the dash I’ve added a latching Vandal switch to my switch panel that connects to 12v digital I/O port on the logger. This has been scripted to start/stop the logging function. I’ll also add a microSD extension cable from the logger to the switch panel so I can easily access the memory card.

    The GPS antenna will (eventually) be mounted to the roof.

    I need to wait until about June of ‘16 for the OBD-II bridge connector to be released so I can poll the ECU.
    After completing the burn in test I can start thinking about some more functions using the Logger CPU. A few that come to mind are:
    • Automatic control of the oil cooler fan based on the oil temperature
    • Water injection post IC to the intake charge based on a temperature reading taken from the IC exit port
    818SC chassis #206 EJ207 2.0L VF37 twin scroll || Cusco type RS 1.5 LSD || Wilwood pedal box (firewall attach) || Wilwood superlite front calipers
    BUILD Phase 1: 6/6/2014 car delivered || 5/24/2015 first start || 6/7/2015 go karted || 4/20/2016 hard-top-topped || 10/25/2016 registered || 11/18/2016 inspected & complete
    BUILD Phase 2: 3/8/2017 EJ207v8 || 5/29/2017 re-first re-start || 7/17/2017 re-assembled with race car bits

  10. #210
    Senior Member mikeb75's Avatar
    Join Date
    Sep 2013
    Posts
    685
    Post Thanks / Like

    End of Winter Hibernation

    With the cold winter months finally “over” I was able to dust off the parts shelves in the garage over the past weekend and start plugging away again.

    Built the wire harness for the brake pressure transducers and plumbed/wired them into the systems. Testing indicated I had the analog connections to the logger off by 1 pin; so fixed that also. After quick testing I verified the 500 PSI transducers are picking up brake line pressure when I hit the stop pedal – nice when things work properly.


    My next project has been grafting a gauge pod to the top of the dash panel. I rough cut the ABS plastic of the pod, used a heat gun to re-profile the edges to better match the curve of the dash and epoxied it in place. If I’m lucky I’ll be able to blend the two parts together well enough with just sanding instead of having to use a filler to blend everything together. Since I’m planning on flocking the dash I only have to get the blend lines ‘close’ (I think).


    818SC chassis #206 EJ207 2.0L VF37 twin scroll || Cusco type RS 1.5 LSD || Wilwood pedal box (firewall attach) || Wilwood superlite front calipers
    BUILD Phase 1: 6/6/2014 car delivered || 5/24/2015 first start || 6/7/2015 go karted || 4/20/2016 hard-top-topped || 10/25/2016 registered || 11/18/2016 inspected & complete
    BUILD Phase 2: 3/8/2017 EJ207v8 || 5/29/2017 re-first re-start || 7/17/2017 re-assembled with race car bits

  11. #211
    Senior Member Bob_n_Cincy's Avatar
    Join Date
    Sep 2012
    Location
    Cincinnati OH
    Posts
    3,904
    Post Thanks / Like
    Mike, Looks good.
    Is 500 psi enough? I thought pressures go up to the 1300-1500 psi levels.
    Bob
    818S #22 Candy Blue Frame, Front Gas Tank, 2.5L Turbo, Rear radiator, Shortened Transmission, Wookiee Compatible, Console mounted MR2 Shifter, Custom ECU panel, AWIC soon
    My Son Michael's Turbo ICE Build X22 http://thefactoryfiveforum.com/showt...rts-818S-Build
    My Electric Supercar Build X21 (on hold until winter) http://thefactoryfiveforum.com/showt...e-Build-Thread

  12. #212
    Moonlight Performance
    Hindsight's Avatar
    Join Date
    May 2014
    Location
    Atlanta
    Posts
    3,402
    Post Thanks / Like
    Welcome back from winter hibernation. How does one flock a dash anyway? I know about Christmas trees...

  13. #213
    Senior Member mikeb75's Avatar
    Join Date
    Sep 2013
    Posts
    685
    Post Thanks / Like
    Quote Originally Posted by Bob_n_Cincy View Post
    Mike, Looks good.
    Is 500 psi enough? I thought pressures go up to the 1300-1500 psi levels.
    Bob
    Good Question, Bob! I did some (back of napkin) maths to estimate line pressure from a formula I found on some web site which estimated ~360 PSI, but admittedly it's an internet formula and math isn't my strong suite... I have exploded one (500 PSI) transducer already when leak testing the brake lines. If I pop another one I'll be upsizing (and redoing the math) :|

    Hindsight, I'll let you know when I work it out 
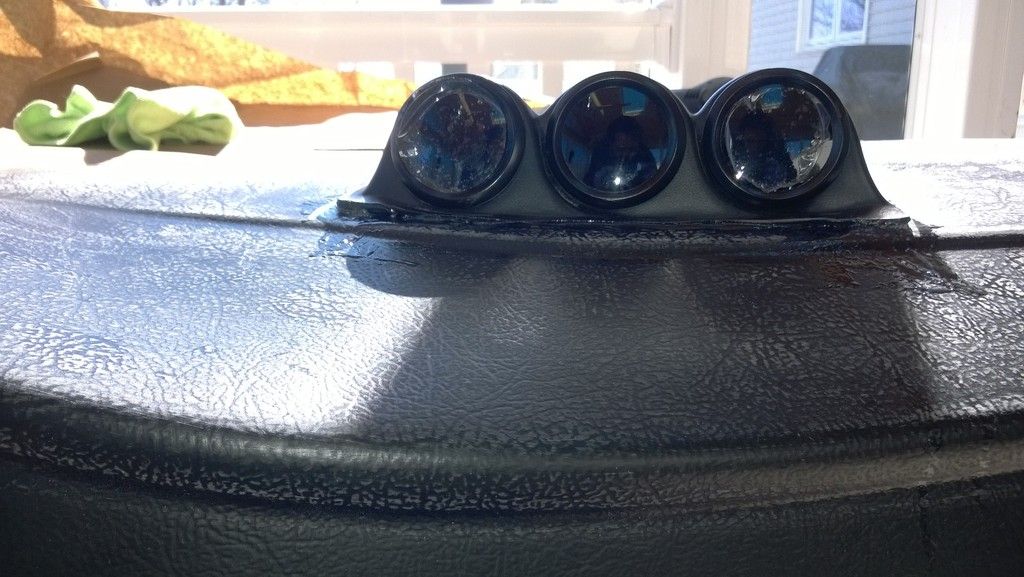
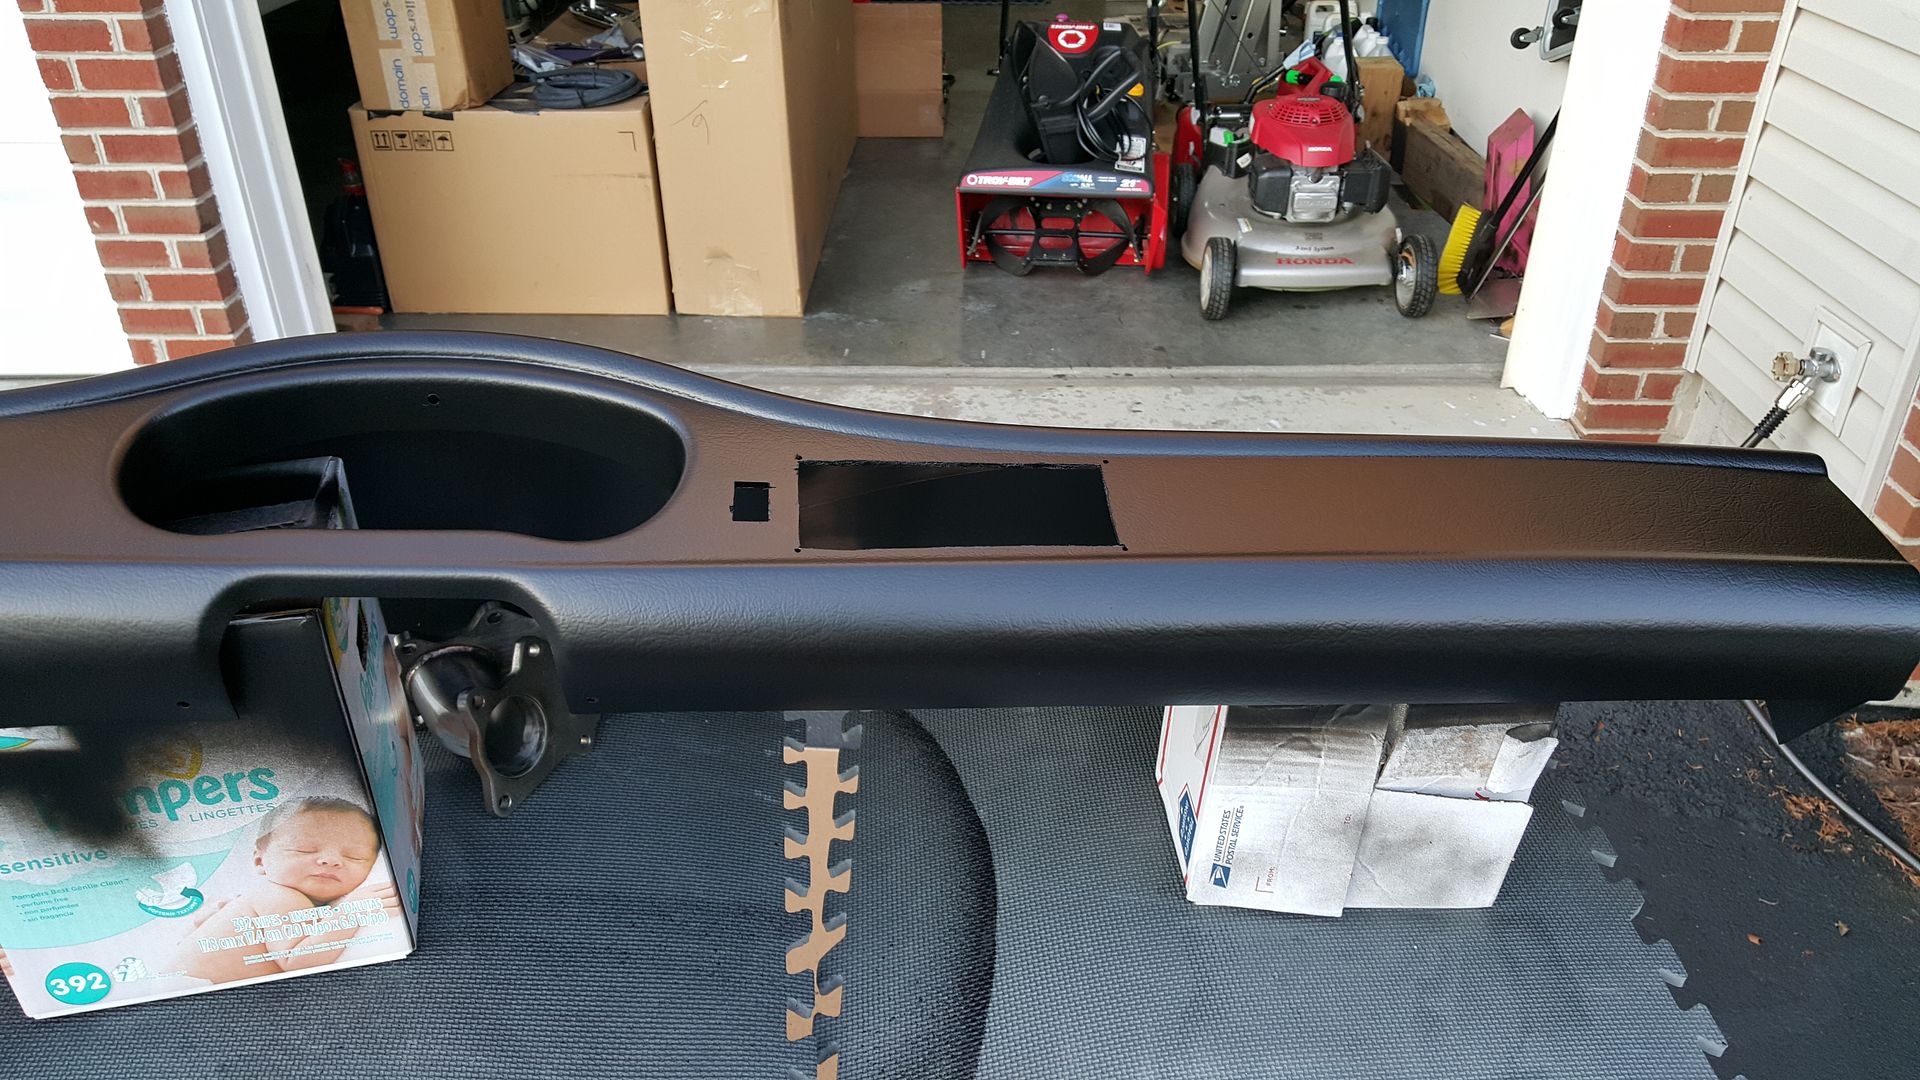
. Actually I'll be using an ebay flock-it-your-self kit (go figure), which consists of acrylic paint, the actual flocking material, and a squeeze bottle for depositing. If it works out properly I'll post the information up.
    818SC chassis #206 EJ207 2.0L VF37 twin scroll || Cusco type RS 1.5 LSD || Wilwood pedal box (firewall attach) || Wilwood superlite front calipers
    BUILD Phase 1: 6/6/2014 car delivered || 5/24/2015 first start || 6/7/2015 go karted || 4/20/2016 hard-top-topped || 10/25/2016 registered || 11/18/2016 inspected & complete
    BUILD Phase 2: 3/8/2017 EJ207v8 || 5/29/2017 re-first re-start || 7/17/2017 re-assembled with race car bits

  14. #214
    Mechie3's Avatar
    Join Date
    May 2012
    Location
    Indianapolis
    Posts
    5,174
    Post Thanks / Like
    A quick formula that can be used is:

    F1 = Foot force
    F2 = force on master cylinder
    L1 = length of moment arm from pivot to center of brake pedal
    L2 = length of moment arm from pivot to master cylinder

    F1 * L1 = F2 * L2

    F2 = F1 * L1 / L2

    P = pressure
    A = surface area
    D = Diameter

    P=F/A
    P = F2/pi*(D/2)^2

    Substitute in all knowns and solve for P.

    P = (F1*L1)/(L2 *pi * (D/2)^2)


    One thing I read at one point was to assume a driver can exert 500lbs of force in a panic stop when they slam the brakes.
    Zero Decibel Motorsports
    Check out my new website!
    www.zerodecibelmotorsports.com
    www.facebook.com/zero.decibel.motorsports

  15. #215
    Senior Member mikeb75's Avatar
    Join Date
    Sep 2013
    Posts
    685
    Post Thanks / Like
    the input of F1 might be the issue; I think I used an unrealistically low value (100 lbs) - I'll need to source 2-3000 PSI sensors if I use F1 = 500 lbs
    818SC chassis #206 EJ207 2.0L VF37 twin scroll || Cusco type RS 1.5 LSD || Wilwood pedal box (firewall attach) || Wilwood superlite front calipers
    BUILD Phase 1: 6/6/2014 car delivered || 5/24/2015 first start || 6/7/2015 go karted || 4/20/2016 hard-top-topped || 10/25/2016 registered || 11/18/2016 inspected & complete
    BUILD Phase 2: 3/8/2017 EJ207v8 || 5/29/2017 re-first re-start || 7/17/2017 re-assembled with race car bits

  16. #216
    Mechie3's Avatar
    Join Date
    May 2012
    Location
    Indianapolis
    Posts
    5,174
    Post Thanks / Like
    Minimally someone can exert their body weight if they can stand on one foot. If you can hop then you can exert more than your body weight. In an adrenaline filled panic stop (and if you right foot brake) your foot is going to come down hard and at speed adding impact loading. I designed and machined an adjustable brake pedal for an F500 and used 500lb as my load case to make sure the owner wouldn't snap the pedal.
    Zero Decibel Motorsports
    Check out my new website!
    www.zerodecibelmotorsports.com
    www.facebook.com/zero.decibel.motorsports

  17. #217
    Member Westview's Avatar
    Join Date
    Jan 2013
    Location
    Columbia, Maryland
    Posts
    78
    Post Thanks / Like
    Hmm...when I was in high school I used to bet people in the weight room that I could leg press the entire weight stack on the machine, 750lbs. It always shocked them when I succeeded, but they didn't realize it was a trick. I'm only 5 foot, 6 inches tall. The seat on the leg press machine was always set too far back for my height. So when I sat down in the seat my legs were barely bent. I only had to move the pedal about 5 inches. I could easily press the 750lbs from that position. I probably could have pressed 1000lbs in the last one inch of my leg extension. That's using both legs, so figure roughly half those values. I weighed about 135lbs at the time. I wonder what a 250lb person could do in the last few inches of leg extension?

  18. #218
    Senior Member mikeb75's Avatar
    Join Date
    Sep 2013
    Posts
    685
    Post Thanks / Like
    And with that gentle prodding ( 
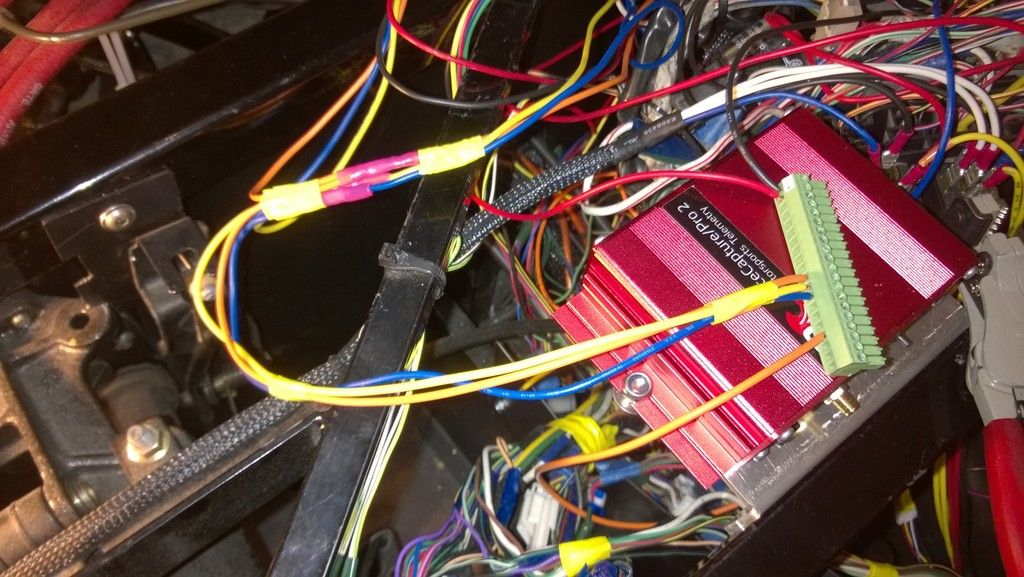
) I went ahead and ordered a pair of 2500 PSI transducers this afternoon

    Truthfully, thanks to the brain trust here for proofing my work! I always appreciate the input and hopefully someone else with the same question finds the good information posted here.
    818SC chassis #206 EJ207 2.0L VF37 twin scroll || Cusco type RS 1.5 LSD || Wilwood pedal box (firewall attach) || Wilwood superlite front calipers
    BUILD Phase 1: 6/6/2014 car delivered || 5/24/2015 first start || 6/7/2015 go karted || 4/20/2016 hard-top-topped || 10/25/2016 registered || 11/18/2016 inspected & complete
    BUILD Phase 2: 3/8/2017 EJ207v8 || 5/29/2017 re-first re-start || 7/17/2017 re-assembled with race car bits

  19. #219
    Senior Member Bob_n_Cincy's Avatar
    Join Date
    Sep 2012
    Location
    Cincinnati OH
    Posts
    3,904
    Post Thanks / Like
    All the gauges on summit go to 1500 psi or more.

    http://www.summitracing.com/search/d...essure%20gauge
    818S #22 Candy Blue Frame, Front Gas Tank, 2.5L Turbo, Rear radiator, Shortened Transmission, Wookiee Compatible, Console mounted MR2 Shifter, Custom ECU panel, AWIC soon
    My Son Michael's Turbo ICE Build X22 http://thefactoryfiveforum.com/showt...rts-818S-Build
    My Electric Supercar Build X21 (on hold until winter) http://thefactoryfiveforum.com/showt...e-Build-Thread

  20. #220
    Senior Member
    Join Date
    Sep 2013
    Location
    Williamsburg VA
    Posts
    105
    Post Thanks / Like
    I have manual gauges hooked up and have been able to see 1400 psi on both gauges pushing for all my 180 pounds could give. My pedal ratio is between 1:5-1:6. On a normal stop I see between 400-800 depending on speed. The FFR supplied pressure reducer can take almost 400 psi out of the front when closed off.

  21. #221
    Senior Member mikeb75's Avatar
    Join Date
    Sep 2013
    Posts
    685
    Post Thanks / Like

    Just Flock It

    Finally, completed blending the gauge pod and covering the dash… mixed results and some lessons learned. It’s a bit patchy and not as uniform as a professional job, but I think with some tweaks to the process it would turn out fine.

    Final prep/blending of the pod


    Cleaned, boxed and ready to apply


    First application; you can see where I ran out of working time on the paint at the bottom. Also I was following the curve of the dash for this application. This turns out to be a mistake.


    Sanded down the right side of the dash and re-applied paint & flock. You can make out the line between the first and second application about 3” to the right of the gauge pod.


    Third application where I covered the remaining part of the dash. Again there is a bit of a seam between the applications.


    After going back over the seam caused by the third application and some other bare patches it looks ‘good enough’ from a few feet away. Up close the imperfections are a bit too obvious.


    A little closer and you can see the trouble areas: The seam from the first to second application, Some streaks on the back of the main gauge area and a patch near the front left of the gauge hump.


    The flocking kit comes with 3 things : acrylic paint, a plastic (condiment) squeeze bottle and the flocking material. The paint which is used to adhere the material to the surface is probably one the cheaper formulations of paint and a higher quality paint would probably give better results.
    The squeeze bottle sucks to deliver the flocking material, I don’t know what would work better but it was very inconsistent in material delivery.

    The instructions state the paint has a 15 minute working time … not really. My first application was really streaky because the paint had surface dried at 8 minutes (was using a stopwatch!).

    The instructions warn to cover the entire surface at one time – this seems pretty important to getting a uniform coverage, but the size of the dash and the limited working time makes this counter intuitive.

    If/when I re-do this I will make the following change to the technique:
    1) Cover the entire dash surface (to be flocked) with 1 coat of acrylic paint.
    2) While the paint is still wet apply a second coat of paint to 1/3 of the dash. Then apply the flocking material from ¼ of the dash to the edge.
    3) Paint a second coat on the second 1/3 of the dash. Again apply flocking material from the middle of the dash out to the already flocked section.
    4) Last apply paint to the remaining 1/3 of the dash and flock the remaining area.

    I'll channel some Adam Sessler and call this e-bay flocking kit a 2 out of 5 stars. And my application skills get a 1 out of 5 stars...
    818SC chassis #206 EJ207 2.0L VF37 twin scroll || Cusco type RS 1.5 LSD || Wilwood pedal box (firewall attach) || Wilwood superlite front calipers
    BUILD Phase 1: 6/6/2014 car delivered || 5/24/2015 first start || 6/7/2015 go karted || 4/20/2016 hard-top-topped || 10/25/2016 registered || 11/18/2016 inspected & complete
    BUILD Phase 2: 3/8/2017 EJ207v8 || 5/29/2017 re-first re-start || 7/17/2017 re-assembled with race car bits

  22. #222
    Senior Member flynntuna's Avatar
    Join Date
    Apr 2011
    Location
    San Diego Ca 92106
    Posts
    1,972
    Post Thanks / Like
    Huh... The YouTube videos make it look so easy. Thanks for your report, I'm going to try it but I'll it looks like I'll need to do some practicing on large things before doing the dash.

  23. #223
    Senior Member metros's Avatar
    Join Date
    Jun 2013
    Location
    NoVA
    Posts
    1,064
    Post Thanks / Like
    The below is my build thread post on the Duplicolor bumper & trim paint I used on the dash. I think your final product would look better with something like this. Although I couldn't find any good examples from google of what flocking looks like.

    I squeezed in some time to address the dash today. Came out pretty good IMO. The finish now no longer looks faded at all and has covered blemishes in the color/light scuffs that were present.

    Before: Notice above the cluster - there were several similar marks in other places.


    Before - Wiped down with brake clean to de-wax the surface.


    After:


    Last edited by metros; 03-11-2016 at 08:56 PM.

  24. #224
    Senior Member mikeb75's Avatar
    Join Date
    Sep 2013
    Posts
    685
    Post Thanks / Like

    Road Trip

    No, didn’t take the 818 for a drive, took a box truck for a drive:


    Looks like I have a bunch more panel alignment, body work and painting to do… not that I’m complaining:


    818SC chassis #206 EJ207 2.0L VF37 twin scroll || Cusco type RS 1.5 LSD || Wilwood pedal box (firewall attach) || Wilwood superlite front calipers
    BUILD Phase 1: 6/6/2014 car delivered || 5/24/2015 first start || 6/7/2015 go karted || 4/20/2016 hard-top-topped || 10/25/2016 registered || 11/18/2016 inspected & complete
    BUILD Phase 2: 3/8/2017 EJ207v8 || 5/29/2017 re-first re-start || 7/17/2017 re-assembled with race car bits

  25. #225
    Senior Member metros's Avatar
    Join Date
    Jun 2013
    Location
    NoVA
    Posts
    1,064
    Post Thanks / Like
    Fitment looks pretty good! My rear trunk lid stuck up like yours did. Roll it out in the sun for a couple hours. Put 2 paint sticks under the middle of the trunk lid resting point and weight the corners. This will bow the rear to fit the space. Keep advancing your painters tape as the body starts to conform and draw the corners down progressively.

    I like that color.

  26. #226
    Senior Member mikeb75's Avatar
    Join Date
    Sep 2013
    Posts
    685
    Post Thanks / Like
    Overall the HT is a nice piece. I made a first pass over the seams, and they're close; the drivers side was really good, only 1 area needs patching. The passenger side is not as good, needs more gel coat added to several places.

    Getting the transitions between the separate parts of the HT from the mold is a bit more difficult. I blocked them quite a bit, bit the angles are such that I still feel a transition. I should get eyeball close and call it done...

    If we get a sunny day (tomorrow?) I'll leave the car out for a few hours. I was able to get the back lined up well with just duct tape, and I think one good warming session should relax the panels enough.

    Torn right now between using the FFR hood pins or quik-latch fasteners on the rear deck. Hood pins are aready paid for... but the fasteners will look nicer. Also can't decide if two will be enough or if four are needed for the HT.
    818SC chassis #206 EJ207 2.0L VF37 twin scroll || Cusco type RS 1.5 LSD || Wilwood pedal box (firewall attach) || Wilwood superlite front calipers
    BUILD Phase 1: 6/6/2014 car delivered || 5/24/2015 first start || 6/7/2015 go karted || 4/20/2016 hard-top-topped || 10/25/2016 registered || 11/18/2016 inspected & complete
    BUILD Phase 2: 3/8/2017 EJ207v8 || 5/29/2017 re-first re-start || 7/17/2017 re-assembled with race car bits

  27. #227
    Senior Member Bob_n_Cincy's Avatar
    Join Date
    Sep 2012
    Location
    Cincinnati OH
    Posts
    3,904
    Post Thanks / Like
    Mike,
    How easy is it to take the hard top on and off?
    Is it held on by windshield bolts in the front and hood pins in the back?
    Bob
    818S #22 Candy Blue Frame, Front Gas Tank, 2.5L Turbo, Rear radiator, Shortened Transmission, Wookiee Compatible, Console mounted MR2 Shifter, Custom ECU panel, AWIC soon
    My Son Michael's Turbo ICE Build X22 http://thefactoryfiveforum.com/showt...rts-818S-Build
    My Electric Supercar Build X21 (on hold until winter) http://thefactoryfiveforum.com/showt...e-Build-Thread

  28. #228
    Senior Member mikeb75's Avatar
    Join Date
    Sep 2013
    Posts
    685
    Post Thanks / Like
    Overall, I'd say very easy.

    There are the front windshield bolts, whatever hood pins in back, and a pair of locating brackets at the door openings. That's it.

    It isn't very heavy without glass, I was able to get it on the car by myself, slid under it and squatted it up, less than 100 lbs. With glass its going to be a 2 person job because of the size.
    818SC chassis #206 EJ207 2.0L VF37 twin scroll || Cusco type RS 1.5 LSD || Wilwood pedal box (firewall attach) || Wilwood superlite front calipers
    BUILD Phase 1: 6/6/2014 car delivered || 5/24/2015 first start || 6/7/2015 go karted || 4/20/2016 hard-top-topped || 10/25/2016 registered || 11/18/2016 inspected & complete
    BUILD Phase 2: 3/8/2017 EJ207v8 || 5/29/2017 re-first re-start || 7/17/2017 re-assembled with race car bits

  29. #229
    Senior Member mikeb75's Avatar
    Join Date
    Sep 2013
    Posts
    685
    Post Thanks / Like

    sneak peek

    since there was finally a day without (much) rain and some sun I finally got a chance to throw some 'dip


    just a peek while I prep for the next paint work and finally get the glass installed...
    Last edited by mikeb75; 05-13-2016 at 10:39 AM. Reason: grammar
    818SC chassis #206 EJ207 2.0L VF37 twin scroll || Cusco type RS 1.5 LSD || Wilwood pedal box (firewall attach) || Wilwood superlite front calipers
    BUILD Phase 1: 6/6/2014 car delivered || 5/24/2015 first start || 6/7/2015 go karted || 4/20/2016 hard-top-topped || 10/25/2016 registered || 11/18/2016 inspected & complete
    BUILD Phase 2: 3/8/2017 EJ207v8 || 5/29/2017 re-first re-start || 7/17/2017 re-assembled with race car bits

  30. #230
    Senior Member metros's Avatar
    Join Date
    Jun 2013
    Location
    NoVA
    Posts
    1,064
    Post Thanks / Like
    I'd love some information about your plastidip. I've been looking at different guns, colors, and brands. What experiences have you had with which brands? Recommendations for a dip newb?

  31. #231
    Senior Member mikeb75's Avatar
    Join Date
    Sep 2013
    Posts
    685
    Post Thanks / Like

    Noob Mike’s Guide to Plasti-Dipping a Car

    Please note, I was a total ‘dip noob before starting the 818. There are some very good videos on youtube by DipYourCar which I used when I started researching.

    Plasti-Dip and similar products are cheap, require minimal prep and are completely removable. For about $250 you have enough materials to cover an 818 Coupe (under $200 for an S/R).

    Tools: I have been using a Wagner Control Spray HVLP electric sprayer, which is the original equipment recommended by DipYourCar.com. Now they offer their own professional (and more expensive) set-up, but the Wagner has worked just fine for me. I could also have used a pneumatic HVLP gun, but honestly for me the electric tool is more convenient.

    Setup: spend as much or little time as you need to prepare the body panels. I didn’t have many voids to fix, but there were some rough edges and chips to fill. I have been using a GelCoat + Wax to do my repairs, so I have been maintaining the same gel-coat surface across the entire panel with no other fillers to account for.

    Panel Prep: dry sand with 180 to make sure of a flat surface, especially over any repairs. Wet sand with 220. I have not needed to go finer since the ‘dip material has some volume to cover light surface scratches. Next, a surface scrub with a green scrub pad and Comet cleaner and warm water further preps the surface, which seems to help the ‘dip adhere better -however I have not removed ‘dip from panels treated this way, so I can’t recommend this procedure yet.

    Use Blue painters masking tape to mask off any areas you do not want covered. A word of warning, the Xylene I use to thin the ‘dip attacks the tape adhesive and leaves a sticky residue. This will require an aggressive cleaning to remove; I use acetone. When performing this cleaning you will affect any paint under the tape. My recommendation is to ‘dip first, then clean, mask and paint the remaining areas.

    Perform a final clean of the panel with acetone and you are ready to lay the ‘dip.

    Material: I have been using the original undiluted Plasti-Dip from Performix, purchased via ebay for about $70 a gallon. Each gallon is thinned 1:1 with an additional gallon of Xylene so it is sprayable with the HVLP equipment. This nets 2 gallons of product for ~ $90.

    In total I used between 6 and 7 coats of ‘dip sprayed at 15 minute intervals. The spray pattern should have a ½ overlap between passes. Watch the youtube videos to understand the proper technique. Individual coats are thin, so the coverage will be very spare for the first 2-3 coats. After that the material will build up enough that the color becomes opaque. The goal is to keep spraying the light coats so the material dries in an even matte pattern without splotches or runs. Overall it’s a forgiving product during application, even more so since you can just pull it off a panel you aren’t happy with and respray. Additionally, a second application of ‘dip can be sprayed over a first to repair damage, even using the plasti-dip from a spray can.

    Be very careful when applying the ‘dip, any contact will rub off the product and require respraying/patching. Also try to work in a clean environment… but be warned the fumes -especially from the Xylene are not good for you. I wear a cartridge mask and gloves/eye protection and work in an open garage. The problem will be debris & bugs that love to land on your freshly sprayed panels…

    Once the last coat is sprayed and has been allowed to set up the masking tape should be pulled -while the ‘dip is still slightly wet. This will provide the sharpest edges, however if the dip has dried more and starts to -pull as the tape is removed use a razor blade to release the tape edge. In the worst case the ‘dip on the tape won’t separate from the ‘dip on the panel and you will get some detachment and pulls. I’ve used a towel and acetone to rub back the ‘dip and clean the edge.

    results:
    Even after the ‘dip has fully dried it’s a bit fragile -rubbing aggressively can cause peels, but it cleans well with soap & water or cleaning alcohol.

    The total weight of ‘dip for a standard size car is under 2 lbs, so it can help keep your 818 818-ier

    I can’t compare Plasti-Dip to the Eastwood product ElastiWrap as I’ve never used them, nor have I tried other equipment other than the Wagner. Likewise, I have not tried any of the pearlizers or finishes and other crap offered … because race car.

    For me the main consideration has been cheap. How to get the best results spending the least amount of money, and for that I’ve been happy with the results so far. I’d be interested in hearing other experiences. I know one other build had a blue dipped car, but I don’t remember a lot of discussion on that thread.
    818SC chassis #206 EJ207 2.0L VF37 twin scroll || Cusco type RS 1.5 LSD || Wilwood pedal box (firewall attach) || Wilwood superlite front calipers
    BUILD Phase 1: 6/6/2014 car delivered || 5/24/2015 first start || 6/7/2015 go karted || 4/20/2016 hard-top-topped || 10/25/2016 registered || 11/18/2016 inspected & complete
    BUILD Phase 2: 3/8/2017 EJ207v8 || 5/29/2017 re-first re-start || 7/17/2017 re-assembled with race car bits

  32. #232
    Senior Member Frank818's Avatar
    Join Date
    Jun 2013
    Location
    QC, Canada
    Posts
    5,732
    Post Thanks / Like
    It's a nice piece of panel. Mike what are you plans with the tops, I mean no top and top? Do you plan on keeping the top on all the time or swapping tops (well top to nothing and other way around) once in a while?
    Frank
    818 chassis #181 powered by a '93 VW VR6 Turbo GT3582R
    Go-karted Aug 5, 2016 - Then May 19+21, 2017
    Tracked May 27/July 26, 2017
    Build time before being driveable on Sep 27, 2019: over 6000h
    Build Completed Winter 2021

  33. #233
    Senior Member metros's Avatar
    Join Date
    Jun 2013
    Location
    NoVA
    Posts
    1,064
    Post Thanks / Like
    Thanks for the first hand experienceside and feedback. I wish the websites had more pictures of vehicles with different colors. I have a difficult time trying to picture the color sample pictures.

  34. #234
    Senior Member mikeb75's Avatar
    Join Date
    Sep 2013
    Posts
    685
    Post Thanks / Like

    Body Re-Work

    Today FIL and I took apart the driver’s side panel to fix the alignment & gap issues we’re seeing with the HT. We adjusted the oil cooler mounting so it was slightly more inboard (not much room to maneuver), adjusted the door striker backing plate and and tweaked the side panel attachment and rear cover attachment.

    These adjustments allowed us to bring both the gaps between the side panels and the HT together. Next step is to verify the driver’s door and latching mechanism sits correctly; it has always been an issue from some mis-alignment/ torqueing on the striker back plate.

    I’m very pleased how all the panels line up now and how the back of the car sits. It really looks like a small supercar.


    Speaking of small, we are going to have to re-address the seat mounts. There is almost no gap between the top of my helmet and the roof liner -not that it’s structural, but if I sit up there is just not enough room! We’ll be removing the 1” risers under the seat mounts and probably adjusting the lay-back angle. Since we must remove the seats to install the upper rear firewall anyway, this will be the ideal time to correct the issue.

    Quote Originally Posted by Frank818 View Post
    It's a nice piece of panel. Mike what are you plans with the tops, I mean no top and top? Do you plan on keeping the top on all the time or swapping tops (well top to nothing and other way around) once in a while?
    Frank, I expect to keep the car in Coupe mode 100% of the time, especially since I’ll be looking to get it fully ‘caged with a front hoop that ties into the existing rollbar.
    818SC chassis #206 EJ207 2.0L VF37 twin scroll || Cusco type RS 1.5 LSD || Wilwood pedal box (firewall attach) || Wilwood superlite front calipers
    BUILD Phase 1: 6/6/2014 car delivered || 5/24/2015 first start || 6/7/2015 go karted || 4/20/2016 hard-top-topped || 10/25/2016 registered || 11/18/2016 inspected & complete
    BUILD Phase 2: 3/8/2017 EJ207v8 || 5/29/2017 re-first re-start || 7/17/2017 re-assembled with race car bits

  35. #235
    Senior Member mikeb75's Avatar
    Join Date
    Sep 2013
    Posts
    685
    Post Thanks / Like

    Starting to look like a car now

    Glass install: done. In preparation for the glass install I had painted the trim surrounds with gloss black spray paint, instead of plasti-dip. I think the effect came out nice. But having the glass in looks nicer, really lends itself to being almost ‘finished’.


    Just a few more items on the punch-list and we should be ready for registration.
    818SC chassis #206 EJ207 2.0L VF37 twin scroll || Cusco type RS 1.5 LSD || Wilwood pedal box (firewall attach) || Wilwood superlite front calipers
    BUILD Phase 1: 6/6/2014 car delivered || 5/24/2015 first start || 6/7/2015 go karted || 4/20/2016 hard-top-topped || 10/25/2016 registered || 11/18/2016 inspected & complete
    BUILD Phase 2: 3/8/2017 EJ207v8 || 5/29/2017 re-first re-start || 7/17/2017 re-assembled with race car bits

  36. #236
    Senior Member mikeb75's Avatar
    Join Date
    Sep 2013
    Posts
    685
    Post Thanks / Like

    Rear Bulkhead/Firewall from Hell

    Ok, it wasn’t that bad, but the instructions in the Manual revision -P leaves a little to be desired, at least with regards to my build which is a C -refit.
    I mocked up the aluminum upper firewall a number of times to get it positioned and leveled correctly. Immediately I found that the tabs on the outside edges of the firewall prevented the hard top from actually sitting flush. So those ends were trimmed off.

    Next, because I used riv-nuts and bolts to hold the firewall/gas tank covers on instead of riveting there was a spacing issue with the upper firewall. Again the hard top was being pushed up and prevented from sitting flush. Ultimately I pulled the bolts, marked and drilled holes in the upper firewall installed it ‘behind’ the lower firewall and used the hardware to hold it in.


    The manuals instructions on glass installation were pretty good. Use a lot of WD-40 on the gasket/installation tool.


    I’m using a harness bar instead of the 3-point harnesses and my chassis number is 206, before they made changes to the seatbelt attachment point. There was only the 1 hole and small tab on my chassis, (not the most confidence inspiring). After the upper firewall was bolted in I marked the locations and drilled the holes.

    I needed to source a pair of M10 x 50mm bolts to go through the harness bar, backing spacers, upper fire wall, second spacers and chassis tabs.


    This was probably one of the most involved installations I’ve done during the build. I must have put-in/taken out the upper firewall 10 times to try to get its alignment and height correct over the past 4 days. Screwing this up would have made getting the hard-top to sit properly more difficult.
    818SC chassis #206 EJ207 2.0L VF37 twin scroll || Cusco type RS 1.5 LSD || Wilwood pedal box (firewall attach) || Wilwood superlite front calipers
    BUILD Phase 1: 6/6/2014 car delivered || 5/24/2015 first start || 6/7/2015 go karted || 4/20/2016 hard-top-topped || 10/25/2016 registered || 11/18/2016 inspected & complete
    BUILD Phase 2: 3/8/2017 EJ207v8 || 5/29/2017 re-first re-start || 7/17/2017 re-assembled with race car bits

  37. #237
    Senior Member Frank818's Avatar
    Join Date
    Jun 2013
    Location
    QC, Canada
    Posts
    5,732
    Post Thanks / Like
    Panel fitment/gap is kinda nice! Keep on going.
    Frank
    818 chassis #181 powered by a '93 VW VR6 Turbo GT3582R
    Go-karted Aug 5, 2016 - Then May 19+21, 2017
    Tracked May 27/July 26, 2017
    Build time before being driveable on Sep 27, 2019: over 6000h
    Build Completed Winter 2021

  38. #238
    Junior Member
    Join Date
    Jul 2012
    Posts
    16
    Post Thanks / Like
    Quote Originally Posted by mikeb75 View Post
    Not to burst your bubble, but I don't think you'll like your gauge pod at night. Any gauge pod that sits on the dash and does not have a large enough hood will be visible on the windshield at night. I had a gauge pod cluster that sat where my WRX's clock pod sits. It was really bad at night time... I got rid of it after about a month of dealing with how distracting it was.

  39. #239
    Senior Member mikeb75's Avatar
    Join Date
    Sep 2013
    Posts
    685
    Post Thanks / Like
    Quote Originally Posted by AgentH View Post
    Not to burst your bubble, but I don't think you'll like your gauge pod at night...
    Yup, was pretty bad. I'm going to have to make hoods for each of the gauges.
    818SC chassis #206 EJ207 2.0L VF37 twin scroll || Cusco type RS 1.5 LSD || Wilwood pedal box (firewall attach) || Wilwood superlite front calipers
    BUILD Phase 1: 6/6/2014 car delivered || 5/24/2015 first start || 6/7/2015 go karted || 4/20/2016 hard-top-topped || 10/25/2016 registered || 11/18/2016 inspected & complete
    BUILD Phase 2: 3/8/2017 EJ207v8 || 5/29/2017 re-first re-start || 7/17/2017 re-assembled with race car bits

  40. #240
    Senior Member mikeb75's Avatar
    Join Date
    Sep 2013
    Posts
    685
    Post Thanks / Like

    Re-Fitting All Doors

    Busy-busy-busy over the long weekend:

    Finalized the placement of the hard-top using a set of knock-off AeroCatch hood pins, using the stock hood pin location I was able to get the catches to pull the rear fenders into pretty good alignment. There is still a bit of pop at the rear cover but the side seams sit well. I’ll upgrade to proper AeroCatch fittings shortly… just needed to test & align.


    It took a long time to get the rear hatch cover to sit properly, A lot of trimming and re-profiling was required to get it to sit perfectly with the required gap at the top and be able to actually open the hatch. I had to trim ¼” from the top and another 1/8” from the bottom, and a lot of sanding to thin out the hatch. There is still a slight rub when opening the hatch fully unless I manually pull it towards me. I think the “push” from the gas struts should do the same thing, otherwise I’ll sand down the rear edge of the hard top.


    The GPS transceiver for the logger is double sided taped to the roof and the wire is run past the gasket and down the roll-bar into the main wiring bundle.


    The door bars and skins were next – drivers side was completely re-aligned and now sits much better, only ¼” away from perfect. The passenger side reused most of the holes and is close, still needs a slight adjustment to address rubbing.


    818SC chassis #206 EJ207 2.0L VF37 twin scroll || Cusco type RS 1.5 LSD || Wilwood pedal box (firewall attach) || Wilwood superlite front calipers
    BUILD Phase 1: 6/6/2014 car delivered || 5/24/2015 first start || 6/7/2015 go karted || 4/20/2016 hard-top-topped || 10/25/2016 registered || 11/18/2016 inspected & complete
    BUILD Phase 2: 3/8/2017 EJ207v8 || 5/29/2017 re-first re-start || 7/17/2017 re-assembled with race car bits

Page 6 of 16 FirstFirst ... 45678 ... LastLast

Posting Permissions

  • You may not post new threads
  • You may not post replies
  • You may not post attachments
  • You may not edit your posts
  •  

FFMetal

Visit our community sponsor