Forte's

Visit our community sponsor

Thanks Thanks:  0
Likes Likes:  0
Results 1 to 35 of 35

Thread: Planning a new 33 Hot Rob Build Would like suggestions

  1. #1
    Junior Member Jazzman442's Avatar
    Join Date
    Nov 2013
    Location
    Tampa Bay Area, FL
    Posts
    4
    Post Thanks / Like

    Planning a new 33 Hot Rod Build Would like suggestions

    Hello everyone. I have been lurking on this site for a while. I am very interested and excited to build one of these 33 Hot Rods. I have build race and street cars since I have been a kid. Electronics are not a problem either as I have done it all. So It brings me to why I am posting this.
    I would like Suggestions on what Tools you would have bought before your builds. Options that are a must. Extras that I should get. Best Motor and Manual Transmission combo? Any and All Suggestions are surly Welcome.
    Last edited by Jazzman442; 11-06-2013 at 10:02 PM.

  2. #2
    Senior Member maczter's Avatar
    Join Date
    Feb 2013
    Location
    Xenia, OH
    Posts
    277
    Post Thanks / Like
    Blog Entries
    1
    The beauty of this kit is there is no right or wrong, only your imagination and skill level. A carbed small block Ford and an AOD automatic would be the shallow end of the pool, while some are building Coyote motors, blown big blocks, 6L hemis and even a BMW powered one. Spend a good 2-4 weeks reading every forum and build thread you can, make lots of notes and ask a ton of questions.

    As far as tools go, this kit can be built with basic hand tools, although some things make it easier such as an air riveter, air body saw, floor jack and stands with poly pads, and the like. Again, most of this is mentioned here and in the ffcars.com forums. Depending on how much you plan to customize will dictate your tools.

    As far as must haves, depends on your planned use of the rod. Me, no fenders, hood or roof, no wipers, heater or AC as it will be a race rod. I did opt for the electric power steering after reading so much about it and maybe power brakes later. Oh, but definitely get a Boyd's gas tank...the FFR one is sub-par.

    The guys here are great and love to talk about their experiences. Good luck and welcome to the madness.

    Jack
    FFR HR #530
    Race car theme, Tim Whitaker roll bar, Autometer Autolite Gauges, Satin Black, SBC 383/700R4, 8.8 rear with Cobra Brakes, 3.29 gear, Boyd Tank, QA1 springs and shocks,

    My build blog: http://jacks33hotrod.blogspot.com/

  3. #3
    EFI Rules and Carbs Drool Arrowhead's Avatar
    Join Date
    Feb 2011
    Location
    Stillwater, NY
    Posts
    599
    Post Thanks / Like
    Welcome aboard! The chassis should really go together with no special tools required and if you've been building cars that long I'm sure you have all the bases covered. Just like anything, you can make do with hand tools or make life easier with air or electric power. Honestly, if you go carb and a basic transmission, the paint and bodywork is probably most of the work to complete the car. The chassis should pretty much bolt together if you are using a "supported" drivetrain. One of the best investments I made was a set of AFS sanding boards for the bodywork.

    http://adjustablesander.com/products.html

    There's an article I was asked to contribute to on The Rod Authority, you might pick up some good info there also.

    http://www.rodauthority.com/tech-sto...-kit-now-what/

    As far as opinions on engine/transmission, well those are like you know what, everyone has one. It really comes down to what your going to use the car for and what you want out of it and that's a personal decision only you can answer. If you want to share more goals for the car, I'm sure you might get some more input.

  4. #4
    Senior Member Jay Mann's Avatar
    Join Date
    Aug 2011
    Location
    Car is in Edmonton
    Posts
    120
    Post Thanks / Like
    Welcome, I second the suggestion to read everything you can on both forums. Make sure to read complete threads since some of the ideas discussed mature and change as build progress. There is a sticky which has a large number of suggestions on everything you can imagine. Yes, we all have opinions and are not shy about expessing them in a mature manner. Unlike some of the other F5R cars, the 33 can be built in a range of variations. Everything from high end down-town show cars to juvenile delinquents that get driven hard. My car has evolved over time, with many things done twice because a better idea has come along, that has been part of the fun.

    Options? - Boyds tank!!!! This is one option that is an absolute must and is hard to change later.
    - Wilwood brake upgrade, excellent moduation and feel, eyeball sucking stops
    - QA1 shocks and springs, can be done later, the ride is much better
    - Power steering also can be added later
    - Rag top, very high quality and killer looks
    Motor/ Trans - I am very happy with the Coyote/TKO600 combo. Double overhead cam, VVT, all aluminum 5 litre, over 400hp right out of the box and excellent gas mileage all at a good price. I ordered the complete assembly from Sean Hyland Motorsports.
    Last edited by Jay Mann; 11-06-2013 at 05:00 PM.
    www.33coyote.com
    Built with the help of my dad and sons
    coyote/TKO 600, Wilwood Brakes,Boyds tank, QA1 shocks
    Speedhut Gages, rag top, bike fenders, power steering

    "Never let physics or common sense get in the way of a good idea"

  5. #5
    Senior Member 68GT500MAN's Avatar
    Join Date
    Feb 2011
    Location
    Fresno, CA
    Posts
    1,808
    Post Thanks / Like
    I know that I am going against many before me, BUT, in my mind there is nothing wrong with the FFR supplied fuel tank. I am using it in my build and have had no problems. Sure the welds look messy, but the tank is covered and no one will ever see it. I did get the larger vent and have no problems filling the tank with gas. I would put the money saved by using the stock tank into brakes or shocks.
    Just my opinions,
    Doug

  6. #6
    PLATNUM Supporting Member
    wallace18's Avatar
    Join Date
    Apr 2012
    Location
    Trenton, Florida
    Posts
    5,381
    Post Thanks / Like
    I would get a Dremel tool. It was very useful in my build.

  7. #7
    Junior Member Jazzman442's Avatar
    Join Date
    Nov 2013
    Location
    Tampa Bay Area, FL
    Posts
    4
    Post Thanks / Like
    This is great information. This is exactly what I am looking for. The little things that make the difference. The things that worked and did not work. I would like the 33 to be used as a cruiser. I like auto cross and really like drags.
    Is the 4 link easy to upgrade later or when I get the kit? I like the suggestion on getting the better breaks and power steering. Has any one looked at the Haywood power racks instead of the power motor in the steering shaft?

    Any tips on the hard top, Power or manual windows and full fenders?

    Thank you I am keeping a list of all the suggestions. Thank you all for the help.

  8. #8
    Senior Member
    Join Date
    Feb 2011
    Location
    Beverly Hills, FL
    Posts
    240
    Post Thanks / Like
    Thanks for starting this thread. I always liked the looks of the street rods from the 30's and tried to get all the information I could about 'Larry'. When it was formally announced, I really liked what I saw. Then as time went on I started paying a lot of attention to the 818. Now, I'm in a quandary, should I build and 818 or a '33. Thankfully, I'm now friends with Wallace18 so I will be able to look very closely at both of them, side by side. I can't wait to get a ride in both of them and really check them out. I'm starting to lean towards the '33 because of the hardtop, power windows and air conditioning. I don't really need another roadster/convertible (not only do I have a 'Cobra', my wife and I have his and hers Miatas).

    I look forward to reading what everyone has to say here.

    Steve
    FFR4958. IRS, 408W, Loud and fast!

  9. #9
    EFI Rules and Carbs Drool Arrowhead's Avatar
    Join Date
    Feb 2011
    Location
    Stillwater, NY
    Posts
    599
    Post Thanks / Like
    Quote Originally Posted by 68GT500MAN View Post
    I know that I am going against many before me, BUT, in my mind there is nothing wrong with the FFR supplied fuel tank. I am using it in my build and have had no problems. Sure the welds look messy, but the tank is covered and no one will ever see it. I did get the larger vent and have no problems filling the tank with gas. I would put the money saved by using the stock tank into brakes or shocks.
    Just my opinions,
    Doug

    I agree, take a few minutes and pressure check the tank after everything is hooked up (soap up the fittings and just blow into the fill port with your mouth). I found the sender and fuel pickup were seeping air, so I changed the gaskets and also had to bend the inner metal "hump" on the tank fitting down a little. If the sending unit or pickup assemblies make metal to metal contact with the tank fitting(except the locking collar of course), it will leak . The pickup and sender should fit solid on the rubber gasket only.

  10. #10
    Senior Member kraftee's Avatar
    Join Date
    May 2013
    Location
    Gainesville, Florida
    Posts
    288
    Post Thanks / Like
    ...or, don't go through all the nonsense of trying to make that lump of a stock tank work. Just get a tank delete credit when you order your 33 and buy a Boyd's tank. It's a work of art and I SERIOUSLY doubt there will be any leaks with the aircraft-style tank assembly! Money wisely spent in my opinion...
    "If everything seems to be coming your way, you're probably in the wrong lane."

  11. #11
    Tech Manager, FFR
    Join Date
    Feb 2011
    Posts
    211
    Post Thanks / Like
    Hi Jazzman,

    Welcome! Thought I'd add in a couple of my own thoughts and opinions on tools for the build. I built my GTM in a 1-car garage space with a toolbox, an 18"X48" shelf, and a small workbench with a vise. I think compressed air is nice but not necessary. I also think that, while the wheeled dollies we use here in-house are a great way to move a chassis around, most don't need to be mobile, and you're better off just keeping it on 4 jack stands (leaves you lots of room to get under the car and work on it, and it won't shift around on you). Have a good cordless drill with a few spare batteries, and get one of those 3/16"-1" stepdrill bits. If there's one thing I would have liked to have had at my disposal, it would have been a nice compact right angle drill.

    If you have any questions, give a call at 508-291-3443 or email [email protected].

    Jason @ FFR

  12. #12
    Senior Member
    Join Date
    Feb 2011
    Posts
    334
    Post Thanks / Like
    Blog Entries
    1
    2X on the build threads. Lots of good info and ideas. Whether building a 33, 818 or roadster, I read them all I can. What might not be covered on the 33 forum for a particular area of a build may be covered on the roadster side for example. One that comes to mind is how to deal with the body mold seams. I've seen more than one FFR car that when completed, the mold seams showed below the finished paint because they weren't done properly. This topic is covered in detail on the roadster side of the forums. Lots of good engine and suspension advice if you look around the other forums as well. The FFR knowledge and brotherhood is shared across the forums.

    If we can help with anything, let us know.

    Tim Whittaker
    Kootenai Valley Customs

    kootenaivalleycustoms.com

  13. #13
    Junior Member Jazzman442's Avatar
    Join Date
    Nov 2013
    Location
    Tampa Bay Area, FL
    Posts
    4
    Post Thanks / Like
    Can some one tell me what size and quantity I should buy of Clecos. Is a certain brand or type better?
    Last edited by Jazzman442; 11-08-2013 at 08:03 AM.

  14. #14
    PLATNUM Supporting Member
    wallace18's Avatar
    Join Date
    Apr 2012
    Location
    Trenton, Florida
    Posts
    5,381
    Post Thanks / Like
    Mike Everson of replica parts here on the forum sells a kit at a very good price. 1/8" will work fine but I bought 3/16 from Summit to help out also.

  15. #15
    Senior Member maczter's Avatar
    Join Date
    Feb 2013
    Location
    Xenia, OH
    Posts
    277
    Post Thanks / Like
    Blog Entries
    1
    2x for the Summit kit, I bought the http://www.summitracing.com/parts/sum-g1850/overview/.
    FFR HR #530
    Race car theme, Tim Whitaker roll bar, Autometer Autolite Gauges, Satin Black, SBC 383/700R4, 8.8 rear with Cobra Brakes, 3.29 gear, Boyd Tank, QA1 springs and shocks,

    My build blog: http://jacks33hotrod.blogspot.com/

  16. #16
    Senior Member kraftee's Avatar
    Join Date
    May 2013
    Location
    Gainesville, Florida
    Posts
    288
    Post Thanks / Like
    Eastwood usually has a nice kit with the tool and ten of the 1/8 clecos on sale - but you will need more 1/8 (copper) clecos - maybe 35 in all. Ten of the 3/16 (gold) clecos should be enough. Don't forget to order 30 or 40 of the 1/4-20 rivnuts from Jeg's. There are lots of places they come in real handy - and the rivnut tool supplied by FFR has a 1/4-20 fitting.
    "If everything seems to be coming your way, you're probably in the wrong lane."

  17. #17
    Junior Member Jazzman442's Avatar
    Join Date
    Nov 2013
    Location
    Tampa Bay Area, FL
    Posts
    4
    Post Thanks / Like
    Thank you all for the information. These are the very helpful tips information that no one tells you about. I want to make sure I have what I need. I am in the process of a total Garage rebuild and getting a lift. Any suggestions on a good lift. Been looking at the Challenger 4 post lift. Any more list of fasteners, cable, paint, specialty tools.
    Thank you all for your suggestions ordering the Clecos tomorrow.

    Also what type size of welder should I use on this build?

  18. #18
    Senior Member kraftee's Avatar
    Join Date
    May 2013
    Location
    Gainesville, Florida
    Posts
    288
    Post Thanks / Like
    Welder? I have a Millermatic 175 Mig welder - but the only time I used it on this build was to fabricate some heavy steel mounts for my 3-point seat belt retractors. Unless you are doing something like that - or using some wild drivetrain & suspension (like In33anity's), you probably won't need a welder. As far as a lift, I guess if you have money to burn, a lift would be okay. I am nowhere near as limber as I used to be, but during my build I have never wished that I had a lift. Some good quality jack stands are really all you need for the fairly limited amount of time you will spend under the car...
    "If everything seems to be coming your way, you're probably in the wrong lane."

  19. #19
    Senior Member Motor_Freak's Avatar
    Join Date
    Feb 2014
    Location
    Los Angeles, CA
    Posts
    116
    Post Thanks / Like
    Lot's of good info and tips. Just placed my order (33HR)!!

  20. #20
    Senior Member H R Lucky's Avatar
    Join Date
    Jun 2012
    Location
    CrossRoads, Pa.
    Posts
    272
    Post Thanks / Like
    congratulations Motor_Freak & welcome to the fun!
    Nevin, AKA H. R. Lucky
    33 Hot Rod sn 524 build started 3/18/2013, First Start-5/09/2015, Go Cart-6/01/2015
    5.0 Coyote engine, 9in. Ford rear, 4 Link, Wilwood 12in. front brakes
    AC, power steering, FFR 17/18in. Hot Rod wheels

  21. #21
    Senior Member Motor_Freak's Avatar
    Join Date
    Feb 2014
    Location
    Los Angeles, CA
    Posts
    116
    Post Thanks / Like
    Quote Originally Posted by H R Lucky View Post
    congratulations Motor_Freak & welcome to the fun!
    Thank you Navin!
    I will start my Build Thread with lots of questions

  22. #22
    Member
    Join Date
    Jan 2015
    Location
    St Catharines Ontario Canada
    Posts
    157
    Post Thanks / Like
    Welcome to the factory five family. Air compressor is a must I would get a 60gal model minimum. The tools you will use is an air ratchet, impact gun, die grinder, and a sander. I used my iPad all the time. I agree with a set of 4 axel stands unless you have a hoist, cordless drill, I had an extra foldable table, good light, and a good set of drill bits the one that has 10 of each bit.

    This is the most important thing is patients, and drywall compound when you forget your patients so you can patch the hole in the wall when you throw a wrench ��. Judy kidding!
    My gas tank is leaking at the sender connection and it is a pain to fill so I would go with Boyd tank.

    Good luck and keep us posted.

  23. #23
    Senior Member Motor_Freak's Avatar
    Join Date
    Feb 2014
    Location
    Los Angeles, CA
    Posts
    116
    Post Thanks / Like
    Any recommendations on Hand Riveter Kit and Air Rivet Tool?

  24. #24

    Join Date
    May 2014
    Location
    Simi Valley, CA
    Posts
    566
    Post Thanks / Like
    FFR included a hand riveter and bags of rivets with the kit. Harbor Freight offers an inexpensive air riveter, but I have seen a few negative comments on its quality. I don't plan to buy one since I will probably be using more screws than rivets, but YMMV.
    Keith

  25. #25
    Ol Skool
    Join Date
    Oct 2013
    Location
    upstate NY
    Posts
    816
    Post Thanks / Like
    I bought the POP nut tool for the Rivnuts when I realized the FFR supplied tool did not have 10-24 mandrels available. I was happier with the POP tool, but the real advantage is leaving one mandrel on one tool and the other for the basic 1/4" aluminum rivnuts. I also bought deep draw rivnuts and some different types to play with. I used more rivnuts than indicated by the kit. As for air riveting it is handy for the 3/16" rivets where it fits. I found a non pivoting head manual tool with good long handles. Every pivoting head I've used has poor leverage for the bigger rivets. A word of caution...Stainless threads require lubrication or an oxide layer to prevent seizing .

  26. #26
    Senior Member Motor_Freak's Avatar
    Join Date
    Feb 2014
    Location
    Los Angeles, CA
    Posts
    116
    Post Thanks / Like
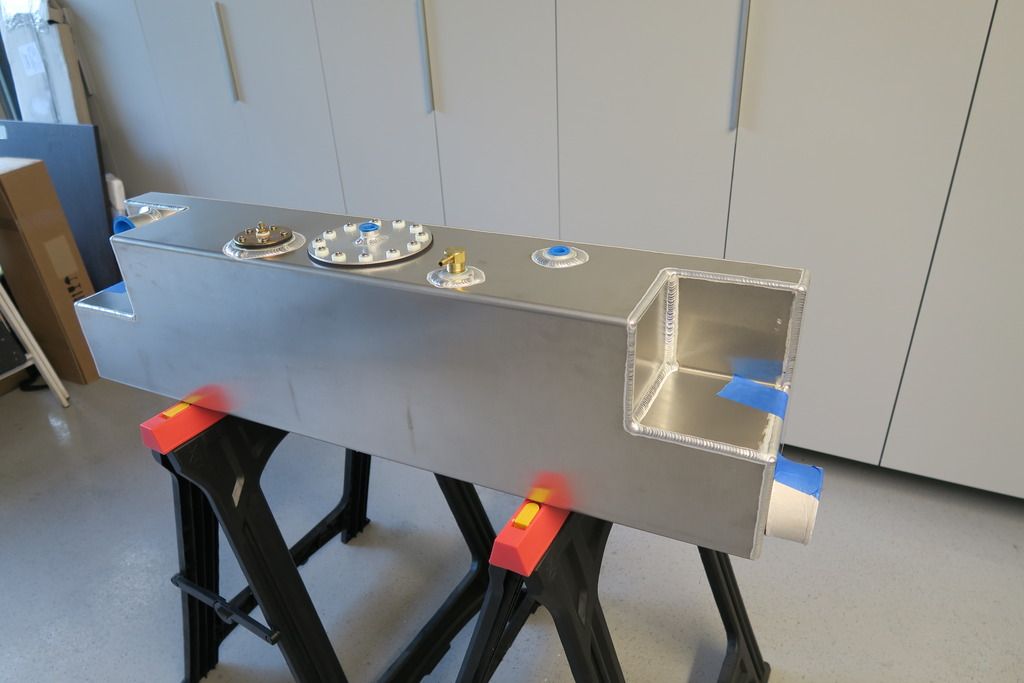
    Just received Boyd tank today, man it's piece of art!


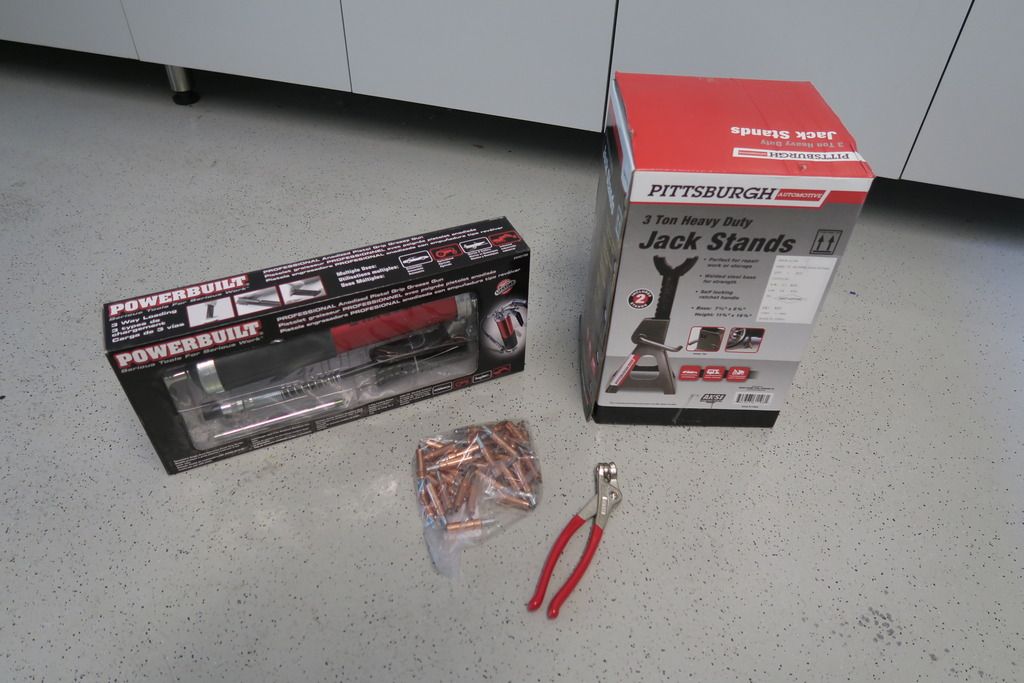
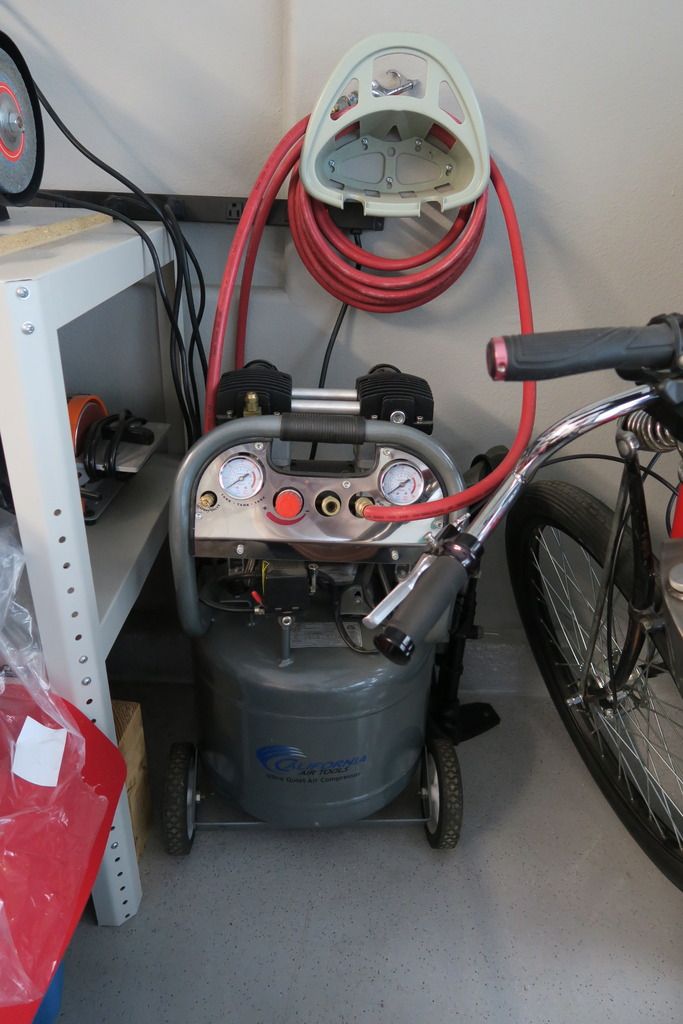
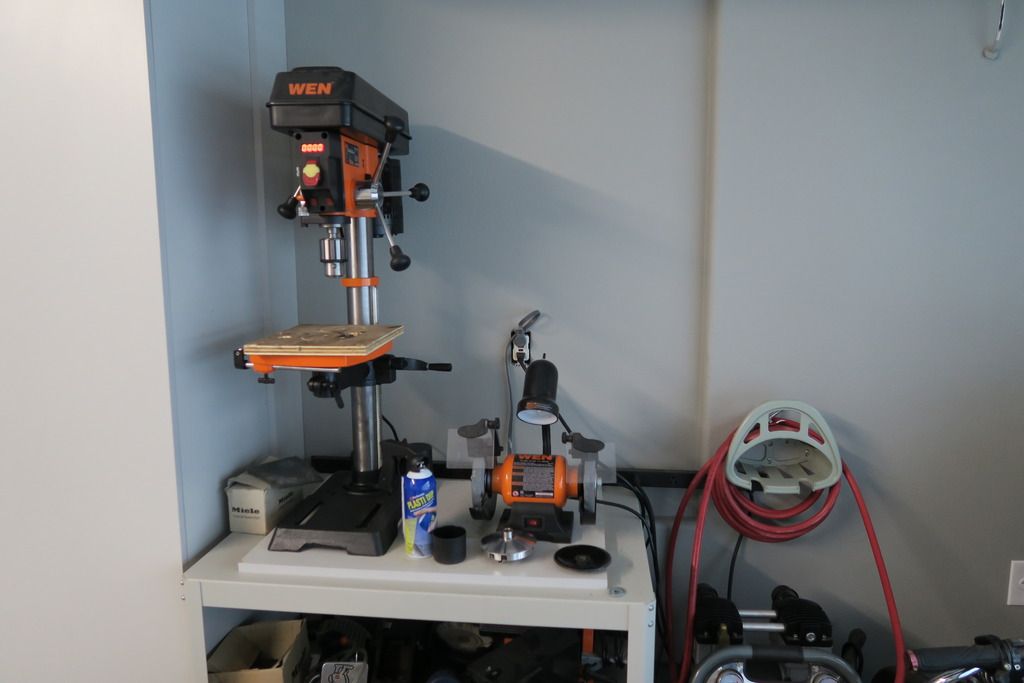
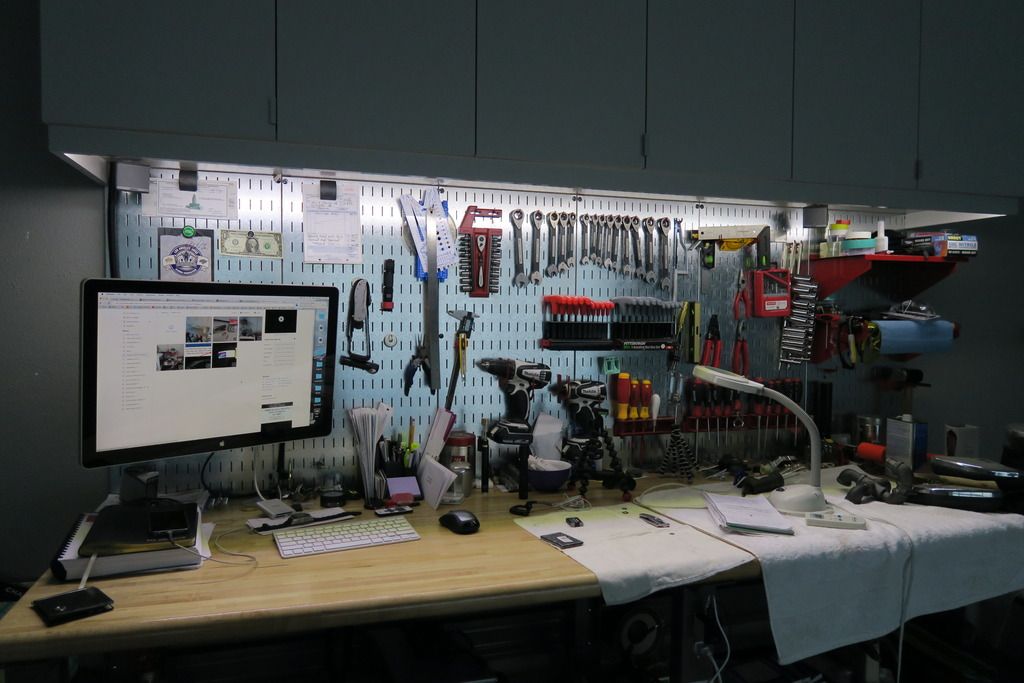
    As of tools, I have small air compressor and many air tools. Clecos arrived yesterday. Here is my work bench!


  27. #27
    Senior Member Motor_Freak's Avatar
    Join Date
    Feb 2014
    Location
    Los Angeles, CA
    Posts
    116
    Post Thanks / Like
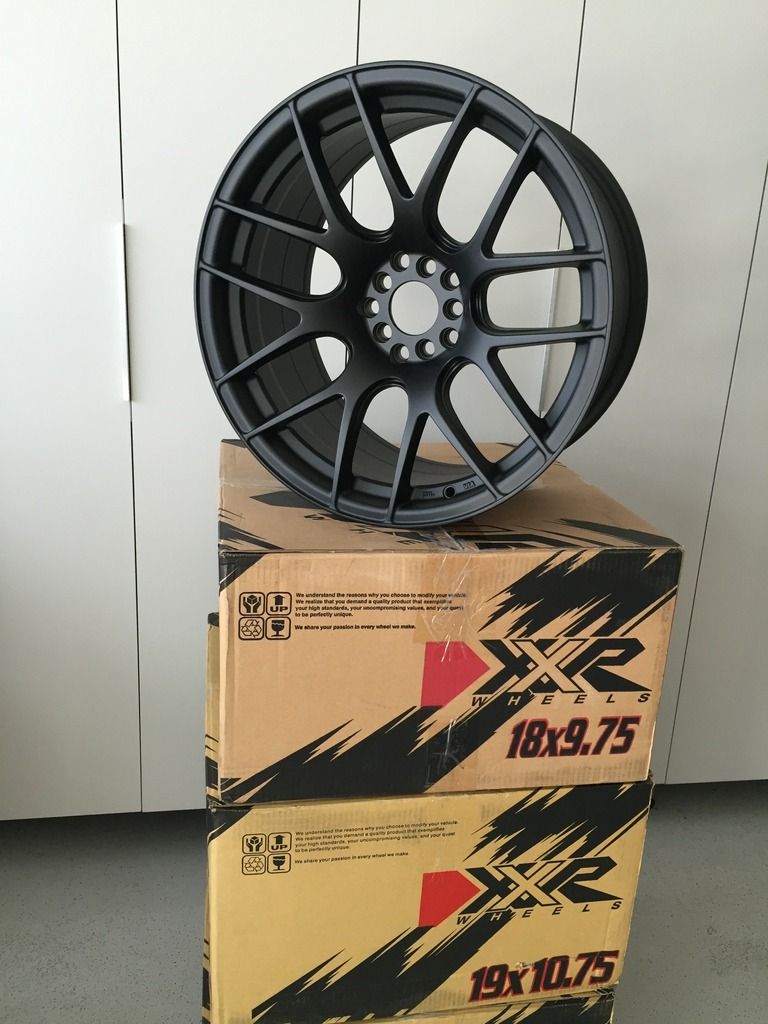
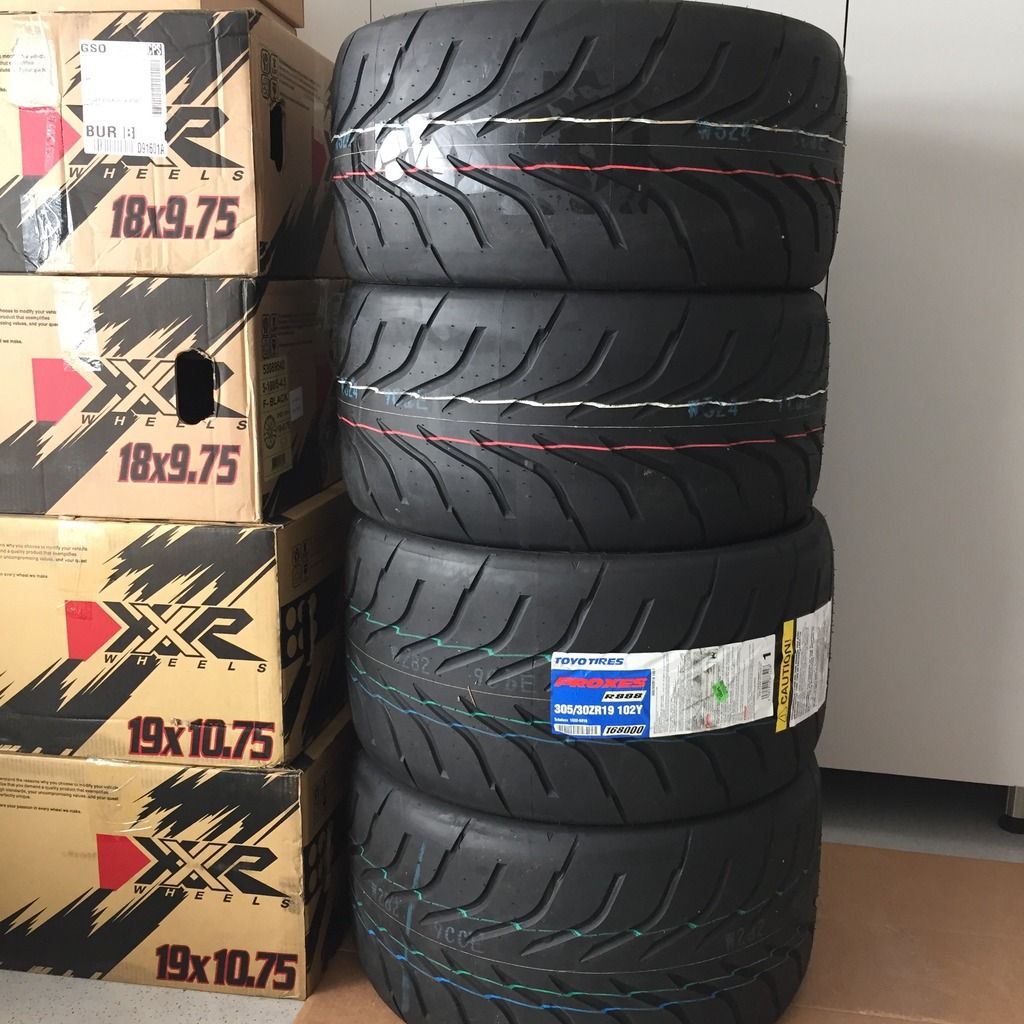
    Wheels are here! I guess I have to start new build thread..


  28. #28
    Senior Member Motor_Freak's Avatar
    Join Date
    Feb 2014
    Location
    Los Angeles, CA
    Posts
    116
    Post Thanks / Like
    Toyo Proxes R888


  29. #29
    Senior Member
    Join Date
    Aug 2015
    Posts
    150
    Post Thanks / Like
    Those wheels and tires look Great Motor Freak. I look forward to watching your build thread.

  30. #30
    Senior Member Motor_Freak's Avatar
    Join Date
    Feb 2014
    Location
    Los Angeles, CA
    Posts
    116
    Post Thanks / Like
    Thanks Gene!

  31. #31
    Junior Member
    Join Date
    May 2016
    Posts
    10
    Post Thanks / Like
    Motor_Freak, I see you are in LA. Please let me know when you receive your kit, I am in the planning process and since I live in OC, would be good to have someone locally to bounce things off of. I did post some questions about the California SB100 process and whether or not I am going to fit in the 33 (6'4" 220#'s) and still use a manual transmission. No real good answers to the fitment issue, so I may be taking a gamble unless someone with a completed car gives me the opportunity to sit in it.

    Congratulations and good luck with your build.

  32. #32
    Senior Member Motor_Freak's Avatar
    Join Date
    Feb 2014
    Location
    Los Angeles, CA
    Posts
    116
    Post Thanks / Like
    Mpdm3, kit delivery scheduled on Aug 15-20. I will let you know once I put few things together and you can test fit.

  33. #33
    Senior Member Motor_Freak's Avatar
    Join Date
    Feb 2014
    Location
    Los Angeles, CA
    Posts
    116
    Post Thanks / Like
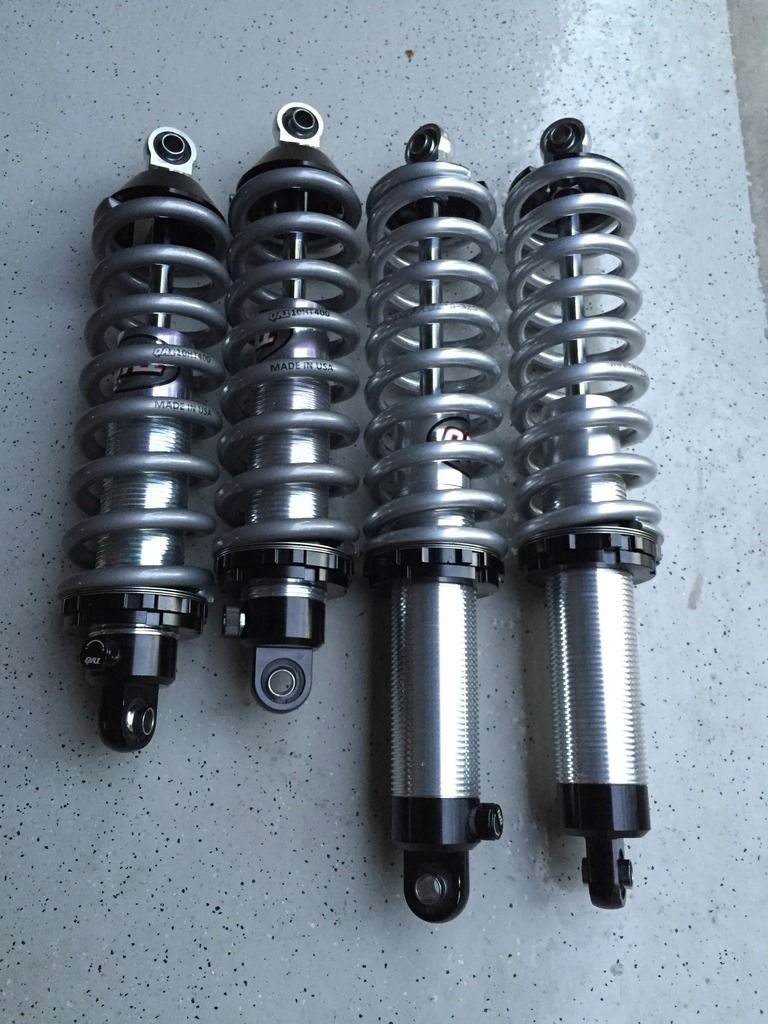
    Package from Dan Ruth is here. QA1 kit UltraRide.


  34. #34
    Senior Member jayguy's Avatar
    Join Date
    Feb 2011
    Location
    Las Vegas
    Posts
    234
    Post Thanks / Like
    Nice!

  35. #35
    Senior Member Motor_Freak's Avatar
    Join Date
    Feb 2014
    Location
    Los Angeles, CA
    Posts
    116
    Post Thanks / Like
    Here is my BUILD THREAD

Posting Permissions

  • You may not post new threads
  • You may not post replies
  • You may not post attachments
  • You may not edit your posts
  •  

Martin's Dent and Collision Shop

Visit our community sponsor