FormaCars

Visit our community sponsor

Thanks Thanks:  0
Likes Likes:  0
Page 1 of 2 12 LastLast
Results 1 to 40 of 61

Thread: Adam's 818R Turnkey Build

  1. #1
    Senior Member
    Join Date
    Sep 2011
    Location
    Wareham + Bow
    Posts
    667
    Post Thanks / Like

    Adam's 818R Turnkey Build

    A few weeks back we began our turnkey build that we have had planned for the past year with our customer.
    This is going to be a full time track car, so it gave us an opportunity to take a different direction in the donor build as compared to most of the 818S donor builds we do.

    Build Components + Donor Details:
    Weak Link Package
    Stage 2 Package


    Drivetrain:
    CM FX300 Clutch
    New Subaru Single Mass Flywheel
    Upgraded Diff- TBA

    Suspension/Chassis:
    Roll Center Bump Steer Kit
    Rebuild Wheel Bearings
    Upgraded Sway Bar Bushings
    Adjustable Rear Lateral Link Kit

    Engine:
    Stage 2-
    Downpipe, Intercooler, etc
    GS Air Oil Separator
    GMS Aluminum Radiator

    Brakes:
    Stainless Lines
    Upgraded Pads
    Upgraded Rotors

    Fuel: TBA


    Safety: TBA

    Aero:
    FFR Diffuser
    FFR Wing


    Wheels/Tires: Enkei RPF1

    Once the back ordered ball joints come in from FFR we will have this up as a roller


    Follow us in this build thread to see our progress on this 818R.
    Kyle our lead tech and builder will be providing weekly build updates as we progress on this 818R.

    Thanks,
    Andrew
    AJW

  2. #2
    PLATNUM Supporting Member
    wallace18's Avatar
    Join Date
    Apr 2012
    Location
    Trenton, Florida
    Posts
    5,381
    Post Thanks / Like
    Looks good. Should be a cool build.

  3. #3
    Senior Member
    Join Date
    Sep 2011
    Location
    Wareham + Bow
    Posts
    667
    Post Thanks / Like
    Thanks Tom

  4. #4
    fasterer and furiouser longislandwrx's Avatar
    Join Date
    Aug 2012
    Location
    Long Island
    Posts
    2,540
    Post Thanks / Like
    Blog Entries
    6
    Cool, looking forward to seeing how you do your interior sheetmetal.
    A well stocked beverage fridge is the key to any successful project.

  5. #5
    Senior Member C.Plavan's Avatar
    Join Date
    Mar 2011
    Location
    Clovis, Ca
    Posts
    2,225
    Post Thanks / Like
    Nice- Now help me figure out what additional harnesses I need to fire up your motor
    Thanks- Chad
    818R-SOLD!!!- Go Karted 7/20/14/ Officially raced NASA ST2- 2/28/15
    2016 Elan NP01 Prototype Racecar Chassis #20
    1969 Porsche 911ST Vintage Race Car
    1972 Porsche 911T (#'s matching undergoing nut & bolt resto in my garage)

  6. #6
    Member
    Join Date
    Oct 2013
    Posts
    46
    Post Thanks / Like
    Today we received the back ordered ball joints and headlights. Looking forward to get it rolling and running the brake and coolant lines.

    I am currently working on modifying the wrx harness to work in the 818. I chose to extend the complete front section to as much of the wrx components as possible.

    Up to now we did all the panels. Installed the pedal box and throttle pedal. The brake and clutch masters have been installed. Some minor modifications to the motor including removing the air pump system and heat wrapping the exhaust manifold and up pipe.

  7. #7
    Senior Member AZPete's Avatar
    Join Date
    Feb 2011
    Location
    Scottsdale, AZ
    Posts
    2,374
    Post Thanks / Like
    Kyle, can you please post a photo of your wrapped manifold? I wondering if I should wrap my Perrin EL headers (from AJW).
    818S/C : Chassis #25 with 06 WRX 2.5 turbo, ABS, cruise, PS, A/C, Apple CarPlay, rear camera, power windows & locks, leather & other complexities. Sold 10/19 with 5,800 miles.
    Mk3 Roadster #6228 4.6L, T45, IRS, PS, PB, ABS, Cruise, Koni's, 17" Halibrands, red w/ silver - 9K miles then sold @ Barrett-Jackson Jan 2011 (got back cash spent).

  8. #8
    Member
    Join Date
    Oct 2013
    Posts
    46
    Post Thanks / Like
    Quote Originally Posted by AZPete View Post
    Kyle, can you please post a photo of your wrapped manifold? I wondering if I should wrap my Perrin EL headers (from AJW).
    Here is the factory manifold wrapped. The outer heat shields will be used also.
    factory header wrap..jpg

    The motor on the left is a Perrin header that is wrapped.
    header wrap.jpg

    Also we used ThermoTec Cool It wrap on both.

  9. #9
    Member
    Join Date
    Oct 2013
    Posts
    46
    Post Thanks / Like
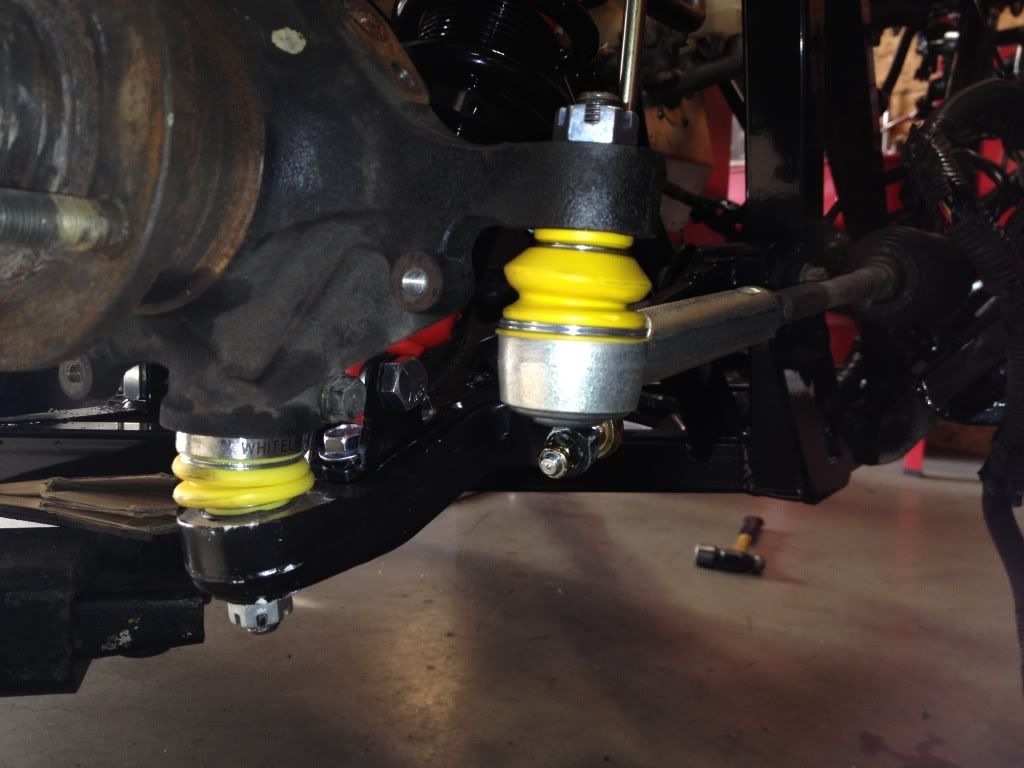
    Now that we received some of the back order items we are working to get it closer to get it rolling. We car still waiting on getting some of the items back from powder coating. I was able to get the front upper ball joints installed and the upper arms installed at track height. The front shocks have been installed. Also have the Whiteline Roll Center Bump Steer Kit installed.


  10. #10
    Member
    Join Date
    Oct 2013
    Posts
    46
    Post Thanks / Like
    Front and rear brake lines are done. Clutch line has been run. Powder coated rear suspension components and assembled. Added Killer B oil pan and pick up. Fuel tank has been swapped.


  11. #11
    Senior Member
    Join Date
    Jun 2011
    Posts
    241
    Post Thanks / Like
    Which rear lat links and rta did you go with?

  12. #12
    Member
    Join Date
    Oct 2013
    Posts
    46
    Post Thanks / Like
    They are from OBX.

  13. #13
    Member
    Join Date
    Oct 2013
    Posts
    46
    Post Thanks / Like
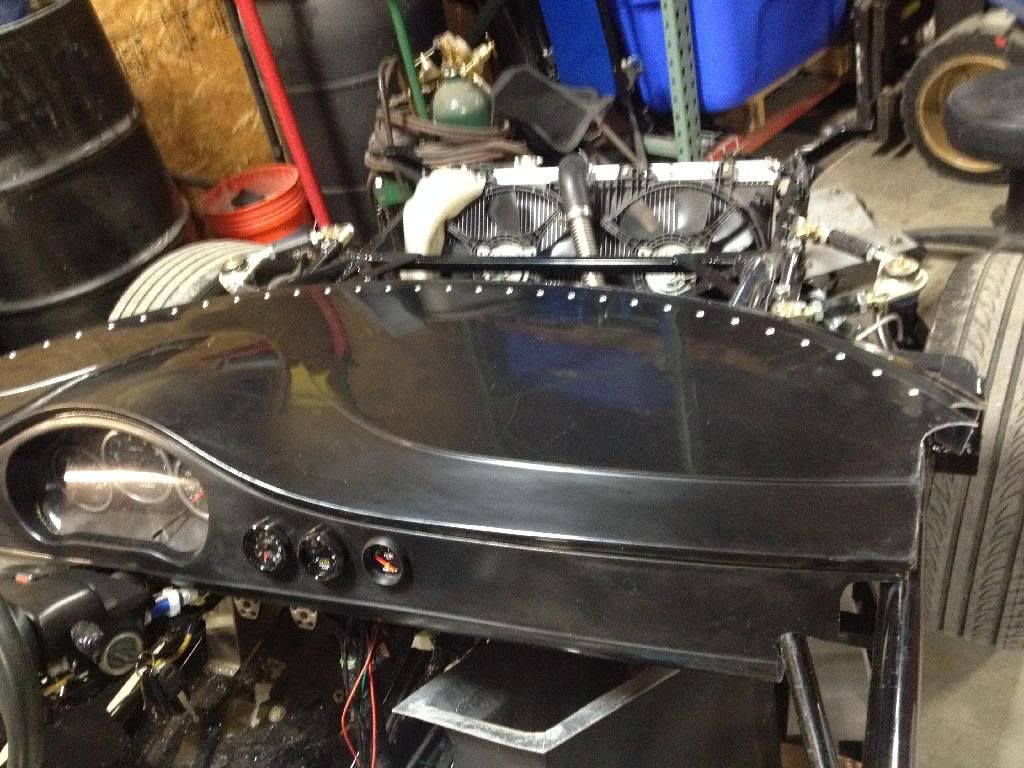
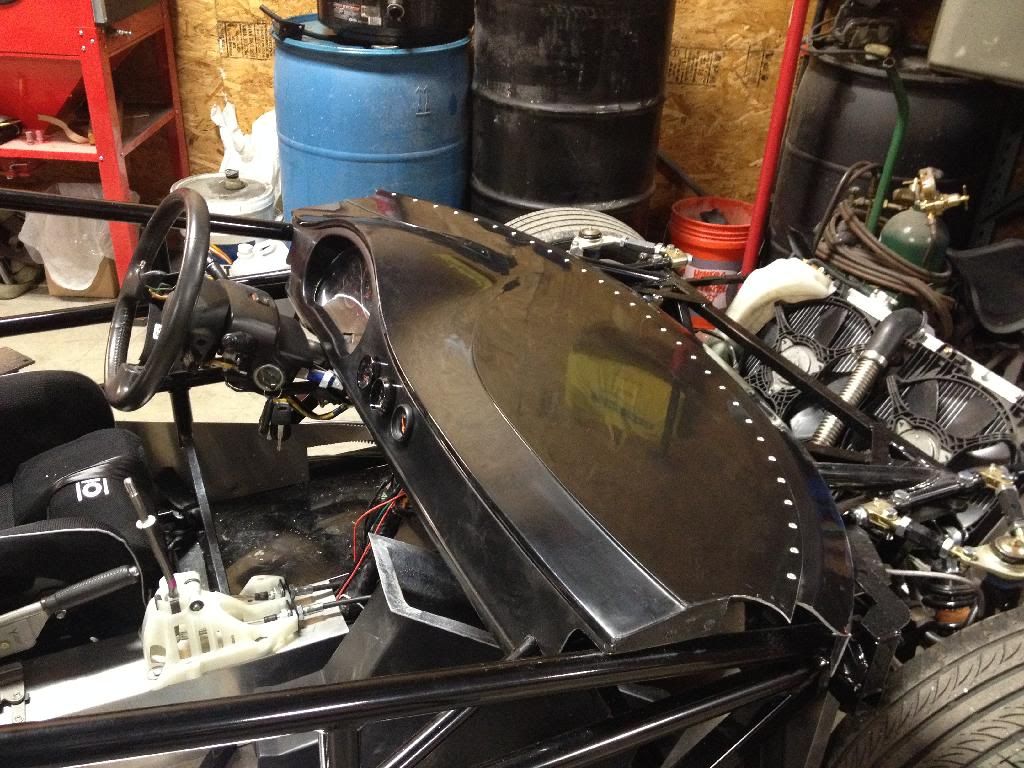
    update. Most of the wiring have been completed. It is up and running. The dash has been installed with addition of 3 gauges. Boost, wide band o2, and fuel. Next major task is adding the body panels on.


  14. #14
    Senior Member
    Join Date
    Sep 2011
    Location
    Wareham + Bow
    Posts
    667
    Post Thanks / Like
    This weeks progress;

    Content to come here are a few (lousy) cell phone pictures

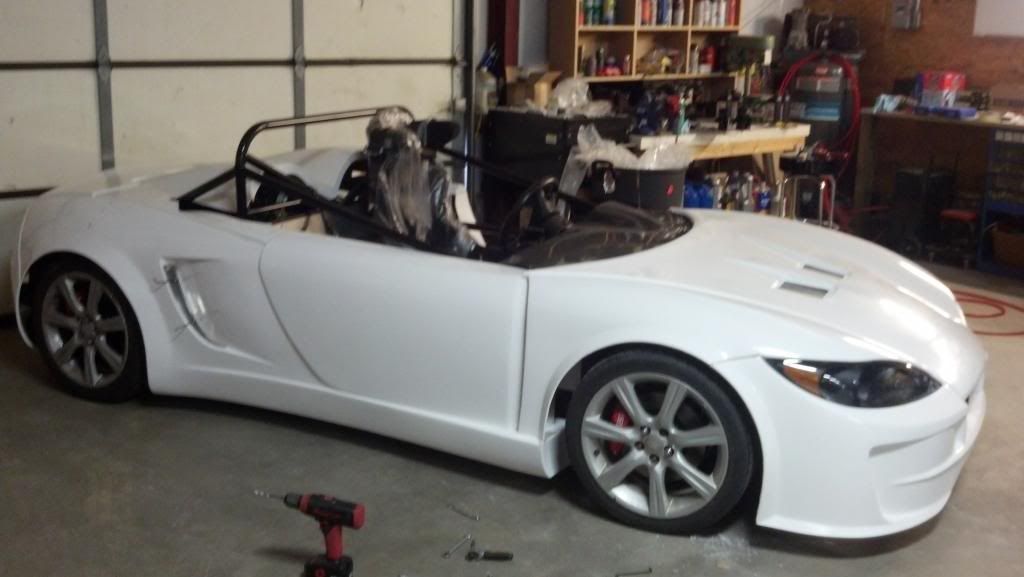
    Body Panels Installed
    Fire System Installed
    Seat Install Finalized


  15. #15
    Member
    Join Date
    Oct 2013
    Posts
    46
    Post Thanks / Like
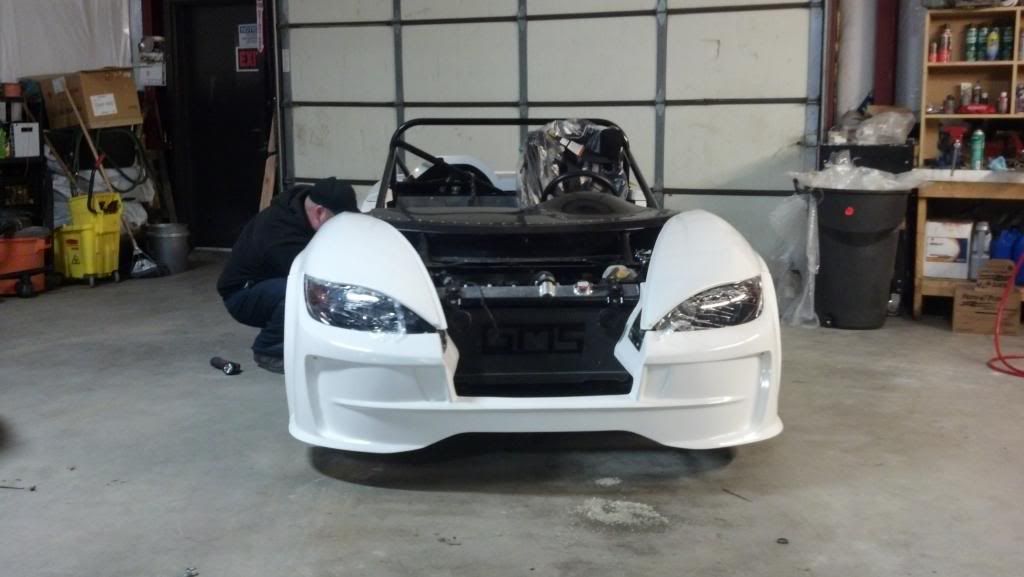
    More body panels have been added. The front splitter and rear diffuser are installed.


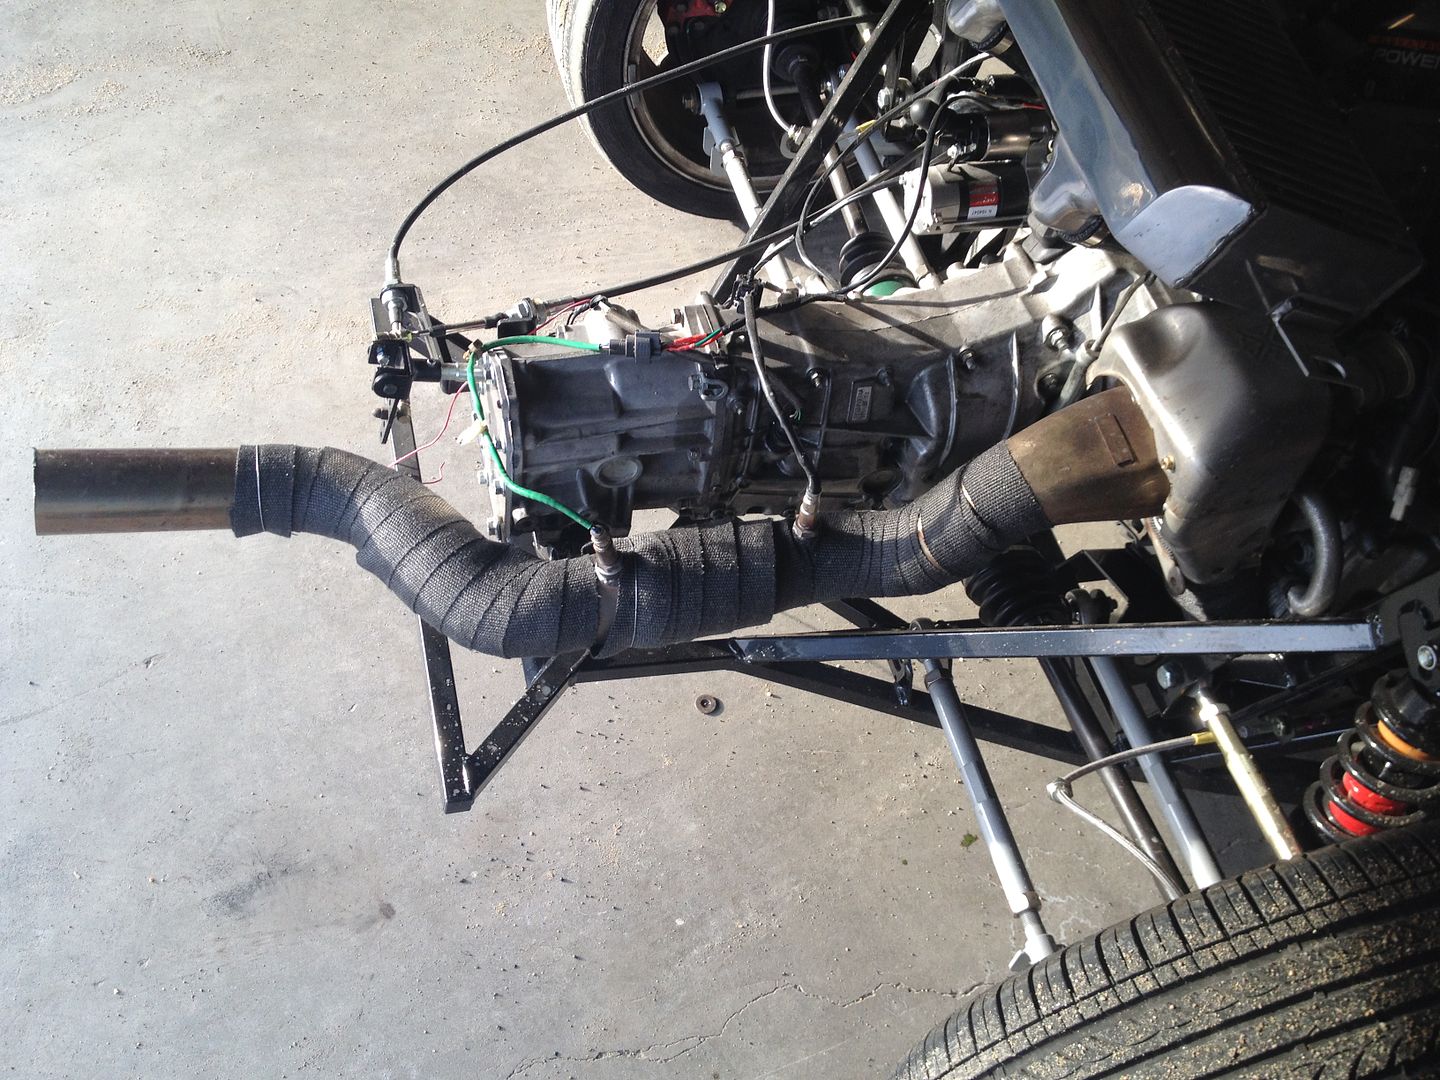
    Here is the custom exhaust that was made for it to have rear exit with a Cat and short race muffler also have wide band O2 and the rear O2 added into it.


  16. #16
    fasterer and furiouser longislandwrx's Avatar
    Join Date
    Aug 2012
    Location
    Long Island
    Posts
    2,540
    Post Thanks / Like
    Blog Entries
    6
    I thought the manual said if you use the front splitter you don't need the louvered aluminum piece, but looking at that aluminum it appears the side pieces attach to it so at minimum you'd need to cut it.

    What do you think?

    also can you snap a picture of how you trimmed the windscreen mount piece to fit over the frame? thanks!
    A well stocked beverage fridge is the key to any successful project.

  17. #17
    Member
    Join Date
    Oct 2013
    Posts
    46
    Post Thanks / Like
    The manual did say it was not needed but it made more sense to use because it seems that it would help direct the air into to radiator. It didn't look correct when I mocked it up.


  18. #18
    fasterer and furiouser longislandwrx's Avatar
    Join Date
    Aug 2012
    Location
    Long Island
    Posts
    2,540
    Post Thanks / Like
    Blog Entries
    6
    Awesome thank you. So your's is not sitting on the "x" braces? I wasn't sure if it needed to be trimmed until it sat on there.
    A well stocked beverage fridge is the key to any successful project.

  19. #19
    Senior Member Bob_n_Cincy's Avatar
    Join Date
    Sep 2012
    Location
    Cincinnati OH
    Posts
    3,903
    Post Thanks / Like
    I was told at one time that is was just 4 big bolts to swap R & S windshields. I'm not seeing that here. What do others think?
    Bob

  20. #20
    Member
    Join Date
    Jul 2013
    Location
    Red Bluff, Ca
    Posts
    47
    Post Thanks / Like
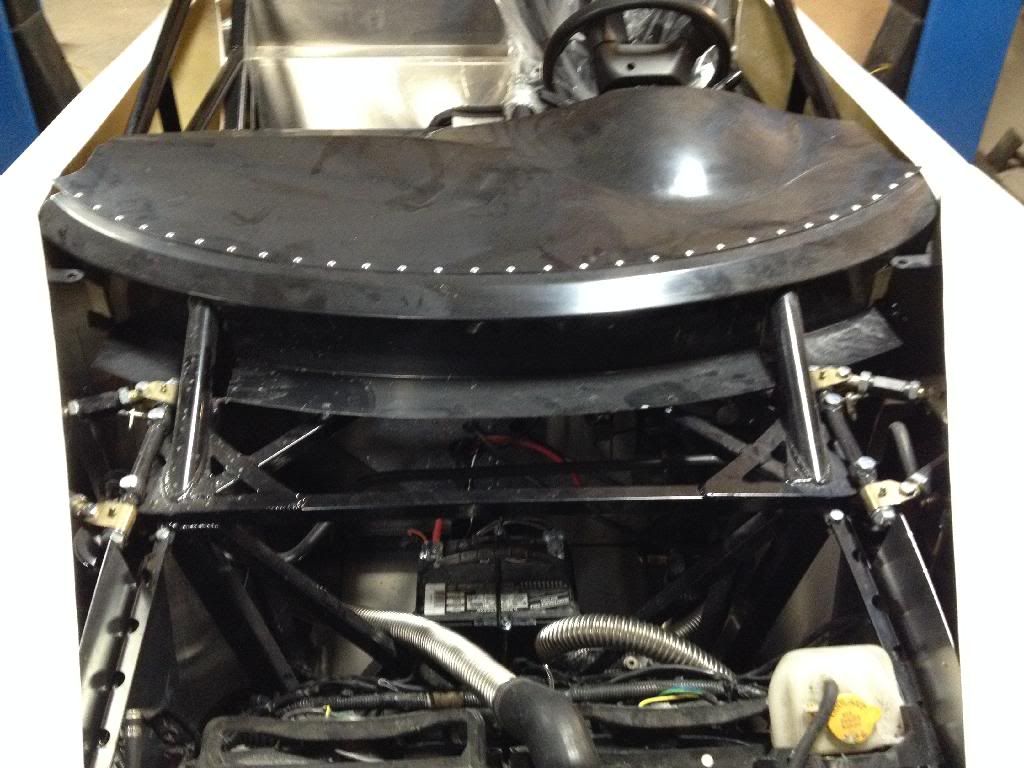
    How are you getting to your brake and clutch masters?

  21. #21
    Senior Member FFRSpec72's Avatar
    Join Date
    Feb 2011
    Location
    Kirkland, WA
    Posts
    2,255
    Post Thanks / Like
    Quote Originally Posted by Bob_n_Cincy View Post
    I was told at one time that is was just 4 big bolts to swap R & S windshields. I'm not seeing that here. What do others think?
    Bob
    The windshield is much like the roadster, a quick disconnect guide and push pins should work, it will be just getting the quick disconnect guide machined as it will be where the windshield supports slot into on the frame, once in the guide put the push pins in and your set. This is how I set my challenge car up as racing I use the speed racer bubble and when I take it on the road I use the windshield to avoid the bugs in the mouth.
    Tony Nadalin
    2018 SOVREN Big Bore Champion
    2015 SCCA Oregon Region VP3 Champion
    2012 ICSCC ITE Class Champion
    FFR MkII Challenge Car, Spec Racer, Street Legal, SCCA, ICSCC and NASA Racing
    818R Build in progress

  22. #22
    Member
    Join Date
    Oct 2013
    Posts
    46
    Post Thanks / Like
    Quote Originally Posted by longislandwrx View Post
    Awesome thank you. So your's is not sitting on the "x" braces? I wasn't sure if it needed to be trimmed until it sat on there.
    It will be sits on the X part but its currently not bolted down.

  23. #23
    Member
    Join Date
    Oct 2013
    Posts
    46
    Post Thanks / Like
    Quote Originally Posted by Bob_n_Cincy View Post
    I was told at one time that is was just 4 big bolts to swap R & S windshields. I'm not seeing that here. What do others think?
    Bob
    I think you could swap windshields on the S but it wouldn't be possible on the R unless you added in the mounting points to the frame.

  24. #24
    Member
    Join Date
    Oct 2013
    Posts
    46
    Post Thanks / Like
    Quote Originally Posted by drdracing View Post
    How are you getting to your brake and clutch masters?
    The dash and cowl are held down by rivet nuts and it lifts up to gain access.

  25. #25
    Senior Member
    Join Date
    Sep 2011
    Location
    Wareham + Bow
    Posts
    667
    Post Thanks / Like
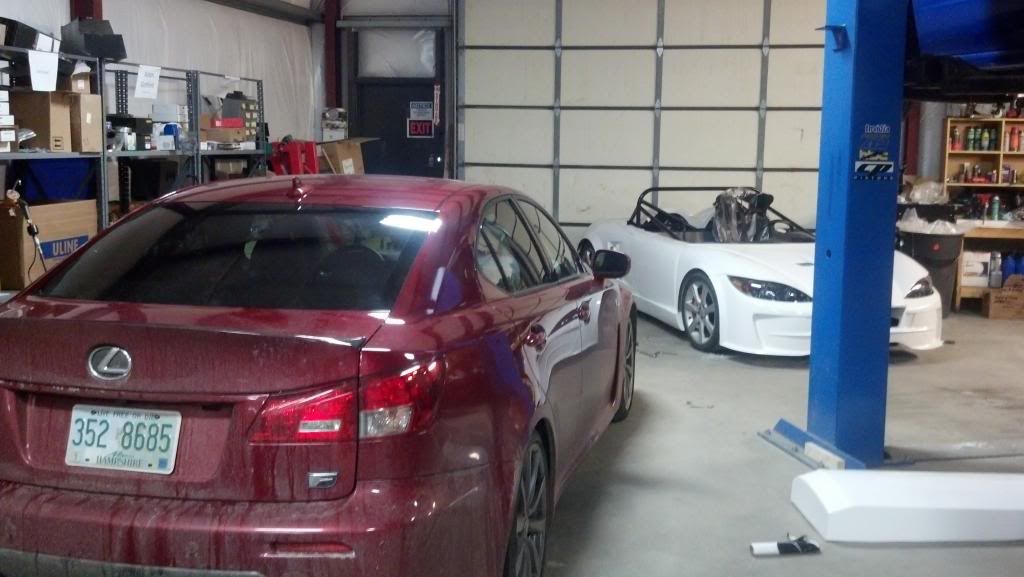
    Good Afternoon folks, here are some updated photos of Adams turnkey!


  26. #26
    Senior Member
    Join Date
    Sep 2011
    Location
    Wareham + Bow
    Posts
    667
    Post Thanks / Like


  27. #27
    Senior Member RM1SepEx's Avatar
    Join Date
    Jul 2011
    Location
    Freeport, ME
    Posts
    3,801
    Post Thanks / Like
    That loks EXACTLY like my exhaust plan for my 818S! I NEED audio... will it be acceptable for the street?

    bellmouth, 3 inch tubing, high flow mini cat, out through the rear metal grating, I have the rear diffuser too so that's the most logical exhaust exit.

    I notice in the front that you used the front splitter AND the aluminum floor with the vents open... can you show us more in that area?

    BTW my Cobb arived today, Thanks AJW
    Dan

    818S #17 Picked up 8/1/13 First start 11/1/13 Go Kart 3/28/14

  28. #28
    Mechie3's Avatar
    Join Date
    May 2012
    Location
    Indianapolis
    Posts
    5,174
    Post Thanks / Like
    Does your engine cover fit with that tmic?
    Zero Decibel Motorsports
    Check out my new website!
    www.zerodecibelmotorsports.com
    www.facebook.com/zero.decibel.motorsports

  29. #29
    Senior Member
    Join Date
    Sep 2011
    Location
    Wareham + Bow
    Posts
    667
    Post Thanks / Like
    Quote Originally Posted by Mechie3 View Post
    Does your engine cover fit with that tmic?
    Yes it does!

  30. #30
    Senior Member
    Join Date
    Sep 2011
    Location
    Wareham + Bow
    Posts
    667
    Post Thanks / Like
    Quote Originally Posted by RM1SepEx View Post
    That loks EXACTLY like my exhaust plan for my 818S! I NEED audio... will it be acceptable for the street?

    bellmouth, 3 inch tubing, high flow mini cat, out through the rear metal grating, I have the rear diffuser too so that's the most logical exhaust exit.

    I notice in the front that you used the front splitter AND the aluminum floor with the vents open... can you show us more in that area?

    BTW my Cobb arived today, Thanks AJW
    Ask and you shall receive!


  31. #31
    Mechie3's Avatar
    Join Date
    May 2012
    Location
    Indianapolis
    Posts
    5,174
    Post Thanks / Like
    What TMIC is that?
    Zero Decibel Motorsports
    Check out my new website!
    www.zerodecibelmotorsports.com
    www.facebook.com/zero.decibel.motorsports

  32. #32
    Senior Member
    Join Date
    Oct 2012
    Location
    Michigan
    Posts
    102
    Post Thanks / Like
    What's the price range for a build like this? Though I'd want to build it myself, the options are very similar to what I'd be doing. I even like the sound of that AJW exhaust!

  33. #33
    Senior Member C.Plavan's Avatar
    Join Date
    Mar 2011
    Location
    Clovis, Ca
    Posts
    2,225
    Post Thanks / Like
    I would call that an expensive "bumper exhaust". One tap,and it will ruin the weekend. Anyway to move it to the side?
    Thanks- Chad
    818R-SOLD!!!- Go Karted 7/20/14/ Officially raced NASA ST2- 2/28/15
    2016 Elan NP01 Prototype Racecar Chassis #20
    1969 Porsche 911ST Vintage Race Car
    1972 Porsche 911T (#'s matching undergoing nut & bolt resto in my garage)

  34. #34
    Senior Member
    Join Date
    Sep 2011
    Location
    Wareham + Bow
    Posts
    667
    Post Thanks / Like
    Quote Originally Posted by C.Plavan View Post
    I would call that an expensive "bumper exhaust". One tap,and it will ruin the weekend. Anyway to move it to the side?
    It can 100% be moved, we could even create stacks if a customer wanted them.

  35. #35
    Senior Member
    Join Date
    Sep 2011
    Location
    Wareham + Bow
    Posts
    667
    Post Thanks / Like


  36. #36
    Senior Member
    Join Date
    Sep 2011
    Location
    Wareham + Bow
    Posts
    667
    Post Thanks / Like


    and a quick video!


  37. #37
    Senior Member
    Join Date
    May 2012
    Location
    Suisun City, CA
    Posts
    851
    Post Thanks / Like
    Any pictures of the wing mount? Or is it just sitting on there?
    818S - #67 (SOLD IT!)
    Delivered: 18 November 2013
    Go Karted: 29 December 2013
    Titled/Registered: 28 March 2014
    Finished: NEVER!
    341 hp @ 4844 RPM / 389 tq @ 3717 RPM

  38. #38
    Senior Member Bob_n_Cincy's Avatar
    Join Date
    Sep 2012
    Location
    Cincinnati OH
    Posts
    3,903
    Post Thanks / Like
    Great job Adam
    In the video your head looks to high.
    How tall are you and can you lower the seat?
    Bob

    head.jpg
    Last edited by Bob_n_Cincy; 04-04-2014 at 08:11 AM.

  39. #39
    Senior Member RM1SepEx's Avatar
    Join Date
    Jul 2011
    Location
    Freeport, ME
    Posts
    3,801
    Post Thanks / Like
    That's what I noticed too, I hope that the customer is a lot shorter than the driver. Need to do straight edge test from roll bar over his head and to the top of the shock tower and A arm structure...
    Dan

    818S #17 Picked up 8/1/13 First start 11/1/13 Go Kart 3/28/14

  40. #40
    Senior Member C.Plavan's Avatar
    Join Date
    Mar 2011
    Location
    Clovis, Ca
    Posts
    2,225
    Post Thanks / Like
    Nice work. I would love to see how the rear wing is mounted. I plan on using the shorter mounts so the wing is not so high.

    Here is my seat height-
    Thanks- Chad
    818R-SOLD!!!- Go Karted 7/20/14/ Officially raced NASA ST2- 2/28/15
    2016 Elan NP01 Prototype Racecar Chassis #20
    1969 Porsche 911ST Vintage Race Car
    1972 Porsche 911T (#'s matching undergoing nut & bolt resto in my garage)

Page 1 of 2 12 LastLast

Posting Permissions

  • You may not post new threads
  • You may not post replies
  • You may not post attachments
  • You may not edit your posts
  •  

Brown County Customs

Visit our community sponsor