BluePrint Engines

Visit our community sponsor

Thanks Thanks:  20
Likes Likes:  104
Page 9 of 25 FirstFirst ... 789101119 ... LastLast
Results 321 to 360 of 967

Thread: Adam's Canadian 13B Rotary 818-SR Build

  1. #321
    Senior Member Canadian818's Avatar
    Join Date
    Nov 2011
    Location
    Edmonton, Alberta
    Posts
    1,378
    Post Thanks / Like
    Quote Originally Posted by Wayne Presley View Post
    They are pretty much Plug and Play via the CAN connections. Hook up 2 wires and everything the ECU sees the dash sees.
    After some reading I think the MXS Strada will be the way to go. I don't need it yet, lots to do, and for initial startup a laptop will suffice. When the time comes Wayne, I'll contact you about a price.

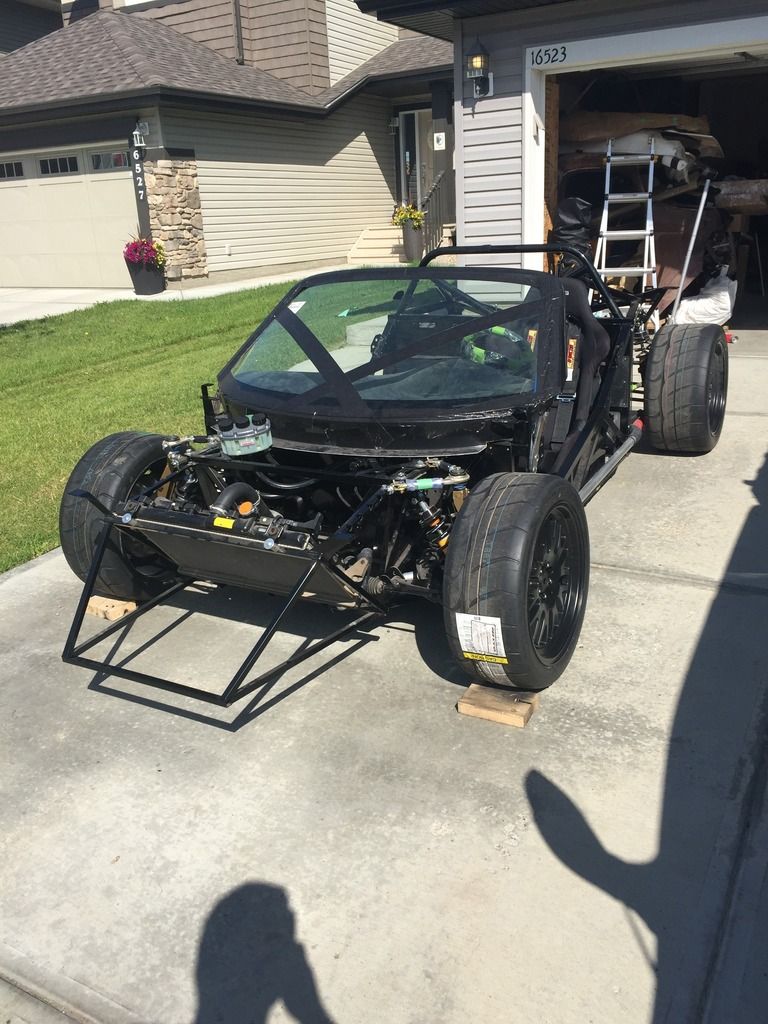
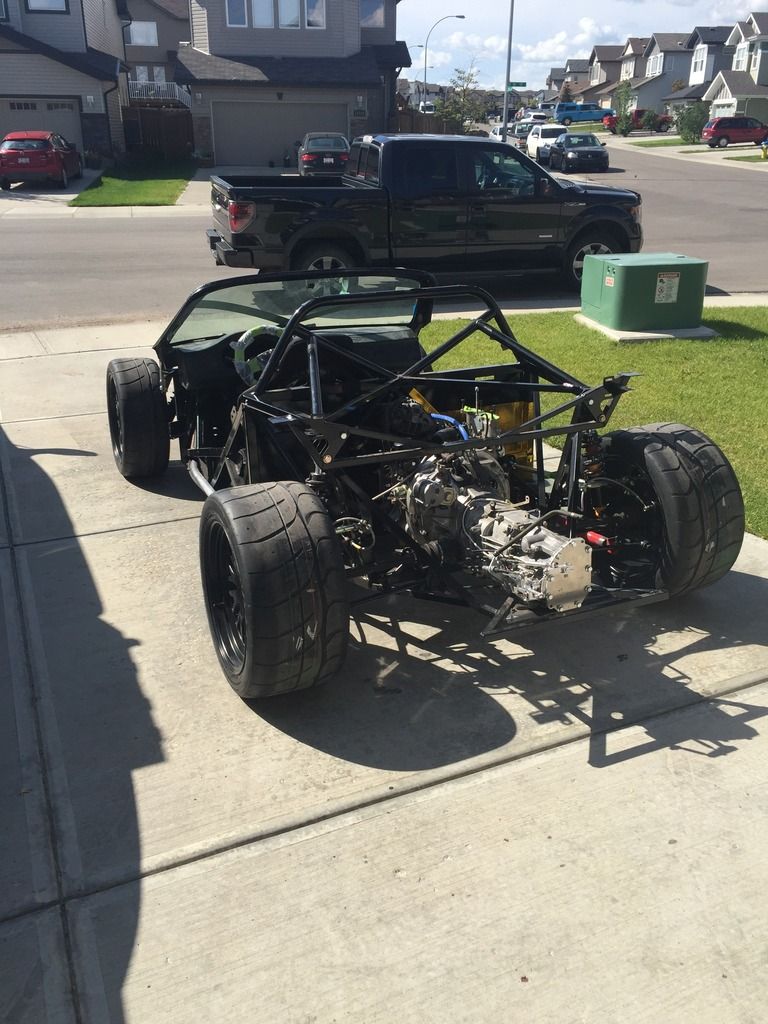
    So I finally put this thing on the ground, and "shut the front door" this thing is low!!! Does everyone just get blown away by that the first time? It's been two days and I still can't believe it when I go out in the garage.


    So I rolled it out in the driveway to start my rough alignment. My garage has a drain in the middle so it's very uneven, everything sits on 3 jack stands. My driveway is perfectly level side to side a an even 3.8 degree slope. Great for adjusting toe, no good for caster, but in my head it should work for camber if the wheel is strait and the chassis and ground are level side to side. However I'm showing -3 degrees front camber before I start adjusting, which from what I've been reading should be impossible. It does however visibly look quite cambered.

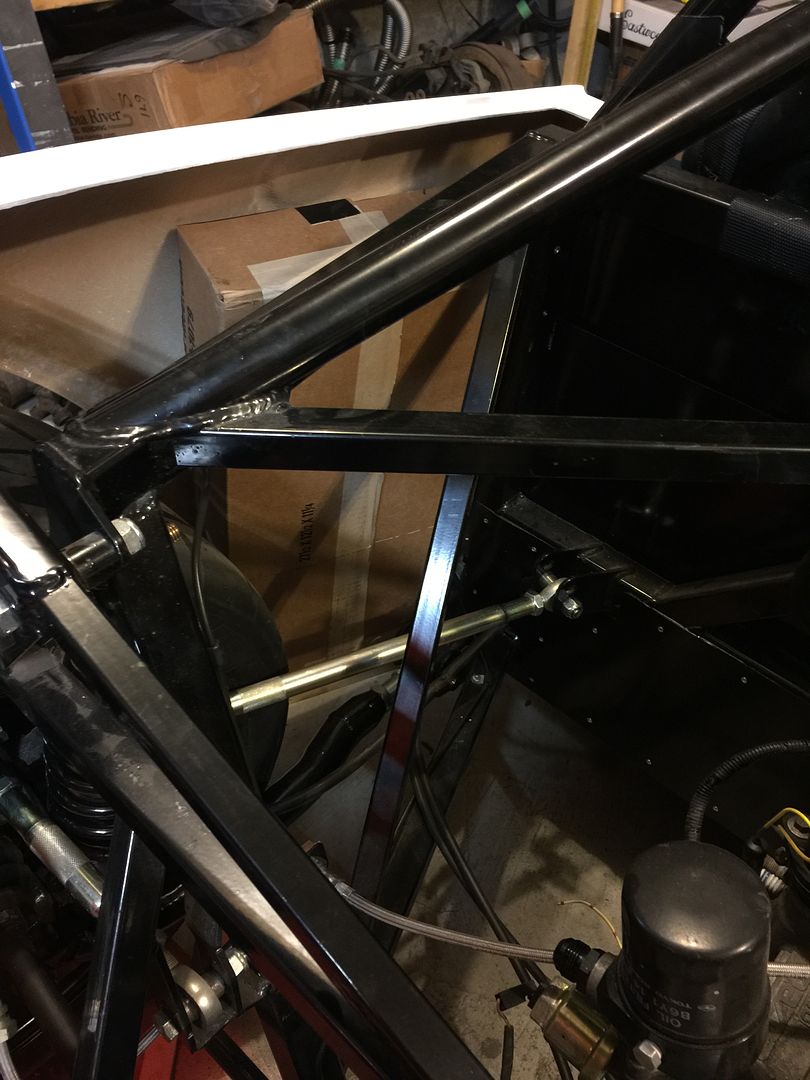
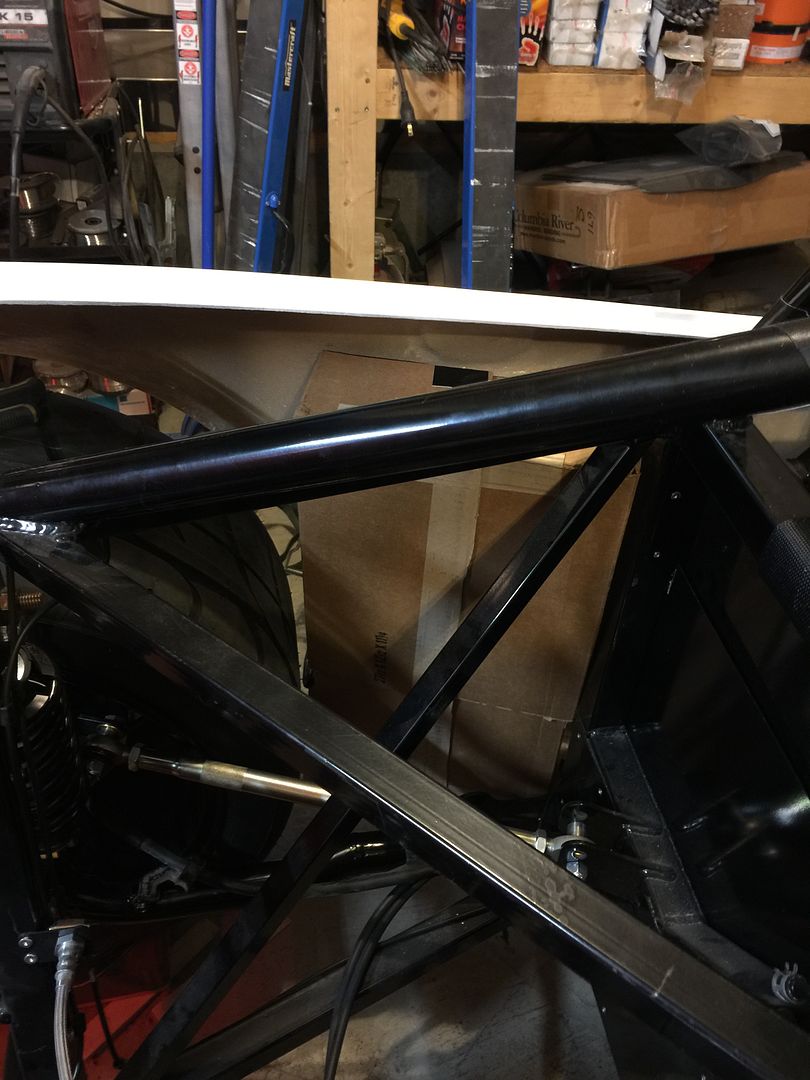
    Also, does anyone else have a taller rear tire then the front? My fronts measure at 25" and my rears at 26", so should I rake the chassis a 1/2"? Since they're taller than most, I figured I should set ride a little higher so the suspension rests where it should. And adjusting ride height is a huge PITA with the wheels on, but it would take forever to take them on and off a dozen times since there's no way of knowing how much to spin them for the desired drop. My current ride height is 5.375" front and 5.875" rear. To get the rear that low the spring collar had to be lowered about 1/2" from Wayne's recommended preload. I'm guessing a combination of tall tire and lighter engine(with turbo off too).

    As always, thoughts and comments are welcome.
    Adam _____ Instagram @PopesProjects____ YouTube Channel
    818 SRX - #91
    Arrived 01/02/2014
    First Start 10/31/2016
    First Drive 05/22/2017
    Registered 10/25/2019 BRAP818

  2. #322
    Moonlight Performance
    Hindsight's Avatar
    Join Date
    May 2014
    Location
    Atlanta
    Posts
    3,402
    Post Thanks / Like
    Congrats on the milestone and yes, literally everyone including myself went "woah" the first time off the jack stands.

    I am running staggered too but I dont think it matters for rude height. I will set the frame with about 1/4" rake.

    When doing alignment, I like to put each tire on a large cement paver. Between that and the tire i put a sandwich of two 1/8" plexiglass (from lowes or HD) with grease in between. Then i get a laser level, the kind that self levels and projects a vertical and horizontal line. I use the horizontal line to find perfect level and then add additional 1/8" plexiglass squares under any tire that needs it untill all 4 are level. Doesnt have to be on the beam, you can measure up or down to the beam from the pavers.

    I was able to get tons of camber too, but prob what you will find is you have little to no caster. Adding caster robs your camber so you have to cut down rear control arm nut tube and the studs to shorten. I need to do that myself, just as soon as I finish the exhaust update. With 3 degrees of caster, I couldnt get more than about -0.75 camber.

    Can't wait to see how this rotary drives. Should be awesome on the track.

  3. #323
    Senior Member Canadian818's Avatar
    Join Date
    Nov 2011
    Location
    Edmonton, Alberta
    Posts
    1,378
    Post Thanks / Like
    Ah, that explains the camber thanks. Maybe I should just take my time and build the car up to level in the garage like you did and get it bang on. In your alignment thread you mentioned that there was a pic of making the rear lateral links parallel, but I couldn't find it.
    Adam _____ Instagram @PopesProjects____ YouTube Channel
    818 SRX - #91
    Arrived 01/02/2014
    First Start 10/31/2016
    First Drive 05/22/2017
    Registered 10/25/2019 BRAP818

  4. #324
    Moonlight Performance
    Hindsight's Avatar
    Join Date
    May 2014
    Location
    Atlanta
    Posts
    3,402
    Post Thanks / Like
    Showing camber setup:
    https://imgur.com/UrbX4Hz

    Caster setup:
    https://imgur.com/cUutzj6

    Getting all tires level:
    https://imgur.com/Y9tY0oH

    What you are looking for:
    First check inside, and zero it out here:
    http://i.imgur.com/Cx7sam2.jpg

    Next check outside and ensure it is still at zero. If so, you are parallel else adjust and recheck.
    https://imgur.com/FL5SiCM

    One more thing: your laser level device should stay in one spot. You can locate it where it will hit all the blocks or cone close. Use some angle iron as shown in the pic to hang the ruler a few inches off each block if you have to in order to hit the beam (though I didnt need to hang it iff on this side but I did on the other side of the car). If you use the angle on all four blocks whether you need it ir not, it keeps the measurements consistent. Man this is hard to explain, esp typing on a phone lol.
    Last edited by Hindsight; 08-05-2016 at 02:39 PM.

  5. #325
    Senior Member wleehendrick's Avatar
    Join Date
    Jul 2012
    Location
    Encinitas, CA
    Posts
    1,653
    Post Thanks / Like
    Blog Entries
    2
    Quote Originally Posted by Canadian818 View Post
    So I finally put this thing on the ground, and "shut the front door" this thing is low!!! Does everyone just get blown away by that the first time? It's been two days and I still can't believe it when I go out in the garage.
    Yup; even though I've had mine rolling before, it's been on jack-stands for a year and I had gotten used to working on it and climbing in it that high. It's not done yet, but a couple weeks ago, I had to drop it down to the ground and rolled it out to the driveway when we put an epoxy floor in the garage, and had the same reaction... this thing's a friggen go-cart!

    Quote Originally Posted by Canadian818 View Post
    Also, does anyone else have a taller rear tire then the front? My fronts measure at 25" and my rears at 26", so should I rake the chassis a 1/2"? Since they're taller than most, I figured I should set ride a little higher so the suspension rests where it should. And adjusting ride height is a huge PITA with the wheels on, but it would take forever to take them on and off a dozen times since there's no way of knowing how much to spin them for the desired drop. My current ride height is 5.375" front and 5.875" rear. To get the rear that low the spring collar had to be lowered about 1/2" from Wayne's recommended preload. I'm guessing a combination of tall tire and lighter engine(with turbo off too).
    I stuck to the recommended tire OD which is 1" larger in the rear: 24" in front and 25" in back (215/40-17 and 255/35-18 rubber) You may have some rubbing issues, particularly that larger. As far as ride height, to keep the suspension geometry the same and provide some additional clearance, setting the ride height 0.5" higher to account for the 1" larger diameter sounds reasonable to me.

  6. #326
    Senior Member Canadian818's Avatar
    Join Date
    Nov 2011
    Location
    Edmonton, Alberta
    Posts
    1,378
    Post Thanks / Like
    Quote Originally Posted by Hindsight View Post
    Showing camber setup:
    https://imgur.com/UrbX4Hz

    Caster setup:
    https://imgur.com/cUutzj6

    Getting all tires level:
    https://imgur.com/Y9tY0oH

    What you are looking for:
    First check inside, and zero it out here:
    http://i.imgur.com/Cx7sam2.jpg

    Next check outside and ensure it is still at zero. If so, you are parallel else adjust and recheck.
    https://imgur.com/FL5SiCM

    One more thing: your laser level device should stay in one spot. You can locate it where it will hit all the blocks or cone close. Use some angle iron as shown in the pic to hang the ruler a few inches off each block if you have to in order to hit the beam (though I didnt need to hang it iff on this side but I did on the other side of the car). If you use the angle on all four blocks whether you need it ir not, it keeps the measurements consistent. Man this is hard to explain, esp typing on a phone lol.
    I appreciate you taking the time to post those pics and explain everything. Believe it or not, I think I understand, lol.

    I imagine that to adjust those arms parallel you adjust the upper trailing arm?
    Adam _____ Instagram @PopesProjects____ YouTube Channel
    818 SRX - #91
    Arrived 01/02/2014
    First Start 10/31/2016
    First Drive 05/22/2017
    Registered 10/25/2019 BRAP818

  7. #327
    Senior Member Canadian818's Avatar
    Join Date
    Nov 2011
    Location
    Edmonton, Alberta
    Posts
    1,378
    Post Thanks / Like
    Quote Originally Posted by wleehendrick View Post
    I stuck to the recommended tire OD which is 1" larger in the rear: 24" in front and 25" in back (215/40-17 and 255/35-18 rubber) You may have some rubbing issues, particularly that larger. As far as ride height, to keep the suspension geometry the same and provide some additional clearance, setting the ride height 0.5" higher to account for the 1" larger diameter sounds reasonable to me.
    Thanks for confirming it sounds right, sometimes things sound good in my head until I say it out loud and see someone's reaction, haha. I have rubbing issues, and that was expected. I have to start cutting to fit, but first I thought an alignment was a good idea so I don't have to clearance it twice.

    It really bugged me that FFR limited us so much on tire size. IMO this car needs its wheelbase extended 4", front and rear wheels an inch forward and rearward respectively and 2" in the cockpit. Since I was not consulted on its design I'm forced to adapt what I feel it should have had to what I was given.
    Adam _____ Instagram @PopesProjects____ YouTube Channel
    818 SRX - #91
    Arrived 01/02/2014
    First Start 10/31/2016
    First Drive 05/22/2017
    Registered 10/25/2019 BRAP818

  8. #328
    Moonlight Performance
    Hindsight's Avatar
    Join Date
    May 2014
    Location
    Atlanta
    Posts
    3,402
    Post Thanks / Like
    Yes you adjust it with the upper link that attaches to the firewall. Its a VERY sensitive adjustment. A little goes a long way.

  9. #329
    Senior Member Frank818's Avatar
    Join Date
    Jun 2013
    Location
    QC, Canada
    Posts
    5,732
    Post Thanks / Like
    Cool! So much space in that engine bay!!!!!

    Yeah I too was impressed by the ****ing low ride. Check out my last update (will do after writing this!) on my thread about that.

    5" of the ground up front? I can't get more than 4.3 or something, maybe you got taller tires than I have. We are limited in tire sizes if we want to keep it without modifications (which you won't).
    Frank
    818 chassis #181 powered by a '93 VW VR6 Turbo GT3582R
    Go-karted Aug 5, 2016 - Then May 19+21, 2017
    Tracked May 27/July 26, 2017
    Build time before being driveable on Sep 27, 2019: over 6000h
    Build Completed Winter 2021

  10. #330
    Senior Member Canadian818's Avatar
    Join Date
    Nov 2011
    Location
    Edmonton, Alberta
    Posts
    1,378
    Post Thanks / Like
    Quote Originally Posted by Hindsight View Post
    Yes you adjust it with the upper link that attaches to the firewall. Its a VERY sensitive adjustment. A little goes a long way.
    Thank you sir! You've been most helpful.


    Quote Originally Posted by Frank818 View Post
    Cool! So much space in that engine bay!!!!!

    Yeah I too was impressed by the ****ing low ride. Check out my last update (will do after writing this!) on my thread about that.

    5" of the ground up front? I can't get more than 4.3 or something, maybe you got taller tires than I have. We are limited in tire sizes if we want to keep it without modifications (which you won't).
    Yep, lots of space! I should have my turbo manifold studs here next week, I'm excited to fill up one side of the engine bay. Soon I'll need to figure my intercooler and oil cooler locations. My friend came by yesterday and has me really doubting if my efforts to run a a2a intercooler will be worth it. The plan as of now is to either place the intercooler at the driver side scoop like Dan with air exiting into the engine bay, or form the scoop to feed a 5" hose going back to the intercooler by the rear bumper sealed off to the bumper and hose.
    Adam _____ Instagram @PopesProjects____ YouTube Channel
    818 SRX - #91
    Arrived 01/02/2014
    First Start 10/31/2016
    First Drive 05/22/2017
    Registered 10/25/2019 BRAP818

  11. #331
    Senior Member Canadian818's Avatar
    Join Date
    Nov 2011
    Location
    Edmonton, Alberta
    Posts
    1,378
    Post Thanks / Like
    Been a few weeks, I was away for work. However there was a big box from summit, small bag from Full-race, and a msg from my local shop saying my AEM stuff was in! Gotta love that! I've been picking at the car the past week, not much to post about. Finally finished porting my manifold and tapped for my Full-race studs. Just waiting on my dual Egt gauge kit to arrive before mounting the turbo. Installed 500# springs in the rear, finished welding up my rear LCA's and powder coated them. I now think I have everything needed for wiring, except for the ecu, but I won't need that for awhile. Hope to start laying out the AEM and painless harnesses tomorrow and make a plan of attack. My focus will be on the engine, everything else can wait.

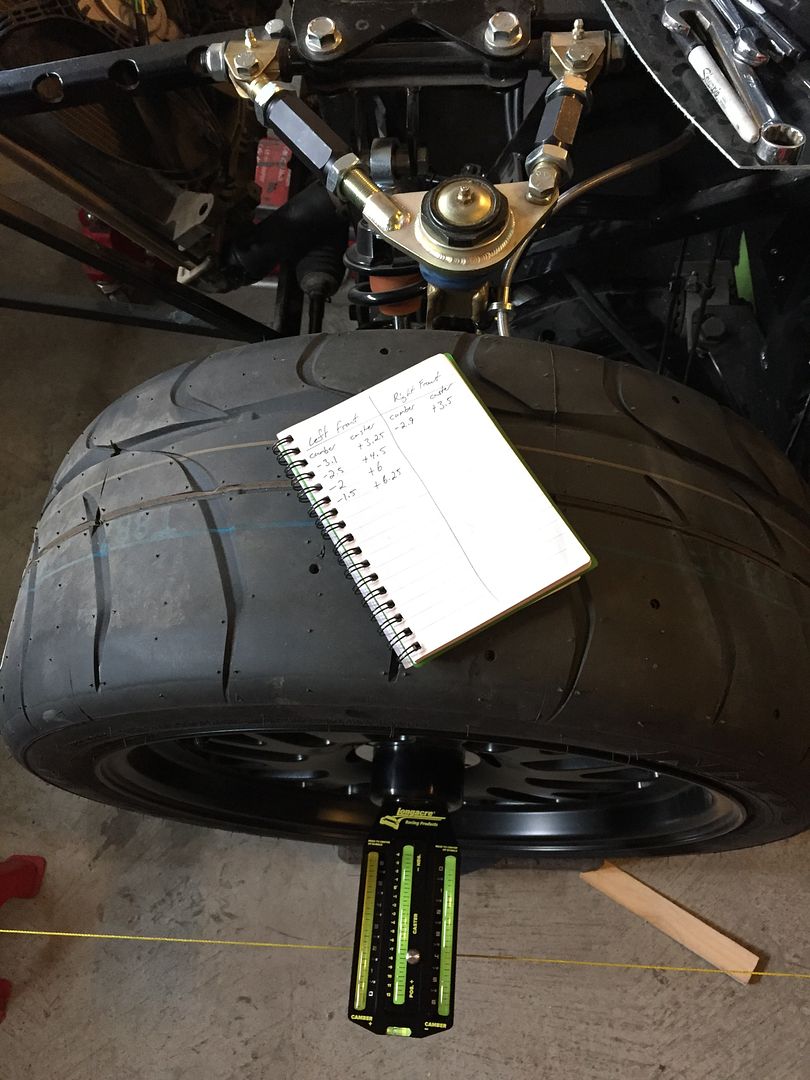
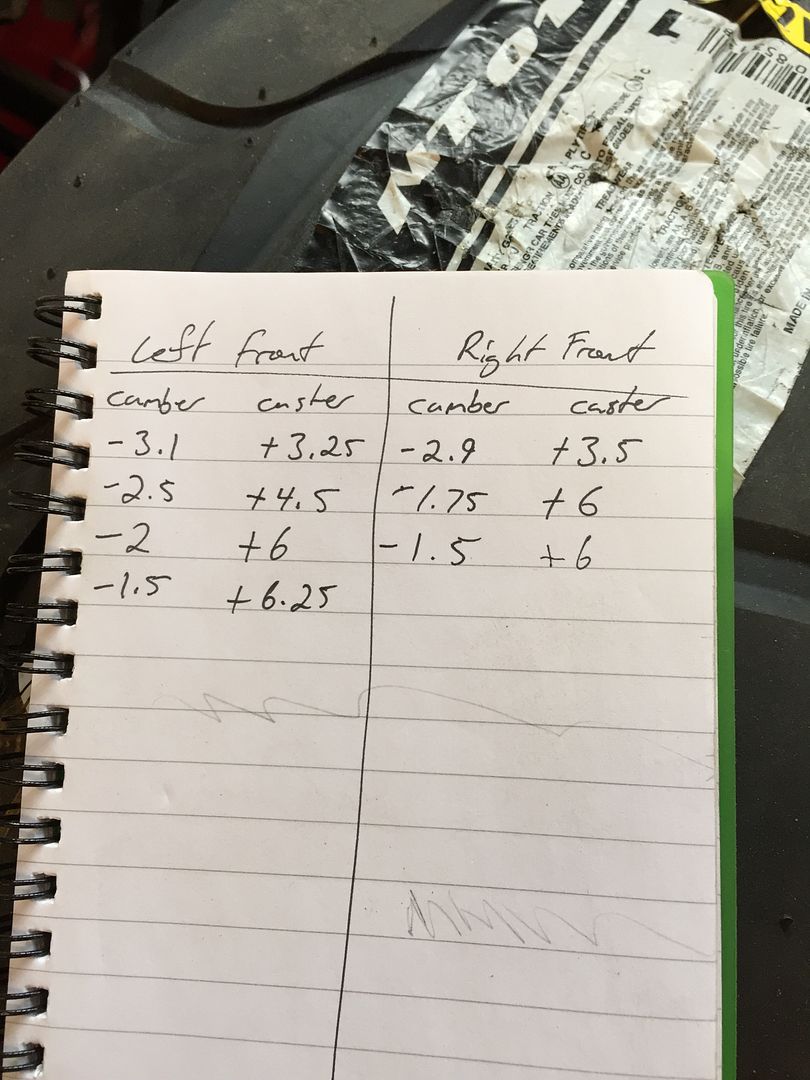
    My alignment took a lot longer than expected, big thanks to Hindsight for all the tips, they helped a lot. Obviously I'll need to adjust again once at full weight, but it needed to be close before I start hacking up fiberglass. I was extremely surprised at how much caster I was able to get, so much so that I had to re-read the instructions to make sure I was doing it right. Here's a pic of my setup and finished numbers...


    As you can see by my progress going down I lost camber and gained caster going down the list. However even at my final settings the rear upper adjustment wasn't maxed out on either side. There's still camber to be had and keep +6 caster.

    Front
    350# springs
    +6* caster
    -1.5* camber
    3/16 total toe in
    5" ride height (25" tires)

    Rear
    500# springs
    -1* camber
    1/4" total toe in
    5.125" ride height (26" tires)
    Last edited by Canadian818; 08-31-2016 at 08:22 PM.
    Adam _____ Instagram @PopesProjects____ YouTube Channel
    818 SRX - #91
    Arrived 01/02/2014
    First Start 10/31/2016
    First Drive 05/22/2017
    Registered 10/25/2019 BRAP818

  12. #332
    Moonlight Performance
    Hindsight's Avatar
    Join Date
    May 2014
    Location
    Atlanta
    Posts
    3,402
    Post Thanks / Like
    Wow, I am really surprised you were able to hit those numbers. I wonder why you were able to get there and I was only able to get like -0.6 camber with 3 caster? Are you running the steel or aluminum control arms? I'm on the aluminum. I wonder if they are any different. Do you have a spacer shim at the rear of your lower control arm? My next steps are to use the eccentric bolt to get more camber without having to adjust the A-arms, and adding a whopping 1/2" spacer at the rear of the control arm. I hate doing that because I know it's going to really torque the bushing at the front of the control arm but I don't have many options.

  13. #333
    Senior Member Canadian818's Avatar
    Join Date
    Nov 2011
    Location
    Edmonton, Alberta
    Posts
    1,378
    Post Thanks / Like
    I'm using steel crontrol arms from an '07 NA. I was one of the first kits to get the non-slanted upper control arms, I don't recall them making any more changes to these. I'm also confused at the numbers I was able to get.
    Adam _____ Instagram @PopesProjects____ YouTube Channel
    818 SRX - #91
    Arrived 01/02/2014
    First Start 10/31/2016
    First Drive 05/22/2017
    Registered 10/25/2019 BRAP818

  14. #334
    Moonlight Performance
    Hindsight's Avatar
    Join Date
    May 2014
    Location
    Atlanta
    Posts
    3,402
    Post Thanks / Like
    Hmm, I'm kit #225 and I think I have the slanted upper control arms..... I wonder if that is why. Or if I have them on upside down?

  15. #335
    Senior Member Canadian818's Avatar
    Join Date
    Nov 2011
    Location
    Edmonton, Alberta
    Posts
    1,378
    Post Thanks / Like
    Quote Originally Posted by Hindsight View Post
    Hmm, I'm kit #225 and I think I have the slanted upper control arms..... I wonder if that is why. Or if I have them on upside down?
    Post a pic of your upper control arm.
    Adam _____ Instagram @PopesProjects____ YouTube Channel
    818 SRX - #91
    Arrived 01/02/2014
    First Start 10/31/2016
    First Drive 05/22/2017
    Registered 10/25/2019 BRAP818

  16. #336
    Moonlight Performance
    Hindsight's Avatar
    Join Date
    May 2014
    Location
    Atlanta
    Posts
    3,402
    Post Thanks / Like
    Here you go. I guessthese are the non-angled ones after all....


  17. #337
    Senior Member Canadian818's Avatar
    Join Date
    Nov 2011
    Location
    Edmonton, Alberta
    Posts
    1,378
    Post Thanks / Like
    Yeah, those look like mine. I'm happy with my numbers, but feel unconfident given others experiences.
    Adam _____ Instagram @PopesProjects____ YouTube Channel
    818 SRX - #91
    Arrived 01/02/2014
    First Start 10/31/2016
    First Drive 05/22/2017
    Registered 10/25/2019 BRAP818

  18. #338
    Senior Member Canadian818's Avatar
    Join Date
    Nov 2011
    Location
    Edmonton, Alberta
    Posts
    1,378
    Post Thanks / Like
    I mocked up my A2A intercooler tonight. I'm going to order this CX-Racing intercooler, which is ironically made for an RX7. It's going to be a tight fit, it'll sit a little higher than in the pics because of the tapered end tanks. I'll also have to relocate the gas cap further back on the quarter panel, but this will be minor compared to the fender mods. I also need to reroute my coolant hose through my lower firewall. I feel with everything sealed on the front side of the IC and one of Kurk's scoops, I should be ok for cooling. It's a rather large IC, and 4" thick.


    Adam _____ Instagram @PopesProjects____ YouTube Channel
    818 SRX - #91
    Arrived 01/02/2014
    First Start 10/31/2016
    First Drive 05/22/2017
    Registered 10/25/2019 BRAP818

  19. #339
    Senior Member Frank818's Avatar
    Join Date
    Jun 2013
    Location
    QC, Canada
    Posts
    5,732
    Post Thanks / Like
    Quote Originally Posted by Canadian818 View Post
    Been a few weeks, I was away for work.
    Yeahyeah, that's your excuse for no working on the car?

    Quote Originally Posted by Canadian818 View Post
    Front
    350# springs
    +6* caster
    -1.5* camber
    3/16 total toe in
    5" ride height (25" tires)
    That's damn awesome.
    Remind me what you did to get that much caster? Just bolting the FFR parts on or you moded something, changed a part, added a part, removed a part...?
    Frank
    818 chassis #181 powered by a '93 VW VR6 Turbo GT3582R
    Go-karted Aug 5, 2016 - Then May 19+21, 2017
    Tracked May 27/July 26, 2017
    Build time before being driveable on Sep 27, 2019: over 6000h
    Build Completed Winter 2021

  20. #340
    Moonlight Performance
    Hindsight's Avatar
    Join Date
    May 2014
    Location
    Atlanta
    Posts
    3,402
    Post Thanks / Like
    Looking forward to seeing how that intercooler works. I think I may move my oil cooler there.

  21. #341
    Senior Member Canadian818's Avatar
    Join Date
    Nov 2011
    Location
    Edmonton, Alberta
    Posts
    1,378
    Post Thanks / Like
    Quote Originally Posted by Frank818 View Post
    Yeahyeah, that's your excuse for no working on the car?


    That's damn awesome.
    Remind me what you did to get that much caster? Just bolting the FFR parts on or you moded something, changed a part, added a part, removed a part...?
    Yeah yeah yeah, excuses excuses, lol. I've done no mods to get that much caster, which is weird. The only thing I can think of is that I haven't seen anyone else use an '06-07 NA as a donor. Most donors are older, newer wrx's, or people just got the '06 aluminum arms.

    Quote Originally Posted by Hindsight View Post
    Looking forward to seeing how that intercooler works. I think I may move my oil cooler there.
    I was going to put an oil coolers on the other side to match, but I'm afraid it won't be enough. The rotary relies too much on oil cooling to risk it, so I think I'll run dual 25 rows up front like a few others have done and just use my right side vent/scoop for an intake.
    Adam _____ Instagram @PopesProjects____ YouTube Channel
    818 SRX - #91
    Arrived 01/02/2014
    First Start 10/31/2016
    First Drive 05/22/2017
    Registered 10/25/2019 BRAP818

  22. #342
    Moonlight Performance
    Hindsight's Avatar
    Join Date
    May 2014
    Location
    Atlanta
    Posts
    3,402
    Post Thanks / Like
    Quote Originally Posted by Canadian818 View Post
    I was going to put an oil coolers on the other side to match, but I'm afraid it won't be enough. The rotary relies too much on oil cooling to risk it, so I think I'll run dual 25 rows up front like a few others have done and just use my right side vent/scoop for an intake.
    How soon do you think you will get to that? I'm very curious to see how you do it and where you mount it. Given I was hitting 240 degree oil temps on the track, causing me to have to stop racing before the session was over, I need to re-do something with my oil cooler setup. I would put one in front but was hoping to use the front vents for brake cooling ducts.

  23. #343
    Senior Member Canadian818's Avatar
    Join Date
    Nov 2011
    Location
    Edmonton, Alberta
    Posts
    1,378
    Post Thanks / Like
    Quote Originally Posted by Hindsight View Post
    How soon do you think you will get to that? I'm very curious to see how you do it and where you mount it. Given I was hitting 240 degree oil temps on the track, causing me to have to stop racing before the session was over, I need to re-do something with my oil cooler setup. I would put one in front but was hoping to use the front vents for brake cooling ducts.
    A few pages back in the build threads Wayne posted a "quick build" thread which made us all feel bad about how long we're taking, lol. Anyway, there's a pic in there showing his dual front coolers. I believe chad also did on his R, and I'm not sure who else. I wouldn't worry too much about brake cooling, I don't think anyone is overheating the brakes with the 818, too light.
    Adam _____ Instagram @PopesProjects____ YouTube Channel
    818 SRX - #91
    Arrived 01/02/2014
    First Start 10/31/2016
    First Drive 05/22/2017
    Registered 10/25/2019 BRAP818

  24. #344
    Senior Member Canadian818's Avatar
    Join Date
    Nov 2011
    Location
    Edmonton, Alberta
    Posts
    1,378
    Post Thanks / Like
    I don't have much to update, although I have been making progress, and have some questions for you fine gentleman. But first, what I've been up to.

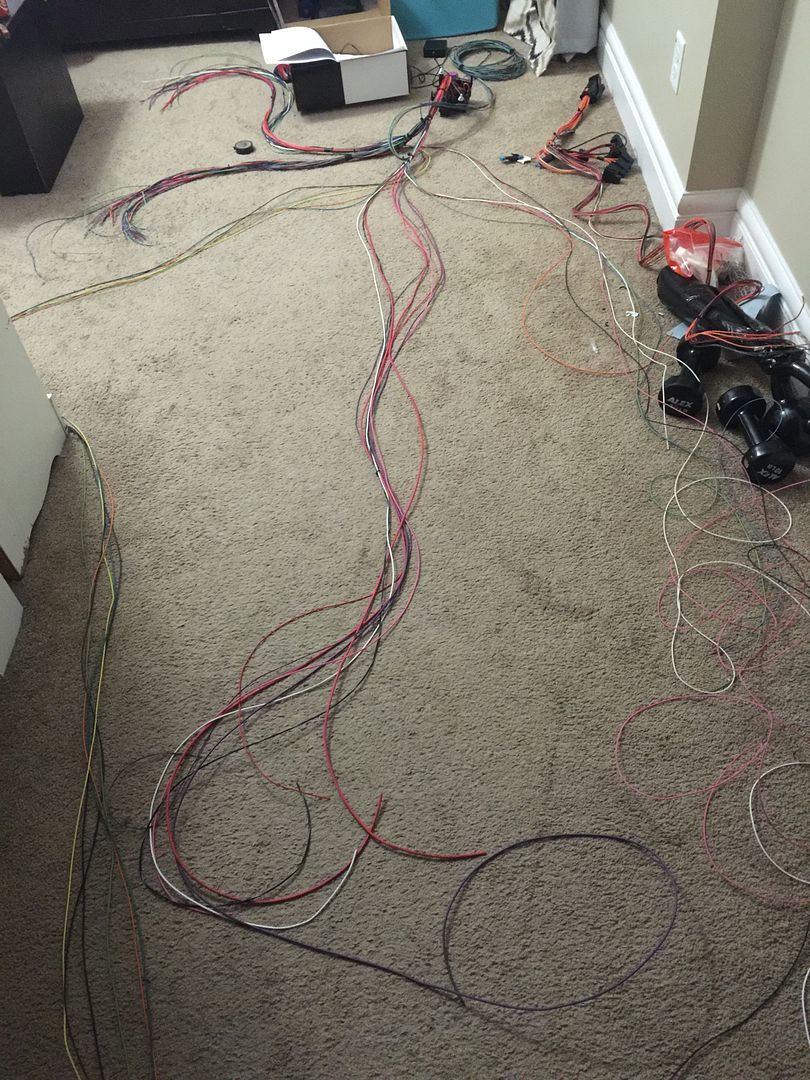
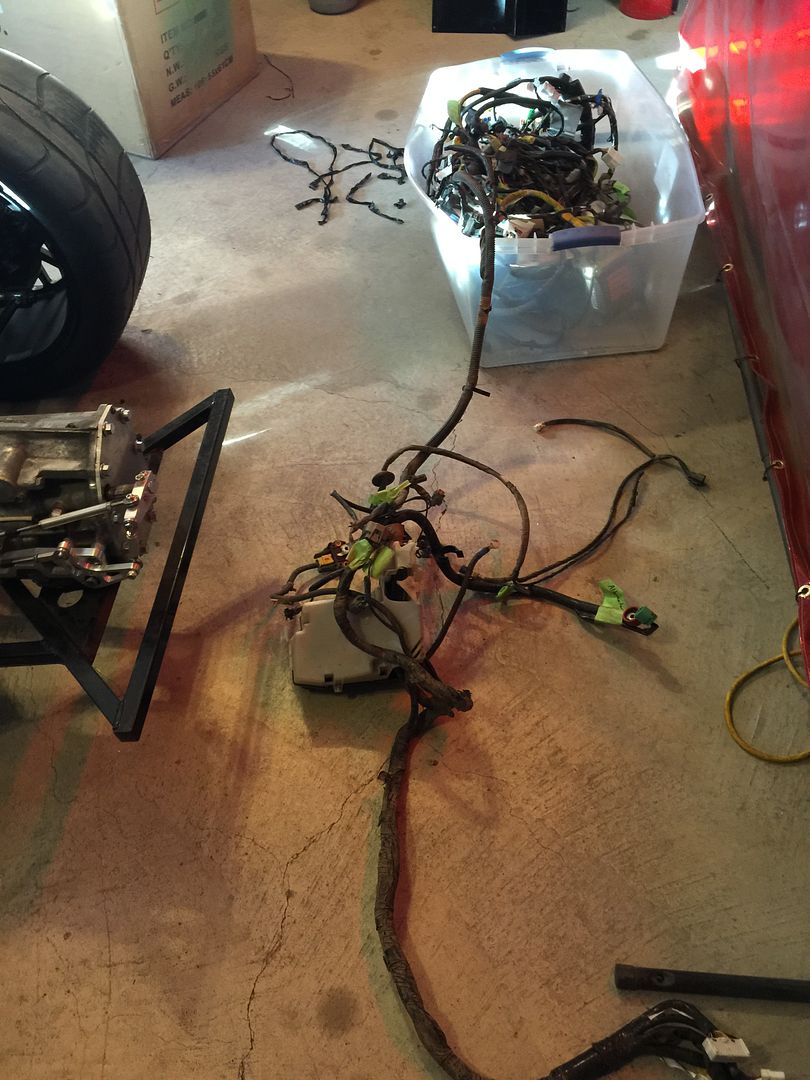
    I'm using a painless harness for whatever my AEM harness doesn't cover. Painless does a good job of labelling their harness, however you have to keep in mind that's it's meant for a 20ft long muscle car with the engine in the front. So I started by laying out the harness and grouping the sections to suit the 818. Not gonna lie, it's initially overwhelming, but one wire at a time, lol.


    Laid things out, there's no shortage of wire length. I also finally got my EGR sensors so I was able to finish my turbo manifold, wrap it, and install the turbo. I already have everything to make my exhaust, but I'll leave that for when I'm inevitably waiting on something to be delivered.


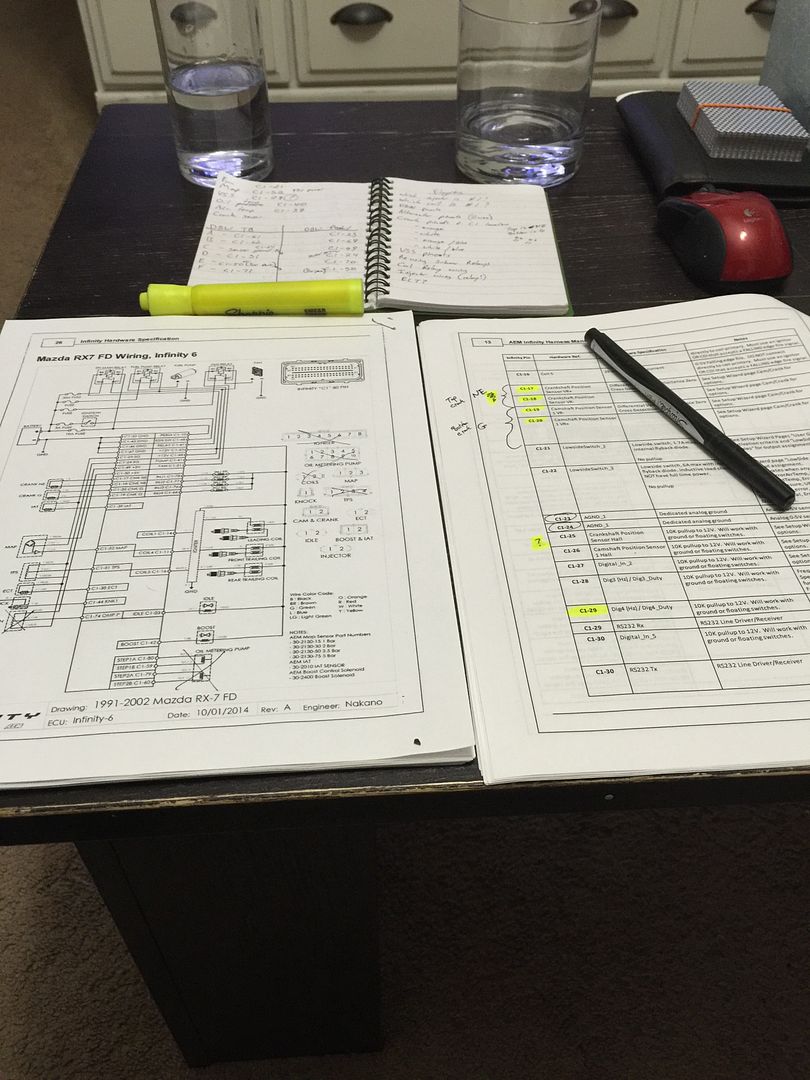
    I spent most of my day studying pinouts, schematics, and instruction manuals. Before this car, the extent of my wiring experience was some trailer lights and an mechanical to electric fan swap. So it's been a steep learning curve. What gets 5v, or 12v, what needs a relay and what doesn't. The nice thing about both harness is what needs to be fused already is. I also played with the AEM software, and while the tuning side is still well over my head, the initial setup is simple enough. My advice is to make good notes, understand what goes where before you start adding wires or terminating.


    I spent about an hour removing what I needed from the Subaru harness, and I really feel for those who "dieted" the stock harness, what a nightmare!


    What's everyone's thoughts on heat shrink butt connectors versus a bare butt connector and seperate heat shrink? A friend was recommending the later, but it just seems easier to use the others. I can't imagine it mattering.

    And where's a good place to find Subaru schematics? My donor was a 07 NA, and I need to find the DBW pedal pinouts, I believe they call it the APP. Also need to know what wires what on the VSS.
    Adam _____ Instagram @PopesProjects____ YouTube Channel
    818 SRX - #91
    Arrived 01/02/2014
    First Start 10/31/2016
    First Drive 05/22/2017
    Registered 10/25/2019 BRAP818

  25. #345
    Senior Member Bob_n_Cincy's Avatar
    Join Date
    Sep 2012
    Location
    Cincinnati OH
    Posts
    3,903
    Post Thanks / Like
    Quote Originally Posted by Canadian818 View Post
    What's everyone's thoughts on heat shrink butt connectors versus a bare butt connector and seperate heat shrink? A friend was recommending the later, but it just seems easier to use the others. I can't imagine it mattering.

    And where's a good place to find Subaru schematics? My donor was a 07 NA, and I need to find the DBW pedal pinouts, I believe they call it the APP. Also need to know what wires what on the VSS.
    I have been the chief electrical engineer on building over 200 vehicles (cars, motorcycles, and trucks) over the last 10 years. This is what I specify.

    I only use Non-Insulated Butt Connector, Brazed Barrel, 22-18 Ga. Del-city 21005 or equivalent.

    Heat Shrink Tubing, Flexible 0.187" Adhesive Lined, Corrosion Resistant, Flame Retardant, Fluid Resistant, Self Extinguishing, Water Resistant(4.8mm) 3 to 1 Black 4.00' (1.22m)

    Ideal 30-429 Multi-Crimp Tool. I've looked long for a better crimp tool. This is the best for what we are doing.

    pm me you email address. I have 06-07 NA/ wrx /sti wiring manual.
    Bob
    Last edited by Bob_n_Cincy; 09-22-2016 at 01:13 AM.
    818S #22 Candy Blue Frame, Front Gas Tank, 2.5L Turbo, Rear radiator, Shortened Transmission, Wookiee Compatible, Console mounted MR2 Shifter, Custom ECU panel, AWIC soon
    My Son Michael's Turbo ICE Build X22 http://thefactoryfiveforum.com/showt...rts-818S-Build
    My Electric Supercar Build X21 (on hold until winter) http://thefactoryfiveforum.com/showt...e-Build-Thread

  26. #346
    Junior Member DrunkenSailor's Avatar
    Join Date
    Aug 2014
    Location
    Highlands Ranch, CO
    Posts
    18
    Post Thanks / Like
    I also have a PDF of the service manual for the 06/07, including the H4SO engine if you still need it. PM me if so.

  27. #347
    Senior Member Canadian818's Avatar
    Join Date
    Nov 2011
    Location
    Edmonton, Alberta
    Posts
    1,378
    Post Thanks / Like
    Thank you both for the offer, Bob I PM'd you my email address. Also, I'll go with your suggestion on the non insulated butt connectors.
    Adam _____ Instagram @PopesProjects____ YouTube Channel
    818 SRX - #91
    Arrived 01/02/2014
    First Start 10/31/2016
    First Drive 05/22/2017
    Registered 10/25/2019 BRAP818

  28. #348
    Senior Member Frank818's Avatar
    Join Date
    Jun 2013
    Location
    QC, Canada
    Posts
    5,732
    Post Thanks / Like
    Adam, no one will ask you that question but I am lolll, why do you have 2 glasses of water on your table?
    Frank
    818 chassis #181 powered by a '93 VW VR6 Turbo GT3582R
    Go-karted Aug 5, 2016 - Then May 19+21, 2017
    Tracked May 27/July 26, 2017
    Build time before being driveable on Sep 27, 2019: over 6000h
    Build Completed Winter 2021

  29. #349
    Tazio Nuvolari wannabe Scargo's Avatar
    Join Date
    Nov 2013
    Location
    south-central CT
    Posts
    1,611
    Post Thanks / Like
    Bob,
    Thanks for the good info! 3M seems to have the only shrink tubing that meets your criteria. I wonder what you think of "Waterproof, Solder Sleeve Heat Shrink Butt Wire Cable Splice Connectors"? I bought a selection of these on Amazon and see that they are now discontinued. I like what I have seen from their ease of use and performance so far. I have had experience doing Mil-Spec wiring and soldering. I know that soldering can create stiff joints that can fail under vibration, thus (I think) the preference for crimping by the military.
    To Canadian818 (sorry, I forget your name): I wonder why you went with Painless and what you think of them. I bought a fuse block assembly from them and was struck by the unplated connectors, cheap wire and overall low quality. It seemed to be typical Chinese crap. How is your experience?

  30. #350
    Senior Member Canadian818's Avatar
    Join Date
    Nov 2011
    Location
    Edmonton, Alberta
    Posts
    1,378
    Post Thanks / Like
    Quote Originally Posted by Frank818 View Post
    Adam, no one will ask you that question but I am lolll, why do you have 2 glasses of water on your table?
    You notice the oddest things Frank, I believe it was my daughters glass, haha.

    Quote Originally Posted by Scargo View Post
    I wonder why you went with Painless and what you think of them. I bought a fuse block assembly from them and was struck by the unplated connectors, cheap wire and overall low quality. It seemed to be typical Chinese crap. How is your experience?
    To be honest Scargo I just don't know any better. All these years of Painless commercials on the power block and local availability are probably the reason I went with them, and I've nothing to compare it to, so I can't really judge the quality.
    Adam _____ Instagram @PopesProjects____ YouTube Channel
    818 SRX - #91
    Arrived 01/02/2014
    First Start 10/31/2016
    First Drive 05/22/2017
    Registered 10/25/2019 BRAP818

  31. #351
    Tazio Nuvolari wannabe Scargo's Avatar
    Join Date
    Nov 2013
    Location
    south-central CT
    Posts
    1,611
    Post Thanks / Like
    Fair enough, Adam.
    There are a number of types of wire suitable for automotive use. Here's some basics of what's available. Besides PVC, You can get thinner and lighter cross-linked wire insulation. Requirements for aircraft wiring are pretty stringent and some building race cars use wire meeting those specifications. After experiencing a racing heat related fire and seeing numerous engine bay fires I believe in using higher temp insulation for the engine and engine bay. I recently bought a pigtail (for a new 7 pound, 55 amp alternator) off Ebay and it was PVC junk wire and cheap plastic connector.
    PVC Automotive Wire:
    GPT - Type GPT automotive wire is intended for use whenever SAE J-1128 specifies general circuit wiring. GPT automotive primary wire features extruded insulation, and has a recommended temperature range of -40°C to 80°C.
    TWP - Type TWP automotive wire is a lead-free PVC option. It is thin-walled, lightweight, and small, so it is a good choice for cramped automotive applications. TWP automotive primary wire has a maximum temperature rating of 105°C.
    HDT - Type HDT automotive primary wire is general circuitry wire, but it is less common than the other types of automotive wire. However, it offers greater physical protection than those types because it has the thickest wall. HDT automotive primary wire meets the requirements of SAE J-1128, and can be used in cars, boats, buses and RVs.
    Cross-Linked Automotive Wire:
    GXL - Type GXL (general purpose cross-linked) XLPE automotive primary wire is the most common type. It works with most standard automotive wire connectors and may be applied in engine compartments where higher heat resistance is required according to SAE J-1128. GXL automotive wire is thin-walled, giving it a small diameter for hard-to-fit areas in trucks and trailers. Its recommended temperature range is -51°C to 125°C.
    SXL – Type SXL (XLP) (special purpose cross-linked) XLPE cross-linked automotive wire has a temperature range of -40°C to 125°C, 60V,, so it may be used in engine compartments where higher heat resistance is required according to SAE J-1128. SXL automotive primary wire has a standard wall thickness.
    TXL – Type TXL (thin wall, cross-linked Polyethylene) XLPE automotive primary wire is the extra-thin wall version of the cross-linked wire, making it the smallest and most lightweight option. It meets SAE J-1560 and SAE J1128.specifications. Like the other types of cross-linked automotive wire, TXL automotive wire has a temperature range of -40°C to 125°C (257°F).

    Tefzel wire is a brand of flame-retardant ETFE insulation is thin and light, but resistant to abrasions, cuts, fuel, oil, and most solvents. Tefzel is multi-strand tinned copper automotive and marine grade wire.
    There are also aerospace and military grades that are PTFE or PET insulated or double insulated with Polyalkene and then Polyvinylidene Fluoride. $$... Spec 55 wire seems to be the high-end race car wire of choice.
    Last edited by Scargo; 10-03-2016 at 10:01 AM. Reason: added info

  32. #352
    Senior Member Canadian818's Avatar
    Join Date
    Nov 2011
    Location
    Edmonton, Alberta
    Posts
    1,378
    Post Thanks / Like
    Quote Originally Posted by Scargo View Post
    There are a number of types of wire suitable for automotive use. Here's some basics of what's available.
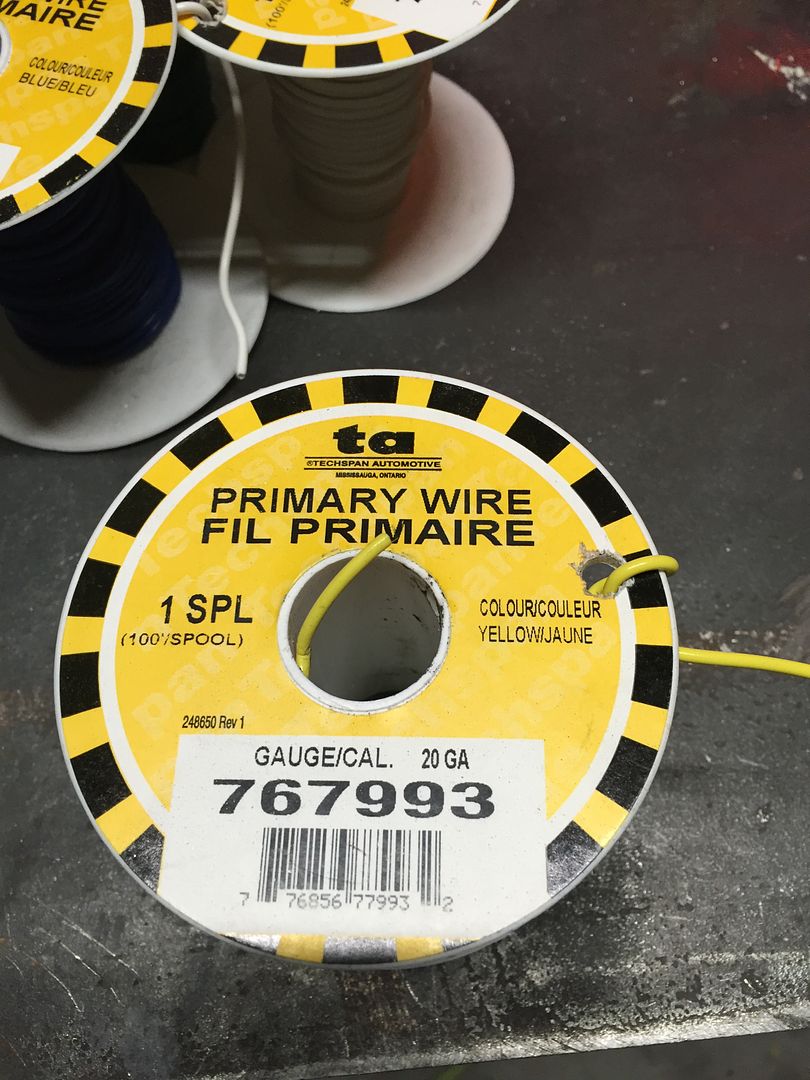
    First off Scargo, thanks for all the info. Secondly, you and I have very different versions of what's "basic", haha. Besides what was included with the AEM and Painless harnesses, this is what I've been using...


    I don't have anymore info on it. It's quite flexible and the insulation is thicker than what's provided in my harnesses.

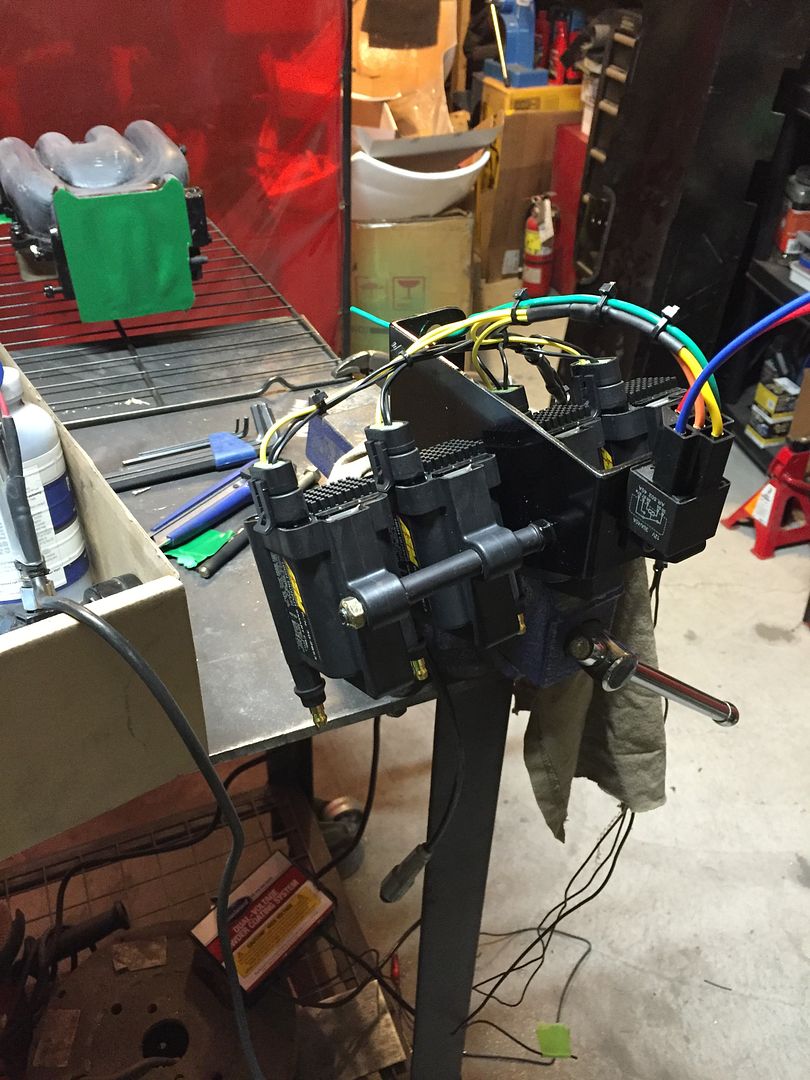
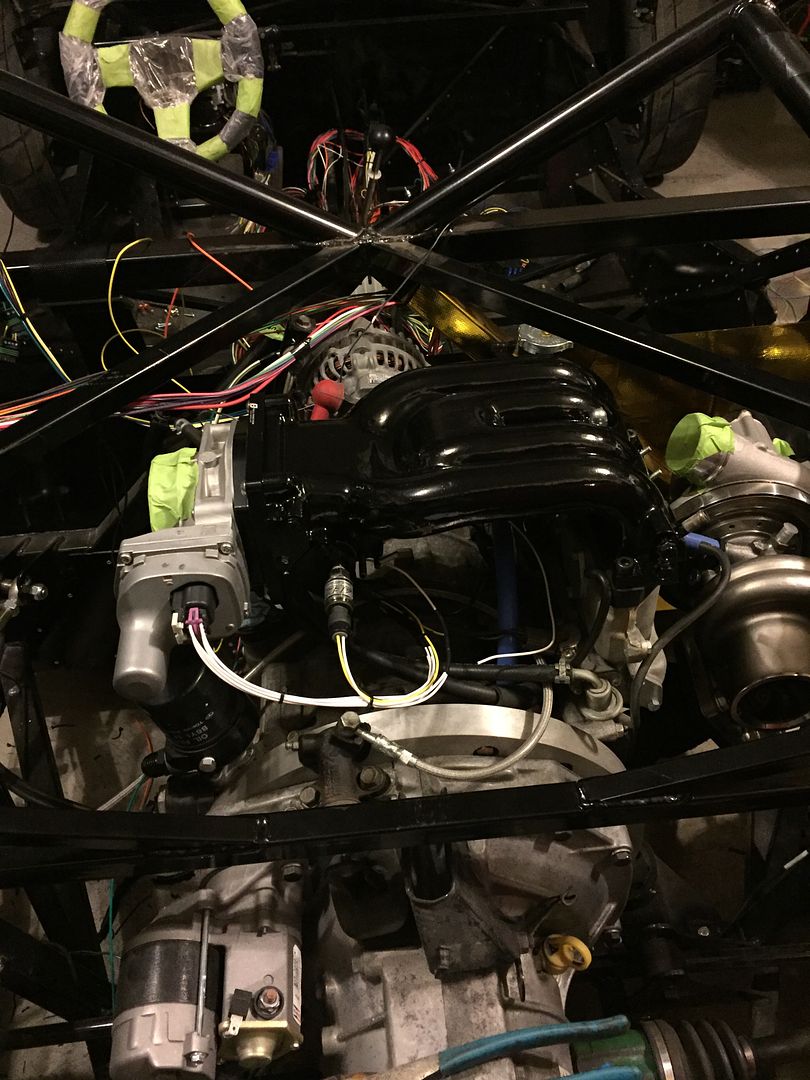
    I've been busy, and fabricated a mount for my coils. It's upside down in this pic, I was starting the coil harness. I also went ahead and powder coated my upper intake manifold because it looked like crap after shaving off some unnecessary tabs. I didn't bother with the lower intake manifold as it will be one of the first parts upgraded with the fuel system after getting it on the road. Most all my engine wiring is complete, just the alternator, starter and some grounds to finish up. Obviously still lots to do before startup, but it's finally all coming together!


    Adam _____ Instagram @PopesProjects____ YouTube Channel
    818 SRX - #91
    Arrived 01/02/2014
    First Start 10/31/2016
    First Drive 05/22/2017
    Registered 10/25/2019 BRAP818

  33. #353
    fasterer and furiouser longislandwrx's Avatar
    Join Date
    Aug 2012
    Location
    Long Island
    Posts
    2,540
    Post Thanks / Like
    Blog Entries
    6
    Quote Originally Posted by Frank818 View Post
    Adam, no one will ask you that question but I am lolll, why do you have 2 glasses of water on your table?

    One is water. One is straight vodka.

    because 12 hours of wiring.
    A well stocked beverage fridge is the key to any successful project.

  34. #354
    Senior Member Frank818's Avatar
    Join Date
    Jun 2013
    Location
    QC, Canada
    Posts
    5,732
    Post Thanks / Like
    Quote Originally Posted by longislandwrx View Post
    One is water. One is straight vodka.

    because 12 hours of wiring.
    Damn right!!!!


    Finally Adam we get to see some kind of engine! Looks great with the glossy black!
    You've got a weird TBody and a starter so similar to my racing Porsche one. It must be cool then.

    Hey I saw Viper parked yesterday while I was walking around, recent model. Thought of you immediately cuz... it had kick-*** wide tires!!! lolll
    Frank
    818 chassis #181 powered by a '93 VW VR6 Turbo GT3582R
    Go-karted Aug 5, 2016 - Then May 19+21, 2017
    Tracked May 27/July 26, 2017
    Build time before being driveable on Sep 27, 2019: over 6000h
    Build Completed Winter 2021

  35. #355
    Senior Member Canadian818's Avatar
    Join Date
    Nov 2011
    Location
    Edmonton, Alberta
    Posts
    1,378
    Post Thanks / Like
    Quote Originally Posted by Frank818 View Post
    Damn right!!!!


    Finally Adam we get to see some kind of engine! Looks great with the glossy black!
    You've got a weird TBody and a starter so similar to my racing Porsche one. It must be cool then.

    Hey I saw Viper parked yesterday while I was walking around, recent model. Thought of you immediately cuz... it had kick-*** wide tires!!! lolll
    Haha, I oogle at my tires all the time. I'm happy with the black, the exhaust will be wrapped black, and I plan to paint my other transmission black as well before installing it. I'm considering powder coating the intake piping, but it might be too much. I could do another color but I don't want it to be tacky. I went with blue coolant hose and I'm already second guessing if it looks tacky. Need to make some plug wires soon too, and not sure what color.

    The throttle body is an GM LS3 unit flipped upside down, starter is Subaru, but from an older model. Hopefully I'll get to start on the exhaust by this weekend!
    Adam _____ Instagram @PopesProjects____ YouTube Channel
    818 SRX - #91
    Arrived 01/02/2014
    First Start 10/31/2016
    First Drive 05/22/2017
    Registered 10/25/2019 BRAP818

  36. #356
    fasterer and furiouser longislandwrx's Avatar
    Join Date
    Aug 2012
    Location
    Long Island
    Posts
    2,540
    Post Thanks / Like
    Blog Entries
    6
    I used the MSD plug wires on my RX7 was impressed with the quality. I'm guessing you need something custom because of your coils?

    http://www.streetbeatcustoms.com/MSD...-32919/771901/
    A well stocked beverage fridge is the key to any successful project.

  37. #357
    Senior Member Canadian818's Avatar
    Join Date
    Nov 2011
    Location
    Edmonton, Alberta
    Posts
    1,378
    Post Thanks / Like
    Quote Originally Posted by longislandwrx View Post
    I used the MSD plug wires on my RX7 was impressed with the quality. I'm guessing you need something custom because of your coils?

    http://www.streetbeatcustoms.com/MSD...-32919/771901/
    Yes, I'll have to make my plug wires. I believe most manufacturers make a DIY kit, and I had another friend recommend MSD as well.

    Slowly making progress this week, much of my time being spent studying schematics. The only thing left to figure out is the ignition switch pinouts and how to wire a relay for it. I'm picking up a battery today, and I need to fab a bracket for it to mount next to the engine.
    Adam _____ Instagram @PopesProjects____ YouTube Channel
    818 SRX - #91
    Arrived 01/02/2014
    First Start 10/31/2016
    First Drive 05/22/2017
    Registered 10/25/2019 BRAP818

  38. #358
    Senior Member Frank818's Avatar
    Join Date
    Jun 2013
    Location
    QC, Canada
    Posts
    5,732
    Post Thanks / Like
    What are you using as coilpack? Or distributor pack. Or maybe coil on plug but certainly not OEM from that engine year (what year again?).
    Frank
    818 chassis #181 powered by a '93 VW VR6 Turbo GT3582R
    Go-karted Aug 5, 2016 - Then May 19+21, 2017
    Tracked May 27/July 26, 2017
    Build time before being driveable on Sep 27, 2019: over 6000h
    Build Completed Winter 2021

  39. #359
    Senior Member Canadian818's Avatar
    Join Date
    Nov 2011
    Location
    Edmonton, Alberta
    Posts
    1,378
    Post Thanks / Like
    Quote Originally Posted by Frank818 View Post
    What are you using as coilpack? Or distributor pack. Or maybe coil on plug but certainly not OEM from that engine year (what year again?).
    I'm using 4 AEM smart coils, the OEM setup uses 3 coils and an ignitor. Not sure what year my engine is from, but I suspect '96-'02 because of the 16bit ecu it came with.
    Adam _____ Instagram @PopesProjects____ YouTube Channel
    818 SRX - #91
    Arrived 01/02/2014
    First Start 10/31/2016
    First Drive 05/22/2017
    Registered 10/25/2019 BRAP818

  40. #360
    Senior Member Frank818's Avatar
    Join Date
    Jun 2013
    Location
    QC, Canada
    Posts
    5,732
    Post Thanks / Like
    Oh, so that's one coil per plug meaning it's not a wasted spark it's almost like coil on plug, you can control spark ignition and duration. As long as your ECU will allow you to change parms. Mine can if I had these. I start to wonder if I should. loll 19amps max each but since pretty much only one at a time is working then the current draw may well be under 25amps max. That's more than my coilpack which is fused at 10a but those look more powerful.
    Frank
    818 chassis #181 powered by a '93 VW VR6 Turbo GT3582R
    Go-karted Aug 5, 2016 - Then May 19+21, 2017
    Tracked May 27/July 26, 2017
    Build time before being driveable on Sep 27, 2019: over 6000h
    Build Completed Winter 2021

Page 9 of 25 FirstFirst ... 789101119 ... LastLast

Posting Permissions

  • You may not post new threads
  • You may not post replies
  • You may not post attachments
  • You may not edit your posts
  •  

Breeze

Visit our community sponsor