FormaCars

Visit our community sponsor

Thanks Thanks:  20
Likes Likes:  104
Page 16 of 25 FirstFirst ... 61415161718 ... LastLast
Results 601 to 640 of 967

Thread: Adam's Canadian 13B Rotary 818-SR Build

  1. #601
    Senior Member
    Join Date
    Jun 2015
    Posts
    678
    Post Thanks / Like
    I think 996 tail lights would be perfect for this car.

  2. #602
    Senior Member Canadian818's Avatar
    Join Date
    Nov 2011
    Location
    Edmonton, Alberta
    Posts
    1,378
    Post Thanks / Like
    Quote Originally Posted by flynntuna View Post
    I totally agree with you on the front end. I've been considering changing it using the gt40 and Lexus as inspiration.
    Both good options. I think different headlights and hood/fenders moulded together could really change things.

    Quote Originally Posted by RetroRacing View Post
    I think 996 tail lights would be perfect for this car.
    Hadn't considered those, probably because I don't see many around. I've been eyeing up everything's tail lights to see what might work. IMO our tail lights scream kit car.
    Adam _____ Instagram @PopesProjects____ YouTube Channel
    818 SRX - #91
    Arrived 01/02/2014
    First Start 10/31/2016
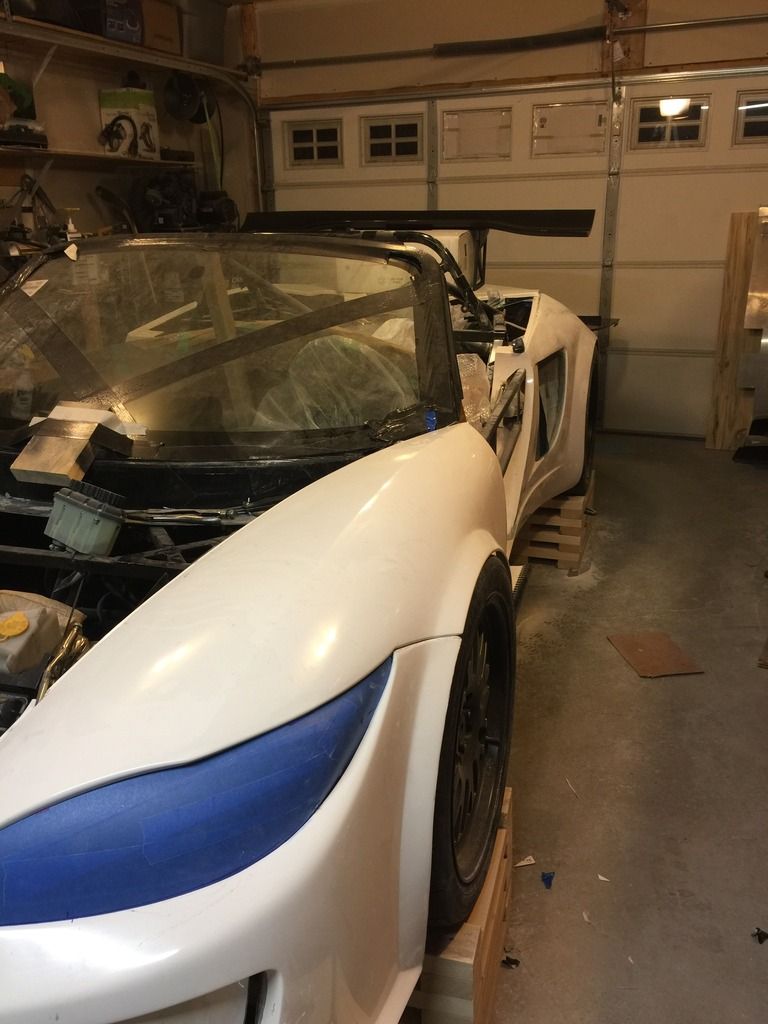
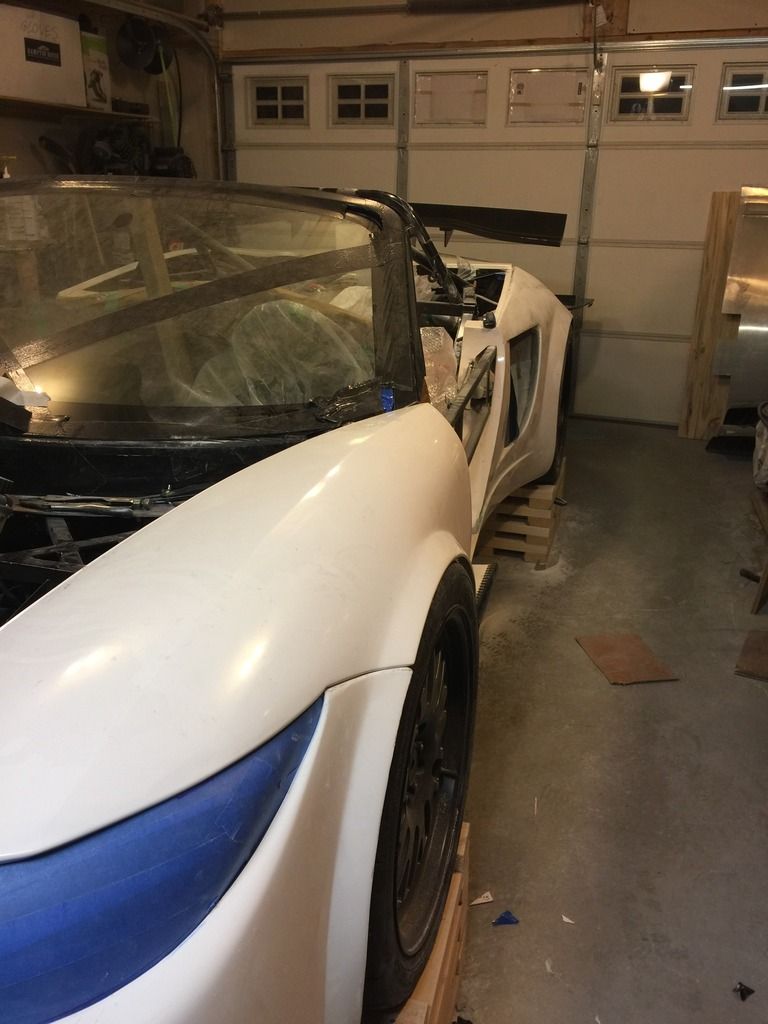
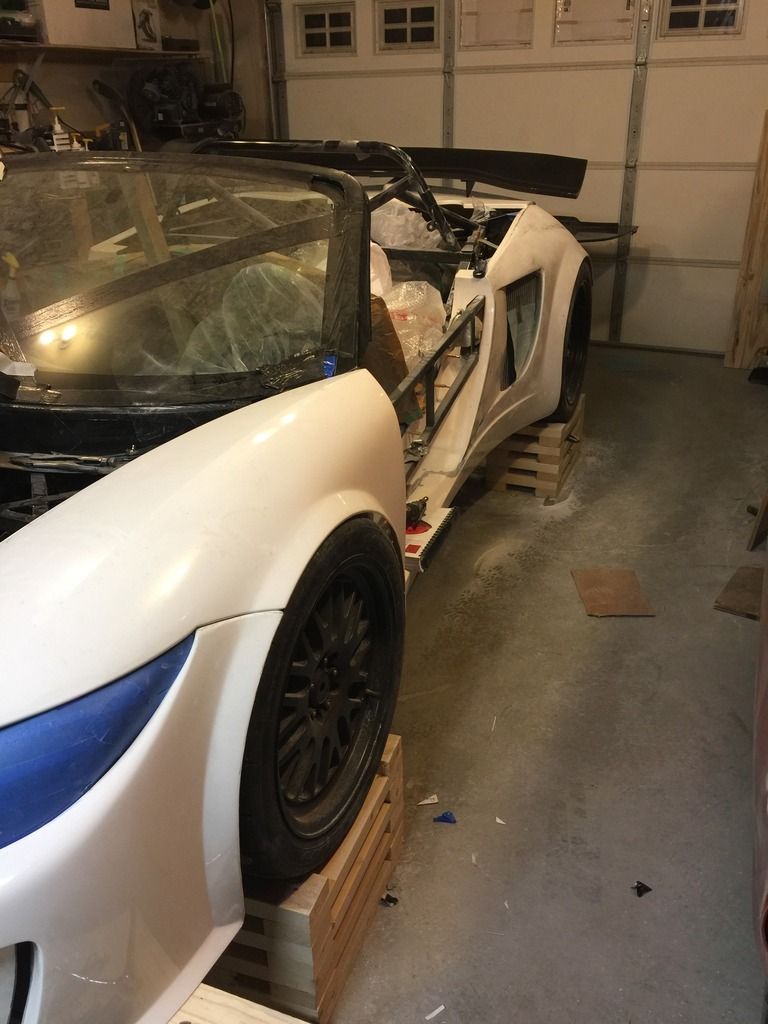
    First Drive 05/22/2017
    Registered 10/25/2019 BRAP818

  3. #603
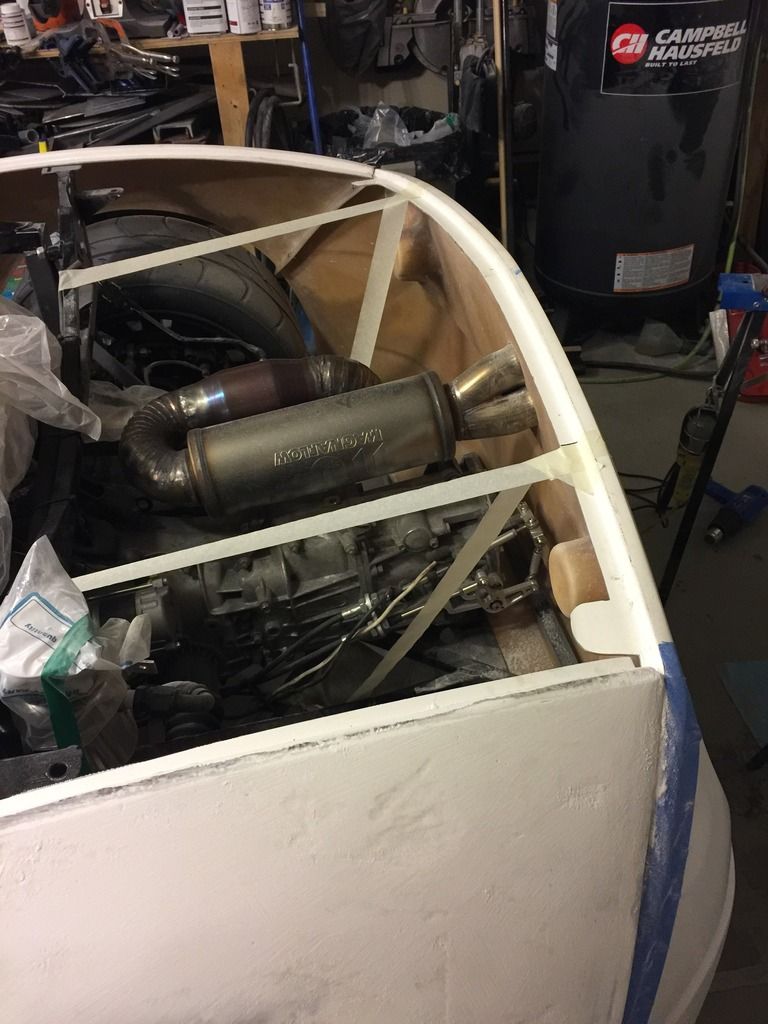
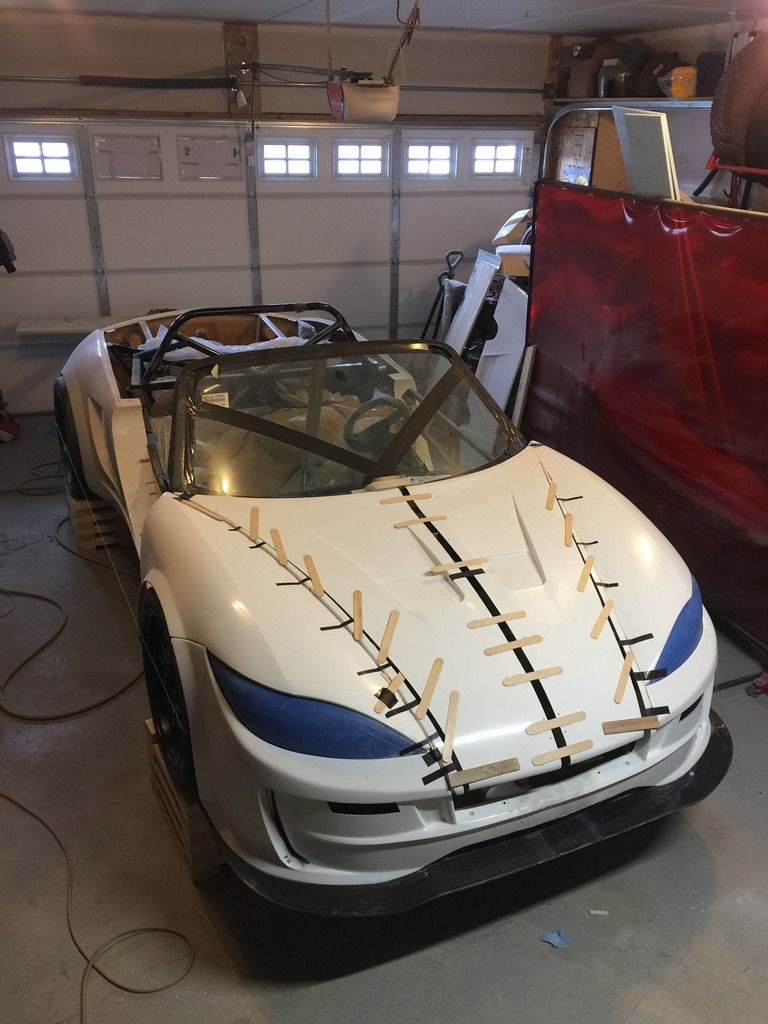
    Senior Member flynntuna's Avatar
    Join Date
    Apr 2011
    Location
    San Diego Ca 92106
    Posts
    1,972
    Post Thanks / Like
    I really don't have that much of an issue with the rear of the 818. That said, the tail lights of the corvette and camero are appealing.
    Attached Images Attached Images

  4. #604
    Senior Member Canadian818's Avatar
    Join Date
    Nov 2011
    Location
    Edmonton, Alberta
    Posts
    1,378
    Post Thanks / Like
    Quote Originally Posted by flynntuna View Post
    I really don't have that much of an issue with the rear of the 818. That said, the tail lights of the corvette and camero are appealing.
    They do, however my fear is hearing "oh he moulded in some vette lights". I don't want someone looking at my car like one of those crazy magazine civics from 10-15 years ago.

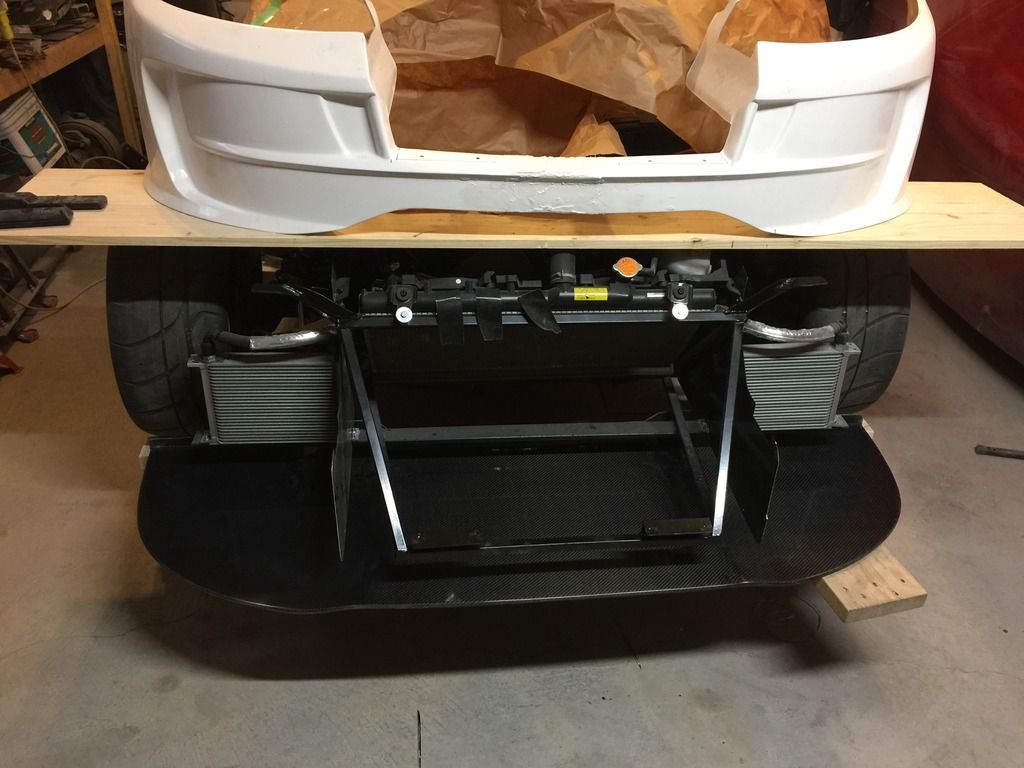
    On with the project. While I continue with the tedious side sail scoop, pictures are kinda pointless. Unless someone wants a bunch of details on how I'm doing it. Keep in mind the first time I ever mixed resin was a couple of weeks ago. The front end is slowly coming along. Bumper is widened and even started filler. Next to be widened is the splitter.


    I realized after taking this pic that it's kinda a trippy allusion with the bumper laying where it is. But the bumper is now installed and I'm very slowly working on headlights. In addition to widening the splitter, I think I'll go ahead and lengthen it too so I can have it stick out 3-4" and rest up against the frame in the back. There will be a seem or two, but I'm hoping to make it as unnoticeable as possible. I could've sold it and made one from scratch, but it's one of the first gen ones with fibreglass backing so it's less desirable. Oh, and I'm in Canada, lol.

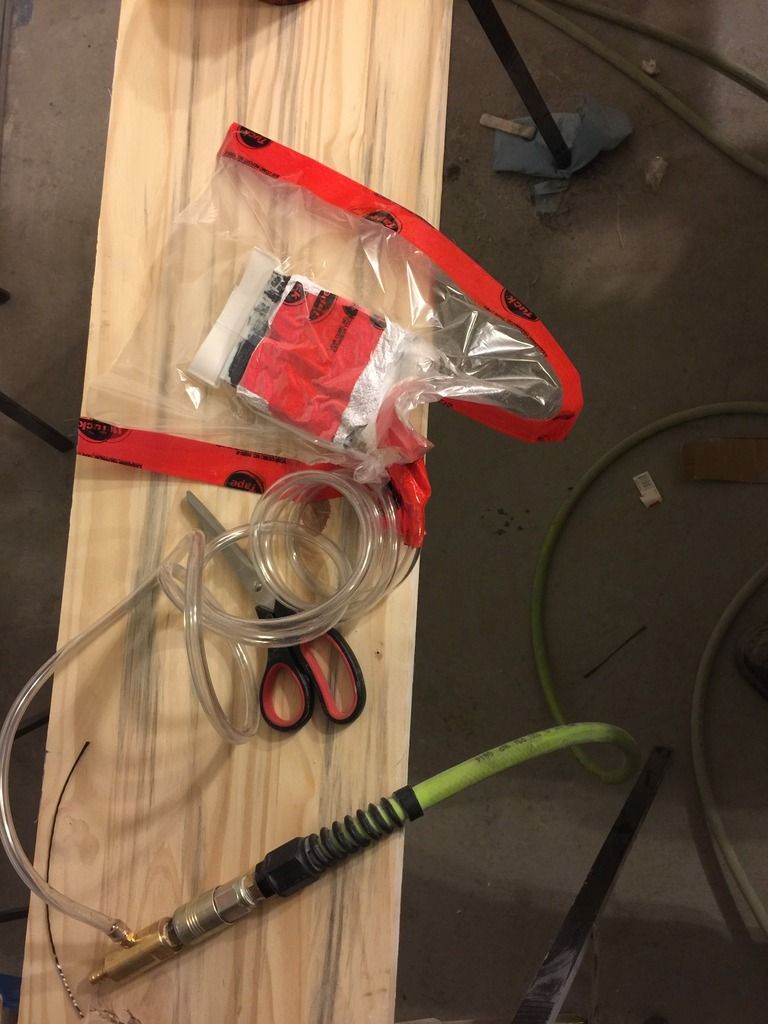
    So I picked up some carbon fibre today, got excited when the guy rolled it out, total fanboy. I wanted to experiment with it in small pieces to avoid ruining a bunch of expensive fabric. I wrapped a piece around the 3/4" foam I'll be using for my side plates. Wrapped it with release fabric, old towel, put it in some poly, tuck taped the edges, and used my airlift coolant vacuum fitting to suck it all tight. I put resin between the foam and fabric, the theory being it'll soak through and excess will be squeezed out through the release fabric and absorbed into the towel.


    If there's no update tomorrow, I did something wrong.
    Adam _____ Instagram @PopesProjects____ YouTube Channel
    818 SRX - #91
    Arrived 01/02/2014
    First Start 10/31/2016
    First Drive 05/22/2017
    Registered 10/25/2019 BRAP818

  5. #605
    Tazio Nuvolari wannabe Scargo's Avatar
    Join Date
    Nov 2013
    Location
    south-central CT
    Posts
    1,611
    Post Thanks / Like
    You're a brave man. Ignorance removes a lot of fear and dread...
    I just hope we don't find you hopelessly stuck to the car one day.
    On that note I wish you the best of luck and congratulate you for your creativity and ingenuity. Going where man has not gone before.
    I just returned from the Rolex 24 hours of Daytona and have a lot of ideas. Neat was the cars running at night, lit up like Christmas trees! Lighting options are endless it seems. Since mine is a pure track R, I think I will keep it simple with some horizontal LED bars at the very top. Perhaps just one. I am not going to do too much with lighting as this will start as a daylight only car. The wiring will be there but I'm starting out basic.

  6. #606
    Senior Member
    Join Date
    Jan 2014
    Location
    USA
    Posts
    587
    Post Thanks / Like
    Vacuum bagging is the way to go when laying up carbon fiber at home. Resin infusion is icing on the cake. I've done this a handful of times and the parts came out comparable to purchased parts. Of course the materials are expensive and the learning curve is a little steep.

  7. #607
    Senior Member Canadian818's Avatar
    Join Date
    Nov 2011
    Location
    Edmonton, Alberta
    Posts
    1,378
    Post Thanks / Like
    Quote Originally Posted by Scargo View Post
    You're a brave man. Ignorance removes a lot of fear and dread...
    I just hope we don't find you hopelessly stuck to the car one day.
    I'm not sure I'm taking that the right way...

    Quote Originally Posted by Scargo View Post
    On that note I wish you the best of luck and congratulate you for your creativity and ingenuity. Going where man has not gone before.
    I just returned from the Rolex 24 hours of Daytona and have a lot of ideas. Neat was the cars running at night, lit up like Christmas trees! Lighting options are endless it seems. Since mine is a pure track R, I think I will keep it simple with some horizontal LED bars at the very top. Perhaps just one. I am not going to do too much with lighting as this will start as a daylight only car. The wiring will be there but I'm starting out basic.
    Thanks, and I look forward to what you come up with.

    Quote Originally Posted by Aero STI View Post
    Vacuum bagging is the way to go when laying up carbon fiber at home. Resin infusion is icing on the cake. I've done this a handful of times and the parts came out comparable to purchased parts. Of course the materials are expensive and the learning curve is a little steep.
    I decided after watching videos to just vacuum bag from the start. I don't see the need yet to buy a vacuum pump or specific vacuum bag materials, my setup will work. Resin infusion is the sh!t, but not worth the investment for the first parts I'm making since they're all mere inches off the ground.


    Turned out ok. Lots of excess resin was removed and the top and bottom are nice and flat with no bubbles. The sides didn't cling to the corners like I had hoped. I have a few ideas why, and will experiment more. Also there's a little blue showing through the carbon fibre, I had anticipated this so I'd picked up a little graphite to mix in with some resin for a base coat to put on the foam prior to wrapping it. I'm also going to do a little strength testing to see if one layer will be enough. Also need to figure out if I should clear it from here or add a thin coat of resin and then clear.
    Adam _____ Instagram @PopesProjects____ YouTube Channel
    818 SRX - #91
    Arrived 01/02/2014
    First Start 10/31/2016
    First Drive 05/22/2017
    Registered 10/25/2019 BRAP818

  8. #608
    Senior Member Frank818's Avatar
    Join Date
    Jun 2013
    Location
    QC, Canada
    Posts
    5,732
    Post Thanks / Like
    You really do it the very hard way. But after a lot of time once you succeed it'll look so good!
    What ducting again will you do for the front rads?
    Frank
    818 chassis #181 powered by a '93 VW VR6 Turbo GT3582R
    Go-karted Aug 5, 2016 - Then May 19+21, 2017
    Tracked May 27/July 26, 2017
    Build time before being driveable on Sep 27, 2019: over 6000h
    Build Completed Winter 2021

  9. #609
    Senior Member metros's Avatar
    Join Date
    Jun 2013
    Location
    NoVA
    Posts
    1,064
    Post Thanks / Like
    Cool build thread with lots of tweaks to the body that will really set this car apart. I really think they should have widened the rear end like you are. The side scoops look much better with taking an aggressive approach vs latest gen MR2ish.

    My biggest complaint about the updated front end is that they didn't select a set of OEM headlights to utilize. Instead we're stuck trying to make the best out of the piecemealed headlight solution. Yes, OEM headlights would add cost. But how much do most of us already have in these cars? Why not throw another 4-600 and have a great looking headlight, which greatly impacts the appearance of the front end - not to mention night time driving safety.

  10. #610
    Senior Member Canadian818's Avatar
    Join Date
    Nov 2011
    Location
    Edmonton, Alberta
    Posts
    1,378
    Post Thanks / Like
    Quote Originally Posted by Frank818 View Post
    You really do it the very hard way. But after a lot of time once you succeed it'll look so good!
    What ducting again will you do for the front rads?
    I just don't have it in me to accept anything I feel I can improve on. I can't decide on a front cutout for the oil coolers that I like. Need to figure that out soon though, might just start drawing out some options.

    Quote Originally Posted by metros View Post
    Cool build thread with lots of tweaks to the body that will really set this car apart. I really think they should have widened the rear end like you are. The side scoops look much better with taking an aggressive approach vs latest gen MR2ish.

    My biggest complaint about the updated front end is that they didn't select a set of OEM headlights to utilize. Instead we're stuck trying to make the best out of the piecemealed headlight solution. Yes, OEM headlights would add cost. But how much do most of us already have in these cars? Why not throw another 4-600 and have a great looking headlight, which greatly impacts the appearance of the front end - not to mention night time driving safety.
    Thanks! I might consider making molds of the side sails at a later date if it's something others wanted.

    I agree on the oem light thing. I think they had it right with the first gen, just poorly executed, not to slam FFR, I'm sure it's far more difficult then I can imagine. What I like is that the Toyota lights look very different on the 818 then the original car, if one uses a different oem light you'd want to accomplish the same.
    Adam _____ Instagram @PopesProjects____ YouTube Channel
    818 SRX - #91
    Arrived 01/02/2014
    First Start 10/31/2016
    First Drive 05/22/2017
    Registered 10/25/2019 BRAP818

  11. #611
    Senior Member Canadian818's Avatar
    Join Date
    Nov 2011
    Location
    Edmonton, Alberta
    Posts
    1,378
    Post Thanks / Like
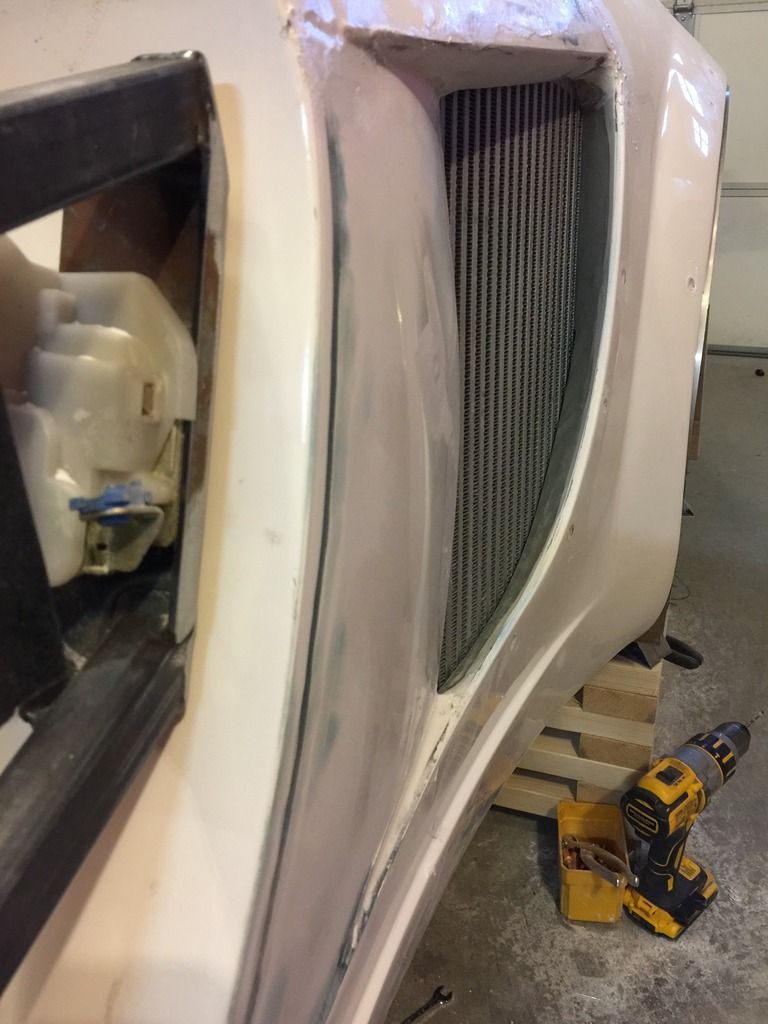
    After Frank mentioned ducting I just couldn't get it out of my mind. Spent a few hours today making cardboard templates, need to pick up some aluminum tomorrow. Since the only bodywork on the bumper can be done while it's installed, and the fenders don't require any, it can all be installed and left installed until I'm ready to wrap it after registration. Pics on the ducting tomorrow.

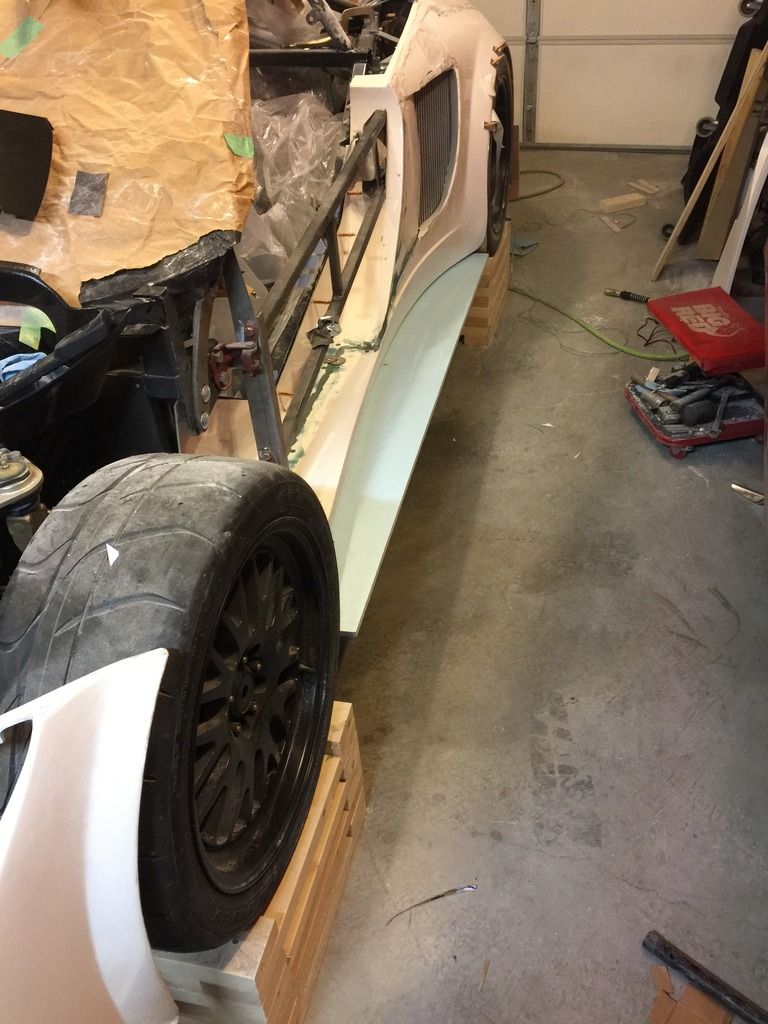
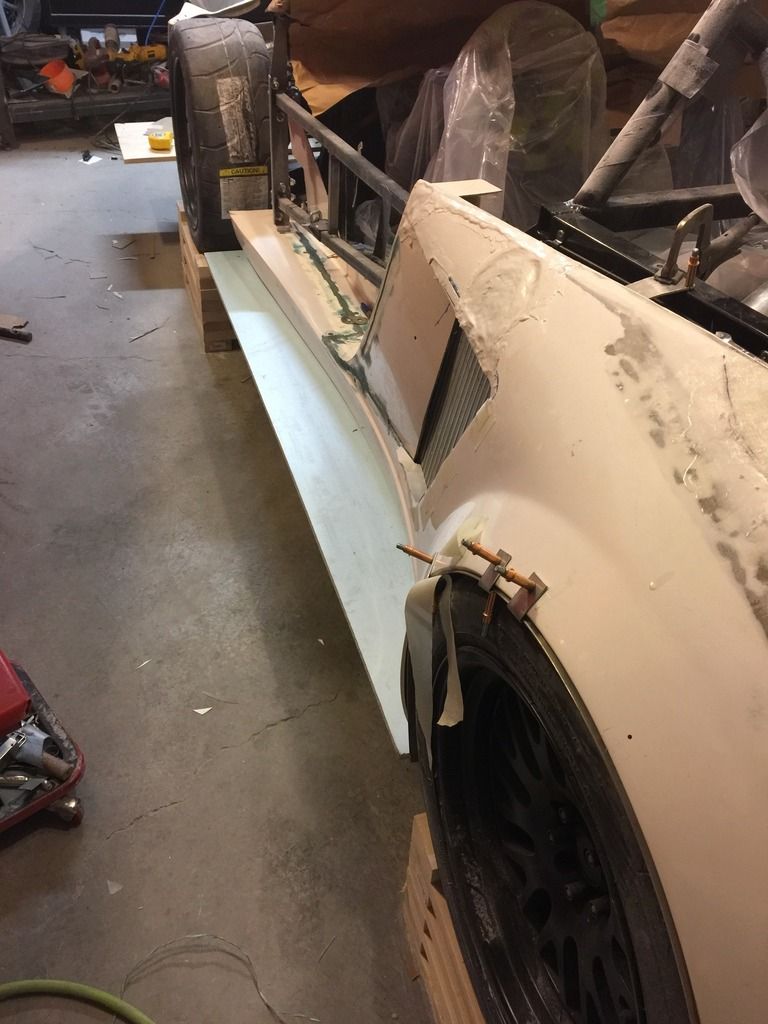
    Almost finished with reshaping the side scoop to the intercooler, so I decided to cut some foam and start mocking up the side plates. In my head I wanted full width, but now I'm unsure. Might go in an inch, or perhaps add a curve. If left full width I'd make a vertical "fin" at the back to tie into the wheel arch. The front will also have a plate of fin to tie into the front fender as it needs a mount since its to wide now to mount to the side sail. So I'm looking for feedback, both negative and positive.


    Adam _____ Instagram @PopesProjects____ YouTube Channel
    818 SRX - #91
    Arrived 01/02/2014
    First Start 10/31/2016
    First Drive 05/22/2017
    Registered 10/25/2019 BRAP818

  12. #612
    Senior Member Frank818's Avatar
    Join Date
    Jun 2013
    Location
    QC, Canada
    Posts
    5,732
    Post Thanks / Like
    I wonder how long it'd take Wayne to build a build like yours or mine... and the number is not 7. lolll

    Adam, are the door skins fitting without any adjustment?
    Frank
    818 chassis #181 powered by a '93 VW VR6 Turbo GT3582R
    Go-karted Aug 5, 2016 - Then May 19+21, 2017
    Tracked May 27/July 26, 2017
    Build time before being driveable on Sep 27, 2019: over 6000h
    Build Completed Winter 2021

  13. #613
    Senior Member flynntuna's Avatar
    Join Date
    Apr 2011
    Location
    San Diego Ca 92106
    Posts
    1,972
    Post Thanks / Like
    Frank, Wayne doesn't sand. Lol.
    Attached Images Attached Images

  14. #614
    Senior Member Canadian818's Avatar
    Join Date
    Nov 2011
    Location
    Edmonton, Alberta
    Posts
    1,378
    Post Thanks / Like
    Haha, yeah I'm not sure Wayne would be willing to go this far, lol. Over half my time has been spent staring at the car scratching my head.

    Frank, I haven't installed the door skins yet. I have laid then in place with shims over the door frame and seen no reason they will give me any hassle.
    Adam _____ Instagram @PopesProjects____ YouTube Channel
    818 SRX - #91
    Arrived 01/02/2014
    First Start 10/31/2016
    First Drive 05/22/2017
    Registered 10/25/2019 BRAP818

  15. #615
    Moonlight Performance
    Hindsight's Avatar
    Join Date
    May 2014
    Location
    Atlanta
    Posts
    3,402
    Post Thanks / Like
    Quote Originally Posted by Canadian818 View Post
    Over half my time has been spent staring at the car scratching my head.
    This..... so this!!!

  16. #616
    Senior Member Bob_n_Cincy's Avatar
    Join Date
    Sep 2012
    Location
    Cincinnati OH
    Posts
    3,903
    Post Thanks / Like
    Quote Originally Posted by Canadian818 View Post
    Over half my time has been spent staring at the car scratching my head.
    I think all of first time builders do this. Me included.
    Also 1/2 time researching on web or reading forum.
    No wonder it takes us so long.
    Bob
    818S #22 Candy Blue Frame, Front Gas Tank, 2.5L Turbo, Rear radiator, Shortened Transmission, Wookiee Compatible, Console mounted MR2 Shifter, Custom ECU panel, AWIC soon
    My Son Michael's Turbo ICE Build X22 http://thefactoryfiveforum.com/showt...rts-818S-Build
    My Electric Supercar Build X21 (on hold until winter) http://thefactoryfiveforum.com/showt...e-Build-Thread

  17. #617
    Senior Member Frank818's Avatar
    Join Date
    Jun 2013
    Location
    QC, Canada
    Posts
    5,732
    Post Thanks / Like
    Quote Originally Posted by flynntuna View Post
    Frank, Wayne doesn't sand. Lol.
    Precisely my point. He unbolts cam bolts! Where's that picture a couple of years ago, using a 6feet or so rod to remove a cam bolt. lolll


    Quote Originally Posted by Canadian818 View Post
    Frank, I haven't installed the door skins yet. I have laid then in place with shims over the door frame and seen no reason they will give me any hassle.
    Yeah that was my question, if you test fitted them. Nice to see you didn't affect that area. It's a difficult area, every time you install the doors they fall at a different place, different angle and you waste 5-6h trying to re-align them, not understanding what the hell changed since last time. I understand Mike when he had to issue after his resgistration.
    Frank
    818 chassis #181 powered by a '93 VW VR6 Turbo GT3582R
    Go-karted Aug 5, 2016 - Then May 19+21, 2017
    Tracked May 27/July 26, 2017
    Build time before being driveable on Sep 27, 2019: over 6000h
    Build Completed Winter 2021

  18. #618
    Senior Member Canadian818's Avatar
    Join Date
    Nov 2011
    Location
    Edmonton, Alberta
    Posts
    1,378
    Post Thanks / Like
    The nice thing about my doors Frank, is that there no where near my fenders, lol.


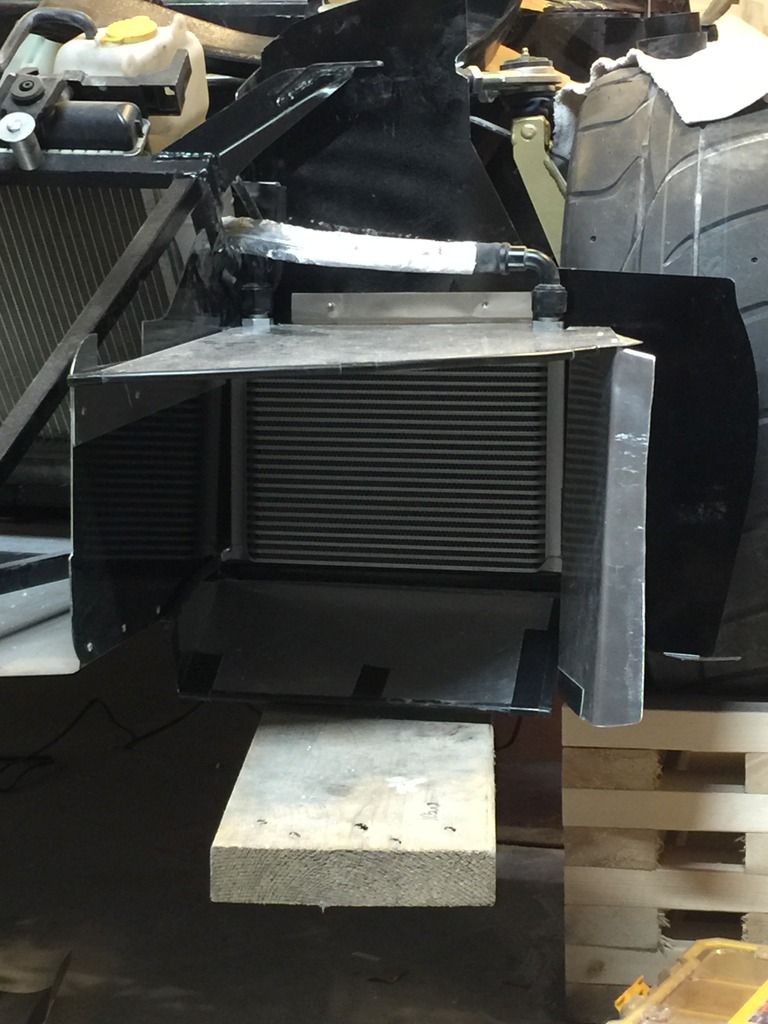
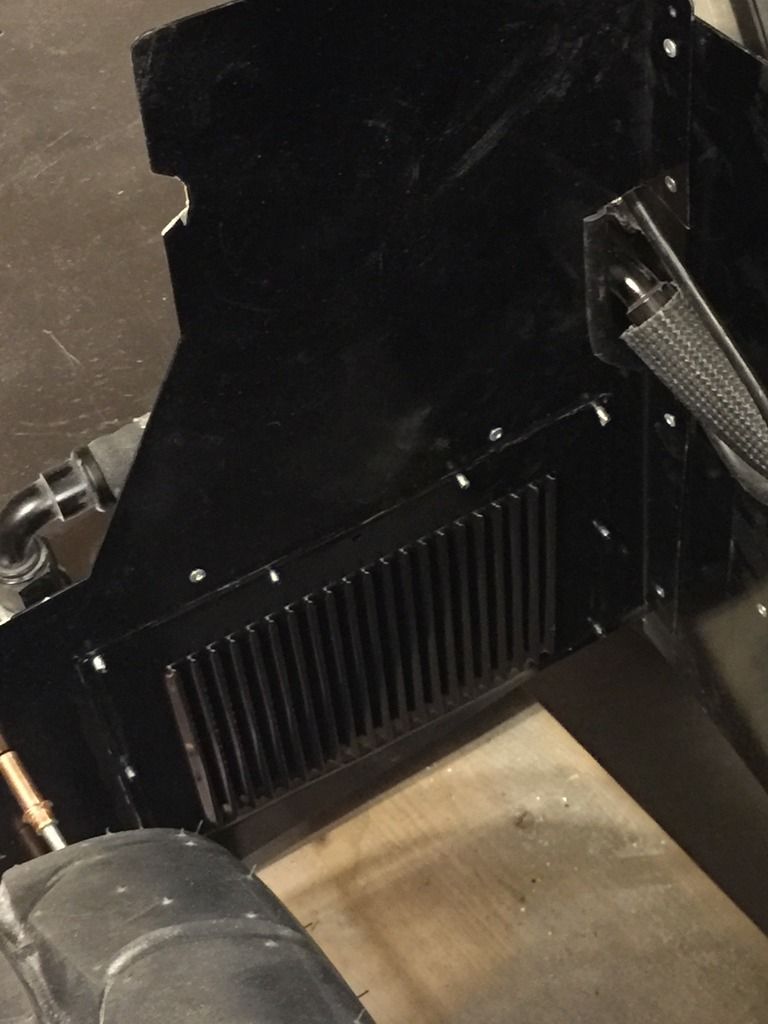
    So here's the ducting for my oil coolers that Frank made me do, haha


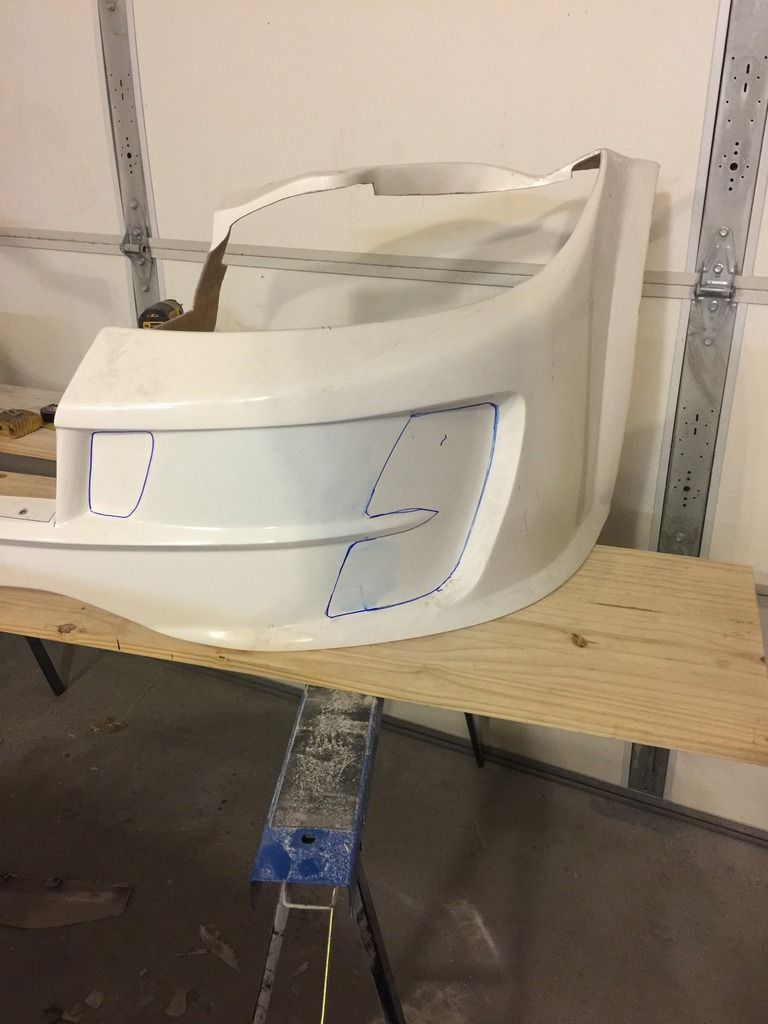
    And here's what I'm thinking about for front bumper cutouts. It's a slight tweak on the FFR design.


    I'm more of a functional guy, if I'm designing or fabricating something all I think of is what works best versus what looks good. Just don't have an eye for it I guess. I feel like if I look at something too much I start second guessing myself. But when I don't second guess myself I end up being to hasty and wishing I hadn't done it. So I'm going to sleep on the cutouts, decide if I like them tomorrow. Please comment if you think it looks good or not, even if it's just meh. Same goes for the side boards, which I still can't decide on.
    Adam _____ Instagram @PopesProjects____ YouTube Channel
    818 SRX - #91
    Arrived 01/02/2014
    First Start 10/31/2016
    First Drive 05/22/2017
    Registered 10/25/2019 BRAP818

  19. #619
    Senior Member Frank818's Avatar
    Join Date
    Jun 2013
    Location
    QC, Canada
    Posts
    5,732
    Post Thanks / Like
    Nice ducts, man! Not sure those 2 openings will enough but those are oil coolers, not coolant, you probably need less.
    No fans, right?
    Frank
    818 chassis #181 powered by a '93 VW VR6 Turbo GT3582R
    Go-karted Aug 5, 2016 - Then May 19+21, 2017
    Tracked May 27/July 26, 2017
    Build time before being driveable on Sep 27, 2019: over 6000h
    Build Completed Winter 2021

  20. #620
    Tazio Nuvolari wannabe Scargo's Avatar
    Join Date
    Nov 2013
    Location
    south-central CT
    Posts
    1,611
    Post Thanks / Like
    I think I'm in agreement with both of you. I like the adage of form follows function. Having just returned from the Rolex 24 hours and looking at all the cars, and older race cars on display, I have a slightly changed perspective.
    I'd say place the inlet more like where the small rectangle is drawn. More "in the face" of oncoming air. Start out with the opening no larger that the area cooled. Let the front stay closed as much as possible. Otherwise air going in has to come out somewhere and that is tricky. The 818's frame does not allow for much air to exit behind the wheels. If it shoots out of the hood then it can disrupt the effectiveness of the wing. Just thinking outloud.

  21. #621
    Senior Member Canadian818's Avatar
    Join Date
    Nov 2011
    Location
    Edmonton, Alberta
    Posts
    1,378
    Post Thanks / Like
    I decided to wait and see if the fans are needed. There's lots of clearance behind the cooler to add a fan if needed.

    Scargo, I totally get what your saying. My reasoning for where the duct is that 2" lip that's going to catch air anyway, and cause turbulence for the canards. So I thought opening that up would relive some of that turbulence. There will also be some grill material there which should help with and air spill over flowing past. I tried drawing out some ideas for cutouts more on the front, but nothing looked right, however like Frank said, this might not be enough opening anyway. My fenders are wide enough that venting through the wheel well shouldn't be a problem, and I have mechie's fender louvers.
    Adam _____ Instagram @PopesProjects____ YouTube Channel
    818 SRX - #91
    Arrived 01/02/2014
    First Start 10/31/2016
    First Drive 05/22/2017
    Registered 10/25/2019 BRAP818

  22. #622
    Senior Member
    Join Date
    Jun 2015
    Posts
    678
    Post Thanks / Like
    Too much air in the front bumper section will create a ton of lift/less down force, and our car at least, under steers like the dickens. the thing is air control, not amount. A small amount of air forced through to the exact point that you need it is way more effective that just a bunch of air. I would go with the most direct route, start small and leave yourself somewhere to go, in that you can install a larger, "pretty" screen on the nose, covering a smaller hole where you can direct the air to where you need it, black out the area behind the screen and adjust accordingly as you test. It is WAY easier to remove than replace.

  23. #623
    Senior Member
    Join Date
    Aug 2016
    Location
    Saline, Mi
    Posts
    289
    Post Thanks / Like
    An old rule I remember is the opening to feed for example, a radiator should be about 1/7 the area of the face of cooler.

  24. #624
    Senior Member Frank818's Avatar
    Join Date
    Jun 2013
    Location
    QC, Canada
    Posts
    5,732
    Post Thanks / Like
    Quote Originally Posted by frankc5r View Post
    An old rule I remember is the opening to feed for example, a radiator should be about 1/7 the area of the face of cooler.
    Now that's interesting to know. I see Porsche's ducts, here.
    Frank
    818 chassis #181 powered by a '93 VW VR6 Turbo GT3582R
    Go-karted Aug 5, 2016 - Then May 19+21, 2017
    Tracked May 27/July 26, 2017
    Build time before being driveable on Sep 27, 2019: over 6000h
    Build Completed Winter 2021

  25. #625
    Senior Member Canadian818's Avatar
    Join Date
    Nov 2011
    Location
    Edmonton, Alberta
    Posts
    1,378
    Post Thanks / Like
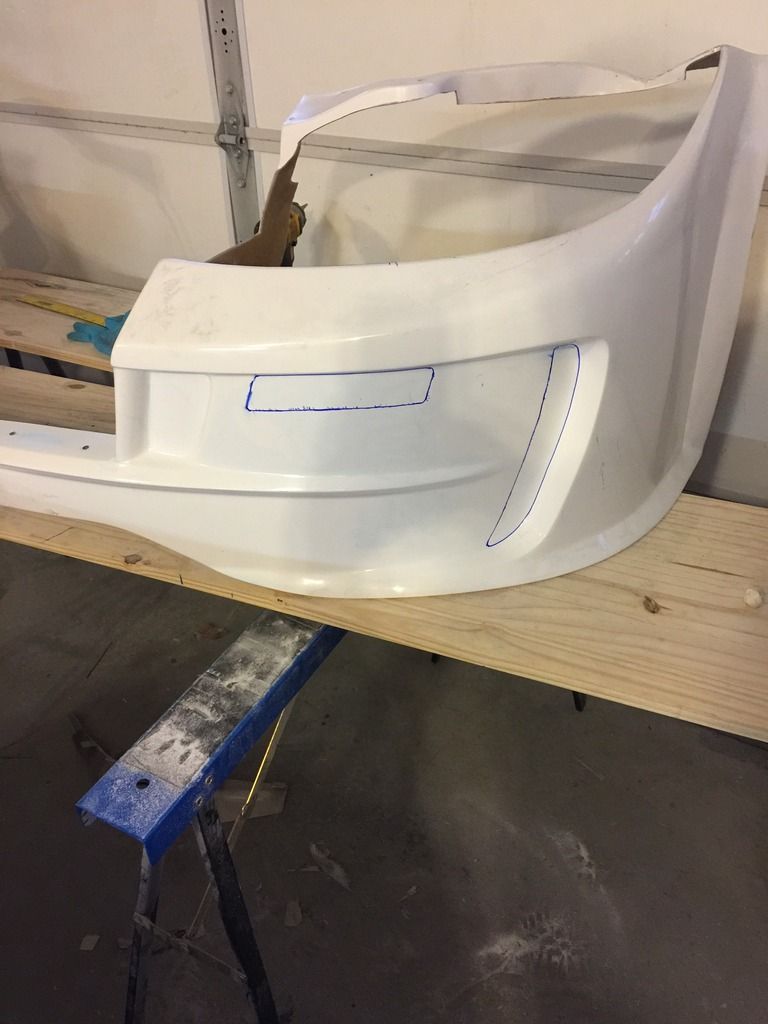
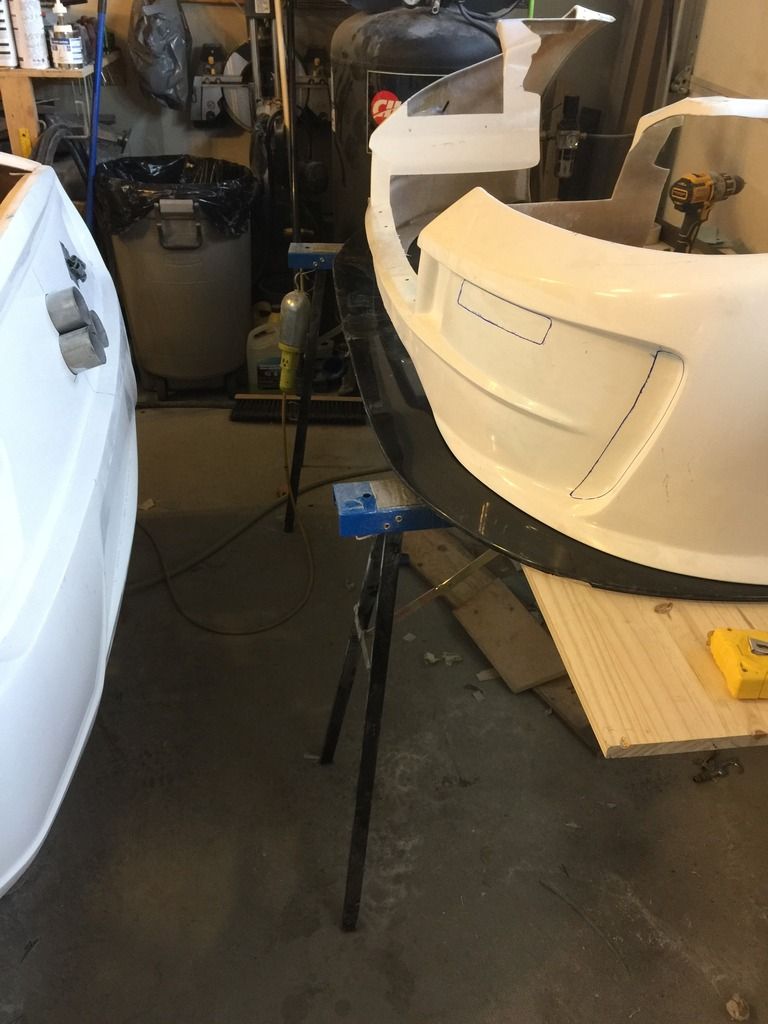
    Thanks everyone for the input, really glad I didn't jump the gun on the cutting. I do like the idea of cutting a little now, more later if needed. Here's idea 2.0


    The recessed rectangular section would actually feed the radiator, so I'm going leave that for now. The small horizontal strip would be a strait shot at the cooler, easily enlarged. I also have a vertical strip in the recessed corner, I don't know why I'm so hung up on that arear but I'm convinced it's going to cause drag and turbulence. I think I'm going to do the whole area in black, so I'm no longer considering what looks best. What do you guys think?

    Also my revised scoop is now molded to the intercooler. Pretty happy with how it turned out. Next up is fitting the fuel cap somewhere ahead of the intercooler by the door latch. Not the nicest place to put it, but no other options really.

    Adam _____ Instagram @PopesProjects____ YouTube Channel
    818 SRX - #91
    Arrived 01/02/2014
    First Start 10/31/2016
    First Drive 05/22/2017
    Registered 10/25/2019 BRAP818

  26. #626
    Senior Member
    Join Date
    Jun 2015
    Posts
    678
    Post Thanks / Like
    IMG_1103.JPG

    Good choice!

  27. #627
    Senior Member Canadian818's Avatar
    Join Date
    Nov 2011
    Location
    Edmonton, Alberta
    Posts
    1,378
    Post Thanks / Like
    Working on mounting the widened splitter today...


    Need to lengthen it a few inches so it goes to the rear of the bumper.


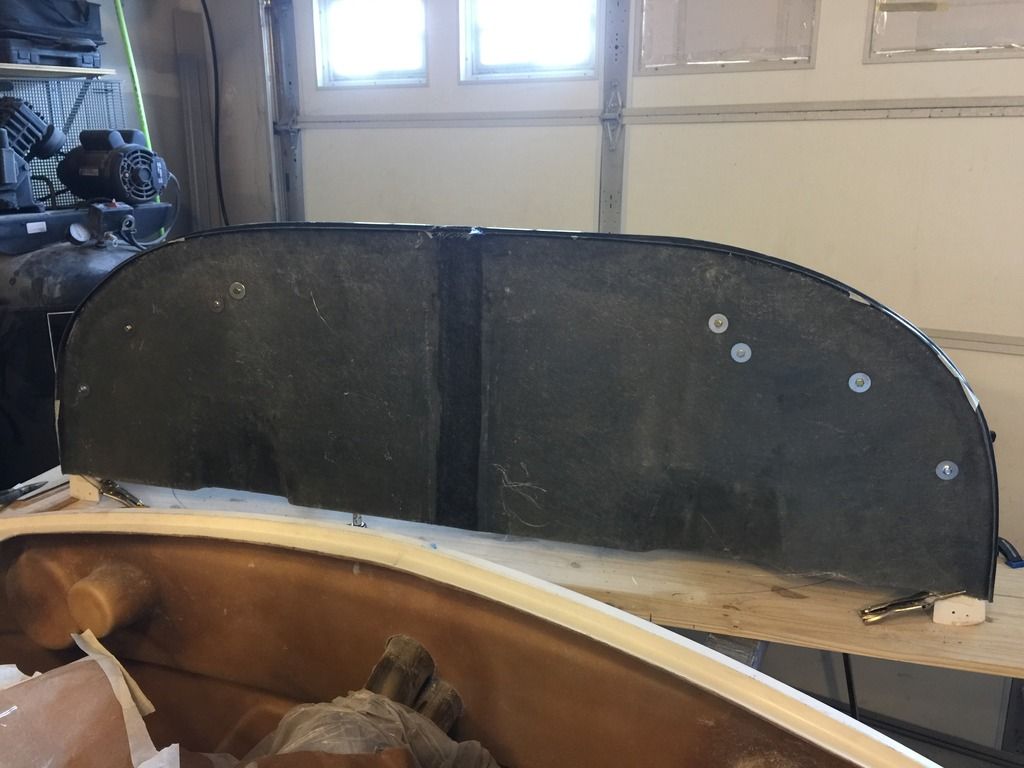
    How's everyone attaching theirs? How many bolts? Reinforcement? This is what I have done so far. I'll add a bolt or two at the back edge of the fender once I add some material to the splitter there.


    I want the splitter removable with the bumper installed, and I don't trust rivnuts, so I'm going to weld some nuts to flat washers and glass them into the bumper.
    Adam _____ Instagram @PopesProjects____ YouTube Channel
    818 SRX - #91
    Arrived 01/02/2014
    First Start 10/31/2016
    First Drive 05/22/2017
    Registered 10/25/2019 BRAP818

  28. #628
    Senior Member Frank818's Avatar
    Join Date
    Jun 2013
    Location
    QC, Canada
    Posts
    5,732
    Post Thanks / Like
    Yeah that looks pretty good on the splitter. I have fitted an 1/4-20 at the very far end closest to the wheels, bolting to the oh wait you got the old nose right? Forget this comment then.

    You could however fit some bolts and brackets like Jeff did, just before the steering to hold the rear end of the splitter. Is yours the 1st gen CF or vacuum CF?
    Frank
    818 chassis #181 powered by a '93 VW VR6 Turbo GT3582R
    Go-karted Aug 5, 2016 - Then May 19+21, 2017
    Tracked May 27/July 26, 2017
    Build time before being driveable on Sep 27, 2019: over 6000h
    Build Completed Winter 2021

  29. #629
    Senior Member Canadian818's Avatar
    Join Date
    Nov 2011
    Location
    Edmonton, Alberta
    Posts
    1,378
    Post Thanks / Like
    Quote Originally Posted by Frank818 View Post
    Yeah that looks pretty good on the splitter. I have fitted an 1/4-20 at the very far end closest to the wheels, bolting to the oh wait you got the old nose right? Forget this comment then.

    You could however fit some bolts and brackets like Jeff did, just before the steering to hold the rear end of the splitter. Is yours the 1st gen CF or vacuum CF?

    It's the 1st gen wet layup with fibreglass mat backing. Looks decent though, just not if you put a light behind it. So no underglows for me, haha. I'll attach it in the middle in the back once it's installed. I think I'm going to add some layers from the front and in 6" to support the mounting area. I'll have to at least install a couple of struts to support the centre section.
    Adam _____ Instagram @PopesProjects____ YouTube Channel
    818 SRX - #91
    Arrived 01/02/2014
    First Start 10/31/2016
    First Drive 05/22/2017
    Registered 10/25/2019 BRAP818

  30. #630
    fasterer and furiouser longislandwrx's Avatar
    Join Date
    Aug 2012
    Location
    Long Island
    Posts
    2,540
    Post Thanks / Like
    Blog Entries
    6
    i bet if you recessed it a little/flush mounted and got creative you could hide the fuel filler in the door jamb
    A well stocked beverage fridge is the key to any successful project.

  31. #631
    Moonlight Performance
    Hindsight's Avatar
    Join Date
    May 2014
    Location
    Atlanta
    Posts
    3,402
    Post Thanks / Like
    Quote Originally Posted by Canadian818 View Post
    How's everyone attaching theirs? How many bolts? Reinforcement? This is what I have done so far. I'll add a bolt or two at the back edge of the fender once I add some material to the splitter there.
    I did it about like you did with bolts into the bumper - about the same number of bolts. I added a piece of aluminum angle at the back which ties into the radiator frame via rivnuts. I also added some support struts to the front side (four in total). I have detailed pics in my build thread (should be on the last page or two).

  32. #632
    Senior Member Canadian818's Avatar
    Join Date
    Nov 2011
    Location
    Edmonton, Alberta
    Posts
    1,378
    Post Thanks / Like
    Quote Originally Posted by longislandwrx View Post
    i bet if you recessed it a little/flush mounted and got creative you could hide the fuel filler in the door jamb
    That's an awesome idea! I've actually ordered a motorcycle flush mount vented cap, and was going to put it just above the scoop. But I like this door jam idea, I might do that, thanks!

    Quote Originally Posted by Hindsight View Post
    I did it about like you did with bolts into the bumper - about the same number of bolts. I added a piece of aluminum angle at the back which ties into the radiator frame via rivnuts. I also added some support struts to the front side (four in total). I have detailed pics in my build thread (should be on the last page or two).
    How much did you stick yours out? I'm at 4" at the closest to centre point the bumper is touching the splitter.
    Adam _____ Instagram @PopesProjects____ YouTube Channel
    818 SRX - #91
    Arrived 01/02/2014
    First Start 10/31/2016
    First Drive 05/22/2017
    Registered 10/25/2019 BRAP818

  33. #633
    Moonlight Performance
    Hindsight's Avatar
    Join Date
    May 2014
    Location
    Atlanta
    Posts
    3,402
    Post Thanks / Like
    3.5" at that point.

  34. #634
    Senior Member Canadian818's Avatar
    Join Date
    Nov 2011
    Location
    Edmonton, Alberta
    Posts
    1,378
    Post Thanks / Like
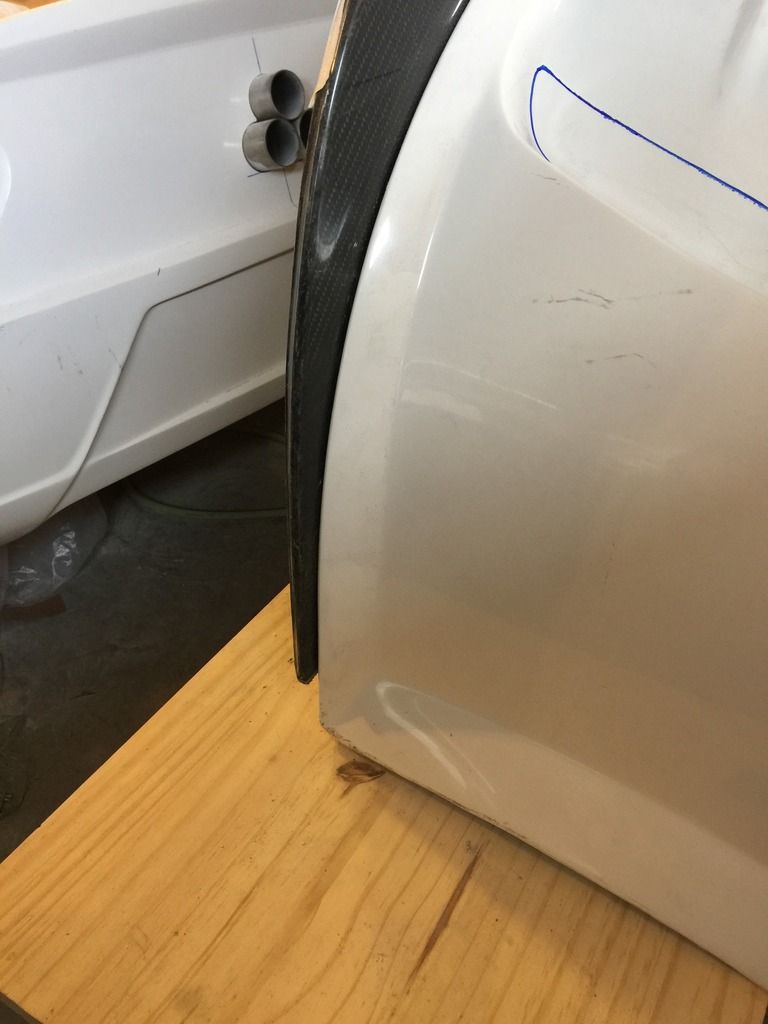
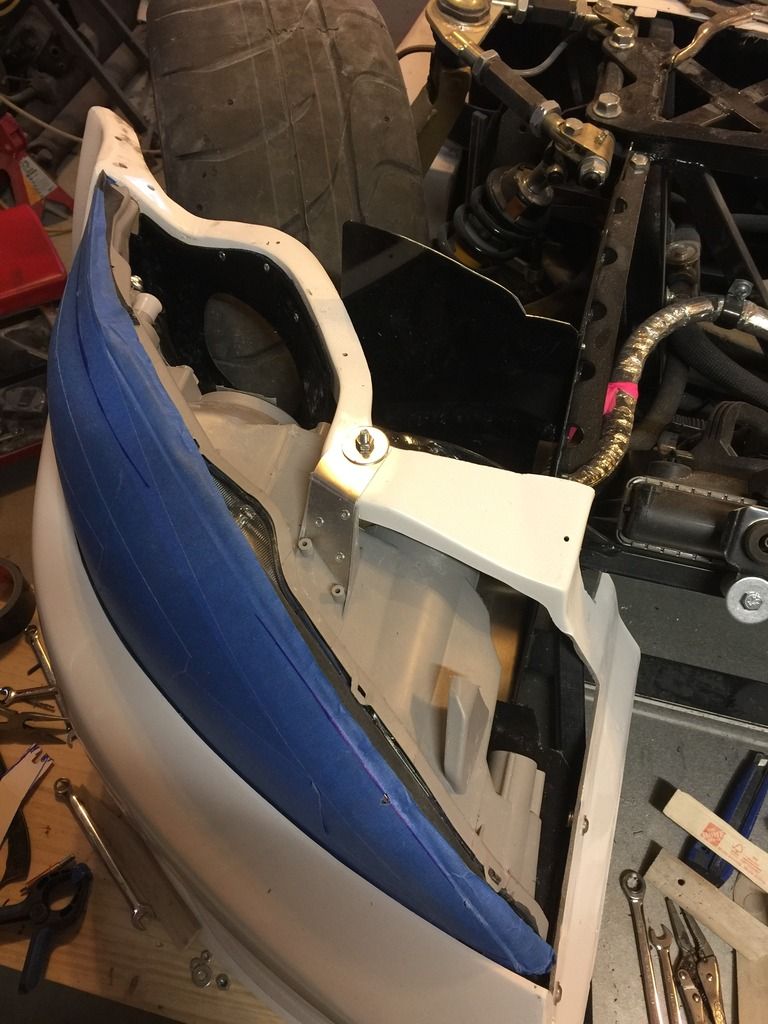
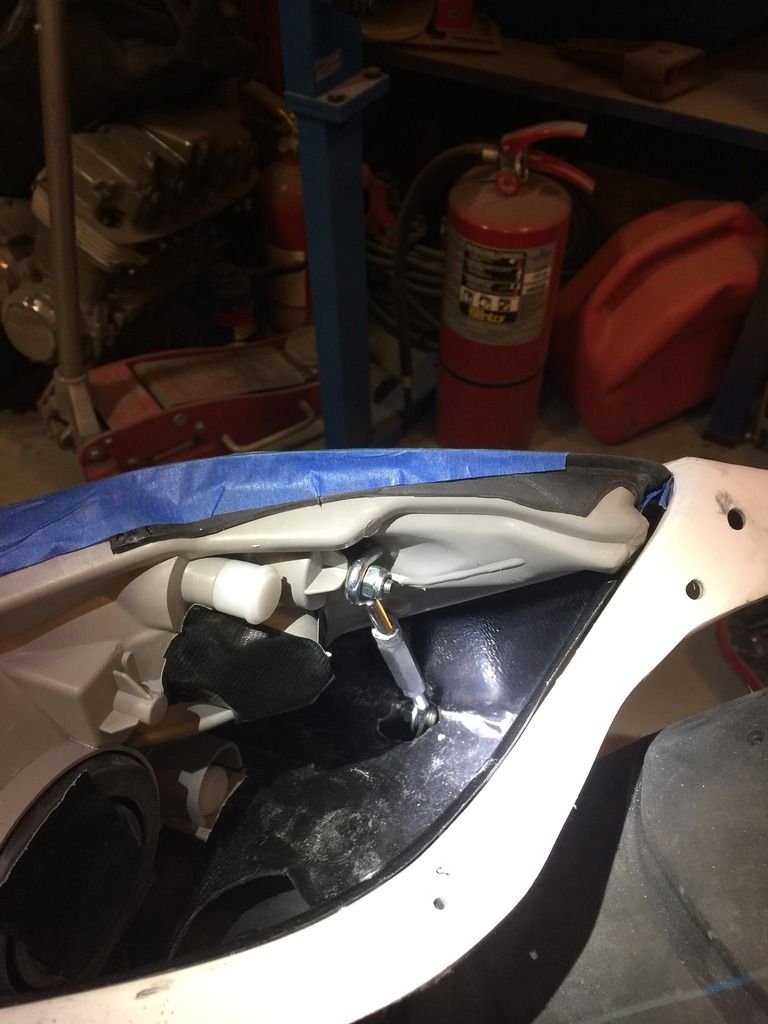
    I seriously can't for the life of me figure out what FFR were thinking when they designed this fender/headlight/bumper area. Just unnecessarily over complicated, everything fights everything. No point in complaining I guess, they realized it didn't work well and redesigned. Anyway, after longer than I'd like to admit they're in, with relatively acceptable gaps. I had to cut off and make new brackets to mount them (got the idea from someone else on here, kurk818 maybe), and on one side I added an aluminum turnbuckle in order to get the outside rear corner to stay out.


    I then spent an hour looking for my twine so I could square up the wheels and fix the rear of the front fenders but eventually gave up. I was also annoyed that the lower sections of the windshield frame fibreglass weren't trimmed remotely close and the rear upper tip/corner of the front fenders are quite different left to right. Frustrating for sure.

    So I moved to the back and began planning my wing mount. Mounting the wing isn't exactly a priority right now, but I plan to use it to support and secure the engine cover, catch can, wiring, etc. Plan is to make the horizontal pieces out of rectangular aluminum, and the vertical pieces aluminum round tube with heim joints so it can be tweeked level. It'll be connected at the back just under the bumper lip so the bumper can also be supported. This will allow me to push/pull the rear bumper so it lines up with the trunk for a decent gap.


    And since I had to take out the wing to get measurements for mounting I decided to get an idea where I'd like to mount it.


    First pic is roughly where it would sit using the supplied stanchions mounted on the trunk. IMO a terrible height as it's inline with both the windshield and roll bar. So I'll either make or have cut some taller ones, up 4-6" from here. I had originally planned to mount the wing on linear actuators and make it so at a flip of a switch I could go from wild to mild. But this build is taking way to long, so I'm just going to have two different height stanchions and switch out when going to the track. I really like the look of a big race wing mounted low, and I think it really works with the big round fenders. So either of the other two pics will be my "street" height.

    My goal is to have the body fitted and all the fibreglass mods done by the end of the month so I can move on to wiring in lights, fans, etc, and sort out the cooling system. I'm also going to rebuild the engine, but depending on the cooling problems I may get it registered before rebuilding.
    Adam _____ Instagram @PopesProjects____ YouTube Channel
    818 SRX - #91
    Arrived 01/02/2014
    First Start 10/31/2016
    First Drive 05/22/2017
    Registered 10/25/2019 BRAP818

  35. #635
    Senior Member Bob_n_Cincy's Avatar
    Join Date
    Sep 2012
    Location
    Cincinnati OH
    Posts
    3,903
    Post Thanks / Like

    Smile

    Quote Originally Posted by Canadian818 View Post
    I seriously can't, for the life of me, figure out what FFR was thinking .
    Hey Adam
    Can I get that quote on a t-Shirt.

    Keep up the good work. I think you are working as hard as anybody on the list.

    Mike and I are taking a break from the 818's this winter to work on another project. I will share it in a month or 2.
    Bob
    Last edited by Bob_n_Cincy; 02-16-2017 at 03:19 AM.
    818S #22 Candy Blue Frame, Front Gas Tank, 2.5L Turbo, Rear radiator, Shortened Transmission, Wookiee Compatible, Console mounted MR2 Shifter, Custom ECU panel, AWIC soon
    My Son Michael's Turbo ICE Build X22 http://thefactoryfiveforum.com/showt...rts-818S-Build
    My Electric Supercar Build X21 (on hold until winter) http://thefactoryfiveforum.com/showt...e-Build-Thread

  36. #636
    Senior Member Canadian818's Avatar
    Join Date
    Nov 2011
    Location
    Edmonton, Alberta
    Posts
    1,378
    Post Thanks / Like
    Quote Originally Posted by Bob_n_Cincy View Post
    Hey Adam
    Can I get that quote on a t-Shirt.

    Keep up the good work. I think you are working as hard as anybody on the list.

    Mike and I are taking a break from the 818's this winter to work on another project. I will share it in a month or 2.
    Bob
    I would love to see that on a shirt! Thanks, and I can't wait to see what you're cooking up, any hints?
    Adam _____ Instagram @PopesProjects____ YouTube Channel
    818 SRX - #91
    Arrived 01/02/2014
    First Start 10/31/2016
    First Drive 05/22/2017
    Registered 10/25/2019 BRAP818

  37. #637
    Senior Member Canadian818's Avatar
    Join Date
    Nov 2011
    Location
    Edmonton, Alberta
    Posts
    1,378
    Post Thanks / Like
    And the puzzle starts to come together! Hood surgery underway. I'm also going to cut the other side sail so I can glass them both up the same time. Snow is melting, I can't wait to go kart this thing soon!

    Adam _____ Instagram @PopesProjects____ YouTube Channel
    818 SRX - #91
    Arrived 01/02/2014
    First Start 10/31/2016
    First Drive 05/22/2017
    Registered 10/25/2019 BRAP818

  38. #638
    Senior Member
    Join Date
    Jun 2013
    Location
    Bowling Green, KY
    Posts
    1,382
    Post Thanks / Like
    The project is looking great.
    Did the same thing with the headlights, beat my head against the wall for a day or 2 through the Manuel away cut the tabs off and made my own. And they fit the way they should.

  39. #639
    Moonlight Performance
    Hindsight's Avatar
    Join Date
    May 2014
    Location
    Atlanta
    Posts
    3,402
    Post Thanks / Like
    So ambitious with the body mods. Looking forward to seeing the results.

  40. #640
    Senior Member
    Join Date
    Jan 2014
    Location
    USA
    Posts
    587
    Post Thanks / Like
    Still looking great. What brand/model wing did you purchase?

Page 16 of 25 FirstFirst ... 61415161718 ... LastLast

Posting Permissions

  • You may not post new threads
  • You may not post replies
  • You may not post attachments
  • You may not edit your posts
  •  

Replica Parts

Visit our community sponsor