Very Cool Parts

Visit our community sponsor

Thanks Thanks:  20
Likes Likes:  104
Page 15 of 25 FirstFirst ... 51314151617 ... LastLast
Results 561 to 600 of 967

Thread: Adam's Canadian 13B Rotary 818-SR Build

  1. #561
    Senior Member Canadian818's Avatar
    Join Date
    Nov 2011
    Location
    Edmonton, Alberta
    Posts
    1,378
    Post Thanks / Like
    Thanks guys. I need a little help. I did my first bit of fibreglass yesterday, and unfortunately it made my whole house smell like glue hours later. The resin I used was Bondo polyester. Is there a different brand or type that will off gas less offensive odours? It'll be 4 or 5 months before I can do it outside, and I was hoping to be done by then.
    Adam _____ Instagram @PopesProjects____ YouTube Channel
    818 SRX - #91
    Arrived 01/02/2014
    First Start 10/31/2016
    First Drive 05/22/2017
    Registered 10/25/2019 BRAP818

  2. #562
    Tazio Nuvolari wannabe Scargo's Avatar
    Join Date
    Nov 2013
    Location
    south-central CT
    Posts
    1,611
    Post Thanks / Like
    Do it "outside" and use more Methyl Ethyl Ketone Peroxide (MEKP). I cannot tell you how much. I'm sure you have experienced making too big a batch of resin or Bondo and it was too hot (too much MEKP) and set up too fast? The chemical reaction made it get hot and the more mass you have the faster the reaction. The cold will slow it down.

    Also, be careful with MEKP. Don't get it on your skin and for sure not in your eyes! Breathing can be harmful, so you should have ventilation. See section 3.
    Yes, it's stinky!

  3. #563
    Senior Member Canadian818's Avatar
    Join Date
    Nov 2011
    Location
    Edmonton, Alberta
    Posts
    1,378
    Post Thanks / Like
    Quote Originally Posted by Scargo View Post
    Do it "outside" and use more Methyl Ethyl Ketone Peroxide (MEKP). I cannot tell you how much. I'm sure you have experienced making too big a batch of resin or Bondo and it was too hot (too much MEKP) and set up too fast? The chemical reaction made it get hot and the more mass you have the faster the reaction. The cold will slow it down.

    Also, be careful with MEKP. Don't get it on your skin and for sure not in your eyes! Breathing can be harmful, so you should have ventilation. See section 3.
    Yes, it's stinky!
    Outside isn't an option as I'm not sure the resin would ever cure at -40 degrees, lol. I'm wondering if maybe epoxy or vinyl-ester resins would allow me to continue without stinking up the house.
    Adam _____ Instagram @PopesProjects____ YouTube Channel
    818 SRX - #91
    Arrived 01/02/2014
    First Start 10/31/2016
    First Drive 05/22/2017
    Registered 10/25/2019 BRAP818

  4. #564
    Moonlight Performance
    Hindsight's Avatar
    Join Date
    May 2014
    Location
    Atlanta
    Posts
    3,402
    Post Thanks / Like
    I use West System Epoxy and while it does have an odor, it isn't that strong at all. I have read various things about epoxy binding properly to vinyl-ester resins.... can't remember if people said yay or nay. Search the forums here.... I believe the post was by mikeinatlanta.

  5. #565
    Senior Member Frank818's Avatar
    Join Date
    Jun 2013
    Location
    QC, Canada
    Posts
    5,732
    Post Thanks / Like
    Quote Originally Posted by Canadian818 View Post
    Outside isn't an option as I'm not sure the resin would ever cure at -40 degrees, lol. I'm wondering if maybe epoxy or vinyl-ester resins would allow me to continue without stinking up the house.

    At 15C vinyl ester takes at least 3 times the time to cure than at 20-21C. And it's more picky on the hardener mix too, if off it may badly cure or not at all.
    So at -40, hum, hell no. loll
    Frank
    818 chassis #181 powered by a '93 VW VR6 Turbo GT3582R
    Go-karted Aug 5, 2016 - Then May 19+21, 2017
    Tracked May 27/July 26, 2017
    Build time before being driveable on Sep 27, 2019: over 6000h
    Build Completed Winter 2021

  6. #566
    Senior Member Canadian818's Avatar
    Join Date
    Nov 2011
    Location
    Edmonton, Alberta
    Posts
    1,378
    Post Thanks / Like
    I know I read it here somewhere, but I couldn't find it. From what I understand the FFR parts are viynl ester, right?

    Google tells me epoxy is the best choice for odour, so I'll try some of that. I can get the garage to around 15c, so perhaps there's a resin designed for curing at colder temps. Time to visit the local fibreglass supply shop I guess.
    Adam _____ Instagram @PopesProjects____ YouTube Channel
    818 SRX - #91
    Arrived 01/02/2014
    First Start 10/31/2016
    First Drive 05/22/2017
    Registered 10/25/2019 BRAP818

  7. #567
    Senior Member Frank818's Avatar
    Join Date
    Jun 2013
    Location
    QC, Canada
    Posts
    5,732
    Post Thanks / Like
    FFR panels are vinyl ester, yes. I used from Derakane vinyl ester and am freakin pleased of the results. If you control it correctly, it hardness a lot and it's very difficult to remove. Doesn't smell horrible, it smells a lot but it doesn't make you leave the 650sq-ft ventilated room.

    Epoxy, at least the one I'm using for my CF splitter and diffuser, doesn't smell as much as vinyl ester. But on vinyl ester, I've been told to use vinyl ester to maximize bond. Epoxy is supposed to bond very good too, I don't know the differences, just that my vinyl ester works above my expectations, which weren't just average.

    At 15C I figured I needed a little more MEKP to make the resin harden somewhere between 110 and 200% of it's normal time. It works though, past expiry date (by a month) vinyl ester resin at 15C still bonds extremely strong.

    Just be careful not to put any on your fingers, this thing sticks and you need to rub a lot or some high end industrial soap (which I have) to remove it with more ease.
    Frank
    818 chassis #181 powered by a '93 VW VR6 Turbo GT3582R
    Go-karted Aug 5, 2016 - Then May 19+21, 2017
    Tracked May 27/July 26, 2017
    Build time before being driveable on Sep 27, 2019: over 6000h
    Build Completed Winter 2021

  8. #568
    Senior Member
    Join Date
    Jan 2014
    Location
    USA
    Posts
    587
    Post Thanks / Like
    Vinylester stinks similar to polyester. Epoxy isn't so bad of a smell. Get a respirator. I have done a lot of fiberglass work over the years and didn't pay attention to what the underlying resin was and didn't have issues. Although, it's best not to mix different types for maximum bond strength. The difference in cost isn't that great and the last thing you want is delamination a few years down the line.

  9. #569
    Senior Member Frank818's Avatar
    Join Date
    Jun 2013
    Location
    QC, Canada
    Posts
    5,732
    Post Thanks / Like
    Vinylester is quite cheap for what you get. Although you will need a lot more than I did for your cut side sails and fenders.
    Frank
    818 chassis #181 powered by a '93 VW VR6 Turbo GT3582R
    Go-karted Aug 5, 2016 - Then May 19+21, 2017
    Tracked May 27/July 26, 2017
    Build time before being driveable on Sep 27, 2019: over 6000h
    Build Completed Winter 2021

  10. #570
    Senior Member Canadian818's Avatar
    Join Date
    Nov 2011
    Location
    Edmonton, Alberta
    Posts
    1,378
    Post Thanks / Like
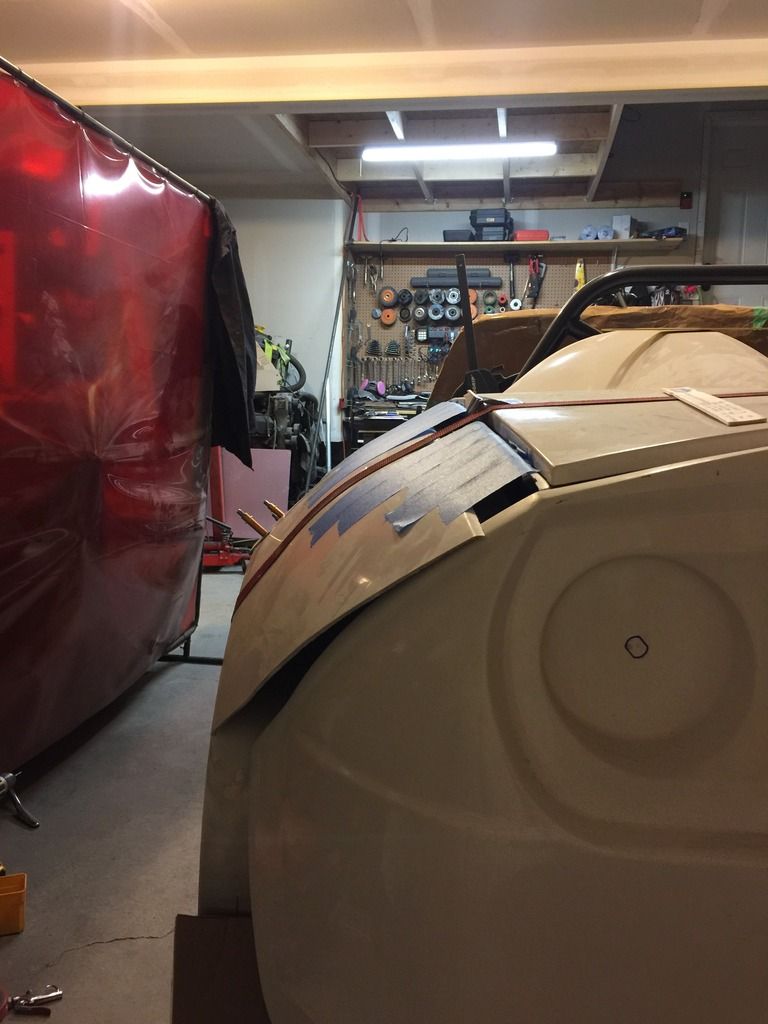
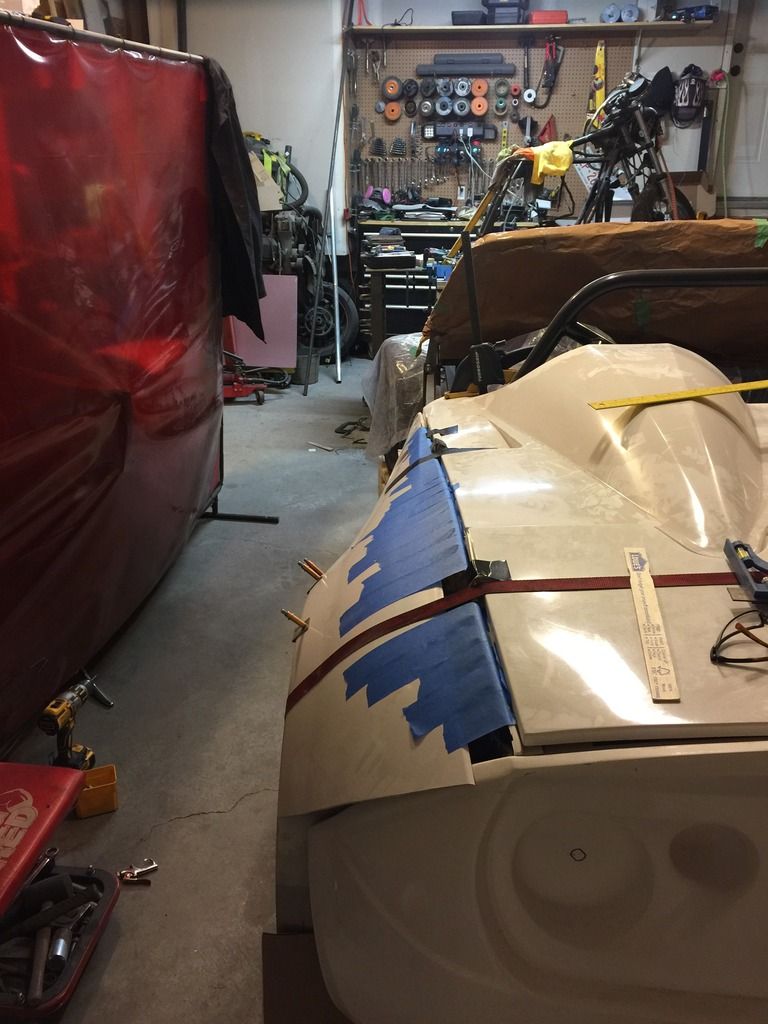
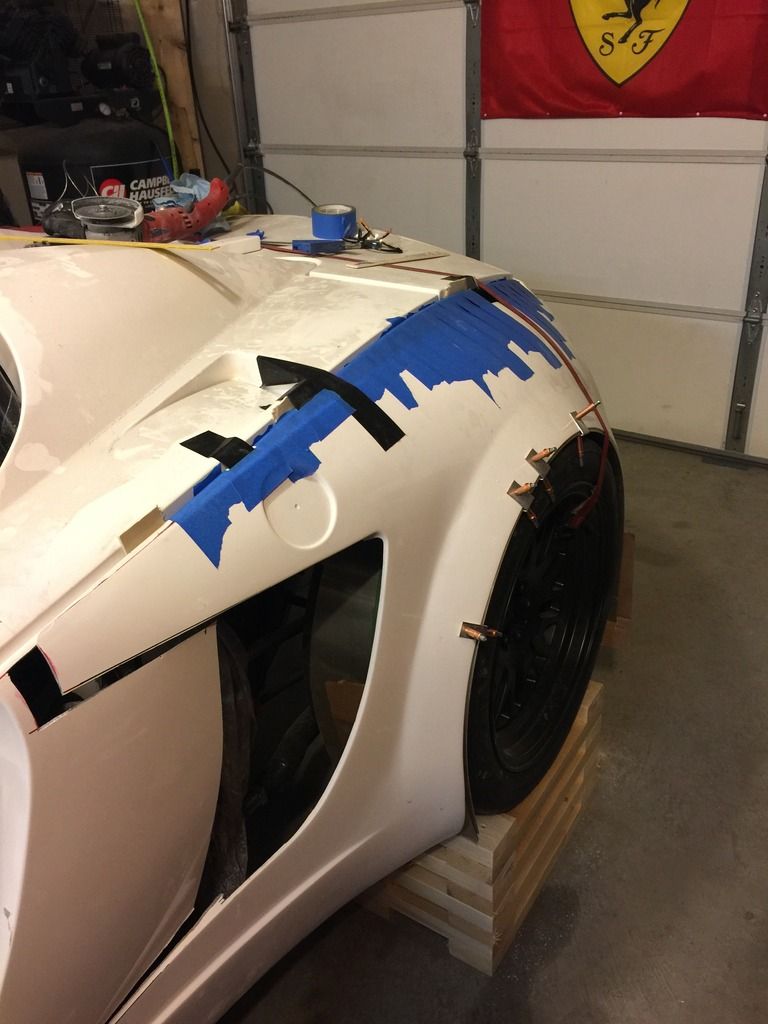
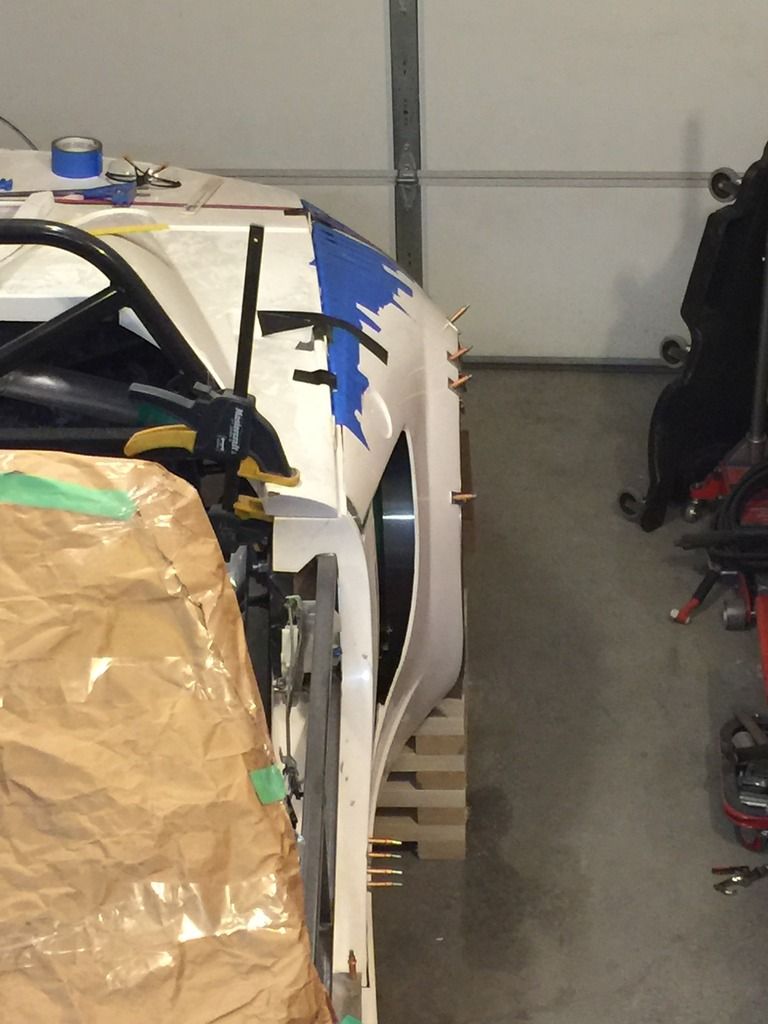
    Finally got back at the car today. I swear I haven't been slacking, there's a built in bookshelf project I've been telling the wife I'd do once the car is finished. She finally snapped, lol, so I hoped to it. Figured three years of procrastinating was a good run, haha.

    Did a little more trimming and tweaking, and tomorrow I'll start laying fibreglass. I just wanted to post some mock up pics for some constructive criticism, maybe I'm missing something or some line is way off.


    Adam _____ Instagram @PopesProjects____ YouTube Channel
    818 SRX - #91
    Arrived 01/02/2014
    First Start 10/31/2016
    First Drive 05/22/2017
    Registered 10/25/2019 BRAP818

  11. #571
    Tazio Nuvolari wannabe Scargo's Avatar
    Join Date
    Nov 2013
    Location
    south-central CT
    Posts
    1,611
    Post Thanks / Like
    How will you handle the as*-end and the blending of the side fender (sail) and the rounded corner of the bumper fascia? I could see you cutting the bumper in half and spreading it out there, but to match it up between the two pieces at that corner, and especially at the bottom, will be interesting. Will they remain separate pieces or part of the sail combined with the rear?
    24475C76-E593-4773-B43E-428CF82A8E88.jpg Lift off or tilt?
    ferrari-330-p4-by-noble-c880505082013191441_1.jpg
    I'm helpful, aren't I?
    I do intend to do the side inlets much like you are doing, with it cut, bent in and opened up quite a bit.
    Please, no mudflaps...

  12. #572
    Senior Member Canadian818's Avatar
    Join Date
    Nov 2011
    Location
    Edmonton, Alberta
    Posts
    1,378
    Post Thanks / Like
    Quote Originally Posted by Scargo View Post
    How will you handle the as*-end and the blending of the side fender (sail) and the rounded corner of the bumper fascia? I could see you cutting the bumper in half and spreading it out there, but to match it up between the two pieces at that corner, and especially at the bottom, will be interesting. Will they remain separate pieces or part of the sail combined with the rear?
    24475C76-E593-4773-B43E-428CF82A8E88.jpg Lift off or tilt?
    ferrari-330-p4-by-noble-c880505082013191441_1.jpg
    I'm helpful, aren't I?
    I do intend to do the side inlets much like you are doing, with it cut, bent in and opened up quite a bit.
    Please, no mudflaps...
    My plan for the *** end is still up in the air. I have two main ideas, one involves reshaping the bumper, the other is creating a pretty wild diffuser.

    I like the framing around the tail lights on this lambo concept, I would probably change the 818 lights.
    lamborghini_estampida_6.jpg

    I could widen the bumper and frame it to feature the tire like the P1.
    mclarenp1gtrrear.jpg

    I'm favouring the side pieces of the diffuser on this lambo. I've been thinking of making my own diffuser, opening up the back end more.
    maxresdefault.jpg
    Adam _____ Instagram @PopesProjects____ YouTube Channel
    818 SRX - #91
    Arrived 01/02/2014
    First Start 10/31/2016
    First Drive 05/22/2017
    Registered 10/25/2019 BRAP818

  13. #573
    Tazio Nuvolari wannabe Scargo's Avatar
    Join Date
    Nov 2013
    Location
    south-central CT
    Posts
    1,611
    Post Thanks / Like
    Some really great ideas and thanks for sharing. All along I have wanted an open rear. I look forward to seeing it develop.

  14. #574
    Senior Member Frank818's Avatar
    Join Date
    Jun 2013
    Location
    QC, Canada
    Posts
    5,732
    Post Thanks / Like
    Quote Originally Posted by Canadian818 View Post
    My plan for the *** end is still up in the air.
    So the *** is up in the air. lolll
    Frank
    818 chassis #181 powered by a '93 VW VR6 Turbo GT3582R
    Go-karted Aug 5, 2016 - Then May 19+21, 2017
    Tracked May 27/July 26, 2017
    Build time before being driveable on Sep 27, 2019: over 6000h
    Build Completed Winter 2021

  15. #575
    Senior Member Canadian818's Avatar
    Join Date
    Nov 2011
    Location
    Edmonton, Alberta
    Posts
    1,378
    Post Thanks / Like
    Quote Originally Posted by Frank818 View Post
    So the *** is up in the air. lolll
    Yes Frank

    Just got back from a local boat store, had a good chat with the guy there and I'm feeling confident I have a better product. Fingers crossed, progress pics coming soon.
    Adam _____ Instagram @PopesProjects____ YouTube Channel
    818 SRX - #91
    Arrived 01/02/2014
    First Start 10/31/2016
    First Drive 05/22/2017
    Registered 10/25/2019 BRAP818

  16. #576
    Senior Member Canadian818's Avatar
    Join Date
    Nov 2011
    Location
    Edmonton, Alberta
    Posts
    1,378
    Post Thanks / Like
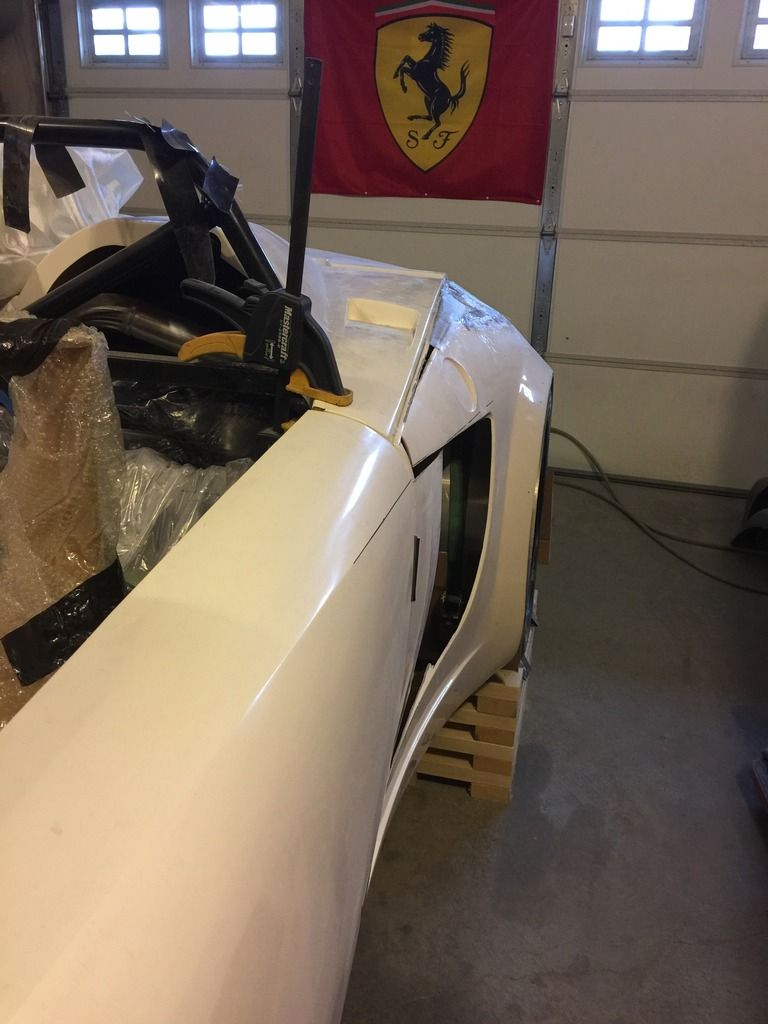
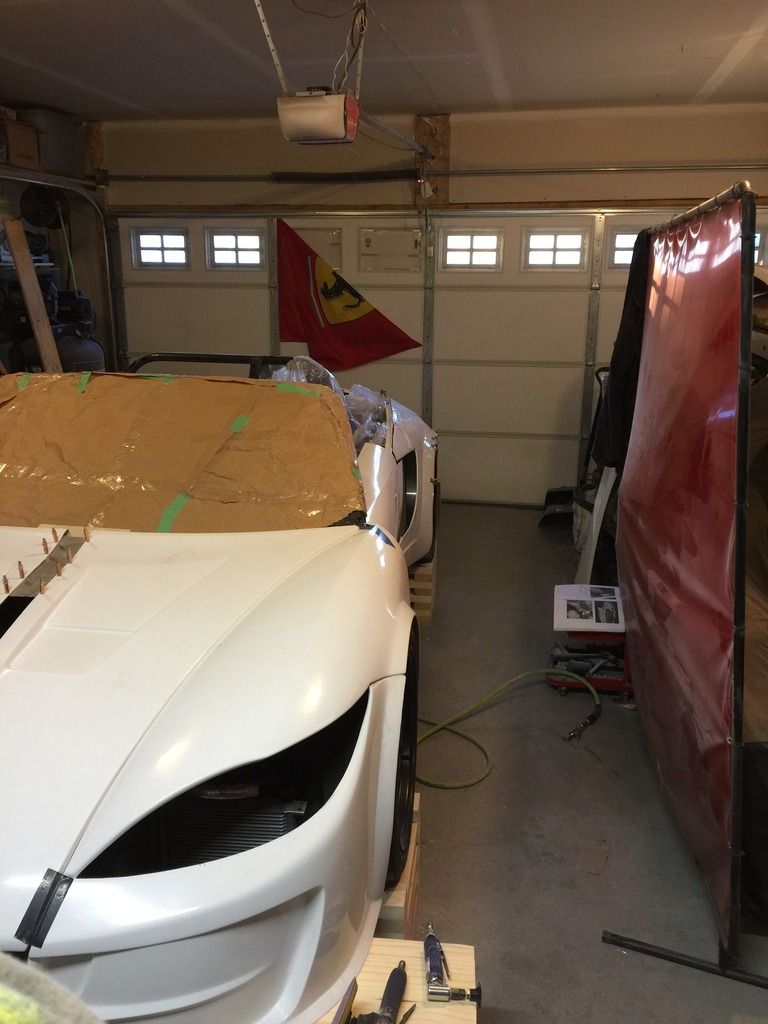
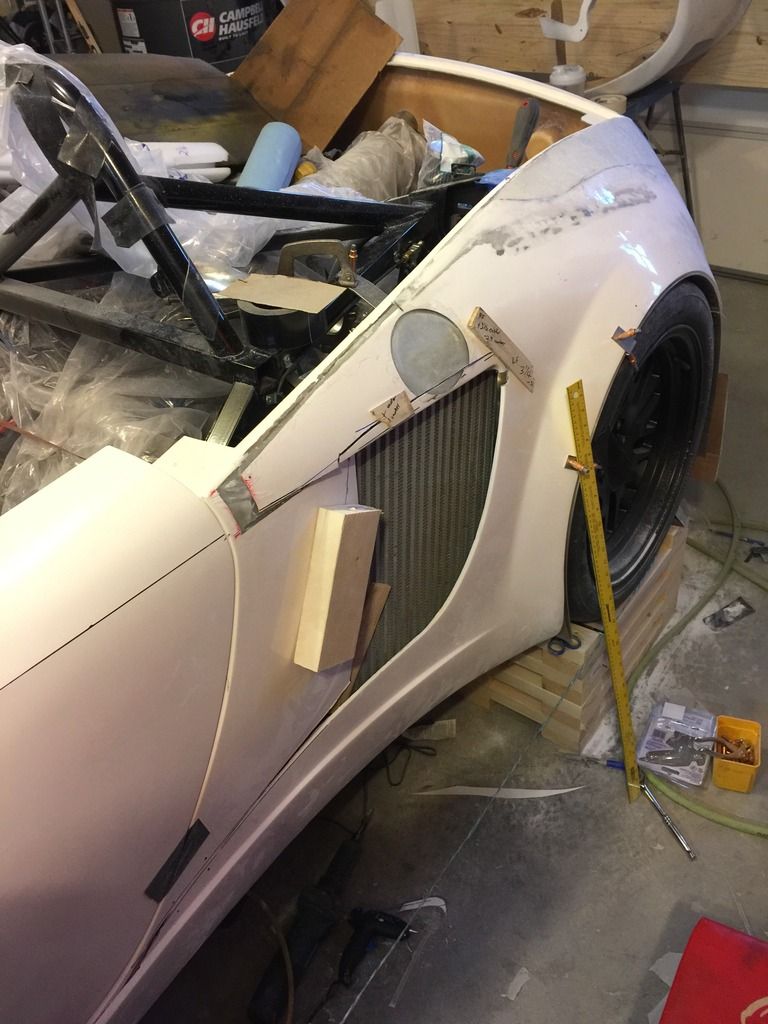
    Widebody progress.


    Got a few layers of cloth laid out, and I'm fairly happy with how it all worked out. Next up is to remove it and glass from behind for strength, then reinstall and start shaping it with fairing compound. The scoop area will be a little reshaped to match the door line, but I want the intercooler reinstalled first so I can build the scoop inward for ducting.

    I didn't want to cut any other parts yet as this was my first time working with fibreglass and I wasn't sure if I was up to the task. Now that I'm feeling more confident I'm going to begin widening the front and other side sail. Actually starting to feel like there's an end in sight now that I'm making headway on the body! Come one spring! (but not too fast, work to be done!)
    Adam _____ Instagram @PopesProjects____ YouTube Channel
    818 SRX - #91
    Arrived 01/02/2014
    First Start 10/31/2016
    First Drive 05/22/2017
    Registered 10/25/2019 BRAP818

  17. #577
    Senior Member Frank818's Avatar
    Join Date
    Jun 2013
    Location
    QC, Canada
    Posts
    5,732
    Post Thanks / Like
    Man you'll fix those tinny fenders in no time!

    What are you using to prevent the resin from dropping on the floor and along the fender so it retains its shape?
    Frank
    818 chassis #181 powered by a '93 VW VR6 Turbo GT3582R
    Go-karted Aug 5, 2016 - Then May 19+21, 2017
    Tracked May 27/July 26, 2017
    Build time before being driveable on Sep 27, 2019: over 6000h
    Build Completed Winter 2021

  18. #578
    Senior Member Canadian818's Avatar
    Join Date
    Nov 2011
    Location
    Edmonton, Alberta
    Posts
    1,378
    Post Thanks / Like
    Quote Originally Posted by Frank818 View Post
    Man you'll fix those tinny fenders in no time!

    What are you using to prevent the resin from dropping on the floor and along the fender so it retains its shape?
    Wasn't too much of an issues, about 5 mins after I get everything wetted out I smoothed everything over with a spreader to get out the excess resin.
    Adam _____ Instagram @PopesProjects____ YouTube Channel
    818 SRX - #91
    Arrived 01/02/2014
    First Start 10/31/2016
    First Drive 05/22/2017
    Registered 10/25/2019 BRAP818

  19. #579
    Senior Member
    Join Date
    Jan 2014
    Location
    USA
    Posts
    587
    Post Thanks / Like
    Looking good!

    It looks like your top layer may have been woven. I've founded it best to use mat for a layer that will likely get sanded out. The mat is randomly oriented. The woven material is very structured and takes more effort to finish, sometimes requiring a thin layer of resin to be applied to smooth it out before going with filler and primer. Woven gets stronger when you criss cross the pattern. Some detail here: http://www.fibreglast.com/product/th...earning_Center

  20. #580
    Senior Member Canadian818's Avatar
    Join Date
    Nov 2011
    Location
    Edmonton, Alberta
    Posts
    1,378
    Post Thanks / Like
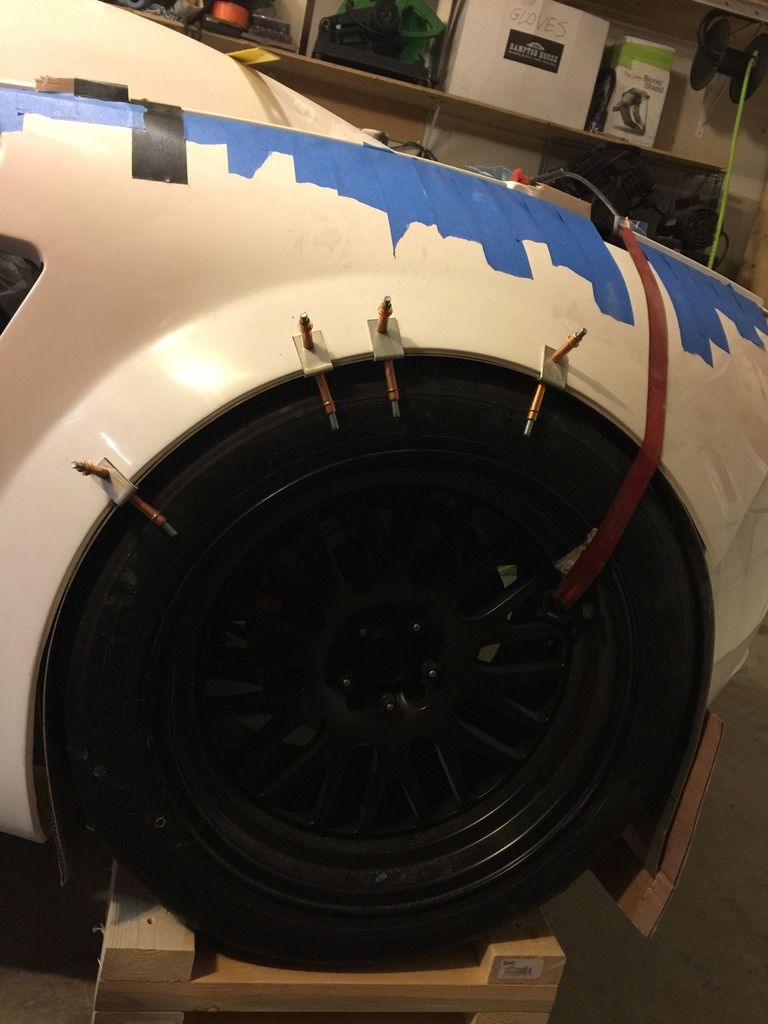
    Thanks Andrew, very interesting read, which lead to google searches and more reading. Different opinions out there on using mat with epoxy. I just started building up the shape using glass beads mixed into epoxy like a filler, kinda neat.

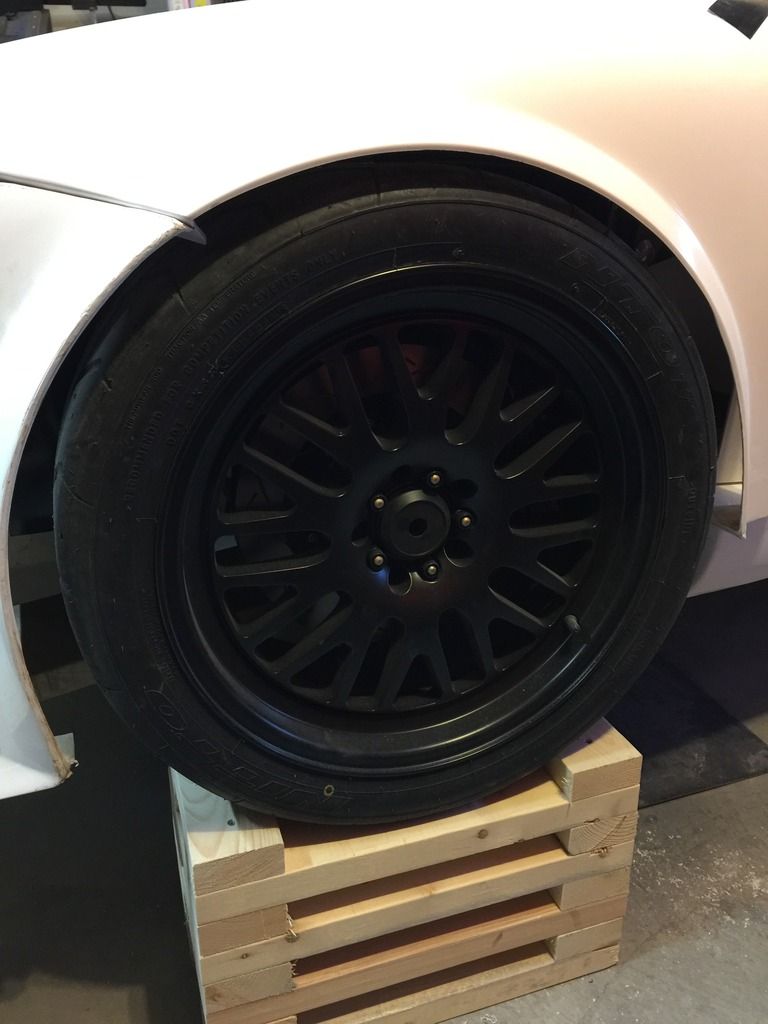
    I also started widening the front end, pretty sure I'm the first on this one too (why do I do this to myself?).


    I'm not 100% sure how high to have the fender above the wheel to minimize rub. I want the outside edge to be flush looking down over the fender at the wheel. Any suggestions from those with finished cars?
    Adam _____ Instagram @PopesProjects____ YouTube Channel
    818 SRX - #91
    Arrived 01/02/2014
    First Start 10/31/2016
    First Drive 05/22/2017
    Registered 10/25/2019 BRAP818

  21. #581
    Senior Member Frank818's Avatar
    Join Date
    Jun 2013
    Location
    QC, Canada
    Posts
    5,732
    Post Thanks / Like
    You've widen the WHOLE front too? Good looord...

    About fender rub, you gotta test it. Depends on your wheel's diameter, splash guards, FFR frame welding variations, etc.
    Frank
    818 chassis #181 powered by a '93 VW VR6 Turbo GT3582R
    Go-karted Aug 5, 2016 - Then May 19+21, 2017
    Tracked May 27/July 26, 2017
    Build time before being driveable on Sep 27, 2019: over 6000h
    Build Completed Winter 2021

  22. #582
    Senior Member Canadian818's Avatar
    Join Date
    Nov 2011
    Location
    Edmonton, Alberta
    Posts
    1,378
    Post Thanks / Like
    Quote Originally Posted by Frank818 View Post
    You've widen the WHOLE front too? Good looord...

    About fender rub, you gotta test it. Depends on your wheel's diameter, splash guards, FFR frame welding variations, etc.
    I understand that I'll need to test, but a starting point would help me temporarily locate everything before I mess with removing the coilover.
    Adam _____ Instagram @PopesProjects____ YouTube Channel
    818 SRX - #91
    Arrived 01/02/2014
    First Start 10/31/2016
    First Drive 05/22/2017
    Registered 10/25/2019 BRAP818

  23. #583
    Member jcpresto's Avatar
    Join Date
    Aug 2015
    Posts
    84
    Post Thanks / Like
    Hi Adam, what are you running upfront? I have a 285/30-18 on the front. 18x9.5 45 offset with 15mm spacer. We added 1.25 inches to the flare if that helps you from a starting point. No rub on compression.

  24. #584
    Senior Member Canadian818's Avatar
    Join Date
    Nov 2011
    Location
    Edmonton, Alberta
    Posts
    1,378
    Post Thanks / Like
    245/40/18 on 18x8.5 +20

    Do you mean 1.25" from the top of the tire to the bottom of the flare? Any pics?
    Adam _____ Instagram @PopesProjects____ YouTube Channel
    818 SRX - #91
    Arrived 01/02/2014
    First Start 10/31/2016
    First Drive 05/22/2017
    Registered 10/25/2019 BRAP818

  25. #585
    Senior Member Bob_n_Cincy's Avatar
    Join Date
    Sep 2012
    Location
    Cincinnati OH
    Posts
    3,903
    Post Thanks / Like
    Quote Originally Posted by Canadian818 View Post
    I'm not 100% sure how high to have the fender above the wheel to minimize rub. I want the outside edge to be flush looking down over the fender at the wheel. Any suggestions from those with finished cars?
    Canadian,
    I like your widen body. I would go ahead and widen the frame.
    I have about 1.5" between front tire and fender. I originally had rub.
    To cure it, I'm running 500 springs in the rear to prevent body roll.
    I also switched to taller upper ball joints in the front to give me more camber gain. This tucks the tire in during compression. My rear tires could stick out a 1/2" to 3/4" wider
    Bob
    Attached Images Attached Images
    818S #22 Candy Blue Frame, Front Gas Tank, 2.5L Turbo, Rear radiator, Shortened Transmission, Wookiee Compatible, Console mounted MR2 Shifter, Custom ECU panel, AWIC soon
    My Son Michael's Turbo ICE Build X22 http://thefactoryfiveforum.com/showt...rts-818S-Build
    My Electric Supercar Build X21 (on hold until winter) http://thefactoryfiveforum.com/showt...e-Build-Thread

  26. #586
    Senior Member Canadian818's Avatar
    Join Date
    Nov 2011
    Location
    Edmonton, Alberta
    Posts
    1,378
    Post Thanks / Like
    Thanks bob! That's about the only thing left to widen, haha. I have 500lb springs out back and 350lb up front. I really want to get the fender as low as possible, but I'll start with around 1.25-1.5" and test fit. I know most remove the spring and go to the bump stop to check clearance, but is it fair to say that if I'm hitting the stops when driving that I need more spring?
    Adam _____ Instagram @PopesProjects____ YouTube Channel
    818 SRX - #91
    Arrived 01/02/2014
    First Start 10/31/2016
    First Drive 05/22/2017
    Registered 10/25/2019 BRAP818

  27. #587
    Senior Member
    Join Date
    Jan 2014
    Location
    USA
    Posts
    587
    Post Thanks / Like
    The front gap you have now looks pretty similar to mine with the old nose. I think you'll be alright.


  28. #588
    Member jcpresto's Avatar
    Join Date
    Aug 2015
    Posts
    84
    Post Thanks / Like
    Quote Originally Posted by Canadian818 View Post
    245/40/18 on 18x8.5 +20

    Do you mean 1.25" from the top of the tire to the bottom of the flare? Any pics?
    I don't have a pic of it finished. Should be in the next 2 months. I got distracted with building a house. The total flare is additional 1.25 wider. I cut the old flare completely off and started from scratch with a new curve and wider stance on the fender for both front and rear. I can fit about 2 fingers between tire and fender and have -1.6 camber in front. Here is a pic before cut the flares, but it doesn't help to much without drawing the lines in your head. image.jpeg

  29. #589
    Senior Member Canadian818's Avatar
    Join Date
    Nov 2011
    Location
    Edmonton, Alberta
    Posts
    1,378
    Post Thanks / Like
    Thanks guys! jcpresto, I can't wait to see how it turns out.

    Another question, for anyone who did a single wiper. How much clearance between the windshield and hood did you need?
    Adam _____ Instagram @PopesProjects____ YouTube Channel
    818 SRX - #91
    Arrived 01/02/2014
    First Start 10/31/2016
    First Drive 05/22/2017
    Registered 10/25/2019 BRAP818

  30. #590
    Senior Member Bob_n_Cincy's Avatar
    Join Date
    Sep 2012
    Location
    Cincinnati OH
    Posts
    3,903
    Post Thanks / Like
    Quote Originally Posted by Canadian818 View Post
    Thanks guys! jcpresto, I can't wait to see how it turns out.

    Another question, for anyone who did a single wiper. How much clearance between the windshield and hood did you need?
    I only have about a 1/4" of clearance. I did not trim my hood at all. I do not have any support lifting the hood in the middle.
    I need to add some support because my hood flutters a bit at speed. You can see the end of my wiper travel where the windshield isn't clean.
    Bob

    wiper.jpg wipwr2.jpg wiprer3.jpg
    Last edited by Bob_n_Cincy; 01-27-2017 at 04:10 AM.
    818S #22 Candy Blue Frame, Front Gas Tank, 2.5L Turbo, Rear radiator, Shortened Transmission, Wookiee Compatible, Console mounted MR2 Shifter, Custom ECU panel, AWIC soon
    My Son Michael's Turbo ICE Build X22 http://thefactoryfiveforum.com/showt...rts-818S-Build
    My Electric Supercar Build X21 (on hold until winter) http://thefactoryfiveforum.com/showt...e-Build-Thread

  31. #591
    Senior Member Canadian818's Avatar
    Join Date
    Nov 2011
    Location
    Edmonton, Alberta
    Posts
    1,378
    Post Thanks / Like
    Thanks as always Bob! 1/4" clearance to the wiper, but at the centre of the hood what's the distance from the hood to the windshield? Looks like around 2"? I don't want to get distracted with a wiper install right now, so I just to to make sure I leave enough room. Thanks
    Adam _____ Instagram @PopesProjects____ YouTube Channel
    818 SRX - #91
    Arrived 01/02/2014
    First Start 10/31/2016
    First Drive 05/22/2017
    Registered 10/25/2019 BRAP818

  32. #592
    Senior Member Bob_n_Cincy's Avatar
    Join Date
    Sep 2012
    Location
    Cincinnati OH
    Posts
    3,903
    Post Thanks / Like
    Quote Originally Posted by Canadian818 View Post
    Thanks as always Bob! 1/4" clearance to the wiper, but at the centre of the hood what's the distance from the hood to the windshield? Looks like around 2"? I don't want to get distracted with a wiper install right now, so I just to to make sure I leave enough room. Thanks
    I'll have to take a measurement. But I do know the windshield is all the back in its top slots. Maybe not all the way back in the bottom slots, as I was going for a little more rake in the windshield.
    Bob
    818S #22 Candy Blue Frame, Front Gas Tank, 2.5L Turbo, Rear radiator, Shortened Transmission, Wookiee Compatible, Console mounted MR2 Shifter, Custom ECU panel, AWIC soon
    My Son Michael's Turbo ICE Build X22 http://thefactoryfiveforum.com/showt...rts-818S-Build
    My Electric Supercar Build X21 (on hold until winter) http://thefactoryfiveforum.com/showt...e-Build-Thread

  33. #593
    Senior Member AZPete's Avatar
    Join Date
    Feb 2011
    Location
    Scottsdale, AZ
    Posts
    2,374
    Post Thanks / Like
    Adam, 1 3/4 inch on mine which is a modified donor mechanism with a single donor wiper arm. I have an adjustable center hood brace.
    Pete
    818S/C : Chassis #25 with 06 WRX 2.5 turbo, ABS, cruise, PS, A/C, Apple CarPlay, rear camera, power windows & locks, leather & other complexities. Sold 10/19 with 5,800 miles.
    Mk3 Roadster #6228 4.6L, T45, IRS, PS, PB, ABS, Cruise, Koni's, 17" Halibrands, red w/ silver - 9K miles then sold @ Barrett-Jackson Jan 2011 (got back cash spent).

  34. #594
    Senior Member Canadian818's Avatar
    Join Date
    Nov 2011
    Location
    Edmonton, Alberta
    Posts
    1,378
    Post Thanks / Like
    Thanks Pete. There's quite a bit of edge I can trim down on the hood so I can stuff a 2x4 (1.5") in there and forget about it for now.

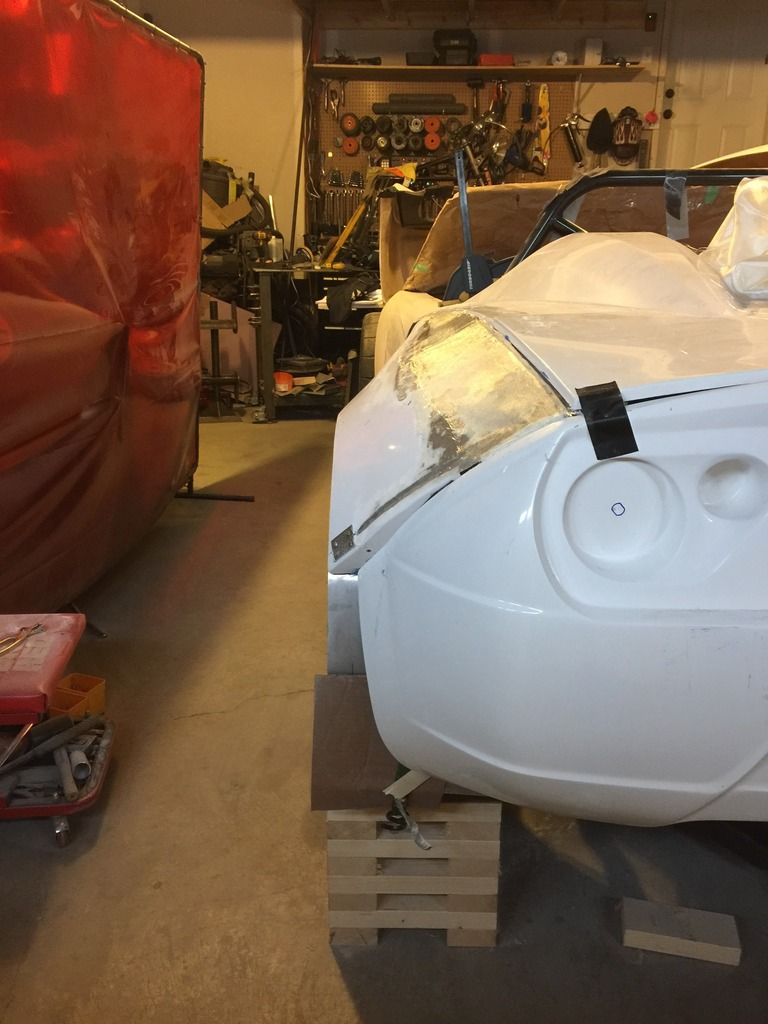
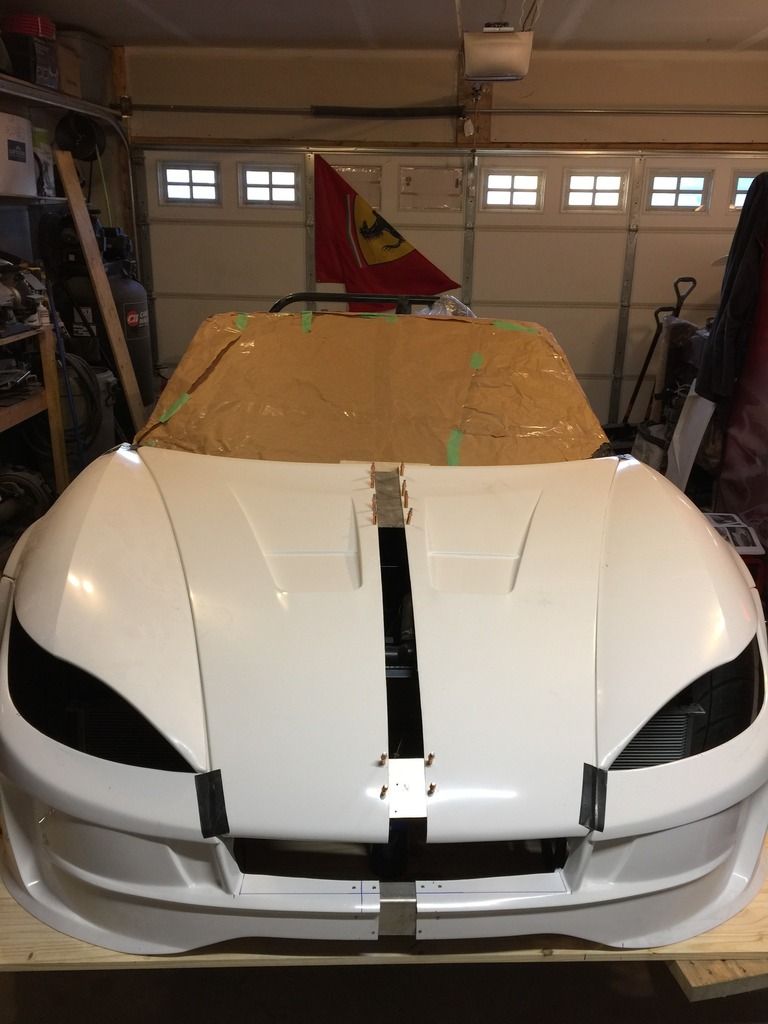
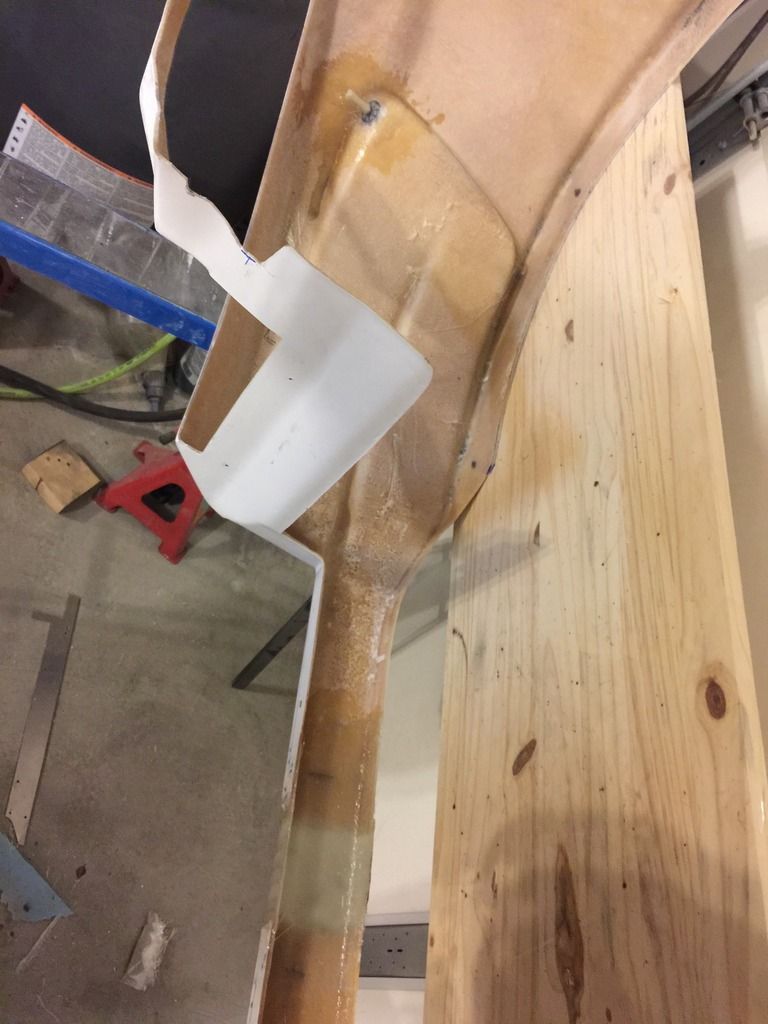
    I've been working on the car lots. Unfortunately with bodywork, most of the work can't be relayed with pics. Today I finished structurally widening the front bumper, still need to weld up the modified bumper mounts. I glued and glassed over some studs to support the headlight buckets.


    And now I'm working on reshaping the drivers side scoop to match the body line on the door.

    Adam _____ Instagram @PopesProjects____ YouTube Channel
    818 SRX - #91
    Arrived 01/02/2014
    First Start 10/31/2016
    First Drive 05/22/2017
    Registered 10/25/2019 BRAP818

  35. #595
    Senior Member
    Join Date
    Jan 2014
    Location
    USA
    Posts
    587
    Post Thanks / Like
    The progress looks excellent!

    I haven't followed the GTM closely to know if it's the same story, but thinking out loud it seems like quite a few people aren't quite satisfied with the body design of the 818. I wonder if Factory Five looks at a few of the threads currently working on or proposing extensive body mods and takes notice. I think that the design could use additional tweaking.

  36. #596
    Senior Member Frank818's Avatar
    Join Date
    Jun 2013
    Location
    QC, Canada
    Posts
    5,732
    Post Thanks / Like
    I never thought you'd spend so much time on the body for so many mods. Seems like all the time I spent converting to VR6 Turbo you are spending converting to massive 600 tires front and rear (ok, "just" 305s but that's like 600 loll).

    Since this is your 1st attempt on fiberglass, you are doing it like a pro!! I couldn't do that good, always amazed to see when people modify a panel.
    Frank
    818 chassis #181 powered by a '93 VW VR6 Turbo GT3582R
    Go-karted Aug 5, 2016 - Then May 19+21, 2017
    Tracked May 27/July 26, 2017
    Build time before being driveable on Sep 27, 2019: over 6000h
    Build Completed Winter 2021

  37. #597
    Senior Member flynntuna's Avatar
    Join Date
    Apr 2011
    Location
    San Diego Ca 92106
    Posts
    1,972
    Post Thanks / Like
    Looking good. It's probably for the best that FFR decided to go with fiberglass panels rather than the thermoformed panels that were originally planned. So much creativity can be unleashed using fiberglass. Looking foward to your next update.

  38. #598
    Moonlight Performance
    Hindsight's Avatar
    Join Date
    May 2014
    Location
    Atlanta
    Posts
    3,402
    Post Thanks / Like
    Wow, some very big changes! Can't wait to see it done.

  39. #599
    Senior Member Canadian818's Avatar
    Join Date
    Nov 2011
    Location
    Edmonton, Alberta
    Posts
    1,378
    Post Thanks / Like
    Thanks guys! I'm fairly happy with how it's going. I'm sure FFR keeps an eye on what we're doing, after seeing all the struggle with the headlights they came out with the new nose. I'm not a huge fan of the front of the car, but I do prefer it to the new nose. IMO the back looks the worst, those tail lights just don't do it for me. I have plans to change those too, but I'm not sure if I'll get to it before spring.

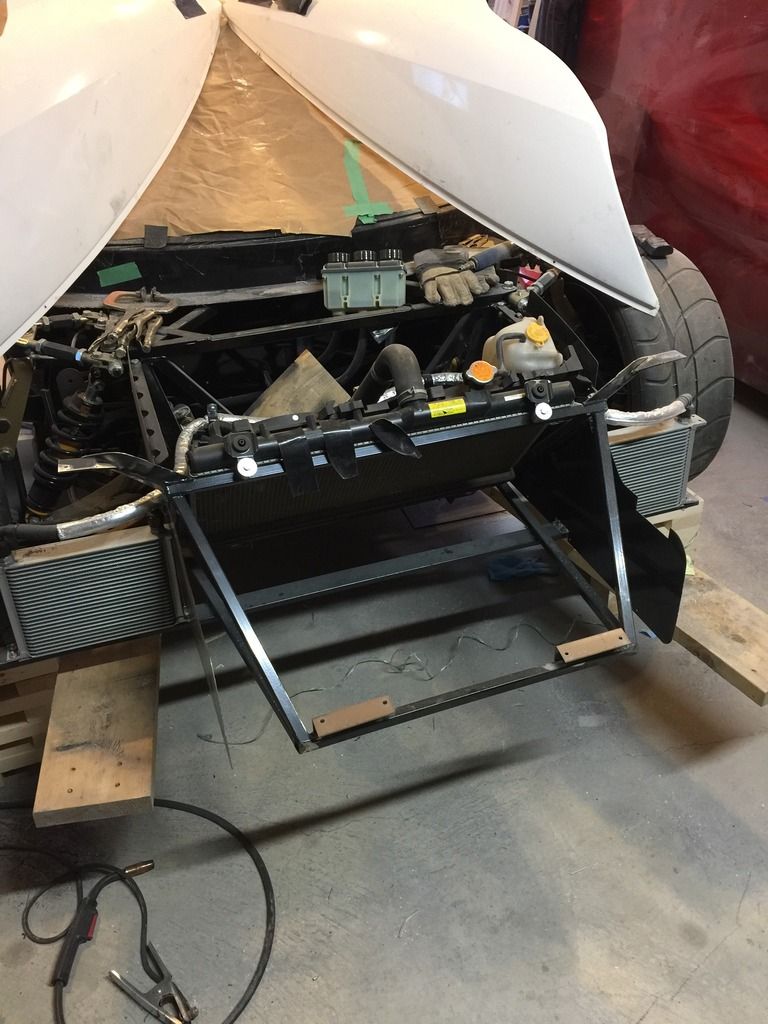
    I wanted to post this pic in hopes that it helps someone. I first put my bumper on a 1/2" thick board and screwed it down. Then I clamped two 2x6's to the bottom of the frame sticking out. Lay your bumper on this instead of on blocks and it insures your bumper is both inline with your frame and exactly 1/2" up. Also in this pic is my modified upper bumper brackets and the bottom brackets I made.

    Adam _____ Instagram @PopesProjects____ YouTube Channel
    818 SRX - #91
    Arrived 01/02/2014
    First Start 10/31/2016
    First Drive 05/22/2017
    Registered 10/25/2019 BRAP818

  40. #600
    Senior Member flynntuna's Avatar
    Join Date
    Apr 2011
    Location
    San Diego Ca 92106
    Posts
    1,972
    Post Thanks / Like
    I totally agree with you on the front end. I've been considering changing it using the gt40 and Lexus as inspiration.
    Attached Images Attached Images
    Last edited by flynntuna; 02-01-2017 at 11:05 PM.

Page 15 of 25 FirstFirst ... 51314151617 ... LastLast

Posting Permissions

  • You may not post new threads
  • You may not post replies
  • You may not post attachments
  • You may not edit your posts
  •  

FFMetal

Visit our community sponsor