Boig Motorsports

Visit our community sponsor

Thanks Thanks:  20
Likes Likes:  104
Page 11 of 25 FirstFirst ... 91011121321 ... LastLast
Results 401 to 440 of 967

Thread: Adam's Canadian 13B Rotary 818-SR Build

  1. #401
    Senior Member Canadian818's Avatar
    Join Date
    Nov 2011
    Location
    Edmonton, Alberta
    Posts
    1,378
    Post Thanks / Like
    Quote Originally Posted by Frank818 View Post
    You fab'ed this?
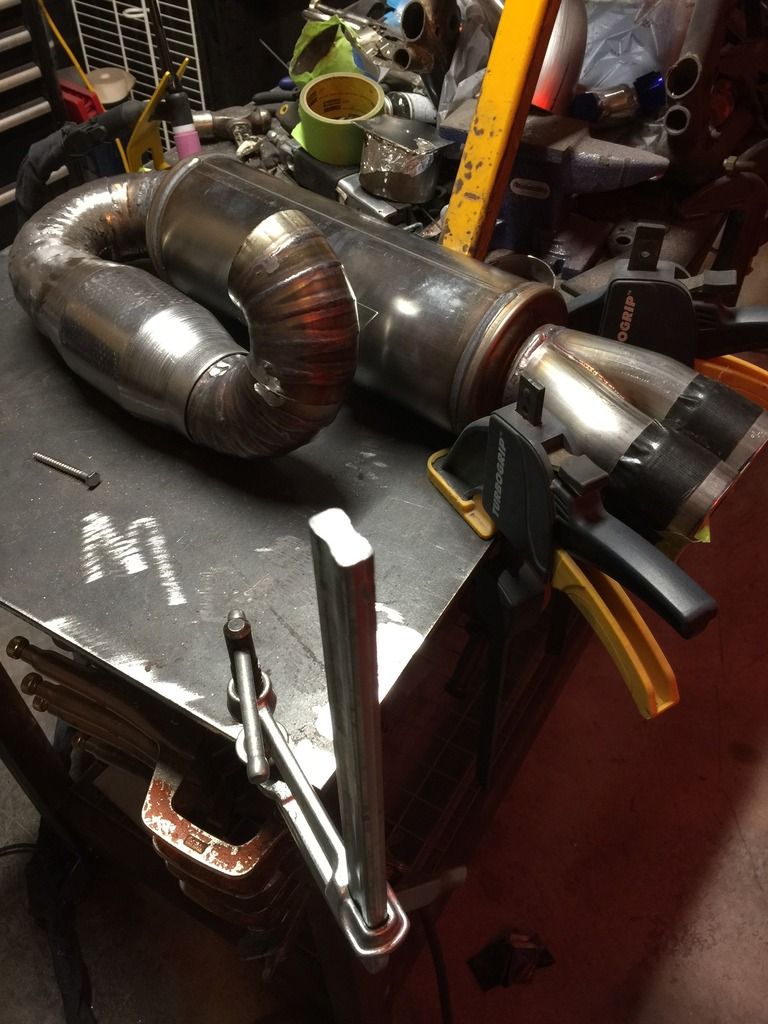
    I did. First time experimenting with pie cutting pipe, and to be honest, I may never buy a bend again.

    Quote Originally Posted by bbjones121 View Post
    Looking good
    Thank you sir!


    Hope to have it finished tomorrow...

    Adam _____ Instagram @PopesProjects____ YouTube Channel
    818 SRX - #91
    Arrived 01/02/2014
    First Start 10/31/2016
    First Drive 05/22/2017
    Registered 10/25/2019 BRAP818

  2. #402
    Senior Member svanlare's Avatar
    Join Date
    Feb 2012
    Location
    San Jose, CA
    Posts
    545
    Post Thanks / Like
    Thats a lot of welding, but turned out good.
    -Steve

  3. #403
    Tazio Nuvolari wannabe Scargo's Avatar
    Join Date
    Nov 2013
    Location
    south-central CT
    Posts
    1,611
    Post Thanks / Like
    Adam, That's pretty! Is that steel or stainless? If SS, are you back-purging or using something like Weldcote Metals Solar Flux Type B ?

  4. #404
    Senior Member Canadian818's Avatar
    Join Date
    Nov 2011
    Location
    Edmonton, Alberta
    Posts
    1,378
    Post Thanks / Like
    It's all SS, and I'm back purging. I've never tried that flux, maybe next time.
    Adam _____ Instagram @PopesProjects____ YouTube Channel
    818 SRX - #91
    Arrived 01/02/2014
    First Start 10/31/2016
    First Drive 05/22/2017
    Registered 10/25/2019 BRAP818

  5. #405
    Tazio Nuvolari wannabe Scargo's Avatar
    Join Date
    Nov 2013
    Location
    south-central CT
    Posts
    1,611
    Post Thanks / Like
    It works really well. It's great if you don't have to worry about it flaking off and going downstream and causing problems or if you can remove it as you go. it becomes glass-like and chips off fairly easily.

  6. #406
    Senior Member Canadian818's Avatar
    Join Date
    Nov 2011
    Location
    Edmonton, Alberta
    Posts
    1,378
    Post Thanks / Like
    Quote Originally Posted by Scargo View Post
    It works really well. It's great if you don't have to worry about it flaking off and going downstream and causing problems or if you can remove it as you go. it becomes glass-like and chips off fairly easily.
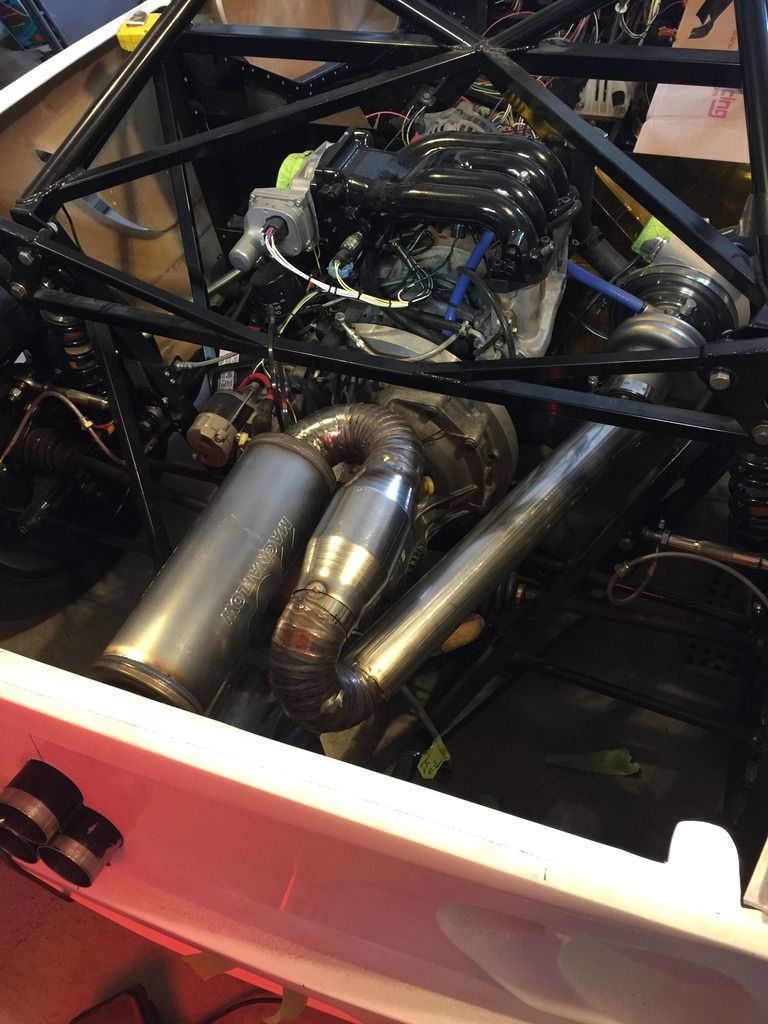
    I'll have to try it next time, probably cheaper than argon too. This weekend is thanksgiving in Canada, so unfortunately turkey is going to keep me from getting all the welding done, but here's what I've come up with.


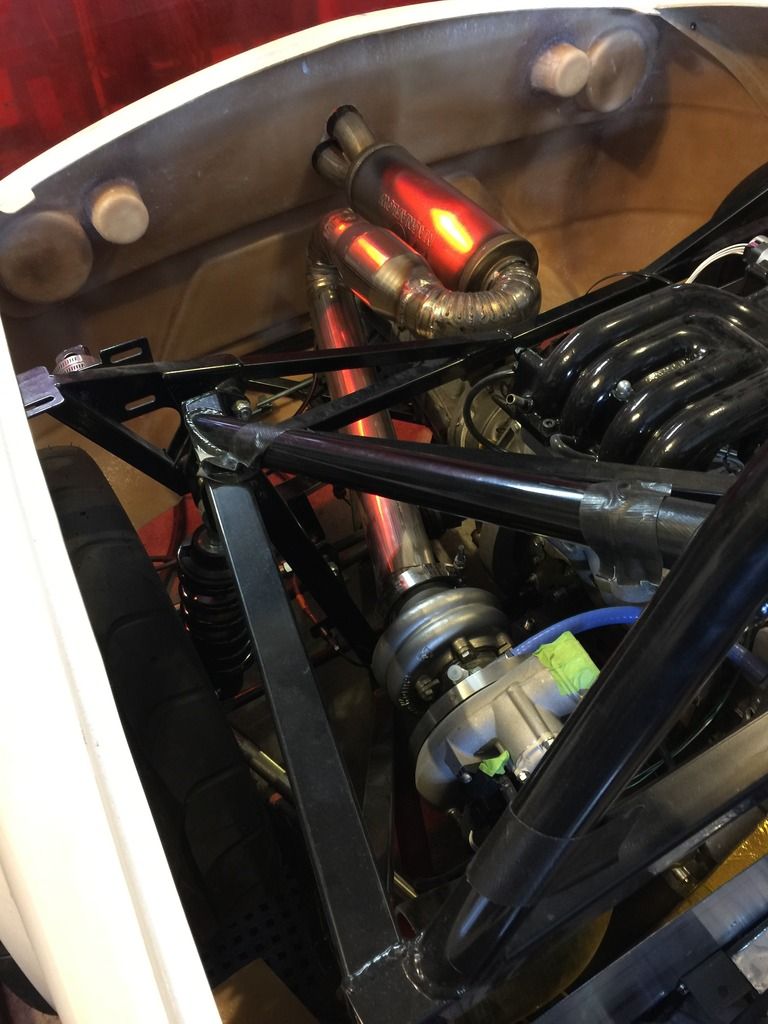
    Once it's all welded up I'll make a bracket to the transmission, but this it. There's a lot of welds in there, so I'm going to wait until it's been properly heat cycled a few times before wrapping it just in case there a crack somewhere. It's definitely more restrictive than my first design, however as far as heat management goes it should keep the heat away from the intake and fuel lines. Also the cat wouldn't have lasted long in the other location with all the heat the rotary generates. Now the cat is almost 3' downstream. As an added bonus, the two 180* bends should quiet it down a bit, which was always going to be a problem.

    Next up is hacking up my drivers side sail to clear my 305's. I'm still far from ready to do bodywork, but I want a rough fitment of where my side sail will be so I can mount my intercooler and get started on plumbing my IC piping.
    Adam _____ Instagram @PopesProjects____ YouTube Channel
    818 SRX - #91
    Arrived 01/02/2014
    First Start 10/31/2016
    First Drive 05/22/2017
    Registered 10/25/2019 BRAP818

  7. #407
    fasterer and furiouser longislandwrx's Avatar
    Join Date
    Aug 2012
    Location
    Long Island
    Posts
    2,540
    Post Thanks / Like
    Blog Entries
    6
    brap brap.
    A well stocked beverage fridge is the key to any successful project.

  8. #408
    Senior Member Frank818's Avatar
    Join Date
    Jun 2013
    Location
    QC, Canada
    Posts
    5,732
    Post Thanks / Like
    Wow, you've got nothing behind that shock tower brace! Empty space, not even air!
    I admit it's a pretty unusual exhaust setup but you've got to be creative, it's not an H4.
    Frank
    818 chassis #181 powered by a '93 VW VR6 Turbo GT3582R
    Go-karted Aug 5, 2016 - Then May 19+21, 2017
    Tracked May 27/July 26, 2017
    Build time before being driveable on Sep 27, 2019: over 6000h
    Build Completed Winter 2021

  9. #409
    Senior Member Canadian818's Avatar
    Join Date
    Nov 2011
    Location
    Edmonton, Alberta
    Posts
    1,378
    Post Thanks / Like
    Quote Originally Posted by Frank818 View Post
    Wow, you've got nothing behind that shock tower brace! Empty space, not even air!
    I admit it's a pretty unusual exhaust setup but you've got to be creative, it's not an H4.
    I can see someone thinking it looks odd, however I have plans for that "empty space" so the packaging might make more sense later.
    Adam _____ Instagram @PopesProjects____ YouTube Channel
    818 SRX - #91
    Arrived 01/02/2014
    First Start 10/31/2016
    First Drive 05/22/2017
    Registered 10/25/2019 BRAP818

  10. #410
    Senior Member Canadian818's Avatar
    Join Date
    Nov 2011
    Location
    Edmonton, Alberta
    Posts
    1,378
    Post Thanks / Like
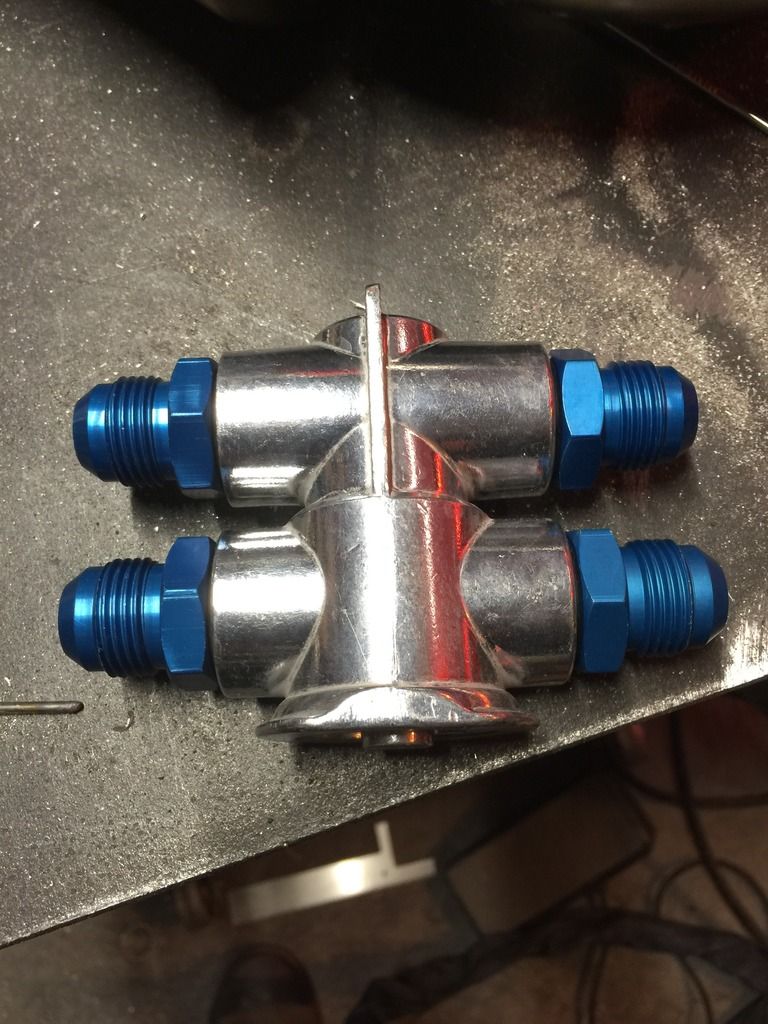
    To those running oil coolers up front, like Chad or Wayne, is there any reason I shouldn't mount my inline thermostat up front?
    Adam _____ Instagram @PopesProjects____ YouTube Channel
    818 SRX - #91
    Arrived 01/02/2014
    First Start 10/31/2016
    First Drive 05/22/2017
    Registered 10/25/2019 BRAP818

  11. #411
    Administrator
    Wayne Presley's Avatar
    Join Date
    Feb 2011
    Location
    Enterprise Alabama
    Posts
    2,804
    Post Thanks / Like
    Blog Entries
    3
    I used a Mishmoto block mounted sandwich plate with a thermostat built in.
    Wayne Presley www.verycoolparts.com
    Xterminator 705 RWHP supercharged 4.6 DOHC with twin turbos

  12. #412
    Tazio Nuvolari wannabe Scargo's Avatar
    Join Date
    Nov 2013
    Location
    south-central CT
    Posts
    1,611
    Post Thanks / Like
    Quote Originally Posted by Wayne Presley View Post
    I used a Mishimoto block mounted sandwich plate with a thermostat built in.
    Wayne,
    Is it this one?
    MMOP-SPTR_3.png
    I just saw this, for the BRZ, which would space the fittings farther away from the timing covers.
    subaru-brz-scion-fr-s-oil-cooler-kit-2013-21.jpg
    My Canton setup:
    ctr-22-595_w_ml.jpgCanton adapter compressed.jpgDSC01457 (2).JPGoil routing low res.jpg
    The Canton sits taller than any other products I know of, hence it allows fittings to hug the timing cover and be routed up the front, away from the exhaust.
    I was just helping a friend build a motor and he has a two-way sandwich plate (that retains the filter mounting position). Two-way in that fittings can be on the side or on the top (as shown). I realized he could not run his oil lines like I do. He ran his fittings and hoses off the top, as shown. Either way you have to go over the exhaust at some point to get to a place for the oil cooler, etc. This spring he had one of his wrapped hoses burst, spin him out and cause an oil fire. His setup is like this:
    sandwich plate_hoses_steve.PNG
    Now I see that it is possible to buy a spacer and use the Mishimoto part you are suggesting, with the internal thermostat. This spacer may not be available separately as it is part of a Mishimoto kit.
    mishimoto_spacer.PNG
    However, the spacing of the Canton unit is near perfect in that fittings barely clear the covers and stay as far away from the headers as possible. Further spacing would move the hoses closer to the exhaust. The Canton part I use does not have an internal thermostatic bypass valve and they do not offer one with an internal thermostatic bypass valve!
    Mocal makes a bunch of adapters with internal thermostats, that I'm guessing you sell, but I don't know if they stand any taller.

  13. #413
    Administrator
    Wayne Presley's Avatar
    Join Date
    Feb 2011
    Location
    Enterprise Alabama
    Posts
    2,804
    Post Thanks / Like
    Blog Entries
    3
    Quote Originally Posted by Scargo View Post
    Wayne,
    Is it this one?
    MMOP-SPTR_3.png

    Yes it is
    Wayne Presley www.verycoolparts.com
    Xterminator 705 RWHP supercharged 4.6 DOHC with twin turbos

  14. #414
    Moonlight Performance
    Hindsight's Avatar
    Join Date
    May 2014
    Location
    Atlanta
    Posts
    3,402
    Post Thanks / Like
    Adam, here is my setup. The fittings easily clear the timing belt cover and the fittings aren't at-all close to the exhaust manifold heat shield. I'm using the mocal thermostatic sandwich plate with a BRZ spacer.

    http://thefactoryfiveforum.com/showt...l=1#post198495
    http://thefactoryfiveforum.com/showt...l=1#post201822

  15. #415
    Senior Member Frank818's Avatar
    Join Date
    Jun 2013
    Location
    QC, Canada
    Posts
    5,732
    Post Thanks / Like
    Adam at what degree your switch will open? Or what are you aiming for.
    On my VW I open it at 80C, a little on the cold side, I believe, but temps always stayed between 90-100 on hot days when not pushing it for too long. I expect these values to change (but not the 80C) with the 818 due to the very very different cooler mount location.
    Frank
    818 chassis #181 powered by a '93 VW VR6 Turbo GT3582R
    Go-karted Aug 5, 2016 - Then May 19+21, 2017
    Tracked May 27/July 26, 2017
    Build time before being driveable on Sep 27, 2019: over 6000h
    Build Completed Winter 2021

  16. #416
    Senior Member mikeb75's Avatar
    Join Date
    Sep 2013
    Posts
    684
    Post Thanks / Like
    Question about your cat positioning: is it too far from the exit of the turbo? Are you going to wrap the long straight pipe? I'm pretty sure the exhaust temp needs to be pretty high through the cat to get it to work correctly.

    Those curves are awesome, very nice job there!
    818SC chassis #206 EJ207 2.0L VF37 twin scroll || Cusco type RS 1.5 LSD || Wilwood pedal box (firewall attach) || Wilwood superlite front calipers
    BUILD Phase 1: 6/6/2014 car delivered || 5/24/2015 first start || 6/7/2015 go karted || 4/20/2016 hard-top-topped || 10/25/2016 registered || 11/18/2016 inspected & complete
    BUILD Phase 2: 3/8/2017 EJ207v8 || 5/29/2017 re-first re-start || 7/17/2017 re-assembled with race car bits

  17. #417
    Senior Member Canadian818's Avatar
    Join Date
    Nov 2011
    Location
    Edmonton, Alberta
    Posts
    1,378
    Post Thanks / Like
    Thanks for sharing your setups guys, but I'm using a remote thermostat. If I mount it up front then I'd be adding the 12-15ft loop of -10 to my "cold" flow. I can't see that making much difference, and it's one less thing to cram in on the left side of the engine.


    Quote Originally Posted by Frank818 View Post
    Adam at what degree your switch will open? Or what are you aiming for.
    On my VW I open it at 80C, a little on the cold side, I believe, but temps always stayed between 90-100 on hot days when not pushing it for too long. I expect these values to change (but not the 80C) with the 818 due to the very very different cooler mount location.
    The thermostat will open between 180*-190*F (80*-88*C).

    Quote Originally Posted by mikeb75 View Post
    Question about your cat positioning: is it too far from the exit of the turbo? Are you going to wrap the long straight pipe? I'm pretty sure the exhaust temp needs to be pretty high through the cat to get it to work correctly.
    The exhaust temps are a lot higher on rotaries, so I was a little worried it wouldn't last with my initial design. This also allows me to put the wideband 18" after the turbo instead of 10", which should save me a few of those. The entire exhaust will be wrapped, except maybe the muffler, so the cat should be plenty warm.

    Quote Originally Posted by mikeb75 View Post
    Those curves are awesome, very nice job there!
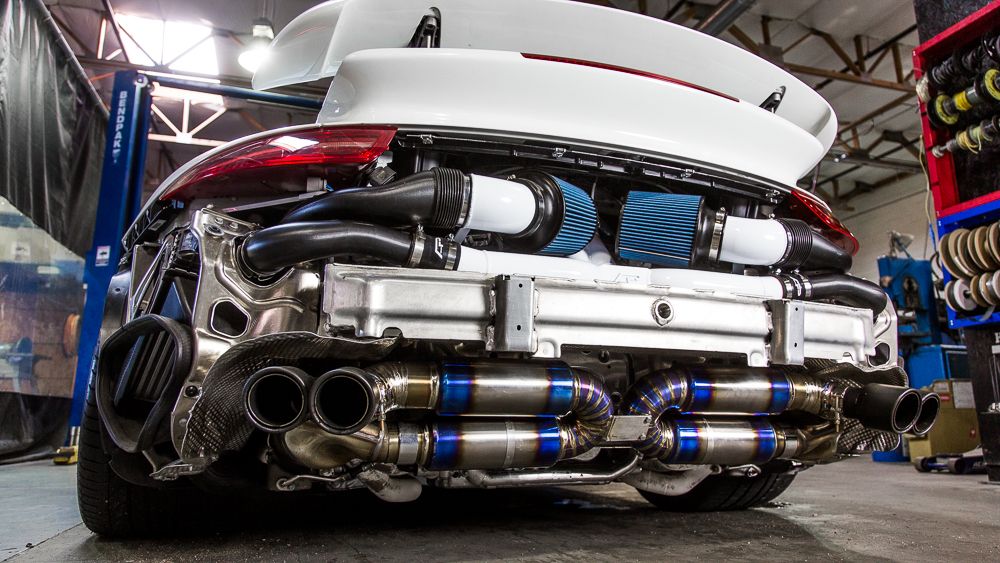
    Thanks, I'd be worried about flow, but the tight 180's work for the Porsche guys...

    Adam _____ Instagram @PopesProjects____ YouTube Channel
    818 SRX - #91
    Arrived 01/02/2014
    First Start 10/31/2016
    First Drive 05/22/2017
    Registered 10/25/2019 BRAP818

  18. #418
    Moonlight Performance
    Hindsight's Avatar
    Join Date
    May 2014
    Location
    Atlanta
    Posts
    3,402
    Post Thanks / Like
    Quote Originally Posted by Canadian818 View Post
    Damn! That rotary really transforms the look of the back of the 818!

  19. #419
    Senior Member mikeb75's Avatar
    Join Date
    Sep 2013
    Posts
    684
    Post Thanks / Like
    A note about your thermostat (if it's a Perma-Cool like mine), it doesn't totally close under 180*F, it's just mostly closed.

    Quote Originally Posted by PermaCool install guide
    ...The valve is open when cold, to allow oil/fluid in the cooler circuit to be pre-warmed or to avoid air pockets. When the valve is closed, it has a slight relief to make up for restrictions elsewhere in the system...
    818SC chassis #206 EJ207 2.0L VF37 twin scroll || Cusco type RS 1.5 LSD || Wilwood pedal box (firewall attach) || Wilwood superlite front calipers
    BUILD Phase 1: 6/6/2014 car delivered || 5/24/2015 first start || 6/7/2015 go karted || 4/20/2016 hard-top-topped || 10/25/2016 registered || 11/18/2016 inspected & complete
    BUILD Phase 2: 3/8/2017 EJ207v8 || 5/29/2017 re-first re-start || 7/17/2017 re-assembled with race car bits

  20. #420
    Senior Member Canadian818's Avatar
    Join Date
    Nov 2011
    Location
    Edmonton, Alberta
    Posts
    1,378
    Post Thanks / Like
    Quote Originally Posted by mikeb75 View Post
    A note about your thermostat (if it's a Perma-Cool like mine), it doesn't totally close under 180*F, it's just mostly closed.
    It is the Perma-Cool, and yeah I noticed that too. But since the rotary relies on oil for 50% of its cooling, I'm not worried that it'll be a problem. It will probably be open most of the time.

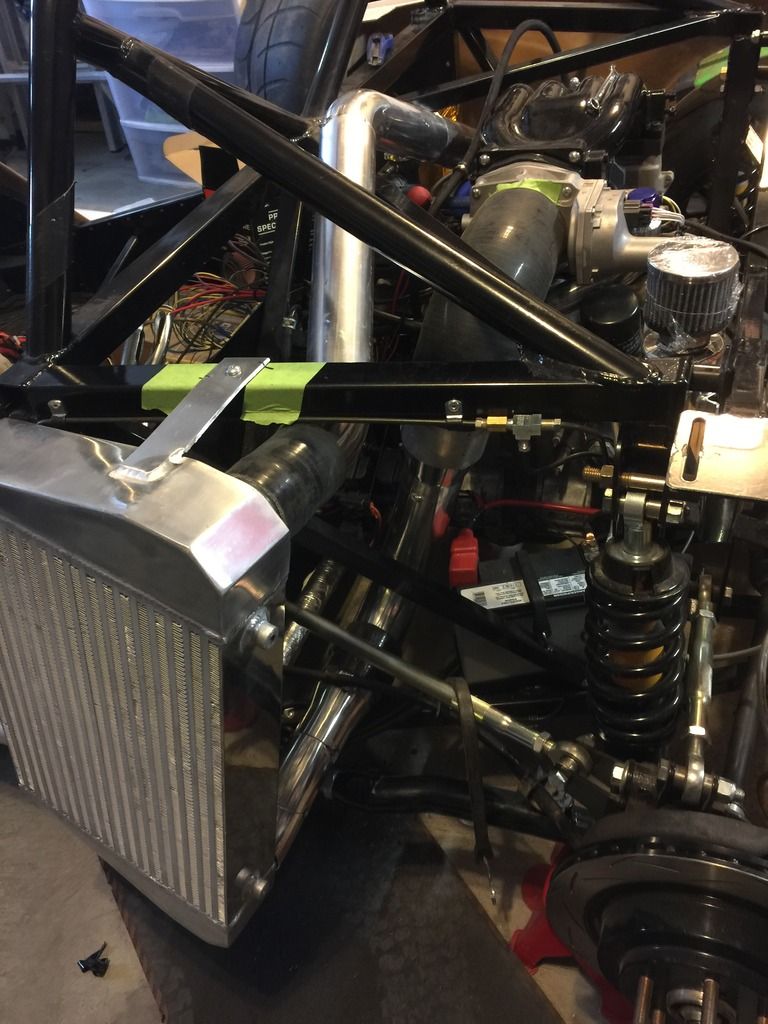
    Finished mocking up my intercooler plumbing. It's tight everywhere, but not so much that I'm concerned. If the engine moves more then expected, I'll have to support the tubes in the middle somewhere.


    So now I have A LOT of welding to do, between the intercooler brackets, piping, and exhaust, I have my work cut out for me. The only thing left to fab before startup is the oil cooler mounts, and all my oil lines. My goal is startup before heading to Austin, Texas for the race next week. If the weather warms up like it's supposed to be, I might even get to drive it! But first, this all needs to melt....

    Adam _____ Instagram @PopesProjects____ YouTube Channel
    818 SRX - #91
    Arrived 01/02/2014
    First Start 10/31/2016
    First Drive 05/22/2017
    Registered 10/25/2019 BRAP818

  21. #421
    Senior Member Frank818's Avatar
    Join Date
    Jun 2013
    Location
    QC, Canada
    Posts
    5,732
    Post Thanks / Like
    Quote Originally Posted by Canadian818 View Post
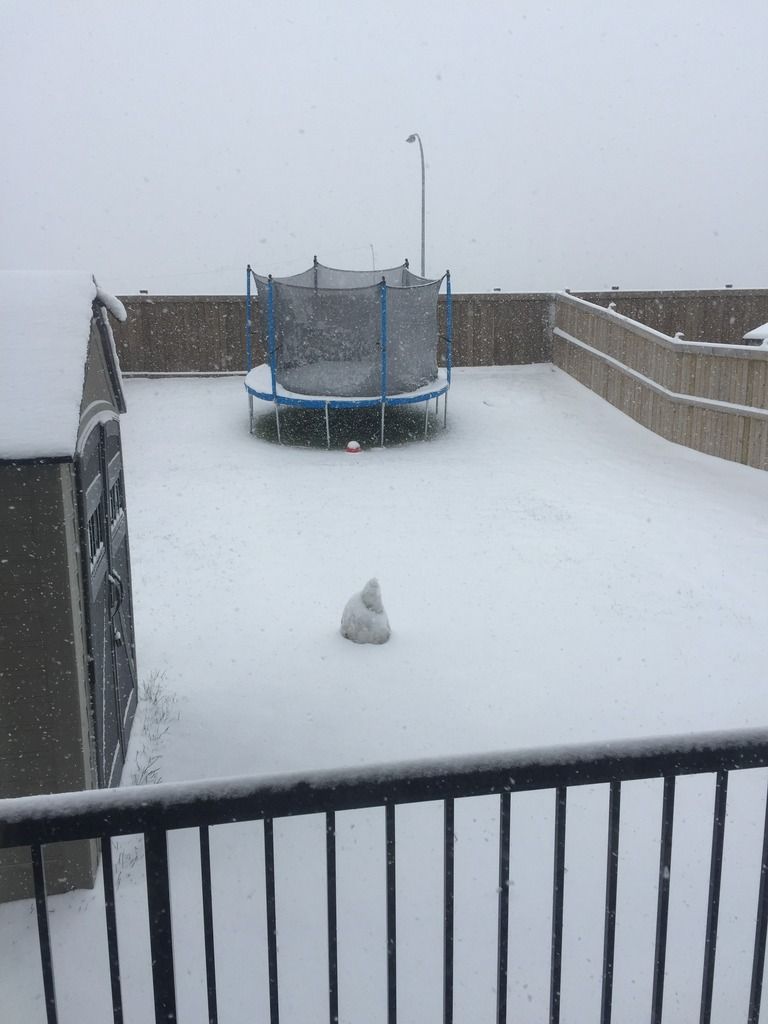
    Excuse my words but that looks like a big white poop in the middle, there.
    Frank
    818 chassis #181 powered by a '93 VW VR6 Turbo GT3582R
    Go-karted Aug 5, 2016 - Then May 19+21, 2017
    Tracked May 27/July 26, 2017
    Build time before being driveable on Sep 27, 2019: over 6000h
    Build Completed Winter 2021

  22. #422
    Senior Member Canadian818's Avatar
    Join Date
    Nov 2011
    Location
    Edmonton, Alberta
    Posts
    1,378
    Post Thanks / Like
    Quote Originally Posted by Frank818 View Post
    Excuse my words but that looks like a big white poop in the middle, there.
    Haha, it used to be a snow man.
    Adam _____ Instagram @PopesProjects____ YouTube Channel
    818 SRX - #91
    Arrived 01/02/2014
    First Start 10/31/2016
    First Drive 05/22/2017
    Registered 10/25/2019 BRAP818

  23. #423
    Moonlight Performance
    Hindsight's Avatar
    Join Date
    May 2014
    Location
    Atlanta
    Posts
    3,402
    Post Thanks / Like
    Wow, I can't even imagine having that much snow this early in the year! Well, nothing better than garage time when the weather is bad!

    I apologize if you mentioned this previously and I missed it, but are you planning on building a shroud for the intercooler that will completely seal it up to the side sail so 100% of the air and pressure that comes in through the side scoop will be forced through the intercooler and if so, what material do you plan on using? I am planning on doing that for my oil cooler and have not decided on material but am thinking aluminum with bulb seal. I will use a contour gauge tool to get the curves and angles right for a perfect seal. Going to be a lot of work though....

  24. #424
    Senior Member Canadian818's Avatar
    Join Date
    Nov 2011
    Location
    Edmonton, Alberta
    Posts
    1,378
    Post Thanks / Like
    Quote Originally Posted by Hindsight View Post
    Wow, I can't even imagine having that much snow this early in the year!
    Yeah me either, it's depressing. Especially when I'm still hopeful to go kart. It's fairly common to get a cold blast for a week in October, and then warm up a little.

    Quote Originally Posted by Hindsight View Post
    I apologize if you mentioned this previously and I missed it, but are you planning on building a shroud for the intercooler that will completely seal it up to the side sail so 100% of the air and pressure that comes in through the side scoop will be forced through the intercooler and if so, what material do you plan on using? I am planning on doing that for my oil cooler and have not decided on material but am thinking aluminum with bulb seal. I will use a contour gauge tool to get the curves and angles right for a perfect seal. Going to be a lot of work though....
    Aluminum and bulb seal is my plan as well. I usually make the shapes/contours/bends with cardboard and tape first so I don't have to keep trimming the aluminum. I watch a lot of Netflix in the garage, so that's also a quieter method. Hopefully Kurk doesn't give up on a carbon fibre version of his scoops, which will be crucial in forcing air through my intercooler. I really hope to prove I can keep my intake temps down on track with this setup. For the weight obsessed in our group, the intercooler weights 20lbs, all piping, silicone, and clamps add another 4lbs. That's 28lbs lighter than an A2W cooler setup including water.
    Adam _____ Instagram @PopesProjects____ YouTube Channel
    818 SRX - #91
    Arrived 01/02/2014
    First Start 10/31/2016
    First Drive 05/22/2017
    Registered 10/25/2019 BRAP818

  25. #425
    Senior Member
    Join Date
    Dec 2015
    Posts
    103
    Post Thanks / Like
    Pretty sick welding skills. I can't believe you have the patients for that. I've just started tig welding. Became a grand master in tungsten grinding on the exhaust I just finished. I'm a pretty experienced Arc and mig hobby welder so I was able to pick up the torch, but it was interesting. lol. Started with the thumb switch and moved to the pedal. Pedal and back purge was key.

    Keep up the good work!

  26. #426
    Senior Member
    Join Date
    Jul 2014
    Location
    Strathroy, Ontario Canada
    Posts
    479
    Post Thanks / Like
    I can't wait to come to Edmonton tomorrow to That snow. What dates are you gone out of town? Oh I will take an XL gas monkey t shirt as well
    Last edited by Lumpyguy; 10-15-2016 at 05:13 AM.

  27. #427
    Moonlight Performance
    Hindsight's Avatar
    Join Date
    May 2014
    Location
    Atlanta
    Posts
    3,402
    Post Thanks / Like
    Awesome keep us posted. If I do my ducting before you, I will be sure to share pics.

  28. #428
    Senior Member Canadian818's Avatar
    Join Date
    Nov 2011
    Location
    Edmonton, Alberta
    Posts
    1,378
    Post Thanks / Like
    Quote Originally Posted by carrera1984 View Post
    Pretty sick welding skills. I can't believe you have the patients for that. I've just started tig welding. Became a grand master in tungsten grinding on the exhaust I just finished. I'm a pretty experienced Arc and mig hobby welder so I was able to pick up the torch, but it was interesting. lol. Started with the thumb switch and moved to the pedal. Pedal and back purge was key.

    Keep up the good work!
    Thanks! I've been working as a welder for just over 10 years, and usually dread having to do it at home. I always enjoy fitting and tacking, but hours of welding gets old quick. I haven't worked much since spring, which is probably why I was willing to do it this way. I mostly just stick weld outside, that's where the money is, but once upon a time I used to mig and tig stainless and aluminum lots. I know very experienced welders that still go through a lot of tungsten, so don't beat yourself up about it. I always break mine in half and sharpen both ends, that way I need to stop to sharpen less often. A good hand control is very helpful in awkward positions, but the pedal is always the preferred method.

    Quote Originally Posted by Lumpyguy View Post
    I can't wait to come to Edmonton tomorrow to That snow. What dates are you gone out of town? Oh I will take an XL gas monkey t shirt as well
    I head to Texas on Thursday, how long are you in town? Apparently this much snow this early broke a 60 year old record. 8*c next week will melt it all though.

    Quote Originally Posted by Hindsight View Post
    Awesome keep us posted. If I do my ducting before you, I will be sure to share pics.
    Sometimes I think I post too much, lol, so I'm sure I will.
    Adam _____ Instagram @PopesProjects____ YouTube Channel
    818 SRX - #91
    Arrived 01/02/2014
    First Start 10/31/2016
    First Drive 05/22/2017
    Registered 10/25/2019 BRAP818

  29. #429
    Senior Member Canadian818's Avatar
    Join Date
    Nov 2011
    Location
    Edmonton, Alberta
    Posts
    1,378
    Post Thanks / Like
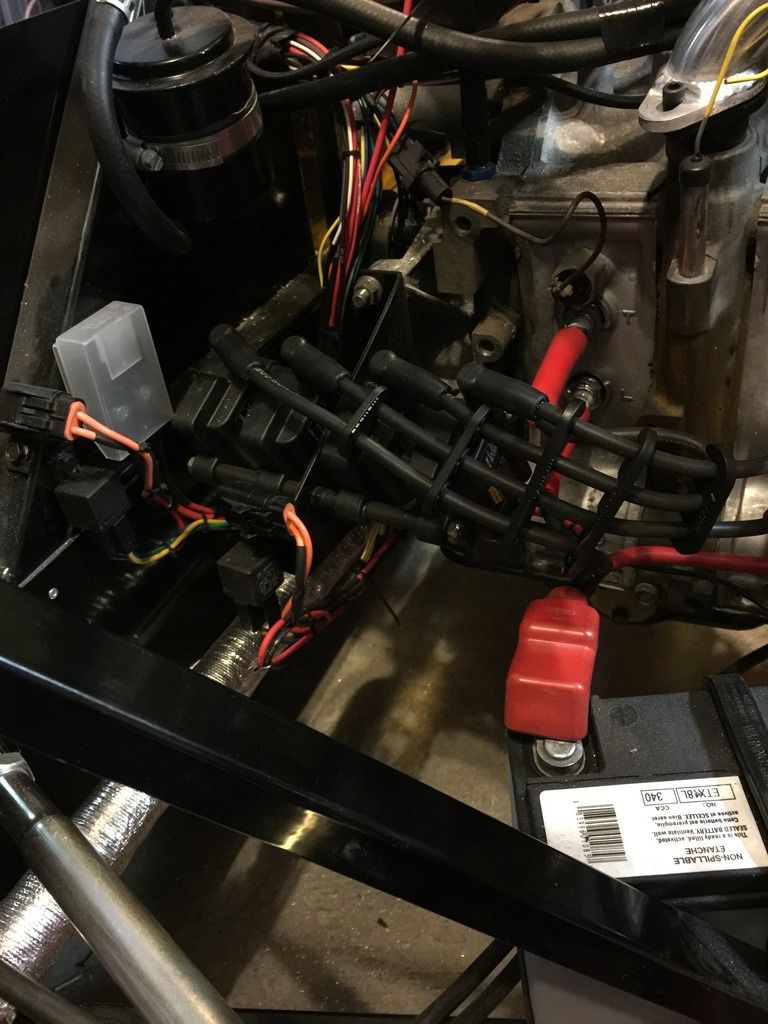
    I finished up my plug wires last night, and figured I'd show this little section now that it's done.


    The plug wires had to be tucked in tight so they don't interfere with the intake tube. Right in front of the coils on the same bracket is the fuse and relay for the coils. On the firewall ahead of the coils is the master 70amp fuse, and next to that is the fuel pump relay and fuse. Both the pump and coils get power directly from the battery, everything else is ran through the 70amp, besides the starter which is direct to the battery.

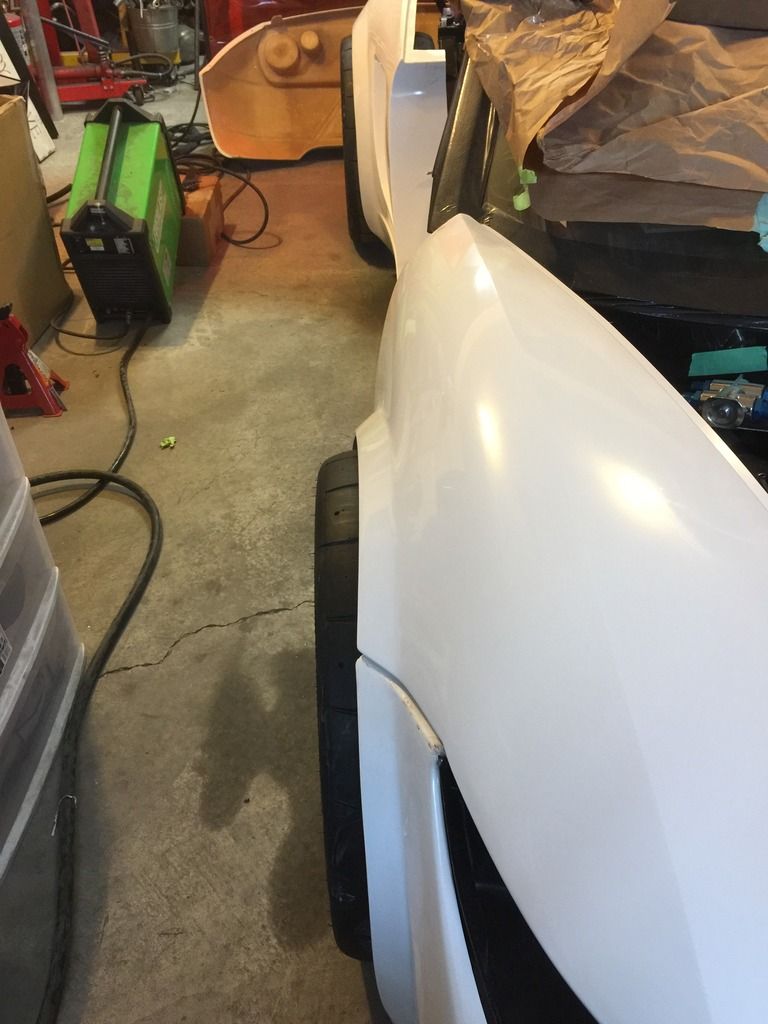
    And here is a peak at another challenge I face between now and spring....

    Adam _____ Instagram @PopesProjects____ YouTube Channel
    818 SRX - #91
    Arrived 01/02/2014
    First Start 10/31/2016
    First Drive 05/22/2017
    Registered 10/25/2019 BRAP818

  30. #430
    Moonlight Performance
    Hindsight's Avatar
    Join Date
    May 2014
    Location
    Atlanta
    Posts
    3,402
    Post Thanks / Like
    Oh boy, so you are gong to tackle custom fender flares too eh? I think so far, no one has really completed it though Tamra and Andrew seem furthest along. If someone made a sender of fiberglass flares that bolted on with a gasket, they could probably sell quite a few of them.

  31. #431
    Senior Member Frank818's Avatar
    Join Date
    Jun 2013
    Location
    QC, Canada
    Posts
    5,732
    Post Thanks / Like
    Or you could leave them as is, gives a different look! :P Last w-e I've seen a super highly lowered Jetta with tires sticking out on very low offset BBS wheels. Better have a bump stop 1in higher, otherwise byebye either fenders or tires.
    Frank
    818 chassis #181 powered by a '93 VW VR6 Turbo GT3582R
    Go-karted Aug 5, 2016 - Then May 19+21, 2017
    Tracked May 27/July 26, 2017
    Build time before being driveable on Sep 27, 2019: over 6000h
    Build Completed Winter 2021

  32. #432
    Senior Member Canadian818's Avatar
    Join Date
    Nov 2011
    Location
    Edmonton, Alberta
    Posts
    1,378
    Post Thanks / Like
    Quote Originally Posted by Hindsight View Post
    Oh boy, so you are gong to tackle custom fender flares too eh? I think so far, no one has really completed it though Tamra and Andrew seem furthest along. If someone made a sender of fiberglass flares that bolted on with a gasket, they could probably sell quite a few of them.
    I'm going about it a little differently than they are in the back, I'll be pushing the whole rear section of the sail out rather than just a flare. Not sure what I'm doing up front. If I can find a flare that works I might go that way, or I could widen the bumper and hood a couple of inches. That would make my splitter useless though.

    Quote Originally Posted by Frank818 View Post
    Or you could leave them as is, gives a different look! :P Last w-e I've seen a super highly lowered Jetta with tires sticking out on very low offset BBS wheels. Better have a bump stop 1in higher, otherwise byebye either fenders or tires.
    Ummmmm NO! lol
    Adam _____ Instagram @PopesProjects____ YouTube Channel
    818 SRX - #91
    Arrived 01/02/2014
    First Start 10/31/2016
    First Drive 05/22/2017
    Registered 10/25/2019 BRAP818

  33. #433
    Moonlight Performance
    Hindsight's Avatar
    Join Date
    May 2014
    Location
    Atlanta
    Posts
    3,402
    Post Thanks / Like
    Not a bad idea to widen the whole thing!

  34. #434
    Senior Member Frank818's Avatar
    Join Date
    Jun 2013
    Location
    QC, Canada
    Posts
    5,732
    Post Thanks / Like
    Quote Originally Posted by Canadian818 View Post
    I'm going about it a little differently than they are in the back, I'll be pushing the whole rear section of the sail out rather than just a flare.
    Do you mean by cutting , moving and re-fiberglassing the sail portion on?
    Or do you just mean stretching out the sail's portion by hand without cracking/cutting anytihng and without doing any fiberglass?
    The latter will not cover your wide ***, trust me.
    Frank
    818 chassis #181 powered by a '93 VW VR6 Turbo GT3582R
    Go-karted Aug 5, 2016 - Then May 19+21, 2017
    Tracked May 27/July 26, 2017
    Build time before being driveable on Sep 27, 2019: over 6000h
    Build Completed Winter 2021

  35. #435
    Senior Member Canadian818's Avatar
    Join Date
    Nov 2011
    Location
    Edmonton, Alberta
    Posts
    1,378
    Post Thanks / Like
    Quote Originally Posted by Frank818 View Post
    Do you mean by cutting , moving and re-fiberglassing the sail portion on?
    Or do you just mean stretching out the sail's portion by hand without cracking/cutting anytihng and without doing any fiberglass?
    The latter will not cover your wide ***, trust me.
    Oh there will be lots of cutting and glassing in my future Frank.
    Adam _____ Instagram @PopesProjects____ YouTube Channel
    818 SRX - #91
    Arrived 01/02/2014
    First Start 10/31/2016
    First Drive 05/22/2017
    Registered 10/25/2019 BRAP818

  36. #436
    Senior Member Canadian818's Avatar
    Join Date
    Nov 2011
    Location
    Edmonton, Alberta
    Posts
    1,378
    Post Thanks / Like
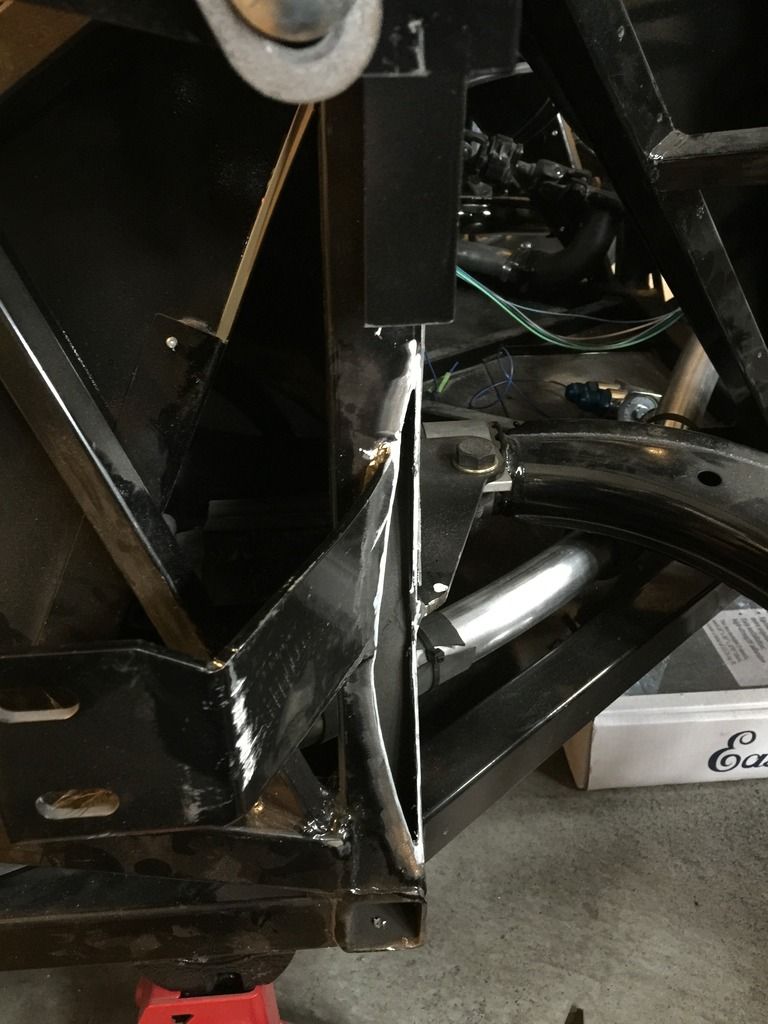
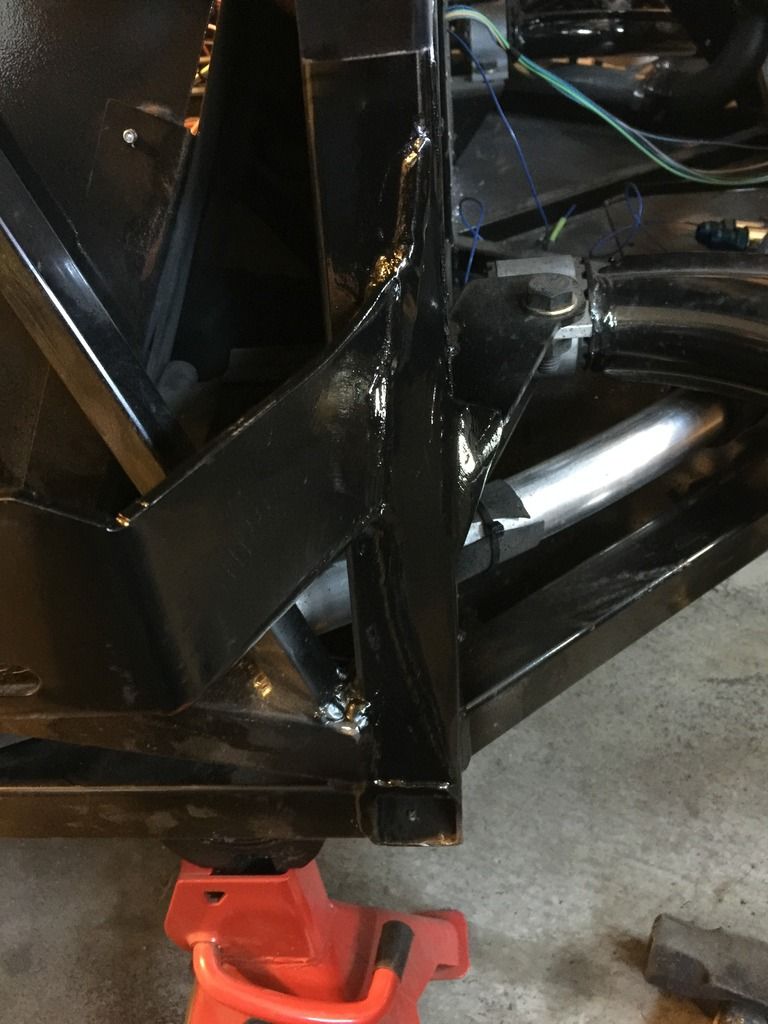
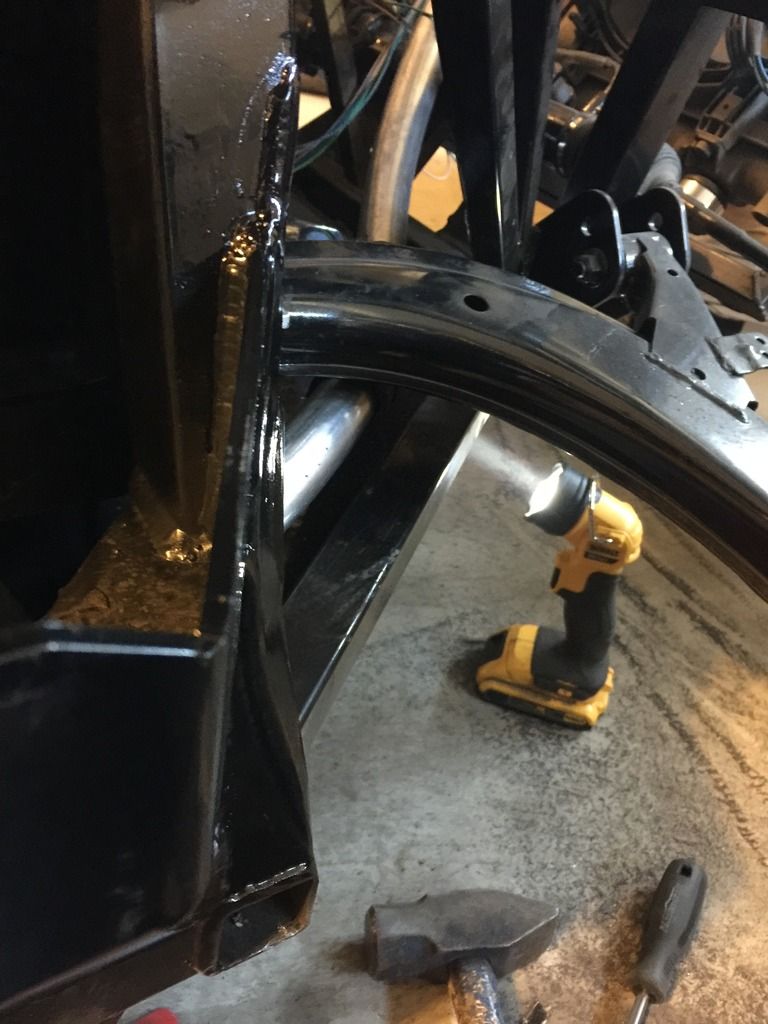
    So you want to run 25" tires up front? Here's the frame mods I had to do...


    I will also have to modify the wheel well aluminum and leading edge of the side sail.
    Last edited by Canadian818; 10-19-2016 at 04:44 PM.
    Adam _____ Instagram @PopesProjects____ YouTube Channel
    818 SRX - #91
    Arrived 01/02/2014
    First Start 10/31/2016
    First Drive 05/22/2017
    Registered 10/25/2019 BRAP818

  37. #437
    Senior Member Frank818's Avatar
    Join Date
    Jun 2013
    Location
    QC, Canada
    Posts
    5,732
    Post Thanks / Like
    Quote Originally Posted by Canadian818 View Post
    So you want to run 25" tires up front?
    No I don't, but that's a nice mod you did there. Nice curve on the flat plate you welded back on. Nice job.
    How much clearance are you left with between the frame and tire?

    You will trim the side sail the same?
    Frank
    818 chassis #181 powered by a '93 VW VR6 Turbo GT3582R
    Go-karted Aug 5, 2016 - Then May 19+21, 2017
    Tracked May 27/July 26, 2017
    Build time before being driveable on Sep 27, 2019: over 6000h
    Build Completed Winter 2021

  38. #438
    Senior Member Canadian818's Avatar
    Join Date
    Nov 2011
    Location
    Edmonton, Alberta
    Posts
    1,378
    Post Thanks / Like
    Quote Originally Posted by Frank818 View Post
    No I don't, but that's a nice mod you did there. Nice curve on the flat plate you welded back on. Nice job.
    How much clearance are you left with between the frame and tire?

    You will trim the side sail the same?

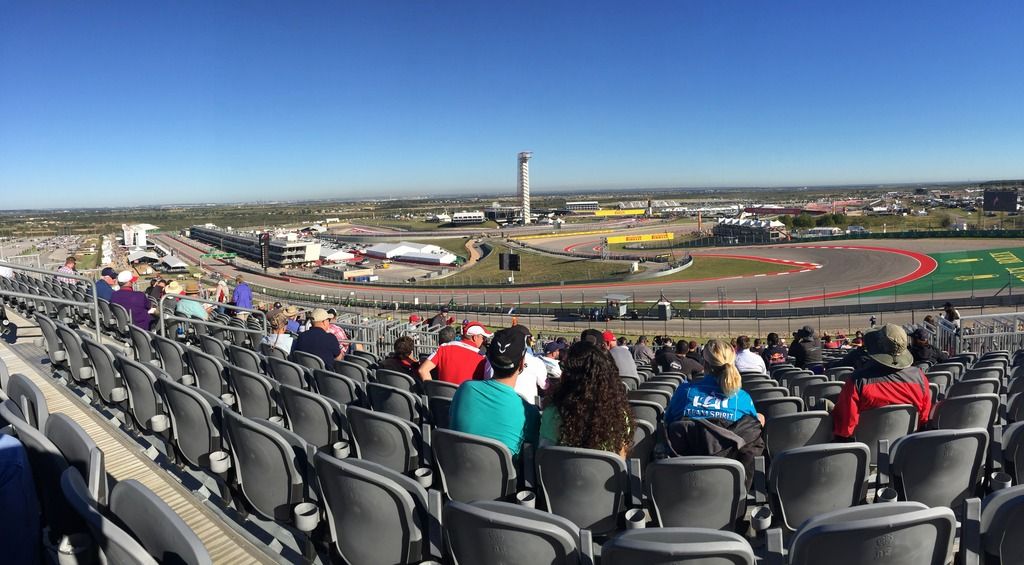
    Not sure how I'm trimming the side pod yet, might just move it all back as it is. I'll take a pic of the clearance with the tires on when I get back from Austin. Here's my view of turn 1.

    Adam _____ Instagram @PopesProjects____ YouTube Channel
    818 SRX - #91
    Arrived 01/02/2014
    First Start 10/31/2016
    First Drive 05/22/2017
    Registered 10/25/2019 BRAP818

  39. #439
    Tazio Nuvolari wannabe Scargo's Avatar
    Join Date
    Nov 2013
    Location
    south-central CT
    Posts
    1,611
    Post Thanks / Like
    Lucky guy! I was born very close to there. Was on my bucket list to drive on it.

  40. #440
    Senior Member
    Join Date
    Jul 2014
    Location
    Strathroy, Ontario Canada
    Posts
    479
    Post Thanks / Like
    I got a chance to stop by and see this ride and I must say it's pretty sweet and I have to give him props! Nice to see things outside the box.

Page 11 of 25 FirstFirst ... 91011121321 ... LastLast

Posting Permissions

  • You may not post new threads
  • You may not post replies
  • You may not post attachments
  • You may not edit your posts
  •  

FFMetal

Visit our community sponsor