Forte's

Visit our community sponsor

Thanks Thanks:  8
Likes Likes:  31
Page 6 of 26 FirstFirst ... 4567816 ... LastLast
Results 201 to 240 of 1012

Thread: Frank's 818R build

  1. #201
    Senior Member Pearldrummer7's Avatar
    Join Date
    Feb 2014
    Location
    Asheville, NC
    Posts
    1,230
    Post Thanks / Like
    Doing some wiring on the dining room table :lol: it's almost done!

    IMG_1289

  2. #202
    Senior Member wleehendrick's Avatar
    Join Date
    Jul 2012
    Location
    Encinitas, CA
    Posts
    1,653
    Post Thanks / Like
    Blog Entries
    2
    Quote Originally Posted by Pearldrummer7 View Post
    Doing some wiring on the dining room table :lol: it's almost done!
    You can't be married!
    Do you respect wood?


  3. #203
    Senior Member STiPWRD's Avatar
    Join Date
    Jan 2014
    Location
    Leesburg, VA
    Posts
    1,624
    Post Thanks / Like
    Quote Originally Posted by Pearldrummer7 View Post
    Doing some wiring on the dining room table :lol: it's almost done!

    IMG_1289
    I'm pretty much at the same stage, most of the trimming is done, just gotta test fit it in the car. Mine has been sprawled out on the basement floor the past 2 weeks

  4. #204
    Senior Member Pearldrummer7's Avatar
    Join Date
    Feb 2014
    Location
    Asheville, NC
    Posts
    1,230
    Post Thanks / Like
    Quote Originally Posted by wleehendrick View Post
    You can't be married!
    Do you respect wood?

    haha! The Walmart wood is holding up astoundingly well to the abuse it's sustained since we got it a year ago. I'm extremely single, as shown by this picture.


    Quote Originally Posted by STiPWRD View Post
    I'm pretty much at the same stage, most of the trimming is done, just gotta test fit it in the car. Mine has been sprawled out on the basement floor the past 2 weeks
    It's a good feeling. I've done a little test fitting here and there. Always more modifying to be done to the harness, though.


    It's kind of stalling to wait for wheels/tires/warmer weather to arrive.

  5. #205
    Senior Member Pearldrummer7's Avatar
    Join Date
    Feb 2014
    Location
    Asheville, NC
    Posts
    1,230
    Post Thanks / Like
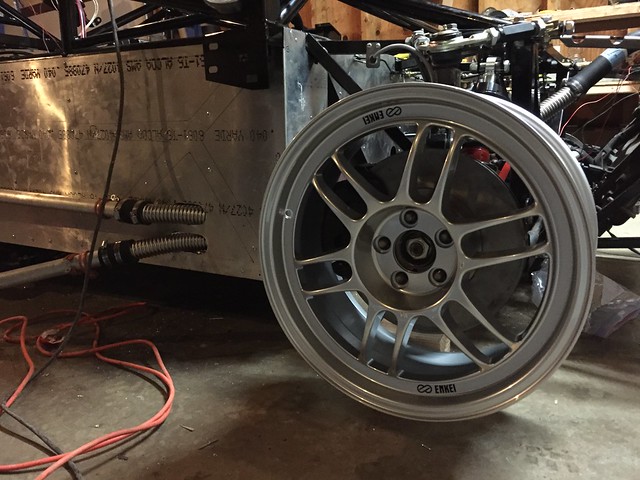
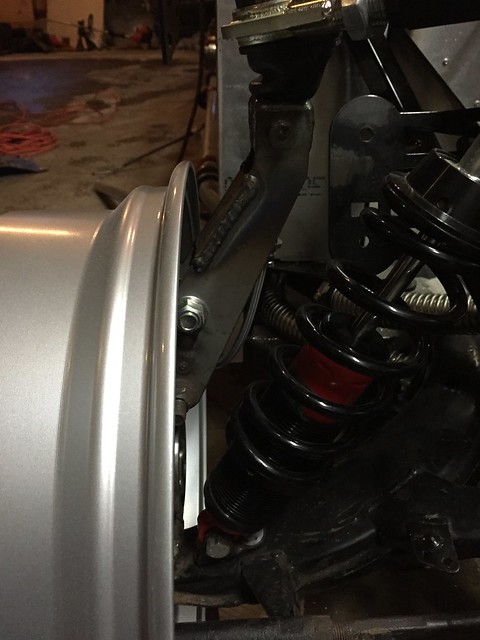
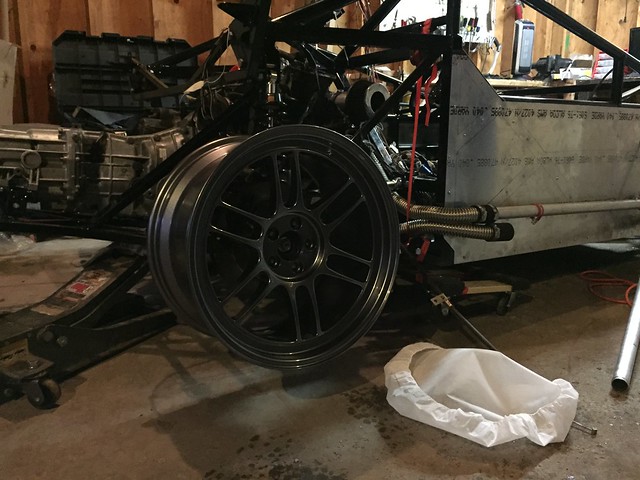
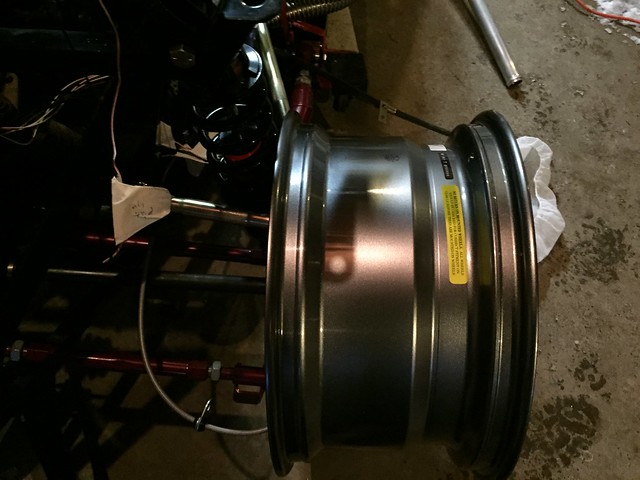
    The fronts fit great (17x8 +35)


    The rears... (18x9.5 +38) aren't even remotely close. I measured quickly and need at least an ~8mm spacer to comfortably clear I think. Which is too much I think. I'm sure Wayne's mod (which I intend to do either way) will help with that, but not that much I think.


    According to Rev F of the manual, I can run this size -_- That's what I get for listening to the manual!


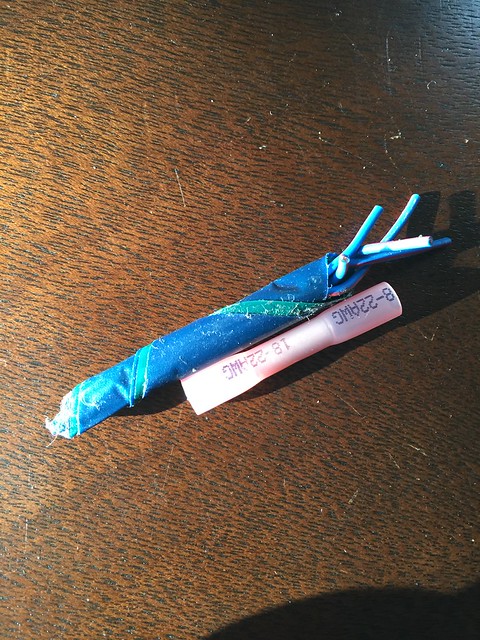
    Also, replacing the crap Subaru provides in the harness with heatshrink crimp connectors:


    What's everyone else doing?

  6. #206
    Senior Member Frank818's Avatar
    Join Date
    Jun 2013
    Location
    QC, Canada
    Posts
    5,732
    Post Thanks / Like
    Quote Originally Posted by Pearldrummer7 View Post
    Also, replacing the crap Subaru provides in the harness with heatshrink crimp connectors:

    What's everyone else doing?
    Tie-wraps and electric tape.
    Frank
    818 chassis #181 powered by a '93 VW VR6 Turbo GT3582R
    Go-karted Aug 5, 2016 - Then May 19+21, 2017
    Tracked May 27/July 26, 2017
    Build time before being driveable on Sep 27, 2019: over 6000h
    Build Completed Winter 2021

  7. #207
    Senior Member
    Join Date
    Jan 2014
    Posts
    617
    Post Thanks / Like
    Quote Originally Posted by Pearldrummer7 View Post
    Also, replacing the crap Subaru provides in the harness with heatshrink crimp connectors:
    It would be better to pull the tape and put your own heat shrink over the factory crimps. It's hard to do better than machine-crimped.

    I generally soldered and heat shrunk everything that I had to lengthen. I agree with many that a good crimp is better than a good solder joint. But, a good solder joint is better than a bad crimp and I'm good at soldering.

  8. #208
    Senior Member Pearldrummer7's Avatar
    Join Date
    Feb 2014
    Location
    Asheville, NC
    Posts
    1,230
    Post Thanks / Like
    Quote Originally Posted by Jaime View Post
    It would be better to pull the tape and put your own heat shrink over the factory crimps. It's hard to do better than machine-crimped.

    I generally soldered and heat shrunk everything that I had to lengthen. I agree with many that a good crimp is better than a good solder joint. But, a good solder joint is better than a bad crimp and I'm good at soldering.
    Well, I'm a better crimper than solderer(what a weird word to say), so hopefully mine hold up alright! I actually slide heatshrink under the heatshrink part of the connector to further protect it. They shrink together very nicely IMO.


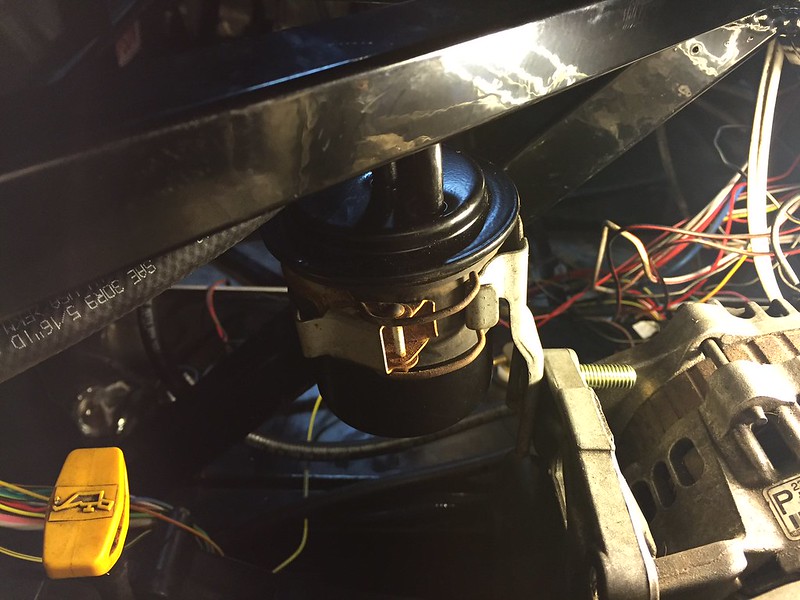
    Alternator/AC bracket? More like alternator/fuel filter bracket! Anyone see anything wrong with re-purposing this to hold onto my fuel filter(as long as I have enough slack in the incoming fuel line to accommodate for the fuel filter moving with the engine)?


  9. #209
    Senior Member STiPWRD's Avatar
    Join Date
    Jan 2014
    Location
    Leesburg, VA
    Posts
    1,624
    Post Thanks / Like
    You're probably ok but the fuel filter may dangle over time due to vibration. I think I'll be mounting mine to the frame.

  10. #210
    Senior Member svanlare's Avatar
    Join Date
    Feb 2012
    Location
    San Jose, CA
    Posts
    545
    Post Thanks / Like
    I really like the heat shrink crimps. I've used them extensively on several track cars, and when I start the wiring on mine in a couple weeks that is exactly what I'll be using.
    -Steve

  11. #211
    Senior Member Pearldrummer7's Avatar
    Join Date
    Feb 2014
    Location
    Asheville, NC
    Posts
    1,230
    Post Thanks / Like
    Quote Originally Posted by STiPWRD View Post
    You're probably ok but the fuel filter may dangle over time due to vibration. I think I'll be mounting mine to the frame.
    Quote Originally Posted by svanlare View Post
    I really like the heat shrink crimps. I've used them extensively on several track cars, and when I start the wiring on mine in a couple weeks that is exactly what I'll be using.
    Thanks for the replies. I'll have to keep an eye on how it holds up to being mounted on the engine. Heat shrink connectors rock!

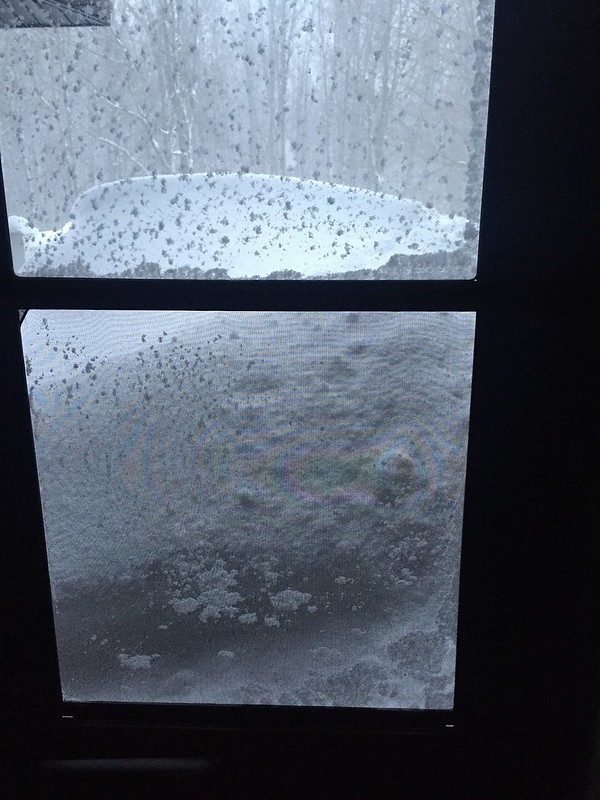
    So, it is snowy up here. Most snow I've ever seen on the ground, I think. This is a quick view out of our back door. We have feet of snow everywhere, and it's going to keep coming for the next week it seems.


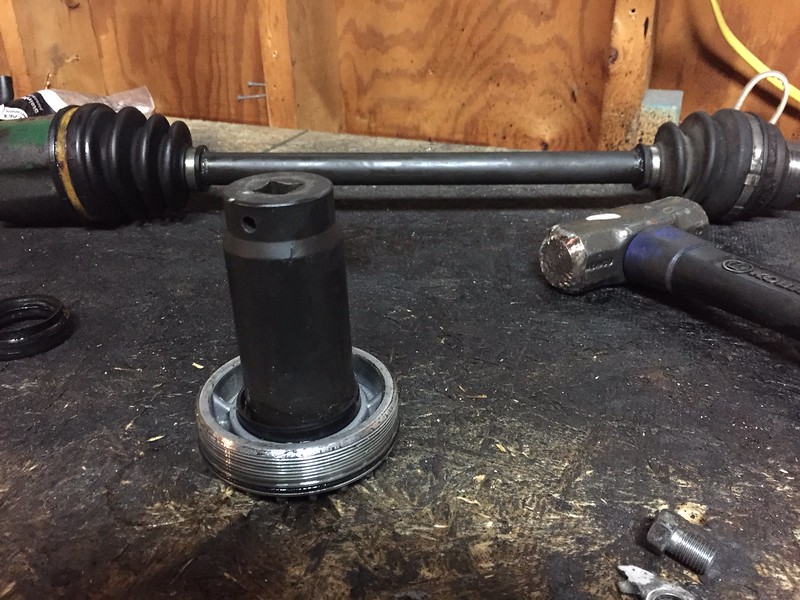
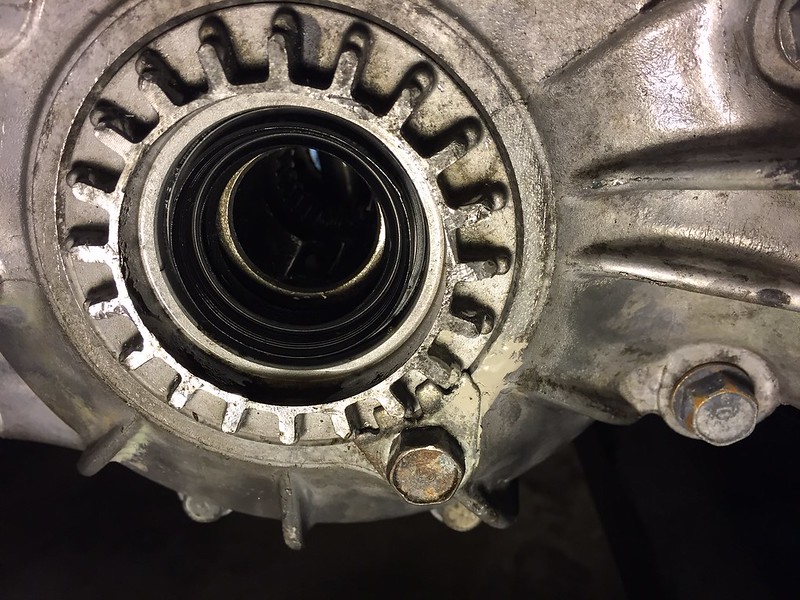
    I filled my transmission with some Motul 300, and it promptly started filling the garage floor with the same. I had to replace the passenger side diff bearing, which luckily my local dealership had in stock! (Romano Subaru in Syracuse is just fantastic, in case anyone was wondering). I marked the sundial with paint and counted the turns coming off so I could get the same depth as last time. Did you know that if you flip the little bolt-on locker (bottom right of sundial, with paint on it), it is half a tooth off? Word of caution in case anyone else ever has to do this. I found that a a 34mm socket works quite well. Also, don't remove both sundials at once; your diff will fall down and I think you'll make more work for yourself.


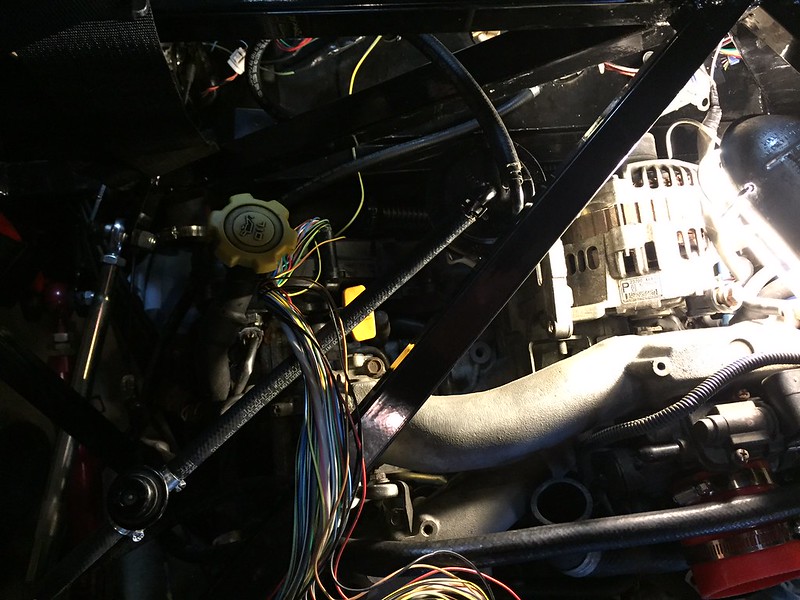
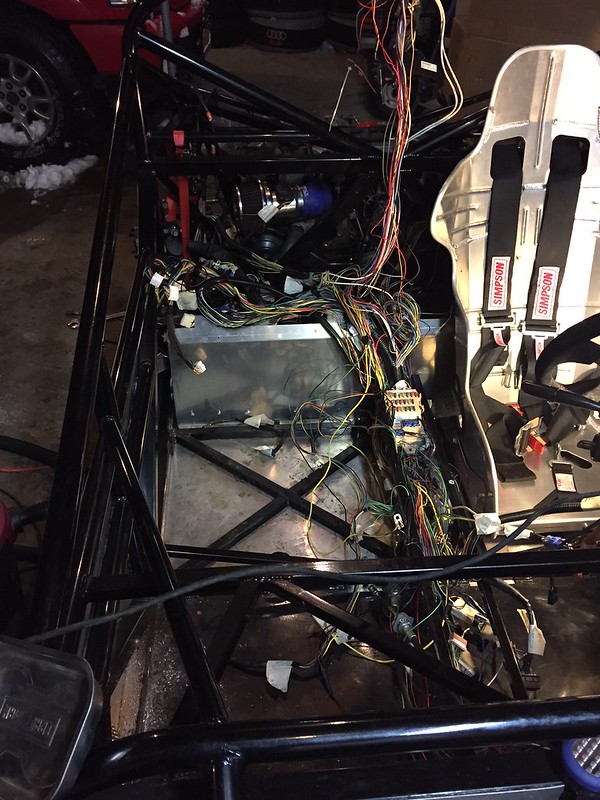
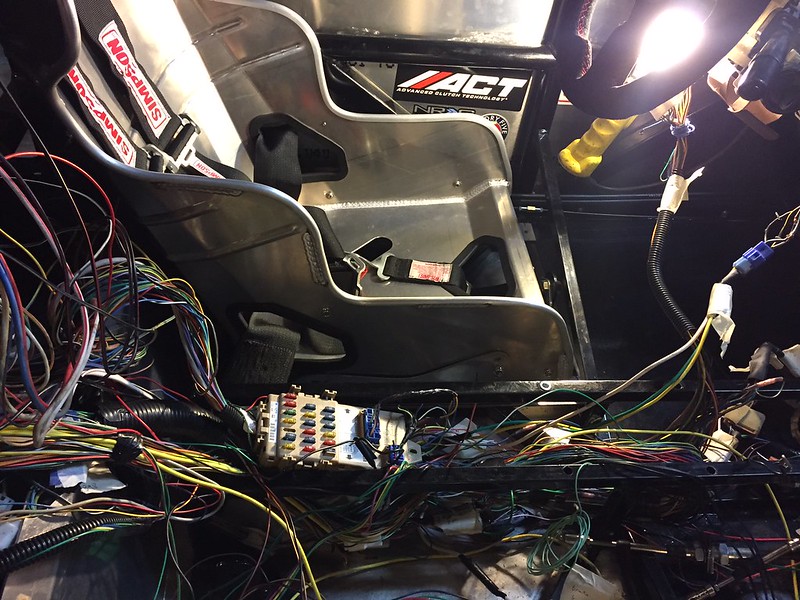
    Also continued to test fit my wiring. I would like to put my fuse panel (someday to be a circuit breaker panel I hope) somewhere accessable. For now, this looks like a tentative spot, if space allows. Note the wiring is just mocked up here; I plan to wrap it and pretty it up a bunch more once I get it all to length.


  12. #212
    Senior Member Pearldrummer7's Avatar
    Join Date
    Feb 2014
    Location
    Asheville, NC
    Posts
    1,230
    Post Thanks / Like
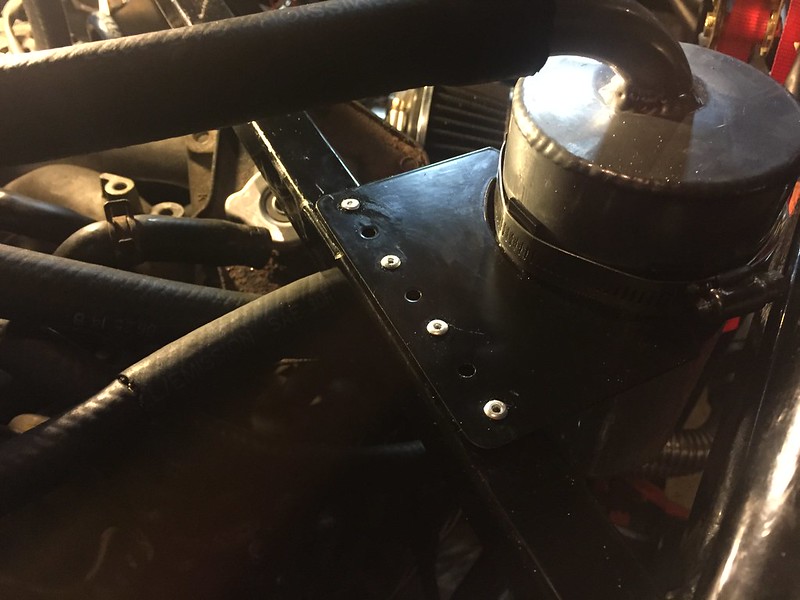
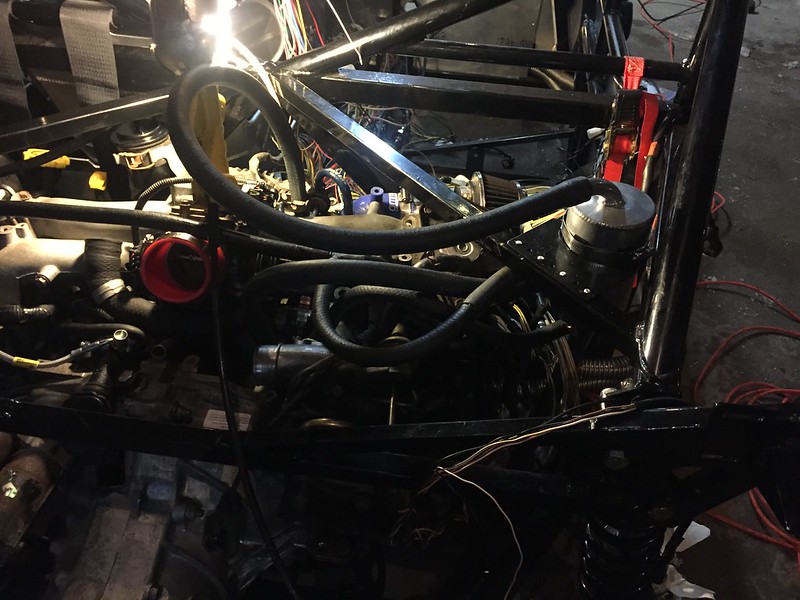
    Installed my AOS today. Didn't trim the plumbing to size yet because I want flexibility in case the intercooler makes me have to rotate the AOS. Pretty excited about it! It's the Crawford V1, which (unlike the V2) doesn't have coolant lines running through it (since this won't be driven in the winter).


  13. #213
    Senior Member Pearldrummer7's Avatar
    Join Date
    Feb 2014
    Location
    Asheville, NC
    Posts
    1,230
    Post Thanks / Like
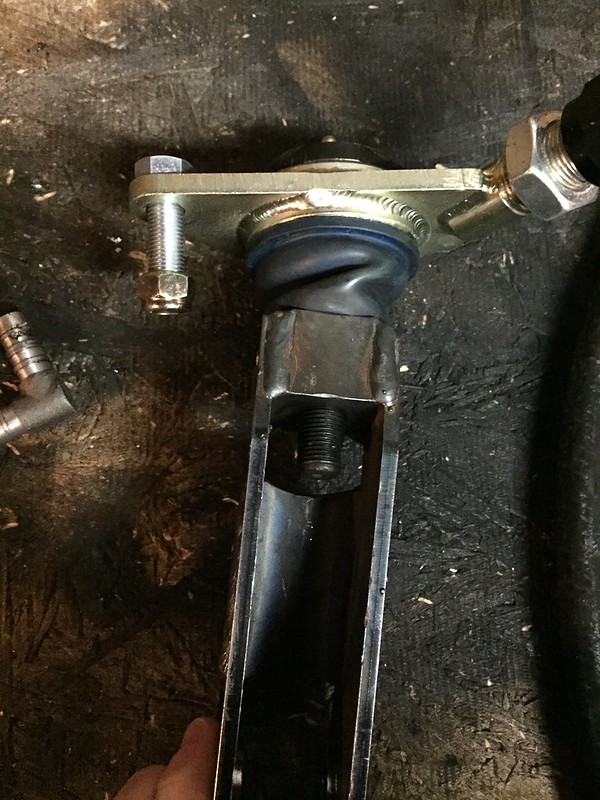
    So I put one of my ball joints in with the cotter pin hole facing the wrong way. And I can't seem to get it out. Anyone have any ideas? I had it in the vice and was rapping on it with a rubber mallet somewhat hard. I don't want to damage it.


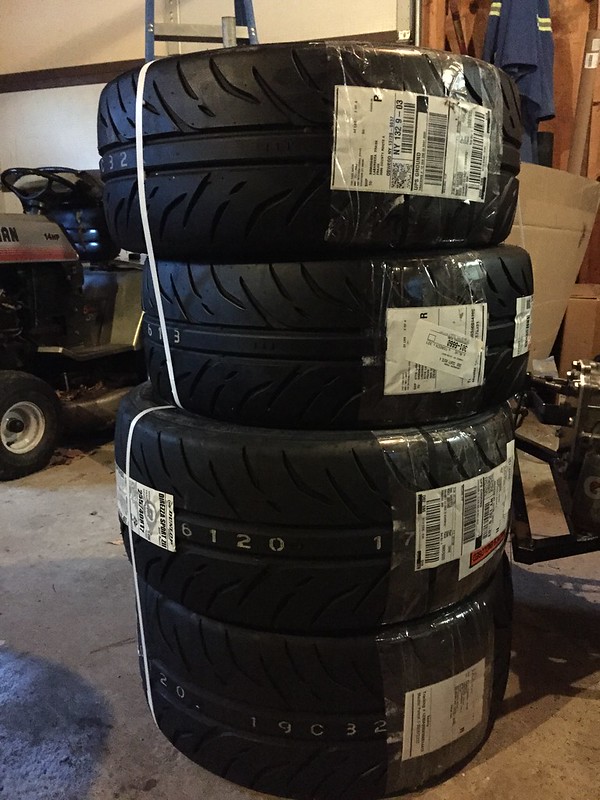
    Got my tires! Putting them on this week, if work permits. Pretty excited.

  14. #214
    Senior Member Frank818's Avatar
    Join Date
    Jun 2013
    Location
    QC, Canada
    Posts
    5,732
    Post Thanks / Like
    Oh yeah, those tires are nice!
    Frank
    818 chassis #181 powered by a '93 VW VR6 Turbo GT3582R
    Go-karted Aug 5, 2016 - Then May 19+21, 2017
    Tracked May 27/July 26, 2017
    Build time before being driveable on Sep 27, 2019: over 6000h
    Build Completed Winter 2021

  15. #215
    Senior Member wleehendrick's Avatar
    Join Date
    Jul 2012
    Location
    Encinitas, CA
    Posts
    1,653
    Post Thanks / Like
    Blog Entries
    2
    Quote Originally Posted by Pearldrummer7 View Post
    So I put one of my ball joints in with the cotter pin hole facing the wrong way. And I can't seem to get it out. Anyone have any ideas?
    You may have to resort to a pickle fork, but that could damage it. I think it's a relatively inexpensive Moog part, so not the end of the world of you do.

    Quote Originally Posted by Pearldrummer7 View Post
    Got my tires! Putting them on this week, if work permits. Pretty excited.
    Look good.. are those Dunlop's?

  16. #216
    Senior Member Pearldrummer7's Avatar
    Join Date
    Feb 2014
    Location
    Asheville, NC
    Posts
    1,230
    Post Thanks / Like
    Quote Originally Posted by Frank818 View Post
    Oh yeah, those tires are nice!
    Pretty stoked! I've had two sets of the regular ZII's on my WRX. Love them. These are the ZII Star Spec, so supposedly "1% faster" and longer lasting. Time will tell!

  17. #217
    Senior Member Pearldrummer7's Avatar
    Join Date
    Feb 2014
    Location
    Asheville, NC
    Posts
    1,230
    Post Thanks / Like
    Quote Originally Posted by wleehendrick View Post
    You may have to resort to a pickle fork, but that could damage it. I think it's a relatively inexpensive Moog part, so not the end of the world of you do.


    Look good.. are those Dunlop's?
    Yes they are! Dunlop Direzza ZII's. I had the Z1 Star Specs right when I got my WRX in 2012. Then got ZII's (twice now) and have been extremely impressed, especially in the wet. Very good for a street tire, and pretty cheap IMO.

  18. #218
    Senior Member Pearldrummer7's Avatar
    Join Date
    Feb 2014
    Location
    Asheville, NC
    Posts
    1,230
    Post Thanks / Like


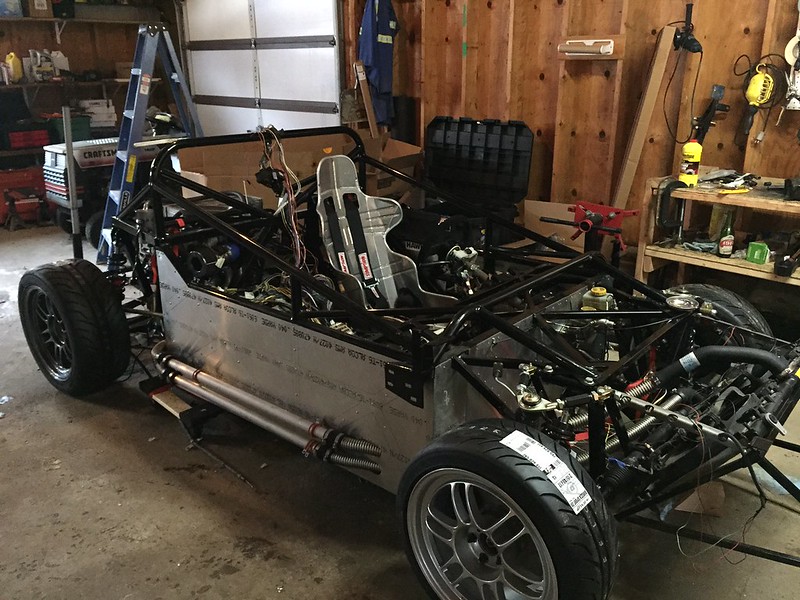
    Once I get my arms back from Wayne she'll finally be a roller!

  19. #219
    Senior Member mikeb75's Avatar
    Join Date
    Sep 2013
    Posts
    685
    Post Thanks / Like
    For your ball-joint problem, I had the same issue. Used a long 1/2" impact drive extension and a mini-sledge on the threaded stud. Needed to really shock the ball joint to get it to release. Pickle fork would be an easier/nicer way to go.
    818SC chassis #206 EJ207 2.0L VF37 twin scroll || Cusco type RS 1.5 LSD || Wilwood pedal box (firewall attach) || Wilwood superlite front calipers
    BUILD Phase 1: 6/6/2014 car delivered || 5/24/2015 first start || 6/7/2015 go karted || 4/20/2016 hard-top-topped || 10/25/2016 registered || 11/18/2016 inspected & complete
    BUILD Phase 2: 3/8/2017 EJ207v8 || 5/29/2017 re-first re-start || 7/17/2017 re-assembled with race car bits

  20. #220
    Senior Member RM1SepEx's Avatar
    Join Date
    Jul 2011
    Location
    Freeport, ME
    Posts
    3,801
    Post Thanks / Like
    I used a pickle fork and wasted the boot, the ball joint was cheap
    Dan

    818S #17 Picked up 8/1/13 First start 11/1/13 Go Kart 3/28/14

  21. #221
    Moonlight Performance
    Hindsight's Avatar
    Join Date
    May 2014
    Location
    Atlanta
    Posts
    3,402
    Post Thanks / Like
    Balljoints.... I had the same problem. This removed them quickly without even having to remove the spindle bracket from the car: http://www.harborfreight.com/3-4-qua...tor-99849.html

    I got one at the local auto parts store. Autozone didn't have them but Advance Auto Parts did. Won't damage the boot and works fast. No fiddling.

  22. #222
    Senior Member TouchStone's Avatar
    Join Date
    Sep 2014
    Location
    Dallas, TX
    Posts
    512
    Post Thanks / Like
    Blog Entries
    1
    Quote Originally Posted by Pearldrummer7 View Post
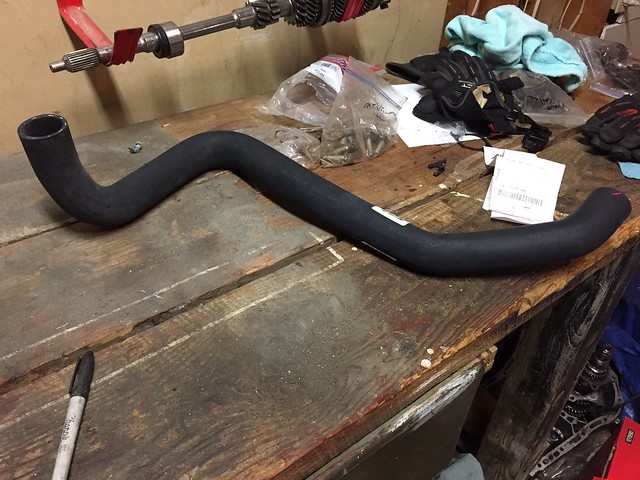
    Also found this gem of a coolant hose in Advanced Auto. It was $13 I think, and it's so long! Has some cool bend in it, too. I'm using this to reroute my coolant lines on the passenger side of the car.

    Why did you route both coolant lines on the passenger side? I may want to do this as well but I'm not sure what the benefit would be.
    818S Chassis #288 2.5L 323hp
    Ordered: 9/19/14 Received Kit: 11/2/14 First Start: 5/31/15 First Drive: 6/7/15 Registered: 3/10/2016 Completed: 2/10/2017
    Status: Complete Build Thread Sold 9/22/2017
    joshuajach.com

  23. #223
    Senior Member Pearldrummer7's Avatar
    Join Date
    Feb 2014
    Location
    Asheville, NC
    Posts
    1,230
    Post Thanks / Like
    Quote Originally Posted by mikeb75 View Post
    For your ball-joint problem, I had the same issue. Used a long 1/2" impact drive extension and a mini-sledge on the threaded stud. Needed to really shock the ball joint to get it to release. Pickle fork would be an easier/nicer way to go.
    Quote Originally Posted by RM1SepEx View Post
    I used a pickle fork and wasted the boot, the ball joint was cheap
    Quote Originally Posted by Hindsight View Post
    Balljoints.... I had the same problem. This removed them quickly without even having to remove the spindle bracket from the car: http://www.harborfreight.com/3-4-qua...tor-99849.html

    I got one at the local auto parts store. Autozone didn't have them but Advance Auto Parts did. Won't damage the boot and works fast. No fiddling.
    I ended up using a pickle fork and getting it off pretty easily. They're awesome tools.

    Quote Originally Posted by TouchStone View Post
    Why did you route both coolant lines on the passenger side? I may want to do this as well but I'm not sure what the benefit would be.
    Weight distribution! I figure it helps offset the fact that I'm on the driver side. I figure besides me, there is steering and fuel filler neck, probably nearly offset by the extra exhaust stuff on the right. I bet left to right, with coolant run on the pass. side it's pretty close to even.

  24. #224
    Senior Member Pearldrummer7's Avatar
    Join Date
    Feb 2014
    Location
    Asheville, NC
    Posts
    1,230
    Post Thanks / Like
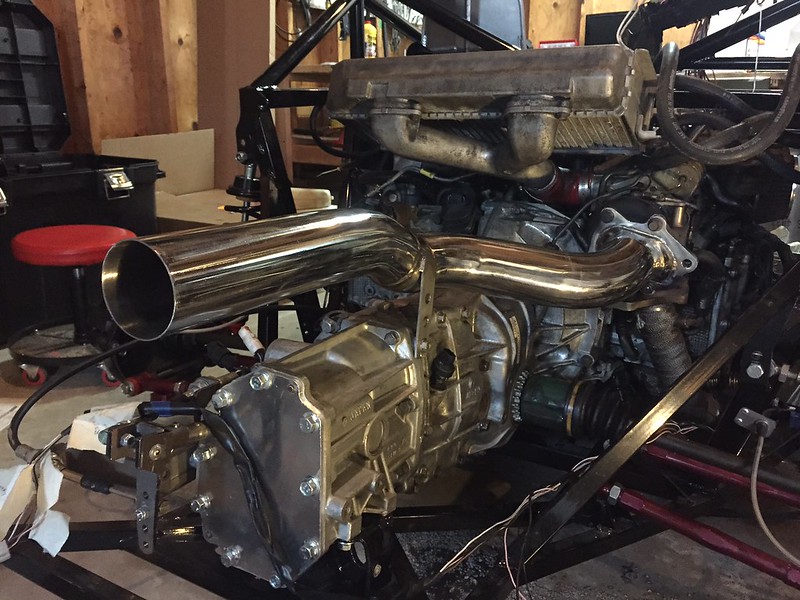
    AJW exhaust is mounted! What a beautiful exhaust! Huge thanks, guys. Waiting on installing the cat until I have the body mounted.


  25. #225
    Senior Member FFRSpec72's Avatar
    Join Date
    Feb 2011
    Location
    Kirkland, WA
    Posts
    2,255
    Post Thanks / Like
    Looks good, I should have mine this week, I also ordered the "ultra quiet resonator", so we will see
    Tony Nadalin
    2018 SOVREN Big Bore Champion
    2015 SCCA Oregon Region VP3 Champion
    2012 ICSCC ITE Class Champion
    FFR MkII Challenge Car, Spec Racer, Street Legal, SCCA, ICSCC and NASA Racing
    818R Build in progress

  26. #226
    Tazio Nuvolari wannabe Scargo's Avatar
    Join Date
    Nov 2013
    Location
    south-central CT
    Posts
    1,611
    Post Thanks / Like
    I hope you will wrap it really well. It looks nice but could potentially heat up a lot of nearby stuff.

  27. #227
    818 builder metalmaker12's Avatar
    Join Date
    Mar 2012
    Location
    Exeter R.I
    Posts
    2,834
    Post Thanks / Like
    Blog Entries
    1
    Quote Originally Posted by FFRSpec72 View Post
    Looks good, I should have mine this week, I also ordered the "ultra quiet resonator", so we will see
    I thought you had a jdm twinscroll setup?
    818S frame #13 Jdm version 8 ej207

  28. #228
    Senior Member FFRSpec72's Avatar
    Join Date
    Feb 2011
    Location
    Kirkland, WA
    Posts
    2,255
    Post Thanks / Like
    Quote Originally Posted by metalmaker12 View Post
    I thought you had a jdm twinscroll setup?
    No I have an EJ207v7 and the v7 is not twin scroll
    Tony Nadalin
    2018 SOVREN Big Bore Champion
    2015 SCCA Oregon Region VP3 Champion
    2012 ICSCC ITE Class Champion
    FFR MkII Challenge Car, Spec Racer, Street Legal, SCCA, ICSCC and NASA Racing
    818R Build in progress

  29. #229
    Senior Member FFRSpec72's Avatar
    Join Date
    Feb 2011
    Location
    Kirkland, WA
    Posts
    2,255
    Post Thanks / Like
    Quote Originally Posted by Scargo View Post
    I hope you will wrap it really well. It looks nice but could potentially heat up a lot of nearby stuff.
    No much around the area, as its about 10-11" from deck lid, and just the transmission is there
    Tony Nadalin
    2018 SOVREN Big Bore Champion
    2015 SCCA Oregon Region VP3 Champion
    2012 ICSCC ITE Class Champion
    FFR MkII Challenge Car, Spec Racer, Street Legal, SCCA, ICSCC and NASA Racing
    818R Build in progress

  30. #230
    Tazio Nuvolari wannabe Scargo's Avatar
    Join Date
    Nov 2013
    Location
    south-central CT
    Posts
    1,611
    Post Thanks / Like
    I have an oil cooler on the tranny of my STi track car; but then it has an internal pump... Doesn't it need love, too? I think radiant heat will affect the intercooler and most everyone seems to feel that the stock intercooler setup is marginal to unacceptable in the 818 anyway.

    BTW, I have essentially three resonators on my STi. One's in the middle of the car. The two at the back of the car are supposed to be mufflers, but they are straight through 3" (everything's three inch). I cannot pass Lime Rock's 89 Db restriction without downturns on the two "mufflers". Perhaps punching out 400 WHP makes a little more noise?
    89Db , not 68...
    Last edited by Scargo; 02-26-2015 at 12:41 PM. Reason: correction on sound level

  31. #231
    Senior Member Pearldrummer7's Avatar
    Join Date
    Feb 2014
    Location
    Asheville, NC
    Posts
    1,230
    Post Thanks / Like
    Scargo- I wrapped the up pipe and headers, but not the turboback yet? Why wrap the TB? Heat to intercooler? I'm a little worried about noise. Hoping the cat helps quiet it out a little bit. If not, I might be running a loud exhaust on the street with a cat, and a muffler on the track. Kinda backwards! haha


    FFR-I'm curious to see how much quieter the muffled exhaust is than the straight pipe vs. catted.

  32. #232
    Senior Member Frank818's Avatar
    Join Date
    Jun 2013
    Location
    QC, Canada
    Posts
    5,732
    Post Thanks / Like
    That looks so mean.
    Frank
    818 chassis #181 powered by a '93 VW VR6 Turbo GT3582R
    Go-karted Aug 5, 2016 - Then May 19+21, 2017
    Tracked May 27/July 26, 2017
    Build time before being driveable on Sep 27, 2019: over 6000h
    Build Completed Winter 2021

  33. #233
    Senior Member D Clary's Avatar
    Join Date
    Aug 2013
    Location
    Santa Rosa CA
    Posts
    407
    Post Thanks / Like
    exhaust and trunk 001.JPGI wrapped mine just to keep the heat out of the engine bay. Also I had visions of brushing up against that shiny stainless when it was hot. OUch!

  34. #234
    Senior Member FFRSpec72's Avatar
    Join Date
    Feb 2011
    Location
    Kirkland, WA
    Posts
    2,255
    Post Thanks / Like
    Quote Originally Posted by Pearldrummer7 View Post
    Scargo- I wrapped the up pipe and headers, but not the turboback yet? Why wrap the TB? Heat to intercooler? I'm a little worried about noise. Hoping the cat helps quiet it out a little bit. If not, I might be running a loud exhaust on the street with a cat, and a muffler on the track. Kinda backwards! haha


    FFR-I'm curious to see how much quieter the muffled exhaust is than the straight pipe vs. catted.
    I will be interested also, as I have a 95 db limit (most of the other tracks are 100 db) that I need to meet, my goal is to have a straight pipe and when I need it put the resonator on, so when I cut the pipe I will have the end flared out so it can slip back on and use a v-clamp to hold it on and add a tip if I need to (so I can reach end of car)
    Tony Nadalin
    2018 SOVREN Big Bore Champion
    2015 SCCA Oregon Region VP3 Champion
    2012 ICSCC ITE Class Champion
    FFR MkII Challenge Car, Spec Racer, Street Legal, SCCA, ICSCC and NASA Racing
    818R Build in progress

  35. #235
    Senior Member wleehendrick's Avatar
    Join Date
    Jul 2012
    Location
    Encinitas, CA
    Posts
    1,653
    Post Thanks / Like
    Blog Entries
    2
    Quote Originally Posted by Pearldrummer7 View Post
    Scargo- I wrapped the up pipe and headers, but not the turboback yet? Why wrap the TB? Heat to intercooler?
    Quote Originally Posted by Scargo View Post
    I think radiant heat will affect the intercooler and most everyone seems to feel that the stock intercooler setup is marginal to unacceptable in the 818 anyway.
    I agree totally! The OEM TMIC has been shown to heat soak in the 818... and that's without a bare exhaust pipe below it. Without insulation, both radiant heat and convection (at a stop) will bake the TMIC. If you don't want to go AWIC, at least wrap the pipe and/or add a heatshield; your motor will thank you!

  36. #236
    Senior Member
    Join Date
    May 2013
    Location
    Colombia
    Posts
    222
    Post Thanks / Like
    I'd put a stainless steel plate between the two, and put some insulation on the plate on the side of the intercooler. Convection and radiation of heat is definitely a huge problem. The alternative is to side-mount the TMIC. Ceramic coating the exhaust also helps both the intercooler and exhaust velocity which helps power.
    Last edited by Speedy G; 02-26-2015 at 01:14 PM.

  37. #237
    Tazio Nuvolari wannabe Scargo's Avatar
    Join Date
    Nov 2013
    Location
    south-central CT
    Posts
    1,611
    Post Thanks / Like
    Ran across this photo this morning.

  38. #238
    Senior Member Pearldrummer7's Avatar
    Join Date
    Feb 2014
    Location
    Asheville, NC
    Posts
    1,230
    Post Thanks / Like
    Quote Originally Posted by Scargo View Post
    Ran across this photo this morning.
    Woah.

    I mean, some steels will start glowing in the 850-900*F range, and EGT's can get over 1500*F...I guess this makes sense, but man is it crazy to see. Really cool pic, Scargo!

  39. #239
    Senior Member Frank818's Avatar
    Join Date
    Jun 2013
    Location
    QC, Canada
    Posts
    5,732
    Post Thanks / Like
    What car is that from?
    Totally jaw-breaking.
    Frank
    818 chassis #181 powered by a '93 VW VR6 Turbo GT3582R
    Go-karted Aug 5, 2016 - Then May 19+21, 2017
    Tracked May 27/July 26, 2017
    Build time before being driveable on Sep 27, 2019: over 6000h
    Build Completed Winter 2021

  40. #240
    Senior Member Pearldrummer7's Avatar
    Join Date
    Feb 2014
    Location
    Asheville, NC
    Posts
    1,230
    Post Thanks / Like
    Quote Originally Posted by Frank818 View Post
    What car is that from?
    Totally jaw-breaking.
    From someone on Facebook:
    "Thats a pic i believe from tomei of japan testing differences between the ej20/ 25 with their header and arms turbo"

Page 6 of 26 FirstFirst ... 4567816 ... LastLast

Tags for this Thread

Posting Permissions

  • You may not post new threads
  • You may not post replies
  • You may not post attachments
  • You may not edit your posts
  •  

Breeze

Visit our community sponsor