Forte's

Visit our community sponsor

Thanks Thanks:  0
Likes Likes:  0
Page 1 of 2 12 LastLast
Results 1 to 40 of 49

Thread: Ghibli Cup's Canadian build thread

  1. #1
    Member
    Join Date
    Feb 2014
    Posts
    38
    Post Thanks / Like

    Cool Ghibli Cup's Canadian build thread

    Hi Everyone,

    This is the start of my second build thread. I did one for my FFR MK III build a few years back which can be found here: http://www.bairds.ca/FFR

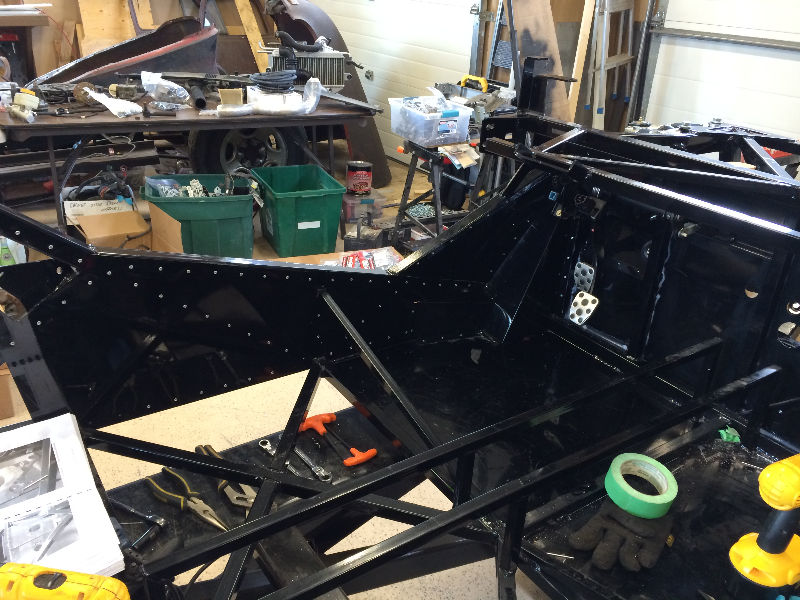
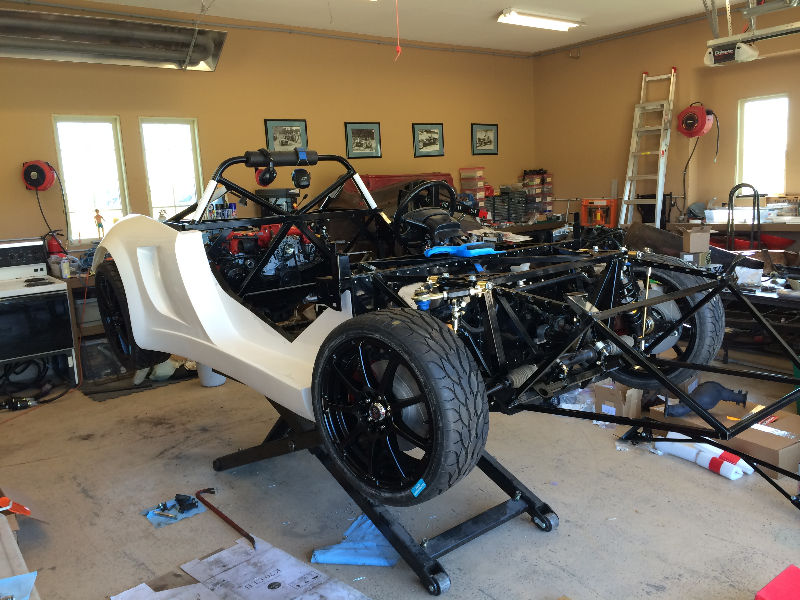
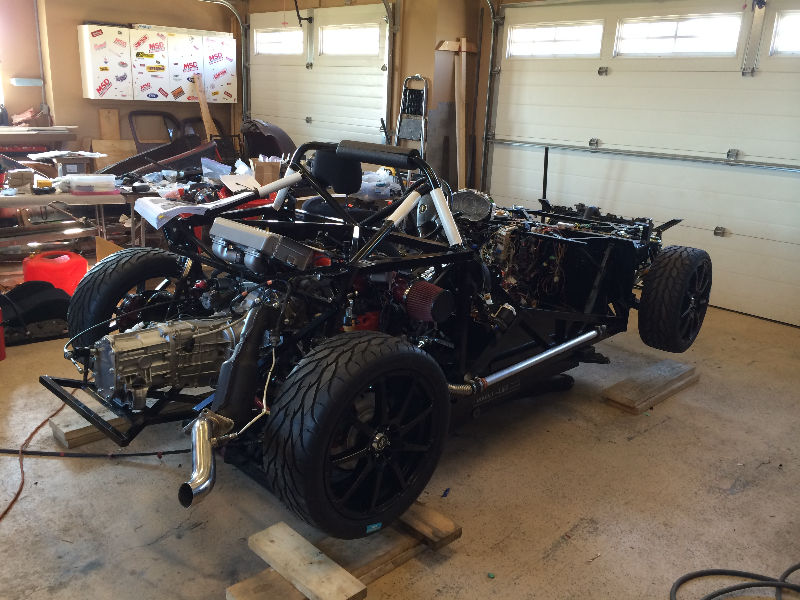
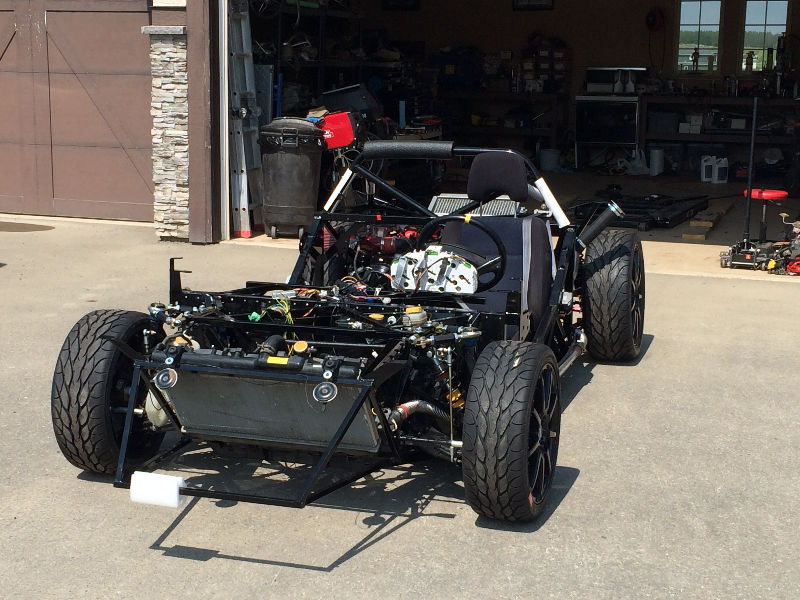
    This time round we are building an 818S, and here is a rendering of what it should look like:


    First things first, I need to finish building the garage to put other vehicles in while we build this one. But today it is minus 20 and snowing, so I'm staying inside on the forum, instead of running electrics outside...

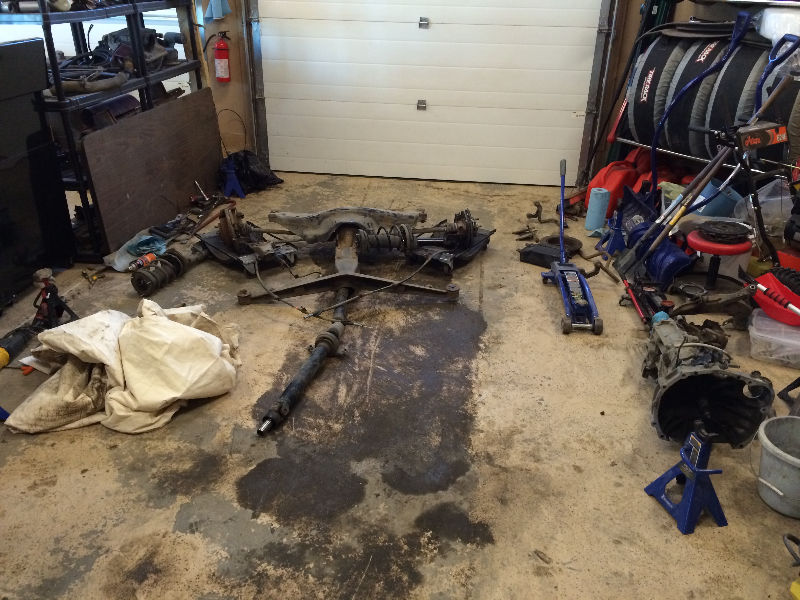
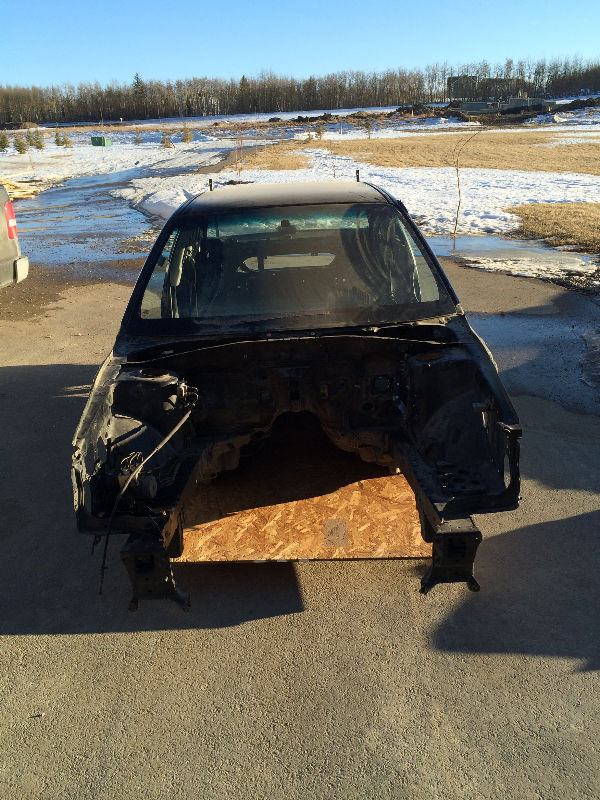
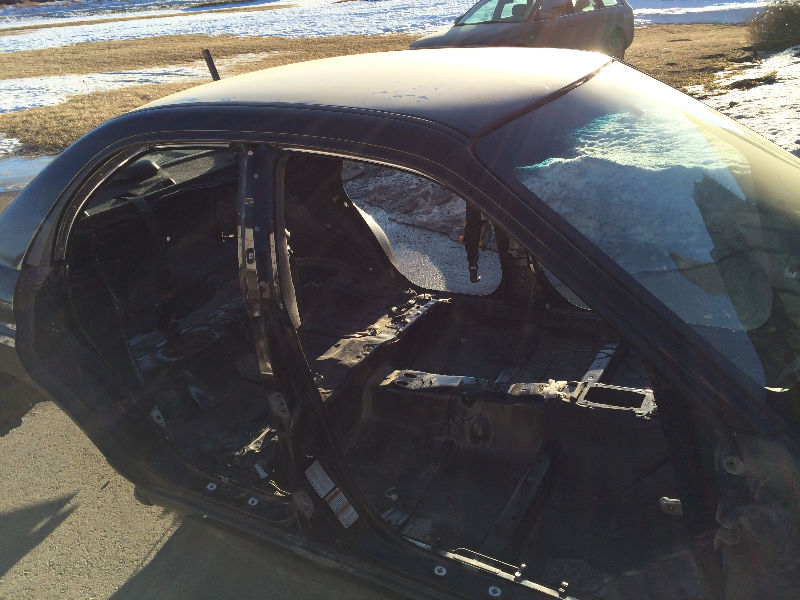
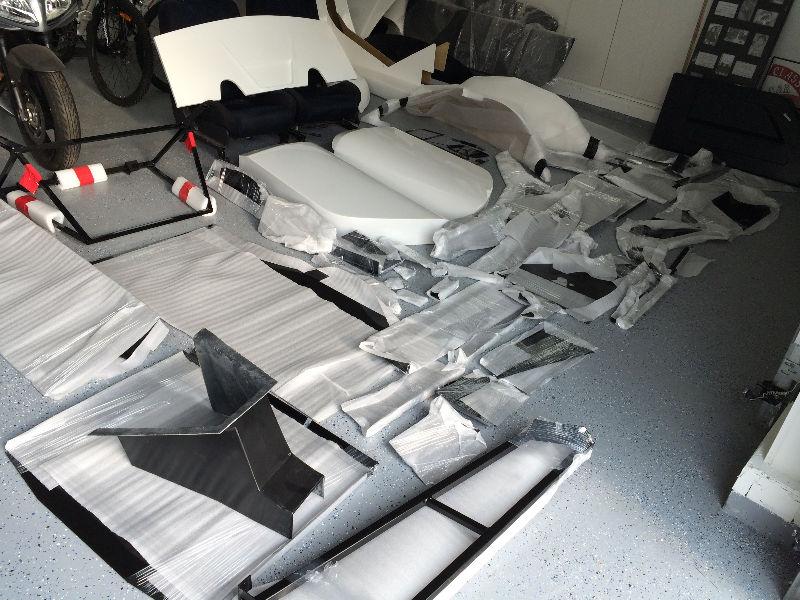
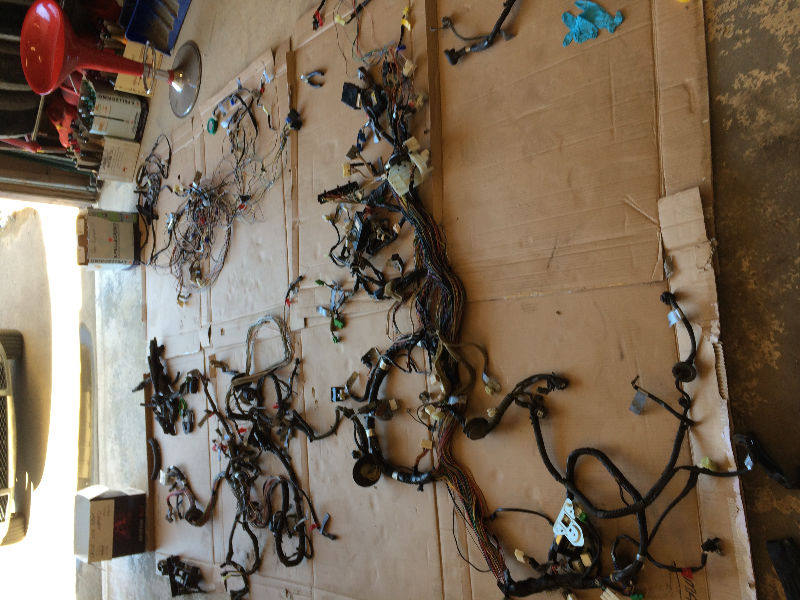
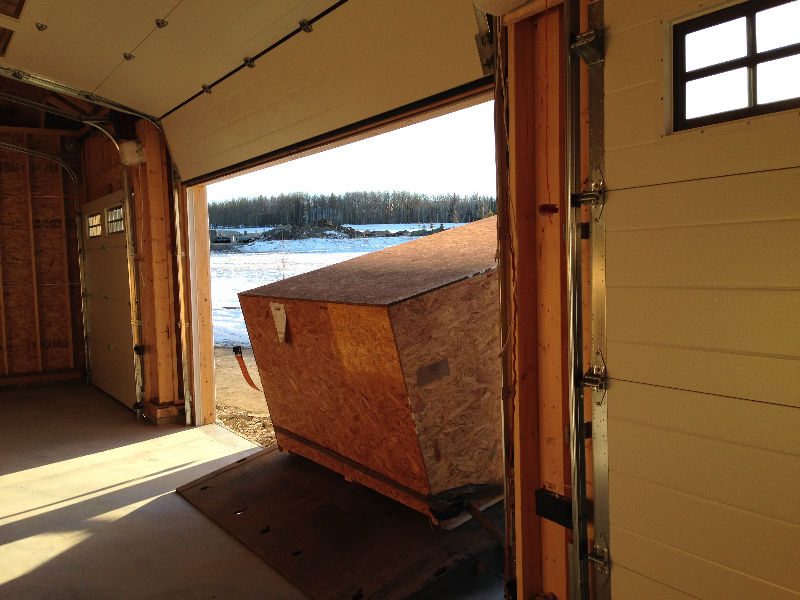
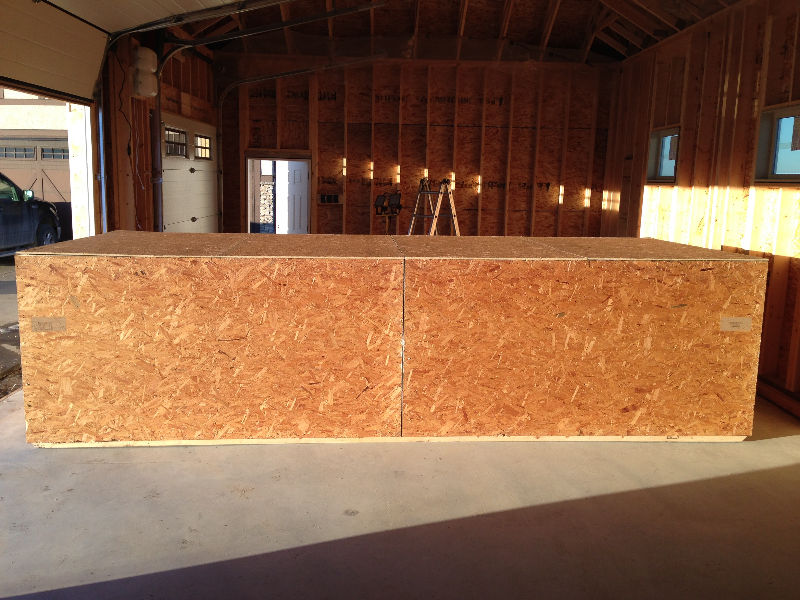
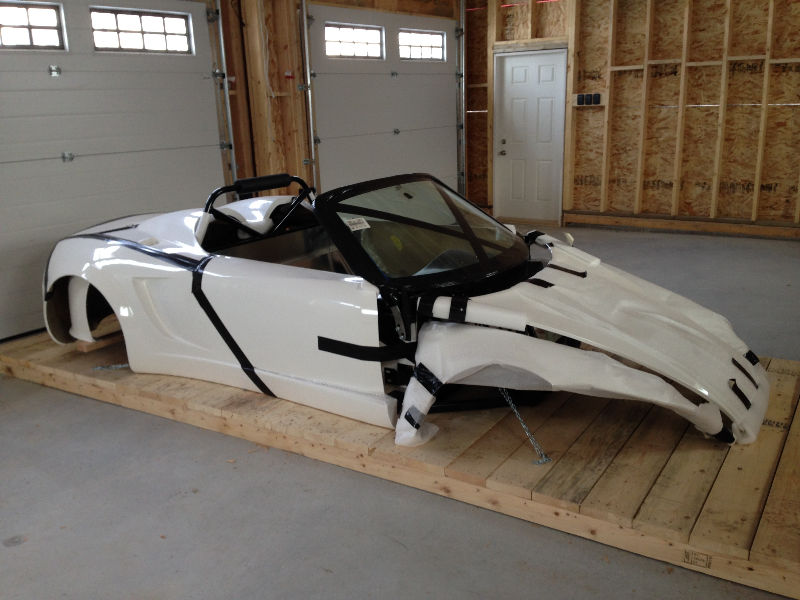
    The kit being delivered:
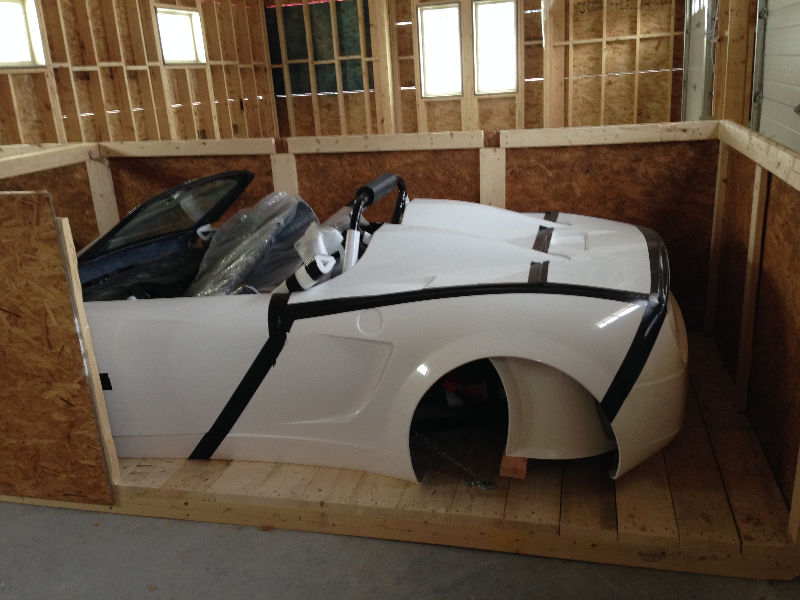


    And being unpacked:


    More to follow...

    Steve

  2. #2
    K3LAG's Avatar
    Join Date
    May 2013
    Location
    Greensburg, PA
    Posts
    552
    Post Thanks / Like
    Congratulations. I like the color scheme. Orange seems to be a popular color around here.

    Larry

  3. #3
    Senior Member Canadian818's Avatar
    Join Date
    Nov 2011
    Location
    Edmonton, Alberta
    Posts
    1,378
    Post Thanks / Like
    Welcome, and congrats! Nice to see another Canadian build, where abouts are you? Love the color scheme, where have I seen that before?
    Adam _____ Instagram @PopesProjects____ YouTube Channel
    818 SRX - #91
    Arrived 01/02/2014
    First Start 10/31/2016
    First Drive 05/22/2017
    Registered 10/25/2019 BRAP818

  4. #4
    Senior Member Xusia's Avatar
    Join Date
    Oct 2011
    Location
    Eugene, OR, USA
    Posts
    2,343
    Post Thanks / Like
    Awesome! Can't wait to see more.

  5. #5
    Senior Member riptide motorsport's Avatar
    Join Date
    Feb 2011
    Location
    Fort Lauderdale Fl.
    Posts
    3,296
    Post Thanks / Like
    Agreed, the Gulf colors do look nice.
    FFR Daytona Type 65 Coupe
    67 427 Cobra
    57' Belair
    72 Pinto Wagon ,306" 1/4 miler
    34 5 window coupe Ford
    2003 Mustang GT
    99' ZX9
    85 Goldwing

    All toys still in the Scuderia!


    Every Saint has a past..................every sinner a future

    Don't take yourself so seriously........no one else does.

    You never see a motorcycle parked outside a Psychiatrists office.

  6. #6
    Member
    Join Date
    Feb 2014
    Posts
    38
    Post Thanks / Like
    Thanks guys. I'm planning to go with the Gulf racing color scheme if I paint it, otherwise I might go the Martini racing route and make it into a Porsche 918 look-a-like...

    01-porsche-918-martini.jpg

    I might even do the high exit exhausts...

    I'm located just West of Calgary.

    Cheers,

    Steve

  7. #7
    Junior Member
    Join Date
    Jul 2012
    Location
    Vancouver, BC
    Posts
    12
    Post Thanks / Like
    I love the Gulf colour scheme. Looking forward to your build!

  8. #8
    Member
    Join Date
    Feb 2014
    Posts
    38
    Post Thanks / Like

    Donor teardoiwn starts

    Well we've given up waiting for the weather to warm up (minus 26.5C last night when we got home...) so decided to start the teardown this weekend. On Last night when we got home from work we jump started the WRX and brought it into the garage to warm up. This is what it looked like a few weeks ago:


    Start time: 11:00am


    11:15


    11:30


    12:00 First door removed


    13:00 Three doors removed


  9. #9
    Senior Member Canadian818's Avatar
    Join Date
    Nov 2011
    Location
    Edmonton, Alberta
    Posts
    1,378
    Post Thanks / Like
    I dunno what is is about these cars, but they come apart quick. It's almost as if they know what their being reincarnated into and want to help.
    Adam _____ Instagram @PopesProjects____ YouTube Channel
    818 SRX - #91
    Arrived 01/02/2014
    First Start 10/31/2016
    First Drive 05/22/2017
    Registered 10/25/2019 BRAP818

  10. #10
    Member
    Join Date
    Feb 2014
    Posts
    38
    Post Thanks / Like
    Four doors now removed:


    Ash manages to get the radio surround off:


    15:00 Status:


    Interior removed and wiring harness exposed:


    18:00 Up on jack stands, all wheels removed, and front wing removed:


    End of day 1: Time for a beer!


    Cheers,

    Steve

  11. #11
    Senior Member Geoff H's Avatar
    Join Date
    Feb 2011
    Location
    Edmonton, Alberta
    Posts
    195
    Post Thanks / Like
    Hey Steve and Ash - This is great news! Glad to see you back in the mix. I will be following your build.

    Happy building!

    Geoff

  12. #12
    Junior Member
    Join Date
    Jan 2014
    Posts
    9
    Post Thanks / Like
    Great progress thus far. I noticed in the pics that you guys did not label the connectors or am i wrong and a later picture will reveal that you did label all the connectors?

  13. #13
    Member
    Join Date
    Feb 2014
    Posts
    38
    Post Thanks / Like
    Day 2 - progress has slowed down. 250,000km are showing on the mechanical bits.. Split pins that won't move from the castle nuts, and rusty hardware throughout. Had hoped to get the engine and mechanicals removed today so that we could get the daily driver back in the garage, but it was not to be... Plus, it's only minus 25C outside - cars love starting at that temp!

    Wings off and ready for the radiator to be removed:


    Wiring removed and labeled:


    Radiator removed:


    Ready to lift the engine and gearbox out. Due to the length of the legs on my engine hoist, I can't drop the subframe down, as it would be sitting on the legs. Instead I need to lift it up, and before I can do that, I need to take the driveshafts out. And I can't do that until the spindles are removed, and I can't do that until I can get the split pins out of the steering arm ball joint as well as the lower ball joint. Both of which have snapped off and need drilling out...


    Ready for pedal removal:


    One of the offending, rusted up, corners:


    What used to be an interior and dashboard:


    Next weekend we'll see if we can finish what we started...

  14. #14
    Senior Member Canadian818's Avatar
    Join Date
    Nov 2011
    Location
    Edmonton, Alberta
    Posts
    1,378
    Post Thanks / Like
    Steve, my picker was about the same size. I put a few 2x4's across the legs and lowered the whole setup onto the crane, then used the crane to lift the car up high enough to clear, support the car and roll it out under.
    Adam _____ Instagram @PopesProjects____ YouTube Channel
    818 SRX - #91
    Arrived 01/02/2014
    First Start 10/31/2016
    First Drive 05/22/2017
    Registered 10/25/2019 BRAP818

  15. #15
    Senior Member Triathletedave's Avatar
    Join Date
    Sep 2012
    Location
    Calgary
    Posts
    232
    Post Thanks / Like
    Great work so far, Steve and Ash! I hope the rest of the tear-down goes smoothly. Please call me if you want any help. I come cheap!
    TriguyDave
    818 noobie builder
    First start: Sept 28, 2014
    Go-carted: Oct 4, 2014
    Registered and Street legal Sept 30, 2015
    Calgary, Alberta

  16. #16
    Senior Member STiPWRD's Avatar
    Join Date
    Jan 2014
    Location
    Leesburg, VA
    Posts
    1,624
    Post Thanks / Like
    Looks like you made short work of that wiring harness, nice work! You may want to look into a space heater, it will completely change working in the garage when it's cold.

  17. #17
    Member
    Join Date
    Feb 2014
    Posts
    38
    Post Thanks / Like
    Hi,

    2nd weekend of the teardown, status update...

    Today we made a lot of progress. Firstly we removed the power steering pump and air conditioning compressor:


    Then the front spindle and lower control arm from the driver's side came off leaving the driveshaft:


    Then with the passenger side removed as well, it was time to try and remove the engine (hint: it is easier if you remove the top rear engine mount...)


    All strapped and ready to go...


    Removed from the car:


  18. #18
    Member
    Join Date
    Feb 2014
    Posts
    38
    Post Thanks / Like
    Then came the fun part of separating the transmission from the engine.

    Thanks to Google, we found out that a 10mm allen key removes the plug on the drivers' side of the gearbox and then by screwing a bolt into the exposed shaft, we were able to pull it completely out, freeing up the selector fork. Once this was done (along with a little bit of persuasion with a 2x4 and a BFH) the transmission separated from the engine no problem at all.

    Before separation:


    After separation. The clutch is in really good shape, and considering it has 250k km on it, the flywheel and clutch are in such good condition, I'm not going to have to replace them.


    Transmission ready for some TLC:


    The engine is now on the engine stand ready for a cam belt service along with some general tidying up.


    Tomorrow the plan is to finish stripping the donor so that the shell can be hauled away and we can get the daily driver back in the garage. Not such a problem now as it is at last above freezing, but last week it was minus 28C with snow, and I was in Texas on business, which left my wife (and co-builder) dealing with the daily commute in a frozen car. Oops...

  19. #19
    Member
    Join Date
    Feb 2014
    Posts
    38
    Post Thanks / Like
    Early-ish start today, with the goal of completing the teardown by the end of the weekend. We started off where we left off yesterday, trying to remove the rear end.


    Turns out I didn't take too many pictures during the day today, which was mainly due to the car fighting me all the way. 12 years in a snow and salt environment took their toll, and some fasteners were simply welded to each other with rust. I managed to break the welds holding two of the captured nuts on the lower rear control bar mount, and was just stripping the head of the bolt connecting the control bar to the frame... Good excuse to get some nice new ones...


    I knew the sides from the crate would come in handy! Just screwed on four casters and away we go:


    Now the real fun starts. Turning these rusty parts into new looking ones...

  20. #20
    Senior Member Triathletedave's Avatar
    Join Date
    Sep 2012
    Location
    Calgary
    Posts
    232
    Post Thanks / Like
    Wow, a lot of progress made! I hope you can get rid of the carcass easily. I think it was Metro Towing that came and took mine away for free. Only took about 10 minutes to load the whole thing. Just have lots of duct tape handy, since there are no hinges left.
    TriguyDave
    818 noobie builder
    First start: Sept 28, 2014
    Go-carted: Oct 4, 2014
    Registered and Street legal Sept 30, 2015
    Calgary, Alberta

  21. #21
    Member
    Join Date
    Feb 2014
    Posts
    38
    Post Thanks / Like
    Well, after months of preparation the build started today! 7:30 this morning the frame was bare. By evening we have installed the front firewall and front suspension, and are ready to finish the steering and rear suspension tomorrow. Hopefully by then it will be sitting on it's own four wheels. Some progress pics...

    The panels back from powder coating:


    Panel marked for drilling:


    First half of the front firewall completed:


    Firewall finished:


    Front suspension installed:


    Starting to come together. More updates tomorrow...

    Cheers,

    Steve

  22. #22
    Senior Member Frank818's Avatar
    Join Date
    Jun 2013
    Location
    QC, Canada
    Posts
    5,732
    Post Thanks / Like
    Those are huge tires.
    Frank
    818 chassis #181 powered by a '93 VW VR6 Turbo GT3582R
    Go-karted Aug 5, 2016 - Then May 19+21, 2017
    Tracked May 27/July 26, 2017
    Build time before being driveable on Sep 27, 2019: over 6000h
    Build Completed Winter 2021

  23. #23

    Join Date
    Oct 2013
    Location
    Puyallup, WA
    Posts
    576
    Post Thanks / Like
    You have to tell me/us what size wheels and tires youve chosen!

  24. #24
    Member
    Join Date
    Feb 2014
    Posts
    38
    Post Thanks / Like
    Hi,

    I think the picture gave a distorted view of the size of the wheels and tires. They are 215/40 ZR 17, but the tread pattern makes them look bigger. I hope to have it sitting on all 4 wheels later today so will post a pic then.

    Cheers,

    Steve

  25. #25
    Member
    Join Date
    Feb 2014
    Posts
    38
    Post Thanks / Like
    I'm a little behind on my updates, so here is what we have achieved in the past 2 days...

    The interior aluminum has been installed.


    The engine has been finished and is ready to be mated to the clutch and gearbox.


    The rear suspension is installed ready for the engine to be dropped in.


    Front suspension in place along with the cockpit sides.


    The moment of truth. Will it fit...


  26. #26
    Member
    Join Date
    Feb 2014
    Posts
    38
    Post Thanks / Like
    Easy does it...


    Success!!!


    Fits like a glove.


    Starting to look like a proper race car now.


    We had to put a body panel on just to see what it looks like.


    And now to tackle the wiring diet (or rather Ash, my wife, is tackling the wiring diet. Something to do with a lack of patience on my part...


    By the end of today I hope to have the suspension all torqued up and take some pictures of it outside.

    Cheers,

    Steve

  27. #27
    Senior Member Frank818's Avatar
    Join Date
    Jun 2013
    Location
    QC, Canada
    Posts
    5,732
    Post Thanks / Like
    Never realized your nice under car lift. Looks cool. Do you mention what it is somewhere in your thread?
    Frank
    818 chassis #181 powered by a '93 VW VR6 Turbo GT3582R
    Go-karted Aug 5, 2016 - Then May 19+21, 2017
    Tracked May 27/July 26, 2017
    Build time before being driveable on Sep 27, 2019: over 6000h
    Build Completed Winter 2021

  28. #28
    Member
    Join Date
    Feb 2014
    Posts
    38
    Post Thanks / Like
    Hi Frank,

    It is a LiftKing scissor lift. Very handy!

    Today was a good day. We got the driveshafts installed, the rear suspension bolted up and were able to roll it outside for the first time.


    Richard and I were happy with the progress.


    We needed to do some significant surgery to the rear tubular arms to stop the tires rubbing, so after the cutting and welding we covered up the work with a bit of powder coating. What garage is not not complete without a second hand oven in it...

    Applying the powder.


    After baking in the oven.


    The final piece of progress today was converting the gearbox to 2WD.


    So that is what we achieved in 4 days in the garage (I had to go into the office yesterday). Not too bad. Now to keep the momentum going...

    Steve

  29. #29

    Join Date
    Oct 2013
    Location
    Puyallup, WA
    Posts
    576
    Post Thanks / Like
    Amazing job and awesome progress! Projects like these with family are the best type and surely will not be forgotten.

  30. #30
    Moonlight Performance
    Hindsight's Avatar
    Join Date
    May 2014
    Location
    Atlanta
    Posts
    3,402
    Post Thanks / Like
    Nice build thread - like all the pics, especially of the tear-down. Crazy how fast it goes. I hope I can make as quick work of all this as you have!

  31. #31
    Senior Member ehansen007's Avatar
    Join Date
    Mar 2011
    Location
    Aliso Viejo, CA
    Posts
    1,625
    Post Thanks / Like
    Quote Originally Posted by GhibliCup View Post


    Fits like a glove.
    Great pic.

  32. #32
    Member
    Join Date
    Feb 2014
    Posts
    38
    Post Thanks / Like
    Progress update for Thursday...

    The brakes and clutch are all plumbed in, and we are now trying to bleed the system. Not the quickest task in the world. I had also been reading about the problems people have been having with the gear selector hitting the rear of the bodywork, so have tried to make an easy modification myself which seems to work. I cut off the tube from the piece of the Subaru linkage that we keep and welded it back on to the inside, so that the 'ears' now face forward. I then drilled a hole in the body of the FFR extension piece so that it would fit over the gear selector shaft with the 'ears' facing forward. I then welded the two parts together and powder coated them and thought I was all done. Until I tried to connect the cables...

    Now that the ball connectors are 1.5" closer to the gearbox, the fore/aft selector was tool long to connect. I noticed that the FFR bracket has enough space to drill a third hole and slide the entire bracket forward by 1.5" so that the cables now fit. I'm really happy with how it has turned out as it only cost a bit of welding wire and powder coat, and the cables now appear to line up and won't hit the rear of the car.


    We also started on the wiring. I don't know what people are so scared of. Looks simple, right...


    So before we can go-kart we need to complete:

    Bleeding brakes & clutch
    Adjust clutch
    Install and bleed coolant lines
    Install and adjust gear selector
    Fill engine and gearbox with fluids
    Finish wiring to main controls and engine
    ...

    With a bit of luck we might be doing this by the end of the weekend. Fingers crossed...

    Cheers,

    Steve

  33. #33
    Senior Member Frank818's Avatar
    Join Date
    Jun 2013
    Location
    QC, Canada
    Posts
    5,732
    Post Thanks / Like
    In ten days you have done all that? Incredible!
    Frank
    818 chassis #181 powered by a '93 VW VR6 Turbo GT3582R
    Go-karted Aug 5, 2016 - Then May 19+21, 2017
    Tracked May 27/July 26, 2017
    Build time before being driveable on Sep 27, 2019: over 6000h
    Build Completed Winter 2021

  34. #34
    Senior Member STiPWRD's Avatar
    Join Date
    Jan 2014
    Location
    Leesburg, VA
    Posts
    1,624
    Post Thanks / Like
    yea seriously, great progress on the build! btw, good choice on the tires, I'm running the same exact ones

  35. #35
    818 builder metalmaker12's Avatar
    Join Date
    Mar 2012
    Location
    Exeter R.I
    Posts
    2,834
    Post Thanks / Like
    Blog Entries
    1
    Nice build A
    818S frame #13 Jdm version 8 ej207

  36. #36

    Join Date
    Oct 2013
    Location
    Puyallup, WA
    Posts
    576
    Post Thanks / Like
    Nice progress! To what extent are you dieting the harness?

  37. #37
    Member
    Join Date
    Feb 2014
    Posts
    38
    Post Thanks / Like
    Well the day arrived. First Start!!!

    Before we could turn the key, Ash had to finish up a little bit of wiring..


    Due to some strange personality quirk, Ash actually enjoyed the dieting of the harness..


    What was cut out so far (thanks to the wiring section of the manual. Absolutely essential to trace the wiring)..


    Fingers crossed..


    Success!

    http://www.youtube.com/watch?v=cSYIGKYBAgE

    Now to get the engine tuned properly and go Go-Karting.


    Very pleased with what we have achieved in two weeks. There won't be much progress in the next few weeks as we are heading down to Bonneville for Speed Week and then down to Pebble Beach for Concorso. Should be a blast!

    Cheers,

    Steve

  38. #38
    Senior Member AZPete's Avatar
    Join Date
    Feb 2011
    Location
    Scottsdale, AZ
    Posts
    2,374
    Post Thanks / Like
    I think it is time to order your next 818, considering how fast you are building this one and the FFR lead time.
    818S/C : Chassis #25 with 06 WRX 2.5 turbo, ABS, cruise, PS, A/C, Apple CarPlay, rear camera, power windows & locks, leather & other complexities. Sold 10/19 with 5,800 miles.
    Mk3 Roadster #6228 4.6L, T45, IRS, PS, PB, ABS, Cruise, Koni's, 17" Halibrands, red w/ silver - 9K miles then sold @ Barrett-Jackson Jan 2011 (got back cash spent).

  39. #39
    Member
    Join Date
    Feb 2014
    Posts
    38
    Post Thanks / Like
    We Go Karted today!!! After giving the car a once over, we torqued everything down and took her for a first drive. Wow! With only a little throttle she wanted to get up and go. These are quick cars! We have the VIN number now from the Alberta government, so once we get the lights and body on we can try for an 'Out of Province' inspection and see about getting her on the road.

    Ready to go:


    Go Karting:

    https://www.youtube.com/watch?v=MOHZpxBHMUI

    https://www.youtube.com/watch?v=9PpfzR6GD3o

    https://www.youtube.com/watch?v=gf-20LBrmBc

    Cheers,

    Steve

  40. #40
    Senior Member Frank818's Avatar
    Join Date
    Jun 2013
    Location
    QC, Canada
    Posts
    5,732
    Post Thanks / Like
    Wow, VIN number before the car is completed! That is a really nice regulation in Alberta! I'm moving there for a couple of months to get my VIN and then back in QC. lolll

    How much power again you got in that? OEM 227?
    Frank
    818 chassis #181 powered by a '93 VW VR6 Turbo GT3582R
    Go-karted Aug 5, 2016 - Then May 19+21, 2017
    Tracked May 27/July 26, 2017
    Build time before being driveable on Sep 27, 2019: over 6000h
    Build Completed Winter 2021

Page 1 of 2 12 LastLast

Posting Permissions

  • You may not post new threads
  • You may not post replies
  • You may not post attachments
  • You may not edit your posts
  •  

Martin's Dent and Collision Shop

Visit our community sponsor