FormaCars

Visit our community sponsor

Thanks Thanks:  2
Likes Likes:  11
Page 5 of 9 FirstFirst ... 34567 ... LastLast
Results 161 to 200 of 353

Thread: My Daytona Coupe Build... Ten Years in the Making

  1. #161
    Senior Member Carlos C's Avatar
    Join Date
    Nov 2013
    Location
    Apollo Beach, FL
    Posts
    494
    Post Thanks / Like
    It's been over 2 months since my last post. Unfortunately, my personal life was turned upside-down. My health took a turn for the worse, and has prevented me from working in the garage. I am slowly recovering, but my physical limitations at this time will probably keep me from working on the kit for a few more weeks. Unfortunately, due to this chronic spine issue, I am now dealing with the reality of being forced out of the military via medical retirement. This situation will also keep me somewhat occupied, but I'm itching to get back to work on the Coupe. It's just too bad that I won't reach my goal of having it completed by summer.

    Update:
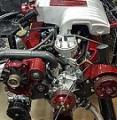
    As of my last post, I had spent a lot of time on the engine. I had completely chemically stripped it of paint and rust, inspected, painted, and re-assembled it. As of now, the engine has new front and rear main seals; the timing chain cover, new oil pump, oil pan, harmonic balancer, and water pump are back on the engine. The valve covers have been sanded and re-polished, and are temporarily installed. The upper and lower intake manifold are basically the only major parts of the engine that need attention. Once I get them powder-coated, they'll be ready for installation. Engine pictures to follow soon.

    Carlos
    Last edited by Carlos C; 01-07-2015 at 05:11 PM.
    FFR Coupe #0635; Ford 347ci, Tremec TKO500, 8.8 rear end w/ 3.27:1 gears, Cobra/SVO brakes

  2. #162
    PLATNUM Supporting Member
    wallace18's Avatar
    Join Date
    Apr 2012
    Location
    Trenton, Florida
    Posts
    5,382
    Post Thanks / Like
    Quote Originally Posted by Carlos C View Post
    It's been over 2 months since my last post. Unfortunately, my personal life was turned upside-down. My health took a turn for the worse, and has prevented me from working in the garage. I am slowly recovering, but my physical limitations at this time will probably keep me from working on the kit for a few more weeks. Unfortunately, due to this chronic spine issue, I am now dealing with the reality of being forced out of the military via medical retirement. This situation will also keep me somewhat occupied, but I'm itching to get back to work on the Coupe. It's just too bad that I won't reach my goal of having it completed by summer.

    Update:
    As of my last post, I had spent a lot of time on the engine. I had completely chemically stripped it of paint and rust, inspected, painted, and re-assembled it. As of now, the engine has new front and rear main seals; the timing chain cover, new oil pump, oil pan, harmonic balancer, and water pump are back on the engine. The valve covers have been sanded and re-polished, and are temporarily installed. The upper and lower intake manifold are basically the major parts of the engine that need attention. Once I get them powder coated, they'll be ready for installation. Engine pictures to follow soon.

    Carlos
    Best wishes on getting well soon. Hang in there. The kit can wait.

  3. #163
    Senior Member Carlos C's Avatar
    Join Date
    Nov 2013
    Location
    Apollo Beach, FL
    Posts
    494
    Post Thanks / Like
    Thanks, Tom! Besides being able to getting around and living a "normal" life again, the other thing I'm looking forward to is working on the Coupe, and eventually finishing it.

    Carlos
    FFR Coupe #0635; Ford 347ci, Tremec TKO500, 8.8 rear end w/ 3.27:1 gears, Cobra/SVO brakes

  4. #164
    Administrator 65 Cobra Dude's Avatar
    Join Date
    Feb 2011
    Location
    Port Charlotte, FL
    Posts
    1,464
    Post Thanks / Like
    Blog Entries
    1
    Carlos,

    Take care or yourself. I'll be driving down in a week and would love to come up and see the Coupe.

    Henry

  5. #165
    Senior Member Carlos C's Avatar
    Join Date
    Nov 2013
    Location
    Apollo Beach, FL
    Posts
    494
    Post Thanks / Like
    Hey Henry:

    Once again, welcome back home! You're more than welcome to come by, although there's not much for you to look at, but we can definitely sit in the garage and talk shop. Send me a PM and let me know when you want to come up and I'll give you my address. If you can, bring your beautiful Roadster. I could definitely use the motivation (and a little envy).

    Carlos
    FFR Coupe #0635; Ford 347ci, Tremec TKO500, 8.8 rear end w/ 3.27:1 gears, Cobra/SVO brakes

  6. #166
    Senior Member John Dol's Avatar
    Join Date
    Feb 2011
    Location
    Gorham, ME
    Posts
    1,522
    Post Thanks / Like
    Carlos,

    Hope you spring back to normal soon. Want to see more progress and pictures from your garage!! Still toying with my Spyder dash.

    John
    Finished the "My Coupe, my way" project.

    http://s956.photobucket.com/albums/ae46/jdcoupe1969/
    Coupe #386,17" Team III 245 FR 315 RR, 3-link, T5, 4 wheel disk, power brakes/steering. Sniper EFI
    First start Sept. 18 2013 First go kart Sept 19 2013

  7. #167
    Senior Member Carlos C's Avatar
    Join Date
    Nov 2013
    Location
    Apollo Beach, FL
    Posts
    494
    Post Thanks / Like
    Thanks, John. Me too...

    The way I figured, the dash cross bar needs to be moved forward about an inch, to allow the Spyder dash to fit properly. This means that the A/C unit would also need to move forward the same amount. But if you make it work a different way, by all means, please post plenty of photos and details.

    Carlos
    FFR Coupe #0635; Ford 347ci, Tremec TKO500, 8.8 rear end w/ 3.27:1 gears, Cobra/SVO brakes

  8. #168
    Senior Member Carlos C's Avatar
    Join Date
    Nov 2013
    Location
    Apollo Beach, FL
    Posts
    494
    Post Thanks / Like
    Although I'm not able to do any work in the garage, I did promise to post photos of the engine as it sits at this time.


    Left: As it came off the Mustang (minus the upper intake, and some other parts), after 10 years of mother nature putting a beating on it. Right: Almost done with the restoration. Next step is to powder coat the upper and lower intake manifolds.


    This is literally how I left the engine the day before my ill-fated spine procedure, which left me in the physical condition I currently find myself in. It pains me to go out to the garage and look at it, and not being able to finish it. Hopefully soon...

    Carlos
    FFR Coupe #0635; Ford 347ci, Tremec TKO500, 8.8 rear end w/ 3.27:1 gears, Cobra/SVO brakes

  9. #169
    Senior Member Carlos C's Avatar
    Join Date
    Nov 2013
    Location
    Apollo Beach, FL
    Posts
    494
    Post Thanks / Like
    By the way, do any of you guys have a set of solid engine mounts for 302/351W that you're not using and I could borrow to test the hood clearance? I plan to install my intake manifold on the mock-up engine block. With the regular mounts, I know I'll have to cut the hood. If I clear the hood with the solid mounts, I'd have to decide if I can live with the engine vibration, but at least I'd have a choice. Of course, I'd also have to check oil pan clearance with the solid mounts. Thanks in advance.

    Carlos
    FFR Coupe #0635; Ford 347ci, Tremec TKO500, 8.8 rear end w/ 3.27:1 gears, Cobra/SVO brakes

  10. #170
    Senior Member CHOTIS BILL's Avatar
    Join Date
    May 2011
    Posts
    427
    Post Thanks / Like
    Blog Entries
    1
    Carlos,

    I know everyone is different but from my experience with back problems, I am preparing for my fifth spinel surgery, do not try and rush getting back to doing normal things like working on your car. There is nothing important enough risk setting back your recovery. Another thing I have found is taking a mussel relaxer helps reduce the pain for me. So get well soon but take your time.

    Gordon Levy sells solid mounts and from what others have said the vibrations aren’t that noticeable.

    I love fallowing along with your build,

    Bill Lomenick
    Chotis Bill

  11. #171
    Senior Member Carlos C's Avatar
    Join Date
    Nov 2013
    Location
    Apollo Beach, FL
    Posts
    494
    Post Thanks / Like
    Thanks, Bill. I'm done with muscle relaxers. They stopped doing anything for me, besides making me feel like a zombie. I'm back at work now, so I can't drive or work while I'm heavily sedated.

    The vibration is dependant on the engine and the camshaft. Mine is fairly lopey, so I'm not sure if I'll like how the car would feel with solid mounts, not to mention I'd need to make sure that the engine will clear the hood with these mounts; otherwise, they'd be useless to me. So before I spend $50 to $100 on a set of solid mounts that may or may not work, I'd like to borrow some, so I can test them with my engine.

    Carlos
    FFR Coupe #0635; Ford 347ci, Tremec TKO500, 8.8 rear end w/ 3.27:1 gears, Cobra/SVO brakes

  12. #172

    Join Date
    May 2011
    Location
    Pittsburgh, PA
    Posts
    728
    Post Thanks / Like
    Carlos,

    Sorry to hear about the health woes; hopefully this will just be a short interruption in building.

  13. #173
    Senior Member Carlos C's Avatar
    Join Date
    Nov 2013
    Location
    Apollo Beach, FL
    Posts
    494
    Post Thanks / Like
    I guess I just couldn't help myself. I hope that as long as I'm sitting on a stool I'm alright, and not in danger of injuring my back.

    I decided to mock up the accessory drive onto the engine to see if there was any chance to add the A/C compressor to what I already had (the blower takes the whole driver side; the alternator and power steering pump go on the passenger side). I was hoping that I would be able to somehow fit the compressor under the blower, but that's a no-go. The accessory bracket (shown on the first picture below) on the passenger side, holds both, the alternator and steering pump. I cannot use it for the A/C compressor. I can save it for the next build.

    This leaves me with only two options, in order to be able to have A/C on this car (keep in mind that I live in FL):
    1. Simply manual steering (power muscle steering...) or
    2. Get an electrical pump set-up.

    The other issue I have to resolve is that the compressor brackets that came with the A/C system don't match the Ford small block heads well. Out of all the holes drilled on these brackets, there's only one way in which two holes align all the way at the bottom, but that leaves the compressor sitting too high on the head, putting too much stress on the bracket, which could lead to failure. I could change the brackets' position by drilling at least one more hole on each one, but that would mean that I have to find or fabricate a bracket for the alternator to mount below it. Bottom line is that I need to mount the A/C compressor and alternator on the passenger side of the engine, and I need to find a company that hopefully makes a bracket that will work with this compressor. Otherwise, fabrication will be in order. And since many companies make this 302/351W bracket set-up with the alternator on top, I assume that I'll have to fabricate a new set of brackets for the compressor, which will have to attach to the alternator bracket.

    If anyone out there has done this, or has seen others do this, please direct me to their pages, post photos, attach links, or even let me know of any company you know of that makes a bracket set-up known to work this way. Also, any recommendations for electrical power steering pumps will be greatly appreciated. Thanks!


    Blower installed on engine, with the alternator/power steering pump combo bracket attached to the passenger side head.


    Basically how the engine will look when it's completed (pay no mind to the gutted alternator casing). Unfortunately, this set-up won't allow the use of an A/C compressor; therefore, the OEM power steering pump needs to go, and so will the bracket that attaches it to the alternator.


    Mocked up the blower on the kit, using the mock-up block, just to make sure that it would clear the frame. It does... by about an inch. So far, the only foreseeable mod to the frame is the dashboard cross member.

    Carlos
    Last edited by Carlos C; 01-13-2015 at 10:05 AM.
    FFR Coupe #0635; Ford 347ci, Tremec TKO500, 8.8 rear end w/ 3.27:1 gears, Cobra/SVO brakes

  14. #174
    Senior Member Carlos C's Avatar
    Join Date
    Nov 2013
    Location
    Apollo Beach, FL
    Posts
    494
    Post Thanks / Like
    Thank you, Jacob. I feel the same way.

    Carlos
    FFR Coupe #0635; Ford 347ci, Tremec TKO500, 8.8 rear end w/ 3.27:1 gears, Cobra/SVO brakes

  15. #175
    Member
    Join Date
    Jun 2014
    Posts
    31
    Post Thanks / Like
    Carlos
    enjoy watching your build, hope to be building a 33 HR in the near future
    in regard to the AC compressor mounting.
    you may want to check out the electric AC compressor I saw in Hot Rod Mag.
    it is about 8"tall and 7" across and can be mounted where you have space.
    i8t is a little pricey at 12-$1500 but may be a solution to the fit
    it's by Sean Hyland Motorsports, check it out at:
    www.seanhylandmotorsport.com
    look under the tab 12V electric AC
    Kevin

  16. #176
    Senior Member Carlos C's Avatar
    Join Date
    Nov 2013
    Location
    Apollo Beach, FL
    Posts
    494
    Post Thanks / Like
    Hey Kevin:

    Thanks for your input. Those compressors are basically what you'd find on your refrigerator. What they don't tell you, are the disadvantages. They create huge amperage draw at start-up and while running, that normal car electrical systems are not equipped to handle. Your typical alternator, for example, wouldn't be able to keep up. Fuses and wires on the chassis harness can't handle the power necessary to run the compressor, etc. Besides spending so much money on one of those compressors, you'd have to spend so much more modifying your electrical system, in order to be able to run it without causing a fire.

    Besides, car A/C compressors are expensive enough. The way I see it, every time I buy the A/C option for one of the kits, it will come with a compressor. The fact is that although I won't be able to use my steering pump on this build, I can always use it on the next one, and save some money then.

    Best case scenario is finding an affordable electrical steering pump, and find a supplier that has brackets that will work with my alternator/compressor combo. Absolute worst case scenario would be going with the manual steering, and having to fabricate a bracket system for the compressor which would work with whatever alternator bracket I end up going with.

    Once again, thanks for your input, Kevin. Keep 'em coming.

    Carlos
    FFR Coupe #0635; Ford 347ci, Tremec TKO500, 8.8 rear end w/ 3.27:1 gears, Cobra/SVO brakes

  17. #177
    Junior Member
    Join Date
    May 2014
    Posts
    14
    Post Thanks / Like
    Carlos, Don't forget I am just around the corner and if you need a third hand let me know. Bob C

  18. #178
    Senior Member Carlos C's Avatar
    Join Date
    Nov 2013
    Location
    Apollo Beach, FL
    Posts
    494
    Post Thanks / Like
    Bob, don't worry. I haven't forgotten about you.

    Carlos
    FFR Coupe #0635; Ford 347ci, Tremec TKO500, 8.8 rear end w/ 3.27:1 gears, Cobra/SVO brakes

  19. #179
    Senior Member Carlos C's Avatar
    Join Date
    Nov 2013
    Location
    Apollo Beach, FL
    Posts
    494
    Post Thanks / Like
    I've been messing around with the supercharger for the last few days, and also taking measurements for custom accessory brackets (more on that later). First, although I've never had any problems with it, I decided that my blower was due for an inspection, since it's over 10 years old. Might as well do it now while it's off the engine, and not wait until it's on the vehicle and it starts making noises or developing leaks.


    The biggest problem I had was trying to separate the front cover from the main body, due to the input shaft seal. It made such a good seal that it took me about 30 minutes to carefully slide the cover off the shaft.


    All the bearings and gears were in excellent condition. There were no metal shavings in the oil or in the casing. The impeller was very clean and free of any damage. Since there's no need to re-build it, I will just be cleaning the main casing, and then coating the outside with high-temp ceramic paint. The front cover and volute will be lightly blasted, cleaned, and then powder-coated.


    The input shaft seal had to be removed, as it would not survive the trip to the powder-coating oven. Amazingly, it came out without any fanfare at all. All I had to use to press it out was my bench vise with hardly any pressure at all. It still looks new, but I will be replacing it anyway.


    The only real issue I ran into was a casting imperfection on the volute. There's a section with a jagged edge (marked with arrows on the photo). Nothing that my Dremel with a grinding stone attachment, a steady hand, and a couple of minutes couldn't fix.

    Now, onto the issue with my accessories. The blower kit I purchased came with a relocation bracket for the power steering pump (to the passenger side, under the alternator), and deleted the A/C. Back then, I lived up North, had a Mustang with roll-down windows, and didn't care for A/C. Now I live in FL, and building a Coupe... Well, you do the math. I can't add any accessories on the driver side (the monster brackets for the blower won't allow it). I decided to delete the steering pump and add the A/C compressor in its place. This means that I can no longer use the bracket that came with the blower kit. I thought that I would have to fabricate my own, since the A/C compressor is not the stock Ford unit, but I decided to call March Performance just to take a shot in the dark. Well, I got lucky. It just so happens that they do have a bracket kit for a 351W for the exact A/C compressor that came with Vintage Air kit, and it mounts on the passenger side, under the alternator. It's a fairly new kit, so I have to wait a few weeks to get it from them, but I'm so far away from that stage, that it doesn't matter anyway. I'm just glad that it will be one less thing to fabricate. After taking some measurements with the exhaust header on, the A/C hoses will have plenty of clearance. I may still go with power steering, but it would be of the electric pump kind.

    mch-30387_w[1].jpg
    This is basically the set-up, except the power steering pump on the driver side. I was told by March Performance that I'd have to provide my own idler pulley on the driver side. Obviously my blower sits there. My blower kit did come with an idler pulley that attaches to the top of the water pump. The only problem is that the belt tensioning turnbuckle from March attaches to one of the bolts that my pulley also attaches to. I'm sure that once I get the system, I'll come up with a spacer to make it all work out.

    I placed an order to Eastwood for some powder-coating supplies, as I just realized that I don't have enough to do everything I'm planning to do in the next few weeks. Hopefully, my back will hold up to the abuse...

    Carlos
    FFR Coupe #0635; Ford 347ci, Tremec TKO500, 8.8 rear end w/ 3.27:1 gears, Cobra/SVO brakes

  20. #180
    Senior Member Carlos C's Avatar
    Join Date
    Nov 2013
    Location
    Apollo Beach, FL
    Posts
    494
    Post Thanks / Like
    Spent the last few days dealing with the custom engine accessory drive kit I received from March Performance. Unfortunately, there were no instructions, diagrams, and even some of the hardware was incorrect. When I contacted them, I was told that no instructions nor diagrams exist for my kit. I was able to find a diagram from a different set-up that resembles the one I have, but it was basically like putting together a puzzle. Even the parts were not well organized in the box, so it took some guessing and a couple of tries.

    After I had everything basically put together, here are the discrepancies I found: The longest bolt in the kit was too long. After a few trips to local hardware and specialty stores with negative results for the exact size I needed, I ended up cutting 3/8" off their bolt to make it fit the way it should. Two other bolts were too short, and so was one of the spacers provided. Instead of arguing with the "know-it-all" I spoke to the first time, I decided to just get these items from the local hardware store. For a company that's been around for so many years, I expected more. At least the kit is pretty to look at.

    The only other problem I ran into was the alternator clearance for the brackets, which I wasn't surprised. My alternator is not stock and the kit was not made for this alternator. The top bracket hole, which incorporates the belt tensioning turnbuckle, did not align with the top hole on the alternator. Using my drill press, I opened up the hole on the alternator case, and with a grinding stone, I removed some of the material around the mounting tab; problem solved.

    The front alternator casing, interfered with the kit's main bracket, which kept the alternator from swinging further, and prevented a bigger belt adjustment. I proceeded to do some minor surgery on the alternator casing. I marked the spot where it hit the bracket, and with a grinding stone, I removed some material and made it concave. I gained about 5 degrees of swing from that.
    IMAG1552.jpg

    The spacer for the A/C compressor rear bracket bolt came 1/2" too short. I had a spare, which I had cut from another spacer mod (see next paragraph) to fill the gap.


    The belt tensioning turnbuckle attaches to the water pump at the same location where the blower kit's serpentine belt idler pulley bracket attaches. This bracket uses 1" spacers, and the turnbuckle rod end is 1/2". I cut the spacer in half, and attached the turnbuckle with idler pulley bracket sitting completely straight.


    Something else I noticed about this kit was that the A/C compressor is supported only on three out of the four attaching points. It may be overkill, but I decided that I'd rather be safe than sorry. The unused attaching point aligns perfectly with one of the bolts on the timing chain cover which also holds the timing pointer. I fabricated a bracket out of 1/8" steel and painted it, and used stainless steel hardware to attach it to the compressor.


    [Continued on next post]

    Carlos
    Attached Images Attached Images
    FFR Coupe #0635; Ford 347ci, Tremec TKO500, 8.8 rear end w/ 3.27:1 gears, Cobra/SVO brakes

  21. #181
    Senior Member Carlos C's Avatar
    Join Date
    Nov 2013
    Location
    Apollo Beach, FL
    Posts
    494
    Post Thanks / Like
    Finally, I used nylon cord and ran it through the pulleys the same way the belt would, while the adjusting turnbuckle was all the way in; then marked, cut, and measured it. I added about 0.325" to compensate for pulley grooves and lip. Here's the final assembly. I still have to powder-coat the alternator and its pulley, and the water pump pulley; not to mention the blower and all its brackets, plus the upper and lower intake manifolds.


    Carlos
    FFR Coupe #0635; Ford 347ci, Tremec TKO500, 8.8 rear end w/ 3.27:1 gears, Cobra/SVO brakes

  22. #182
    mcwho's Avatar
    Join Date
    Feb 2011
    Location
    DeBary - Florida
    Posts
    541
    Post Thanks / Like
    Congrats, I kinda know how you feel as I was Overseas and ordered my kit as a present to myself.
    Baghdad Bob

    Complete Kit Delivered July 2010, serial @ 7287, Whitby Power Brakes, Whitby Tonneau, Power Steering w HEIDTS PS Valve, Hydralic clutch, 15" Wheels, BFG Tires, 331 stroker w Quick Fuel 650, RPM Heads, Air Gap Intake. IRS w 3.27, TKO-600. FFMETAL Firewall Forward, FFMETAL Dropped Battery Box in Trunk, Enlarged Passenger footbox, Breeze Cubby storage, Breeze Seat Brackets, Herbs Door Panels. Ford ruby red 12 coats.

  23. #183
    Senior Member Carlos C's Avatar
    Join Date
    Nov 2013
    Location
    Apollo Beach, FL
    Posts
    494
    Post Thanks / Like
    Thanks, Bob. I hope to start feeling that way when it's done and I can enjoy driving the wheels off it.

    Carlos
    FFR Coupe #0635; Ford 347ci, Tremec TKO500, 8.8 rear end w/ 3.27:1 gears, Cobra/SVO brakes

  24. #184
    Senior Member Carlos C's Avatar
    Join Date
    Nov 2013
    Location
    Apollo Beach, FL
    Posts
    494
    Post Thanks / Like
    When it rains, it pours:

    Due to my spine issues, I haven't been able to ride my bike since November. Well, I guess it decided to finally show its disapproval by leaking front fork oil all over my floor. If that wasn't annoying and distracting from the project enough, now I'm also dealing with more medical issues. So for the time being, while I'm painfully surviving a kidney stone and infection, there will be no garage time for me.

    10407756_749414405127621_1139766133471699776_n[2].jpg
    A not-so-very-pleasant surprise from my motorcycle. Since this happened while the bike was sitting in my garage for a couple of months, my best guess would be dry-rotted, but the seal is constantly submerged in oil... So, the only logical explanation is that my bike just does not like me much right now.

    10993440_749414401794288_9089204535085663859_n[2].jpg
    Since the bike was due for a fork oil change anyway, I decided to take both forks off the bike. Unfortunately, I do not have any of the special tooling required to re-build these, so I just took them to my local Harley dealer, who were a little skeptical about re-building these custom forks. My reply to them was: "Hey, you used to sell and work on these custom bikes. At least I did half of the work for you already."

    Hopefully, I can recover soon from this health issue, and get back to work on the Coupe (and the bike).

    Carlos
    FFR Coupe #0635; Ford 347ci, Tremec TKO500, 8.8 rear end w/ 3.27:1 gears, Cobra/SVO brakes

  25. #185
    Senior Member MPTech's Avatar
    Join Date
    Feb 2011
    Location
    St. Louis, MO
    Posts
    1,182
    Post Thanks / Like
    Blog Entries
    8
    Sorry to hear this when you're down with back problems.
    Hope you're better soon and can finish up the coupe, I was enjoying the progress.
    F5R #7446: MK4, 302, T5 midshift, 3.55 Posi IRS, 17" Halibrands
    Delivered 4/4/11, First start 9/29/12, Licensed 4/24/13, off to PAINT 2/15/14!! Wahoo!

  26. #186
    Senior Member Carlos C's Avatar
    Join Date
    Nov 2013
    Location
    Apollo Beach, FL
    Posts
    494
    Post Thanks / Like
    Was enjoying? Don't give up on me yet. The Coupe will get done, even if it is by my ghost...

    Seriously though, thanks for your kind words.

    Carlos
    FFR Coupe #0635; Ford 347ci, Tremec TKO500, 8.8 rear end w/ 3.27:1 gears, Cobra/SVO brakes

  27. #187
    Senior Member MPTech's Avatar
    Join Date
    Feb 2011
    Location
    St. Louis, MO
    Posts
    1,182
    Post Thanks / Like
    Blog Entries
    8
    I KNOW you'll finish it! hang in there!
    F5R #7446: MK4, 302, T5 midshift, 3.55 Posi IRS, 17" Halibrands
    Delivered 4/4/11, First start 9/29/12, Licensed 4/24/13, off to PAINT 2/15/14!! Wahoo!

  28. #188
    Senior Member mjazzka's Avatar
    Join Date
    Jun 2014
    Location
    Katy, TX
    Posts
    173
    Post Thanks / Like
    Sounds like you need more Icy Hot! Just watch where you put it...

    But really, I know back problems can be REALLY bad, and I hope you make a recovery as soon as possible.

    I enjoy your posts about your bike, they are kind of like bonus information. I didn't even know motorcycle forks had oil in them! What is that for, exactly...?
    Michael
    Coupe #675 "Eloise"


    10/14/14 Coupe Ordered - 1/29/15 Coupe Delivered - 5/1/16 First Start
    Build Thread - Flickr

  29. #189
    Senior Member
    Join Date
    Feb 2011
    Location
    Gorham, ME
    Posts
    253
    Post Thanks / Like
    Hey Carlos C - Got a solution for your back problem, come on up here to Maine and shovel some snow for excercise, we've only got over 90 inches so far. Only kidding, hope you recover from the back problem and able to complete that coupe!!!
    Bill

    Coupe #421, Picked Up 11/15/08, started 1/1/09 - Rebuilt mildly massaged 302, T5, 3 Link, and Loads of Extras

  30. #190
    Senior Member Carlos C's Avatar
    Join Date
    Nov 2013
    Location
    Apollo Beach, FL
    Posts
    494
    Post Thanks / Like
    Michael:

    Besides the old-school "springer" type forks, the modern forks have internal springs. The oil works to dampen the bound and re-bound, just like a typical car strut/shock.

    Bill:

    I used to live up North (MA, MD, VA, AK), and don't miss shoveling snow at all. Once my kidney infection clears up, I'll slowly get back to work on the Coupe, while I rehab my spine.

    Carlos
    FFR Coupe #0635; Ford 347ci, Tremec TKO500, 8.8 rear end w/ 3.27:1 gears, Cobra/SVO brakes

  31. #191
    Senior Member Carlos C's Avatar
    Join Date
    Nov 2013
    Location
    Apollo Beach, FL
    Posts
    494
    Post Thanks / Like
    Now that I finally passed the stone and the kidney infection has subsided, I decided to go back out to the garage and get something done. Since I will most likely not use the EGR and EGR spacer, I went ahead and fabricated a bracket that will be sandwiched between the intake manifold and the throttle body, and will hold the throttle cable bracket.

    89.jpg
    Made a template out of cardboard, using the throttle body and the EGR spacer as guides. Then, I transferred it to 14 gauge sheet steel, using a sheet metal shear, a drill press, a hole saw, a grinder, and a vertical band saw.

    90.jpg
    Test-fitted the bracket on the intake and installed the throttle body. Everything fit perfectly. Now, a little high-temp paint to avoid rust, and it'll be done.

    Carlos
    Last edited by Carlos C; 03-08-2015 at 11:19 PM.
    FFR Coupe #0635; Ford 347ci, Tremec TKO500, 8.8 rear end w/ 3.27:1 gears, Cobra/SVO brakes

  32. #192
    Senior Member John Dol's Avatar
    Join Date
    Feb 2011
    Location
    Gorham, ME
    Posts
    1,522
    Post Thanks / Like
    good stuff, keep at it Carlos!

    John
    Finished the "My Coupe, my way" project.

    http://s956.photobucket.com/albums/ae46/jdcoupe1969/
    Coupe #386,17" Team III 245 FR 315 RR, 3-link, T5, 4 wheel disk, power brakes/steering. Sniper EFI
    First start Sept. 18 2013 First go kart Sept 19 2013

  33. #193
    Senior Member Carlos C's Avatar
    Join Date
    Nov 2013
    Location
    Apollo Beach, FL
    Posts
    494
    Post Thanks / Like
    Thanks, John. I can only do small things for the time being, but at least it's still progress.

    For whatever reason, the photos didn't upload before. Hopefully now they did, even if they're just hyperlinks.

    Carlos
    FFR Coupe #0635; Ford 347ci, Tremec TKO500, 8.8 rear end w/ 3.27:1 gears, Cobra/SVO brakes

  34. #194
    Senior Member Carlos C's Avatar
    Join Date
    Nov 2013
    Location
    Apollo Beach, FL
    Posts
    494
    Post Thanks / Like
    I'm Back... Sort of.

    I can't believe that it's been 7 months since the last time I wrote anything on my own thread, but I'd been busy dealing with my health, and lawyers due to my forced retirement from the military for medical reasons. Unfortunately, I lost the battle and I was medically retired three weeks ago, but I won my disability percentage battle with the military. Now, I just have to see how the VA will rate me, once they close my case. Besides that, I'm also now the VP of my community's HOA, so that keeps me fairly busy.

    I went to the Emerald Coast Cruizin' car show in Panama City last weekend, and spent a lot of time hanging out with the crew from FFR, especially Tony Zullo. Thanks to him, we were able to iron out some decisions about the exhaust system on my Coupe. Tony, I'll be giving you a call soon. I took some photos from the car show, including one of Wayne's twin-turbo and supercharged Roadster beast, which he sold to a customer who apparently has been lighting up the rear tires.

    20151114_115802.jpg 20151114_115917.jpg 20151114_120039.jpg 20151114_121639.jpg 20151114_132223.jpg

    I also met TV celebrity Courtney Hansen, who's off the Power Nation (Power Block) TV show and supposedly working on her own show, in which she will be turning wrenches.
    20151114_124101.jpg

    Of course, my day wouldn't be complete if I didn't catch up with Dave Smith.
    20151114_174132.jpg

    In regards to my build, I've started working on a powder coating box. This will be the last piece of the puzzle for me (hopefully). Once I get this done, I can start powder coating the FFR parts which came bare, and some donor parts which I'd rather powder coat than paint. After that, I can start with the actual build. There will be plenty of custom work done, so this is going to take a while. I'll post photos of the powder coating box construction once I get it done.

    Carlos
    FFR Coupe #0635; Ford 347ci, Tremec TKO500, 8.8 rear end w/ 3.27:1 gears, Cobra/SVO brakes

  35. #195
    PLATNUM Supporting Member
    wallace18's Avatar
    Join Date
    Apr 2012
    Location
    Trenton, Florida
    Posts
    5,382
    Post Thanks / Like
    Glad to hear you are able to get back to working on your build.

  36. #196
    Senior Member CHOTIS BILL's Avatar
    Join Date
    May 2011
    Posts
    427
    Post Thanks / Like
    Blog Entries
    1
    Welcome back Carlos,

    Very sorry that your back issues forced an unwanted life style change on you and hope your dealings with the VA turns out better that what TV is always reporting. My brother was in the Air Force and had nothing but good things to say about the treatment he received.

    Good luck,

    Bill Lomenick
    Chotis Bill

  37. #197
    Senior Member John Dol's Avatar
    Join Date
    Feb 2011
    Location
    Gorham, ME
    Posts
    1,522
    Post Thanks / Like
    All I want to know is, where is your other hand in the picture with Courtney
    Seriously though good to hear from you. What did you think of that black 818? I think it looks awesome.

    John
    Finished the "My Coupe, my way" project.

    http://s956.photobucket.com/albums/ae46/jdcoupe1969/
    Coupe #386,17" Team III 245 FR 315 RR, 3-link, T5, 4 wheel disk, power brakes/steering. Sniper EFI
    First start Sept. 18 2013 First go kart Sept 19 2013

  38. #198
    Senior Member Carlos C's Avatar
    Join Date
    Nov 2013
    Location
    Apollo Beach, FL
    Posts
    494
    Post Thanks / Like
    Thanks, guys. I'm hoping that I can pick things back up after the holidays.

    Bill:

    My case is still open, and was told not to expect a resolution until next summer, so we'll see.

    John:

    My hand was properly placed...
    As for the 818, I never cared for this car when it first came out. I didn't like the front end, or the Subaru engine. As a matter of fact, I kept bugging FFR to put the Eco-Boost in it. Now that it will finally have the Ford engine, a beautiful front-end, and even a hard top, I want to build one. But I still have a full running gear set from a Mustang. So, after I get done with the Coupe, I'll probably build a Roadster next.

    Carlos
    FFR Coupe #0635; Ford 347ci, Tremec TKO500, 8.8 rear end w/ 3.27:1 gears, Cobra/SVO brakes

  39. #199
    Senior Member Carlos C's Avatar
    Join Date
    Nov 2013
    Location
    Apollo Beach, FL
    Posts
    494
    Post Thanks / Like
    POWDER COATING BOX SIDE PROJECT

    Well, it is after the holidays, and I did say that I would get back in the garage. I have spent my time working on the powder coating box. And although I'm not done with it, I've made some progress. I just can't wait to be done with it, so I can start powder coating parts, and then commence with the kit assembly.


    Laying down measurements and cutting lines to aluminum sheets, which will make up the powder coating box panels.


    Cutting the aluminum sheets into panels on an industrial-size hydraulic shear.


    Using a gravity-fed band saw to cut "L"-shaped aluminum stock, which will serve as the framework for the box.


    Spent hours upon hours using my bench drill press to drill dozens of holes and then insert rivet nuts on the framework.


    Aluminum sheets cut into panels for the box. They still have to be drilled out.

    I still have to bend the panel for the exhaust fan, purchase all the hardware to install everything together, purchase and install caster wheels; and fabricate a couple of "C" channels for the air filter, which will go before the exhaust fan. I also have to buy a rod which will go through the top of the box, to serve as a hanging point for the items to be coated; and a couple of bushings for that rod, in order to isolate it from the rest of the metal from the box.

    Carlos
    FFR Coupe #0635; Ford 347ci, Tremec TKO500, 8.8 rear end w/ 3.27:1 gears, Cobra/SVO brakes

  40. #200
    PLATNUM Supporting Member
    wallace18's Avatar
    Join Date
    Apr 2012
    Location
    Trenton, Florida
    Posts
    5,382
    Post Thanks / Like
    Nice work! good to see you back at it.

Page 5 of 9 FirstFirst ... 34567 ... LastLast

Posting Permissions

  • You may not post new threads
  • You may not post replies
  • You may not post attachments
  • You may not edit your posts
  •  

Martin's Dent and Collision Shop

Visit our community sponsor