Thanks:
  Likes:


Jeff,
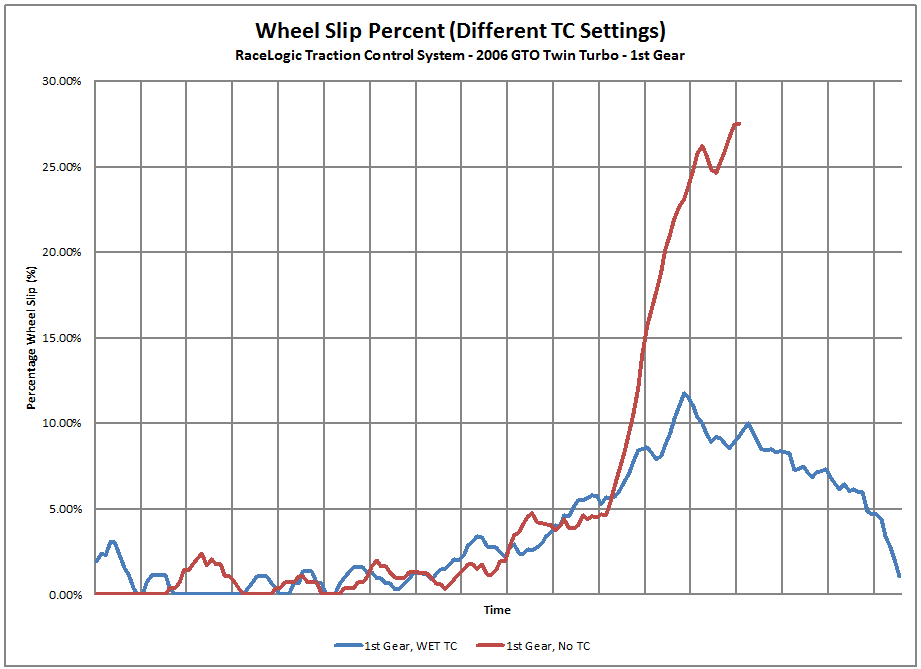
Have you installed a race logic traction control system in any of your other vehicles? Seems like the installation should be fairly straight forward in the 818 so long as you retain the ABS system no? I have never been a fan of traction control because my experience with it has been with OEM systems that kill performance instead of improve it (my old S4 would just kill the throttle for like 3 or 4 seconds on wheel slip). But after reading up more on the race logic system, I think I am completely sold.
- Home
- Latest Posts!
- Forums
- Blogs
- Vendors
- Forms
-
Links

- Welcomes and Introductions
- Roadster
- Type 65 Coupe
- 33 Hot Rod
- GTM Supercar
- 818
- Challenge Series
- 289 USRCC
- Coyote R&D
- Ask a Factory Five Tech
- Tech Updates
- General Discussions
- Off Topic Discussions
- Eastern Region
- Central Region
- Mountain Region
- Pacific Region
- Canadian Discussions
- Want to buy
- For Sale
- Pay it forward
-
Gallery
- Wiki-Build-Tech

 Reply With Quote