Forte's

Visit our community sponsor

Thanks Thanks:  7
Likes Likes:  21
Page 2 of 11 FirstFirst 1234 ... LastLast
Results 41 to 80 of 432

Thread: Harley's 818S

  1. #41
    Harley818's Avatar
    Join Date
    Jan 2014
    Location
    Vancouver BC
    Posts
    788
    Post Thanks / Like
    Thanks Tahoe and Mechie3,
    I think I found the answer.
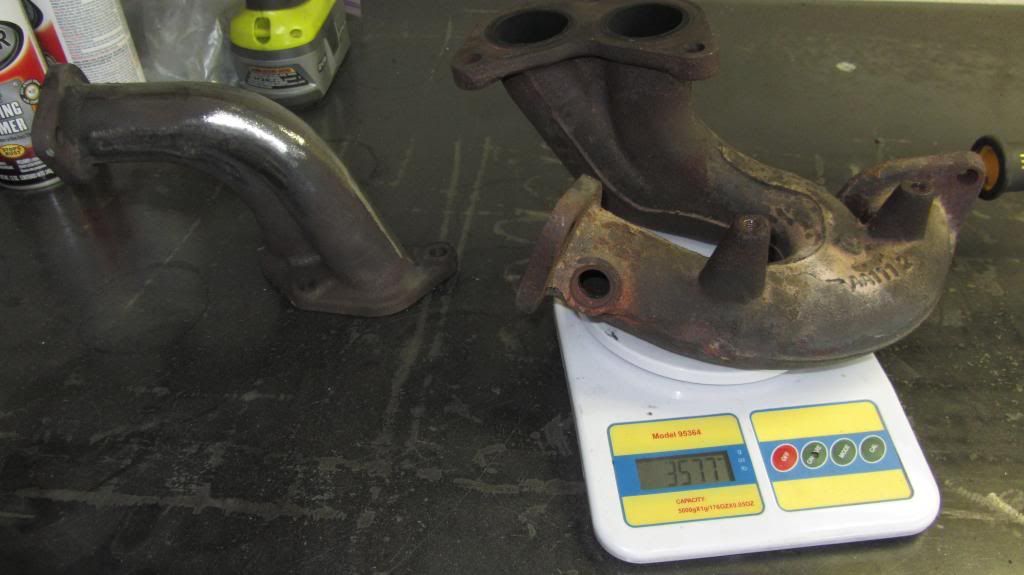
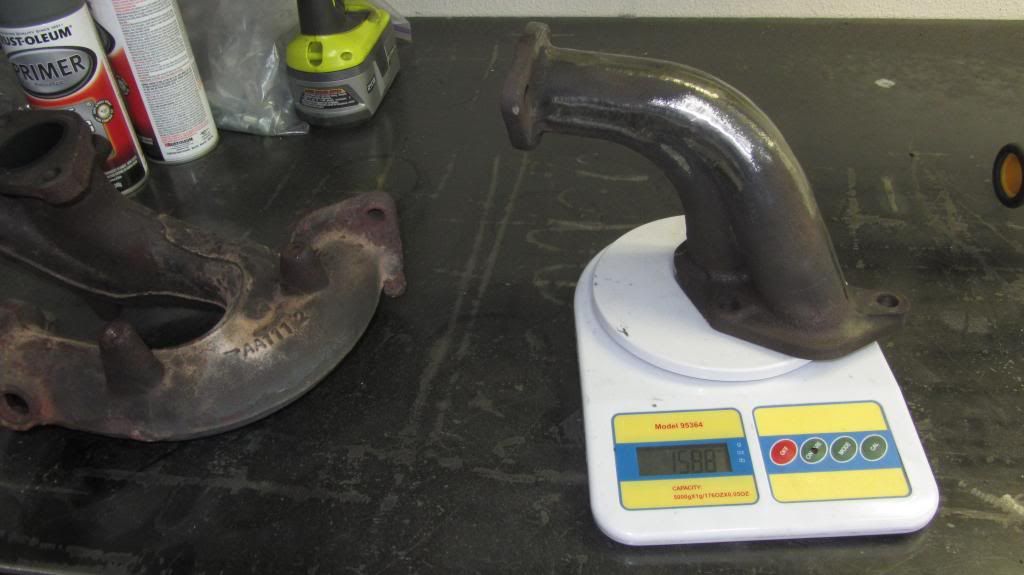
    I was really careful to label all the bolts i needed to re-use, but somehow, in the process, I left these unmarked ones on my bench.
    I've been racking my brain for weeks about this and it came to me yesterday while on a "run"...... the rear diff!
    Sure enough when I go back from my run I grabbed one of the bolts and it fit perfectly on the transmission end of the diff. 4 holes with thread protruding the exact amount.

    Problem solved. The one extra bolt is probably a stray from something else.
    I have the trans bolts labelled in a ziplok.

    Harley

  2. #42
    Harley818's Avatar
    Join Date
    Jan 2014
    Location
    Vancouver BC
    Posts
    788
    Post Thanks / Like
    Been having a little trouble lately with uploading pictures but finally figured it out.

    Here is a shot of the phenolic TGV's I bought from ZeroLift for those who are going to delete the TGV's. $180 for the pair including the orings.

    DSCF4464.jpgDSCF4467.jpg

    Here is the intake manifold installed with throttle valve.

    DSCF4469.jpg

  3. #43
    Harley818's Avatar
    Join Date
    Jan 2014
    Location
    Vancouver BC
    Posts
    788
    Post Thanks / Like
    I went to bolt on the turbo which had been sitting on a shelf for a few months. Should have checked it before, but now found that there was some bearing play on the intake compressor side.
    Found a company in LA area that does good work according to a few Subaru forums - SoCal Porting. They re going to port the turbo and check and replace any bearings etc that need it.
    While its there they will be doing a ceramic coating on the exhaust side.
    Hoping they do good work.

    Also ordered Stopteck brakes and rotors from Autoanything but they sent me the wrong ones. I have an early 2002, and I got the kit for later 2002. Back to the border to package it up and send it back. Good that Washington state is so close to where I work.

    brakes.JPG
    Buying stuff in the US saves some good cash to be use for other options..... like ceramic coating of my stock exhaust manifolds.
    I hear the stock system is good for up to 300hp, and I'm worried about clearance below the frame with the other headers. that will be a future upgrade. Anyone find any unequal length headers that don't hang down past the frame?

  4. #44
    Harley818's Avatar
    Join Date
    Jan 2014
    Location
    Vancouver BC
    Posts
    788
    Post Thanks / Like
    Apparently my turbo is now ported, bearings checked out OK, and its on its way back. I'll post pictures of the porting if anyone's interested.

    In the meantime, I've mounted the pedal box, then re-mounted it to straighten out the brake master cylinder tilt, and now installed the gas pedal.

    DSCF4554.jpg
    First try at mounting the brake master cylinder - I definitely didn't like the tilt. Why would they not fix this?

    DSCF4557.jpgDSCF4558.jpg
    OK, messed around with drilling new holes and now have it how I like it. I ended up drilling into the factory pedal box wall on an angle to create space for the new nut on the inside. This wall doesn't provide any structural function, its just in the way.


    I didn't like the lack of travel of the top of the gas pedal, so like RMSepex, Wallace18, and others I mounted it directly to the firewall. I used the FFR supplied bracket, but cut it down for added rigidity, and added a couple extra rivets on the front side of the firewall.
    DSCF4564.jpgDSCF4565.jpg

    This is where FFR recommends locating the pedal - not much travel. Here is where I cut the FFR bracket.
    DSCF4560.jpgDSCF4561.jpg

    I riveted the FFR bracket to the top of the subaru bracket to maintain stiffness as well.
    DSCF4563.jpg
    Last edited by Harley818; 10-16-2014 at 12:11 AM.

  5. #45
    Senior Member Bob_n_Cincy's Avatar
    Join Date
    Sep 2012
    Location
    Cincinnati OH
    Posts
    3,903
    Post Thanks / Like
    Quote Originally Posted by Harley818 View Post
    First try at mounting the brake master cylinder - I definitely didn't like the tilt. Why would they not fix this?
    Hi Harley,
    I believe the reason for the tilt has to do with the manual brake option (which everybody is doing). When they added the higher hole in the brake pedal, they had to raise the master cylinder. Raising it level would make the top two pedal box bolts unusable because of the proximity to the master cylinder. see my picture.

    mcbolt.jpg

    By raising it tilted they were able to keep 3 of the pedal box bolts.

    I feel FFR made an effort to make the car bolt together with as little possible cutting, drilling and grinding.

    I have 2 of the early chassis and lots of cutting and grinding. I look at the pictures of more recent chassis and I see lots of little improvement where I had fight through.

    Part of the fun of building the car is changing things you want different.
    That's what makes it YOUR car.
    Enjoy
    Bob
    Last edited by Bob_n_Cincy; 10-16-2014 at 01:27 AM.
    818S #22 Candy Blue Frame, Front Gas Tank, 2.5L Turbo, Rear radiator, Shortened Transmission, Wookiee Compatible, Console mounted MR2 Shifter, Custom ECU panel, AWIC soon
    My Son Michael's Turbo ICE Build X22 http://thefactoryfiveforum.com/showt...rts-818S-Build
    My Electric Supercar Build X21 (on hold until winter) http://thefactoryfiveforum.com/showt...e-Build-Thread

  6. #46
    Harley818's Avatar
    Join Date
    Jan 2014
    Location
    Vancouver BC
    Posts
    788
    Post Thanks / Like
    So the kit is set up for both manual and the brake booster...... I forgot that.
    It was relatively easy to drill out a new hole in the plate on the Left side and in the Subaru pedal box to get the MC to sit straight.
    I now have 4 button heads for the pedal box bolts, and my master cylinder is flat.
    Little victories!

  7. #47
    Harley818's Avatar
    Join Date
    Jan 2014
    Location
    Vancouver BC
    Posts
    788
    Post Thanks / Like
    Good progress this weekend.

    My son helped me out with getting the front passenger suspension installed, and I showed him how to torque most of the bolts. We are leaving the rest till its ready to set ride height. I think I saw a good description by Freds to set it on blocks at ride height and put 10psi in the tires. I'll try that later on.
    DSCF4571.jpgDSCF4572.jpg


    It was also a good opportunity to show him how to do the brakes, so we worked on the fronts, and he did the rears himself. We got the Stainless flexible lines hooked to the caliper, and then insnalled the wheels....
    Almost roller...... just need the brake lines run.
    DSCF4570.jpgDSCF4579.jpgDSCF4577.jpgDSCF4580.jpg

    I added a rear firewall on the engine side just for additional safety and to help cut down the noise.
    I had a panel of aircraft wing from an old project I was doing for MacDonnell Douglas about 25 years ago....so it finally came in handy. It is about 3/16 at the top, and thickens to 1/4 at the bottom.
    The lower piece is about 1/4 in thick. This stuff is really "bullet proof" so it should be good.
    I made it in two panels so they could be removed (down and out) if I need to do some work on the front of the engine. I'll be bolting them in.
    Then I'll add outer panels that will be more permanent after I get all the lines run so I know how much room I need.
    DSCF4582.jpg

    I picked up my turbo on Friday. Sent it away to get ported and the exhaust side ceramic coated. They also checked out the compressor turbine. I was worried that it had a little play, but they checked it and said that was normal and is needed for oil lubrication. Hope they are right.
    Here are before and after..... Done by SoCal Porting in California. Supposed to provide a little better breathing and slightly lower torque curve. Lets hope. Just read about it on the Subaru Forum (unibomber) and thought it couldn't hurt if it was in for checking bearings anyways.

    Before
    turbo exh side before.jpgturbo inlet before.jpg

    After - ceramic coating
    turbo exh ceramic coated.jpg

  8. #48
    Harley818's Avatar
    Join Date
    Jan 2014
    Location
    Vancouver BC
    Posts
    788
    Post Thanks / Like
    After - porting of the turbo

    I don't have a before of the outlet but you can see the inlet is much smoother.
    turbo exit ported.jpgturbo inlet ported.jpg

    I decided to stick with my stock exhaust manifold and crossover... but I am sending them out for ceramic coating.
    Wondering if I should also do an exhaust wrap as well? Is it advisable to do both to keep the heat down or won't the wrap be as effective with the ceramic coating. Apparently ceramic coating reduces heat by up to 30 - 40%, so I am thinking the wrap will also help.
    Anyone have experience with this?exh manifold.jpg

  9. #49
    Senior Member Rasmus's Avatar
    Join Date
    Mar 2012
    Location
    Las Vegas, USA
    Posts
    983
    Post Thanks / Like
    I'd write, talk to the coating supplier. Some say you can wrap, some say not to, or that it's not necessary.


    Before you send out the headers


    Cut the heat shield bosses off.


    It's a ***** to wrap around the bosses. And even if you don't wrap it weighs less and just looks better.
    Fast Cars, Fast Women, Fast Haircuts!

  10. #50
    Harley818's Avatar
    Join Date
    Jan 2014
    Location
    Vancouver BC
    Posts
    788
    Post Thanks / Like
    Funny you should mention this. i was thinking the same thing, then decided against it...... sent them out yesterday.
    Now I'm thinking I should have done it anyways....lol

  11. #51
    Harley818's Avatar
    Join Date
    Jan 2014
    Location
    Vancouver BC
    Posts
    788
    Post Thanks / Like
    out of town for a bit, so back to work on the 818 this weekend.

    Mounted the radiator. Had to make my own spacers to raise it up about 3/4 of an inch. Mounting bolts are tapped directly into the FFR support brackets.
    Nice clearance for the lower radiator hose to rack bellows.
    DSCF4779.jpgDSCF4780.jpg

    Then made up some top mount brackets out of PVC material. Throughbolted into the FRR crosspiece.
    DSCF4781.jpg
    Last edited by Harley818; 01-06-2015 at 01:00 AM. Reason: updated pictures

  12. #52
    Harley818's Avatar
    Join Date
    Jan 2014
    Location
    Vancouver BC
    Posts
    788
    Post Thanks / Like
    Installed the rivnuts for my rear firewall.
    DSCF4599.jpg
    DSCF4605.jpg

    Took a page out of Rasmus book and decided the do the pans underneath at an early stage.
    Got the front one in with cleco's, then did the underseat pan as well since I had it up on the stands.
    I found it relatively easy if I had something under my hand to provide leverage to push while drilling (as opposed to pushing up with your whole arm)
    Also I broke alot of the cheap harbour freight titanium coated bits. They would bend, wobble and break. Went and bought some other steel ones that lasted much longer. Much more satisfying.
    DSCF4601.jpg

    Fuel tank fill tube
    DSCF4606.jpg

    and interior aluminum - sealed with black sealant.... now waiting for the gator-hide to help sound deadening
    DSCF4607.jpgDSCF4608.jpg

    Started working on the coolant tube runs in the front.
    DSCF4609.jpg

  13. #53
    Harley818's Avatar
    Join Date
    Jan 2014
    Location
    Vancouver BC
    Posts
    788
    Post Thanks / Like
    I had a bit of trouble with the side coolant tubes and the rubber sealing bushings.

    I got the thick ones on, but once on, i couldn't get the cloth outer hose on. Tried forcing it and got it most of the way on, but it didn't look right..... looked too large diameter compared to everyone elses pictures.
    And I couldn't get the FFR supplied hose clamps over the cloth outer hose. So I figured it wasn't right. Diameter with the thick bushing looks quite a bit thicker than where the flex tubing is.
    DSCF4610.jpgDSCF4612.jpg

    I took them apart (difficult to get off) and used the smaller thickness rubber bushings. They seemed to go on tight on the 1.5 OD aluminum tube, and were also tight when I pushed on the cloth hose ends over top. Now the hose clamps also worked (with not much to spare), and it looks like the pictures I have seen from other builds, and the manual.
    What did everyone else do here.
    I read Mechie's account, but it seemed to work for him with the thicker bushings????

    Thanks

  14. #54
    Senior Member
    Join Date
    Jan 2014
    Posts
    617
    Post Thanks / Like
    I used the thinner ones. I tried the thicker ones and couldn't get them on. I've go karted mine and had no leaks.

  15. #55
    Senior Member mikeb75's Avatar
    Join Date
    Sep 2013
    Posts
    685
    Post Thanks / Like
    Harley, I had the same trouble putting the thick adapters on the tubes; they're now sitting in my spare-parts bin. I'm not close to running the engine, so can't say anything about leaks; but I'm in the same boat as you.

    Good to hear that Jamie's verified with just the thin adapters.
    818SC chassis #206 EJ207 2.0L VF37 twin scroll || Cusco type RS 1.5 LSD || Wilwood pedal box (firewall attach) || Wilwood superlite front calipers
    BUILD Phase 1: 6/6/2014 car delivered || 5/24/2015 first start || 6/7/2015 go karted || 4/20/2016 hard-top-topped || 10/25/2016 registered || 11/18/2016 inspected & complete
    BUILD Phase 2: 3/8/2017 EJ207v8 || 5/29/2017 re-first re-start || 7/17/2017 re-assembled with race car bits

  16. #56
    Senior Member Bob_n_Cincy's Avatar
    Join Date
    Sep 2012
    Location
    Cincinnati OH
    Posts
    3,903
    Post Thanks / Like
    Quote Originally Posted by Harley818 View Post
    I They seemed to go on tight on the 1.5 OD aluminum tube, and were also tight when I pushed on the cloth hose ends over top.
    My tubes, (early kits) used 1-1/4" od tubing. That might be why the thick adaptors don't work.
    Bob
    818S #22 Candy Blue Frame, Front Gas Tank, 2.5L Turbo, Rear radiator, Shortened Transmission, Wookiee Compatible, Console mounted MR2 Shifter, Custom ECU panel, AWIC soon
    My Son Michael's Turbo ICE Build X22 http://thefactoryfiveforum.com/showt...rts-818S-Build
    My Electric Supercar Build X21 (on hold until winter) http://thefactoryfiveforum.com/showt...e-Build-Thread

  17. #57
    Mechie3's Avatar
    Join Date
    May 2012
    Location
    Indianapolis
    Posts
    5,174
    Post Thanks / Like
    I have chassis #15, so I likely have the small diameter tubes as well. It was super tight.
    Zero Decibel Motorsports
    Check out my new website!
    www.zerodecibelmotorsports.com
    www.facebook.com/zero.decibel.motorsports

  18. #58
    Member
    Join Date
    Apr 2014
    Posts
    79
    Post Thanks / Like
    Quote Originally Posted by Bob_n_Cincy View Post
    My tubes, (early kits) used 1-1/4" od tubing. That might be why the thick adaptors don't work.
    Bob

    Quote Originally Posted by Mechie3 View Post
    I have chassis #15, so I likely have the small diameter tubes as well. It was super tight.

    Why was there a design change from 1.25 OD tubing to 1.5?? Did the car need a bigger ID tubing for flow?

  19. #59
    Harley818's Avatar
    Join Date
    Jan 2014
    Location
    Vancouver BC
    Posts
    788
    Post Thanks / Like
    So here I am following Mechie's instructions, thinking..... he said it went on relatively easy!!! what am I doing wrong????..... they changed the tube diameter! lol
    Worked out great with the smaller thickness bushings ....so heads up out there for those of you who are still coming.

    Mechie's trick of using a bit of teflon spray helps them slip on really easily.

  20. #60
    Mechie3's Avatar
    Join Date
    May 2012
    Location
    Indianapolis
    Posts
    5,174
    Post Thanks / Like
    Quote Originally Posted by MrDude_1 View Post
    Why was there a design change from 1.25 OD tubing to 1.5?? Did the car need a bigger ID tubing for flow?
    No idea on official reasons, but I'm glad I found out about this. Might just have to buy my own tubing to step it up. Certainly the fewer times the ID changes size the less fluid energy losses you'll have.
    Zero Decibel Motorsports
    Check out my new website!
    www.zerodecibelmotorsports.com
    www.facebook.com/zero.decibel.motorsports

  21. #61
    Member
    Join Date
    Apr 2014
    Posts
    79
    Post Thanks / Like
    Quote Originally Posted by Mechie3 View Post
    No idea on official reasons, but I'm glad I found out about this. Might just have to buy my own tubing to step it up. Certainly the fewer times the ID changes size the less fluid energy losses you'll have.
    I was having the opposite thought. Water is heavy, and the OEM subaru system didnt need an increase in capacity. I kind of want to run whatevers the smallest that works.

  22. #62
    Senior Member Bob_n_Cincy's Avatar
    Join Date
    Sep 2012
    Location
    Cincinnati OH
    Posts
    3,903
    Post Thanks / Like
    Quote Originally Posted by MrDude_1 View Post
    I was having the opposite thought. Water is heavy, and the OEM subaru system didnt need an increase in capacity. I kind of want to run whatevers the smallest that works.
    The cooling system on a wrx has multiple paths to bring water back to the water pump.
    1. oil cooler/warmer
    2. throttle body warmer
    3. heater core (bypass loop)
    4. radiator: when thermostat is open
    5. turbo cooler/ expansion tank

    The amount of flow through each path is controlled by the restriction of that path.
    Be careful if you add any restriction. You may not get enough flow through that path. This problem will not show up until heavy loads. (racing)
    My 2 cents.
    Bob
    Last edited by Bob_n_Cincy; 11-04-2014 at 10:51 AM.
    818S #22 Candy Blue Frame, Front Gas Tank, 2.5L Turbo, Rear radiator, Shortened Transmission, Wookiee Compatible, Console mounted MR2 Shifter, Custom ECU panel, AWIC soon
    My Son Michael's Turbo ICE Build X22 http://thefactoryfiveforum.com/showt...rts-818S-Build
    My Electric Supercar Build X21 (on hold until winter) http://thefactoryfiveforum.com/showt...e-Build-Thread

  23. #63
    Mechie3's Avatar
    Join Date
    May 2012
    Location
    Indianapolis
    Posts
    5,174
    Post Thanks / Like
    My thinking was long bob's lines of thinking. They changed for a reason. I'm not going to run out and buy new tubes ASAP, but will keep on eye on it (and others build/test threads). The OEM system wasn't designed to push water 10 feet forward and then 10 feet back with lots of extra bends. Just something to be aware of and keep tabs on and make a decision later. For all we know their supplier said "hey, we can supply these tubes for less $".
    Zero Decibel Motorsports
    Check out my new website!
    www.zerodecibelmotorsports.com
    www.facebook.com/zero.decibel.motorsports

  24. #64
    Senior Member flynntuna's Avatar
    Join Date
    Apr 2011
    Location
    San Diego Ca 92106
    Posts
    1,972
    Post Thanks / Like
    Quote Originally Posted by Mechie3 View Post
    My thinking was long bob's lines of thinking. They changed for a reason. I'm not going to run out and buy new tubes ASAP, but will keep on eye on it (and others build/test threads). The OEM system wasn't designed to push water 10 feet forward and then 10 feet back with lots of extra bends. Just something to be aware of and keep tabs on and make a decision later. For all we know their supplier said "hey, we can supply these tubes for less $".
    Does the water pump actually work harder? It's not pushing the water up hill, it just more water. It will take longer for the water to make the loop, but does that increase the back pressure to strain the WP? Engineers, help me out.

  25. #65
    Mechie3's Avatar
    Join Date
    May 2012
    Location
    Indianapolis
    Posts
    5,174
    Post Thanks / Like
    Fluidic drag is a function of several things including:

    Total flow length
    Flow diameter
    Surface finish
    Pipe geometry
    Expansion/contraction losses (think smooth tapered coupler vs sudden ID changes)

    To help visualize it, imagine blowing through a very long small diameter straw. It gets tough. Now, blow through a very short straw of the same diameter and it's much easier.

    The increased length puts more back pressure on the system. The pump can't actually work harder (it's output is limited by vane design and rpm) so the end result of more resistance is less flow.
    Zero Decibel Motorsports
    Check out my new website!
    www.zerodecibelmotorsports.com
    www.facebook.com/zero.decibel.motorsports

  26. #66
    Senior Member Bob_n_Cincy's Avatar
    Join Date
    Sep 2012
    Location
    Cincinnati OH
    Posts
    3,903
    Post Thanks / Like
    To add to what Mechie3 said:

    The pump is a centrifugal type. The spinning water gets thrown to the outside by centrifugal force. The faster it spins the higher the inlet to outlet pressure.
    The bigger issue is which way the water decides to go.
    If you had 2 paths the same length, same number of turns, and same diameter you would get 50-50 flow.
    The 818 compared to the WRX has a less resistive heater core path and a more resistive radiator path. so it will have less flow to the radiator than a standard WRX
    This is why FFR and beta builder testing is so important to verify sufficient flow to the radiator.
    Bob
    Electrical Engineer
    Last edited by Bob_n_Cincy; 11-04-2014 at 02:39 PM.
    818S #22 Candy Blue Frame, Front Gas Tank, 2.5L Turbo, Rear radiator, Shortened Transmission, Wookiee Compatible, Console mounted MR2 Shifter, Custom ECU panel, AWIC soon
    My Son Michael's Turbo ICE Build X22 http://thefactoryfiveforum.com/showt...rts-818S-Build
    My Electric Supercar Build X21 (on hold until winter) http://thefactoryfiveforum.com/showt...e-Build-Thread

  27. #67
    Member
    Join Date
    Apr 2014
    Posts
    79
    Post Thanks / Like
    Quote Originally Posted by Bob_n_Cincy View Post
    To add to what Mechie3 said:

    The pump is a centrifugal type. The spinning water gets thrown to the outside by centrifugal force. The faster it spins the higher the inlet to outlet pressure.
    The bigger issue is which way the water decides to go.
    If you had 2 paths the same length, same number of turns, and same diameter you would get 50-50 flow.
    The 818 compared to the WRX has a less resistive heater core path and a more resistive radiator path. so it will have less flow to the radiator than a standard WRX
    This is why FFR and beta builder testing is so important to verify sufficient flow to the radiator.
    Bob
    Electrical Engineer
    Hopefully this isnt too off topic...Regarding the heater flow for a second. We all know the subaru heads need the heatercore path to flow in order to remove air and a deadhead area in the heads. But what amount of flow is needed? I know there is a similar area on the chevy LS v8s, and they use a very small hose to bleed that area. Could a restrictor or smaller line in the heatercore pathway help?

  28. #68
    Senior Member STiPWRD's Avatar
    Join Date
    Jan 2014
    Location
    Leesburg, VA
    Posts
    1,624
    Post Thanks / Like
    Don't put any restrictors in the heater core path or use a smaller ID hose than what FFR provided. This will change the coolant flow path and potentially overheat the driver side of your engine.

    Engine cooling schematic.png

  29. #69
    Senior Member Bob_n_Cincy's Avatar
    Join Date
    Sep 2012
    Location
    Cincinnati OH
    Posts
    3,903
    Post Thanks / Like
    The most important reason you need to keep the heater loop is to bring the hot water from the top of the engine to the sensor side of the thermostat. Without that loop, the thermostat will not open allowing cool radiator water into the engine.
    Bob
    818S #22 Candy Blue Frame, Front Gas Tank, 2.5L Turbo, Rear radiator, Shortened Transmission, Wookiee Compatible, Console mounted MR2 Shifter, Custom ECU panel, AWIC soon
    My Son Michael's Turbo ICE Build X22 http://thefactoryfiveforum.com/showt...rts-818S-Build
    My Electric Supercar Build X21 (on hold until winter) http://thefactoryfiveforum.com/showt...e-Build-Thread

  30. #70
    Harley818's Avatar
    Join Date
    Jan 2014
    Location
    Vancouver BC
    Posts
    788
    Post Thanks / Like
    Getting ready for engine install this week.

    Installed the new Exedy OEM clutch, bolted the tranny on, and now ready for install.....
    Release bearing set up and ready to go...
    DSCF4614.jpg

    Clutch and pressure plate....

    DSCF4617.jpgDSCF4618.jpg

    Ready to go.....
    DSCF4622.jpg

  31. #71
    Harley818's Avatar
    Join Date
    Jan 2014
    Location
    Vancouver BC
    Posts
    788
    Post Thanks / Like
    My insulation material arrived, so I finished off the firewall and installed it.... ready for engine to install.
    DSCF4623.jpg

    Engine is in! My wife asked me to wait till she was home to install the engine.... so I had a helping hand. My son was away at a football game in Seattle, and I didn't want to wait.
    DSCF4625.jpgDSCF4626.jpg

    Looks like the engine is a bit tilted down in front, but I am waiting for my Type N transmission mount, then I will know final position. I have Type N motor mounts, but was going to use OEM transmission mount. After checking it out and seeing it is very soft, I decided to go Type N for the Trans as well after seeing some videos with quite a bit of movement.

    DSCF4628.jpgDSCF4629.jpg

    With the engine installed and shafts hooked up, I installed the 2WD conversion for the rear of the transmission.
    DSCF4627.jpg

  32. #72
    Harley818's Avatar
    Join Date
    Jan 2014
    Location
    Vancouver BC
    Posts
    788
    Post Thanks / Like
    I haven't seen much in the way of documenting of the routing of the water lines ( I may have missed it), so I thought I would do so here.

    With the side rigid tubes set up, I installed them as far forward as possible, but the rear rubber connector is just behind the frame. Then I ran the corrogated tubing under the fuel fill tube and up to the waterpump connection. It seemed to have the most natural curves this way.
    DSCF4630.jpgDSCF4631.jpgDSCF4632.jpgDSCF4633.jpg

    For the front, I ran the line along the bottom of the frame, and tight around the steering, angling in to the bottom radiator connection. Seemed like it wanted to go that route. I used zip ties to secure to the frame.
    DSCF4637.jpgDSCF4638.jpgDSCF4639.jpg

    For the top radiator connection, I ran straight across the fan down to the bottom of the frame, along the frame, and through the access to the outside rigid tube. (see previous picture). Ran zip ties to the fan housings and frame to hold it securely in place.
    I plan to add rubber protection where ever the tubing gets close to contacting the frame, just for added vibration protection.

    Still need to hook up the top motor connection to the rad.
    I have to add the "wayne connection" to help burp it. I'm a bit nervous about drilling and tapping 1/8 NPT into such thin material !!! but I will probably do it anyways since others have gone there successfully.

    Feels good after all that work to finally have the engine in place.
    DSCF4640.jpg

    Next task.... install the ceramic coated exhaust manifold and hook up to the turbo.
    DSCF4635.jpg

  33. #73
    Senior Member Bob_n_Cincy's Avatar
    Join Date
    Sep 2012
    Location
    Cincinnati OH
    Posts
    3,903
    Post Thanks / Like
    Harley
    Looking great:
    Don't forget to remove the bearing race from the back of the transmission.
    Maybe you already did, I cant tell from the picture for sure.
    Bob
    attachment.jpg
    818S #22 Candy Blue Frame, Front Gas Tank, 2.5L Turbo, Rear radiator, Shortened Transmission, Wookiee Compatible, Console mounted MR2 Shifter, Custom ECU panel, AWIC soon
    My Son Michael's Turbo ICE Build X22 http://thefactoryfiveforum.com/showt...rts-818S-Build
    My Electric Supercar Build X21 (on hold until winter) http://thefactoryfiveforum.com/showt...e-Build-Thread

  34. #74
    Harley818's Avatar
    Join Date
    Jan 2014
    Location
    Vancouver BC
    Posts
    788
    Post Thanks / Like
    Hi Bob,
    Not sure I understand. Your arrow looks like its pointing to a casting plug. I removed the appropriate washers and bearing/spline, etc. when I replaced the 2WD conversion. Are you talking about something different?
    I must have totally missed this.

  35. #75
    Senior Member Bob_n_Cincy's Avatar
    Join Date
    Sep 2012
    Location
    Cincinnati OH
    Posts
    3,903
    Post Thanks / Like
    Quote Originally Posted by Harley818 View Post
    Hi Bob,
    Not sure I understand. Your arrow looks like its pointing to a casting plug. I removed the appropriate washers and bearing/spline, etc. when I replaced the 2WD conversion. Are you talking about something different?
    I must have totally missed this.
    There was a bearing race in the top hole by my arrow.
    A lot have forgotten to remove it. It is not pressed in and just falls out after you hit a few bump.
    Bob

    You can see it better in this picture:$_57.jpg
    Last edited by Bob_n_Cincy; 11-11-2014 at 08:34 AM.
    818S #22 Candy Blue Frame, Front Gas Tank, 2.5L Turbo, Rear radiator, Shortened Transmission, Wookiee Compatible, Console mounted MR2 Shifter, Custom ECU panel, AWIC soon
    My Son Michael's Turbo ICE Build X22 http://thefactoryfiveforum.com/showt...rts-818S-Build
    My Electric Supercar Build X21 (on hold until winter) http://thefactoryfiveforum.com/showt...e-Build-Thread

  36. #76
    Harley818's Avatar
    Join Date
    Jan 2014
    Location
    Vancouver BC
    Posts
    788
    Post Thanks / Like
    Perfect timing Bob.

    I went back and sure enough, there is a bearing race there. Got it out.
    Its hard to see, and I wouldn't have known it was there. Good catch.
    DSCF4672.jpgDSCF4673.jpg

    Installed my Type N transmission mount today. Glad there was someone discussing this on the forum. I had switched to Type N for engine mounts because my old ones were shot. The trans mount was still OK, but wow, what a difference. The Type N has about 2 - 3 times the rubber, and is MUCH stiffer.
    DSCF4641.jpg

    Thanks for the feedback guys on drilling out the manifold for the brass fitting (Wayne's mod). I drilled it out today and installed a 90 degree fitting - 1/8NPT to run up to the coolant tank.
    DSCF4662.jpgDSCF4664.jpgDSCF4665.jpgDSCF4667.jpg

    Finished off the coolant routing up the Right side.
    DSCF4668.jpgDSCF4669.jpg

    Got my titanium wrap.... and wrapped the exhaust manifold.
    DSCF4670.jpg

  37. #77
    Harley818's Avatar
    Join Date
    Jan 2014
    Location
    Vancouver BC
    Posts
    788
    Post Thanks / Like
    Started to lay out my brake lines routing and ran the emergency brake lines through the rear firewall, right next to the rear link.
    DSCF4671.jpg

  38. #78
    Senior Member Frank818's Avatar
    Join Date
    Jun 2013
    Location
    QC, Canada
    Posts
    5,732
    Post Thanks / Like
    Quote Originally Posted by Harley818 View Post
    Started to lay out my brake lines routing and ran the emergency brake lines through the rear firewall, right next to the rear link.
    DSCF4671.jpg
    Interesting location. It doesn't kink too much over the fuel tank and back over the tunnel?
    That's a location I would like to use, considering my engine configuration and the space it's going to use in the middle.
    Frank
    818 chassis #181 powered by a '93 VW VR6 Turbo GT3582R
    Go-karted Aug 5, 2016 - Then May 19+21, 2017
    Tracked May 27/July 26, 2017
    Build time before being driveable on Sep 27, 2019: over 6000h
    Build Completed Winter 2021

  39. #79
    Harley818's Avatar
    Join Date
    Jan 2014
    Location
    Vancouver BC
    Posts
    788
    Post Thanks / Like
    Its almost the most direct route and lays right on the fuel tank (if you use the FRR tank).

    I am thinking that I may need to switch tanks. I'm 5'11" and with stock seats, I'm finding myself too close to the pedals.
    My plan is to find a new seat first, and hope it gives me a couple more inches. If so, I'll keep the FFR tank, otherwise, I'll go Boyd to get the extra space.

  40. #80
    Senior Member Frank818's Avatar
    Join Date
    Jun 2013
    Location
    QC, Canada
    Posts
    5,732
    Post Thanks / Like
    Well I'll definitely take a shot on that one! Tnx for showing.
    Frank
    818 chassis #181 powered by a '93 VW VR6 Turbo GT3582R
    Go-karted Aug 5, 2016 - Then May 19+21, 2017
    Tracked May 27/July 26, 2017
    Build time before being driveable on Sep 27, 2019: over 6000h
    Build Completed Winter 2021

Page 2 of 11 FirstFirst 1234 ... LastLast

Posting Permissions

  • You may not post new threads
  • You may not post replies
  • You may not post attachments
  • You may not edit your posts
  •  

Brown County Customs

Visit our community sponsor