Boig Motorsports

Visit our community sponsor

Thanks Thanks:  0
Likes Likes:  0
Page 2 of 2 FirstFirst 12
Results 41 to 74 of 74

Thread: Brian's Virginia build

  1. #41
    Senior Member smithbks's Avatar
    Join Date
    Mar 2014
    Location
    Atlee, VA
    Posts
    152
    Post Thanks / Like
    Thanks edwardb. I ordered the spacers from Mike Forte today.
    Mk4 #8340, 351w/427, 3-link, Wilwood 4 piston rear brakes, 3.27 gear, TKO600, delivered June 18th, 2014

  2. #42
    Senior Member smithbks's Avatar
    Join Date
    Mar 2014
    Location
    Atlee, VA
    Posts
    152
    Post Thanks / Like
    So I had my First start of the engine this weekend. It wasn't what I had hoped for and I ran into some fuel and electrical issues but it was a start nonetheless. (Is there a way to upload a video other than Youtube?)

    The good news is that I got some help from the Travelling Builder and found a blown Coil fuse that fixed all of the other issues!!! Now I'm back working on it and headed for the transmission. I received 3 1/4" spacers to work with setting the angle. I am concerned the driveshaft is not long enough. Here is a picture of the driveshaft fully engaged and how much is sticking out. The pinion angle isn't set yet but I don't think it will make that big of a difference. I think I read somewhere 3/4-1 inch is right but I have more like 2 inches out. Thoughts?
    driveshaft.JPG

    http://www.shutterfly.com/video/myVi...694b2e58d641de
    Last edited by smithbks; 02-09-2015 at 08:45 AM.
    Mk4 #8340, 351w/427, 3-link, Wilwood 4 piston rear brakes, 3.27 gear, TKO600, delivered June 18th, 2014

  3. #43
    Senior Member edwardb's Avatar
    Join Date
    Feb 2011
    Location
    Lake Orion, Michigan
    Posts
    10,567
    Post Thanks / Like
    Quote Originally Posted by smithbks View Post
    So I had my First start of the engine this weekend. It wasn't what I had hoped for and I ran into some fuel and electrical issues but it was a start nonetheless. (Is there a way to upload a video other than Youtube?)

    The good news is that I got some help from the Travelling Builder and found a blown Coil fuse that fixed all of the other issues!!! Now I'm back working on it and headed for the transmission. I received 3 1/4" spacers to work with setting the angle. I am concerned the driveshaft is not long enough. Here is a picture of the driveshaft fully engaged and how much is sticking out. The pinion angle isn't set yet but I don't think it will make that big of a difference. I think I read somewhere 3/4-1 inch is right but I have more like 2 inches out. Thoughts?
    If you use a photo hosting website like Photobucket, normally they also allow videos. I personally use Photobucket, and have put videos there. Works OK. But I still like YouTube a little better for that purpose.

    You're right. The slip joint should be 3/4 to 1 inch exposed. 2 inches is too much. Note the measurement should be with the rear suspension at ride height (not hanging) and pinion angle in the ball park.
    Build 1: Mk3 Roadster #5125. Sold 11/08/2014. Build 2: Mk4 Roadster #7750. Sold 04/10/2017. Build Thread
    Build 3: Mk4 Roadster 20th Anniversary #8674. Sold 09/07/2020. Build Thread and Video. Build 4: Gen 3 Type 65 Coupe #59. Gen 3 Coyote. Legal 03/04/2020. Build Thread and Video
    Build 5: 35 Hot Rod Truck #138. LS3 and 4L65E auto. Rcvd 01/05/2021. Legal 04/20/2023. Build Thread. Sold 11/9/2023.

  4. #44
    Senior Member smithbks's Avatar
    Join Date
    Mar 2014
    Location
    Atlee, VA
    Posts
    152
    Post Thanks / Like
    Just a quick update of the progress I have made and hopefully a big weekend ahead:

    - Finally got the wiring finished. I posted a thread about Fan switch gremlins that was solved. That actually took me about 3 weeks to fix in between work and life. I'm happy to report the fan works like it should. I also had a bit of a bug in the horn wiring that I solved. Again, using what I learned on the relays I was able to chase down the problem. For anyone interested, when I hooked up the horn it was staying on all the time. I went to the relay and the circuit had power (when it shouldn't) so the switch was "closed" and triggering the horn. I checked all of my wires and determined it had to be in the switch because when I disconnected the wires from the switch it operated properly. I did a quick resistance check of the switch terminals and verified that it was the problem. Took it apart and it was just out of alignment. Re-aligned the "tongue" inside and now everything works

    -transmission is in and filled with syncromesh (expensive stuff!)

    -I need to set the pinion angle and obtain a longer driveshaft. FF wanted me to set everything first before sending a new one...

    -engine runs well.

    -The clutch was initially stuck but has released. I have had a little trouble with the clutch fork in that it seems like the threaded rod is too long and I had to tighten it all the way down to fully engage the clutch. Now there really isn't any play at all and I am worried about the throw out bearing. But I have no familiarity with the TKO so I'm learning alot about it. I did also find that my clutch pedal rubbed ever so slightly on the frame (Wilwood assembly). I had planned to do the notch to the frame mod, but before I noticed I had worn a 1/2 inch shallow groove/cup in the clutch pedal. I may just leave it as-is. The worn area isn't enough to affect the structural integrity and the clearance is ok.

    -re-bled the brakes again. One of the crush washers on the DS front was leaking. I took the forum's advice and replaced it with a copper washer and had no issues

    -finished the cockpit Dynamat. I'll probably start a new question with this: Should I install Dynamat in the trunk. I'm using the Dynamat Extreme and it is expensive stuff! I don't see how I will benefit from it in the trunk with an open top roadster?

    Looking to go-kart this weekend and get the video posted. Hoping all goes well for a very short trip to the cul de sac.
    Mk4 #8340, 351w/427, 3-link, Wilwood 4 piston rear brakes, 3.27 gear, TKO600, delivered June 18th, 2014

  5. #45
    Junior Member
    Join Date
    Sep 2014
    Location
    Perth, Australia
    Posts
    18
    Post Thanks / Like
    I have installed dynamat extreme to 85% of the trunk area and planning on carpet. I believe it makes the aluminium feel more solid in general and will sound less tinny so it can't hurt to use it (other than it hurting your wallet). I am installing a stereo with speakers in the rear wall as well as a 6" Bazooka sub tube strapped in the trunk so I'd rather have minimum metallic vibrations or reverberation caused by a bare aluminium floor.


  6. #46
    Senior Member edwardb's Avatar
    Join Date
    Feb 2011
    Location
    Lake Orion, Michigan
    Posts
    10,567
    Post Thanks / Like
    I'm personally in favor of insulating the trunk as well as the cockpit. I don't have any data or db measurements to say it lowers the noise level. In fact, I suspect it doesn't. But I firmly believe it contributes to the overall solid feel of the car and eliminates any tinniness or rattling from the exposed aluminum. Also suspect it may dampen road noise a bit from the rear suspension/tires. I happen to use Lizard Skin in my builds, including the trunk area. The pic is just after I completed the LS spray during my Mk4 build. Not promoting LS at all. Just insulation in general. I agree Dynamat is expensive. Probably about the most expense out there. You could use a different brand and maybe save a few bucks. But I would definitely vote to insulate the trunk. Now is the time to do it!

    Build 1: Mk3 Roadster #5125. Sold 11/08/2014. Build 2: Mk4 Roadster #7750. Sold 04/10/2017. Build Thread
    Build 3: Mk4 Roadster 20th Anniversary #8674. Sold 09/07/2020. Build Thread and Video. Build 4: Gen 3 Type 65 Coupe #59. Gen 3 Coyote. Legal 03/04/2020. Build Thread and Video
    Build 5: 35 Hot Rod Truck #138. LS3 and 4L65E auto. Rcvd 01/05/2021. Legal 04/20/2023. Build Thread. Sold 11/9/2023.

  7. #47
    Senior Member smithbks's Avatar
    Join Date
    Mar 2014
    Location
    Atlee, VA
    Posts
    152
    Post Thanks / Like
    Good feedback. So do you think if I dropped down to standard Dynamat instead of the Dynamat Extreme - which I used for the heat properties - for the trunk it would achieve the desired effect?
    Mk4 #8340, 351w/427, 3-link, Wilwood 4 piston rear brakes, 3.27 gear, TKO600, delivered June 18th, 2014

  8. #48
    Senior Member edwardb's Avatar
    Join Date
    Feb 2011
    Location
    Lake Orion, Michigan
    Posts
    10,567
    Post Thanks / Like
    Quote Originally Posted by smithbks View Post
    Good feedback. So do you think if I dropped down to standard Dynamat instead of the Dynamat Extreme - which I used for the heat properties - for the trunk it would achieve the desired effect?
    Heat isn't a concern in the trunk area.
    Build 1: Mk3 Roadster #5125. Sold 11/08/2014. Build 2: Mk4 Roadster #7750. Sold 04/10/2017. Build Thread
    Build 3: Mk4 Roadster 20th Anniversary #8674. Sold 09/07/2020. Build Thread and Video. Build 4: Gen 3 Type 65 Coupe #59. Gen 3 Coyote. Legal 03/04/2020. Build Thread and Video
    Build 5: 35 Hot Rod Truck #138. LS3 and 4L65E auto. Rcvd 01/05/2021. Legal 04/20/2023. Build Thread. Sold 11/9/2023.

  9. #49
    Senior Member smithbks's Avatar
    Join Date
    Mar 2014
    Location
    Atlee, VA
    Posts
    152
    Post Thanks / Like
    This was my big weekend! Finally got to drive it down the street!!

    I know you guys know how this feels. I was so pumped afterwards I couldn't even hold the screwdriver straight to tighten the radiator hoses (just doing the warm hose tightening). Up until now I had the car sitting in front of me, and the promise of the road when I ran the engine, but to drive it out of the garage brought it all home!

    The car felt great and I can feel the power even going slowly. A few odds and ends:
    -the tires are so sticky that even at 50 degrees they still picked up every pebble and threw it at me
    -the Tremec TKO600 tranny takes a little getting used to . I read a lot about it as well. It needs a little force to go in gear and is much stiffer than your typical gearbox. Once I got used to it I was fine but there were a few moments of coasting while I tried to grab a gear. Once I applied force it was fine - and there was no grinding.
    -just barely moving along I put it in 2nd gear and gave a little throttle and the rear end stepped out immediately!! I plan to go to a parking lot and get used to it.

    Everything went well, no leaks, all gauges worked, temps came, up, BEAUTIFUL!!!http://www.shutterfly.com/video/myVi...694b2e58d641d3

    http://www.shutterfly.com/video/myVi...694b2e58d641da
    Mk4 #8340, 351w/427, 3-link, Wilwood 4 piston rear brakes, 3.27 gear, TKO600, delivered June 18th, 2014

  10. #50
    Junior Member
    Join Date
    Sep 2014
    Location
    Perth, Australia
    Posts
    18
    Post Thanks / Like
    Well done, this stage is a great feeling. I remember the adrenalin going through my body after I took mine out! It's like your baby is walking for the first time... (I never said that to my wife otherwise she would have thought I was crazy) By the way make sure you remember to lube up all those ball joints and set tires at around 24psi for a better ride.

  11. #51
    Senior Member MPTech's Avatar
    Join Date
    Feb 2011
    Location
    St. Louis, MO
    Posts
    1,182
    Post Thanks / Like
    Blog Entries
    8
    Congrats of the first drive! that is a MAJOR milestone and will motivate further to completing! It's a great feeling!
    I enjoy reading the first drive posts, so rewarding for all of your work!


    Not yet, but after a hundred or 200 miles (they will happen fast in go-kart!) make sure to re-tighten your header bolts!! (I lost a bolt, a couple more were loosened and damaged my header gasket (had to remove headers again to replace gasket), because I didn't re-tighten them after re-installing my headers over the winter last year)
    F5R #7446: MK4, 302, T5 midshift, 3.55 Posi IRS, 17" Halibrands
    Delivered 4/4/11, First start 9/29/12, Licensed 4/24/13, off to PAINT 2/15/14!! Wahoo!

  12. #52
    Senior Member smithbks's Avatar
    Join Date
    Mar 2014
    Location
    Atlee, VA
    Posts
    152
    Post Thanks / Like
    Not a lot of big news but some important things accomplished this week.

    *Completed the ride height to 3.75" front and 4.25" rear. I'm not terribly worried about dialing this in right now as everyone says it settles for the first few weeks and will need to be readjusted.

    *Set the pinion angle, although this one caused me some confusion. Some was self induced by reading my measurement backwards. I still have some questions...But here is what I ended up with: I first took one of the 1/4" spacers off the tranny mount which still left 1/2" of spacers in. That gives me a 5/16" or so gap over the cross member. I set 4.5 degrees at the crank pointing down to the rear of the car, 2.5 degrees at the pinion flange pointing up to the front of the car. What bugs me is that the pinion flange is higher than the tranny output shaft meaning the driveshaft (after the u joint) has to point down to the tranny to connect to it. Anyway, now that is done I can contact FFR for a new driveshaft as there is still 2 inches out of the tranny lip and it should be half of that.

    *completed the alignment using the Fastrax tool with the Toe attachment. A nifty little tool you can almost do the entire process by yourself. I folded up a garbage bag under the wheel, set a level on the steering wheel to center it exactly and went to setting the caster at 3 degrees and the camber at -1/2 degree. In between each adjustment I rolled the car back a few feet to settle everything and measured again (according to the tool's instructions). I also set the toe at -1/32" (I was striving for 1/16" but once I got to here I decided to let it be for now).

    *changed the gear oil. I flushed it with some standard 75-140 oil and then drained it well before putting in the Red Devil friction modified 75-90 synthetic

    *installed some noise dampener in the trunk based on everyone's suggestion. Easy enough

    *adjusted the e-brake. Not easy enough. I can't seem to get it tight enough until fully extended and then it doesn't want to disengage and sounds like it is dragging. I'm going to try to put a spring in at the caliper to allow me to tighten it but let it disengage. I'm guessing I can get one from McMaster Carr - I'll have to search the threads as I know this has been discussed.

    Maybe I'll get to test fit the body this weekend...
    Mk4 #8340, 351w/427, 3-link, Wilwood 4 piston rear brakes, 3.27 gear, TKO600, delivered June 18th, 2014

  13. #53
    Senior Member smithbks's Avatar
    Join Date
    Mar 2014
    Location
    Atlee, VA
    Posts
    152
    Post Thanks / Like
    This was a fun weekend. I was able to test fit the body with the help of a friend. It is also a learning experience and a frustration.

    I'm not sure what I was thinking trying to fit the body with the side pipes on. 
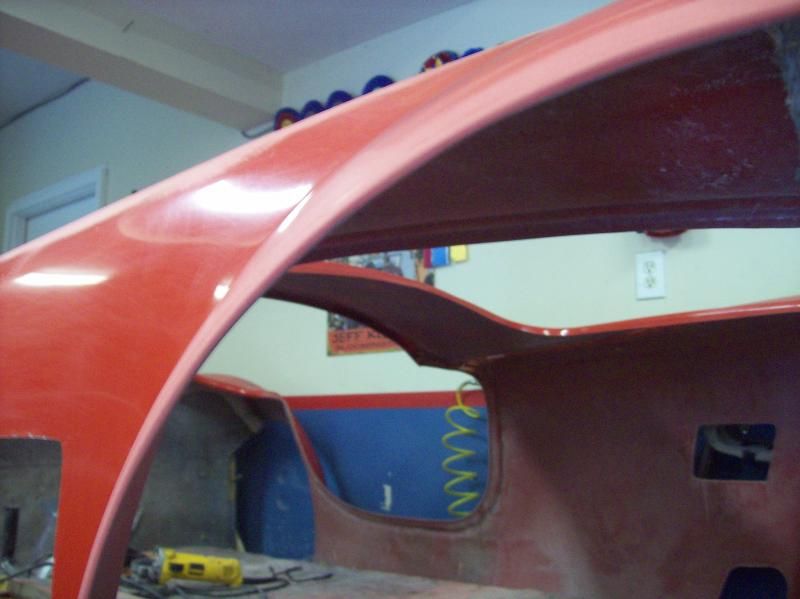
That was quickly remedied and the pipes were removed. But everywhere it seems to fit so tight. The bulb seal isn't just touching, it is mashed down in all spots. I did fix the rub on the front wheels by adjusting the ride height higher and now I have a full finger's width around all four tires to the fender. I like where the wheels are centered in the wheel wells so that part came out fine. I've even started to test fit the front lights. The factory cut holes had to be worked on a little to get a nice smooth fit. Just ran a 1/64 bigger bit for the tail light studs and used my drill drum sanding attachment to open the front headlight bucket hole.

    Three things I'll need to search the forums for answers:
    1. The door hinges won't open. At the bottom of the hinge it hits the body. It looks like it needs about 1/4 inch more clearance. I think I could shim the bottom bolt out to clear. I'll look to see if others had had this problem.

    2. My air cleaner sits above the engine opening so I can put the hood all the way down. I'm sure the hood scoop cutout will give it clearance but is this usual? I don't have a large air cleaner. I think it is the standard 2". I don't think if I put spacers on the tranny again that it will lower it enough to clear. I have 1/2" there already. I might get 1/4" clarance by lifting the tranny and then I would be parallel to the frame and throw off my pinion angle.

    3. The side pipes do not look like they will clear the factory cut openings, worse on the DS than the PS. Looks like the header pipes are too high for the cutout and slightly forward towards the nose.

    But I'm also wondering if these are related so I'll wait to do anything until I search more. There always seems to be something, but having the body on makes it ok!

    One little footnote - my buddy hadn't heard the engine so he asked me to fire it up. The pipes weren't on so it was loud as heck. Hurt my ears - but it did make him jump backwards about a foot
    body_on.jpg
    Attached Images Attached Images
    Mk4 #8340, 351w/427, 3-link, Wilwood 4 piston rear brakes, 3.27 gear, TKO600, delivered June 18th, 2014

  14. #54
    Not a waxer Jeff Kleiner's Avatar
    Join Date
    Feb 2011
    Location
    Bloomington, Indiana
    Posts
    8,066
    Post Thanks / Like
    Hi Brian,

    Quote Originally Posted by smithbks View Post
    ...The bulb seal isn't just touching, it is mashed down in all spots.
    That's why it is advisable to test fit the body without bulb seal first and mark then trim the panels as necessary to provide an approximately 3/8" gap all the way around. On later Mk4s (with the revised trunk configuration) I have found that the vertical portion of rear side panels and the entire rear horizontal lip are the areas that usually need to be trimmed.

    I did fix the rub on the front wheels by adjusting the ride height higher and now I have a full finger's width around all four tires to the fender.
    That will improve when the wheelwell returns are trimmed and shaped during the bodywork process. They'll go from this:


    To this, which will greatly increase tire to body clearance and allow you to bring it back down if you wish:


    1. The door hinges won't open. At the bottom of the hinge it hits the body. It looks like it needs about 1/4 inch more clearance. I think I could shim the bottom bolt out to clear.
    I think you'll find that this too will be corrected without modification as the body fitting progresses. The rocker panels wrap around the outer tubing of the chassis and will be will be pushed in as far as possible in the area at the front of the doors. As the door fitting is done the hinge's attachment point at the chassis will change with it usually moving outward.

    2. My air cleaner sits above the engine opening so I can put the hood all the way down...
    What intake? An Air Gap on a 351 based engine usually requires a dropped air filter base for hood clearance.

    3. The side pipes do not look like they will clear the factory cut openings, worse on the DS than the PS. Looks like the header pipes are too high for the cutout and slightly forward towards the nose.
    Before getting too concerned about sidepipe fit you need to first install the front splash panels and push the lower edge of the body inward in front of the doors as I mentioned above. They look way off but it is decieving. Typically you need to massage the openings and enlarge them a bit, much like what you discovered on the headlight and parking lamp cutouts. The 351/Hooker header combination seems to usually need more material removed from the top of the opening on the driver's side than on the passenger side.

    Yes, they are ridiculously loud with open headers!

    I think you've got my number; feel free to call if you need to and good luck!

    Jeff

  15. #55
    Senior Member smithbks's Avatar
    Join Date
    Mar 2014
    Location
    Atlee, VA
    Posts
    152
    Post Thanks / Like
    Thanks Jeff. I'll be travelling until next weekend so I can't address all of this yet. My intake is EDELBROCK VICTOR JR. SINGLE PLANE INTAKE MANIFOLD with a 4 BARREL 750 CFM HOLLEY ULTRA DOUBLE PUMPER CARBURETOR.
    Mk4 #8340, 351w/427, 3-link, Wilwood 4 piston rear brakes, 3.27 gear, TKO600, delivered June 18th, 2014

  16. #56
    Senior Member smithbks's Avatar
    Join Date
    Mar 2014
    Location
    Atlee, VA
    Posts
    152
    Post Thanks / Like
    Time for an update. After vacation, work, travel, etc. I have gotten some things done and have focus for the finish line:

    -I gave up on a perfect fit of the body and took it back off to concentrate on finishing up the car first. I did note where it was tight, against the dashboard front face - and I intend to relive that edge about 1/8". I'll check the forum to see if that rolled lip is supposed to be contacting the front face, but I think a small gap is fine.
    -I painted the underside with Rustoleum bedliner using several coats on the wheel wells. word of advice - do this outside. I painted it in my garage with box fans for ventilation and more than a week later it still has an odor.

    I moved on to the carpet and seats and have everything in except the outside DS footbox. I still need to attach that piece. The carpet went in real nice using Super 77. So while Super 77 doesn't do a great job on the dash it seems fine for carpet. I used the method of spraying the surface and the back of the carpet. On the PS floor piece I put it down slightly out of adjustment and tried to move it. A quarter size piece of carpet pulled out Luckily it is under the seat so I glued some carpet fiber in place and it will be fine. You have to trim a little bit here and there but it mostly fits well. A couple of notes:
    - I used Jeff's method of spray painting all of the corners black first. Definitely worth it - highly recommended.
    - I didn't realize the carpet only went up to the dash so I have Dynamat on the crossmember/frame (that the pillow block attaches to). I ordered some carpet from FFR to do the trunk and I think I may put a piece there. If not I'll have to peel the strip of Dynamat off. Once I do this one way or another I'll post a pic
    - I was going to use the Finish Line seat belt bezels but I read somewhere about trouble with the screw holes. Sure enough, it looked difficult so I ordered from Mike Everson. His bezels look and feel great and the screw placement is better for the MK4 so I am very happy now
    - I wish FFR included a tab for the 5 point harness. I don't see anywhere to easily attach the middle/crotch strap
    - Don't tighten the seat down until you hook the bottom cushion onto the frotn wire if you have the classic low back seats. Otherwise you will have to loosen them to gain clearance. That is if there is no seat adjuster. I am only adjusting the DS.

    One more note on trim/carpet. I tried to use the FFR supplied shift boot but unless the fit is perfect (or so I assume because I couldn't achieve it) you don't have clearance for the gear shift. If I got it right for 1-3-5 I wouldn't be able to shift into R because it was too tight. If I got it right for R it would pop out of 1st. So, I searched a little and found Mike Everson also had the shift boot. It looks great, fits well, and makes me happy. I showed it to my wife and she couldn't believe I was going to use the plastic one. (you can see it in the background of the bezel pic) So Mike made my weekend!

    All in all, I am very happy with the interior. carpet.jpginterior.jpgseat belt bezel.jpg
    Mk4 #8340, 351w/427, 3-link, Wilwood 4 piston rear brakes, 3.27 gear, TKO600, delivered June 18th, 2014

  17. #57
    Senior Member smithbks's Avatar
    Join Date
    Mar 2014
    Location
    Atlee, VA
    Posts
    152
    Post Thanks / Like
    As a follow up to the above post, I worked on a few more things I need to take some pictures of and complete:

    -Forte's Mechanical throttle
    Ordered from Mike and received it right away. Has anyone ever said Mike is the best?!! I knew I wanted to do this but have never seen or done one before, so I was tentative. The parts are pretty straightforward and you get the concept pretty quick so I wouldn't call it a technical install. The hardest part is cutting the aluminum tube to fit and tapping it. I have to buy a 14-28 tap as I only have a 14-20. aluminum threads easy. The hole for the throttle needs to be opened up and I need to check on that before I do. I'm worried it will be too big a hole and weaken the arm. I'll have a full report after I get it finished. Some guys worry about the firewall not being stiff enough but I have a support and so far seems ok.

    -Jeff Kleiner's Quick Jack Mod
    I am kicking myself for dismissing this early on. When I test fit the body I realized my foolishness. Now I am going to drop the tank one last time and do it. Some things are learned the hard way! It is super simple and my only delay is finding a 7/16 bolt as the big box didn't have it. Anybody know what length bolt I should buy? I'm assuming 3/4" if I need 1/2" into the coupler in the interior.

    -Miscellaneous
    Seat attachment was interesting. I did not find that all of my holes went perfectly into the floor pan for either seat. For the PS I ran 3 bolts into the floor pan but the 4th was way back and I ended up through the aluminum above the control arm bracket. I don't see how you could do otherwise if the seat is all the way back. I'm sure it will be fine as 3 bolts are through the additional floorpan. The DS was even tougher with the seat track FFR supplies. One hole ended up in the 4" fram tube that I had to tap and but a special bolt for. Another ended up in a tight corner where the 4" tubes met and I had to cut some of the end off, spend 20 minutes using tweezers to position the nut, and finally tighten, and another had to go through the 2x2 square tube. All three are good connection points, but what a pain!
    I wired in a cigarette lighter for electronics. I made a little bracket to attach it vertically (pointing down) to the dash bracket so it is hidden from view but easy enough to shove an adapter in when needed.
    I need to put the PS ReplicaParts seat belt bezels on to match the DS.
    I'm still contemplating the clutch pedla mod before I button it up. I have a very small rub that doesn't affect engagement. I'm looking to either notch the frame slightly or cut it and bolt on the outside square tube.

    I basically have just to carpet the trunk (not mandatory but I want to do it all together), put the DS outer footbox panel on, make sure the mechanical throttle is finished, and replace the driveshaft with a longer one and I am finished and ready for paint...and all the hours of work that come after that!
    Mk4 #8340, 351w/427, 3-link, Wilwood 4 piston rear brakes, 3.27 gear, TKO600, delivered June 18th, 2014

  18. #58
    Senior Member smithbks's Avatar
    Join Date
    Mar 2014
    Location
    Atlee, VA
    Posts
    152
    Post Thanks / Like
    Update on the clutch clearance and the mechanical throttle:
    -I decided to notch the tube slightly. As there was a small wear spot on the clutch arm already, I basically went down the ultimate compromise road and notched both the clutch pedal and the frame. The clutch pedal was already done (by accident when I pushed it a few times early in the install). I took a Dremel and made a small clearance in the tube. So I didn't have to cut too deep into either and achieved the result I needed. With the new I-beam Wilwood pedals I think this is a good solution.

    -I talked to Mike about the throttle pedal attachment and he agreed that I should fab a plate to attach the joint and not overly weaken the hole. for reference, the Mechanical throttle he supplies needs a 1/4" hole for attachment and the FFR throttle pedal has smaller holes without a lot of "meat" around it. With a piece of flat aluminum slightly oversized for the new hole and bolted through the remaining holes on the pedal I achieved my goal and didn't have to change the attach point. Here is my end result with the bracket painted black:

    gas pedal bracket1.JPGgas pedal bracket2.JPGgas pedal bracket3.JPG

    Now I can button up the DS footbox, finish the carpet, and...
    Mk4 #8340, 351w/427, 3-link, Wilwood 4 piston rear brakes, 3.27 gear, TKO600, delivered June 18th, 2014

  19. #59
    Senior Member edwardb's Avatar
    Join Date
    Feb 2011
    Location
    Lake Orion, Michigan
    Posts
    10,567
    Post Thanks / Like
    Good progress! Looking good. Couple of comments

    Quote Originally Posted by smithbks View Post
    I did note where it was tight, against the dashboard front face - and I intend to relieve that edge about 1/8". I'll check the forum to see if that rolled lip is supposed to be contacting the front face, but I think a small gap is fine.
    No, the instrument panel shouldn’t contact the rolled lip on the body. I didn’t trim mine. Just cleaned it up and straightened it a bit. It has 3/16 - 1/4 gap. Not sure why yours is so tight. If you’re positive the body is in the right position, then it should be trimmed to not contact.

    Quote Originally Posted by smithbks View Post
    I wish FFR included a tab for the 5 point harness. I don't see anywhere to easily attach the middle/crotch strap.
    You’re right. No tab for the anti-submarine belt like all the others. The purpose of this belt is to keep the lap belt in place so that you don't slide through. So in theory I guess it doesn't need the same tabs as the others. It has has an angled bracket and should bolt right through near the front of the steel seat pan. The instructions from Simpson show the optimal position for it, slightly behind the chest line. I’ve not used adjustable seat tracks on either of my builds, so not sure how this might affect the position though. It would need to be placed forward far enough to not limit seat travel, and hopefully the seat pan goes that far forward. Also, if you’re going to use floor mats, take a look at where the back edge falls. Could be an interference. With the fixed seats in my Mk4, and placed about as far back as they can go, the location for the attachment is just behind the back edge of the floor mats and still catches the seat pan.
    Last edited by edwardb; 03-27-2015 at 03:10 PM.
    Build 1: Mk3 Roadster #5125. Sold 11/08/2014. Build 2: Mk4 Roadster #7750. Sold 04/10/2017. Build Thread
    Build 3: Mk4 Roadster 20th Anniversary #8674. Sold 09/07/2020. Build Thread and Video. Build 4: Gen 3 Type 65 Coupe #59. Gen 3 Coyote. Legal 03/04/2020. Build Thread and Video
    Build 5: 35 Hot Rod Truck #138. LS3 and 4L65E auto. Rcvd 01/05/2021. Legal 04/20/2023. Build Thread. Sold 11/9/2023.

  20. #60
    Senior Member smithbks's Avatar
    Join Date
    Mar 2014
    Location
    Atlee, VA
    Posts
    152
    Post Thanks / Like
    Thanks for the information edwardb. Like others, I frequently review your build for reference. It is outstanding!

    Some more progress this weekend and a small setback. I was able to install the remaining carpet in the footbox and the trunk. The footbox was challenging. I left the outside panel off as long as I could knowing it would be tight - and it is! It is ridiculously tight in the footbox so maneuvering carpet behind the tubes is hard. The outer piece covers the front and side together. I couldn't figure out how to get it behind the tubes without getting glue everywhere and prematurely sticking it in place so I decided to cut it at the corner and make 2 pieces. That was much easier to work with, the seam is tight and clean. Next up was the trunk carpet which I ordered from FFR. The site recommended 2 yards but I ordered 3 because I wanted a little extra for some trim. Now I have way too much . I've seen several solutions for battery access but I'm going to try something slightly different. I installed it all as one piece front to back making cuts for the bars, seat belt tabs, etc. I am cutting out the section over the FFMetals battery box and cutting a separate piece slightly oversized to fit on the panel top. I'll put binding on the edges, paint the screw black and use a black washer to hold it down. I'll have access and I think the screws will actually look good with the bound panel.
    ds footbox carpet.JPG
    A couple of notes in the trunk: I do like the FFR carpet matching the interior. The quality could be better as many have noted but it is very workable. Be prepared to vacuum "fuzzies" from everywhere! My MK4 does not have the trunk side panels in front of the rear bar attachment (on the inside). Apparently they stopped making these for later MK4's. I was going to put aluminum there but came up with an easier option that works just as well and can still be removable if need be (although I can't think of any reason). I cut cardboard templates and glued the carpet to it, set it in place and contact cemented the carpet tab that was oversized to the square tube on top. It looks super clean and nice. I got the idea from others who have done this with the front to hide the seat belts. Personally I like the look of the belts, so I left them exposed. I'm really pleased with the outcome and happy I got to use my extra Super 77 glue.
    trunk carpet 2.JPGtrunk carpet.jpg
    The setback is with the throttle. Everything was working like it should until I was threading the final tube and my tap broke in the tube. I was working slow, backing out, etc. but must have done something wrong. I couldn't drill it out so I had to cut the tube which left it too short. Now I'll need another tube. It's a 10 minute fix, just irritating.
    firewall throttle.JPGthrottle pedal.JPG
    Next up is a slight trim to front lip for the dash clearance and putting the body back on for final fit.
    Mk4 #8340, 351w/427, 3-link, Wilwood 4 piston rear brakes, 3.27 gear, TKO600, delivered June 18th, 2014

  21. #61
    Senior Member smithbks's Avatar
    Join Date
    Mar 2014
    Location
    Atlee, VA
    Posts
    152
    Post Thanks / Like
    Big weekend just wrapped up! The biggest part was Easter!

    For the car, I reached a couple of milestones. I had an opportunity to do a bit of work Saturday and just a little on Sunday, but everything seemed to work this time around (unlike my prior body fitting). Needless to say I am very excited. I keep thinking to myself "this is actually happening" and I will actually have a Cobra soon.

    The first thing was to finish up all odds and ends so I mounted the remaining clips for the electrical, finished taping a few looms, and zip tied neatly where necessary. I re-routed the front harness from outside the 3/4" frame rail to inside. When I did my first body fit I found that if I ran it outside (closest to the tire) it would interfere with the splash guard. By running it inside the rail (engine side) I avoided that and only had to run it over the top outside corner of the radiator. I also added a LED strip to the PS for a courtesy light. Then I painted my charcoal canister (the Jeff Kleiner version) and mounted it high above the rear axle with the vent hose exiting towards the DS rear wheel.

    Next up were the brakes. I done lots of searches so I know I'm not the only one suffering here, but I have had a small leak at the DS caliper from the beginning. I've bled it a number of times, and it doesn't help when my wife sees me and comments "you're doing THAT again". Well, here is what I have done and it appears to finally have worked: I bled them to take a test drive and all seemed well...except the extra work I gave myself when I let the reservoir get too low and suck air. So I go-karted it down the street (about 150 yds to the cul de sac) at 20mph and the breaks were spongy. Uh oh. Drove right back to the garage. I had read the banjo bolt and line could be bad so took it off for inspection - looked great. Replaced the crush washers with copper washers. Decided to bleed the master cylinders. (In my inexperience I did not bench bleed them originally). After bleeding them - BINGO! All is well. One last bleeding of the brakes at the caliper. Let it sit, took it back down the street and it is great. Did several hard stops, good reaction...but I can't learn too much at 20mph and I didn't want to go faster in my cul de sac.

    Final prep item was the pinion angle. I have been struggling with too much of the drive shaft sticking out of the tranny (2"+). Talked with FFR and they wanted me to zero out the angle because all of my equipment was the standard stuff and we needed to baseline the issue. I also added the 1/4" spacer I had taken off the TKO back on it to return it to a 3/4" spacer total. That helped the engine a little for hood clearance too. Then I set the pinion flange angle to up 3 degrees. My crankshaft is pointed down to about 4 degrees so I'm not quite at zero but close. Anyways, the shaft is now only about an inch showing so it seems to be mission accomplished. Tightened everything down.

    I clearanced 1/8 inch off the dash lip on the body and then put it in place. I am VERY pleased to report that it lined up well. Where I had problems before are now solved. The doors are forward enough that the hinges swing freely and everything lines up. I did tear the rear aluminum bulb seal at the very back and will need to replace that, but oh well. Even the roll bar fit with minimal modification to the rear bar hole. I can't tell you how happy I am right now. So much so I forgot pictures and will have to go back to take them!

    I'm going to Greensboro Friday to meet with Whitby's and get all set for paint.
    Mk4 #8340, 351w/427, 3-link, Wilwood 4 piston rear brakes, 3.27 gear, TKO600, delivered June 18th, 2014

  22. #62
    Senior Member smithbks's Avatar
    Join Date
    Mar 2014
    Location
    Atlee, VA
    Posts
    152
    Post Thanks / Like
    I didn't actually do anything on my car this weekend but I did get some valuable information that might help. I drove to Greensboro to meet with Jeff at Whitby Motorcars about doing the paint and bodywork. I can't say enough about what a good impression Jeff made. I've read the many referrals and seen his finished work, and he is as good as both. Just a good guy that loves what he is doing. I got to see the entire shop, including over 10 cobras in various stages of completion and one super ugly aurora? replica with a long flat nose and a hiked up butt - yuck. Well, we decided that I would drive it this summer and drop it off in the fall to have it back in plenty of time for spring driving. I asked all about what I could and couldn't do before bringing it to him and he gave me guidance but basically said "there's nothing you can do that we can't fix"

    So my short list to get it ready for title is: slightly trim the doors and trunk so they open and close fine, no more; headlights and running trim; temporary secure splash guards, hood scoop cutout. I really am torn here as my engine won't clear without the scoop but if I misalign it I'm buying a new hood for Jeff to cut and install Hoping to get this titled in less than a month...we'll see.
    Mk4 #8340, 351w/427, 3-link, Wilwood 4 piston rear brakes, 3.27 gear, TKO600, delivered June 18th, 2014

  23. #63
    Senior Member edwardb's Avatar
    Join Date
    Feb 2011
    Location
    Lake Orion, Michigan
    Posts
    10,567
    Post Thanks / Like
    Great progress! Don't freak out about the scoop and cutting the hole in the hood. But I agree it's a little scary. I personally don't like the sequence provided in the FFR instructions. My recommendation: (1) Very first step, get the hood scoop trimmed and sized the way you want it. It comes oversize. Then lay out and drill the mounting holes around the edges. Be as careful as you can to make them parallel to the edges and evenly spaced. (2) With the hood fitted to the opening and centered the way you want it, determine the location for the scoop. The instructions from FFR are OK for this, but be sure you're happy with where it's located compared to the inner shell of the hood. Note also that if you're doing stripes, getting the hood and scoop centered are especially critical as it just fits inside the stripes. (3) With the scoop located, mark and drill the mounting holds using the scoop as a guide. (4) Now use the holes to determine the location of the hole in the hood. Again, the size instructions for FFR are OK, but using the holes you'll know it's in the exact right location. You will need to put some filler between the hood layers once the hole is made. More details plus pictures in my build thread: http://www.ffcars.com/forums/4201346-post128.html
    Build 1: Mk3 Roadster #5125. Sold 11/08/2014. Build 2: Mk4 Roadster #7750. Sold 04/10/2017. Build Thread
    Build 3: Mk4 Roadster 20th Anniversary #8674. Sold 09/07/2020. Build Thread and Video. Build 4: Gen 3 Type 65 Coupe #59. Gen 3 Coyote. Legal 03/04/2020. Build Thread and Video
    Build 5: 35 Hot Rod Truck #138. LS3 and 4L65E auto. Rcvd 01/05/2021. Legal 04/20/2023. Build Thread. Sold 11/9/2023.

  24. #64
    Senior Member smithbks's Avatar
    Join Date
    Mar 2014
    Location
    Atlee, VA
    Posts
    152
    Post Thanks / Like
    Sorry for the delay in posting an update. It seems like the progress is now pretty slow and detailed. Below is what I have completed:
    =trunk alignment and lock with bulb seal around opening

    =re-aligned doors (for the hundredth time!). The driver's side fits like everyone says - poorly. Pushed in at the front and out at the back. I did my best to align the body and screw it in, but the door will need filler at the front. From searching various forums I see that this is extremely common so I am not too concerned. The passenger side fits near perfectly. I had to clearance the back edge some but that was it. All doors and deck lids required minor trimming to get a decent fit without binding.

    =Installed the windshield. I did have to open the slots a little for the right fit but the chrome tabs FFR provides covers them. I used the template I found on the forum for the angle of the windshield and that worked really well. Plus I reused my old spacer for the body buck so no extra parts! I pushed the windshield down as hard as I could and I have a tight seal at the dash hoop, but a gap at the fenders where it dips. I even took the dash out to see if I could push it down further and that didn't help. Is this another area where the bodywokr fixes it? windshield dash seal.jpgwindshield fender gap.jpg

    =Installed the rear view mirror and side mirror because I plan to title it and drive it before taking it for paint later this year

    =Installed the exhaust hangers. The pipes seem to be in really good alignment so no major adjustments. I also applied two tips I recently read about. I bought brass nuts for the pipe to header connection which will help with future anti-seizing of the nuts. I also only screwed the hanger into the top hole on the pipe tab and did not crank the nut down tight to prevent the tab from being torn off later.

    =went through all of my parts to catalog what was left and realized I had a trunk prop rod from Breeze I forgot about. I can put that on and remove the piece of wood I have been using!

    It is looking good and feeling better. If I can get the front hood on and aligned and cut the scoop this weekend I will be in great shape. I worked for a few minutes on the door locks and they gave me enough trouble I decide to come back to that job soon.
    exterior progress.jpg
    Mk4 #8340, 351w/427, 3-link, Wilwood 4 piston rear brakes, 3.27 gear, TKO600, delivered June 18th, 2014

  25. #65
    Senior Member edwardb's Avatar
    Join Date
    Feb 2011
    Location
    Lake Orion, Michigan
    Posts
    10,567
    Post Thanks / Like
    My Mk4 windshield has a little bit of a gap under the gasket in the fender valleys like you pictured. But not that much. Need to make sure the windshield posts are pulled down as far as possible. Sounds like maybe you are since the gasket looks pretty tight across the top. The angle of the windshield will affect the fit of the gasket, including that area. So make sure it's exactly right. Really nothing your body shop can do to fix that. Interested in what others may add. I'm hoping a little time out in the sun and driving will help mine settle completely closed.
    Build 1: Mk3 Roadster #5125. Sold 11/08/2014. Build 2: Mk4 Roadster #7750. Sold 04/10/2017. Build Thread
    Build 3: Mk4 Roadster 20th Anniversary #8674. Sold 09/07/2020. Build Thread and Video. Build 4: Gen 3 Type 65 Coupe #59. Gen 3 Coyote. Legal 03/04/2020. Build Thread and Video
    Build 5: 35 Hot Rod Truck #138. LS3 and 4L65E auto. Rcvd 01/05/2021. Legal 04/20/2023. Build Thread. Sold 11/9/2023.

  26. #66
    Senior Member smithbks's Avatar
    Join Date
    Mar 2014
    Location
    Atlee, VA
    Posts
    152
    Post Thanks / Like
    Is there a place to shim from underneath the valleys, and is that even a good idea?
    Mk4 #8340, 351w/427, 3-link, Wilwood 4 piston rear brakes, 3.27 gear, TKO600, delivered June 18th, 2014

  27. #67
    Senior Member edwardb's Avatar
    Join Date
    Feb 2011
    Location
    Lake Orion, Michigan
    Posts
    10,567
    Post Thanks / Like
    Quote Originally Posted by smithbks View Post
    Is there a place to shim from underneath the valleys, and is that even a good idea?
    I don't think there's any way to get that area to budge. Don't think you'd want to anyway. Likely to have other unintended consequences, like messing up hood alignment. Curious to hear if others have seen this problem and what if anything they may have done about it. FWIW, I've seen a couple builds that had the opposite problem. The windshield sits OK on the corners and in the valleys, but is open across the center. Now that's really unfortunate.
    Build 1: Mk3 Roadster #5125. Sold 11/08/2014. Build 2: Mk4 Roadster #7750. Sold 04/10/2017. Build Thread
    Build 3: Mk4 Roadster 20th Anniversary #8674. Sold 09/07/2020. Build Thread and Video. Build 4: Gen 3 Type 65 Coupe #59. Gen 3 Coyote. Legal 03/04/2020. Build Thread and Video
    Build 5: 35 Hot Rod Truck #138. LS3 and 4L65E auto. Rcvd 01/05/2021. Legal 04/20/2023. Build Thread. Sold 11/9/2023.

  28. #68
    Not a waxer Jeff Kleiner's Avatar
    Join Date
    Feb 2011
    Location
    Bloomington, Indiana
    Posts
    8,066
    Post Thanks / Like
    Time in the sun on a hot day will relax the gasket somewhat. The cowl on the Mk4 has more curve than the earlier cars but I don't think the shape across the bottom of the windshield frame was adjusted for it, therefore it hits in the middle but not the edges.

    RE: fitting the door latches: (Note that this is all to be done after you have adjusted the doors in the openings and have them opening & closing without binding on the body. Also note that the driver's side often needs the laser cut spacer behind the latch mechanism. The passenger side usually mounts directly to the door with no spacer). First of all chamfer the hole on the striker that the latch pin goes into. Elongate the striker mounting holes on the frame tab outward. Install the striker on the chassis then engage the latch mechanism onto it. You're going to bring the door to the latch rather than attaching it to the door and trying to adjust the striker meet it. Bring the door in so that the latch mechanism sits flush on it, drill the holes and install the mounting screws. That will get you about 99% there; the final 1% is moving the striker in or out as necessary to get the best matchup of the body lines.

    Jeff

  29. #69
    Senior Member smithbks's Avatar
    Join Date
    Mar 2014
    Location
    Atlee, VA
    Posts
    152
    Post Thanks / Like
    It has been a little while so I thought I would get an update in place and then follow it in a few weeks with a detailed update with photos.

    Right now the car is on the road with a title and tags!! It has been a blast driving it, although I am only at about 60 miles right now. The reason is a nagging parking brake problem that caused me to fail my inspection. So I'm driving with a Rejection sticker until the parts arrive tomorrow to fix it. The problem is as follows: the cable needed to be shortened to fit the Wilwood 4-piston brakes and to use the special clevis. I used a swage tool and the stop ferrule but it just won't hold it at the caliper. It has twice pulled through at inspection time. Very, very frustrating. I have the Lokar universal parts coming to fix it and will have the full inspection Friday or Monday.

    In my little amount of driving I am really impressed with the power. I haven't done much as I'm still shaking it down and checking all adjustments but who can resist going from 35mph to 75mph at the edge of the on ramp on I95?? The stiff suspension takes getting used to also. I went over a bump in the road (concrete to asphalt) that would have thrown me from the car without the harness - LOL! All in all it is a pure joy.

    I still have to finish off the final items like wind wings and I am already lamenting dropping it off with my painter for months when the cold weather comes.
    Mk4 #8340, 351w/427, 3-link, Wilwood 4 piston rear brakes, 3.27 gear, TKO600, delivered June 18th, 2014

  30. #70
    Senior Member metros's Avatar
    Join Date
    Jun 2013
    Location
    NoVA
    Posts
    1,064
    Post Thanks / Like
    Could you elaborate on the VA registration process? I'm building an 818 in winchester, VA and haven't come across a black & white checklist/rules/etc. Did you need a windshield de-fogger?

  31. #71
    Junior Member
    Join Date
    Jun 2015
    Posts
    9
    Post Thanks / Like
    Does anyone know required accessories for titling a MK4 Roadster as a replica in Virginia? Do I need heater/defroster, full bumpers, reverse lights?

  32. #72
    Senior Member smithbks's Avatar
    Join Date
    Mar 2014
    Location
    Atlee, VA
    Posts
    152
    Post Thanks / Like
    It has been a long time since my last post because not much has been going on. I took it in for paint and body work quite some time ago...but the BIG news is I brought my baby home Friday! It is UNBELIEVEABLE! I could stare at it for hours - but only until the sun comes out and then I'm driving again. It's too cold to do much driving, but I'm getting some seat time. I have some odds and ends to tie up before I can graduate the build officially. Here are some early photos. As soon as I get a few things done I'll post more and move to the graduation. What a pure joy!cobra1.jpgcobra2.jpgcobra3.jpg
    Mk4 #8340, 351w/427, 3-link, Wilwood 4 piston rear brakes, 3.27 gear, TKO600, delivered June 18th, 2014

  33. #73
    Senior Member wareaglescott's Avatar
    Join Date
    Apr 2016
    Location
    Auburn, AL
    Posts
    2,146
    Post Thanks / Like
    looks great. Congrats on getting it back!
    MK4 #8900 - complete kit - Coyote, TKO600, IRS - Delivered 6/28/16 First Start 10/6/16 Go cart - 10/16/16 Build completed - 4/26/17 - 302 days to build my 302 CI Coyote Cobra - Registered and street legal 5/17/17
    Build Thread http://thefactoryfiveforum.com/showt...e-build-thread
    PHIL 4:13 INSTAGRAM - @scottsrides

  34. #74
    Senior Member jlfernan's Avatar
    Join Date
    Feb 2011
    Location
    Port Orange, Fl
    Posts
    323
    Post Thanks / Like
    Blog Entries
    1
    Quote Originally Posted by smithbks View Post
    The setback is with the throttle. Everything was working like it should until I was threading the final tube and my tap broke in the tube. I was working slow, backing out, etc. but must have done something wrong. I couldn't drill it out so I had to cut the tube which left it too short. Now I'll need another tube. It's a 10 minute fix, just irritating.
    firewall throttle.JPGthrottle pedal.JPG
    Car's looking great. Three question 1-Did Mike send you instructions for the mechanical throttle?, 2-What measurement did you use for the rod end bearing towards the center of the firewall, and 3-What keeps everything lined up? It looks to me the shaft running through the rod bearings could easily move side ti side. Thanks.

Page 2 of 2 FirstFirst 12

Posting Permissions

  • You may not post new threads
  • You may not post replies
  • You may not post attachments
  • You may not edit your posts
  •  

Stewart Transport

Visit our community sponsor