Forte's

Visit our community sponsor

Thanks Thanks:  0
Likes Likes:  0
Page 1 of 2 12 LastLast
Results 1 to 40 of 74

Thread: Brian's Virginia build

  1. #1
    Senior Member smithbks's Avatar
    Join Date
    Mar 2014
    Location
    Atlee, VA
    Posts
    152
    Post Thanks / Like

    Brian's Virginia build

    I'm a little late starting this build thread but several things got in the way in the meantime. Anyway, here goes...

    I've been enamored with the '65 C**** ever since I was a kid. I wrote book reports on it, built plastic models, bought the matchbox cars, and always stopped to admire any picture, or the seldom seen car. I also have wanted to build a car, so when I saw the FFR kit I was sold immediately. I have younger kids (12and under) but plan to make this as much a family event as possible. I still remember building an old 5 series BMW with my dad, ground up.

    (This is my first blog post so I'm still figuring this out. Pictures from my iPhone seem too large to post)

    I took possession June 18th with a pretty smooth delivery by Steve at Stewart. Then I went to inventory the boxes and was pleasantly surprised that FFR had caught up on a lot of items (like spindles). Once that was done I went right to the suspension before leaving for a mission trip to Costa Rica. To date I have completed the front and rear suspension (minus springs I'm waiting on), fuel tank, and steering rack.

    I'll post pictures with more details of each step as soon as I figure out the upload, but I knew if I waited any longer I'd never do it.

    By the way, I've been reading the forums, a few posts, and found you guys incredibly helpful. Hopefully my experiences will be helpful too!

    Regards,
    Brian

  2. #2
    Senior Member smithbks's Avatar
    Join Date
    Mar 2014
    Location
    Atlee, VA
    Posts
    152
    Post Thanks / Like
    hoisted.jpgOk - I read the instructions and reduced the size of my photos. Here is my car on the Stewart truckdelivery.jpg
    Underneath my car was an 818 and there was a FIA also in the truck. Delivery was super smooth
    Last edited by smithbks; 07-06-2014 at 12:42 PM.

  3. #3
    Senior Member smithbks's Avatar
    Join Date
    Mar 2014
    Location
    Atlee, VA
    Posts
    152
    Post Thanks / Like
    The first thing I worked on was the front suspension. Some notes on my experience:
    1) the ball joint went in smoothly. So smoothly that I was worried because I had read a lot of horror stories. But it threaded right on and the vice tightened it.
    2) Thank you to the forums for helping me get the castle nuts torqued. I couldn't get them tightened without spinning the stud until I read about jacking the spindle to relieve pressure and then most importantly using a dremel to grind a taper on the bottom inside of the space so it wouldn't contact the angled part of the stud. That combination allowed me to get a good torque on it. This might be a stupid question, but with the cotter pin in, what is the risk of not torqueing the castle nut? I didn't chance it - just curious.
    3) the upper arm is completely unadjusted. I'll wait until I have the wheels for that.
    4) The hub went on fine with just a very light tap, no sanding needed. the dust caps were the real bear!
    5) I may have used a few too many rivets on the F-panel. Oh well.
    6) painted panels and coated chassis scratch way too easy. I'll have to touch up a bunch of spots before this is over.

    F panel.jpgfront susp.jpgsusp side.jpg

  4. #4
    Senior Member smithbks's Avatar
    Join Date
    Mar 2014
    Location
    Atlee, VA
    Posts
    152
    Post Thanks / Like
    shock.jpgThe rear suspension was a lot more difficult. The easy part was buying it from Mike Forte. This is a 31 spline axle, 3.27 gear 8.8 with 4 piston Wilwood brakes. Getting the lower tubes to line up was an enormous challenge for me and I moved the jack around a bunch all while my wife helped me by keeping it steady. I finally had to attach the tube to the frame and then attach it to the DS axle mount to get it in. I don't have my upper link spacers or my rear coil springs yet so everything is just hand tightened in right now.

    One area that concerns me is the DS lower shock mount. It seems to have a big gap. The PS went together fine and the multiple spacers took out the gap, but the DS calls for one long spacer and one small spacer. Do I need a different spacer?rear.jpg

  5. #5
    Senior Member smithbks's Avatar
    Join Date
    Mar 2014
    Location
    Atlee, VA
    Posts
    152
    Post Thanks / Like
    Last post for today. I decided to put the fuel tank in. It was fairly straight forward thanks to a little research and watching the FFR video. Two things that helped:

    1) The video showed me not to put the filler tube in until after the tank was strapped in. The took out some frustration. But, the filler tube does touch the frame. Is this a problem?

    2) I bought the longer bolt for the PS strap. It took 5 seconds to see that would be a problem so I just went with the longer bolt.
    tank.jpg

    I've avoided the aluminum long enough and now have to tackle some of it...

  6. #6
    Senior Member smithbks's Avatar
    Join Date
    Mar 2014
    Location
    Atlee, VA
    Posts
    152
    Post Thanks / Like
    I haven't accomplished much lately but I did start working on the brake lines. All I can say is this has taken some of the fun out of it so I am taking a couple nights off to regroup and rethink my strategy to do them right.

  7. #7
    Member
    Join Date
    Sep 2013
    Posts
    76
    Post Thanks / Like
    Quote Originally Posted by smithbks View Post
    1) The video showed me not to put the filler tube in until after the tank was strapped in. The took out some frustration. But, the filler tube does touch the frame. Is this a problem?
    I think it's best to avoid that metal-to-metal contact around your fuel tank. I used some furniture leg pads that had been sitting in a junk drawer for years...screwed them into the bottoms of the frame members that tank lip rests against...bought me a little gap between filler tube and frame.

  8. #8
    Senior Member 68GT500MAN's Avatar
    Join Date
    Feb 2011
    Location
    Fresno, CA
    Posts
    1,808
    Post Thanks / Like
    If you want to insulate the two, just cut a piece out of an old inner tube and place it between the two with a little contact cement.
    Doug

  9. #9
    Senior Member edwardb's Avatar
    Join Date
    Feb 2011
    Location
    Lake Orion, Michigan
    Posts
    10,566
    Post Thanks / Like
    Quote Originally Posted by smithbks View Post
    The video showed me not to put the filler tube in until after the tank was strapped in. The took out some frustration. But, the filler tube does touch the frame. Is this a problem?
    This is a problem that's frequently reported. The same thing happened with my Mk4 build as well. No, you don't want the filler tube contacting the frame. I made 1/4 inch spacers from hard rubber and added at the point where the tank contacts the frame supports. Problem solved. It's also possible to "clearance" the filler tube or the chassis. Seen all of the above.
    Build 1: Mk3 Roadster #5125. Sold 11/08/2014. Build 2: Mk4 Roadster #7750. Sold 04/10/2017. Build Thread
    Build 3: Mk4 Roadster 20th Anniversary #8674. Sold 09/07/2020. Build Thread and Video. Build 4: Gen 3 Type 65 Coupe #59. Gen 3 Coyote. Legal 03/04/2020. Build Thread and Video
    Build 5: 35 Hot Rod Truck #138. LS3 and 4L65E auto. Rcvd 01/05/2021. Legal 04/20/2023. Build Thread. Sold 11/9/2023.

  10. #10
    Senior Member fordboy's Avatar
    Join Date
    Oct 2013
    Posts
    122
    Post Thanks / Like
    Hi Brian... while your at this point, have you seen the rear bumper jack mod where a bolt is put thru the frame and a rod coupling attached to it since you'll have to drop the gas tank in order to get the bumper-jack bolt back in when its time to put body back on ?? You should check out Jeff Kleiners build threads....


    http://thefactoryfiveforum.com/showt...165#post151165

  11. #11
    Senior Member smithbks's Avatar
    Join Date
    Mar 2014
    Location
    Atlee, VA
    Posts
    152
    Post Thanks / Like
    Thanks guys. I'm going to add the spacer to the tubes using an exhaust hanger rubber mount (will cut it up). I'm also going to check out the quick jack mod.

    I made some progress on the brake lines as well and this weekend hope to have pictures up of the new lines...and wheels! I just received my Fedex tracking on it and I could get this to a roller by Sunday!

  12. #12
    Senior Member smithbks's Avatar
    Join Date
    Mar 2014
    Location
    Atlee, VA
    Posts
    152
    Post Thanks / Like
    I'm a little late making an update here but I accomplished some important steps. The brake lines really frustrated me at first so I decided to use the lines sent with the kit as a practice run. Using my Eastwood hand bender I got pretty confident that I could do it. I waffled between using the Cunifer lines and regular steel but decided this isn't really a show car so the bling wasn't necessary. I wanted straight lines that looked good but I'm not trying to draw attention to them. Rather, I want them to stay in the background. (that said, if I could do what edwardb did with ss I would). The final product I think looks pretty good and clean. I bought the regular steel lines. I searched a lot of forum pictures to get ideas on coming out of the footbox and hobrake line1.jpgbrake line2.jpgbrake line3.jpgbrake line5.jpgbrake line4.jpgpefully avoiding any future problems with mounting. I am a little nervous that something will have to be moved later...

  13. #13
    Senior Member smithbks's Avatar
    Join Date
    Mar 2014
    Location
    Atlee, VA
    Posts
    152
    Post Thanks / Like

    Wheels!

    I couldn't resist putting the wheels on the car once they arrived! I know I'll have to take them off and on a few times, but who cares! They look awesome!!wheels tires.jpg


    I also received my rear springs so I finished up the rear suspension. Note that I reversed the Koni shock installation by turning the body down to avoid the panhard bar on the DS. I read a few posts that said the Koni shocks don't care which way they're mounted and won't leak. If anybody has some data to the contrary please share. But then I'll have to figure out how to get them on without the hat interfering...
    rear shock.jpg

    Next up will be to drop the tank and put in 4 rubber squares I cut from an exhaust hanger to lower the filler pipe away from the frame. I plan to look into and install the quickjack bolt mod at this time too. I hope to paint the trunk panels this weekend and prep for installation with my FFMetals battery box. I did buy posterboard to mock up the PS footbox mod...we'll see how that goes.

    Question for you guys: Do you spray the underliner before or after you attach the panels to the frame? I'm thinking before. Also, do you bother painting the interior panels that will be covered with carpet and thermal liner?

  14. #14
    Senior Member smithbks's Avatar
    Join Date
    Mar 2014
    Location
    Atlee, VA
    Posts
    152
    Post Thanks / Like
    I realized in looking this thread over that I never gave the details of the car:
    -Complete Kit MkIV
    -351w 427 from Engine Factory supposed to be 535HP
    -TKO 600
    -Carb with mechanical fuel pump
    -8.8 straight axle from Mike Forte with 4 piston Wilwood brakes and 3.27 gears
    -Mods I am planning thus far are PS footbox, battery box, adjustable seats, glove box
    -Considering a fan shroud and hydraulic clutch

  15. #15
    Carl carlewms's Avatar
    Join Date
    May 2012
    Location
    Nokesville, VA
    Posts
    1,125
    Post Thanks / Like
    "Question for you guys: Do you spray the underliner before or after you attach the panels to the frame? I'm thinking before. Also, do you bother painting the interior panels that will be covered with carpet and thermal liner?"

    I am building a Mk 4 from the basic kit...located in Nokesville, VA.

    I sprayed the underliner before attaching to the frame but I masked off the areas that touched the frame before spraying. My thought was to have make sure the adhesive stuck well and I was not sure it would on the undercoating.

    I recommend use the professional level undercoating...it is thicker than the regular stuff.

    I am using SharkHide on expose aluminum after sanding and treating with a scotch pad.

    Carl
    Mk 4 Roadster
    October 25, 2012 - Kit Arrives
    April 8, 2013 - Build Starts
    August 23, 2015 - Rolling Chassis/Engine & Transmission Installed
    March 26, 2016 - Go Cart

  16. #16
    Carl carlewms's Avatar
    Join Date
    May 2012
    Location
    Nokesville, VA
    Posts
    1,125
    Post Thanks / Like
    Quote Originally Posted by smithbks View Post
    I realized in looking this thread over that I never gave the details of the car:
    -Complete Kit MkIV
    -351w 427 from Engine Factory supposed to be 535HP
    -TKO 600
    -Carb with mechanical fuel pump
    -8.8 straight axle from Mike Forte with 4 piston Wilwood brakes and 3.27 gears
    -Mods I am planning thus far are PS footbox, battery box, adjustable seats, glove box
    -Considering a fan shroud and hydraulic clutch
    Since you have the Wilwood pedal box I would definitely recommend the Forte hydraulic clutch mod.

    Carl
    Mk 4 Roadster
    October 25, 2012 - Kit Arrives
    April 8, 2013 - Build Starts
    August 23, 2015 - Rolling Chassis/Engine & Transmission Installed
    March 26, 2016 - Go Cart

  17. #17
    Senior Member smithbks's Avatar
    Join Date
    Mar 2014
    Location
    Atlee, VA
    Posts
    152
    Post Thanks / Like
    Learned a valuable lesson today...ALWAYS wear my safety glasses when drilling the frame. I got a small piece of metal in my eye and had to have the optometrist remove it. Not fun. So, even though it was just one time out of many drilling, always wear your goggles!

  18. #18
    Senior Member smithbks's Avatar
    Join Date
    Mar 2014
    Location
    Atlee, VA
    Posts
    152
    Post Thanks / Like
    It's been a little stretch since my last update. Life with kids tends to get in the way! Football practice is every day during August, relegating my work to weekends between all the other stuff that needs to get done. So, since my last post here is wht I have accomplished:
    -Installed the rear battery box
    -Installed trunk panels
    -lowered fuel tank with rubber spacers so the filler tube wouldn't contact the frame
    -did a real rough alignment and ride-height adjustment
    -re-installed the DS footbox front wall with the new clutch panel. Installed the new clutch quadrant and re-routed the brake line up through the bottom instead of the front of the footbox. I was worried about heat from the headers.
    -installed the cockpit aluminum

    My next steps will be to run the wiring harness, finish bleeding brakes, adjust the throttle and pedal, and tackle the e-brake. If I can get that done by the end of Aug. it will put me right on track to have the engine and transmission delivered.

    (pictures will be posted in the next entry in a few minutes)

  19. #19
    Senior Member smithbks's Avatar
    Join Date
    Mar 2014
    Location
    Atlee, VA
    Posts
    152
    Post Thanks / Like

  20. #20
    Senior Member smithbks's Avatar
    Join Date
    Mar 2014
    Location
    Atlee, VA
    Posts
    152
    Post Thanks / Like
    Sorry for the sideways view. I need to brush up on my pictures skill!

  21. #21
    Member
    Join Date
    Aug 2014
    Location
    Stafford, VA
    Posts
    91
    Post Thanks / Like
    It's interesting following someone's build - I bought a car that was put together by a vocational school in Texas. Are you going to put in power steering? That is something I want in my MK4.

    Don - Stafford, VA

  22. #22
    Senior Member smithbks's Avatar
    Join Date
    Mar 2014
    Location
    Atlee, VA
    Posts
    152
    Post Thanks / Like
    I'm not planning to do power steering at this time. There are several mods I have considered: power steering, hydraulic clutch, fuel injection, but I chose to keep it simple and relatively period correct. I started out thinking I would build a true replica of a '65 but it didn't take long to realize that was not my true goal. I want a car I built and looks like a replica but doesn't have to be a replica - if that makes sense. Sorry for the long answer. Enjoy upgrading your car - should be fun. You're close to me as well so we should get together one of these days.

  23. #23
    Senior Member smithbks's Avatar
    Join Date
    Mar 2014
    Location
    Atlee, VA
    Posts
    152
    Post Thanks / Like
    I'm sorry I haven't had more updates lately. Like I said earlier - it's football season and I coach so there is little time left over. However, I did pass some important milestones recently in getting the RF harness installed. I also ran the battery cables for my FFMetals trunk battery box. And I finally finished bleeding my brakes and buttoning it up. I decided to run the rear brake line up through the bottom of the footbox and it worked real well. On the harness there is a branch labelled "Hot Rod Only". I was going to diet that out along with a couple of the EFI wires I won't use, but after quite a bit of research the best advice I got was to just tie them out of the way as it wasn't worth the trouble - so that's what I did. I did have to enlarge the engine side footbox panel pass-through to make room for the solenoid wires with the rear harness. Wasn't really too hard with a Dremel. I also had to drill and sand a ground contact under the car, on the trunk frame floor pan, because the wires for the battery box come out under the car. If anyone reading this thinks that is a bad idea - let me know.

    One recommendation I would make is to run your wiring harness before putting the rivets in the trunk aluminum. You'll have better access and it will just be easier to do all around.

    While I wait for my engine to be built I'm going to tackle the dash and the seats. That should make for some decent pictures again. I'll also jump into the ebrake, but first I learned I need special brake end clevis' for my 4 piston Wilwood rears. More research...
    Mk4 #8340, 351w/427, 3-link, Wilwood 4 piston rear brakes, 3.27 gear, TKO600, delivered June 18th, 2014

  24. #24
    2bking's Avatar
    Join Date
    Jul 2013
    Location
    Garland, Texas
    Posts
    799
    Post Thanks / Like

    Brake line routing

    I searched a lot of forum pictures to get ideas on coming out of the footbox and hopefully avoiding any future problems with mounting.brake line4.jpg
    Running the brake line under the frame isn't a good idea. The car has only 4" or so of ground clearance and the frame can make contact with curbs and road bumps. The most likely areas are where you chose to go under the frame. The only parts that are designed to go under the frame are the parking brake cables which isn't a good idea either. An easy fix would be to reverse the bend to go over the frame.
    King
    Roadster #8127, ordered 7/12/13, received 9/11/13
    http://thefactoryfiveforum.com/showt...4-Coyote-Build

  25. #25
    Senior Member smithbks's Avatar
    Join Date
    Mar 2014
    Location
    Atlee, VA
    Posts
    152
    Post Thanks / Like
    Good feedback. I hate taking a finished brake line off, but I'm going to give this a lot of consideration. Interested in other opinions on it as well. Thanks 2bking.
    Mk4 #8340, 351w/427, 3-link, Wilwood 4 piston rear brakes, 3.27 gear, TKO600, delivered June 18th, 2014

  26. #26
    Senior Member edwardb's Avatar
    Join Date
    Feb 2011
    Location
    Lake Orion, Michigan
    Posts
    10,566
    Post Thanks / Like
    Quote Originally Posted by smithbks View Post
    Good feedback. I hate taking a finished brake line off, but I'm going to give this a lot of consideration. Interested in other opinions on it as well. Thanks 2bking.
    Couldn't agree more. Ideally, nothing should hang below the 4 inch frame tubes. As stated, it's extremely low and vulnerable. Something like a brake line is a huge no-no in my book. Especially since there are any number of ways to route without going under the frame. Fix it now while it's relatively easy.
    Build 1: Mk3 Roadster #5125. Sold 11/08/2014. Build 2: Mk4 Roadster #7750. Sold 04/10/2017. Build Thread
    Build 3: Mk4 Roadster 20th Anniversary #8674. Sold 09/07/2020. Build Thread and Video. Build 4: Gen 3 Type 65 Coupe #59. Gen 3 Coyote. Legal 03/04/2020. Build Thread and Video
    Build 5: 35 Hot Rod Truck #138. LS3 and 4L65E auto. Rcvd 01/05/2021. Legal 04/20/2023. Build Thread. Sold 11/9/2023.

  27. #27
    Senior Member smithbks's Avatar
    Join Date
    Mar 2014
    Location
    Atlee, VA
    Posts
    152
    Post Thanks / Like
    I'm making steady progress even though it is slow. I'm down to about an hour or two per week while the boys' football season is here. But, I do have a few updates:

    I was going to do the PS Footbox modification and mocked up the posterboard to get ready. However, my wife was adamant she didn't need it and it wasn't worth the trouble. She's tall (5'9") so a good candidate, but I couldn't convince her. In the end she is who I was doing it for, so if she didn't want it I'll spend my time elsewhere.ps footbox.JPG

    I had my son help me with installing the stock footbox. He did most of the rivets and I only had to help him a little. That was a cool experience. I've had him carefully drill a few of the holes as well. One of my goals is for this to be a family car for generations so I want them to be part of the build.help riveting.JPG

    I also began working on the dash wiring. I'm going really slow and researching a bunch, but my layout is pretty basic so there is a lot of information out there to do it right. I've mocked up the wires, satisfied they will fit correctly and I'm ready to move forward. I did experience one failure that I wrote about on the other forum with the glue. I won't use 3M super 77 for the dash glue anymore as it didn't hold on the bends. Oh well, time to fix that. dash wire.JPG.

    One last thing - it does look good with the seats in place! They're just sitting there right now while I measure for the seat adjuster but it won't be too long before I can put the Dynamat down and then the seats.photo 4.JPG
    Mk4 #8340, 351w/427, 3-link, Wilwood 4 piston rear brakes, 3.27 gear, TKO600, delivered June 18th, 2014

  28. #28
    Senior Member smithbks's Avatar
    Join Date
    Mar 2014
    Location
    Atlee, VA
    Posts
    152
    Post Thanks / Like
    One other problem I encountered was the parking brake cable (big surprise to everyone there!) I have Wilwood 4 piston rear brakes that require the Lokar clip to attach to the drum brake portion. In addition, the cable I ordered from FFR was way too long. You can see below how far it extended past the caliper. I tried lots of different configurations like running it through the ears on the diff but I just had too much cable to bend and route. So after lots of deliberation I decided I would cut the cable to length. I had read others cutting the Lokar clip, sliding the cable in and bending it back, but as I had to shorten the cable anyway I didn't cut the clip. The only ferrules that were readily available were the aluminum ones at Home Depot so I bought those and the swaging? tool to do it. (Side comment - all they had at the store were used so I got them for $10...not bad) I used the next lower crimp hole on the ferrule and it really dug into the aluminum crimping it down tight. After several pulls on the tight cable I think it will hold fine. Rest assured I'll be keeping a close eye on it.

    A couple of notes that may help others on this topic. 1) The brake cable was already sheathed outside and on the cable. Cutting the cable braids with the inner sheath on kept it from fraying. I used the Dremel tool. 2)Then I just used a razor knife to remove it where the ferrule slipped on to get wire-ferrule contact. 3)The outer sheath was alaso cut with a Dremel but very carefully. Keeping it at a slight bend with tension allowed it to break instead of cutting through. Mind you it is very slight tension and a very minor break almost when you are cut through. 4)I routed the cables through the unused 4 link mounts on the chassis (lowest hole). 5)I also borrowed JKleiner's idea to use the rope tie down on the fram to separate the wires (see his thread).

    I have been fairly nervous about screwing this up, so if anyone sees something critically worng here PLEASE call it out.ferrule.JPGlong cable.JPGmounted cable.JPG
    Mk4 #8340, 351w/427, 3-link, Wilwood 4 piston rear brakes, 3.27 gear, TKO600, delivered June 18th, 2014

  29. #29
    Senior Member DamnYankee's Avatar
    Join Date
    Feb 2011
    Location
    Port St Lucie, FL
    Posts
    236
    Post Thanks / Like
    Hey Brian,
    I'm right down the road from you in Mechanicsville. We should get together.
    Ron


    Quote Originally Posted by smithbks View Post
    I'm a little late starting this build thread but several things got in the way in the meantime. Anyway, here goes...

    I've been enamored with the '65 C**** ever since I was a kid. I wrote book reports on it, built plastic models, bought the matchbox cars, and always stopped to admire any picture, or the seldom seen car. I also have wanted to build a car, so when I saw the FFR kit I was sold immediately. I have younger kids (12and under) but plan to make this as much a family event as possible. I still remember building an old 5 series BMW with my dad, ground up.

    (This is my first blog post so I'm still figuring this out. Pictures from my iPhone seem too large to post)

    I took possession June 18th with a pretty smooth delivery by Steve at Stewart. Then I went to inventory the boxes and was pleasantly surprised that FFR had caught up on a lot of items (like spindles). Once that was done I went right to the suspension before leaving for a mission trip to Costa Rica. To date I have completed the front and rear suspension (minus springs I'm waiting on), fuel tank, and steering rack.

    I'll post pictures with more details of each step as soon as I figure out the upload, but I knew if I waited any longer I'd never do it.

    By the way, I've been reading the forums, a few posts, and found you guys incredibly helpful. Hopefully my experiences will be helpful too!

    Regards,
    Brian

  30. #30
    Senior Member smithbks's Avatar
    Join Date
    Mar 2014
    Location
    Atlee, VA
    Posts
    152
    Post Thanks / Like
    Ron,

    I think we met one night at the Chik-Fil-A event. You have a cool car. I've got a month more of football for the boys but let's get together in Nov. I'd love to talk shop!

    -Brian
    Mk4 #8340, 351w/427, 3-link, Wilwood 4 piston rear brakes, 3.27 gear, TKO600, delivered June 18th, 2014

  31. #31
    Senior Member smithbks's Avatar
    Join Date
    Mar 2014
    Location
    Atlee, VA
    Posts
    152
    Post Thanks / Like
    So a little bit of progress to report. But first a mistake not to repeat. I had quite a bit of trouble with the dash. At first I couldn't get the 3M Super 77 to hold the back tabs of the vinyl so the forum helped me with alternatives and I was able to get the proper glue. My next mistake was using spring clamps on the tabs while they dried. The clamps left an impression I was pretty sure would never come out. After about 2 weeks using the heat gun gingerly every day it came back enough not to notice. I have not used any clamps on any vinyl since! The wiring went pretty well so that was not a problem:
    early wiring.JPG

    What followed was what cost me money. I bought the ********** glovebox because I don't plan on ever having a heater in my climate. I read that I could install it from the front so I didn't worry that it was on backorder and went ahead with the dash. I suppose a very careful person could do that. I must not be one. While I was grinding the edges of the hole I slipped and ruined the visible face of the vinyl. No recovery there! After all of my near misses I was finally stopped. I had to re-order the vinyl. To make matters worse I also noticed that I had somehow gotten one of the switch holes out of line and I sould really see it. Anyway, time to start over.

    I can now report that the "re-wire" went well. So well that I was able to hook up a trickle charger to test the lights and everything came on!
    completed dash.jpglights up.jpg

    I am now only weeks away from the engine being delivered and being able to go kart it!
    Mk4 #8340, 351w/427, 3-link, Wilwood 4 piston rear brakes, 3.27 gear, TKO600, delivered June 18th, 2014

  32. #32
    2bking's Avatar
    Join Date
    Jul 2013
    Location
    Garland, Texas
    Posts
    799
    Post Thanks / Like
    time to start over
    I feel your pain. I'm always two steps forward and one step back but I always make something better with the next step forward. I enjoy the challenges.
    King
    Roadster #8127, ordered 7/12/13, received 9/11/13
    http://thefactoryfiveforum.com/showt...4-Coyote-Build

  33. #33
    Senior Member smithbks's Avatar
    Join Date
    Mar 2014
    Location
    Atlee, VA
    Posts
    152
    Post Thanks / Like
    Woo Hooo! Engine just completed and being shipped! Engine Factory is the builder and has done a great job keeping me updated and excited. They sent me pictures throughout the build and a video of the test run. I can't wait!
    Mk4 #8340, 351w/427, 3-link, Wilwood 4 piston rear brakes, 3.27 gear, TKO600, delivered June 18th, 2014

  34. #34
    Administrator David Hodgkins's Avatar
    Join Date
    Feb 2011
    Location
    Corona del Mar, CA
    Posts
    6,062
    Post Thanks / Like
    Blog Entries
    7
    Great to hear your build will be breathing fire soon!

    Do you have a link to the test run?


    FFR 5369 Pin Drive, IRS, Trigos, Torsen, Wilwoods, FMS BOSS 302 "B" cam , Mass-flo. CA SB100 (SPCN) Registered
    Delivered 4/23/06. "Finished" 4/2012 (still not done!)


  35. #35
    Senior Member smithbks's Avatar
    Join Date
    Mar 2014
    Location
    Atlee, VA
    Posts
    152
    Post Thanks / Like
    Lots to update now that I am able to work on the car again!

    The first order of business was to drop the engine in. This took a little preparation because my dad had given me an electric hoist rated to 880lbs earlier this year. Yes, an engine hoist would have been simpler, but with the electric hoist I can use it for a number of things in the garage. My biggest fear was the weight pull on the joists that were under my upstairs bedroom. This isn’t a construction thread so I’ll spare you the details – let’s just say I did a lot of research and braced the heck out of it (as you can see in the pictures) and then used a dead-man brace underneath for added support. My buddy provided some dollies so we just rolled the chassis over to the correct spot. The final result = no problems and peace of mind! The engine is in.hoist.jpgengine.jpg

    I’m choosing to install the transmission separately later. I know it would be easier to put it in with the engine, but it should not be difficult to jack it up under the car later.

    With the engine in I went to hooking up the rest of the wiring. The Engine Factory engine is so simple to work with because everything comes tagged and labelled as to where to hook it up. The only part that bothers me is leaving wires unattached in the harness (EFI wires – blue crank, orange fuel pickup in rear) because I am running a carb with a mechanical fuel pump. I also chose to run the parallel painless fan switch like Jeff Kleiner describes so the green fan thermo switch is left unattached as well. I had to run two new wires back to the fan switch in the dash and connect one into the orange fan wire and one into the brown switch feed wire. I tapped off of the orange wire to the amber indicator light as well. Thanks Jeff! The rest was plug and play for the choke, tach, and sensors. The water temp sensor is located on the thermostat housing and the paniless switch immediately behind it in the manifold. The oil pressure switch was already located and I just had to hook it up.temp.JPG

    I also read quite a bit about mini starters and solenoids and decided to use both. My engine has the mini starter and the builder recommended no solenoid. However, the manufacturer included a diagram to wire off of the solenoid. In the end it was easier to use the solenoid because the RF harness is already wired for it and redundancy just adds extra protection here. The only modification I had to make was to take off the plug for the alternator because I have a 1-wire alternator and extend the wire about 18 inches. The unused brown alternator plug is just a 12v power lead so I can use that for my cigarette lighter plug for charging electronics. From there I wired the solenoid according to the directions which had me run 2 wires to the mini starter solenoid. One was for power and the other from the switch to activate it. solenoid.JPG

    I also finished up the battery cut off switch. I chose to locate mine on the DS in the back of the trunk by the quick jack bolt. It is a good spot that is close to the FFMetal battery box. All of the battery wire and the wire to the alternator are 4 gauge. It was pretty hard to crimp it with my standard wire strippers so in order to get good connections I used either my bench vise or a big set of C-clamps to crimp it down. That seemed to work. Now all of my wiring is hooked up.cutoff.jpg

    Next up, the radiator. The radiator seemed to be one of the easier things to install. The fan went on rather easily, although looking at it now I am seriously considering a fan shroud. After bolting the radiator on and zip tying the bottom I ran the corrugated steel hose. I may be in the minority, but I like the look of the steel hose. I did have to run a short length off of the thermostat to get the T-filler level as the thermostat points upward. My complete kit came with a black plastic T-filler that I am not fond of. I do plan to replace this with a stainless model later. The lower radiator hose looks awkward in the run because you have to go around the front of the frame and then under the x brace. I immediately ordered the brace clamp from Breeze. I have the round tubes but I’m pretty sure I can still make it work as I have to have a clamp there to support the hose. I located the overflow tank on the PS F panel below the T-filler.overflow.jpgengine in.jpg

    My last steps for this week were to run the fuel line and tackle some unfinished business with the brakes. I’m glad I waited on the fuel line because it turns out my pump is on the DS front of the engine. I need to run it under the DS instead of the PS for the most efficient run. I did this by coming across under the trunk with a combination of the rubber hose and the hard line, then down the rear DS wheel well and along the outside of the round tube. The hard line terminated just forward of the DS footbox with about a 12 inch run of rubber hose to the pump. fuel line.JPG

    The brake line was more trouble. Heeding the advice of many of you I am not running it under the frame, but going down the same line as the fuel line. So after disconnecting the rear line (and making as little mess as possible) I began bending and installing the new line. It was actually easier this time because I could come straight up into the DS footbox, straight down the frame, straight up the DS rear wheel well and into the T junction. (Why didn’t I do it this way the first time?)brake line.jpglines.jpg

    That brings me to odds and ends until I put the transmission in. I’m thinking of attaching the matching plug end to the AFCO fan. Anybody know the part # for the female end of the plug? Also looking at horn attachment options and the x brace seems most popular. I still have to tidy up some of the wiring. Finally I need to finish the cockpit. I have the PS covered in Dynamat Xtreme and need to do the DS. It is now ready as I have finished installing the FFR adjustable seat mount to the classic seat. That necessitated me drilling into the large round frame tube, threading the hole, drilling out the FFR bolt and replacing it to get a proper attachment. I’m happy with the final result but it was a PIA to do it.

    Oh, you’ll notice the side pipes are on. I couldn’t resist!

    One final note – my dad came up for Thanksgiving and helped me a little. The best moment was when I had him sit in the DS for a picture. He used to race short track stock cars in South Florida. This was a real treat for him.

    (More pictures in next reply)
    Mk4 #8340, 351w/427, 3-link, Wilwood 4 piston rear brakes, 3.27 gear, TKO600, delivered June 18th, 2014

  36. #36
    Senior Member smithbks's Avatar
    Join Date
    Mar 2014
    Location
    Atlee, VA
    Posts
    152
    Post Thanks / Like
    Mk4 #8340, 351w/427, 3-link, Wilwood 4 piston rear brakes, 3.27 gear, TKO600, delivered June 18th, 2014

  37. #37
    Senior Member smithbks's Avatar
    Join Date
    Mar 2014
    Location
    Atlee, VA
    Posts
    152
    Post Thanks / Like
    By the way - SORRY for the photos not being rotated. I just haven't figured that part out yet
    Mk4 #8340, 351w/427, 3-link, Wilwood 4 piston rear brakes, 3.27 gear, TKO600, delivered June 18th, 2014

  38. #38
    Senior Member Niburu's Avatar
    Join Date
    Feb 2011
    Location
    Richmond, VA
    Posts
    470
    Post Thanks / Like
    Brian and Ron,

    Have you guys been down to the Cars & Coffee Richmond meets?

    http://carsandcoffeerichmond.com/


    Quite a few Factory Fives have shown up, there's even a local 818 bulder said he'll be down once it's built
    2011 Subaru Forester - the DD - uber rare 5spd manual
    1990 Miata - Track Rat, autocrossing cheap POS - love it
    2018 Factory 5 Racing 818 Hardtop Coupe - preapproved by the wife

  39. #39
    Senior Member smithbks's Avatar
    Join Date
    Mar 2014
    Location
    Atlee, VA
    Posts
    152
    Post Thanks / Like
    I know I seem to have long delays between updates, but that's what my job does to me...

    This weekend was a big milestone for me. The transmission is now in! There's really nothing between me and my first start this weekend. Woo Hoo!

    Note for those of you planning to install the transmission separate from the engine - DON'T DO IT! I chose to install my transmission separate for one bad reason and one good reason. The good was that I needed to wait to order it because I had burned through my budget with the engine so the TKO 600 was delayed. The bad was that I was worried about the strain on my floor joists when combining an engine and transmission on the electric hoist. I don't recommend using a hoist unless you do the things I did to reinforce it, and then you don't have to worry. I just over-worried. (I spanned 5 joists perpendicular in two spots with a 2x8 and lag screwed them into the joists. Then I hung a 1 1/2" pipe from the 2x8's and hung the hoist on that so it can move. The final touch was I made a "dead man" out of 2x4's and wedged it under one of the 2x8's when in use to counter the downward pull)
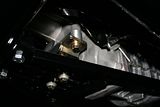
    So here is a description of why you don't do it the way I did: You cannot get the TKO up and into position from underneath with the engine bolted in. You need about 3/4" more to clear the bell housing. So, I ended up having to unbolt the engine again to gain a couple of inches. By now it was fully wired so I didn't pull it all the way out. I should have! Once the engien was swung forward I was able to get the transmission up and in and then fit it into the engine and start the four bolts. The A-frame went in ok as did the tranny mount.

    Question: The bottom of the boss on the TKO still slightly rubs the frame. Mike Forte cut it off for me and there is only about 1/8" left so it looks really good. Will this clear once the driveshaft is in or do I need to worry about it right now?

    So I was feeling really good about my progress until this point. I went to put a wrench on the bolts and tighten them down and it is awful. I have about an 1/8 of a turn of clearance and no room for an air tool for two of the bolts. So for the top two bolts I will spend approximately 2 hours tightening the bolts and killing my shoulder/arm. I'm sure when I'm done I'll fondly remember these times, but for now I think it stinks. Hopefully tonight I can get it done, slip on the driveshaft and get ready to go. That will change my attitude.
    Mk4 #8340, 351w/427, 3-link, Wilwood 4 piston rear brakes, 3.27 gear, TKO600, delivered June 18th, 2014

  40. #40
    Senior Member edwardb's Avatar
    Join Date
    Feb 2011
    Location
    Lake Orion, Michigan
    Posts
    10,566
    Post Thanks / Like
    Quote Originally Posted by smithbks View Post
    Question: The bottom of the boss on the TKO still slightly rubs the frame. Mike Forte cut it off for me and there is only about 1/8" left so it looks really good. Will this clear once the driveshaft is in or do I need to worry about it right now?
    Yes, you need to worry about it. The driveshaft isn't going to change anything. Have you measured your pinion angle yet? Every single TKO install I've seen (including my Mk4) required spacers under the rear transmission mount boss to get it up to the proper angle. This will solve the clearance issue on the frame. Somewhere in the 3/8-3/4-1 inch range. Mike Forte sells a spacer. I made my own. Will look something like this:


    Interesting read with your experience installing the transmission after the engine is in. As relatively easy as it is to get the entire engine assembly in and out, you just reinforced my thought to never try that. My TKO was a very tight fit onto the QuickTime bell housing. I wouldn't have wanted to do that assembly other than outside of the chassis. Unfortunately, some of our best lessons are learned the hard way.
    Last edited by edwardb; 01-12-2015 at 09:42 AM.
    Build 1: Mk3 Roadster #5125. Sold 11/08/2014. Build 2: Mk4 Roadster #7750. Sold 04/10/2017. Build Thread
    Build 3: Mk4 Roadster 20th Anniversary #8674. Sold 09/07/2020. Build Thread and Video. Build 4: Gen 3 Type 65 Coupe #59. Gen 3 Coyote. Legal 03/04/2020. Build Thread and Video
    Build 5: 35 Hot Rod Truck #138. LS3 and 4L65E auto. Rcvd 01/05/2021. Legal 04/20/2023. Build Thread. Sold 11/9/2023.

Page 1 of 2 12 LastLast

Posting Permissions

  • You may not post new threads
  • You may not post replies
  • You may not post attachments
  • You may not edit your posts
  •  

Martin's Dent and Collision Shop

Visit our community sponsor