Midwest Classic Insurance

Visit our community sponsor

Thanks Thanks:  0
Likes Likes:  0
Results 1 to 37 of 37

Thread: VCP Door mounting Tricks

  1. #1
    Administrator
    Wayne Presley's Avatar
    Join Date
    Feb 2011
    Location
    Enterprise Alabama
    Posts
    2,804
    Post Thanks / Like
    Blog Entries
    3

    VCP Door mounting Tricks

    Here's how I mount the doors after mounting sidepods, rear panel, and engine cover.
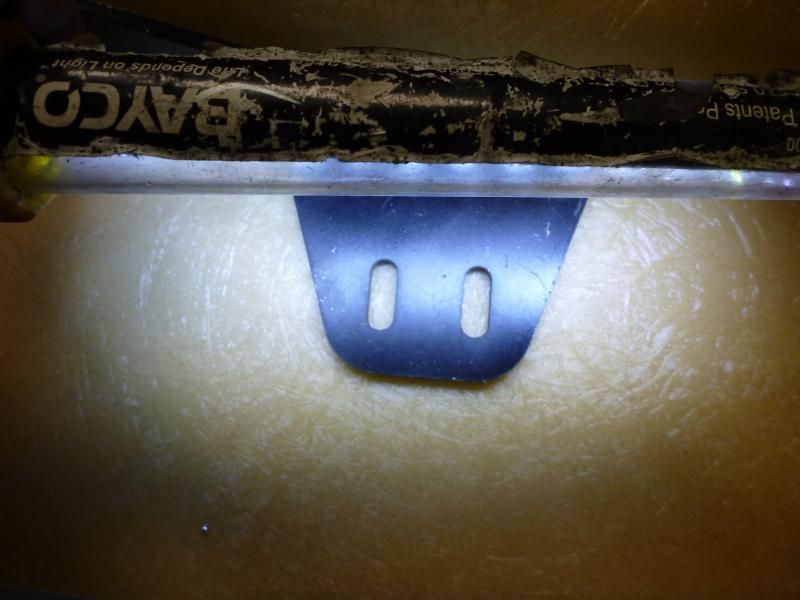
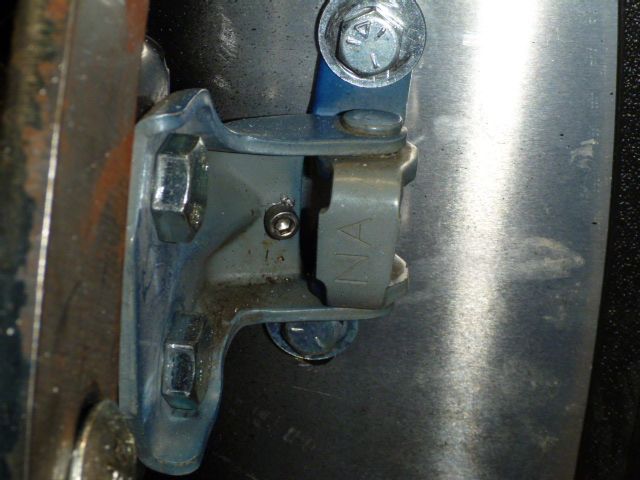
    I mount the striker support up against he body, snug the bolts in the middle of the slots. Hold a bright light behind the bracket so you can see through the fiberglass and drill the holes in the middle of the slots.

    you can see the print through in this pic.


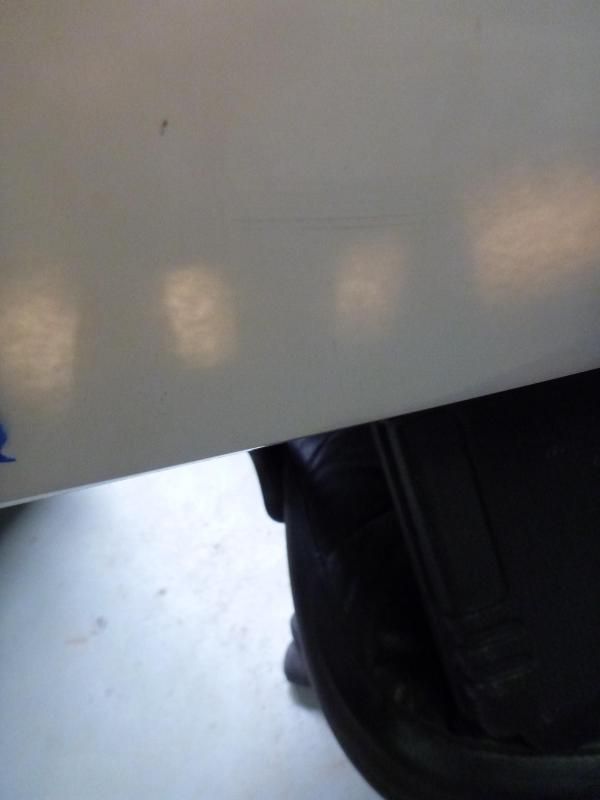
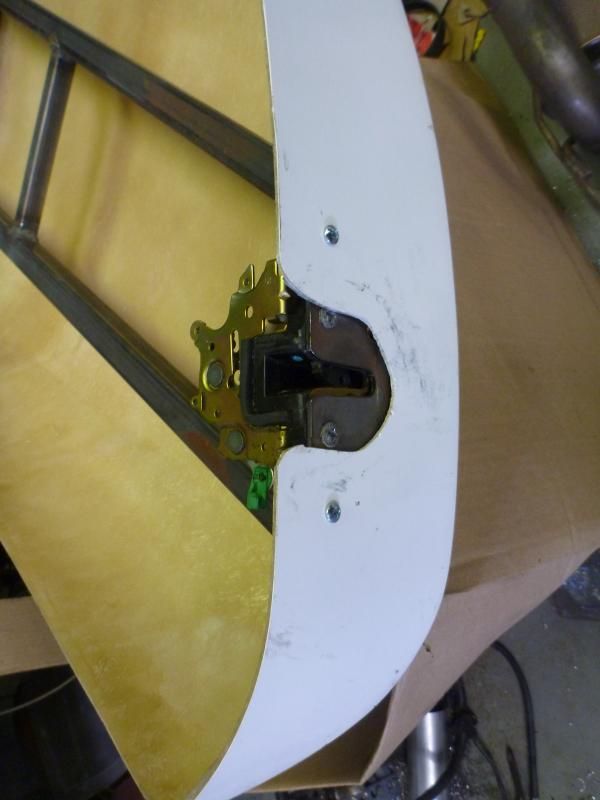
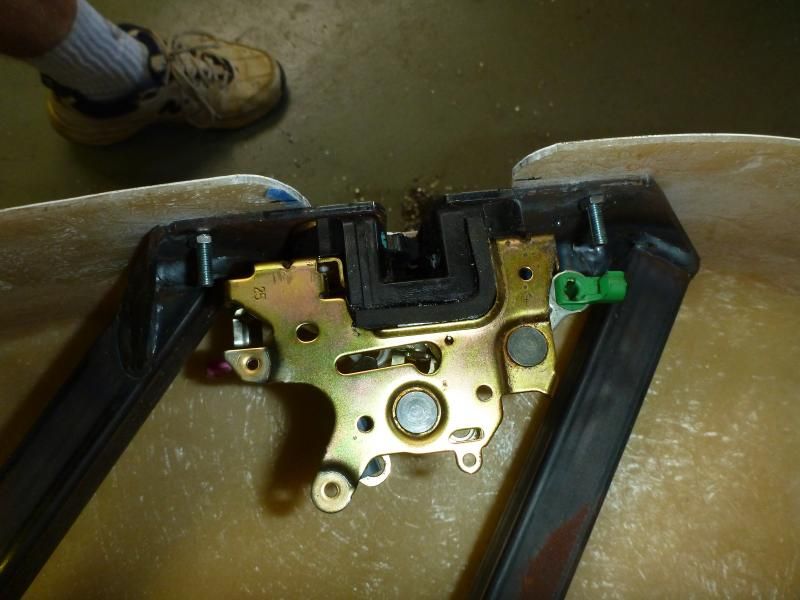
    I mount the latches directly to the frame and countersink the screws. Latch the door frame to the striker and mount the hinges. Adjust the height of the front of the door frame to .250" above the sidepod, then tighten all hinge bolts. The door frame should now swing open and closed easily.
    You can see 2 out of the 3 bolts holding the latch on in this pic.


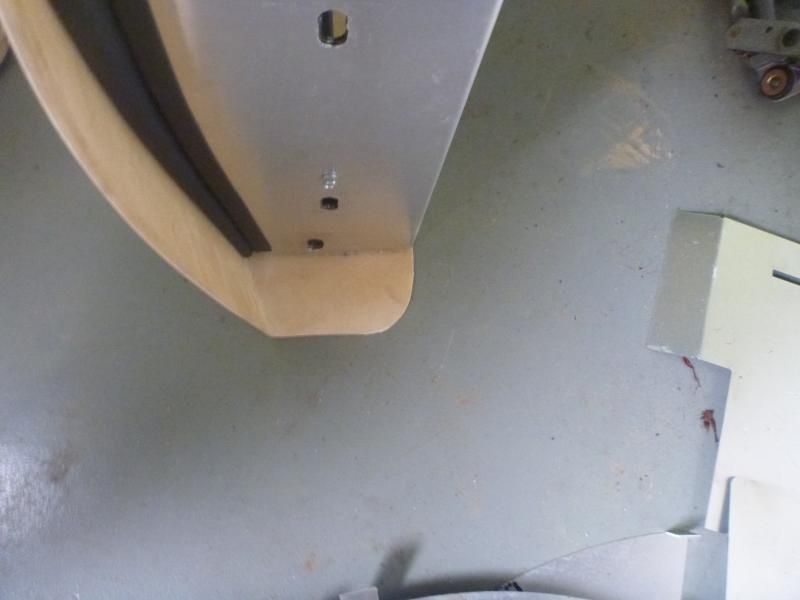
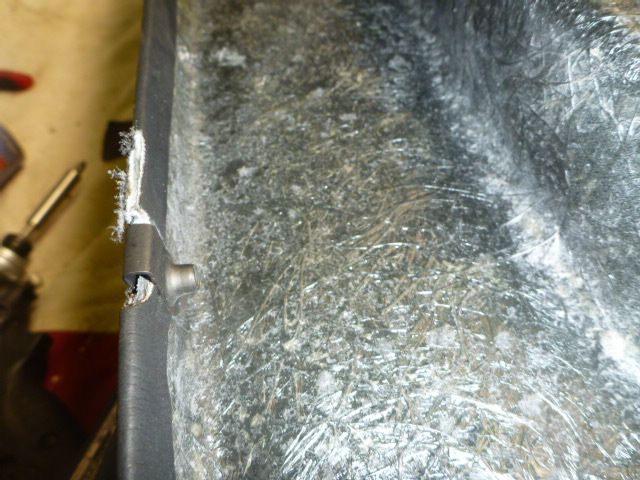
    Trim lower front corner off the door skin so the door can swing without the skin hitting the sidepod.


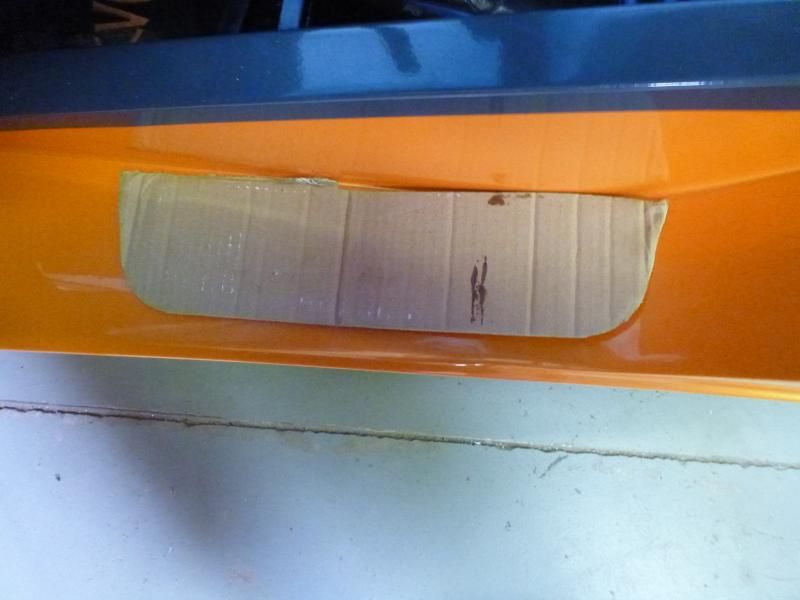
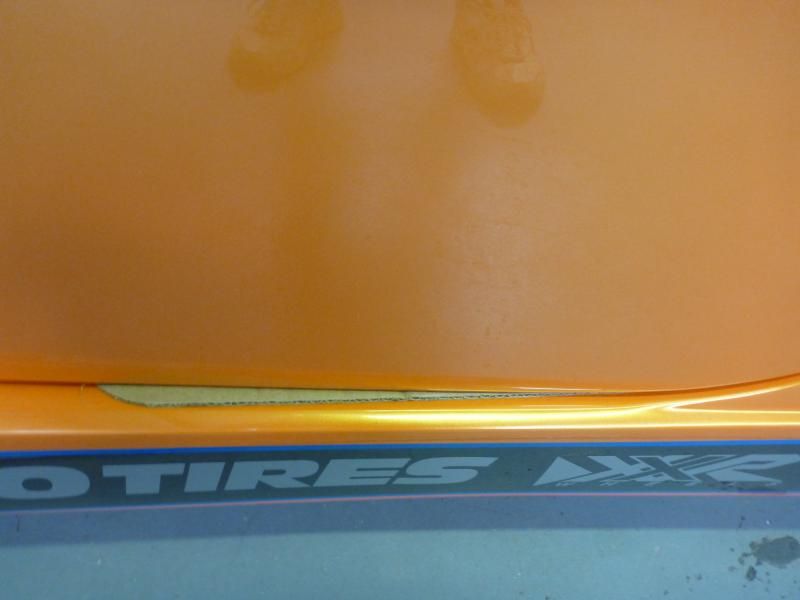
    Now put a piece of masking tape along the edge of the door skin where the striker will go. Cut strips of regular cardboard and lay in the gap between the door and sidepod.
    Door open, I use strips from the bottom of striker to the front of door (only one piece shown)

    Door closed


    Slide door skin into opening and tap on skin to mark on the masking tape where the door needs to be slotted for striker. Measure and mark door skin to allow for the complete striker to clear the skin. See pic 3 above.

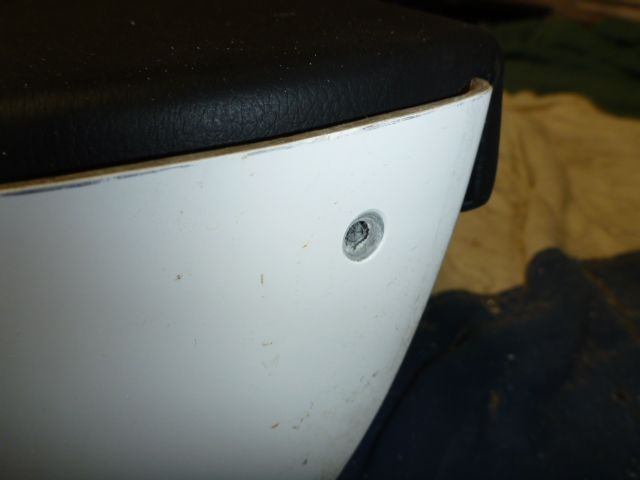
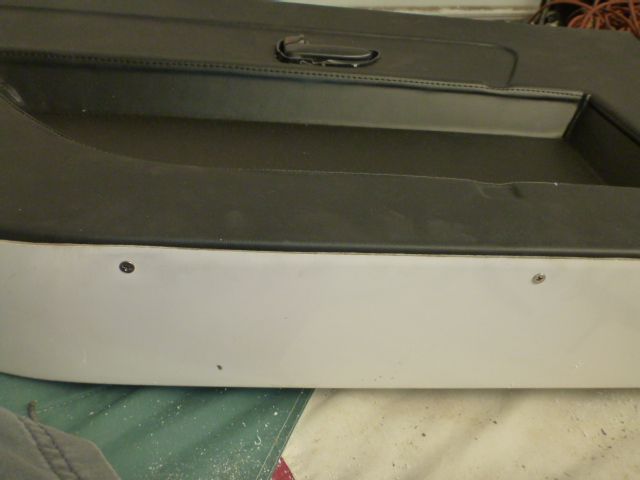
    Drill two 3/16" holes in the door frame as shown by the two 10-32 screws in the below pic.


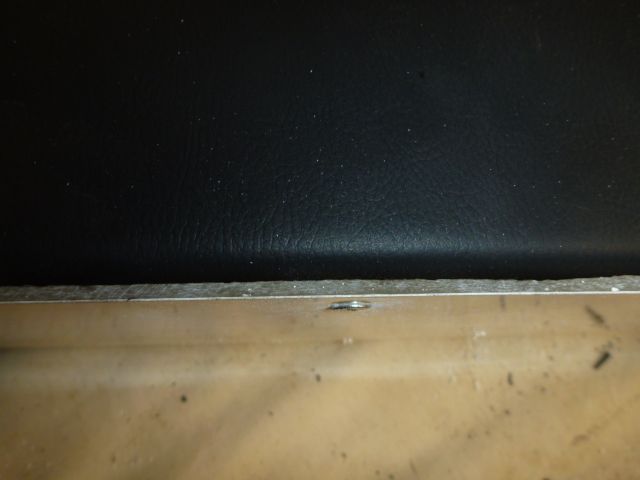
    Slide door skin back in on the cardboard shims, make the back of the door flush with the sidepods and drill top hole only. Install countersunk 10-32 screw in the top hole and tighten snug. Close door and recheck that the door skin is still flush with side pods and drill lower hole. Install countersunk 10-32 screw in the bottom hole and tighten snug.

    On the top front of the door skin, drill the hole for the mirror mount so that edge of the skin overhangs the door frame by 3/16" and install a 10/32 screw. You will be using a different screw for final mounting, the 10-32 is to use until final mounting. Adjust front lower edge to the desired position and mark the lower frame to skin. Unbolt the 3/8" bolts and remove door leaving the hinges in place. Drill the lower hole in the skin and install the countersunk 10-32 screw, you will want a countersink due to the very limited clearance.

    Install front door aluminum, mark and slot aluminum for 3/8" door bolts, install bulb seal on aluminum and final mount it to the door frame with rivets.

    Install complete door back on the car with cardboard shims in place, the 3/8" bolts. Remove cardboard and fine tune hinges for smooth opening if necessary.
    Wayne Presley www.verycoolparts.com
    Xterminator 705 RWHP supercharged 4.6 DOHC with twin turbos

  2. #2
    Senior Member
    Join Date
    Jan 2012
    Posts
    1,112
    Post Thanks / Like
    Very good tips. Really wish this was posted Saturday morning would of saved so much time and headaches. I was wondering what those brackets I had left over were for. Just happened to stumble upon them the other day after I got my powder coated parts back. About how much would you say should you trim from the front edge?

  3. #3
    Administrator
    Wayne Presley's Avatar
    Join Date
    Feb 2011
    Location
    Enterprise Alabama
    Posts
    2,804
    Post Thanks / Like
    Blog Entries
    3
    Maybe 3/4" from the point of the door. See the above pic #4
    Wayne Presley www.verycoolparts.com
    Xterminator 705 RWHP supercharged 4.6 DOHC with twin turbos

  4. #4
    Senior Member
    Join Date
    Jan 2012
    Posts
    1,112
    Post Thanks / Like
    Did you remove the locking mechanism in your car or just in the photo? My door is stuck shut and I can't get it to release.

  5. #5
    PLATNUM Supporting Member
    wallace18's Avatar
    Join Date
    Apr 2012
    Location
    Trenton, Florida
    Posts
    5,382
    Post Thanks / Like
    Quote Originally Posted by 07FIREBLADE View Post
    Did you remove the locking mechanism in your car or just in the photo? My door is stuck shut and I can't get it to release.
    I made the locking mechanism inop. on both my doors. What good would it be on a roadster anyway IMO.

  6. #6
    Administrator
    Wayne Presley's Avatar
    Join Date
    Feb 2011
    Location
    Enterprise Alabama
    Posts
    2,804
    Post Thanks / Like
    Blog Entries
    3
    There are two locks on the rear door latches, regular locks and the child lock. Make sure both are unlocked.
    Wayne Presley www.verycoolparts.com
    Xterminator 705 RWHP supercharged 4.6 DOHC with twin turbos

  7. #7
    Senior Member
    Join Date
    Feb 2011
    Posts
    607
    Post Thanks / Like
    Thanks for posting this Wayne, it saved me a ton of time and mistakes. Had I followed the manual it would not have been correct. Their method of mounting the striker is not correct, your's ensures it lines up with the underbody bracket that mounts to the chassis. Once again, building this car would not be possible without the help of the community.

  8. #8
    Senior Member
    Join Date
    Jan 2012
    Posts
    1,112
    Post Thanks / Like
    Yes very true. Thanks Wayne it help a bunch when I did my passenger door today. The manual sucks with trying to explain on how mount the doors. Do you happen to have a fender headlight how to. That's my next hurtle to conquer and it's not going to well.

  9. #9
    Member CanadianYank's Avatar
    Join Date
    Sep 2014
    Location
    Carstairs AB
    Posts
    61
    Post Thanks / Like
    Blog Entries
    2
    Wyane, Excellent write up thank you. Booked marked for build!

    Frank
    The most important things in the world have been accomplished by people who don't give up and have just kept on trying...

  10. #10
    Administrator
    Wayne Presley's Avatar
    Join Date
    Feb 2011
    Location
    Enterprise Alabama
    Posts
    2,804
    Post Thanks / Like
    Blog Entries
    3
    Final door fitting tips:
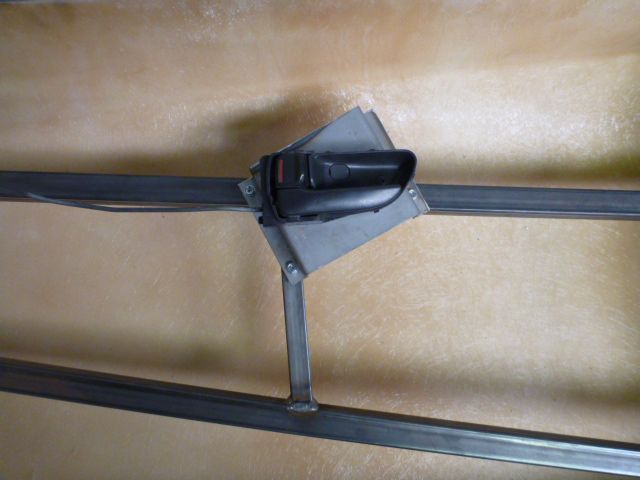
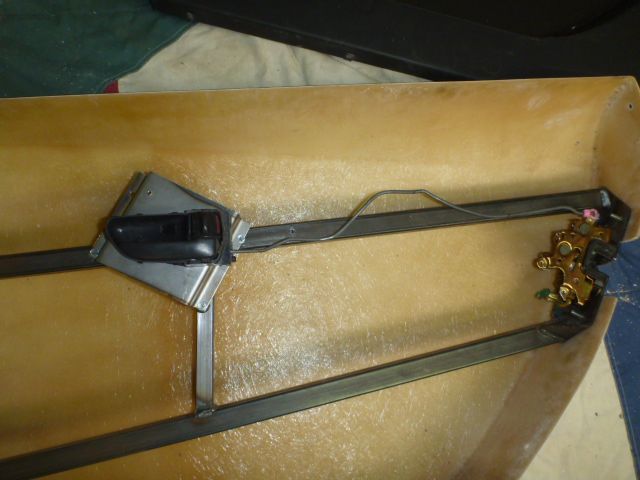
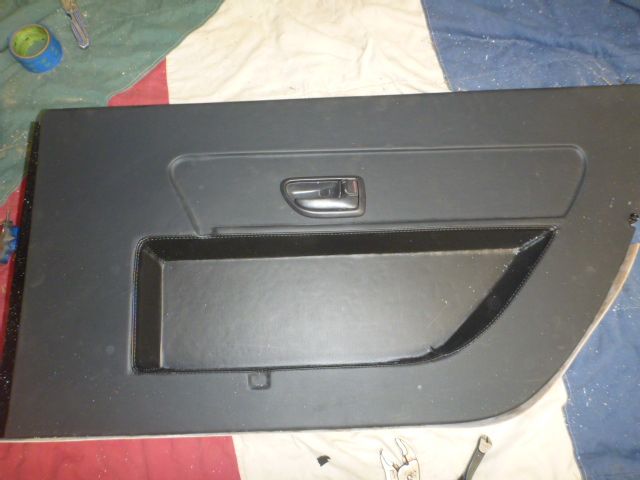
    I used the FFR supplied aluminum piece to mark the cutout for the door release handle. Then I mount the panel to the door using 10-32 speed nuts and countersunk flat top phillips screws.


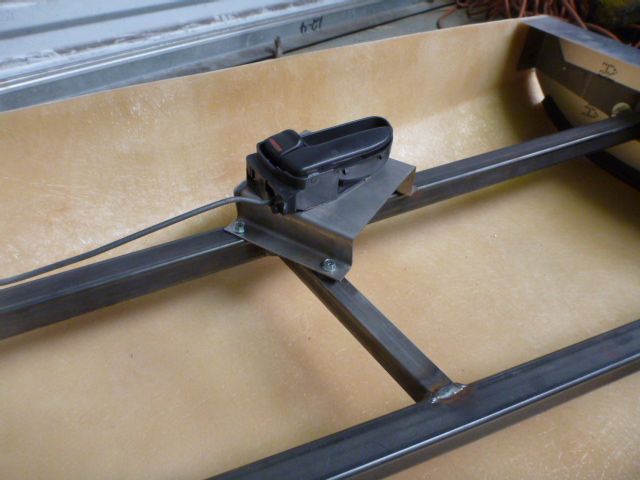
    I build a raised plate to mount the door handle to on the door frame and with the handle placed in its cutout, I fully install the panel. I screw the handle to the plate and then remove the panel.
    Wayne Presley www.verycoolparts.com
    Xterminator 705 RWHP supercharged 4.6 DOHC with twin turbos

  11. #11
    Administrator
    Wayne Presley's Avatar
    Join Date
    Feb 2011
    Location
    Enterprise Alabama
    Posts
    2,804
    Post Thanks / Like
    Blog Entries
    3
    Final door fitting tips:
    I used the FFR supplied aluminum piece to mark the cutout for the door release handle. Then I mount the panel to the door using 10-32 speed nuts and countersunk flat top phillips screws.


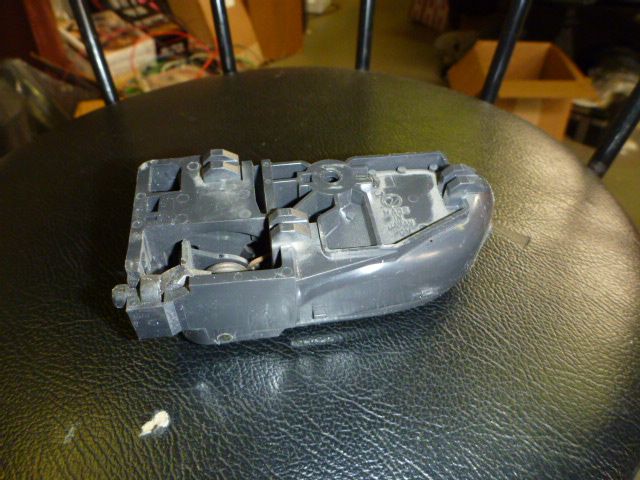
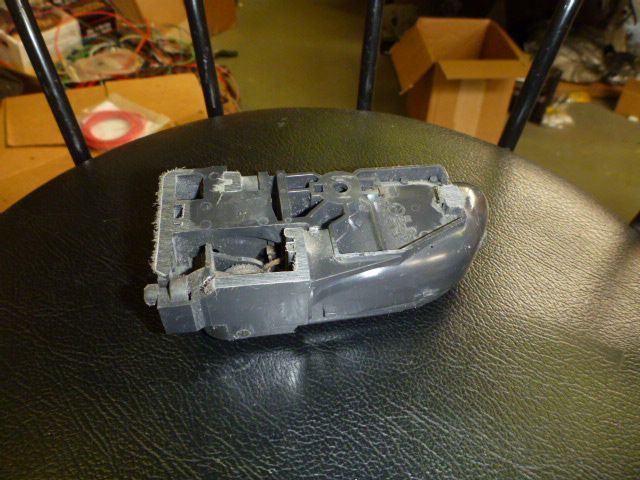
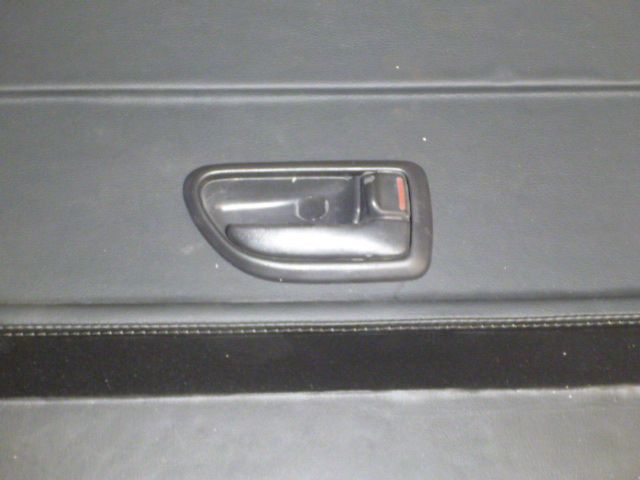
    I remove the claws on the back of the handle with a belt sander
    Before

    After
    Wayne Presley www.verycoolparts.com
    Xterminator 705 RWHP supercharged 4.6 DOHC with twin turbos

  12. #12
    Administrator
    Wayne Presley's Avatar
    Join Date
    Feb 2011
    Location
    Enterprise Alabama
    Posts
    2,804
    Post Thanks / Like
    Blog Entries
    3
    I build a raised plate to mount the door handle to on the door frame. It is about .800" taller than the frame. I place the handle in the door panel and fully mount the panel. I screw the handle onto the plate and remove the panel.


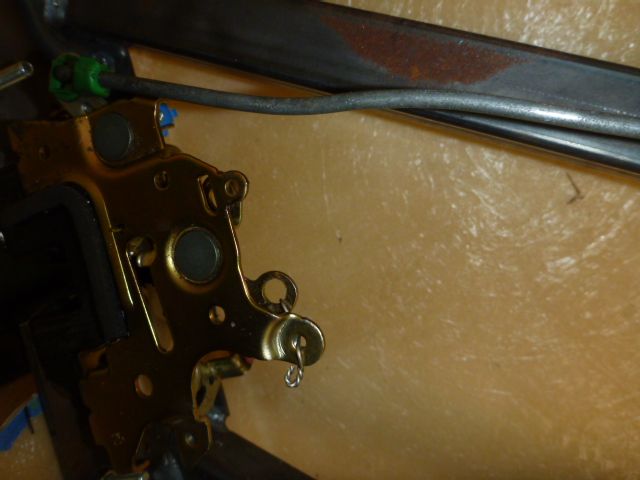
    While you are in there, safety wire the lock unlocked.


    Put the release rod in the handle and it should look like this


    Put gentle Z bends in the rod to make the rod the right length


    reinstall the door panel and snap on handle trim ring


    And you're done
    Wayne Presley www.verycoolparts.com
    Xterminator 705 RWHP supercharged 4.6 DOHC with twin turbos

  13. #13
    PLATNUM Supporting Member
    wallace18's Avatar
    Join Date
    Apr 2012
    Location
    Trenton, Florida
    Posts
    5,382
    Post Thanks / Like
    Great tip!

  14. #14
    Administrator
    Wayne Presley's Avatar
    Join Date
    Feb 2011
    Location
    Enterprise Alabama
    Posts
    2,804
    Post Thanks / Like
    Blog Entries
    3
    On the last car, I also made adjustable door stops to customize just how far the door opens.

    Drill the hinge from the back side and drill and tap it for a 10/32 socket head bolt. Thread the bolt in and adjust the swing of the door by screwing the bolt in or out. When you have it where you want, open the door and put a lock nut on the other side.

    Wayne Presley www.verycoolparts.com
    Xterminator 705 RWHP supercharged 4.6 DOHC with twin turbos

  15. #15
    Moonlight Performance
    Hindsight's Avatar
    Join Date
    May 2014
    Location
    Atlanta
    Posts
    3,402
    Post Thanks / Like
    Quote Originally Posted by Wayne Presley View Post
    On the last car
    Ok Wayne.... how many are you up to now??

  16. #16
    Administrator
    Wayne Presley's Avatar
    Join Date
    Feb 2011
    Location
    Enterprise Alabama
    Posts
    2,804
    Post Thanks / Like
    Blog Entries
    3
    Four
    Wayne Presley www.verycoolparts.com
    Xterminator 705 RWHP supercharged 4.6 DOHC with twin turbos

  17. #17
    Senior Member Buzz Skyline's Avatar
    Join Date
    May 2013
    Location
    Greenbelt, MD
    Posts
    502
    Post Thanks / Like
    Quote Originally Posted by Wayne Presley View Post
    I used the FFR supplied aluminum piece to mark the cutout for the door release handle.
    Is that aluminum piece just for finding the right place to cut for the releases? Or is it supposed to be installed on the door. The manual isn't clear about that. If it is supposed to be mounted, is it only decorative? Or does it serve a purpose?

    -Buzz

  18. #18
    Administrator
    Wayne Presley's Avatar
    Join Date
    Feb 2011
    Location
    Enterprise Alabama
    Posts
    2,804
    Post Thanks / Like
    Blog Entries
    3
    You can leave it off, cover with a contrasting color/texture material, or paint/powdercoat it.
    Wayne Presley www.verycoolparts.com
    Xterminator 705 RWHP supercharged 4.6 DOHC with twin turbos

  19. #19
    Senior Member Buzz Skyline's Avatar
    Join Date
    May 2013
    Location
    Greenbelt, MD
    Posts
    502
    Post Thanks / Like
    Does anyone know the part number and formal description for the FFR supplied aluminum piece with the door release cutout in it?

    I don't seem to have it, and I can't find anything missing on my inventory list that appears to correspond to it either.

  20. #20
    Senior Member gwarden's Avatar
    Join Date
    Jan 2012
    Location
    Surry Va
    Posts
    199
    Post Thanks / Like
    I counter sunk the holes to mount my latch's but the Subaru screws are too short.
    any one else have this problem

  21. #21
    Senior Member
    Join Date
    Jan 2012
    Posts
    1,112
    Post Thanks / Like
    I just replaced the Subaru bolts with some stainless ones I found at the store. Countersunk them too everything worked out perfectly.

  22. #22
    Administrator
    Wayne Presley's Avatar
    Join Date
    Feb 2011
    Location
    Enterprise Alabama
    Posts
    2,804
    Post Thanks / Like
    Blog Entries
    3
    I use longer bolts on them also
    Wayne Presley www.verycoolparts.com
    Xterminator 705 RWHP supercharged 4.6 DOHC with twin turbos

  23. #23
    Mechie3's Avatar
    Join Date
    May 2012
    Location
    Indianapolis
    Posts
    5,174
    Post Thanks / Like
    I replaced mine as well, but used black oxide as they're stronger than stainless and I want to make sure that door has every chance it can to remain in place in the event of an accident.
    Zero Decibel Motorsports
    Check out my new website!
    www.zerodecibelmotorsports.com
    www.facebook.com/zero.decibel.motorsports

  24. #24
    Senior Member gwarden's Avatar
    Join Date
    Jan 2012
    Location
    Surry Va
    Posts
    199
    Post Thanks / Like
    I must be over complicating this but what hardware did you use to mount the brackets that hold the striker.
    I ended up using the aluminum pieces as shims between the door frame and the latch on the inside of the door frame otherwise the latch would not mount flush.

  25. #25
    Senior Member
    Join Date
    Mar 2011
    Location
    Houston
    Posts
    477
    Post Thanks / Like
    Quote Originally Posted by gwarden View Post
    I must be over complicating this but what hardware did you use to mount the brackets that hold the striker.
    I ended up using the aluminum pieces as shims between the door frame and the latch on the inside of the door frame otherwise the latch would not mount flush.
    This is fairly common check http://thefactoryfiveforum.com/showt...-won-t-bolt-up

    The strong medicine I refer to in that thread involved notching, heating with an oxy acetylene torch, bending and re welding the notch for strength.

    cheers

    fred

  26. #26
    Administrator
    Wayne Presley's Avatar
    Join Date
    Feb 2011
    Location
    Enterprise Alabama
    Posts
    2,804
    Post Thanks / Like
    Blog Entries
    3
    I used longer flat headed screws instead of the oval headed for slightly more clearance and tighter door gaps.
    Wayne Presley www.verycoolparts.com
    Xterminator 705 RWHP supercharged 4.6 DOHC with twin turbos

  27. #27
    Senior Member gwarden's Avatar
    Join Date
    Jan 2012
    Location
    Surry Va
    Posts
    199
    Post Thanks / Like
    Quote Originally Posted by freds View Post
    This is fairly common check http://thefactoryfiveforum.com/showt...-won-t-bolt-up

    The strong medicine I refer to in that thread involved notching, heating with an oxy acetylene torch, bending and re welding the notch for strength.

    cheers

    fred
    Ok that post told me that I might want to use carriage bolts but what size? were they supplied with the kit?

  28. #28
    Senior Member gwarden's Avatar
    Join Date
    Jan 2012
    Location
    Surry Va
    Posts
    199
    Post Thanks / Like
    Quote Originally Posted by Wayne Presley View Post
    I used longer flat headed screws instead of the oval headed for slightly more clearance and tighter door gaps.
    what did you use to mount the bracket to the main frame?

  29. #29
    Administrator
    Wayne Presley's Avatar
    Join Date
    Feb 2011
    Location
    Enterprise Alabama
    Posts
    2,804
    Post Thanks / Like
    Blog Entries
    3
    Bracket is mounted to the frame with the FFR supplied carriage bolts
    Wayne Presley www.verycoolparts.com
    Xterminator 705 RWHP supercharged 4.6 DOHC with twin turbos

  30. #30
    Senior Member gwarden's Avatar
    Join Date
    Jan 2012
    Location
    Surry Va
    Posts
    199
    Post Thanks / Like
    thanks wayne I sure didn't find that in the manual

  31. #31
    Senior Member Buzz Skyline's Avatar
    Join Date
    May 2013
    Location
    Greenbelt, MD
    Posts
    502
    Post Thanks / Like
    This is one of my favorite mods, Wayne. Thanks for posting it. It's simple and effective and much more flexible than going with the hinge stops that come with the kit.

    (I used a slightly heavier M6-1.0 bolt, just because I had the right tap and drill handy.)

    Quote Originally Posted by Wayne Presley View Post
    On the last car, I also made adjustable door stops to customize just how far the door opens.

    Drill the hinge from the back side and drill and tap it for a 10/32 socket head bolt. Thread the bolt in and adjust the swing of the door by screwing the bolt in or out. When you have it where you want, open the door and put a lock nut on the other side.


  32. #32
    Member
    Join Date
    May 2014
    Posts
    88
    Post Thanks / Like
    Quote Originally Posted by Wayne Presley View Post
    Here's how I mount the doors after mounting sidepods, rear panel, and engine cover.
    I mount the striker support up against he body, snug the bolts in the middle of the slots. Hold a bright light behind the bracket so you can see through the fiberglass and drill the holes in the middle of the slots.

    you can see the print through in this pic.

    Does anyone have a picture of these striker supports? I'm assuming they are installed in the side skirt?

    Thanks,
    Cf

  33. #33
    Administrator
    Wayne Presley's Avatar
    Join Date
    Feb 2011
    Location
    Enterprise Alabama
    Posts
    2,804
    Post Thanks / Like
    Blog Entries
    3
    Quote Originally Posted by craigfree View Post
    Does anyone have a picture of these striker supports? I'm assuming they are installed in the side skirt?

    Thanks,
    Cf
    they are, supports bolt to the frame in the slots behind the door and below the engine cover
    Wayne Presley www.verycoolparts.com
    Xterminator 705 RWHP supercharged 4.6 DOHC with twin turbos

  34. #34
    Senior Member
    Join Date
    Apr 2015
    Location
    Andover, MA
    Posts
    530
    Post Thanks / Like
    Mine are on the car, so sorry for lousy exposure down in the hole. They are heavy steel brackets.

    Also, you can see in one photo that I have rubber seal where the engine hatch sits. I have not seen where anyone recommends having this in place and not sure that I am going to keep it, but it needs to be there when fitting the doors as it holds the hatch higher than it would be otherwise.

    I hope to keep the seal as I dont like the idea of the hatch rubbing against the side sails.

    -Ben

    IMG_8554.JPG IMG_8553.JPG

  35. #35
    Senior member
    Join Date
    Feb 2011
    Location
    Carlsbad,Ca
    Posts
    60
    Post Thanks / Like
    Blog Entries
    1
    With the latch mounted to the door frame and the striker mounted
    the support is not long enough to reach the striker when bolted
    to the frame.
    Anyone else have this problem ?

  36. #36
    Harley818's Avatar
    Join Date
    Jan 2014
    Location
    Vancouver BC
    Posts
    788
    Post Thanks / Like
    Hi Jim,
    I had to elongate the slotted holes to get the right placement. It was a pain, but now fits right.
    Otherwise I was having a problem where the bracket was forcing the fiberglass behind the striker to be oriented at the wrong angle.
    You want the support behind the striker not to stress the fiberglass but just provide solid backing for the striker.
    Harley
    Bought 2002 Donor Jan 2014
    First Start Jan 18, 2015
    First Drive Feb 14, 2015

  37. #37
    Senior Member
    Join Date
    Aug 2014
    Posts
    165
    Post Thanks / Like
    Quote Originally Posted by Jim Haar View Post
    With the latch mounted to the door frame and the striker mounted
    the support is not long enough to reach the striker when bolted
    to the frame.
    Anyone else have this problem ?
    Hi Jim, I also had this problem and ended up putting an aluminum spacer behind the striker just to extend it slightly. Others have solved this problem with having less than a paint stick thick gap around the doors which thus places the latch close enough to the striker. I am currently looking for a different striker from another vehicle with a longer striker pin. I will keep you updated with what I find.

Posting Permissions

  • You may not post new threads
  • You may not post replies
  • You may not post attachments
  • You may not edit your posts
  •  

Brown County Customs

Visit our community sponsor