Very Cool Parts

Visit our community sponsor

Thanks Thanks:  0
Likes Likes:  0
Results 1 to 13 of 13

Thread: Help!!! Body on chassis problem!

  1. #1
    PLATNUM Supporting Member
    wallace18's Avatar
    Join Date
    Apr 2012
    Location
    Trenton, Florida
    Posts
    5,381
    Post Thanks / Like

    Help!!! Body on chassis problem!

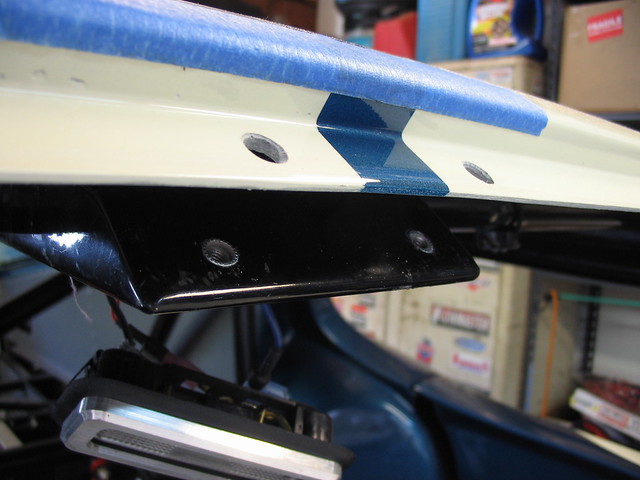
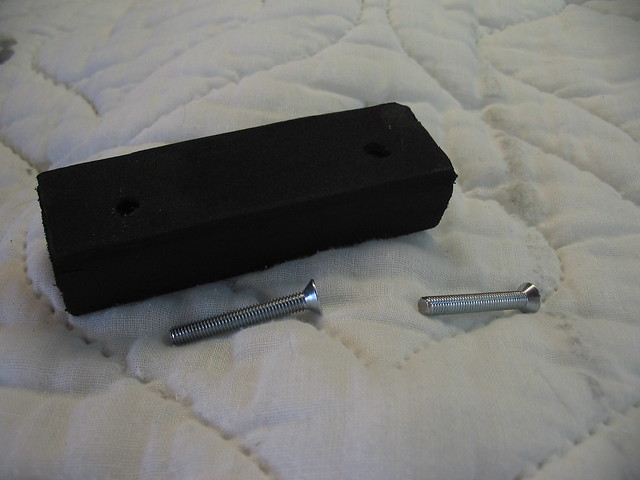
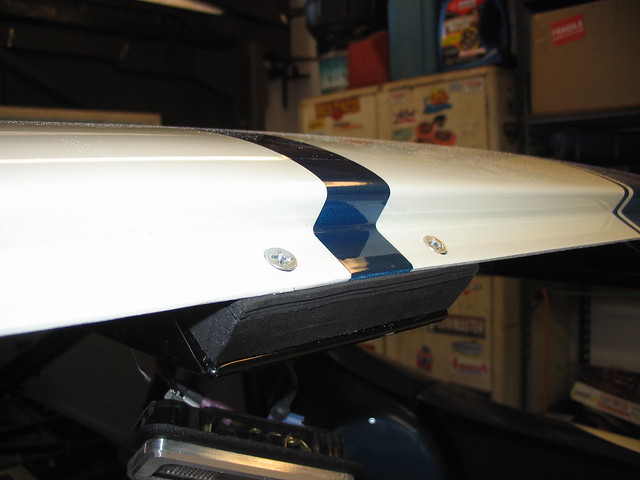
    I went to put the body on the chassis today with the help of 2 friends. I have done everything in the manual up to the body part. In the back the rear hits the fuel tank and will not allow the back to go all the way on. On the rear trunk aluminum I put some weather strip on the top. Was this a mistake? Should I cut the rectangle area on the bottom around the tank so it fits? I do not see how to do it otherwise. also the flaps from the side rear aluminum do I tuck them in or worry about them after the body is on? Any hints from anyone who has done this would be so much appreciated. Thanks. TW.

    IMG_0751.JPGIMG_0753.JPGIMG_0754.JPG

  2. #2

    Join Date
    Feb 2011
    Location
    Norton, MA USA earth
    Posts
    3,339
    Post Thanks / Like
    You need to cut out the back a bit to clear the stock tank. No weather stripping on the aluminum. The side and back aluminum should be under the body. In other words the rear window flange is over the panels.
    Mike

  3. #3
    PLATNUM Supporting Member
    wallace18's Avatar
    Join Date
    Apr 2012
    Location
    Trenton, Florida
    Posts
    5,381
    Post Thanks / Like
    Thanks Mike. I will give it a try.

  4. #4
    PLATNUM Supporting Member
    wallace18's Avatar
    Join Date
    Apr 2012
    Location
    Trenton, Florida
    Posts
    5,381
    Post Thanks / Like
    Thanks again Mike! I cut the rectangle some and finally got the body on. Looks good ! Very tight fit though. I will be sweating bullets after paint putting it back on. LOL.

  5. #5
    Senior Member
    Join Date
    Feb 2011
    Location
    Cumming, GA
    Posts
    232
    Post Thanks / Like
    Quote Originally Posted by wallace18 View Post
    Thanks again Mike! I cut the rectangle some and finally got the body on. Looks good ! Very tight fit though. I will be sweating bullets after paint putting it back on. LOL.
    Precisely the reason I decided to paint body on and spend a little more time on prep

  6. #6
    PLATNUM Supporting Member
    wallace18's Avatar
    Join Date
    Apr 2012
    Location
    Trenton, Florida
    Posts
    5,381
    Post Thanks / Like
    Well I bolted up the back of the car to the flat plates where the tail lights go as per the manual. Now I have a substantial gap at the windshield bracket. Should I move every thing so the windshield lines up with it's bracket and then shim the rear? To say this body has fitment issues is like saying politicians have credibility issues. LOL. The headers do not come close to lining up with the body cutouts. Looks like fun up ahead for me. I now understand the straight jacket. LOL.

    IMG_0755.JPGIMG_0756.JPG

  7. #7
    Senior Member
    Join Date
    Feb 2011
    Location
    Gorham, ME
    Posts
    253
    Post Thanks / Like
    My body was the old black body which was a lot worse than your red body. However, just make a spacer for the windshield. mine was made out of a 1" piece of square tubing. In past threads everybody complained about fit but all shimmed here and there and it all came out ok. I also had to shim the taillight plates with a piece of 1/4" aluminum plate. Also had to shim the rear down bars at the sides with 1/8" x 3/4" flat aluminum bar. Cant see a thing now. Works fine and no rattles.
    Bill

    Coupe #421, Picked Up 11/15/08, started 1/1/09 - Rebuilt mildly massaged 302, T5, 3 Link, and Loads of Extras

  8. #8
    Senior Member CJBergquist's Avatar
    Join Date
    Feb 2011
    Location
    Palo Alto, CA
    Posts
    230
    Post Thanks / Like
    My body had a gape of about 1" between the body and the mount. I made a spacer out of plastic.


    Chris
    If it's too LOUD....you're too OLD!!

    Build Site >> http://www.flickr.com/photos/51103049@N00/collections/

    FFR#0441CP Complete Coupe kit, IRS, T-5, 392ci 351W, Webers, Delivered 4/29/09

  9. #9
    PLATNUM Supporting Member
    wallace18's Avatar
    Join Date
    Apr 2012
    Location
    Trenton, Florida
    Posts
    5,381
    Post Thanks / Like
    Thanks guys. Spacer I will make.

  10. #10
    Senior Member
    Join Date
    Feb 2011
    Location
    Cumming, GA
    Posts
    232
    Post Thanks / Like
    They must all fit a little different. I chose to bring the body back further which lined the windshield bracket up and used spacers in the rear. This also allowed me to use the door latch post as a mounting point rather than a large hole around it
    Last edited by Timb; 10-20-2014 at 01:41 PM.

  11. #11
    Member kiki231's Avatar
    Join Date
    Feb 2012
    Location
    New Brunswick
    Posts
    83
    Post Thanks / Like
    In the "my 2 cents" category, i had the same fuel tank issues, but my windshield was fairly close to the bracket. I ended up putting 3/8" spacers at the back where the rear lights run through. Also, my frame was lower by about 1" on the passenger side, causing the rear corner to droop id it rested directly on the farm and also causing a slight alignment issue on the rear hatch when closed. So i had to shim the rear upper corner where it sits on the hatch frame.
    As far as the exhaust openings , mine had to cut much larger to get the pipes out and prevent heat burns.
    Chris Bourque

    Coupe #578

  12. #12
    PLATNUM Supporting Member
    wallace18's Avatar
    Join Date
    Apr 2012
    Location
    Trenton, Florida
    Posts
    5,381
    Post Thanks / Like
    Quote Originally Posted by kiki231 View Post
    In the "my 2 cents" category, i had the same fuel tank issues, but my windshield was fairly close to the bracket. I ended up putting 3/8" spacers at the back where the rear lights run through. Also, my frame was lower by about 1" on the passenger side, causing the rear corner to droop id it rested directly on the farm and also causing a slight alignment issue on the rear hatch when closed. So i had to shim the rear upper corner where it sits on the hatch frame.
    As far as the exhaust openings , mine had to cut much larger to get the pipes out and prevent heat burns.
    All part of the fun of the Coupe, LOL.

  13. #13
    Senior Member GThompson's Avatar
    Join Date
    Feb 2011
    Location
    Spencerport, NY
    Posts
    115
    Post Thanks / Like
    Sorry, gotta' throw my $0.02 in too...

    I raised my tank about 1-1/2", no body fit problems, but had to modify the tube that used to be above the filler neck. Now I'm looking at building a panel to cover the fuel tank.


Posting Permissions

  • You may not post new threads
  • You may not post replies
  • You may not post attachments
  • You may not edit your posts
  •  

Replica Parts

Visit our community sponsor