Boig Motorsports

Visit our community sponsor

Thanks Thanks:  1
Likes Likes:  3
Page 5 of 37 FirstFirst ... 3456715 ... LastLast
Results 161 to 200 of 1452

Thread: Andrew & Tamra's 818SR EM Autox Hybrid Destroked Long-Rod Build

  1. #161
    Senior Member
    Join Date
    Dec 2014
    Location
    north east ct
    Posts
    160
    Post Thanks / Like
    Quote Originally Posted by Tamra View Post
    We brought our 818 home today! We've kept a donor thread here for the full teardown process, but now that it's time to start assembly, we figured we should create a build thread. Our 818 is #297.

    Our excited faces:


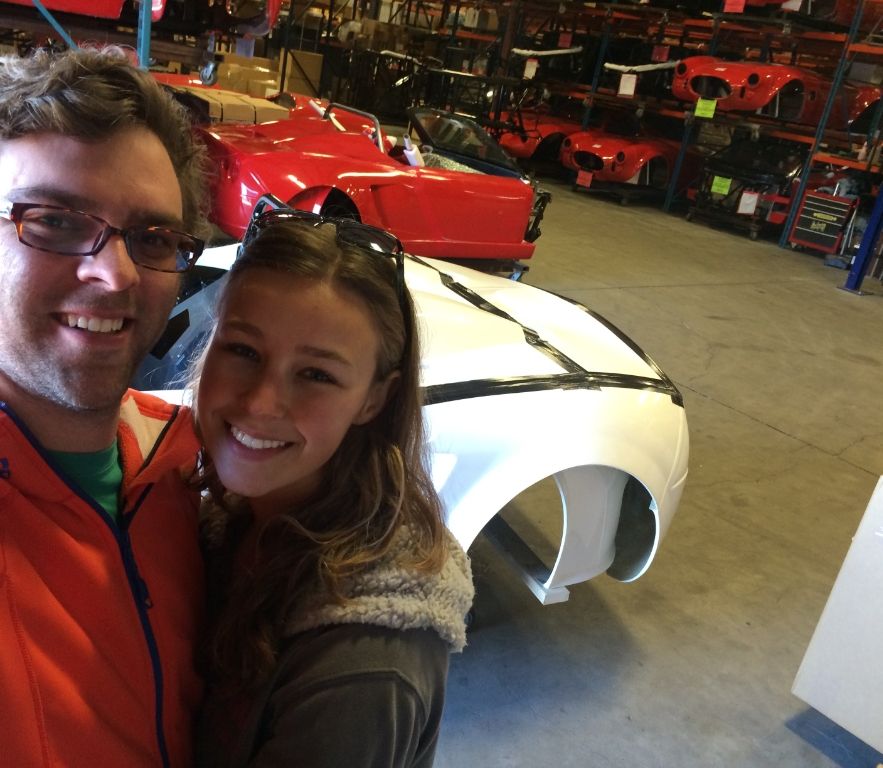
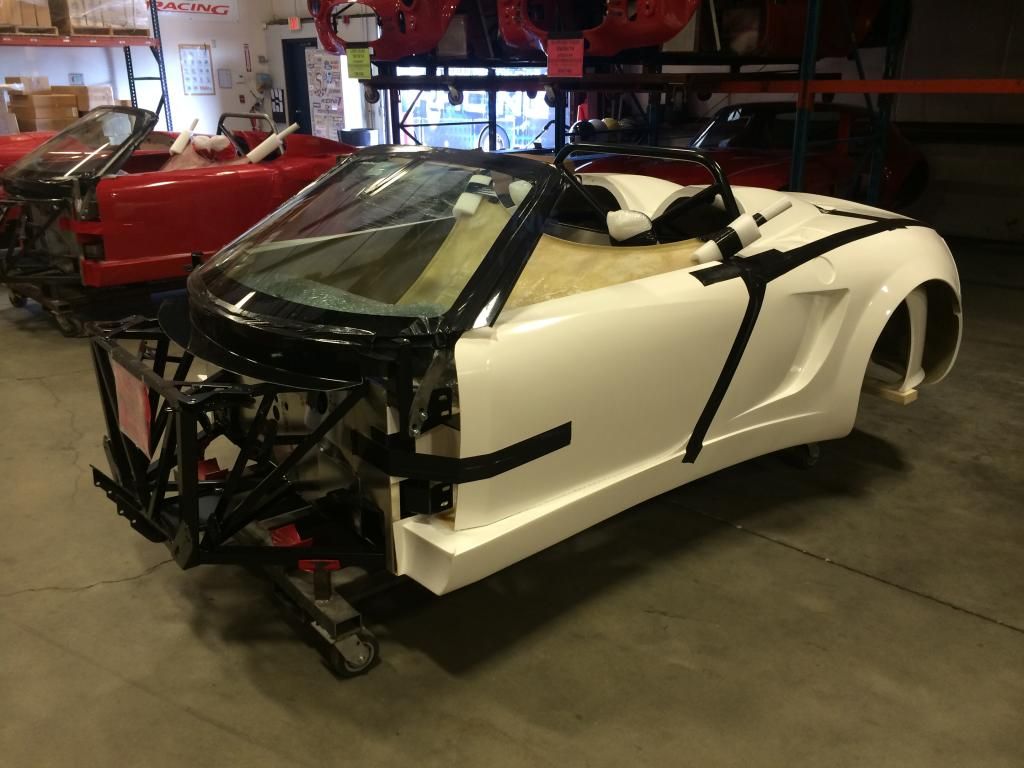
    We ordered a white body:


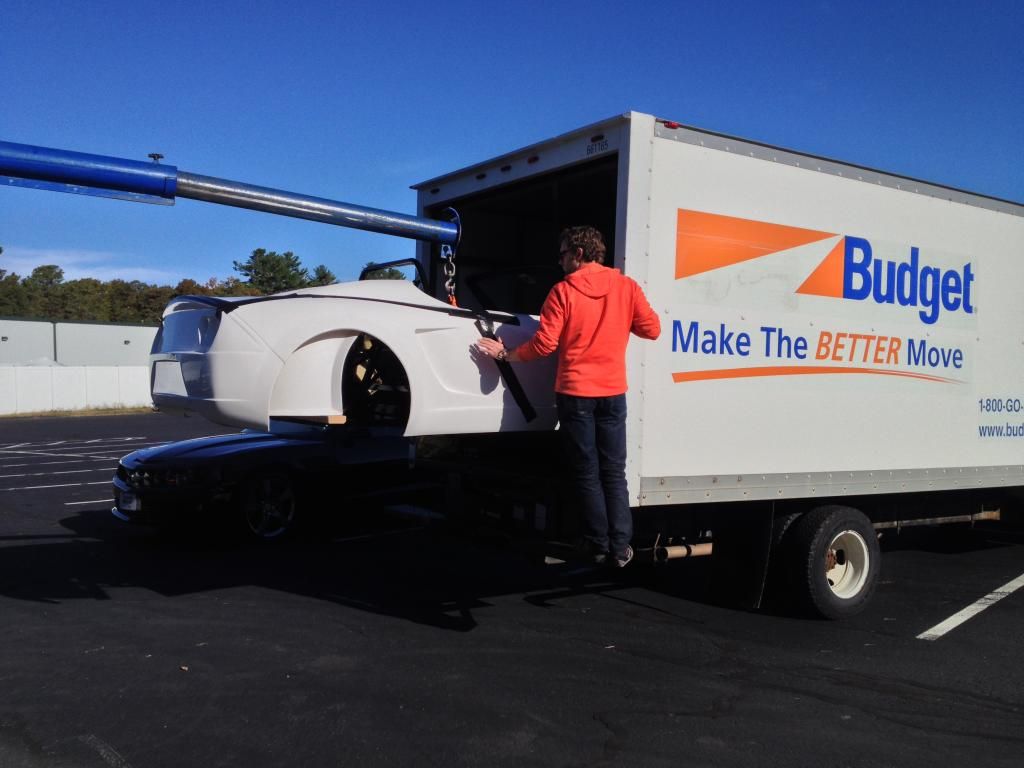
    As one of our friends put it, "the 818 is definitely the better move"


    We have never owned Subarus before (Mazda family), and we've definitely never built a car before. Let alone a motor. This will be a learning process. Our goal is to autocross our 818 and also have it be street legal. Our hope is to have it on the road next spring.

    We are going to build a 2.34L destroked short block, built for up to 650whp, but we will be tuning it to around 350whp max, with multiple maps. The machined 2.0 Heads will have an upgraded valve train. Oiling will be our limiting factor, so we will be running it at 8k rpm max to start. We are still deciding on the turbo, but leaning toward a BW 200SX twin scroll setup.

    We will be doing all of the assembly of our engine. Larry's Power did the machine work on the heads and block and balanced the rotating assembly. We balanced the rods and pistons ourselves to .1 grams. We purchased our parts through Fidelis Motorsports, who also helped us pick the right parts for our goals.

    2.34L destroked short block
    -MPS +2mm H Tuff rods
    -JE FSR Pistons
    -upgraded Tool Steel Wrist Pins
    -75mm WRX crank
    -King Race and Main Bearings
    -ARP Subaru EJ Series DOHC Headstuds

    Supporting mods:
    Borg Warner S200SX 51mm .84 a/r twin scroll turbo
    Kinuguwa Twin Scroll Header (sits level with the oil pan!)
    Custom twin scroll up-pipe that we are making
    STI oil pan
    Killer B Motorsport Ultimate Oil Pickup
    Killer B Motorsport Oil Baffle Windage Tray
    OEM 10mm oil pump (TBD to shim)
    Partial TGV deletes
    Cobb intake
    NGK 1-step colder plugs
    Forge full recirc bpv
    Grimmspeed ebcs
    255lph fuel pump
    Semi-parallel fuel lines
    Gates Racing Timing Belt
    Group N engine and transmission mounts
    Frozenboost AWIC

    2.0 Chamber Matched Machined Heads
    -Shimless buckets
    -GSC Beehive Valve Springs w/ Titanium Retainer Valvetrain Kit
    -GSC Chrome Polished Intake Valve
    -GSC Chrome Polished Exhaust
    -Injector Dynamics Fuel Injectors Top Feed 1000cc

    Other items:
    ACT StreetLite Flywheel
    South Bend Stage 2 Endurance Clutch
    OBX LSD (upgraded washers/bolts)
    FFR adjustable lateral links
    Aluminum control arms for the "castor mod"
    Stainless steel braided brake lines
    Cobb 27mm sway bar (TBD if we use this or a smaller one)
    Koni 30 series shocks with 500lb springs (R package)
    Race seats - Sparco Corsa
    Wheels TBD (likely RPF1's) with Hoosier A6's
    Lots of gauges
    The car will be street legal and registered

    Other project creep TBD


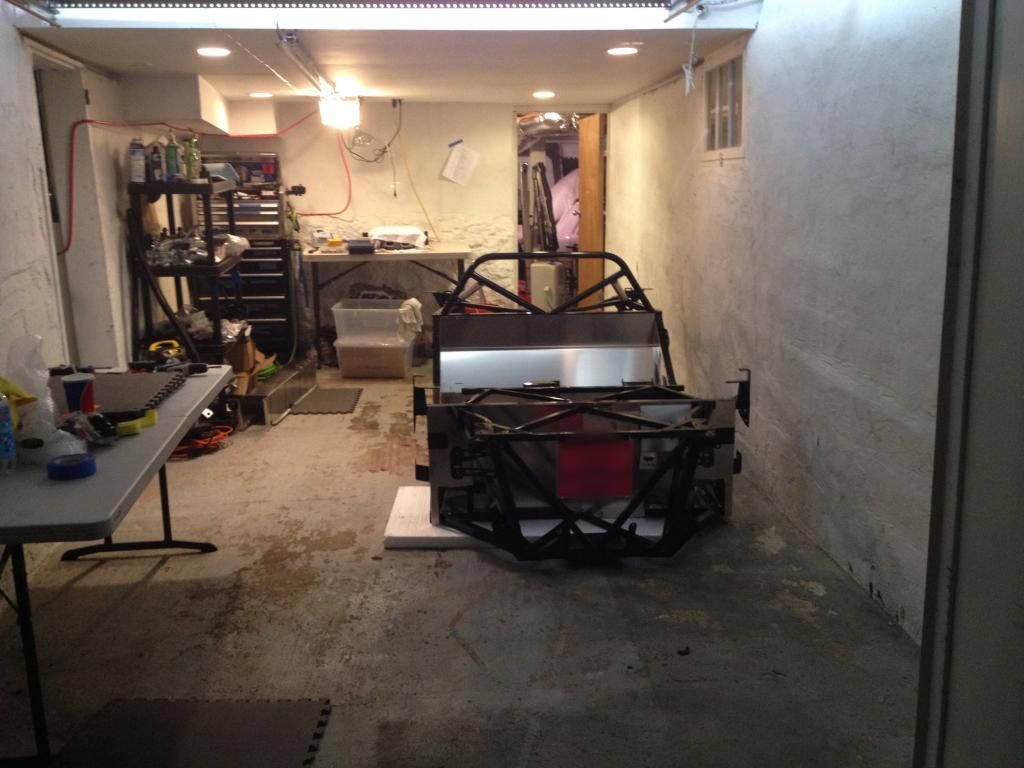
    We have very limited space (two 10x20ft garages, one which is fully taken by the Miata and the bike), so when we got it home, first thing was to hang the body panels from the ceiling of our second garage. The bumpers and fender didn't fit, but at least most of them are out of the way.


    All tucked away:


    At this point, all of our donor parts have been cleaned and painted, bushings replaced where necessary, etc. The wiring harness has had a once through and had everything unnecessary deleted, although we haven't re-routed anything yet. The transmission has an OBX lsd installed with the upgraded washers. We are still in process of building the motor, so that is one of the primary items on our list for this week, in addition to taking inventory. The only items on the packing list that were backordered were small items that we will not need for awhile.

    Thanks to all of the threads on this forum, we have already learned a great deal. As you read through our posts, please feel free to comment if you see any issues or have any recommendations.

    Also, my better (or at least more mechanical) half is Andrew, forum name xxguitarist.
    andrew did you pickup your car on 10-25 if so my car is the red one behind yours #299 I live north windham ct were are you on your build mine is all built and now dis, and out to powder coat

  2. #162
    Senior Member
    Join Date
    Dec 2014
    Location
    north east ct
    Posts
    160
    Post Thanks / Like
    I see your using the stock brakes I own a junk yard in ct and found in yard that a 06 legacy gt has much bigger brakes, vented rear bolts right on and very cheap at the parts store with all that power you might want more brakes

  3. #163
    Senior Member Tamra's Avatar
    Join Date
    Apr 2014
    Location
    Shelton, CT
    Posts
    1,011
    Post Thanks / Like
    We are actually thinking of going smaller in order to fit 15" wheels in the front, and just upgrading the pads. Autocross is short and doesn't build up much heat, so most people go smaller and lighter. We might contact you to see if you have any that would work! Which junk yard is it?
    Tamra
    Building 818SR #297 picked up 10/25/14 with Andrew (xxguitarist)
    First start 12/21/14, First "drive" 1/17/15
    First Dyno at EFI Logics 3/7/15- 310whp at 15psi for break in, full spool by ~3500rpm!
    First autocross 3/29/15
    1st Registered 818 in Connecticut 7/24/2015. 9 months - 1 day from kit pickup!

  4. #164
    Senior Member Tamra's Avatar
    Join Date
    Apr 2014
    Location
    Shelton, CT
    Posts
    1,011
    Post Thanks / Like
    Oh, and we are in Shelton, CT, so a little over an hour from you. Good to see another Connecticut builder!
    Tamra
    Building 818SR #297 picked up 10/25/14 with Andrew (xxguitarist)
    First start 12/21/14, First "drive" 1/17/15
    First Dyno at EFI Logics 3/7/15- 310whp at 15psi for break in, full spool by ~3500rpm!
    First autocross 3/29/15
    1st Registered 818 in Connecticut 7/24/2015. 9 months - 1 day from kit pickup!

  5. #165
    Senior Member
    Join Date
    Dec 2014
    Location
    north east ct
    Posts
    160
    Post Thanks / Like
    Newington auto parts 860 666 6122 brian

  6. #166
    Senior Member Tamra's Avatar
    Join Date
    Apr 2014
    Location
    Shelton, CT
    Posts
    1,011
    Post Thanks / Like
    Last night, we finished up permanently mounting the gas tank and fuel hoses. We left the charcoal canister for a later date, once we figure out where we are mounting items that will be permanently installed...
    We put some mats under the gas tank to try to prevent future squeaking. Unfortunately, that made the clearance between the filler hose, the tank, and the chassis next to nothing. Took us nearly over an hour and some repositioning of the tank, but eventually got it on and kept the mats in place.

    Then today, we started on this...


    We only had a couple of hours to work on things before we had family obligations for the rest of the afternoon. Going to really tackle it tomorrow.

    Some observations so far were that the WRX had two fuel senders, whereas the 818 only has 1. Andrew forgot about the second sender and was going crazy trying to figure out the pins to work with for the kit. Once the second sender was plugged in (they're in series) the lines ohm'd out easily.
    Tamra
    Building 818SR #297 picked up 10/25/14 with Andrew (xxguitarist)
    First start 12/21/14, First "drive" 1/17/15
    First Dyno at EFI Logics 3/7/15- 310whp at 15psi for break in, full spool by ~3500rpm!
    First autocross 3/29/15
    1st Registered 818 in Connecticut 7/24/2015. 9 months - 1 day from kit pickup!

  7. #167
    Senior Member Buzz Skyline's Avatar
    Join Date
    May 2013
    Location
    Greenbelt, MD
    Posts
    502
    Post Thanks / Like
    i was thinking of putting something under the gas tank too. I ultimately decided against it. I hope I won't regret that. What the heck- it's a kit, I'll just tear it apart if it squeaks.

    Wiring - it sucks.

  8. #168
    Senior Member RM1SepEx's Avatar
    Join Date
    Jul 2011
    Location
    Freeport, ME
    Posts
    3,801
    Post Thanks / Like
    I ran a bead of silicone around the perimeter and a couple Xs in the middle. Push it down hard to seat it into the soft silicone and it should quiet it down. I didn't have clearance problems using this technique.

    Wiring... right now I'm questioning my cut the obvious and get it running wiring plan. I now want to clean it up and I'm doing everything with my body twisted around in the cockpit.
    Dan

    818S #17 Picked up 8/1/13 First start 11/1/13 Go Kart 3/28/14

  9. #169
    Moonlight Performance
    Hindsight's Avatar
    Join Date
    May 2014
    Location
    Atlanta
    Posts
    3,402
    Post Thanks / Like
    Interesting on the fuel sensors. How did you use them both though?

  10. #170
    Senior Member xxguitarist's Avatar
    Join Date
    Nov 2013
    Posts
    389
    Post Thanks / Like
    Dan,
    We wanted it more removable than that.. We figure there's a 50-ish % chance that we will be doing something different next winter for weight distribution/ slosh handling

    Hindsight,
    We didn't use both in the kit, just used both to find the appropriate pins in the harness to splice to the single FFR supplied sender.

    On that note, anyone know the correct polarity for the FFR:WRX wiring colors for fuel pump & sender? Sender being resistive, it shouldn't matter, but the pump ought to.

  11. #171
    Senior Member RM1SepEx's Avatar
    Join Date
    Jul 2011
    Location
    Freeport, ME
    Posts
    3,801
    Post Thanks / Like
    Quote Originally Posted by xxguitarist View Post
    Dan,
    We wanted it more removable than that.. We figure there's a 50-ish % chance that we will be doing something different next winter for weight distribution/ slosh handling
    Two words in that case:

    Wax Paper
    Dan

    818S #17 Picked up 8/1/13 First start 11/1/13 Go Kart 3/28/14

  12. #172
    Senior Member Tamra's Avatar
    Join Date
    Apr 2014
    Location
    Shelton, CT
    Posts
    1,011
    Post Thanks / Like
    Thanks to the help of two friends (one all day, one for a few hours), we made a lot of progress.

    1) Installed the front nose and radiator. Although we are using an OEM radiator, it sat about 5/8" above the frame rail, so we are going to have to space it up. Plenty of clearance on the steering rack though.

    2) Installed the coolant lines. Note: the manual is very unclear for which pieces of the oem radiator hoses go where. As a tip, the 90 degree hose goes on the coolant cross over line on the engine, not the 60 degree hose like it makes it sound. Also, the radiator hose adapters are a pain to separate, but there are three hoses within each one. We ended up with the one thick, smallest one left from each of the five. Any ideas where these go? Also, the manual states to make sure the coolant lines are attached to the frame no more than 5" above the bottom frame rail, but the photos show otherwise. We went no more than 5" in order to avoid body clearance issues, but we're not entirely sure why the photos showed them closer to 8" up.

    3) Installed the clutch lines. A pipe bender from Autozone worked great and we were able to route them very tidily back to the transmission. As our slave cylinder is further back on the transmission, we had to use one extra piece of the hard line than what the manual said. So now we are short a coupler and a brake line that we will need to replace down the road.

    4) Wiring harness has been made sense of. We have a handful of wires (around 8-12) left to extend to the engine bay (attachment points on the transmission and the down pipe), and have not extended the headlights or tail lights yet (tail lights seem like they reach though???). However, the fuse boxes all seem to reach their respective locations without any major issues. We have quite a few open plugs left that we are holding off on doing a full delete until first start, when we can confirm they can be deleted. We should hopefully be able to shave down a bit more of the tangle, but for the time/frustration vs weight loss, we are only going so far.

    5) Received our start-up tune from EFI Logics!!!

    If you exclude the engine specific work, we are at 77 hours into the build since pickup on October 25th, including inventory (including the engine is 130 hours), which puts us at about 18 hours/week. Around 9 hours on the wiring harness to get it to it's current state, in the car, and an additional 8 hours of deleting things such as ABS, airbags, hvac, stereo, doors, etc., for a total of 17 hours to date. We spent 136 hours on the donor car from May-October, so you can see we have picked up our pace a bit

    Also, we have officially sold more money in parts from our donor than what we paid for it. We are at $6,450 in parts sales, and a purchase price of $6300 (unfortunately, we overpaid for our donor considering we thought it came with a freshly built motor - see our donor teardown thread linked on p1 for the full story of our lying seller. We might as well have bought a similar car with rod knock for half the price or less, considering our full engine rebuild!). Regardless, our parts sales have really helped us.

    We are looking at about $14,000 in upgrades, our full engine build, and maintenance items so far, which is putting us at just under $24k final build cost. We still have a lot of parts listed for sale though, so hopefully we will cut down that final build cost.

    Time lapse!
    Tamra
    Building 818SR #297 picked up 10/25/14 with Andrew (xxguitarist)
    First start 12/21/14, First "drive" 1/17/15
    First Dyno at EFI Logics 3/7/15- 310whp at 15psi for break in, full spool by ~3500rpm!
    First autocross 3/29/15
    1st Registered 818 in Connecticut 7/24/2015. 9 months - 1 day from kit pickup!

  13. #173
    Moonlight Performance
    Hindsight's Avatar
    Join Date
    May 2014
    Location
    Atlanta
    Posts
    3,402
    Post Thanks / Like
    You are going so fast. That is great on the donor car sales. I am at just under $2k in parts sales and the sales have really tapered off at this point.... So even with the motor issue you had, you still did very well. I will probably end up between 25k and 30k on total build cost.

    At this pace, you should be go karting within a month!

  14. #174
    Senior Member
    Join Date
    Jun 2013
    Location
    Bowling Green, KY
    Posts
    1,382
    Post Thanks / Like
    Great progress, and good job donor on parts sales.
    With all that I am doing to my R I am going to end up close to 30K and building the car I want so no regrets.

  15. #175
    Senior Member Tamra's Avatar
    Join Date
    Apr 2014
    Location
    Shelton, CT
    Posts
    1,011
    Post Thanks / Like
    Yup, things add up fast... awic, twin scroll turbo and related components, full long-rod motor build including all the machine work and balancing, lsd, upgraded clutch and lightweight flywheel, cobb accessport, and 6 gauges definitely blew the budget fast... let alone the million other items, even just oem replacement parts, that add up No regrets! The budget was blown anyway once we found out we were going to have to build the engine, so we figured that we might as well do it right the first time.

    However, with some deal searching we've saved a lot, worked hard to sell parts, and put in a lot of labor (only outsourcing was the actual machine work on the engine) so we feel like we are building the car we want at a great price. Almost nothing has gone untouched on this thing. Can't wait to get it on the road and autocross next season!
    Tamra
    Building 818SR #297 picked up 10/25/14 with Andrew (xxguitarist)
    First start 12/21/14, First "drive" 1/17/15
    First Dyno at EFI Logics 3/7/15- 310whp at 15psi for break in, full spool by ~3500rpm!
    First autocross 3/29/15
    1st Registered 818 in Connecticut 7/24/2015. 9 months - 1 day from kit pickup!

  16. #176
    Senior Member Tamra's Avatar
    Join Date
    Apr 2014
    Location
    Shelton, CT
    Posts
    1,011
    Post Thanks / Like
    Began work on the up-pipe tonight... We picked up some 1.75" pipes with 45 degree angles, 90 degree angles, and straight. Here's a sneak peak... more to come as it gets finished. We will be coming up with a solution for the cross brace, as our turbo will be right in the middle of it. Thanks to our friend Gene for bringing over his chop saw and mig welder and helping us get started. We will continue another night, as we called it quits at just past midnight.

    We started with the Kinugawa flange. Their flange is specific to Kinugawa and you cannot purchase it anywhere, so we had to clean out the old tubing and re-use it, which was a little annoying. However, he was able to mill down past the brazing.


    Then on to the fresh pipes.... more to come later as we finish it up.


    Tamra
    Building 818SR #297 picked up 10/25/14 with Andrew (xxguitarist)
    First start 12/21/14, First "drive" 1/17/15
    First Dyno at EFI Logics 3/7/15- 310whp at 15psi for break in, full spool by ~3500rpm!
    First autocross 3/29/15
    1st Registered 818 in Connecticut 7/24/2015. 9 months - 1 day from kit pickup!

  17. #177
    Tazio Nuvolari wannabe Scargo's Avatar
    Join Date
    Nov 2013
    Location
    south-central CT
    Posts
    1,611
    Post Thanks / Like
    Most excellent! You guys are hard working... I have big vise envy.

  18. #178
    Moonlight Performance
    Hindsight's Avatar
    Join Date
    May 2014
    Location
    Atlanta
    Posts
    3,402
    Post Thanks / Like
    Very cool! I'm jealous of your fab skillz and gear! I have vise envy too.... no matter how hard I tighten the rotation locking level on mine, it will still rotate. Makes it impossible to torque bolts on things I have clamped in the vice because the whole vice just rotates on me.

    You two should start making custom exhaust! hint hint. Side exit please. Thanks.

  19. #179
    Senior Member xxguitarist's Avatar
    Join Date
    Nov 2013
    Posts
    389
    Post Thanks / Like
    Hindsight, whatever exhaust we make will be pretty unique, our turbo looks like it will be sitting a few different sorts of rotated, and then there's the bit about it having a huge marman (think: John deere & Cummins) flange.

    On the vise, it's one of Yost's more affordable large vises. 6.5" apprentice series. The rotation has spun on me, but only when we were trying to bend some of the kiniguwa up-pipe pieces to get a feel for how it might sit. We were pulling on it with most of a 5' lever arm.. And that's just not fair :-) It's a good solid unit, and I have a set of aluminum jaws too, which are awesome for things you don't want to damage (like when checking rod bearing sizes!)

  20. #180
    Moonlight Performance
    Hindsight's Avatar
    Join Date
    May 2014
    Location
    Atlanta
    Posts
    3,402
    Post Thanks / Like
    I'd be happy with a vise that lets me torque a bolt on a piece clamped in it to about 45ft lbs. Mine only holds to like 15 or so. I'll look into a yost vise. A good vise is just so crazy expensive.... even ~$175 seems a lot to pay for a vise. By the time this project is over, I'll probably have spent more in additional tools than on parts for the car. I need to come up with some sort of side business to help justify the tool expense lol.

    I have thought about just drilling a 1/4" hole that goes through the top-flange and into the base of the vise I have, while the vise is oriented perpendicular to the bench (normal non-rotated orientation), and then inserting a steel rod into the hole to "lock" the vise in position for when I need to torque things down.
    Last edited by Hindsight; 12-18-2014 at 02:16 PM.

  21. #181
    818 builder metalmaker12's Avatar
    Join Date
    Mar 2012
    Location
    Exeter R.I
    Posts
    2,834
    Post Thanks / Like
    Blog Entries
    1
    Unfortunately a good vise is not cheap. This Wilton was about $750-1000 15 years agoimage.jpg
    818S frame #13 Jdm version 8 ej207

  22. #182
    818 builder metalmaker12's Avatar
    Join Date
    Mar 2012
    Location
    Exeter R.I
    Posts
    2,834
    Post Thanks / Like
    Blog Entries
    1
    Unfortunately a good vise is not cheap. This Wilton was about $750-1000 15 years agoimage.jpg

    Looking good guys, good idea to tack it in with mig, you going to have it tig welded. I do that ya know. I can get it done asap also.
    818S frame #13 Jdm version 8 ej207

  23. #183
    Tazio Nuvolari wannabe Scargo's Avatar
    Join Date
    Nov 2013
    Location
    south-central CT
    Posts
    1,611
    Post Thanks / Like
    I noted the South Bend Stage 2 Endurance Clutch in the picture. I was just given a positive heads-up about South Bend clutches. Why did you pick it and the ACT StreetLite Flywheel? I have the ACT (SB10-HDG6) HD-M/Race Sprung 6-Pad Pressure Plate Kit and ACT XACT flywheel Prolite 600240. I like the clutch. Very light, smooth feel, but that's in my 400 WHP STi @3000 pounds...
    Why didn't you pick the 1.9 pound lighter flywheel?

  24. #184
    Senior Member xxguitarist's Avatar
    Join Date
    Nov 2013
    Posts
    389
    Post Thanks / Like
    Quote Originally Posted by Hindsight View Post
    I'd be happy with a vise that lets me torque a bolt on a piece clamped in it to about 45ft lbs. Mine only holds to like 15 or so. I'll look into a yost vise. A good vise is just so crazy expensive.... even ~$175 seems a lot to pay for a vise. By the time this project is over, I'll probably have spent more in additional tools than on parts for the car. I need to come up with some sort of side business to help justify the tool expense lol.

    I have thought about just drilling a 1/4" hole that goes through the top-flange and into the base of the vise I have, while the vise is oriented perpendicular to the bench (normal non-rotated orientation), and then inserting a steel rod into the hole to "lock" the vise in position for when I need to torque things down.
    We can certainly torque to well over 100 ft*lb with this before it begins to move. The pin approach might work.

    Quote Originally Posted by metalmaker12 View Post
    Unfortunately a good vise is not cheap. This Wilton was about $750-1000 15 years agoimage.jpg

    Looking good guys, good idea to tack it in with mig, you going to have it tig welded. I do that ya know. I can get it done asap also.
    Secondary argon flow regulator on the way to do back-gas, and I'll TIG it at work. Trying to decide if I want to do the flanges with filler for 304 or silicon bronze brazed.

    Quote Originally Posted by Scargo View Post
    I noted the South Bend Stage 2 Endurance Clutch in the picture. I was just given a positive heads-up about South Bend clutches. Why did you pick it and the ACT StreetLite Flywheel? I have the ACT (SB10-HDG6) HD-M/Race Sprung 6-Pad Pressure Plate Kit and ACT XACT flywheel Prolite 600240. I like the clutch. Very light, smooth feel, but that's in my 400 WHP STi @3000 pounds...
    Why didn't you pick the 1.9 pound lighter flywheel?
    We wanted a little extra weight in the flywheel to make launches for Pro-SOLO easier. There's not a lot of shifting, so not too much need for quick engine speed changes, relative to the track. This seemed like a good intermediate option. It's balanced with the pressure plate, and relative orientation was noted by the machine shop.

  25. #185
    Tazio Nuvolari wannabe Scargo's Avatar
    Join Date
    Nov 2013
    Location
    south-central CT
    Posts
    1,611
    Post Thanks / Like
    Good answer. I concur...
    On the welding: why would you risk braze? I would think a rod for 304 would be preferable. With a hot turbo you will be on the verge of melting bronze.

  26. #186
    Senior Member xxguitarist's Avatar
    Join Date
    Nov 2013
    Posts
    389
    Post Thanks / Like
    The solidus melting point for Silicon-Bronze is around 1600F, so it's still pretty hot for a turbo.
    Agreed, it's a lot lower than the stainless rod would be.
    The kiniguwa was made with brazed flanges. Convenient since I had to mill them off of it.

    The tubes will definitely be with filler for 304, it's just on the flanges, there is some filling to do & the sil-bronze won't be as likely to try and warp them on us.

  27. #187
    Senior Member Tamra's Avatar
    Join Date
    Apr 2014
    Location
    Shelton, CT
    Posts
    1,011
    Post Thanks / Like
    We have a tacked up-pipe and turbo placement! We will have to modify the cross brace, but it looks like not as much as we initially thought.


    Tamra
    Building 818SR #297 picked up 10/25/14 with Andrew (xxguitarist)
    First start 12/21/14, First "drive" 1/17/15
    First Dyno at EFI Logics 3/7/15- 310whp at 15psi for break in, full spool by ~3500rpm!
    First autocross 3/29/15
    1st Registered 818 in Connecticut 7/24/2015. 9 months - 1 day from kit pickup!

  28. #188
    Moonlight Performance
    Hindsight's Avatar
    Join Date
    May 2014
    Location
    Atlanta
    Posts
    3,402
    Post Thanks / Like
    Wow, that REALLY makes me want to do a rotated setup!

  29. #189
    818 builder metalmaker12's Avatar
    Join Date
    Mar 2012
    Location
    Exeter R.I
    Posts
    2,834
    Post Thanks / Like
    Blog Entries
    1
    Nice
    818S frame #13 Jdm version 8 ej207

  30. #190
    Senior Member Tamra's Avatar
    Join Date
    Apr 2014
    Location
    Shelton, CT
    Posts
    1,011
    Post Thanks / Like
    More progress today!

    Bled the clutch. Thanks to some tips we found on the forum, we clamped the slave cylinder open, and we disconnected the push rod and slid a bolt through it for ease of pressing. Doing it this way it got more travel than pressing the pedal alone and helped speed up the process.

    It only took us a few minutes before it seemed that all of the air was out of the line. No vacuum or anything. Thanks for the tips on the forum!


    Next, we thought we were going to have a problem when we found out we received the wrong plug and play adapters for our ID1000 injectors. Since those weren't going to work, we decided we would just crimp them in with the provided connectors. We started trying to find any local places that would have an F-type crimp tool. Plenty had the crimpers for f-type connectors, but they were for the coax type. Thankfully, we figured out that Andrew's work had what we needed, so we made the 1 hour round trip run out to grab the tool.

    The ID1000's included one extra crimp, which is good, because we broke one on the 2nd injector after over crimping it just a little. That made us a little nervous since we didn't have any others to botch, but we realized that it didn't actually take much force to get a good crimp with these connectors, and the rest went smoothly and all crimped thoroughly.


    Next we moved on to plugging up some holes. Since our turbo won't be ready for first start (still finishing the up-pipe and also Kinuguwa sent us the wrong turbo feed and return lines and fittings - for the record their idea of 4an and 10an lines is not standard! We will be ordering them from somewhere else), we plugged the turbo feed line using our original banjo bolt and some clamped hose (hopefully that will hold! We will probably wrap a towel around it just in case...). From our research, it seems like this will be fine since the NA cars don't have a line there. Let us know if you see any problem with this. We also capped the water return, since our turbo is not water cooled and this will not be used. Finally, just slipped on a cap over the return line to keep things clean.


    We added our oil pressure sensor and capped our pcv on the heads. We then attached hoses with clamps to the two crank case venting spots, ran them into the original crank case vent using it as a T, and then into a catch can. The catch can will be eventually be looped into a Venturi running into the exhaust. We also ran a 2nd catch can between the two heads with another T. It will also be ran into the exhaust most likely. We are not positive if this will affect our inspection, but we do not see anything explicitly not allowing it. On that note, we found out that our car will be exempt from emissions in CT, but must have the emissions equipment for the year of the motor in the car present for the initial inspection. Oh yeah, and we'll need a statement from Subaru verifying the year of our engine and transmission...


    So the next thing left us a little puzzled. Has anyone had any issues with the transmission and engine mounts not lining up properly? So, backing up a few steps, we pushed the engine all the way to the passenger side as far as it would go (about 2" of movement available on the engine mounting points, left to right). It is still biased toward the DRIVER side by about 1/2" somehow?? The mounts must not be square on the chassis? So then we are left with two problems - the first is that the transmission will be angled slightly toward the driver in order to line up with the mounting holes (we really don't want to move the engine an inch further toward the driver side, making it 1.5" biased toward the driver. If anything we want the opposite for weight balance!). Second, is that the transmission mount bolt sits too far forward. Has anyone had to dremel out the mounting hole in order to get the transmission mount to slide in? It will go in as it is, but it is putting a lot of twisting pressure on the mount that doesn't seem good. Our mounts are brand new, Group N.


    Tamra
    Building 818SR #297 picked up 10/25/14 with Andrew (xxguitarist)
    First start 12/21/14, First "drive" 1/17/15
    First Dyno at EFI Logics 3/7/15- 310whp at 15psi for break in, full spool by ~3500rpm!
    First autocross 3/29/15
    1st Registered 818 in Connecticut 7/24/2015. 9 months - 1 day from kit pickup!

  31. #191
    Senior Member RM1SepEx's Avatar
    Join Date
    Jul 2011
    Location
    Freeport, ME
    Posts
    3,801
    Post Thanks / Like
    Tamra, I thought I had this problem, make sure that each mount is in the right location and orientation, next loosen up everything and work at it, by doing that I was able to get them to line up. I'd also do yourself a favor and cut those trans mount bolts shorter IIRC they are about 1/2 inch too long and they stick down creating some interference issues.
    Dan

    818S #17 Picked up 8/1/13 First start 11/1/13 Go Kart 3/28/14

  32. #192
    Senior Member Tamra's Avatar
    Join Date
    Apr 2014
    Location
    Shelton, CT
    Posts
    1,011
    Post Thanks / Like
    Quote Originally Posted by RM1SepEx View Post
    Tamra, I thought I had this problem, make sure that each mount is in the right location and orientation, next loosen up everything and work at it, by doing that I was able to get them to line up. I'd also do yourself a favor and cut those trans mount bolts shorter IIRC they are about 1/2 inch too long and they stick down creating some interference issues.
    Thanks Dan. We will double check everything today.

    We also have a friend that is going to bring over a banjo fitting so we don't have to use the hose and clamp to block the oil feed line.
    Tamra
    Building 818SR #297 picked up 10/25/14 with Andrew (xxguitarist)
    First start 12/21/14, First "drive" 1/17/15
    First Dyno at EFI Logics 3/7/15- 310whp at 15psi for break in, full spool by ~3500rpm!
    First autocross 3/29/15
    1st Registered 818 in Connecticut 7/24/2015. 9 months - 1 day from kit pickup!

  33. #193
    818 builder metalmaker12's Avatar
    Join Date
    Mar 2012
    Location
    Exeter R.I
    Posts
    2,834
    Post Thanks / Like
    Blog Entries
    1
    Check you put the motor mounts on the correct way on each side. You might have put one on wrong since you can mismatch the orientation within the sub mount that bolts to block.
    818S frame #13 Jdm version 8 ej207

  34. #194
    Moonlight Performance
    Hindsight's Avatar
    Join Date
    May 2014
    Location
    Atlanta
    Posts
    3,402
    Post Thanks / Like
    I think you could also block the oil feed by using a regular bolt (whatever size and pitch the banjo bolt was.... guessing maybe m10x1.0?) and then get an M10 crush washer.

  35. #195
    818 builder metalmaker12's Avatar
    Join Date
    Mar 2012
    Location
    Exeter R.I
    Posts
    2,834
    Post Thanks / Like
    Blog Entries
    1
    Quote Originally Posted by Hindsight View Post
    I think you could also block the oil feed by using a regular bolt (whatever size and pitch the banjo bolt was.... guessing maybe m10x1.0?) and then get an M10 crush washer.
    I have blocked them off with just a bolt this way. M10x1.5mm
    818S frame #13 Jdm version 8 ej207

  36. #196
    Senior Member Tamra's Avatar
    Join Date
    Apr 2014
    Location
    Shelton, CT
    Posts
    1,011
    Post Thanks / Like
    Well guys........ it's alive!!!!!!!!!!!!!!!!!!


    We ended up just putting a bolt in the turbo feed. I think it was actually an M12 though. We put the Cobb directly on the throttle body, which effectively bypassed the awic (that we don't have yet) and the turbo, while still allowing the maf to function properly.


    The day started out with extending wires to the engine bay. We just used wiring from the deleted portions of the harness and tried to match up the colors. It worked out pretty well actually. We only had one casualty, which was our friend Tim's jacket to the soldering iron (and a touch of skin as well).

    We filled the car with coolant. We are pretty sure there will be some bleeding to do still, as we only got in about 2.3 gallons of the Subaru Super Blue coolant in it. Added 4.2 quarts of Rotella T oil to the engine. Although relatively accessible now, I imagine that will be a pain with body panels on! Also put in a couple of gallons of gas.

    We installed the rear shift linkage so that we could test that the gears were working properly and ensured it was in neutral. We forgot to buy the washer on the drain plug, so we couldn't fill the transmission with oil for the start-up. We just pressed the clutch pedal during start-up to prevent the gears from engaging.

    We then started attempting to download our Cobb tune from EFI logics, but our Cobb was not connecting to the car (kept repeating the message "make sure the ignition is switched to the on position"). We figured out we had a ground disconnected from the ecu after about 30 or 40 minutes of searching for the issue. Then, we were free and clear and the tune was in!

    Next, we had to prime the engine with oil since it is brand new, so we unplugged the fuel pump and coils. We weren't having much luck initially despite turning over the engine for probably nearing 60 seconds (in short bursts). We then pulled the oil filter, and on the next attempt oil started spilling out. It must have had an air bubble or something, and so within another few quick turns we had oil come out of the turbo oil feed and we knew we had made it through the entire engine. We also saw pressure on the oil gauge of around 60 psi just from cranking.

    Next, we reconnected the fuel pump and coils and started switching the key to the "on" position repeatedly to prime the fuel system. We were starting to get concerned because we could not get the engine to to start after repeated priming. I was wondering if 2 gallons of fuel wasn't enough, so we dumped in the remaining 3 gallons (for a total of 5 gallons), and it made an immediate difference. The fuel poured out of the return line within a few more times of switching the key to the on then off position.

    Then, it fired up! Considering the ID1000 injectors, we were pretty impressed with how smoothly it idled. A little loud... but with no up-pipe or exhaust, I guess that would do it Oil pressure hovered right at 90 psi. We then celebrated by going out to Sushi with our friends Tim and Gene who spent all afternoon into the evening with us finishing things up.

    Overall, a success and 4 days ahead of our Christmas goal!!!
    Tamra
    Building 818SR #297 picked up 10/25/14 with Andrew (xxguitarist)
    First start 12/21/14, First "drive" 1/17/15
    First Dyno at EFI Logics 3/7/15- 310whp at 15psi for break in, full spool by ~3500rpm!
    First autocross 3/29/15
    1st Registered 818 in Connecticut 7/24/2015. 9 months - 1 day from kit pickup!

  37. #197
    Senior Member Tamra's Avatar
    Join Date
    Apr 2014
    Location
    Shelton, CT
    Posts
    1,011
    Post Thanks / Like
    Our friend Tim captured the "official" first startup with his go pro:


    Such a great day! We are not sure whether our sense of excitement or relief was greater when it fired up (you know, first engine we've ever built and all).
    Tamra
    Building 818SR #297 picked up 10/25/14 with Andrew (xxguitarist)
    First start 12/21/14, First "drive" 1/17/15
    First Dyno at EFI Logics 3/7/15- 310whp at 15psi for break in, full spool by ~3500rpm!
    First autocross 3/29/15
    1st Registered 818 in Connecticut 7/24/2015. 9 months - 1 day from kit pickup!

  38. #198
    Senior Member Bob_n_Cincy's Avatar
    Join Date
    Sep 2012
    Location
    Cincinnati OH
    Posts
    3,904
    Post Thanks / Like
    congratulations, Great job.
    818S #22 Candy Blue Frame, Front Gas Tank, 2.5L Turbo, Rear radiator, Shortened Transmission, Wookiee Compatible, Console mounted MR2 Shifter, Custom ECU panel, AWIC soon
    My Son Michael's Turbo ICE Build X22 http://thefactoryfiveforum.com/showt...rts-818S-Build
    My Electric Supercar Build X21 (on hold until winter) http://thefactoryfiveforum.com/showt...e-Build-Thread

  39. #199
    818 builder metalmaker12's Avatar
    Join Date
    Mar 2012
    Location
    Exeter R.I
    Posts
    2,834
    Post Thanks / Like
    Blog Entries
    1
    Be careful not to run it too much with bigger injector duty cycle not mapped in cause it will run pretty lean. Nice job, it runs and should be all set. You beat your deadline and congrats. Much to do now, get it all together and have fun.


    Ps 2 gal is a bit low because the FFR tank pickup is a bit to high in there, so more fuel like 3-5 gal min. The Boyd gets down to a gal and than you experience the same thing. So don't run it low and you'll be all set. Your gas gauge working good, 1/4 tank is my max empty on this car. And my mistake on bolt that one is an m12 1.25. The other banjos are smaller.
    Last edited by metalmaker12; 12-22-2014 at 05:48 AM.
    818S frame #13 Jdm version 8 ej207

  40. #200
    Senior Member Frank818's Avatar
    Join Date
    Jun 2013
    Location
    QC, Canada
    Posts
    5,732
    Post Thanks / Like
    Wow that is great it's running! Now you just need 4 wheels and you're off! lolll
    Frank
    818 chassis #181 powered by a '93 VW VR6 Turbo GT3582R
    Go-karted Aug 5, 2016 - Then May 19+21, 2017
    Tracked May 27/July 26, 2017
    Build time before being driveable on Sep 27, 2019: over 6000h
    Build Completed Winter 2021

Page 5 of 37 FirstFirst ... 3456715 ... LastLast

Posting Permissions

  • You may not post new threads
  • You may not post replies
  • You may not post attachments
  • You may not edit your posts
  •  

Martin's Dent and Collision Shop

Visit our community sponsor