Very Cool Parts

Visit our community sponsor

Thanks Thanks:  0
Likes Likes:  0
Page 2 of 5 FirstFirst 1234 ... LastLast
Results 41 to 80 of 193

Thread: Ninjanick's 818S Build Thread

  1. #41
    Senior Member Canadian818's Avatar
    Join Date
    Nov 2011
    Location
    Edmonton, Alberta
    Posts
    1,378
    Post Thanks / Like
    Quote Originally Posted by Ellimist View Post
    Ya, but seems like there was someone else, as well. At any rate, it looks like he dealt with it by centering the seat based on the steering column (i.e., closer to the center console):
    http://thefactoryfiveforum.com/showt...l=1#post167544

    Also, this post shows that his steering column wasn't square with the frame, so he squared it up.
    I also did it, pics somewhere in my build thread. Just bugged me too much, so I moved the seats together. Doesn't leave any room for a centre console though.
    Adam _____ Instagram @PopesProjects____ YouTube Channel
    818 SRX - #91
    Arrived 01/02/2014
    First Start 10/31/2016
    First Drive 05/22/2017
    Registered 10/25/2019 BRAP818

  2. #42
    Senior Member
    Join Date
    Oct 2014
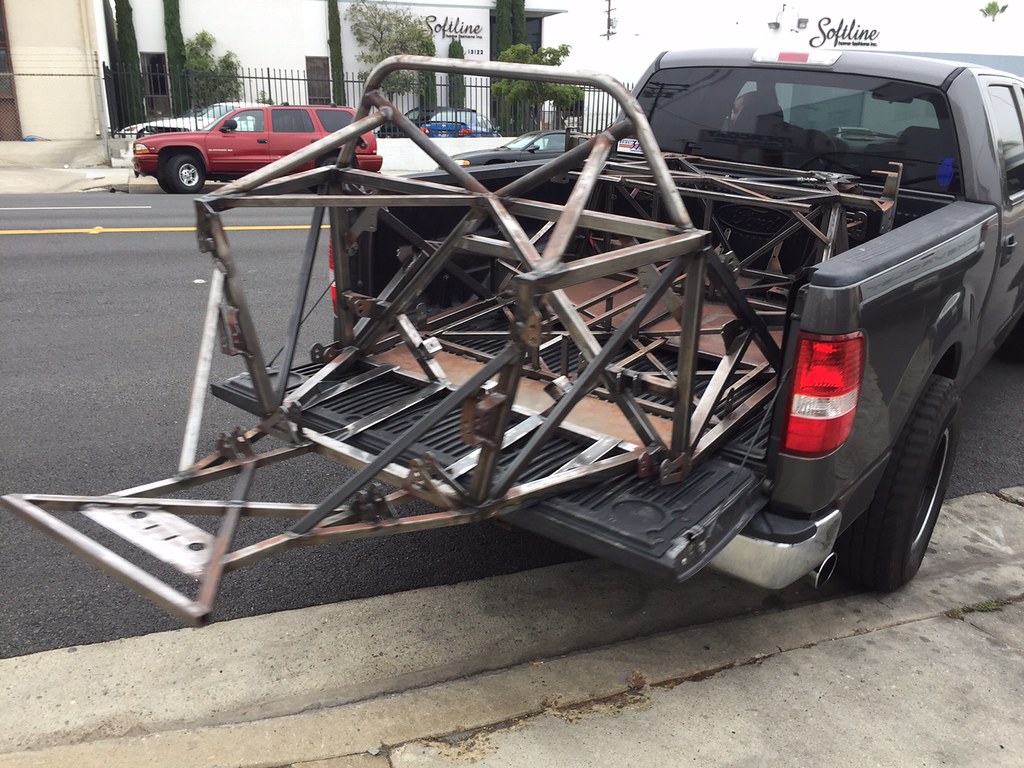
    Location
    Redondo Beach, CA
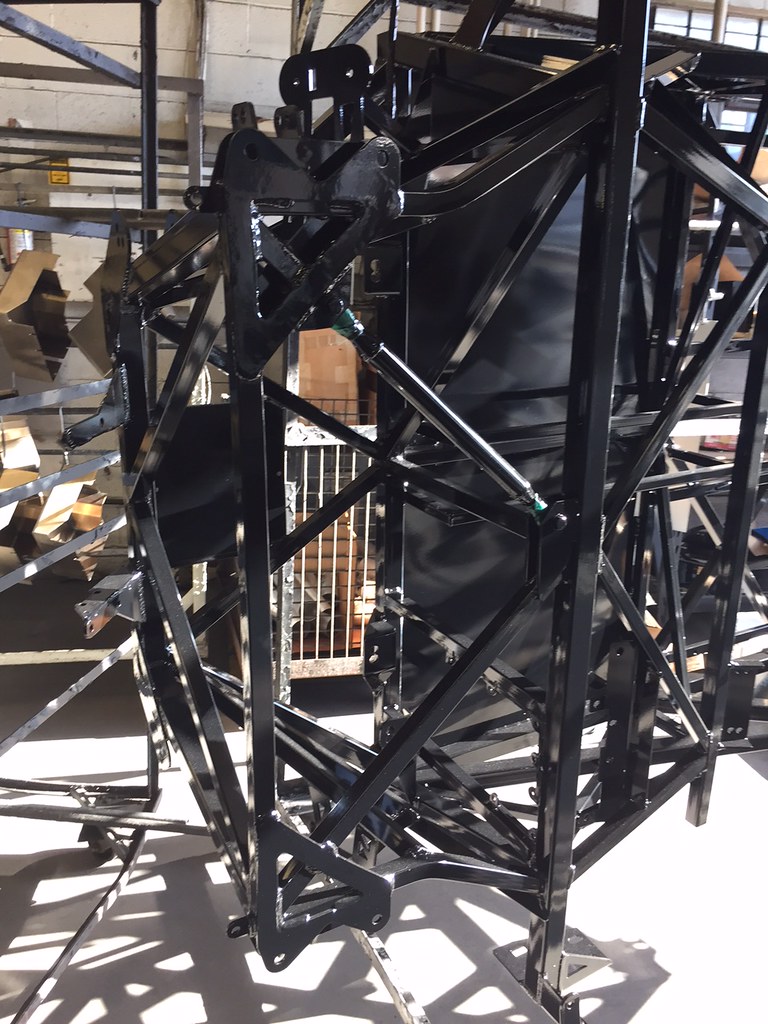
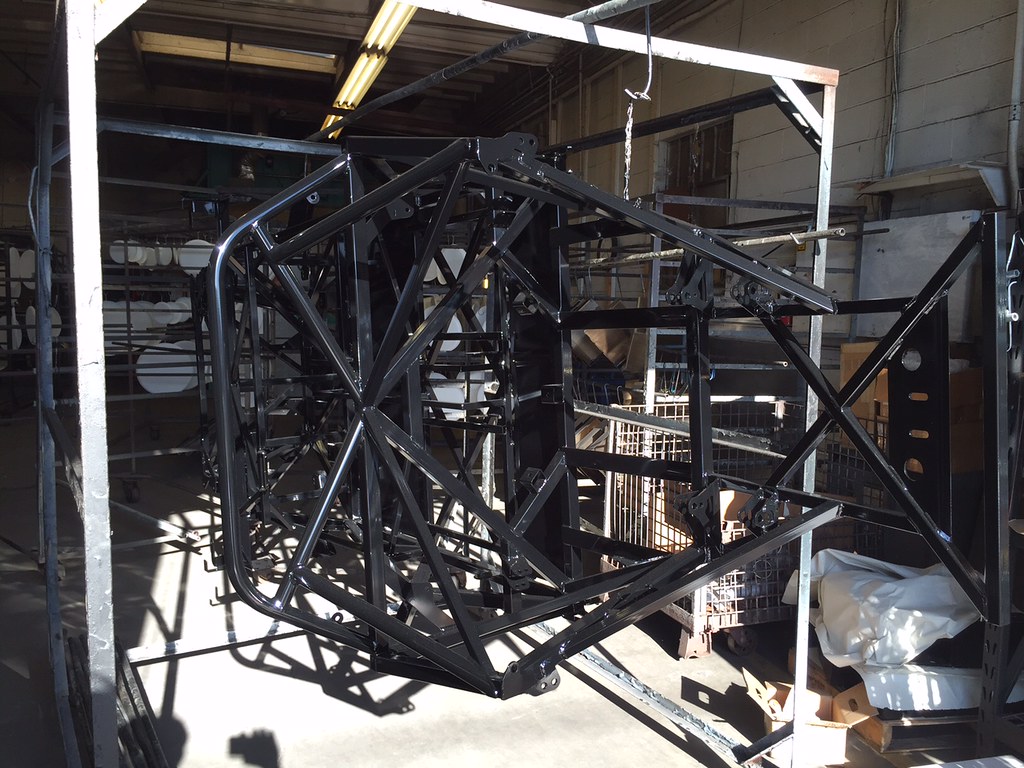
    Posts
    161
    Post Thanks / Like
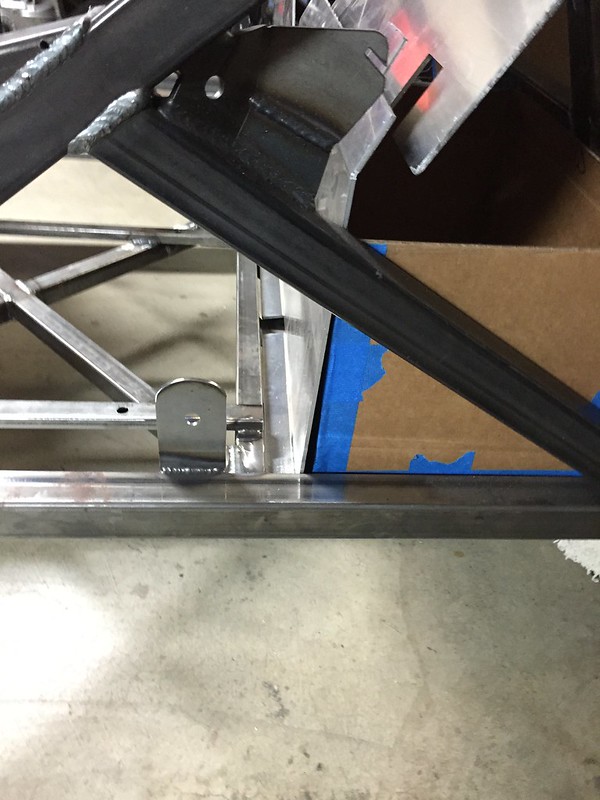
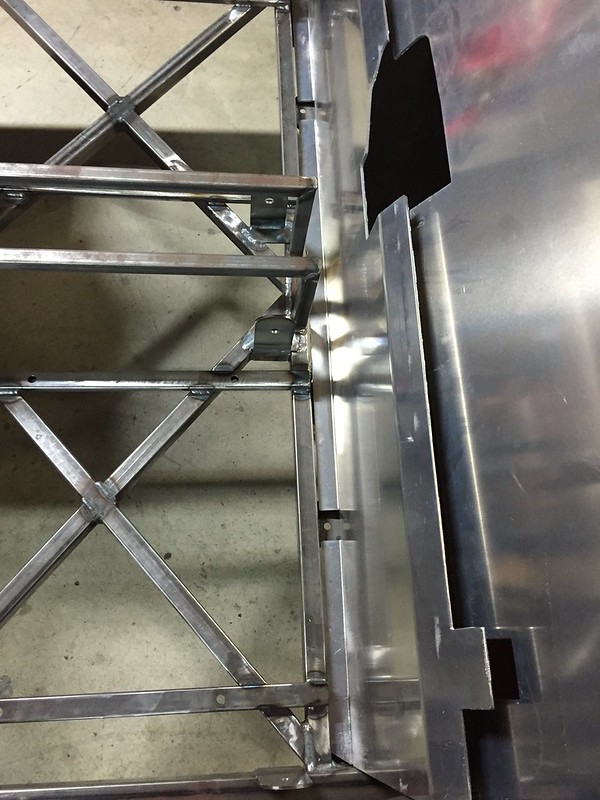
    So I'm having some issues fitting battery boxes behind the rear firewall plates.


    Anyone see any issues with mounting the lower rear firewall plate to the cross beam adjacent to the seats? Basically on top of the cross beam where the seal rails rest? I figure some cutting and re-bending is in order. Weaken material? Going to be a fit up nightmare?

  3. #43
    Senior Member RM1SepEx's Avatar
    Join Date
    Jul 2011
    Location
    Freeport, ME
    Posts
    3,801
    Post Thanks / Like
    you will need to be short! Not much room for the seats as is...
    Dan

    818S #17 Picked up 8/1/13 First start 11/1/13 Go Kart 3/28/14

  4. #44
    Senior Member
    Join Date
    Oct 2014
    Location
    Redondo Beach, CA
    Posts
    161
    Post Thanks / Like
    Quote Originally Posted by RM1SepEx View Post
    you will need to be short! Not much room for the seats as is...
    I'm not too tall being 5'8", but I did want some adjustability with the seats. Right now it looks like I'll be 1" away from the upper corner of the battery box with the seat moved forward. Other solutions:

    1. Notch the lower rear firewall panel at the interface of the box corner. This allows room for the battery box, but still doesn't allow more seat movement.
    2. Chamfer the box corner to fit it within current volume. This allows maximum seat movement, but makes the battery box look janky. Maybe not a concern since it will be hidden, but I'll know.
    3. Reduce the number of cells in that location and place them elsewhere. This creates other challenges (location and space at the top) and increases overall pack resistance using more cable (poorer performance).

  5. #45
    Senior Member STiPWRD's Avatar
    Join Date
    Jan 2014
    Location
    Leesburg, VA
    Posts
    1,624
    Post Thanks / Like
    I'd suggest mocking up your pedals, steering wheel, and seat and seeing how comfortable it feels with the rear firewall where you want it. This is what I did and realized the stock fuel tank and rear firewall were too far forward for a comfortable seating position. I ended up getting a Boyd tank and the 3 inches of leg room really helped.

  6. #46
    Senior Member
    Join Date
    Oct 2014
    Location
    Redondo Beach, CA
    Posts
    161
    Post Thanks / Like
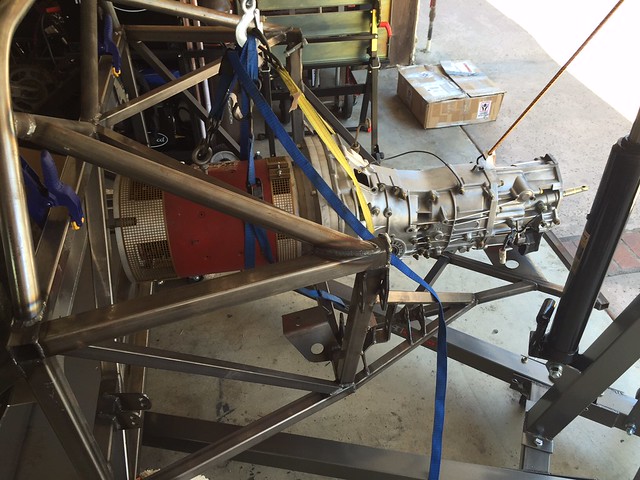
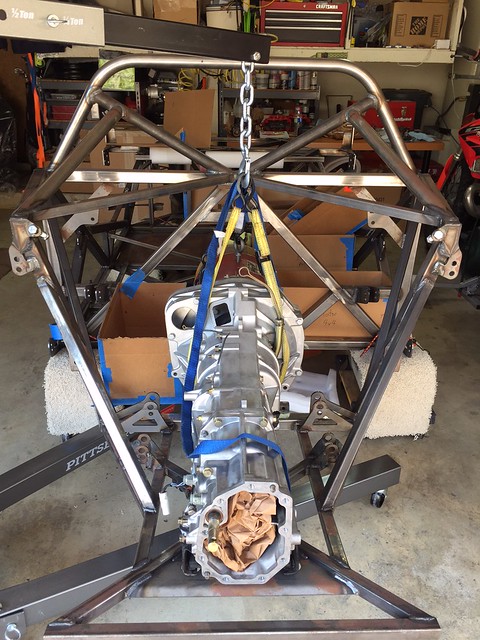
    Got the motor last weekend and finally had a chance to mate the trans.

    Last edited by ninjanick; 05-24-2015 at 11:54 PM.

  7. #47
    Senior Member
    Join Date
    Oct 2014
    Location
    Redondo Beach, CA
    Posts
    161
    Post Thanks / Like
    As expected I need to cut that cross bar out


    Looks like I only need about another 1.5" or so
    image1

  8. #48
    Senior Member
    Join Date
    Oct 2014
    Location
    Redondo Beach, CA
    Posts
    161
    Post Thanks / Like
    So I decided to add a piece of square tubing toward the top of the triangle to reinforce that area in preparation for cutting out the lower cross bar. I was staring at it a little today and thought about adding more supports from where the cross beam would be cut out. Basically cut the center bar out, but leave 2" stubs, then weld those stubs with square tubing at an angle to the bottom frame tube. Thoughts?


    Where the tape measure and foot pedal are shown in the above picture.

  9. #49
    Senior Member
    Join Date
    May 2013
    Location
    Colombia
    Posts
    222
    Post Thanks / Like
    The second set of tubes sound good, but what I'm wondering is how you're going to attach the motor to the frame. From the looks of it, you could attach the face of the motor to a plate welded (steel)/attached(aluminum) to the triangle due to the placement of the motor. That would mean, the plate could give you the extra structural rigidity. The only thing is that your auxiliary belt, steering pump, etc would have to go behind it, if you're planning on using one. What I'm doing is just adding an electric power steering pump for speeds below 5mph, and I'm using no power brakes for consistency in braking, so I'm not using an auxiliary belt drive.

  10. #50
    Senior Member
    Join Date
    Oct 2014
    Location
    Redondo Beach, CA
    Posts
    161
    Post Thanks / Like
    I'm going to make a custom bracket that fits on the commutator end and utilizes the stock isolators. It will most likely mount to the bottom tube. I could try and mount them at an angle, but that ups the complexity of the mount a little. I'm going pretty bare bones with no power steering or brakes so the only thing on the commutator shaft would be an RPM sensor.

  11. #51
    Senior Member Bob_n_Cincy's Avatar
    Join Date
    Sep 2012
    Location
    Cincinnati OH
    Posts
    3,903
    Post Thanks / Like
    Hi Ninjanick,
    Looks good so far.
    I am using these mounts for my motor.

    http://www.mcmaster.com/#6309k36/=xdfjio

    You don't need power steering unless you put a 1000 lbs of batteries in front. About 225 tires is the widest that fit up front.
    You can get buy without power brakes but I do recommend up sizing the rear calipers.
    If you need to go to power brakes I would recommend a an electric vacuum pump for the power booster. I did that in my electric minivan years ago.

    http://www.evalbum.com/377

    Not sure why you need a speed sensor.
    You could put a prox sensor on the 5th gear near the back of the transmission.

    5th-gear-and-Subaspool.jpg
    You could go in through the top of the rear housing.
    Bob
    Last edited by Bob_n_Cincy; 05-28-2015 at 01:47 AM.
    818S #22 Candy Blue Frame, Front Gas Tank, 2.5L Turbo, Rear radiator, Shortened Transmission, Wookiee Compatible, Console mounted MR2 Shifter, Custom ECU panel, AWIC soon
    My Son Michael's Turbo ICE Build X22 http://thefactoryfiveforum.com/showt...rts-818S-Build
    My Electric Supercar Build X21 (on hold until winter) http://thefactoryfiveforum.com/showt...e-Build-Thread

  12. #52
    Senior Member
    Join Date
    Oct 2014
    Location
    Redondo Beach, CA
    Posts
    161
    Post Thanks / Like
    Quote Originally Posted by Bob_n_Cincy View Post
    I am using these mounts for my motor.

    http://www.mcmaster.com/#6309k36/=xdfjio
    I'm looking at the isolator you linked and it's a two piece design. Does that mean you don't sandwich the pieces together? Just basically drive a bolt through and done? It's supplied with one large washer for support in case the isolator fails. There's a recessed end where the bushing sits. Is the flat washer meant to install on that end?

    Quote Originally Posted by Bob_n_Cincy View Post
    Not sure why you need a speed sensor.
    You could put a prox sensor on the 5th gear near the back of the transmission.

    5th-gear-and-Subaspool.jpg
    You could go in through the top of the rear housing.
    Bob
    Can you explain this a little? I'm going to add a tachometer sensor EVWest Tach Sensor. When you say prox sensor are you talking about a sensor mounted close to 5th gear to measure shaft speed?
    Last edited by ninjanick; 06-06-2015 at 10:07 PM.

  13. #53
    Senior Member Bob_n_Cincy's Avatar
    Join Date
    Sep 2012
    Location
    Cincinnati OH
    Posts
    3,903
    Post Thanks / Like
    Quote Originally Posted by ninjanick View Post
    I'm looking at the isolator you linked and it's a two piece design. Does that mean you don't sandwich the pieces together? Just basically drive a bolt through and done? It's supplied with one large washer for support in case the isolator fails. There's a recessed end where the bushing sits. Is the flat washer meant to install on that end?

    Here is a drawing that describes how they are used.

    http://www.avproductsinc.com/center-...ce-mounts.html

    On the tach, I was unaware that the Evnetics and Manzanita Controllers needed special feedback.
    Bob
    Last edited by Bob_n_Cincy; 06-06-2015 at 09:23 PM.
    818S #22 Candy Blue Frame, Front Gas Tank, 2.5L Turbo, Rear radiator, Shortened Transmission, Wookiee Compatible, Console mounted MR2 Shifter, Custom ECU panel, AWIC soon
    My Son Michael's Turbo ICE Build X22 http://thefactoryfiveforum.com/showt...rts-818S-Build
    My Electric Supercar Build X21 (on hold until winter) http://thefactoryfiveforum.com/showt...e-Build-Thread

  14. #54
    Senior Member
    Join Date
    Oct 2014
    Location
    Redondo Beach, CA
    Posts
    161
    Post Thanks / Like
    Quote Originally Posted by Bob_n_Cincy View Post
    Here is a drawing that describes how they are used.

    http://www.avproductsinc.com/center-...ce-mounts.html
    That definitely clears it up thanks!

  15. #55
    Senior Member
    Join Date
    Oct 2014
    Location
    Redondo Beach, CA
    Posts
    161
    Post Thanks / Like
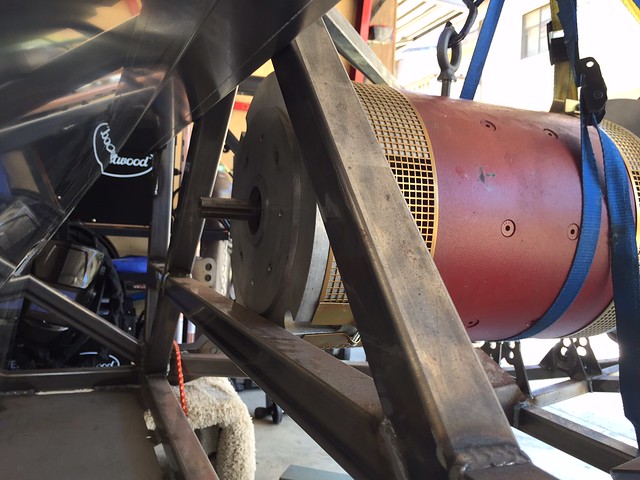
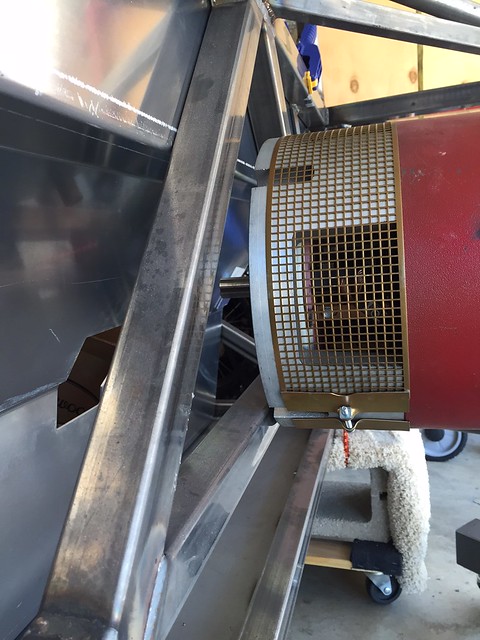
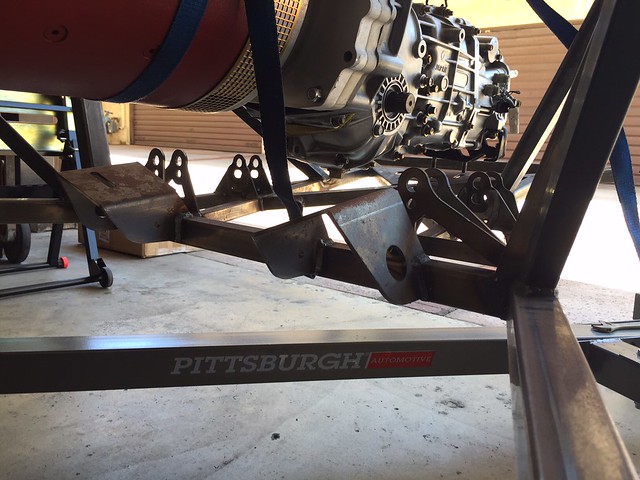
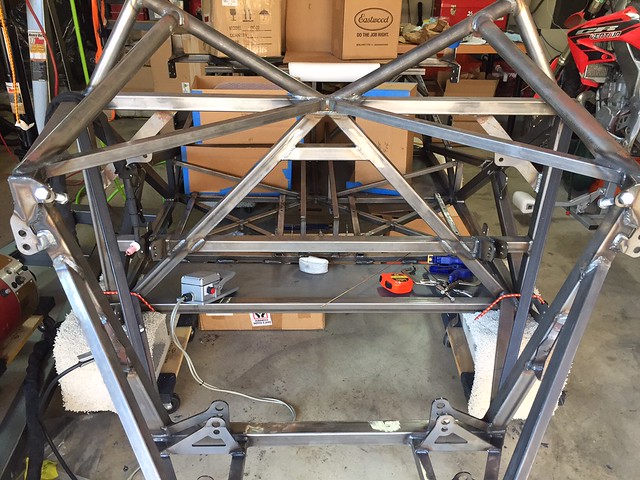
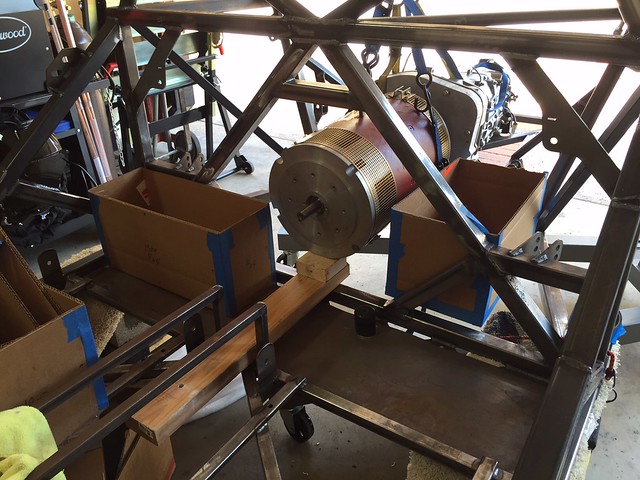
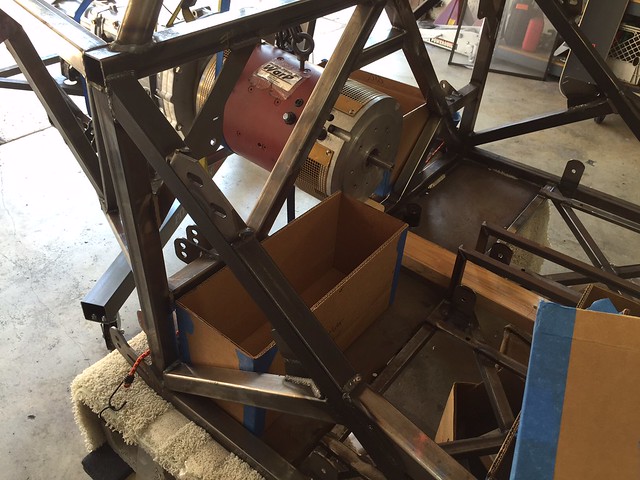
    So got the center cross bar cut out and re-welded in some supporting legs to stiffen the center triangle.


    Motor and trans temporarily in place to figure out what to do next


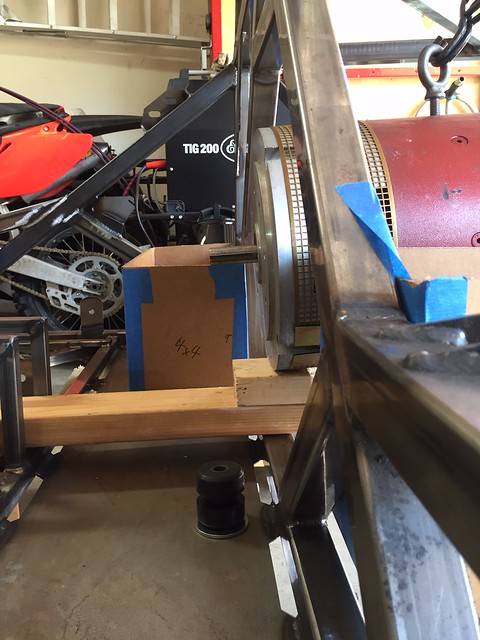
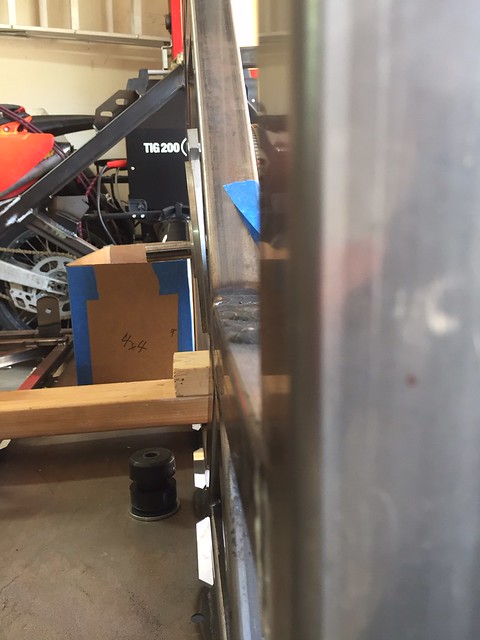
    Using some 2x4 to approximate the height


    Slight downward tilt so I will probably raise it up a little tomorrow. I'm hoping by sliding the transmission back a little and making the commutator end flush I'll be able to lay in more batteries behind the seats.

  16. #56
    Senior Member
    Join Date
    Oct 2014
    Location
    Redondo Beach, CA
    Posts
    161
    Post Thanks / Like
    Another shot of the downward tilt


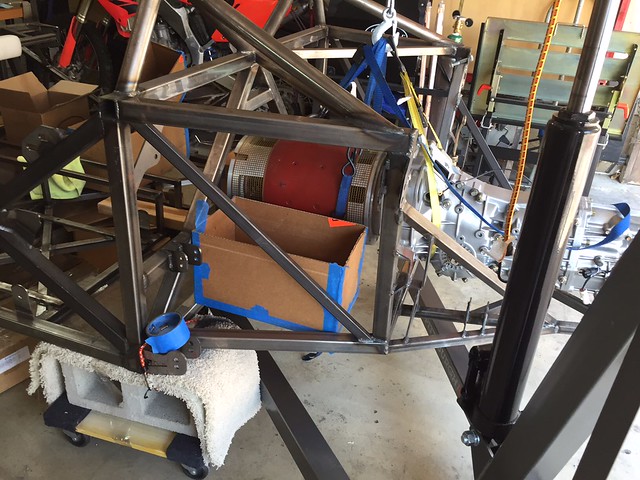
    Battery box location current taped in place, but definitely room to stack another box on top if need be. I think that's going to bias the rear too much though.


    Gas tank battery location mockup. This area is severely limited by the trapazoid shape the rear firewall makes. I'm hoping by raising the motor up a little, I can extend the box all the way through or at minimum place batteries in from of the motor. Perhaps it's time to revisit placing batteries along the center tunnel?

  17. #57
    Senior Member Frank818's Avatar
    Join Date
    Jun 2013
    Location
    QC, Canada
    Posts
    5,732
    Post Thanks / Like
    Nice redesign and welding.

    Are you going to fit one battery pack on the right side of the "gas tank" location? Or you are short one cardboard box to mock-up the left side battery pack?
    Frank
    818 chassis #181 powered by a '93 VW VR6 Turbo GT3582R
    Go-karted Aug 5, 2016 - Then May 19+21, 2017
    Tracked May 27/July 26, 2017
    Build time before being driveable on Sep 27, 2019: over 6000h
    Build Completed Winter 2021

  18. #58
    Senior Member flynntuna's Avatar
    Join Date
    Apr 2011
    Location
    San Diego Ca 92106
    Posts
    1,972
    Post Thanks / Like
    Great thread. One safety concern though, those concrete blocks shouldn't be laying on their sides. They aren't designed to hold much weight that way. Even though there's not that much weight , it's better to be safe than sorry.

  19. #59
    Senior Member
    Join Date
    Oct 2014
    Location
    Redondo Beach, CA
    Posts
    161
    Post Thanks / Like
    Quote Originally Posted by flynntuna View Post
    Great thread. One safety concern though, those concrete blocks shouldn't be laying on their sides. They aren't designed to hold much weight that way. Even though there's not that much weight , it's better to be safe than sorry.
    Gotcha ... I'll flip them around this weekend.

  20. #60
    Senior Member
    Join Date
    Oct 2014
    Location
    Redondo Beach, CA
    Posts
    161
    Post Thanks / Like
    Quote Originally Posted by Frank818 View Post
    Nice redesign and welding.

    Are you going to fit one battery pack on the right side of the "gas tank" location? Or you are short one cardboard box to mock-up the left side battery pack?
    Ran out of cardboard. I've got too many different configurations floating around. There should be 2 boxes to each side of the motor. The plan is to have another 2 behind the seats. With the motor raised up more, I believe I can squeeze in another 8 batteries. That would alleviate the space requirement needed in front of the front firewall.

  21. #61
    Senior Member
    Join Date
    Oct 2014
    Location
    Redondo Beach, CA
    Posts
    161
    Post Thanks / Like
    Quote Originally Posted by Bob_n_Cincy View Post
    Here is a drawing that describes how they are used.

    http://www.avproductsinc.com/center-...ce-mounts.html
    Looking over the design, the static weight is about right, but it also relies on nearly 0.5" thick substrate to mount. How thick is your mounting plate and do you have a picture/idea of what it will look like? I'm debating to extend the mount to the angled square tubing I just welded or go straight down to the bottom square tube.

  22. #62
    Senior Member Bob_n_Cincy's Avatar
    Join Date
    Sep 2012
    Location
    Cincinnati OH
    Posts
    3,903
    Post Thanks / Like
    Quote Originally Posted by ninjanick View Post
    Looking over the design, the static weight is about right, but it also relies on nearly 0.5" thick substrate to mount. How thick is your mounting plate and do you have a picture/idea of what it will look like? I'm debating to extend the mount to the angled square tubing I just welded or go straight down to the bottom square tube.
    Hi Nick
    I'm not able to help. My electric 818 is on hold until I get the gas one sorted out. (never ending)
    My motor mount design will be totally different.
    Bob

    Attached Images Attached Images
    818S #22 Candy Blue Frame, Front Gas Tank, 2.5L Turbo, Rear radiator, Shortened Transmission, Wookiee Compatible, Console mounted MR2 Shifter, Custom ECU panel, AWIC soon
    My Son Michael's Turbo ICE Build X22 http://thefactoryfiveforum.com/showt...rts-818S-Build
    My Electric Supercar Build X21 (on hold until winter) http://thefactoryfiveforum.com/showt...e-Build-Thread

  23. #63
    Senior Member
    Join Date
    Oct 2014
    Location
    Redondo Beach, CA
    Posts
    161
    Post Thanks / Like
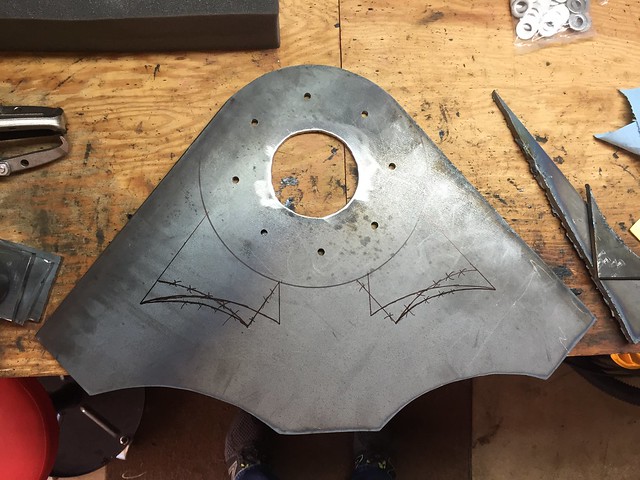
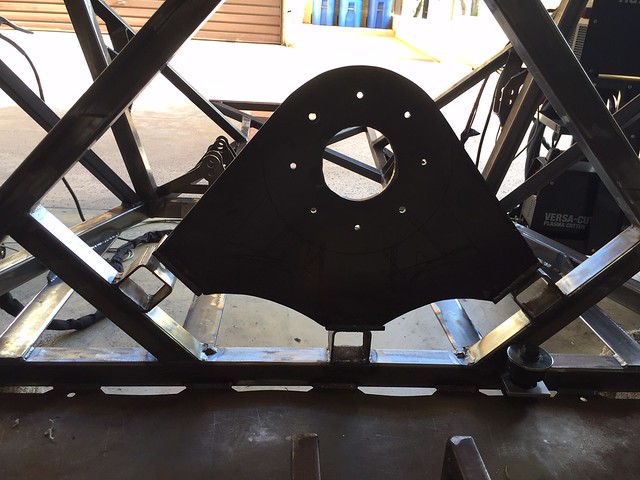
    Finally had some time to spend on the motor mount today. I basically traced out what I thought it would/should look like and manually cut it from 0.250" plate steel. Not complete, but it's coming along. This piece will bolt to the commutator end and there will be 3 mounting locations. I intend to weld on some gussets and adapters at right angles to bolt the isolators to the frame. I was playing around with some ideas of cutting away some of the inside to save a little weight. Not exactly sure how much I should cut away ... any suggestions?


  24. #64
    Senior Member Flamshackle's Avatar
    Join Date
    Jun 2011
    Location
    Aotearoa (New Zealand)
    Posts
    648
    Post Thanks / Like
    Quote Originally Posted by Bob_n_Cincy View Post
    Hi Nick
    I'm not able to help. My electric 818 is on hold until I get the gas one sorted out. (never ending)
    My motor mount design will be totally different.
    Bob

    Man this is an exciting build. Love this thread.

    What electric motor is this? Out of a tesla? Now that would be awesome
    __________________________________________________ _____________

    That man is no fool, who gives what he cannot keep to gain what he cannot lose
    __________________________________________________ _____________

  25. #65
    Senior Member Bob_n_Cincy's Avatar
    Join Date
    Sep 2012
    Location
    Cincinnati OH
    Posts
    3,903
    Post Thanks / Like
    Quote Originally Posted by Flamshackle View Post
    Man this is an exciting build. Love this thread.

    What electric motor is this? Out of a tesla? Now that would be awesome
    It is a Siemens Motor and Borg Warner Gearbox out of a Ford Transit Connect.
    http://www.plugincars.com/ford-transit-connect-electric
    818S #22 Candy Blue Frame, Front Gas Tank, 2.5L Turbo, Rear radiator, Shortened Transmission, Wookiee Compatible, Console mounted MR2 Shifter, Custom ECU panel, AWIC soon
    My Son Michael's Turbo ICE Build X22 http://thefactoryfiveforum.com/showt...rts-818S-Build
    My Electric Supercar Build X21 (on hold until winter) http://thefactoryfiveforum.com/showt...e-Build-Thread

  26. #66
    Senior Member
    Join Date
    Oct 2014
    Location
    Redondo Beach, CA
    Posts
    161
    Post Thanks / Like
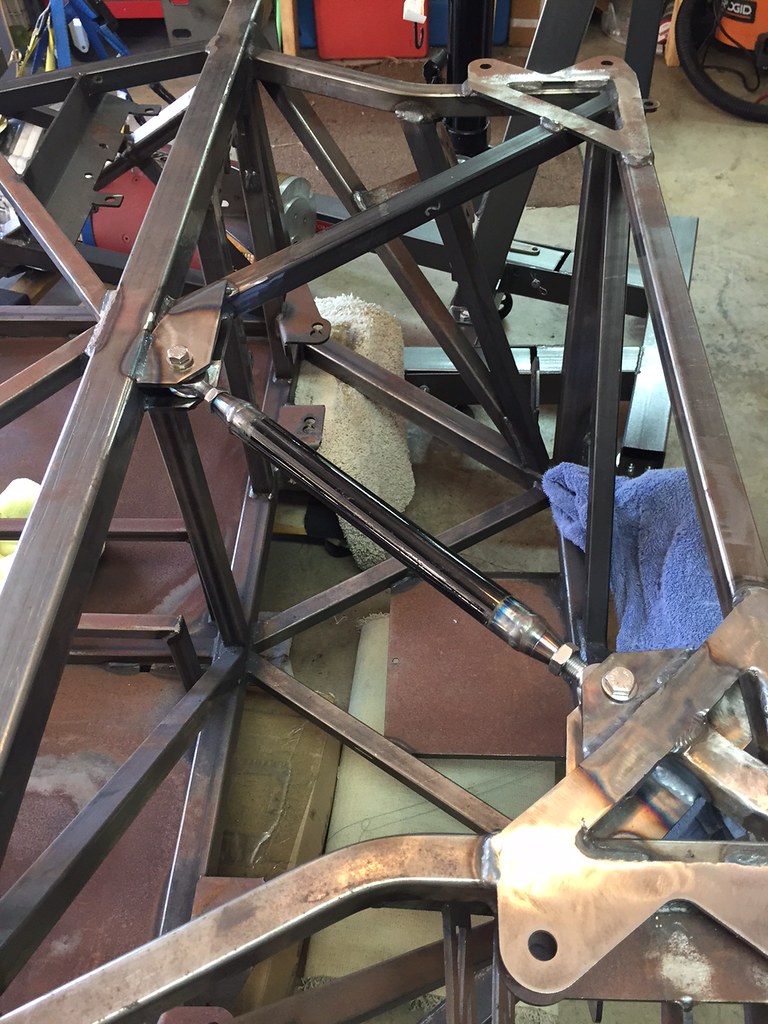
    Got some work done this weekend. Welded in some mounts and fit up a strut to replace a section of frame I cut out to allow room for the front battery box.


  27. #67
    Senior Member
    Join Date
    Oct 2014
    Location
    Redondo Beach, CA
    Posts
    161
    Post Thanks / Like
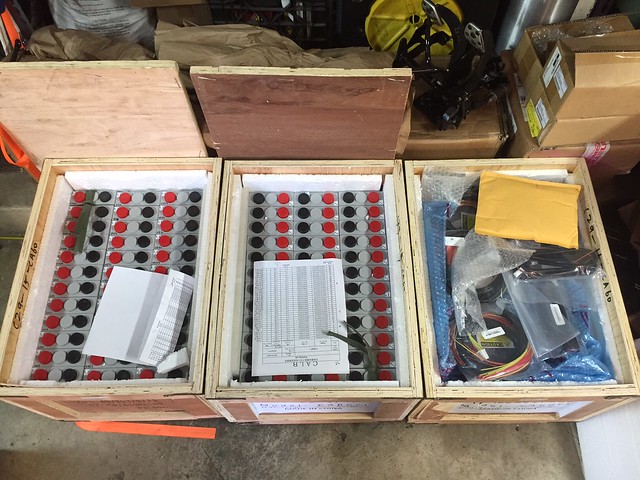
    Batteries and BMS arrived!!! 100 CALB CA 60aH cells all stable around 3.26V.


  28. #68
    Senior Member
    Join Date
    Oct 2014
    Location
    Redondo Beach, CA
    Posts
    161
    Post Thanks / Like
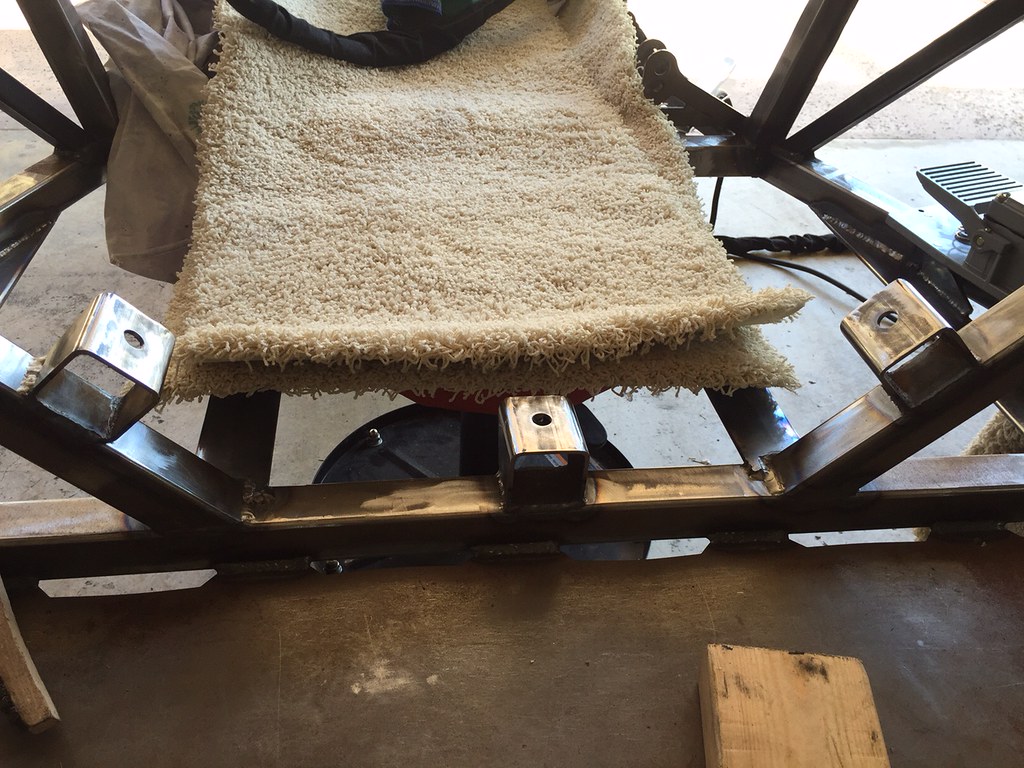
    Welded in the motor mounts to the frame. Carpet was used as I was laying flat on my stomach trying to weld those square tubes in place. I used square tubing mainly so I can access the nut on the bottom without having to further cut the frame.


    Motor mount "tacked" into place. The gap is there because the isolators take up about 0.5" at all 3 locations. One isolator is in the bottom right of the picture. Need to finish welding that piece up and send it off to powdercoat. Apologies for the underexposure. Was trying to clean up and didn't pay attention to the photo till afterwards.


  29. #69
    Senior Member
    Join Date
    Oct 2014
    Location
    Redondo Beach, CA
    Posts
    161
    Post Thanks / Like
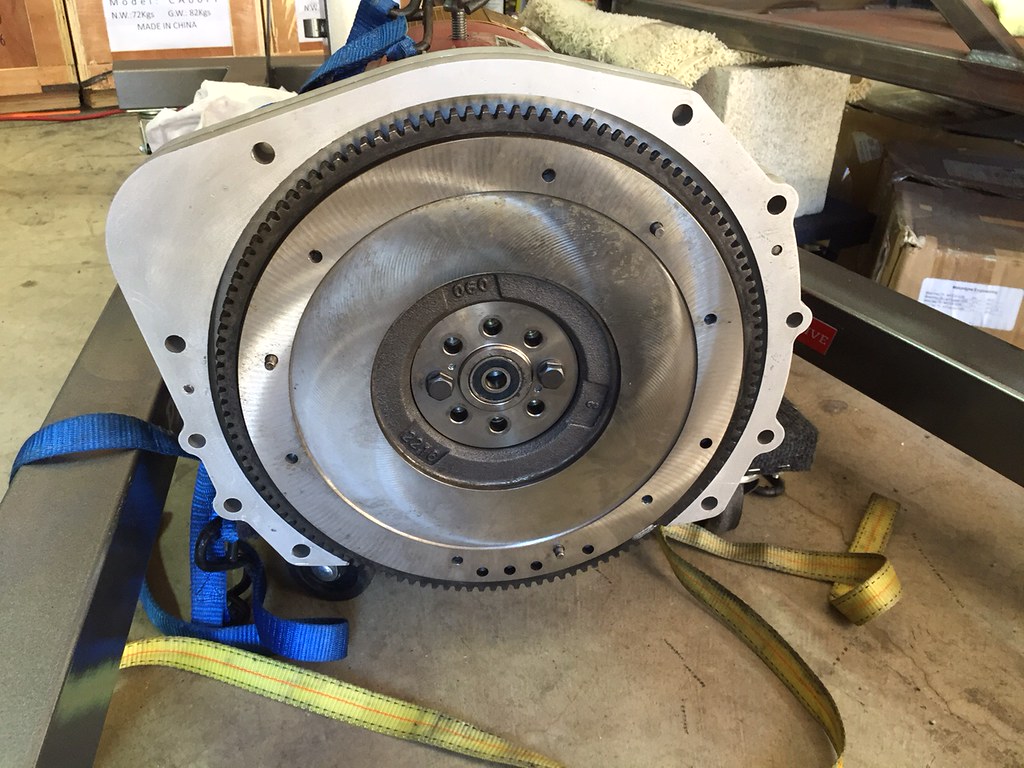
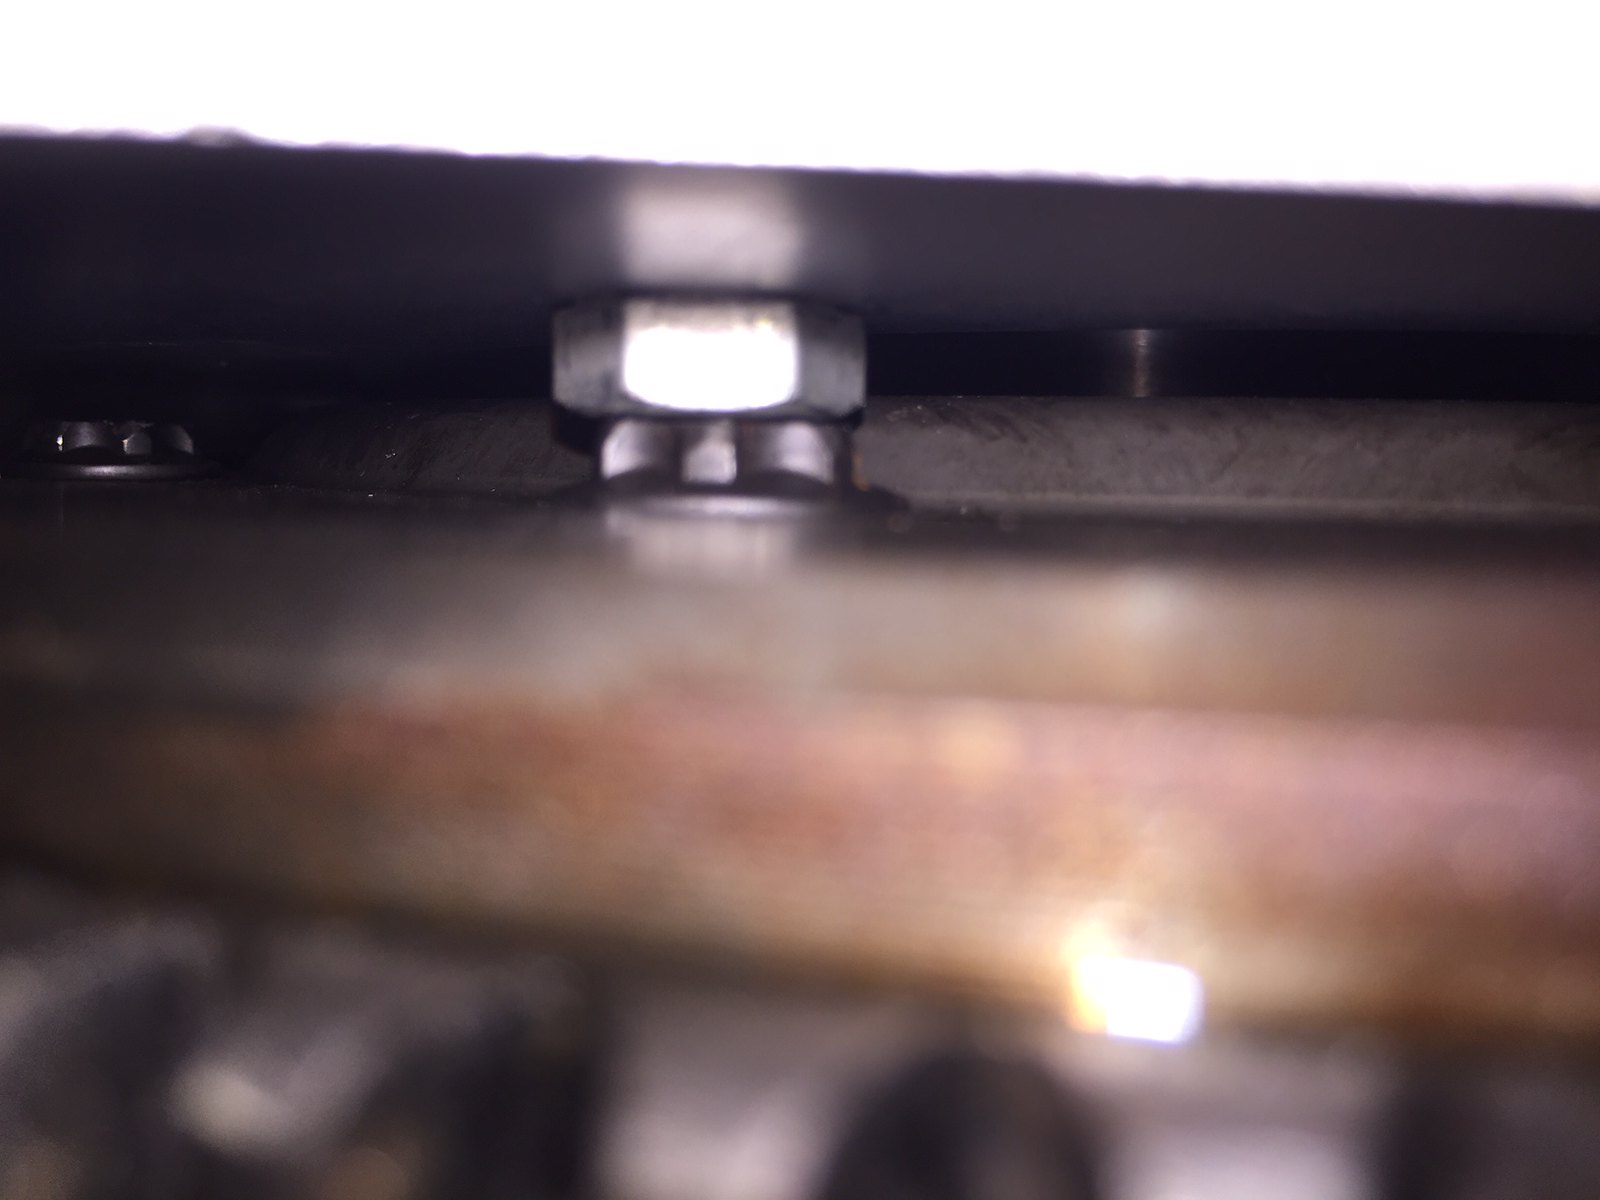
    I also de-mated the motor from the transmission to fit up the flywheel to the coupler ...


    And ... interference! Talked to Michael over at EVWest and he suggested I countersink the adapter plate to gain some clearance. Going to attempt this on my drill press ... nice a slow ....
  30. #70
    Senior Member Frank818's Avatar
    Join Date
    Jun 2013
    Location
    QC, Canada
    Posts
    5,732
    Post Thanks / Like
    Oh I hate interferences! I understand your frustration, I get that almost every time I fit a part! So limited...
    Frank
    818 chassis #181 powered by a '93 VW VR6 Turbo GT3582R
    Go-karted Aug 5, 2016 - Then May 19+21, 2017
    Tracked May 27/July 26, 2017
    Build time before being driveable on Sep 27, 2019: over 6000h
    Build Completed Winter 2021

  31. #71
    Senior Member
    Join Date
    Oct 2014
    Location
    Redondo Beach, CA
    Posts
    161
    Post Thanks / Like
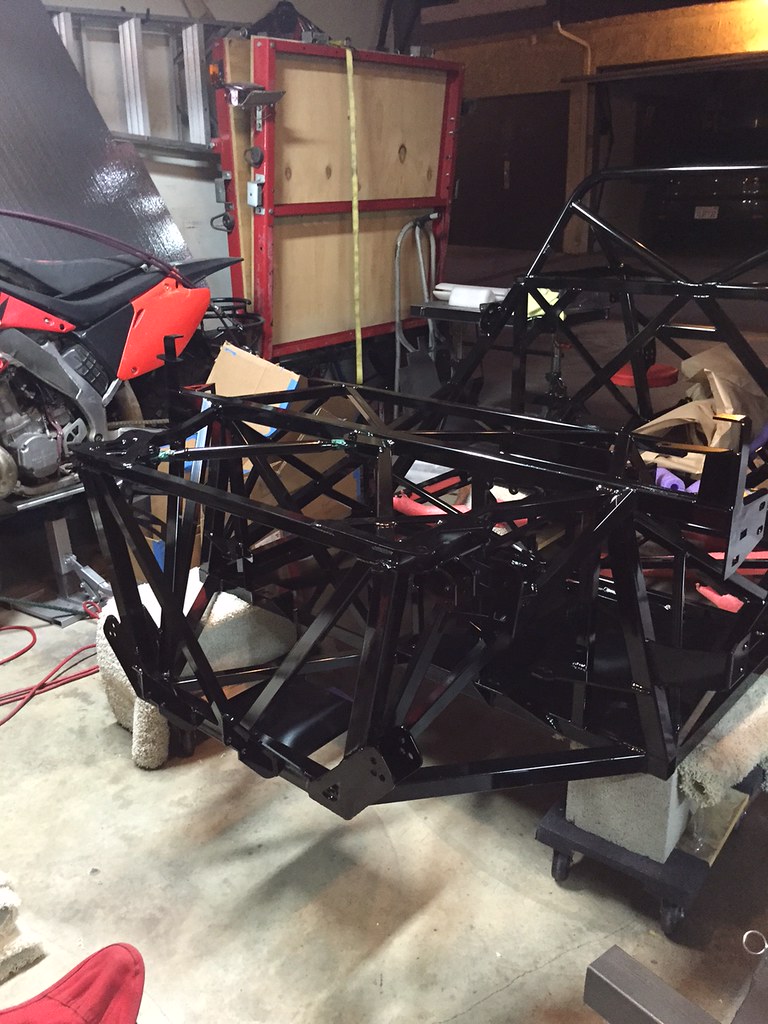
    Frame is now at Powdercoaters ... 2 weeks and hopefully a nice gloss black! Trying to get to rolling chassis by summer's end.


  32. #72
    Member
    Join Date
    Feb 2011
    Posts
    44
    Post Thanks / Like
    Quote Originally Posted by Bob_n_Cincy View Post


    Who knows, in 10 years we may be building a kit car on top of a Tesla skateboard.
    I'm going to start looking for donors now.


    Tesla built that motor/inverter right. Throttle pedal wired right into it. Stand alone setup now available. Bump this video up to 44:10 to see it powered up and under control:


  33. #73
    Senior Member
    Join Date
    Oct 2014
    Location
    Redondo Beach, CA
    Posts
    161
    Post Thanks / Like
    Back from powdercoat!


    It was surprisingly a lot heavier than I expected. Powdercoat looks thick ... bad for weight.


  34. #74
    Senior Member Bob_n_Cincy's Avatar
    Join Date
    Sep 2012
    Location
    Cincinnati OH
    Posts
    3,903
    Post Thanks / Like
    Quote Originally Posted by ninjanick View Post
    Back from powdercoat!

    It was surprisingly a lot heavier than I expected. Powdercoat looks thick ... bad for weight.
    Now would be a good time to check the clearance of every hole on the frame.
    During my build, I had to drill out the powder coat on every hole.
    I'm glad the suspension holes don't have any play. FFR does a very good job on hole dimensions.
    Bob
    818S #22 Candy Blue Frame, Front Gas Tank, 2.5L Turbo, Rear radiator, Shortened Transmission, Wookiee Compatible, Console mounted MR2 Shifter, Custom ECU panel, AWIC soon
    My Son Michael's Turbo ICE Build X22 http://thefactoryfiveforum.com/showt...rts-818S-Build
    My Electric Supercar Build X21 (on hold until winter) http://thefactoryfiveforum.com/showt...e-Build-Thread

  35. #75
    Senior Member
    Join Date
    Jan 2012
    Posts
    1,112
    Post Thanks / Like
    Only if they could get the body that tight with their dimensions.

  36. #76
    Senior Member Pearldrummer7's Avatar
    Join Date
    Feb 2014
    Location
    Asheville, NC
    Posts
    1,230
    Post Thanks / Like
    Quote Originally Posted by Bob_n_Cincy View Post
    Now would be a good time to check the clearance of every hole on the frame.
    During my build, I had to drill out the powder coat on every hole.
    I'm glad the suspension holes don't have any play. FFR does a very good job on hole dimensions.
    Bob
    Quote Originally Posted by 07FIREBLADE View Post
    Only if they could get the body that tight with their dimensions.
    Agreed on both points^


    Motor looks awesome. This is an exciting build.

  37. #77
    Senior Member
    Join Date
    May 2013
    Location
    Colombia
    Posts
    222
    Post Thanks / Like
    Awesome! I can't wait to see your progress from here on out.

  38. #78
    Senior Member
    Join Date
    Oct 2014
    Location
    Redondo Beach, CA
    Posts
    161
    Post Thanks / Like
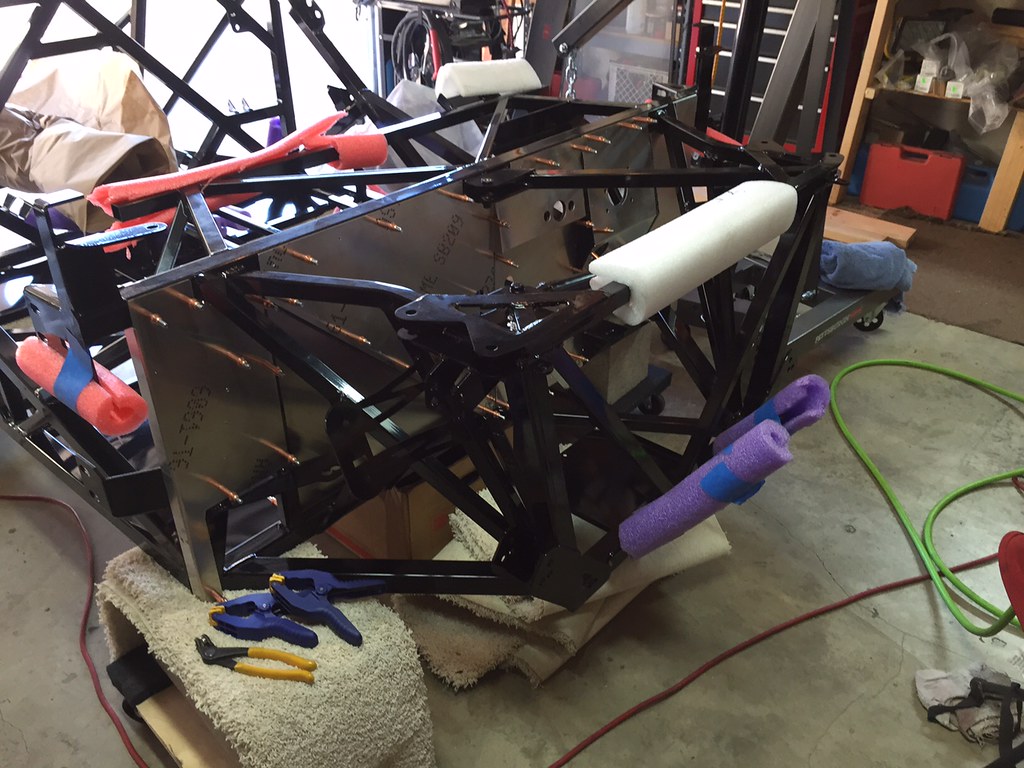
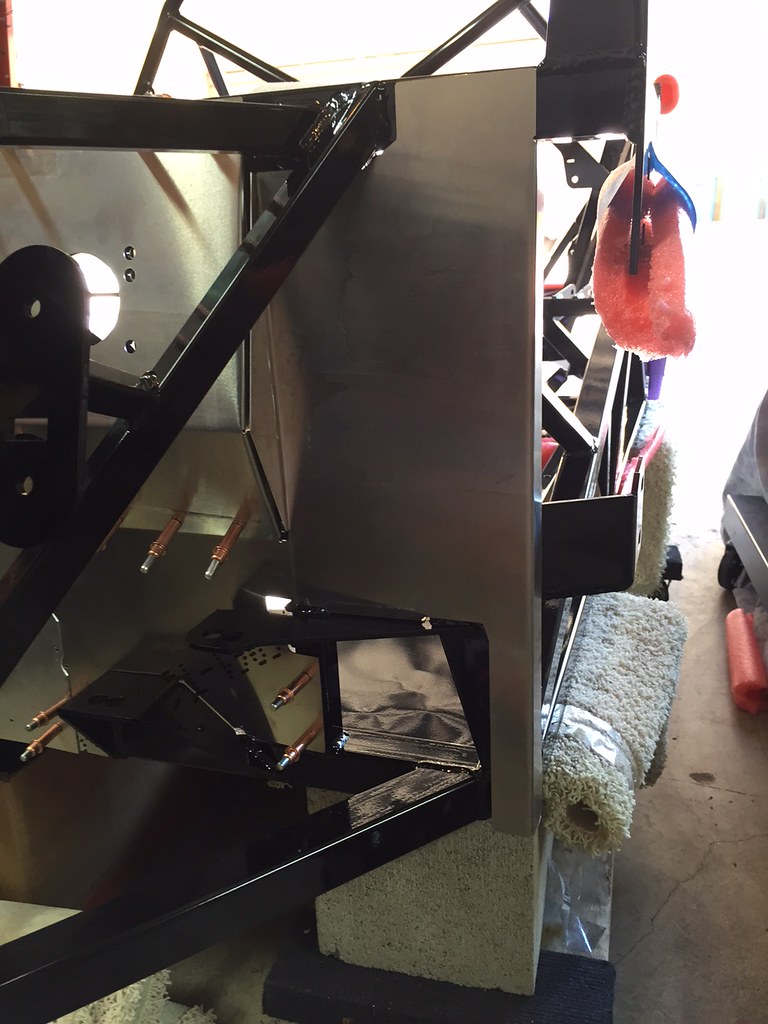
    Worked on the front firewall today ... I thought I bought enough Cleco's but I had to start "reusing" some to support all the panels.


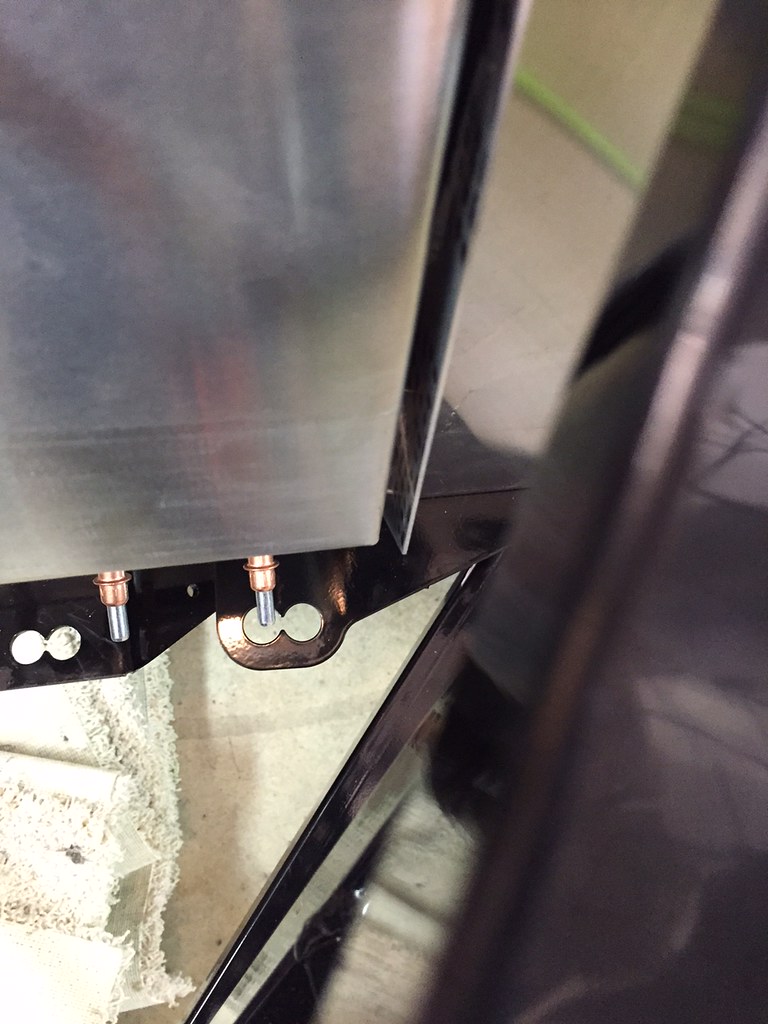
    Had a problem with the front driver side panel. I aligned the middle panels with the through hole pattern from the pedal box mount, but I have a 0.25" gap between the aluminum panels.


    Acceptable and just fill with silicon?


    On the subject of Silicon, there seems to be a variety of types/uses. Which is preferred Window and Door, Gasket sealant?

  39. #79
    Senior Member RM1SepEx's Avatar
    Join Date
    Jul 2011
    Location
    Freeport, ME
    Posts
    3,801
    Post Thanks / Like
    I used clear and black 100% silicone, 50 year stuff. Drill out a panel and try to replace it, this stuff really holds well
    Dan

    818S #17 Picked up 8/1/13 First start 11/1/13 Go Kart 3/28/14

  40. #80
    Senior Member Frank818's Avatar
    Join Date
    Jun 2013
    Location
    QC, Canada
    Posts
    5,732
    Post Thanks / Like
    I had to fill with silicone in many places. I used black all the way cuz that's what I had, but I am painting or wrapping or glueing sound deadening on the panels so the color will not be seen anyway.
    Frank
    818 chassis #181 powered by a '93 VW VR6 Turbo GT3582R
    Go-karted Aug 5, 2016 - Then May 19+21, 2017
    Tracked May 27/July 26, 2017
    Build time before being driveable on Sep 27, 2019: over 6000h
    Build Completed Winter 2021

Page 2 of 5 FirstFirst 1234 ... LastLast

Posting Permissions

  • You may not post new threads
  • You may not post replies
  • You may not post attachments
  • You may not edit your posts
  •  

Brown County Customs

Visit our community sponsor