Boig Motorsports

Visit our community sponsor

Thanks Thanks:  0
Likes Likes:  0
Page 1 of 3 123 LastLast
Results 1 to 40 of 86

Thread: Jason's 33 "Scootin' Thunder"

  1. #1
    Member 3dGuy's Avatar
    Join Date
    Feb 2015
    Location
    San Jose
    Posts
    98
    Post Thanks / Like

    Jason's 33 "Scootin' Thunder"

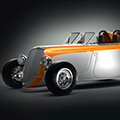
    I finally did it. I placed my order for my very own 33. I thought id post my own build thread along with a more detailed build page here... www.scootinthunder33.com . Im looking forward to this build and hoping it goes as well as it has in my head. The design Is based in part to the b-24 liberator "scootin' Thunder" my grandfather flew in the pacific theater during ww2. I'm sure the design will change as time goes on but this will at least give a good point of reference to get things started. As my name suggests I'm a 3d artist by trade but come from a long line of engineers so hopefully the two sides get along.
    33HotRod_002_logo.jpg
    SCOOTINTHUNDER1.JPG

  2. #2
    Senior Member
    Join Date
    Apr 2011
    Location
    Shawnee KS< KC Burb
    Posts
    844
    Post Thanks / Like
    Quote Originally Posted by 3dGuy View Post
    I finally did it. I placed my order for my very own 33. I thought id post my own build thread along with a more detailed build page here... www.scootinthunder33.com . Im looking forward to this build and hoping it goes as well as it has in my head.
    Welcome to the forum
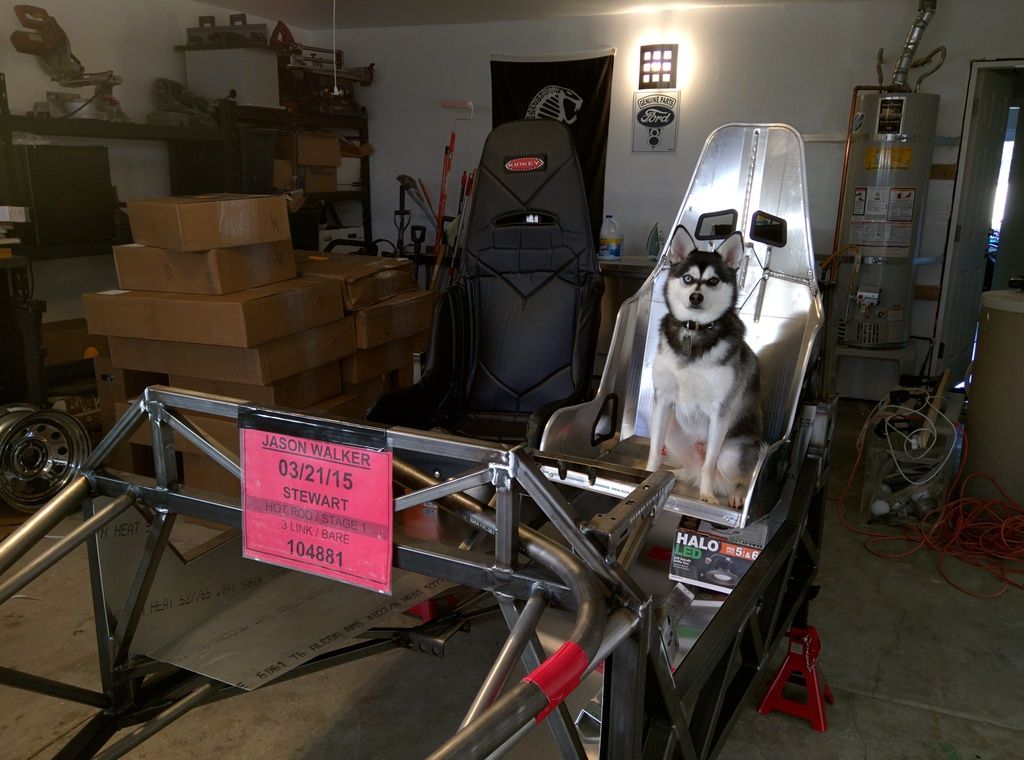
    Tell us more about your build and which options you chose or deleted on your order
    Dale
    Hemi33

  3. #3
    Member 3dGuy's Avatar
    Join Date
    Feb 2015
    Location
    San Jose
    Posts
    98
    Post Thanks / Like
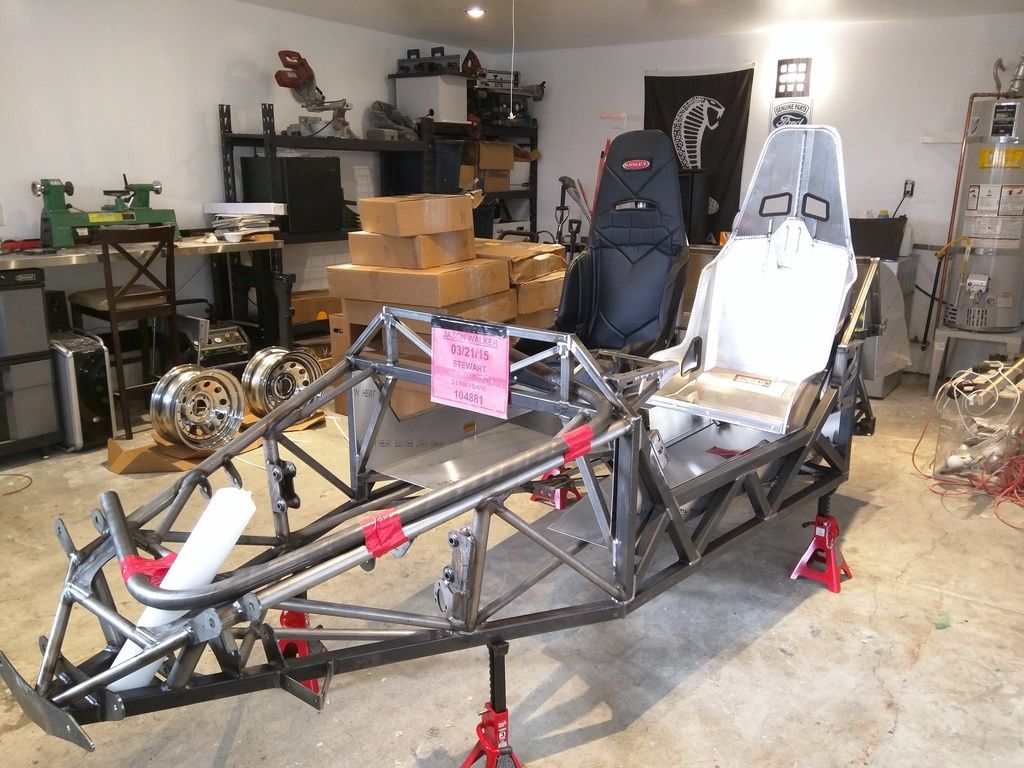
    Currently im hoping the kit will be on its way in about a week. Happily surprised the kit will be together that quickly. Here's what i got:
    Stage 1:
    coyote/coyote aluminator s/c with Edelbrock supercharger
    electric steering
    side exhaust
    tilt steering column
    3 link
    t-56 transmission
    Ford 3-Link Complete Rear Axle Assembly from Moser
    Wilwood brakes
    t-56 (still deciding)
    Some kind of wheels still up in the air what ones.

  4. #4
    Senior Member rcotner's Avatar
    Join Date
    Aug 2013
    Location
    Wilsonville, OR
    Posts
    200
    Post Thanks / Like
    Blog Entries
    1
    Welcom and good luck! My build is similar (Aluminator XS, T-56, 3-link...)! I am really looking forward to seeing what you do. Here is the link to my thread if you are interested:

    http://thefactoryfiveforum.com/showt...0-Ray-s-hotrod

  5. #5
    Member 3dGuy's Avatar
    Join Date
    Feb 2015
    Location
    San Jose
    Posts
    98
    Post Thanks / Like
    Thank you. where did you purchase the XS? seems like the prices very quite a bit. It looks like from your build that you have yours on the move, do you think you have enough power with the xs or want more?

  6. #6
    Senior Member rcotner's Avatar
    Join Date
    Aug 2013
    Location
    Wilsonville, OR
    Posts
    200
    Post Thanks / Like
    Blog Entries
    1
    I bought it through a local (Portland OR) Ford Racing dealer. He was able to get me a pretty good price on the low end of the distribution. The shops name is Aldridge Motorsport and Engineering. Here is their web site:

    http://www.aldridgemotorsportsinc.com/

    They are a pretty well know engine and car builder around here that specializes in Ford builds. After dyno tuning and with a "conservative" tune I am making ~425 rwHP. That compares to about 375 or so rwHP on my boss 302. Frankly I am a bit afraid of that level of HP in a 2200lb car. So to answer your question I don't want any more power at this point. I might change my mind though. We'll see.

  7. #7
    Member 3dGuy's Avatar
    Join Date
    Feb 2015
    Location
    San Jose
    Posts
    98
    Post Thanks / Like
    good to know, helps me to not go overboard with more power than the coyote. i was wondering how much room do you have for the seats with the t-56 trans.

  8. #8
    Senior Member 68GT500MAN's Avatar
    Join Date
    Feb 2011
    Location
    Fresno, CA
    Posts
    1,808
    Post Thanks / Like
    Jason, it was a pleasure to meet with you Sunday and discuss your upcoming build. I hope that you had a safe return to San Jose and remember; if you need any photo's, measurements or questions answered fell free to contact me.
    Doug
    Built FFR5196 MKII in 2003, 427w
    Building FFR0058HR, Edlebrock 347-AOD

  9. #9
    Junior Member
    Join Date
    Feb 2015
    Posts
    4
    Post Thanks / Like
    Hey another Fresnan here, actually about to move to Sanger and get my order in for a 33

  10. #10
    Member 3dGuy's Avatar
    Join Date
    Feb 2015
    Location
    San Jose
    Posts
    98
    Post Thanks / Like
    Will do, thank you for inviting me. Just got word that the kit should be loaded on Friday and hopefully be here sometime early next month. Unfortunately the truck that would have been on its way by now broke down and is in the shop. (steward transport)
    My build site : www.ScootinThunder33.com

  11. #11
    Member 3dGuy's Avatar
    Join Date
    Feb 2015
    Location
    San Jose
    Posts
    98
    Post Thanks / Like
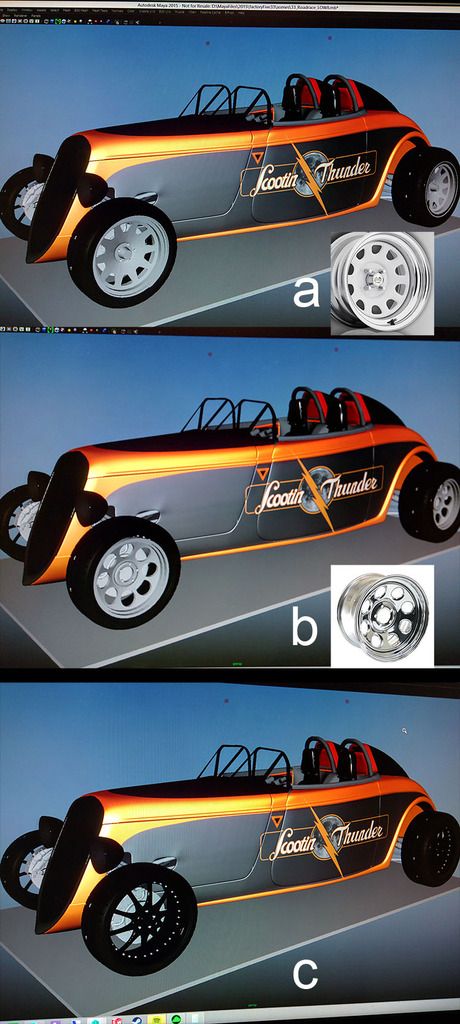
    Time to pick wheels. right now i'm looking at 17"x8"(a) or 17"x9"(b) rims 285/40/17 rear and 235/40/17 front. The hope is to maintain a more classic look similar to the b-24 bombers wheel, and a more modern option (c) thrown in as well. what design do you think works best. i do have wilwoods coming so if something seems off in the fitment please let me know. Btw how do you post a full size image and not a thumbnail.
    My build site : www.ScootinThunder33.com

  12. #12
    Senior Member
    Join Date
    Apr 2011
    Location
    Shawnee KS< KC Burb
    Posts
    844
    Post Thanks / Like
    Tom Veale is running wheels a lot like your option A IIRC so go take a look at his car on the forums. It will help to see them on a real car on the road and I think he has
    some track pictures as well.

    I like your concept and the bomber theme looks good on the 33's already done that way.
    DB

  13. #13
    Senior Member maczter's Avatar
    Join Date
    Feb 2013
    Location
    Xenia, OH
    Posts
    277
    Post Thanks / Like
    Blog Entries
    1
    I like "B", but in keeping with the theme, a steelie or solid wheel might fit the bill.
    FFR HR #530
    Race car theme, Tim Whitaker roll bar, Autometer Autolite Gauges, Satin Black, SBC 383/700R4, 8.8 rear with Cobra Brakes, 3.29 gear, Boyd Tank, QA1 springs and shocks,

    My build blog: http://jacks33hotrod.blogspot.com/

  14. #14
    Member 3dGuy's Avatar
    Join Date
    Feb 2015
    Location
    San Jose
    Posts
    98
    Post Thanks / Like
    Thank you for pointing out Tom Veale wheels, i think they actually are the same wheels as option A. Its great seeing them in a photo. I have looked at steelie wheels and actually found these wheels that i wish i could use. Unfortunattly they are 16.5" rims and the wilwood site says the wheels must be 17". Am i wrond thinking that they wont fit in a 16.5" rim? These are Unique series 96 rims.
    My build site : www.ScootinThunder33.com

  15. #15
    Senior Member maczter's Avatar
    Join Date
    Feb 2013
    Location
    Xenia, OH
    Posts
    277
    Post Thanks / Like
    Blog Entries
    1
    FFR HR #530
    Race car theme, Tim Whitaker roll bar, Autometer Autolite Gauges, Satin Black, SBC 383/700R4, 8.8 rear with Cobra Brakes, 3.29 gear, Boyd Tank, QA1 springs and shocks,

    My build blog: http://jacks33hotrod.blogspot.com/

  16. #16
    Member 3dGuy's Avatar
    Join Date
    Feb 2015
    Location
    San Jose
    Posts
    98
    Post Thanks / Like
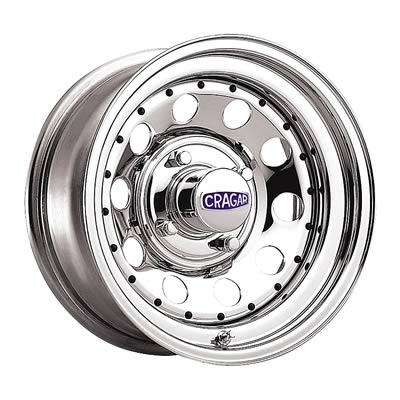
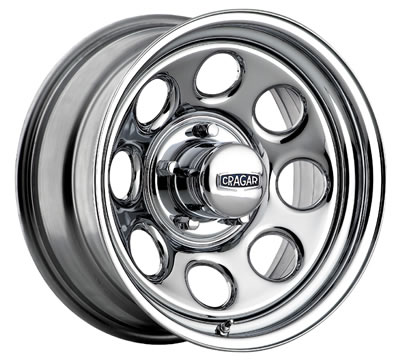
    Maczter- thanks for the links, they looks nice but wanted a few "holes" around the wheel to mimic the b-24 a bit more. Did a few quick rendering of the wheels i ended up ordering (two different Cragar wheels 16",17")
    Color mock ups with the wheels. I think I'm Favoring A the newer cleaner design.
    A

    B (original Idea)

    front

    rear
    My build site : www.ScootinThunder33.com

  17. #17
    Member 3dGuy's Avatar
    Join Date
    Feb 2015
    Location
    San Jose
    Posts
    98
    Post Thanks / Like
    On another note i finally got the first parts of the car in, sadly not to much to look at, just the wheel caps. Still waiting for Stewart transport to fix their trucks (2 of their now) fuel problem's. Hoping to get Stage one in another week or so.
    My build site : www.ScootinThunder33.com

  18. #18
    Member TigerBill's Avatar
    Join Date
    Jan 2013
    Location
    Kingsport, TN
    Posts
    93
    Post Thanks / Like
    Wow, nice software to be able to do that rendering - I guess due to your profession. I like the color scheme and the mods you have planned. I like option B on the wheels. Its a little more open. C is nice too, but doesn't fit the theme as well. I'd probably choose A on the rendering. The black part of the hood seems a little too much. Besides, then you ave to deal with the glossy black - impossible to keep swirl free and clean. I'm just finishing mine and jealous that you are just now getting started. It was great fun and learned a lot along the way.
    Bill
    '33HR #522, LS3, TKO 500, Boyd's Tank, QA1 Shocks, Double Roll Bars

  19. #19
    Member 3dGuy's Avatar
    Join Date
    Feb 2015
    Location
    San Jose
    Posts
    98
    Post Thanks / Like
    Quote Originally Posted by TigerBill View Post
    Wow, nice software to be able to do that rendering - I guess due to your profession. I like the color scheme and the mods you have planned. I like option B on the wheels. Its a little more open. C is nice too, but doesn't fit the theme as well. I'd probably choose A on the rendering. The black part of the hood seems a little too much. Besides, then you ave to deal with the glossy black - impossible to keep swirl free and clean. I'm just finishing mine and jealous that you are just now getting started. It was great fun and learned a lot along the way.
    Thank you bill, Maya come in handy. It helps alot to build the car digitally first. I feel like iv problem solved a lot of issues already. I really like the roll bars that you have in your build and planing to add the same with 1.5" bars and no the 2" ones in your build. how did you decide what was center for your placement of the hoops?
    My build site : www.ScootinThunder33.com

  20. #20
    Member TigerBill's Avatar
    Join Date
    Jan 2013
    Location
    Kingsport, TN
    Posts
    93
    Post Thanks / Like
    Jason, I decided on my seat placement in the vehicle and temporarily installed them. Then I centered the roll bars on the seats, so that the driver and passenger are also center on the roll bars.
    Bill
    '33HR #522, LS3, TKO 500, Boyd's Tank, QA1 Shocks, Double Roll Bars

  21. #21
    Member 3dGuy's Avatar
    Join Date
    Feb 2015
    Location
    San Jose
    Posts
    98
    Post Thanks / Like
    Quote Originally Posted by TigerBill View Post
    Jason, I decided on my seat placement in the vehicle and temporarily installed them. Then I centered the roll bars on the seats, so that the driver and passenger are also center on the roll bars.
    Makes sense, what spaceing/ measurements did you finalize on?
    My build site : www.ScootinThunder33.com

  22. #22
    Member TigerBill's Avatar
    Join Date
    Jan 2013
    Location
    Kingsport, TN
    Posts
    93
    Post Thanks / Like
    My roll bars were supposed to be 12" but ended up at 12.5" center line to center line and are 2" O.D. If you measure from the center line of the chasis, the centerline of the inside leg of each roll bar is 5 7/8". see Pic. If you use 1.5" bars you won't have this problem quite as bad, but its easy for the legs of the roll bars to hit the inside wall of the "waterfall" (cockpit back wall) and make the hole very elongated. If I would have realized that earlier, I would have moved the gas tank back a little to give me another 1/2 or so to move my roll bars back. There is some room to move tank without causing other problems. I also reinforced the new mounting sleeves with some angle iron welded to the frame.
    image.jpg
    Bill
    '33HR #522, LS3, TKO 500, Boyd's Tank, QA1 Shocks, Double Roll Bars

  23. #23
    Member 3dGuy's Avatar
    Join Date
    Feb 2015
    Location
    San Jose
    Posts
    98
    Post Thanks / Like
    That will give me some food for thought this weekend, once i get the kit here i should be able to see for myself. In the mean time i decided instead of driving myself crazy waiting i did a better quality render and composite for the car just to figure out what works on the car and not just in my mind.
    My build site : www.ScootinThunder33.com

  24. #24
    Ol Skool
    Join Date
    Oct 2013
    Location
    upstate NY
    Posts
    816
    Post Thanks / Like
    Nice! Almost looks like a 37 nose might work on it. hmmm...

  25. #25
    Member 3dGuy's Avatar
    Join Date
    Feb 2015
    Location
    San Jose
    Posts
    98
    Post Thanks / Like
    Quote Originally Posted by erlihemi View Post
    Nice! Almost looks like a 37 nose might work on it. hmmm...
    lol, i think your right that might be a good look for it. Very tempting . Goof thing i can do it in the computer first before dropping any cash lol. that and having cnc's, 3d printers and CAD all at my disposal is dangerous for this kind of project.
    My build site : www.ScootinThunder33.com

  26. #26
    Ol Skool
    Join Date
    Oct 2013
    Location
    upstate NY
    Posts
    816
    Post Thanks / Like
    You can 3D print a scale model for final effect. Awesome! I still sketch it out on brown packing paper or drywall

  27. #27
    Senior Member
    Join Date
    Apr 2011
    Location
    Shawnee KS< KC Burb
    Posts
    844
    Post Thanks / Like
    erlihemi
    re the sketch; Me too but I have stopped eating the red crayons<> you know the ones that taste the best
    3D guy
    love the renderings but that last one needs a rear fender or much wider tires to pull it together. Those big bumps make the butt look small.
    DB

  28. #28
    Ol Skool
    Join Date
    Oct 2013
    Location
    upstate NY
    Posts
    816
    Post Thanks / Like
    I think the small butt may be due to the wheel offset outside the fenderwell. 3D guy will have to make a solid model and upload the viewer so we can rotate it and view from infinite planes.

  29. #29
    Member 3dGuy's Avatar
    Join Date
    Feb 2015
    Location
    San Jose
    Posts
    98
    Post Thanks / Like
    Quote Originally Posted by erlihemi View Post
    I think the small butt may be due to the wheel offset outside the fenderwell. 3D guy will have to make a solid model and upload the viewer so we can rotate it and view from infinite planes.
    Its here! Sadly didn't have time to open anything but did get a chance to place the seats I had bought, and quickly realizing they might be to big. I can get them to fit if I place them above the trans tunnel, but would that be to high to mount them or should I return the seats (20" wide) right now they would sit lower than the seats in my mustange but I never see anyone beside those with bench seats place the seats at the height of the trans tunnel. I love the room of the seats as is so I'm hoping this setup will work.
    erlihemi- I can post 3d files if it would help anyone, obj. Since I didn't have any reference for axle size I guessed rear wheel spacing.


    My build site : www.ScootinThunder33.com

  30. #30
    Member TigerBill's Avatar
    Join Date
    Jan 2013
    Location
    Kingsport, TN
    Posts
    93
    Post Thanks / Like
    IMO I don't think there is any way the seats would be acceptable mounted at the same level as the top of the trans tunnel. You would be way too high. No head room with the hard top and you'd be looking over the windshield in the roadster (unless you are really short like my wife). I am 6'1'' and it fits me good, but just an inch or two higher would be a problem. I can even notice the difference between the mock up with the seats sitting on the bare aluminum vs the finished car sitting on sound deadener and carpet.. Also, once you finish things off, the seats get tighter side to side. The supplied seats are very snug once I put in an arm rest and put vinyl on the back cover.
    Bill
    '33HR #522, LS3, TKO 500, Boyd's Tank, QA1 Shocks, Double Roll Bars

  31. #31
    Ol Skool
    Join Date
    Oct 2013
    Location
    upstate NY
    Posts
    816
    Post Thanks / Like
    I'm not sure how we went from small butt to large seat discussions on this forum...
    17" Kirkey are probably an OK fit for the car, not sure about the butt. I guess it depends on whether the padding goes on the seat or arrives with the driver. I think mine are 16" and I can just get my fingers down the outside of the seat. Must be a topic about this someplace on the forum already.

  32. #32
    Ol Skool
    Join Date
    Oct 2013
    Location
    upstate NY
    Posts
    816
    Post Thanks / Like
    Besides that, I think the dog would look bigger in a smaller seat. He'll want to set up pretty high though so his tongue can hang out the window

  33. #33
    Member 3dGuy's Avatar
    Join Date
    Feb 2015
    Location
    San Jose
    Posts
    98
    Post Thanks / Like
    quick update, Just got the roll hoops inspired by bill's build fabricated and installed with 1.5" hoops. Including cad drawing for anyone that's interested. hopping to get the chassis back from powder Friday or Monday. Rear axle is still on its way along with the wilwood brakes that were back-ordered. I sent the seats back to summit without issue and will wait a bit longer to replace them with something that fits when i'm ready.

    does anyone know what the part number is for an original t-56 transmission is or if u can install the t-56 magnum (not xl) without fabrication into the ffr t-56 transmission mounts?


    Last edited by 3dGuy; 04-22-2015 at 02:41 PM.
    My build site : www.ScootinThunder33.com

  34. #34
    Senior Member jayguy's Avatar
    Join Date
    Feb 2011
    Location
    Las Vegas
    Posts
    234
    Post Thanks / Like
    Rollbars look great, I'm saving your drawing for reference when I build mine.


    Jay

  35. #35
    Senior Member Tom Veale's Avatar
    Join Date
    Mar 2011
    Location
    Wisconsin
    Posts
    447
    Post Thanks / Like
    Hi 3D, I had my steel wheels made for me at http://www.diamondracingwheels.com in Milwaukee, WI. They make a variety of standard sizes for dirt trackers and oval paved racers but will make up just about anything you want. HOwever, I don't think they build any wheels bigger than maybe 16" dia. You can get them unfinished and paint them as I did or you can order them chrome plated. 16.5" rims in steel will have more clearance than an alloy wheel of the same diameter. That's because of the thickness of the aluminum rim vs a steel rim. The 16.5" rims just might fit where a 17" alloy rim would normally go.


    Mine are 15" rims all around.

    Best regards, Tom

    Quote Originally Posted by 3dGuy View Post
    Thank you for pointing out Tom Veale wheels, i think they actually are the same wheels as option A. Its great seeing them in a photo. I have looked at steelie wheels and actually found these wheels that i wish i could use. Unfortunattly they are 16.5" rims and the wilwood site says the wheels must be 17". Am i wrond thinking that they wont fit in a 16.5" rim? These are Unique series 96 rims.
    Last edited by Tom Veale; 04-22-2015 at 04:27 PM.

  36. #36
    Member 3dGuy's Avatar
    Join Date
    Feb 2015
    Location
    San Jose
    Posts
    98
    Post Thanks / Like

    update

    Well this has been a long month. As you can see by my lack of posting iv been busy building. So far iv been able to take a good chunk out of the build. the frame is back from powder-coat with new roll hoops. The front Control arms, spindles, brakes, shocks are in along with master cylinders, most of the 3 link, wheels, and finally last night started the install of the fire wall. I ran into a problem that i later found to be a happy accident. the rims i chose for the front didn't have the correct clearance due to the rim actually curving inward towards the center of the rim. I quickly went to the local 4x4 shop and found 1.25" spacers that fixed the problem. Due to the width of the tires on the 8" rim being now 10" the backspace offset seems like it shouldn't prematurely wear out the bearings. I'm hoping im right on that but if not please correct me, but after doing some digging the proper backspace on a 10" wheel is 6" and the original backspace for these rims were 5". I'm happy that each week since i got the frame back iv been able to fill my recycle bin completely. Progress, although the hunny do list is growing as well. One thing i noticed is the lack of the transmission tunnel, is that not included in the stage1 kit?

    Chassis back

    control arms in

    seats/steering column in.

    3-link

    start of firewall install.
    My build site : www.ScootinThunder33.com

  37. #37
    Senior Member rcotner's Avatar
    Join Date
    Aug 2013
    Location
    Wilsonville, OR
    Posts
    200
    Post Thanks / Like
    Blog Entries
    1
    looks wonderful!!

  38. #38
    Senior Member 68GT500MAN's Avatar
    Join Date
    Feb 2011
    Location
    Fresno, CA
    Posts
    1,808
    Post Thanks / Like
    Jason, your build is looking great.
    Doug
    Built FFR5196 MKII in 2003, 427w
    Building FFR0058HR, Edlebrock 347-AOD

  39. #39
    Senior Member Motor_Freak's Avatar
    Join Date
    Feb 2014
    Location
    Los Angeles, CA
    Posts
    116
    Post Thanks / Like
    Post more pictures, looking good!

  40. #40
    Senior Member 6t8dart's Avatar
    Join Date
    Apr 2015
    Location
    Irving, TX
    Posts
    545
    Post Thanks / Like
    I'll tell you, if you really want to pay tribute to the B24 he flew, you should paint the frame and suspension a zinc-chromate yellow/green and the exterior a flat olive drab.

    image.jpg

    image.jpg

    image.jpg
    Last edited by 6t8dart; 06-22-2015 at 08:54 PM.

Page 1 of 3 123 LastLast

Tags for this Thread

Posting Permissions

  • You may not post new threads
  • You may not post replies
  • You may not post attachments
  • You may not edit your posts
  •  

Breeze

Visit our community sponsor