Forte's

Visit our community sponsor

Thanks Thanks:  0
Likes Likes:  0
Results 1 to 22 of 22

Thread: Struggling with headlight install - one side

  1. #1
    K3LAG's Avatar
    Join Date
    May 2013
    Location
    Greensburg, PA
    Posts
    552
    Post Thanks / Like

    Struggling with headlight install - one side

    I'm really struggling with my headlight install. With a few hours work we managed to get the drivers side headlight installed and fitting pretty well. As with most people I had to do pretty significant trimming on the eyelid.

    However, we can not get the passenger side to fit. I've trimmed as much eyelid as I dare and I just can't get the top of the light to roll back and up far enough to get the bottom of the light anywhere close. After fighting with it for about 5 hours I started taking measurements and discovered that the height of the headlight opening on the passenger side is 1/2 inch less than the divers side.

    HeadlightProblem.jpg

    The bumper is cut the same on both sides and more measuring and examination shows that the front point on the top of the fender is 1/2 lower on one side than the other. I don't see how it's possible to get this headlight to fit. Any suggestions?

    Larry

  2. #2
    Senior Member Bob_n_Cincy's Avatar
    Join Date
    Sep 2012
    Location
    Cincinnati OH
    Posts
    3,903
    Post Thanks / Like
    Larry
    You can try my method.
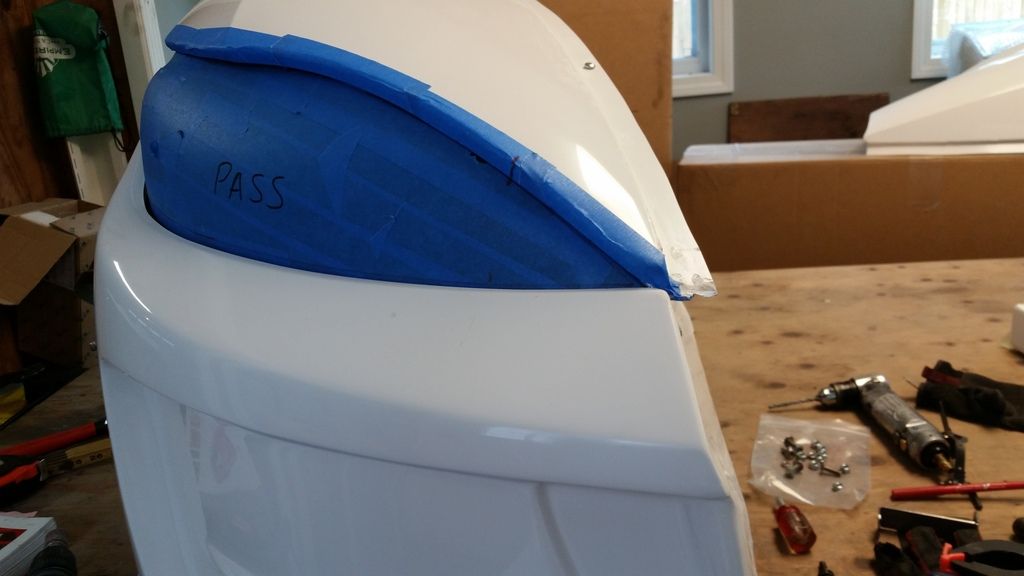
    I did not trim my eyelids. I just lowered the buckets.
    https://youtu.be/QlPaGiM453c
    Bob
    818S #22 Candy Blue Frame, Front Gas Tank, 2.5L Turbo, Rear radiator, Shortened Transmission, Wookiee Compatible, Console mounted MR2 Shifter, Custom ECU panel, AWIC soon
    My Son Michael's Turbo ICE Build X22 http://thefactoryfiveforum.com/showt...rts-818S-Build
    My Electric Supercar Build X21 (on hold until winter) http://thefactoryfiveforum.com/showt...e-Build-Thread

  3. #3
    K3LAG's Avatar
    Join Date
    May 2013
    Location
    Greensburg, PA
    Posts
    552
    Post Thanks / Like
    Quote Originally Posted by Bob_n_Cincy View Post
    Larry
    You can try my method.
    I did not trim my eyelids. I just lowered the buckets.
    https://youtu.be/QlPaGiM453c
    Bob
    Bob,

    I did try your method. When putting the tape covered light in to trace the shape of the opening on the light the light won't even come close to fitting. The bottom of the light won't move forward enough to come even close to the bumper cut out. The gap is over 1/2". The top of the light seems to be hitting the inside of the top of the fender. I put some paint on tape on the top of the light to see where it was hitting and it's leaving paint on the under side of the fender just behind the eyelid for about the inner 4 inches.

    The only thing I can figure is that the fender is actually shaped wrong as evidenced by the above shown measurement. It wouldn't be the first dimension I have found out of whack on my body.

    Larry

  4. #4
    Senior Member Bob_n_Cincy's Avatar
    Join Date
    Sep 2012
    Location
    Cincinnati OH
    Posts
    3,903
    Post Thanks / Like
    Quote Originally Posted by K3LAG View Post
    Bob,

    I did try your method. When putting the tape covered light in to trace the shape of the opening on the light the light won't even come close to fitting. The bottom of the light won't move forward enough to come even close to the bumper cut out. The gap is over 1/2". The top of the light seems to be hitting the inside of the top of the fender. I put some paint on tape on the top of the light to see where it was hitting and it's leaving paint on the under side of the fender just behind the eyelid for about the inner 4 inches.

    The only thing I can figure is that the fender is actually shaped wrong as evidenced by the above shown measurement. It wouldn't be the first dimension I have found out of whack on my body.

    Larry
    Hey Larry,
    By squeezing the side of the fender-bumber toward the center of the car. it might create more ark in the fender above the headlight.
    Just a thought.
    Bob
    818S #22 Candy Blue Frame, Front Gas Tank, 2.5L Turbo, Rear radiator, Shortened Transmission, Wookiee Compatible, Console mounted MR2 Shifter, Custom ECU panel, AWIC soon
    My Son Michael's Turbo ICE Build X22 http://thefactoryfiveforum.com/showt...rts-818S-Build
    My Electric Supercar Build X21 (on hold until winter) http://thefactoryfiveforum.com/showt...e-Build-Thread

  5. #5
    K3LAG's Avatar
    Join Date
    May 2013
    Location
    Greensburg, PA
    Posts
    552
    Post Thanks / Like
    Quote Originally Posted by Bob_n_Cincy View Post
    Hey Larry,
    By squeezing the side of the fender-bumber toward the center of the car. it might create more ark in the fender above the headlight.
    Just a thought.
    Bob
    I'll look at it again tomorrow. I'm going to spend most of the day working on a couple other projects on the car. I need to get the AWIC hooked back up since we needed to move it to make space for the trunk. So, that and a few other projects are on the books for tomorrow.

    I'll look at the headlight after we get some other stuff done, but I want tomorrow to be more productive than Friday was.

    Larry

  6. #6
    Senior Member AZPete's Avatar
    Join Date
    Feb 2011
    Location
    Scottsdale, AZ
    Posts
    2,374
    Post Thanks / Like
    My headlights are in but not right. I think FFR is working on a new front body piece so I'm waiting to see if it solves the problems with the headlights. (fingers crossed)
    818S/C : Chassis #25 with 06 WRX 2.5 turbo, ABS, cruise, PS, A/C, Apple CarPlay, rear camera, power windows & locks, leather & other complexities. Sold 10/19 with 5,800 miles.
    Mk3 Roadster #6228 4.6L, T45, IRS, PS, PB, ABS, Cruise, Koni's, 17" Halibrands, red w/ silver - 9K miles then sold @ Barrett-Jackson Jan 2011 (got back cash spent).

  7. #7
    Member
    Join Date
    Mar 2014
    Location
    Edwardsville, IL
    Posts
    99
    Post Thanks / Like
    I am with you Larry. I have been fighting with the headlights for a couple of weeks. I have trimmed, filed, ground, and poked holes in the headlight buckets. Don't know what's left except to grind a little off of the headlamp itself.

    I am tempted to go with the bigger hammer!

  8. #8
    Senior Member TrickyPete's Avatar
    Join Date
    Feb 2015
    Location
    Lewiston ME
    Posts
    117
    Post Thanks / Like
    I've fought with the front end of my car for about 3 weeks now. Finally got it to a point I can live with. Definitely the most frustrating part I've delt with so far...

  9. #9
    K3LAG's Avatar
    Join Date
    May 2013
    Location
    Greensburg, PA
    Posts
    552
    Post Thanks / Like
    Quote Originally Posted by jaw777 View Post

    I am tempted to go with the bigger hammer!
    I'm trying to find a fiberglass stretcher myself. Someone should sell them right along side wire stretchers.

    Larry

  10. #10
    Senior Member
    Join Date
    Jan 2012
    Posts
    1,112
    Post Thanks / Like
    I just started over this weekend. So far I got new buckets from factory. So far I haven't got them mounted to the bumper but my buckets fit way better and my headlamps are actually an inch higher just resting in place. I should be able to get the stock lamps aimes properly once install is finished. Hopefully I didn't cut to much away from the bumper and fenders on the first attempt.

  11. #11
    K3LAG's Avatar
    Join Date
    May 2013
    Location
    Greensburg, PA
    Posts
    552
    Post Thanks / Like
    Quote Originally Posted by 07FIREBLADE View Post
    I just started over this weekend. So far I got new buckets from factory. So far I haven't got them mounted to the bumper but my buckets fit way better and my headlamps are actually an inch higher just resting in place. I should be able to get the stock lamps aimes properly once install is finished. Hopefully I didn't cut to much away from the bumper and fenders on the first attempt.
    Can you post pictures of your new buckets?

  12. #12
    Senior Member
    Join Date
    Jan 2012
    Posts
    1,112
    Post Thanks / Like


    Got to excited to get the buckets in and forgot to take a few pics before install. The first photo is with the bucket half installed. I noticed that the passenger side was a bit short and wouldn't reach that well. So i moved the lip to the inside like in Bob's video and used ducktape to get my lines where I liked them. After I did this I remade the bottom z bracket that factory provides us with from aluminum and used a perforated base stud to hold the bottom in place. I got the idea from a few other guys. Once that was done it was a simple mark measure and cut and the bucket fell right into place. The second photo was just for my reference to see the progress with the new and old buckets. The sharpie line was my original placement and the location it is at now will be about final placement minus the fender to wedge the pieces together. I still need to redrill the top mounting tap and side bolt hole but all in all I'm extremely pleased with getting my headlights to passable standards. My only gripe is I trimmed way to much of my fenders away trying to get them working in the first place. I no longer have the front leading tabs to hold everything together but that's just fiberglass which could be fixed.

  13. #13
    Senior Member AZPete's Avatar
    Join Date
    Feb 2011
    Location
    Scottsdale, AZ
    Posts
    2,374
    Post Thanks / Like
    Does the new bucket hold the headlight rotated inward, or is the bottom edge level? It's hard to tell in your photo.
    818S/C : Chassis #25 with 06 WRX 2.5 turbo, ABS, cruise, PS, A/C, Apple CarPlay, rear camera, power windows & locks, leather & other complexities. Sold 10/19 with 5,800 miles.
    Mk3 Roadster #6228 4.6L, T45, IRS, PS, PB, ABS, Cruise, Koni's, 17" Halibrands, red w/ silver - 9K miles then sold @ Barrett-Jackson Jan 2011 (got back cash spent).

  14. #14
    Senior Member Bob_n_Cincy's Avatar
    Join Date
    Sep 2012
    Location
    Cincinnati OH
    Posts
    3,903
    Post Thanks / Like
    Quote Originally Posted by AZPete View Post
    Does the new bucket hold the headlight rotated inward, or is the bottom edge level? It's hard to tell in your photo.
    Pete
    I have some of each buckets. They fit in each other like a glove. I suspect the used the fiberglass bucket as mold for the plastic ones.
    The advantage of the plastic ones are that they are very flexible.
    Bob
    818S #22 Candy Blue Frame, Front Gas Tank, 2.5L Turbo, Rear radiator, Shortened Transmission, Wookiee Compatible, Console mounted MR2 Shifter, Custom ECU panel, AWIC soon
    My Son Michael's Turbo ICE Build X22 http://thefactoryfiveforum.com/showt...rts-818S-Build
    My Electric Supercar Build X21 (on hold until winter) http://thefactoryfiveforum.com/showt...e-Build-Thread

  15. #15
    Senior Member
    Join Date
    Jan 2012
    Posts
    1,112
    Post Thanks / Like
    Both of my buckets were plastic. The new ones just seem to fit better in general. The headlight is level and rotated properly now but this is with a set of oem headlights that I retrofitted projectors into so I can adjust the light rotation unlike the spider ones you have azpete

  16. #16
    K3LAG's Avatar
    Join Date
    May 2013
    Location
    Greensburg, PA
    Posts
    552
    Post Thanks / Like
    Went and took some pictures tonight.

    Here is my left side light which fits pretty well:
    IMG_0785.jpg IMG_0784.jpg

    Here is the right one I am having a problem with:

    IMG_0794.jpg IMG_0795.jpg

    It seems like the top of the light needs to rotate back a bit more so the front can rotate forward and up. It won't rotate any further that way though because it is all bound up at the top.

    Larry

  17. #17
    Senior Member
    Join Date
    Jan 2012
    Posts
    1,112
    Post Thanks / Like
    Maybe relieve some stress or glass up top. It's hard to tell. Your picture is what my headlights use to look like with my old buckets. The new ones I mounted differently and didn't have to cut any of the bucket to get my headlights to fit in it. One thing I did notice though was that my passenger side is still giving me problems but is way better than the old way. My driver side looks just like yours does.

  18. #18
    K3LAG's Avatar
    Join Date
    May 2013
    Location
    Greensburg, PA
    Posts
    552
    Post Thanks / Like
    Quote Originally Posted by 07FIREBLADE View Post
    Maybe relieve some stress or glass up top.
    I've removed about as much fiberglass as I dare. I think perhaps the real problem is at the back of the light not the front. I'm thinking that maybe the mounting tab on the back of the light may be too high with respect to the opening and it's forcing the headlight to be pointed down like that. The light fits in the opening exactly the same way even without the bucket so it has to be related to the location of the mounting tab with respect to the opening. I'm going to have to look closer at that next time I'm down at the garage.

    Although there are several things I'd like to see FFR improve/tweak on this kit, if I could pick only one, headlight mounting would be it.

    Larry

  19. #19
    K3LAG's Avatar
    Join Date
    May 2013
    Location
    Greensburg, PA
    Posts
    552
    Post Thanks / Like
    Well, after two months of fiddling, fitting, refitting and changing a part or two I finally have the headlights fitting to my satisfaction.

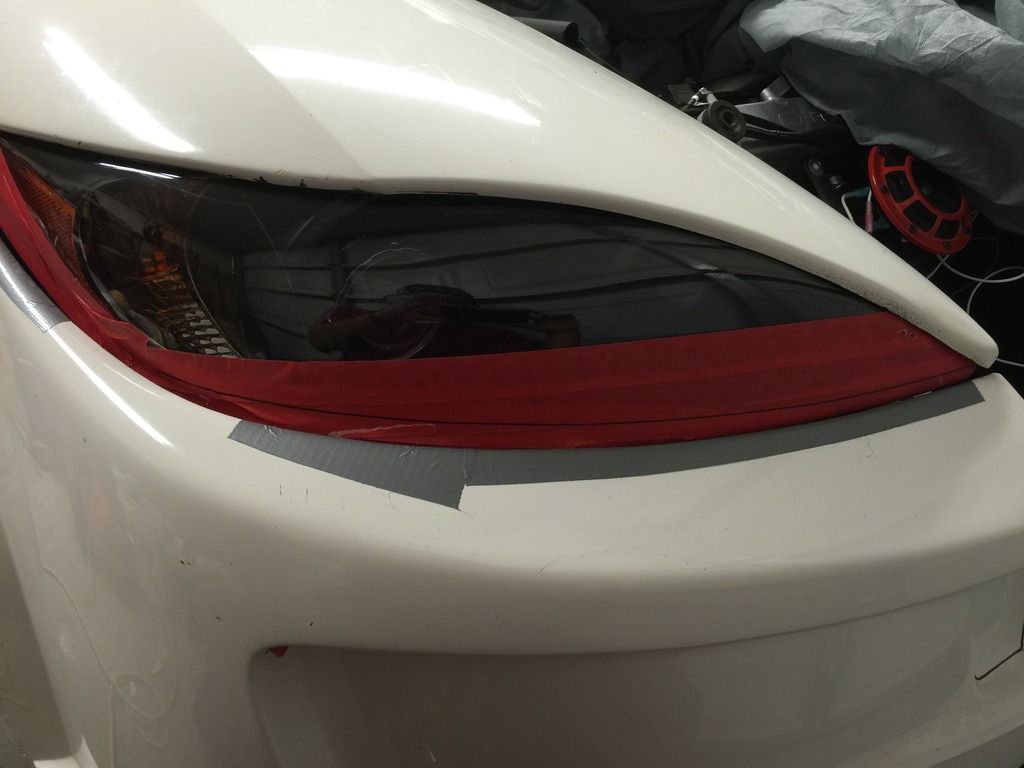
    My initial problem was definitely the shape of the top of the fender above where the light mounting tab is. That point was too low and wouldn't allow the light and fender to fit because of the lack of clearance. After sharing a bunch of pictures with FFR and having a few phone discussions with Vinny, FFR decided that the best course of action was to make me a new fender. We picked up the new fender at the open house.

    Once we got the new fender, we started fitting the passenger side over again. The new fender had the same clearance problem that the first one did. In fact it might have been a bit worse. However, since the fender was just out of the mold a few days, we were able to use a bit of heat and clamps to get the fender into the shape it needed to be and we ended up with about the same amount of clearance above the mounting tab on each side and had pretty good gaps around the lights.

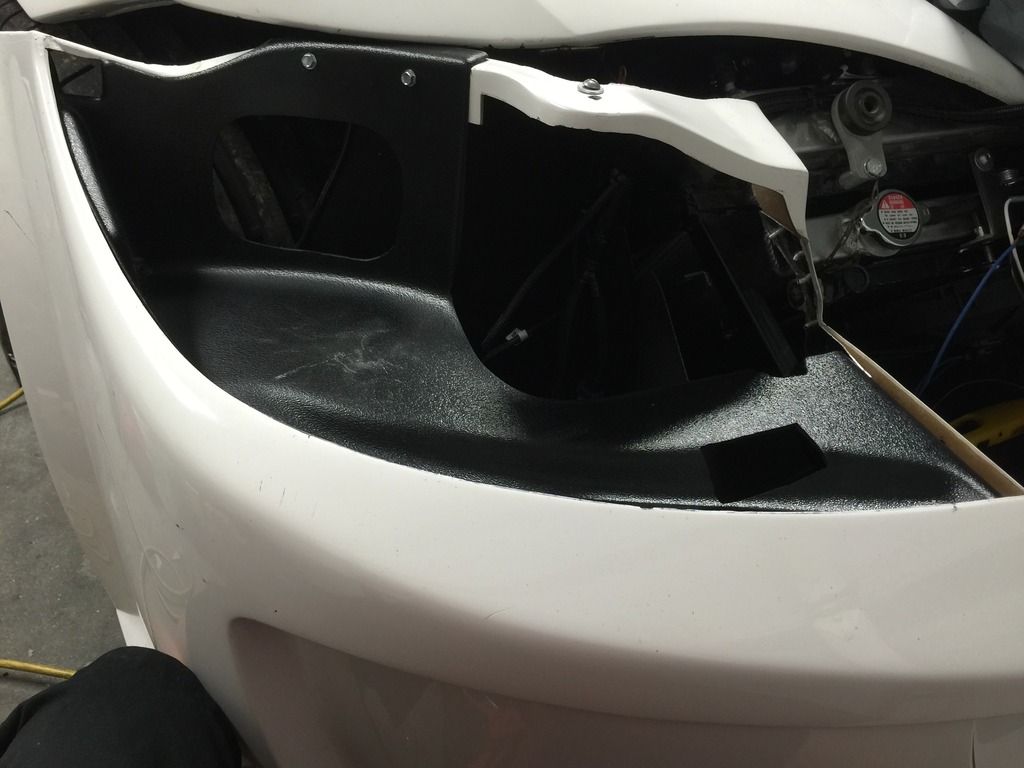
    We weren't able to get the inside corner of the fender down as close to the front bumper as we wanted, but the application of some more clamps and heat, plus a few adjustments and we ended up in a happy place. Here are some pictures:

    IMG_0976.jpg IMG_0977.jpg IMG_0978.jpg

    A few tricks we learned along the way:

    1. It's important to get the light far enough outward so that the 'tip' of the fender clears it to get the gap as small as possible. You may also need to clearance the back of the fender tip if it is thick there.

    2. If you can't get the 'tip' where you want it double check your fitting of the two bolts where the fender meets the nose at the wheel well. We removed those two bolts and adjusted the 'tip' to where we wanted it. Then we discovered that if we adjusted the bolt locations for the fender to nose connection by just a little it improved the fit of the 'tip' quite a bit.

    3. Also, you can make slight adjustments in the position of the light by loosening the bolt in the top bracket of the light and moving it around a little since the hole is a good bit bigger than the bolt.

    4. Wait to drill the bottom hole that attaches the light to the bucket until after you are happy with everything else. Small errors in the location of this bolt can significantly effect the fit of the light.

    Now that is all is fitted. We have no need for any trim at the top of the lights and a fairly small gap at the bottom. The bottom gap varies from close to 0 to 3/16 at the worst. The headlights aren't wired yet, but I'll let you all know how the aim looks once I get to that point.

    Larry
    Last edited by K3LAG; 07-28-2015 at 07:10 PM. Reason: typo

  20. #20
    Senior Member
    Join Date
    Jan 2014
    Location
    Massachusetts
    Posts
    148
    Post Thanks / Like
    I'm still trying to fit the bumper to the fender and headlight on a table like Bob did it. The gap where the fender meets the bumper at the wheel opening is pretty crude. Also I don't understand how the very forward tip of the fender meets the bumper at the inside of the headlight. No way to attach them together except duct tape. Seems like nothing is exact in the body install process.
    Trying to upload pics but upload failed.
    Davis

  21. #21
    Senior Member
    Join Date
    Jan 2014
    Location
    Massachusetts
    Posts
    148
    Post Thanks / Like
    [IMG][/IMG]

  22. #22
    Senior Member Bob_n_Cincy's Avatar
    Join Date
    Sep 2012
    Location
    Cincinnati OH
    Posts
    3,903
    Post Thanks / Like
    Quote Originally Posted by CU9DZ View Post
    I'm still trying to fit the bumper to the fender and headlight on a table like Bob did it. The gap where the fender meets the bumper at the wheel opening is pretty crude. Also I don't understand how the very forward tip of the fender meets the bumper at the inside of the headlight. No way to attach them together except duct tape. Seems like nothing is exact in the body install process.
    Trying to upload pics but upload failed.
    Davis
    CD9DZ
    The place where the tip of the fender meets the bumper is mostly heald together by the steel hood pin bracket.

    Just try and make the fender-hood line match the bumper-hood line.

    pin.jpg

    Bob
    818S #22 Candy Blue Frame, Front Gas Tank, 2.5L Turbo, Rear radiator, Shortened Transmission, Wookiee Compatible, Console mounted MR2 Shifter, Custom ECU panel, AWIC soon
    My Son Michael's Turbo ICE Build X22 http://thefactoryfiveforum.com/showt...rts-818S-Build
    My Electric Supercar Build X21 (on hold until winter) http://thefactoryfiveforum.com/showt...e-Build-Thread

Posting Permissions

  • You may not post new threads
  • You may not post replies
  • You may not post attachments
  • You may not edit your posts
  •  

Replica Parts

Visit our community sponsor