
Visit our community sponsor

Thanks:
0

Likes:
0
-
Senior Member

2004 WRX Tear-down - TX-Lou
I thought I would go ahead and create a teardown thread for our project. I wish I would have done this already as it probably would have saved us a few dollars from mistakes that weve already made but
.live and learn.
As mentioned in the title of this thread our donor car is a 2004 Impreza WRX 2.0L turbo (EJ205). We got the car through a Copart Auction in Houston. A little word of advice for those folks who are going to purchase through a Copart Auction. I originally registered with Copart and tried to bid on car but couldnt since I wasnt a broker. So, I used J &L Auto Brokers (who were great) out of Alabama. They created a Copart account for me and I used that to bid. Copart bids are fast and furious
..and can be a little confusing at times. We were winning the pre-bid. When the bidding starts the current high bid is the winner if nobody bids in about 8 to 10 seconds. It goes fast and furious since you have just a few seconds to bid or decide to pass. We were all sitting around the computer and the bids were flying. Copart pops up a banner that tells you that you are winning the bid. That goes away and your states flag shows.
Things are flashing around the screen quickly but I was happy to keep seeing my TX State flag. So the auction starts to wind down and I get the notice that Im winning
.but then it flashes a big red X on the screen. We were all really confused and time was running out so I bid again and the same thing happened again. Time was running out again and everyone behind me was urging me to bid again so I did. After it did the same thing again the little lightbulb in my head goes off that something is wrong. So I didnt bid again and the auction ended
..only to find out we did win after all. What I didnt realize was that my account didnt get registered with my TX address. It was listed with the address of our broker in Alabama. While some folks here are probably very familiar with the Alabama state flag, none of us were. But, I sure will never forget the big red X that is the Alabama state flag ever again. Yes, we probably cost ourselves an extra $150 or $200 and felt really dumb afterward but we did get the car and we will always laugh about it.
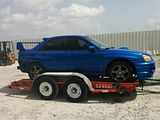
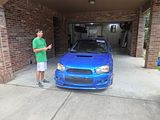
Here is our donor car on a trailer that I rented from U-Haul and in pre-teardown in our driveway.

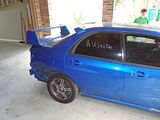
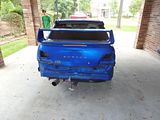
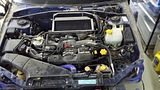
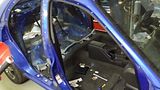
Here are some pics of where we are right now. Doors, Hood, Trunk, Rear Seats and Seatbelts are all out. We just started on the dash. Weve already cut some door and headlight wiring that we didnt think we were going to need but after reading more here realized we do. Oh well, Ill have to buy or build those cables. But the edict is out now
. Dont Cut Anything!
.....................Edited on 09-24-2015...................
I thought I would post some information concerning what resources we used for teardown and some other stuff that may help others.
RESOURCES
The main resources we used for information concerning what to do and how to do it were:
TOOLS
Here are the main tools that we used for the teardown.
- 1 Standard 3/8 Socket Wrench
- 1 Adjustable Angle 3/8 Socket Wrench
- 1 Metric Deep Socket Set (10mm through 19mm)
- 1 Metric Impact Socket set (10mm through 19mm)
- 21 mm Socket - Transmission Plug
- 19 mm 1/2 Deep Socket - Suspension Bolts
- Torx t70 Socket Bit - Coolant Plug
- 17" Breaker Bar - 1/2
- 10" Socket Extension - 1/2
- 3" Socket Extension - 3/8
- 1/2 Female to 3/8 Male adapter
- 3/8 Female to 1/2 Male adapter
- 90 Degree Needle Nose Pliers
- Pry Bar
- Misc. Small Tools - Pliers, Hammers, Screwdrivers, Snips, Heavy Scissors, etc.
- 18V Battery Powered Reciprocating Saw
- Diablo 9" Heavy Metal Demolition Blades
We also used a dremmel to cut off a mangled bolt, a lighter to heat a suspension bolt to loosen it, and an 18V Power Driver with 3/8 socket adapter.
Last edited by TX-Lou; 09-24-2015 at 01:54 PM.
Reason: Add info about the resources and tools used in the teardown
-
Moonlight Performance


Congrats on the donor car. That's a funny story. I did the same thing. For me the worst part of the whole online bidding part was waiting for the car I wanted to bid on to show up. A number of times, the car was scheduled to go to auction and I sat there on the computer only to find out it was re-scheduled for a later date (after watching an hour of cars I wasn't interested in float by... of course you can't take your eyes of the screen for even a second or you'll miss your car.) I ended up getting lucky on mine... the broker put in a pre-bid for me and when the auction time came, the entire system went down. So I won based on the pre-bid alone.
The car looks like it is in great shape so you should be able to recoup quite a bit by selling stuff you don't need on eBay.
-
Senior Member
Thanks Hindsight. Yes, the auction system was pretty fun to watch. I stayed by the computer to make sure I didn't miss it as I didn't trust the times it was telling us for when the auction for the car would actually start. After outbidding ourselves a few times we ended up getting the car for $3,850 plus auction and Broker fees. I was hoping to get it for less but was wiling to pay more because I could pick up the car myself out of the Houston lot. I also got a chance to go check out the car and make sure that it had keys and could be started before the auction. That put my mind at ease a little more. I wish I could have gotten it on our pre-bid like you did. That would have saved us a lot.
As for the car it looks better from a distance. I saved the spoiler and probably could salvage a few other things that we don't need. Someone had already taken out the speakers and the stereo look like it was after market but old. I was planning to sell most of the metal that I pull off as scap. Is there a demand on ebay for some of these parts?
-
Moonlight Performance
The metal isn't worth much as scrap. $100 for the whole thing maybe.... depends on the recycler near you. Also, some demand you give them the title. The doors, hood and trunk are all worth money if in good shape. The hood especially since it's aluminum. Sunroof and it's assembly is worth money too. All the interior... even stuff you wouldn't think like the sub-frame, the u-shaped frame brace, the rear differential carrier etc. Salt-belt areas rust these parts out first so there is a good market for them.
-
Senior Member
Great to know, thanks! I started digging through the stuff that we pulled out to see what is in good enough shape to save/sell.
-
Senior Member

We sold over $7k in parts from our donor. You would be surprised what people will buy - even stuff in not so great shape. Heck, we sold the interior trim rings, various plastic panels, latches, even the dash support bar (who the heck breaks one of those??). Of course the aftermarket goodies sell the fastest/easiest, but all of the $5-$20 items add up quickly. We still have over $1,000 worth of items listed for sale (but we haven't bumped the for sale threads in awhile, since we've been busy building).
We posted everything on Ebay, Nasioc, and Craiglist. Craigslist sold the most ($3600 of the total) but was also a pain dealing with flaky people.
Tamra
Building 818SR #297 picked up 10/25/14 with Andrew (xxguitarist)
First start 12/21/14,
First "drive" 1/17/15
First Dyno at EFI Logics 3/7/15- 310whp at 15psi for break in, full spool by ~3500rpm!
First autocross 3/29/15
1st Registered 818 in Connecticut 7/24/2015. 9 months - 1 day from kit pickup!
-
Senior Member
Wow! Over $7K in parts! Even if I can get back a fraction of that amount it would be worth it and would pay for the lift, engine leveler, engine stand, jack and jack stands that I just bought. Not to mention the upgrades and add-ons that we have in mind.
Thanks!
-
Senior Member
-
Senior Member
-
Senior Member
-
Senior Member
I forgot to mention that we pulled the air intake, airbox and filter out as well. I should also mention that we pulled the front bumper off and removed the suspension brace. Our plan is to do what many here have done in removing the engine, transmission and front suspension all at once. We will need to cut the sheet metal that is left in the front of the car to be able to drop all of that out the front with our lift. I'll take some pictures before we do that.
- Lou
-
Senior Member
Great progress! When will your 818 be ready for shipment/pickup?
Tamra
Building 818SR #297 picked up 10/25/14 with Andrew (xxguitarist)
First start 12/21/14,
First "drive" 1/17/15
First Dyno at EFI Logics 3/7/15- 310whp at 15psi for break in, full spool by ~3500rpm!
First autocross 3/29/15
1st Registered 818 in Connecticut 7/24/2015. 9 months - 1 day from kit pickup!
-
Senior Member
Thanks Tamra.
We haven't even ordered it yet. We are going to order the 818C but wanted to do that after we take build school class. The September 818 class doesn't work for us so we are looking hopefully at December or January for the next one. That is what they told me when I called them. I was thinking we will have everything stripped, cleaned and rebuilt (engine/transmission) by then (hopefully). After taking the class and having poured through all of the build threads here I thought we would have a better idea of what options we wanted to order from Factory Five and elsewhere.
If that thinking doesn't make sense based on your experience please do let me know.
- Lou
-
Senior Member
-
Senior Member
Oh, I forgot to mention that we placed our pre-order Sunday night. After talking it over we decided it was probably best to get into the production queue/schedule as soon as possible after we saw that there were already about 50 folks in the queue with Factory Five saying they will manufacture about 3 a week. That would put is right about where we want to be in terms of the production schedule. We can always change the order details just prior to production if we decide to do some things differently.
- Lou
-
Senior Member
-
Senior Member

-
Senior Member
Josh,
We are in The Woodlands (just north of Houston). We have lived in both Highland Village and Flower Mound over the last 15 years and I am in Dallas usually 3 out of 4 weeks a month on business (usually just day trips once a week).
Your Build Thread was the first one that I bookmarked. You are doing an outstanding job on your 818S.
I know of a few other builds in Texas but I was surprised that there weren't more. Hopefully we will take delivery of our 818C in January with a goal of having the build mostly done by the end of the summer next year.
- Lou
-
Senior Member
-
Moonlight Performance
Nice work. Looking at that is like deja vu; my donor was the same color.
You might consider labeling the harness connectors with masking tape and a sharpie if you didn't do that already. Time tends to make one forget what connected to where. If you don't, it's not a huge deal because MOST of the plugs will only fit into one place, but there were a few on mine where the same plug would fit into two different places. I think it was the keyless entry unit and the immobilizer unit.
-
Senior Member

Don't use masking tape and a sharpie... they get damaged. Use tags with strings or something else more durable
Ask me how I know...
Dan
818S #17 Picked up 8/1/13 First start 11/1/13 Go Kart 3/28/14
-
Moonlight Performance
Haha, I think you made that comment almost a year ago in another thread, after I had already done mine with masking tape. I read that and got nervous, but when I pulled mine out of the box a year later, everything stayed in place. I used the good blue 3m masking tape and wrapped each label all the way around the wires, so the tape was sticky-side to sticky-side. Then I cut off any sticky part still exposed so it wouldn't snag on anything. I didn't have a single label tear or fall off. But my donor was also very clean and had no grease on the harness. If there is grease on the harness, I doubt it would have worked so well.
-
Senior Member
Thanks guys.
Man, it felt really good yesterday standing there looking at that empty shell. When we first started this thing it was as intimidating as hell. I remember popping the hood and thinking "Holy xxxx, what have I gotten myself into". But slowly, piece by piece we got it done. We learned so much along the way and I'm really glad we opted to go the donor route rather then the pallet. Before we started this we couldn't have told you where the turbo, starter motor, pumps or pretty much anything else was on the car. It is one thing to know that those things exist, but it is another thing altogether to know where they are and how they work. Now, we know what everything is, where it goes and how it connects in. If anyone is thinking about jumping in and doing an 818 build but they are worried they don't know much about cars this is the way to go. It took us 8 weeks of working on it on the weekends. There were frustrations and we did a lot of research in between. I'm sure a mechanic could have done it in a fraction of the time but I'm proud of what we have accomplished so far.
After we cut up the and dispose of the car we start on the cleanup of parts, rebuild of the engine and transmission and selling off what we don't need. Tackling the engine and transmission rebuild will be tough tasks but I'd rather do that now considering the donor had 141,000 miles on it. Thankfully there are a ton of resources here and on the Internet. We have a lot to learn before we start but I'm looking forward to it.

Originally Posted by
Hindsight

Haha, I think you made that comment almost a year ago in another thread, after I had already done mine with masking tape. I read that and got nervous, but when I pulled mine out of the box a year later, everything stayed in place. I used the good blue 3m masking tape and wrapped each label all the way around the wires, so the tape was sticky-side to sticky-side. Then I cut off any sticky part still exposed so it wouldn't snag on anything. I didn't have a single label tear or fall off. But my donor was also very clean and had no grease on the harness. If there is grease on the harness, I doubt it would have worked so well.
We used the same tape and once the sticky sides touch they aren't coming apart. I tried to label tightly behind the plugs so that it couldn't slide off the plug. I also wrote on a lot of the connectors just in case. If I had it to do all over again I would have gotten zip ties with the little labels on them. I'm pretty sure we are going to do an IWIRE harness or something similar, but I wanted to have the original harness just in case.
- Lou
-
Senior Member
That harness is so big, heavy and it get's tangled. Too easy to tear one off then you spend hrs figuring out what is what. Best to do it right the first time. A bundle of tags is cheap insurance. A ton of approaches have been used, my tape sucked...
iWire or stand alone like Wayne's is the way to go... It's so much cleaner. I have to have stock ECU so iWire fit my needs, it is so clean and uncluttered. I worried about long term reliability.
Feels go to go at the shell with the saws all, doesn't it!
Last edited by RM1SepEx; 09-13-2015 at 09:53 AM.
Dan
818S #17 Picked up 8/1/13 First start 11/1/13 Go Kart 3/28/14
-
Senior Member

Originally Posted by
TX-Lou
Tomorrow we will cut up the bare donor shell and sell it, the doors, trunk and hood as scrap metal.
I'd suggest not selling the doors as scrap, I sold my on craigslist for $150 to $200 a piece.
I also used 3m blue painters tape and a sharpie to label my wiring, it worked out just fine for me.
-
Senior Member
Originally Posted by
STiPWRD
I'd suggest not selling the doors as scrap, I sold my on craigslist for $150 to $200 a piece.
Thanks, but they are already gone now. I thought about selling them if I could but in the end it wasn't worth the trouble. There are other things that I kept that were smaller and easier to store until sold. They are also much easier to ship out.
-
Senior Member
-
Senior Member

To late for you, but others may find a metal cutting saw from horrible fright might be useful.
http://t.harborfreight.com/power-too...saw-69702.html
-
Senior Member
I thought I would post some information concerning what resources we used for teardown and some other stuff that may help others. I'll also edit the first post of this thread to add this to the bottom of that post so it is easier to find.
RESOURCES
The main resources we used for information concerning what to do and how to do it were:
TOOLS
Here are the main tools that we used for the teardown.
- 1 Standard 3/8 Socket Wrench
- 1 Adjustable Angle 3/8 Socket Wrench
- 1 Metric Deep Socket Set (10mm through 19mm)
- 1 Metric Impact Socket set (10mm through 19mm)
- 21 mm Socket - Transmission Plug
- 19 mm 1/2 Deep Socket - Suspension Bolts
- Torx t70 Socket Bit - Coolant Plug
- 17" Breaker Bar - 1/2
- 10" Socket Extension - 1/2
- 3" Socket Extension - 3/8
- 1/2 Female to 3/8 Male adapter
- 3/8 Female to 1/2 Male adapter
- 90 Degree Needle Nose Pliers
- Pry Bar
- Misc. Small Tools - Pliers, Hammers, Screwdrivers, Snips, Heavy Scissors, etc.
- 18V Battery Powered Reciprocating Saw
- Diablo 9" Heavy Metal Demolition Blades
We also used a dremmel to cut off a mangled bolt, a lighter to heat a suspension bolt to loosen it, and an 18V Power Driver with 3/8 socket adapter.
-
Senior Member
Just an update on where things stand. Things have slowed considerably while we are waiting for our kit delivery. We have been cleaning and painting parts, going through the build manual and starting to get some things ready. We are also having our engine rebuilt by Auto Science in Carrollton, TX (recommended by Nolan). We are targeting 300whp. The rebuilt engine will include:
- 2.5l Block Upgrade with 2.5l head gasket and 2.5l crankcase
- Wiseco Forged Pistons
- Manley Rods
- Gates Racing Timing Belt Kit with Pump
- Oil Pump
- Crossdrilled Hardened Forged Crank
- Supertech dual valve springs, retainers, intake valves, seals and Inconel Exhaust valve
- Radius valve job, head machine work, cleaning and rebuild
We also plan to upgrade the turbo to a 20g and upgrade the injectors and fuel pump along with it.
We should be able to tune conservatively for about 300whp and have at least 50,000 miles of reliability for street use.
As for the donor parts that we weren't going to use we opted to donate them to our local school district's high school auto shop. We probably could have recouped some money off of the seats, wheels and some of the other parts that we donated but it came down to few things that we had to consider. Our garage was crowded with parts and we didn't have a lot of room to work on cleaning, painting and prepping for the kit. We wanted to clean things out quickly and I just didn't have the time and energy to list, sell and ship the parts. Plus, we also knew that the high school auto shop needed anything they could get. In the end I'm glad we did donate the parts.
-
Nice job! Just saw this thread.
-
Senior Member
Just wanted to close out our tear-down thread by posting a link to our build thread now that our 818C kit has arrived.
818C Build - John and Lou - The Woodlands, TX
- Lou
 Posting Permissions
- You may not post new threads
- You may not post replies
- You may not post attachments
- You may not edit your posts
-
Forum Rules

Visit our community sponsor


 Reply With Quote


