Boig Motorsports

Visit our community sponsor

Thanks Thanks:  29
Likes Likes:  38
Page 14 of 20 FirstFirst ... 41213141516 ... LastLast
Results 521 to 560 of 779

Thread: EdwardBs Mk4 #8674 20th Anniversary Build

  1. #521
    Senior Member Dave Howard's Avatar
    Join Date
    Feb 2012
    Location
    North Bay, Ontario
    Posts
    534
    Post Thanks / Like
    Quote Originally Posted by edwardb View Post
    Yea, that's the one downside of the tri-coats. Not the easiest to touch up. It will be a driver, so will get the inevitable stone chips and whatever around the nose. I'll put the usual clear film on the rear flare. Interesting what you did. Will keep that in mind.
    If it's going to be driven, consider custom 3M for the front (hood opening forward) and the front of the rear wheel wells. Get it done before the 1st mile and before the 1st stone chip. A relatively cheap investment in your project. I wouldn't bother with the paint defender system. I applied it on mine and the +10K paint job got hammered anyways.

  2. #522
    Senior Member edwardb's Avatar
    Join Date
    Feb 2011
    Location
    Lake Orion, Michigan
    Posts
    10,567
    Post Thanks / Like
    Quote Originally Posted by Dave Howard View Post
    If it's going to be driven, consider custom 3M for the front (hood opening forward) and the front of the rear wheel wells. Get it done before the 1st mile and before the 1st stone chip. A relatively cheap investment in your project. I wouldn't bother with the paint defender system. I applied it on mine and the +10K paint job got hammered anyways.
    It will absolutely be driven. I'll be looking at options. Thanks.
    Build 1: Mk3 Roadster #5125. Sold 11/08/2014. Build 2: Mk4 Roadster #7750. Sold 04/10/2017. Build Thread
    Build 3: Mk4 Roadster 20th Anniversary #8674. Sold 09/07/2020. Build Thread and Video. Build 4: Gen 3 Type 65 Coupe #59. Gen 3 Coyote. Legal 03/04/2020. Build Thread and Video
    Build 5: 35 Hot Rod Truck #138. LS3 and 4L65E auto. Rcvd 01/05/2021. Legal 04/20/2023. Build Thread. Sold 11/9/2023.

  3. #523
    Senior Member edwardb's Avatar
    Join Date
    Feb 2011
    Location
    Lake Orion, Michigan
    Posts
    10,567
    Post Thanks / Like

    Paint Done and Back Home

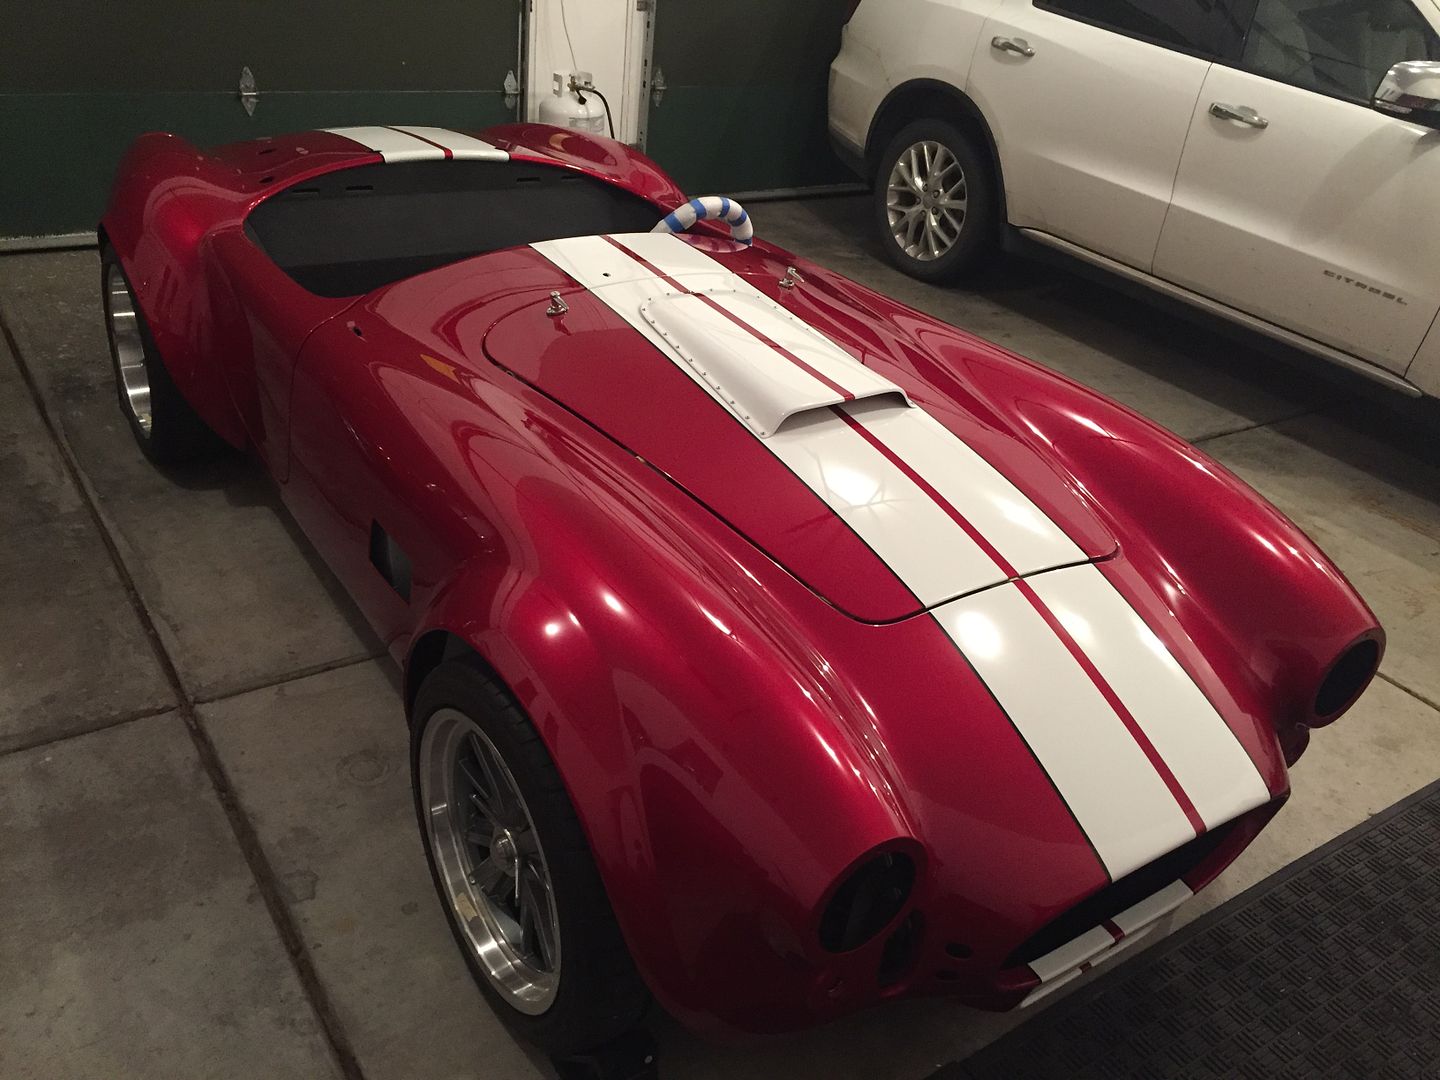
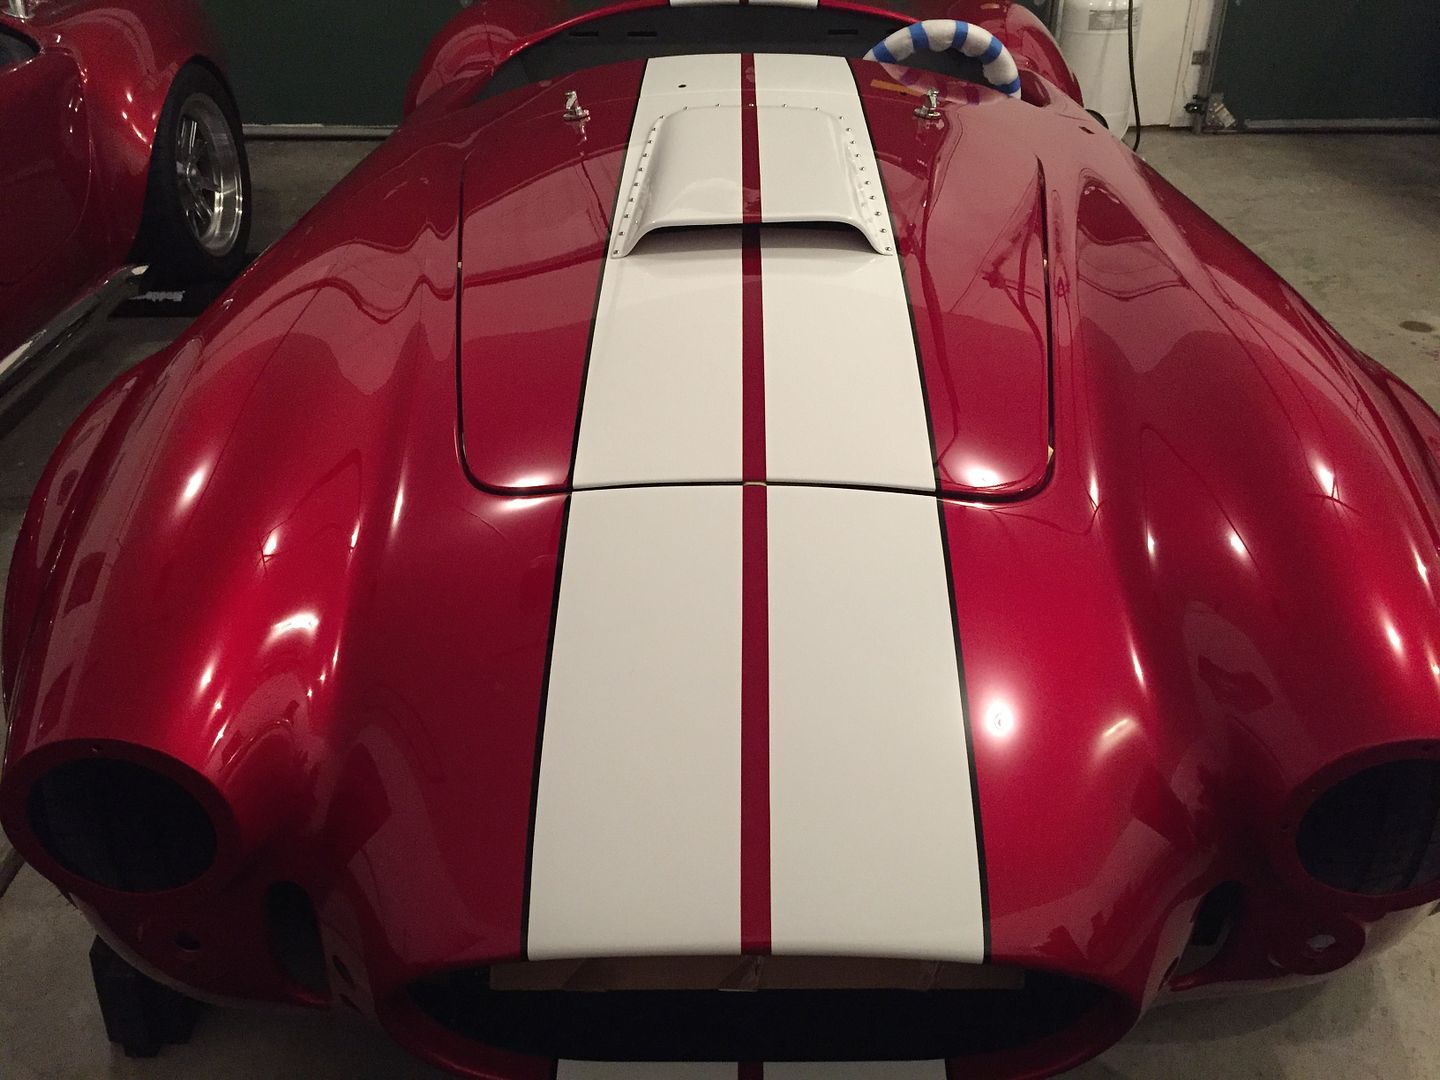
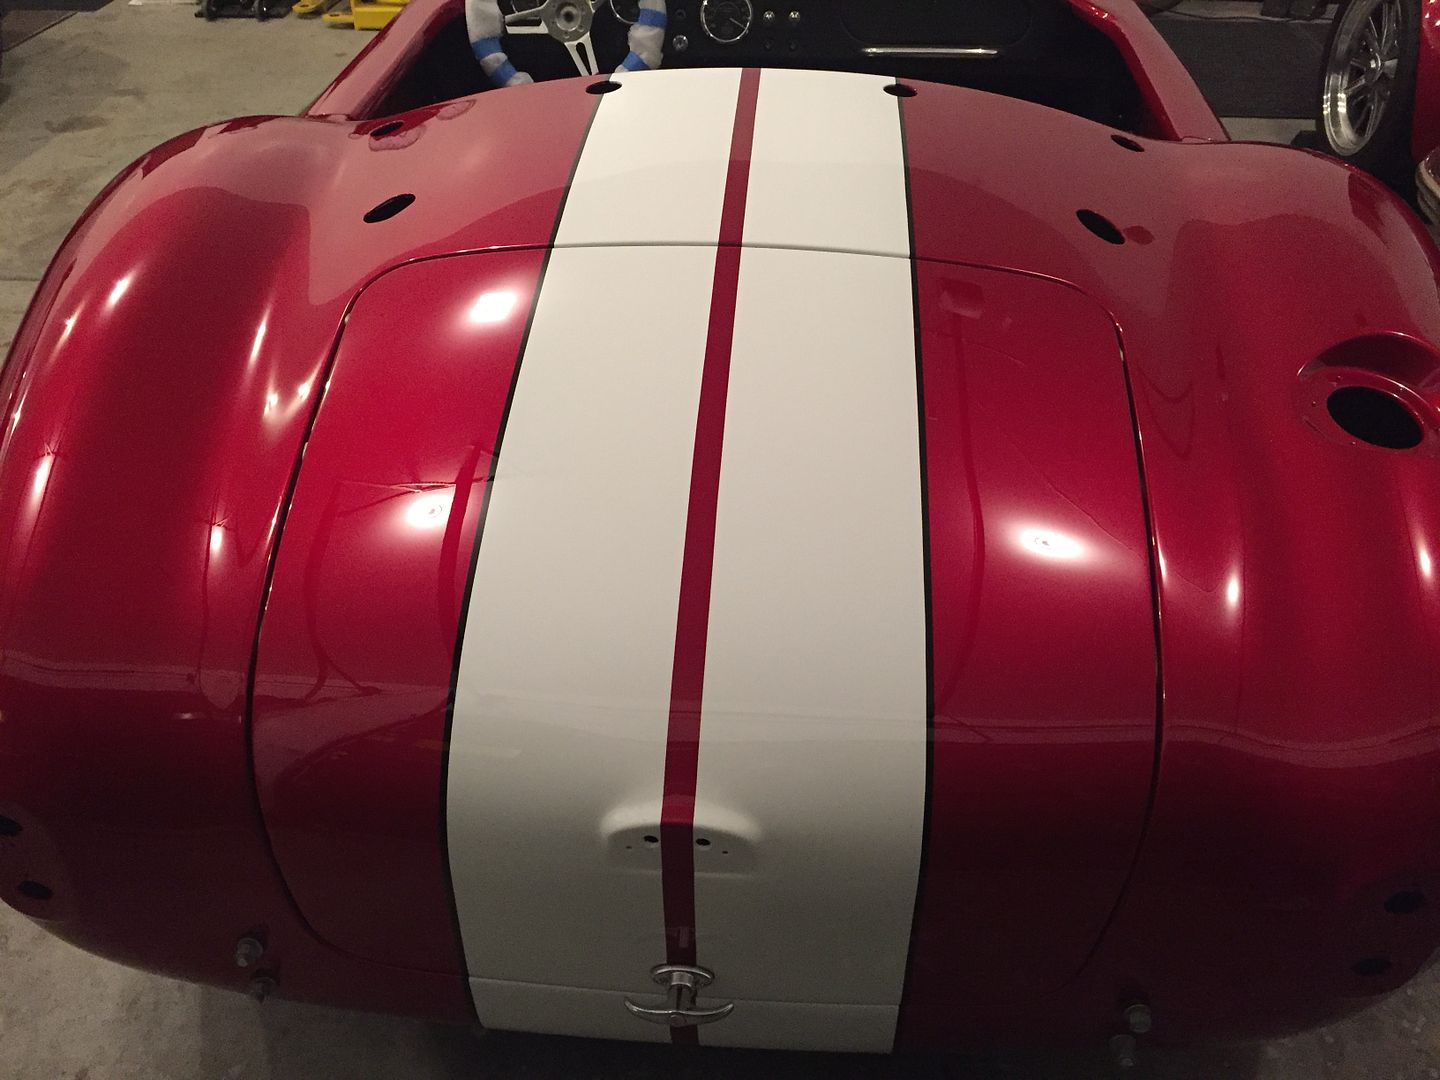
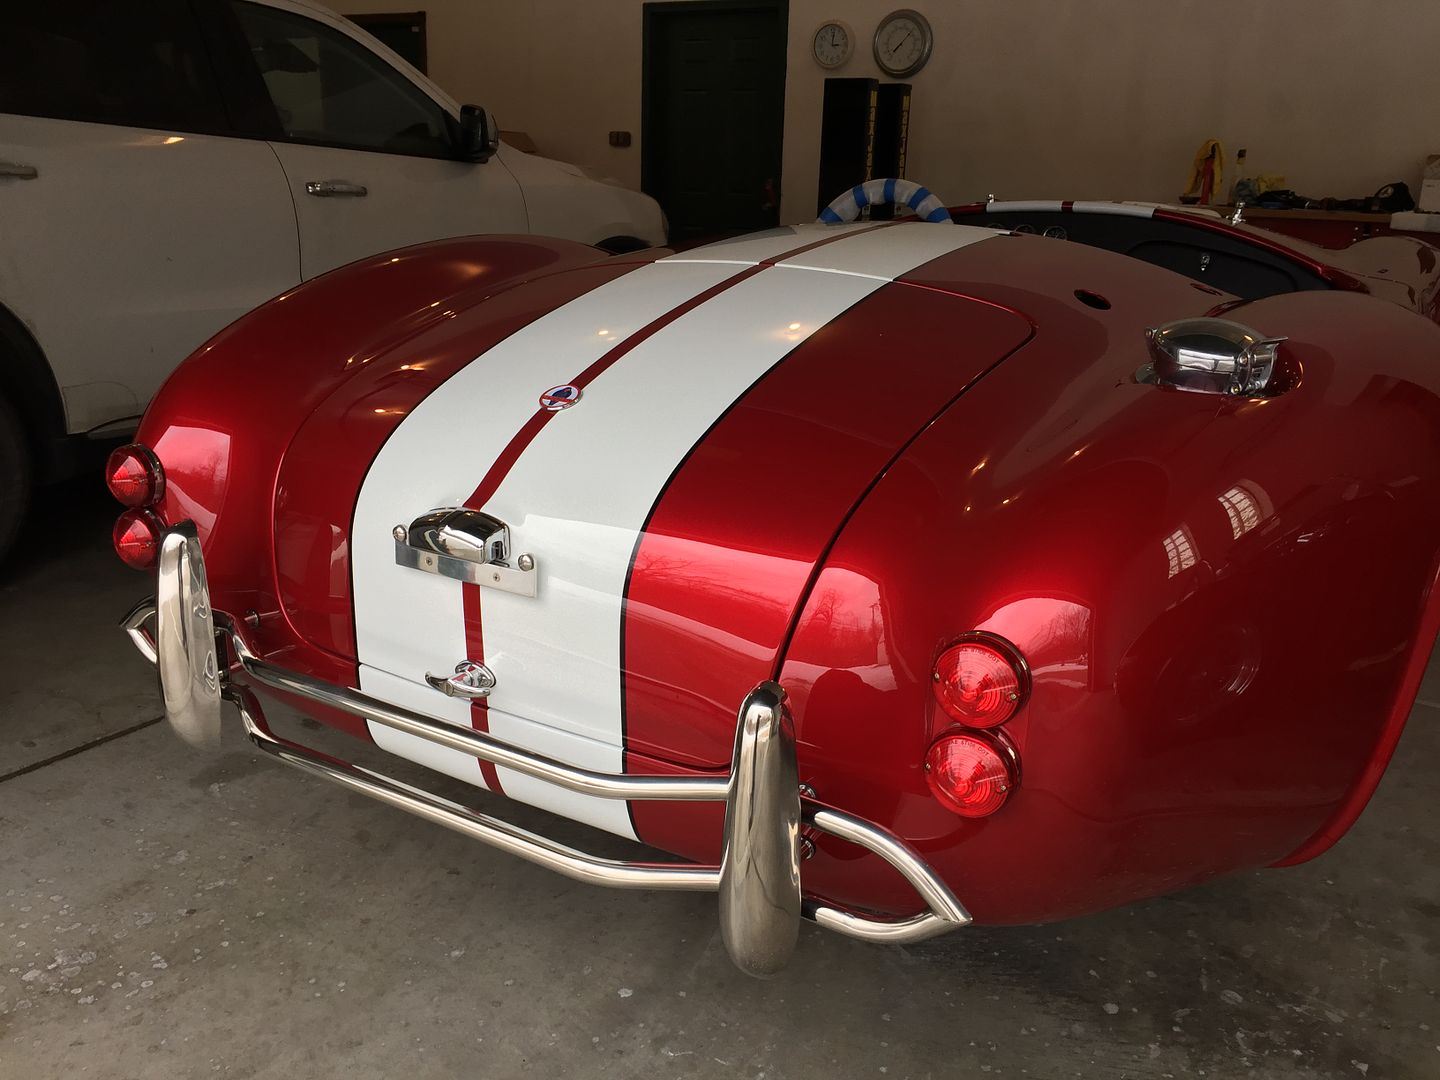
    Huge day today. Received the call yesterday that my paint would be done today and ready for pickup. Hooked up the SE and headed across town. Cold and a bit snowy today, but that wasn’t going to keep this from happening. It was of course amazing to see it finished. All the pictures have been great but seeing it in person made my day. Rick did an awesome job. The Coyote started right up after being at the shop for a little over a month. Once again gathered a big crowd. Open headers do that. It’s now home and safely in the garage. I have just under four weeks to get it ready for Detroit Autorama. Received word last week that my application was accepted and I'm in.

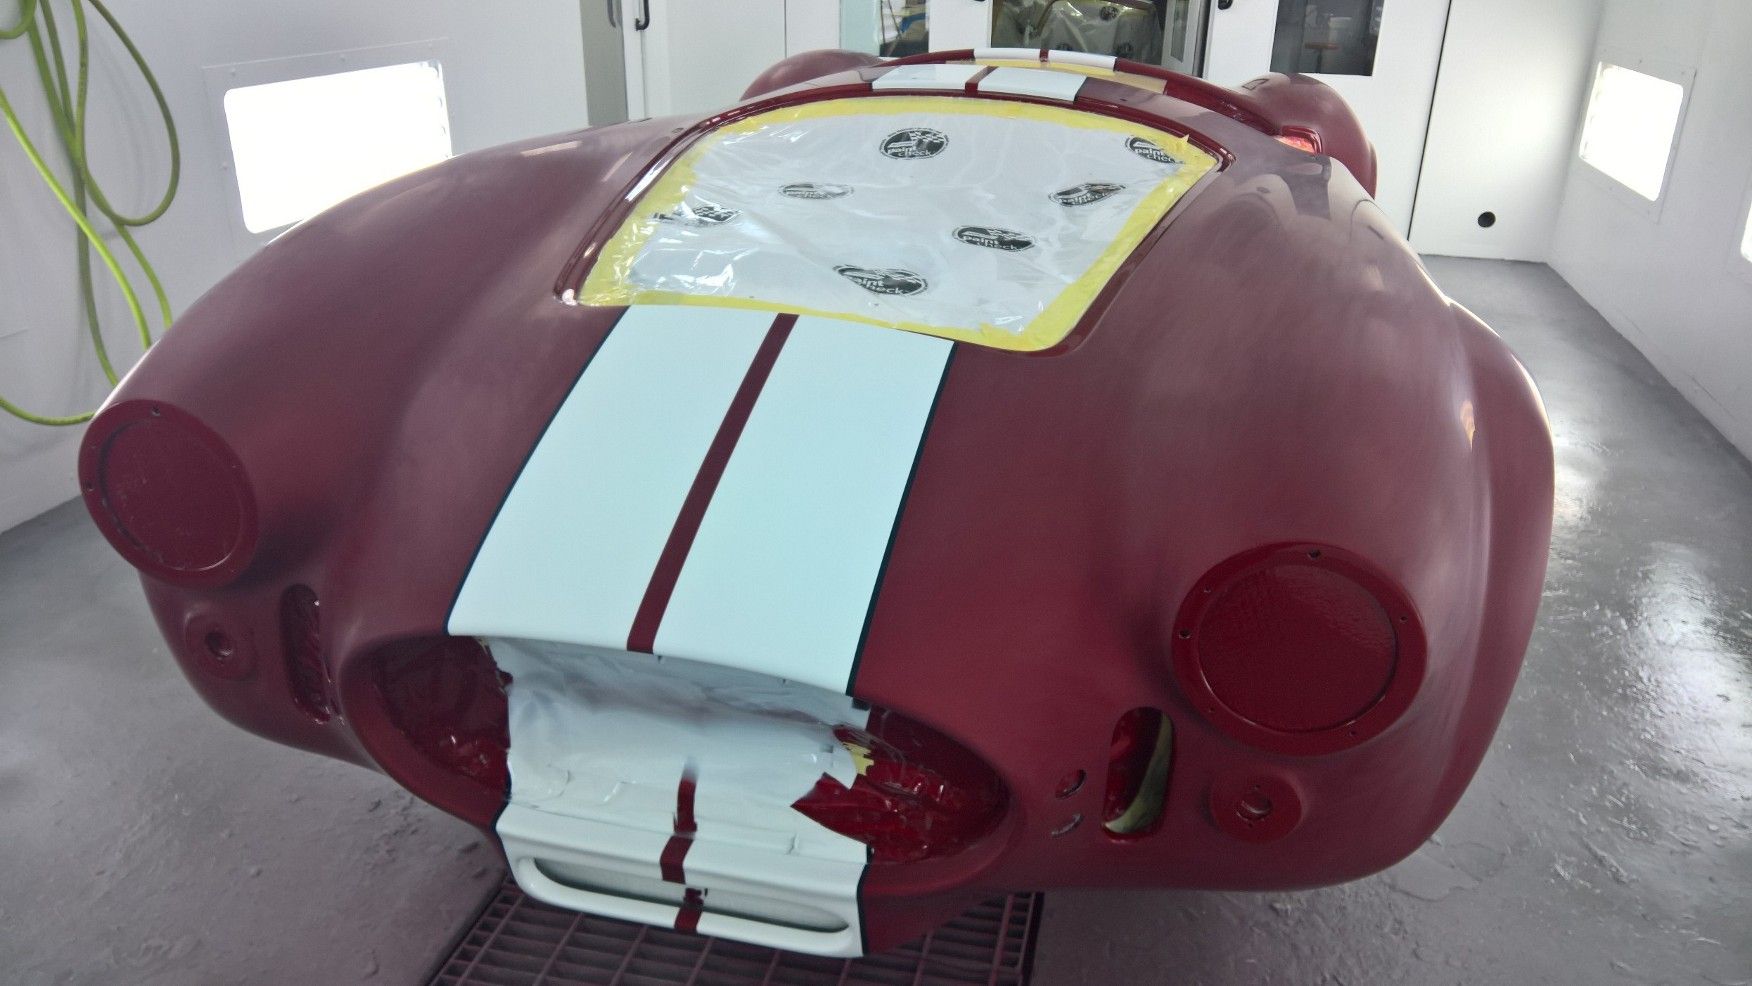
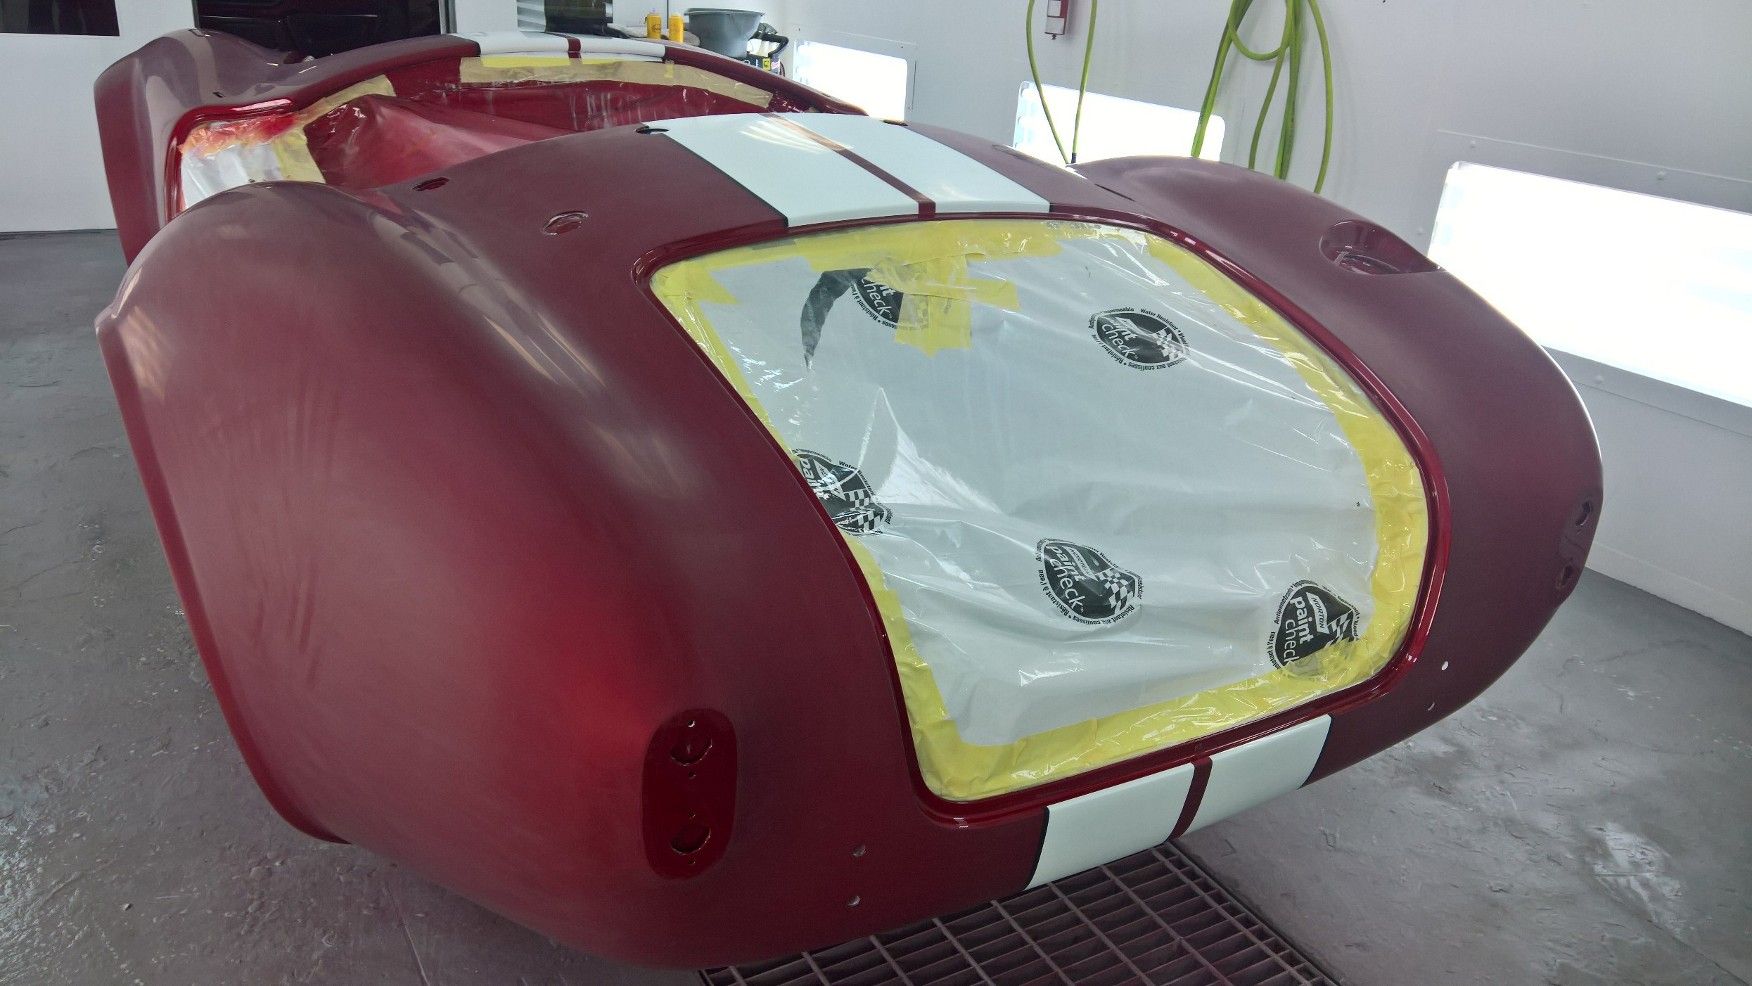
    First is a couple pics from three days ago when cut and buff was underway. Hurts a little to see that beautiful shine all sanded down, but the end result is worth it.


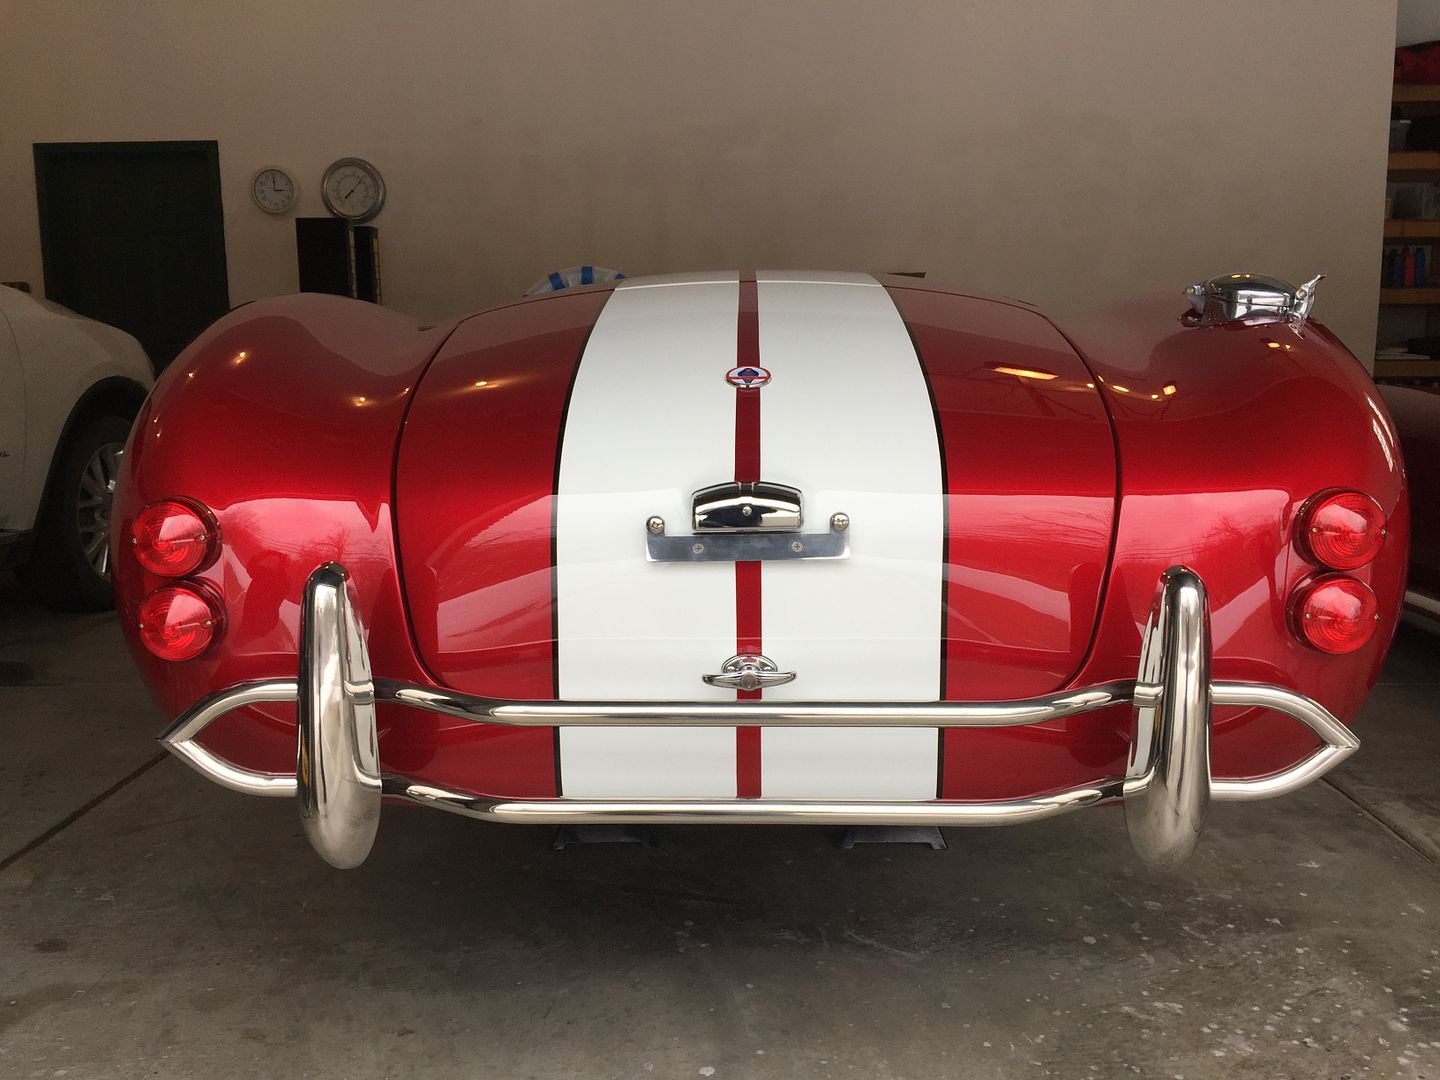
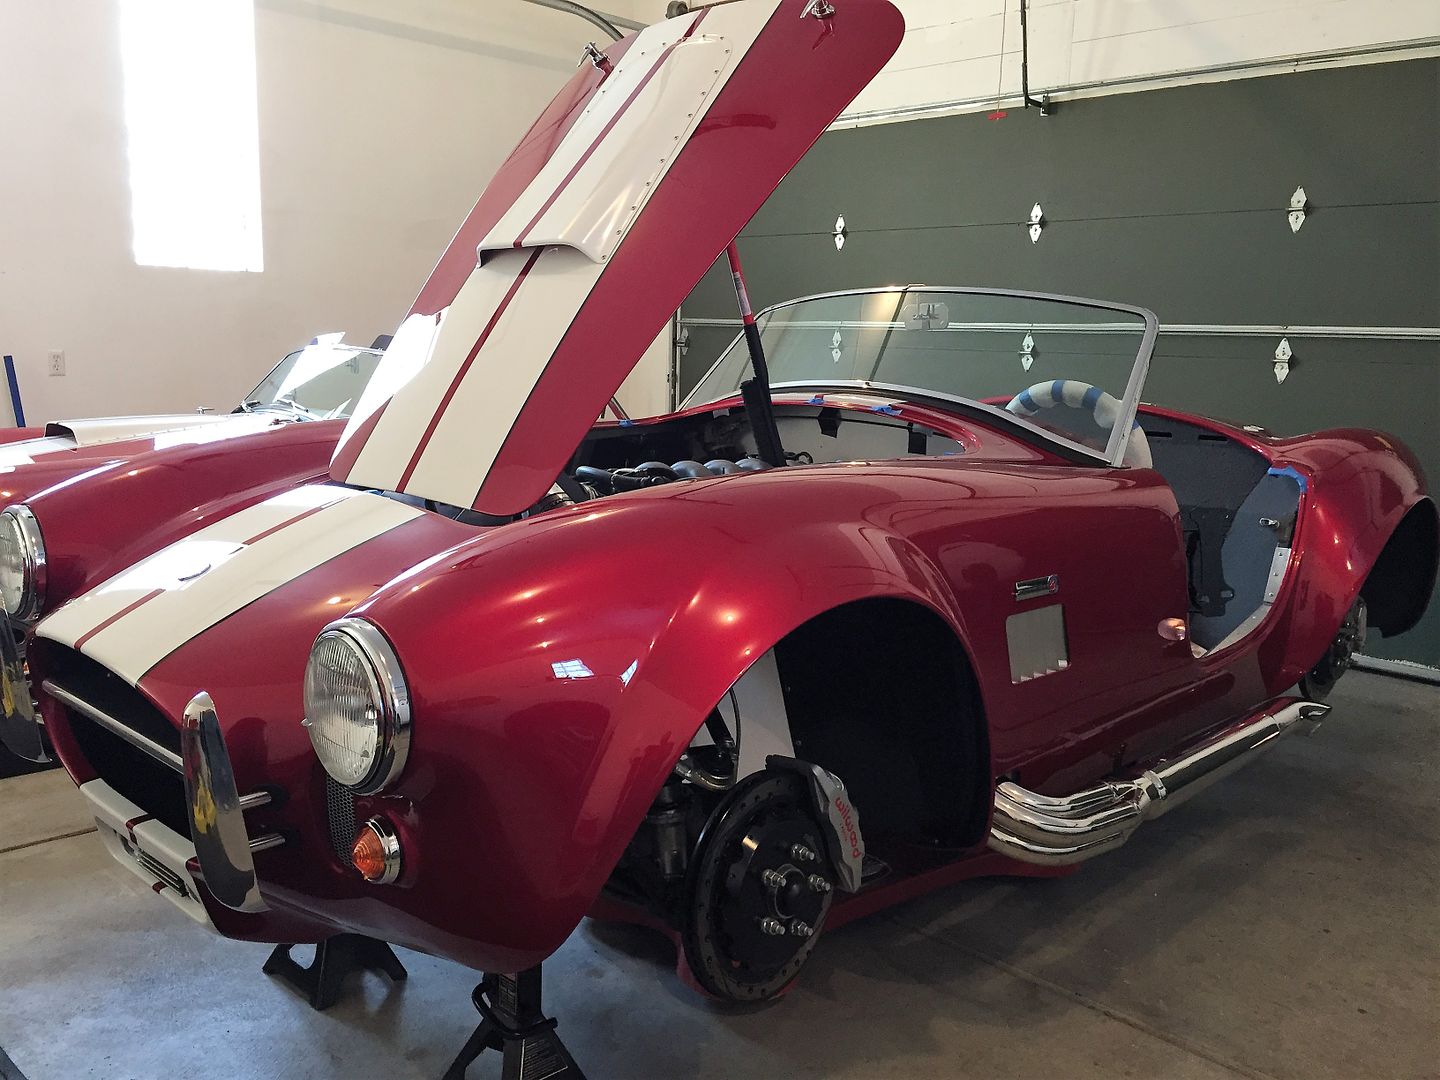
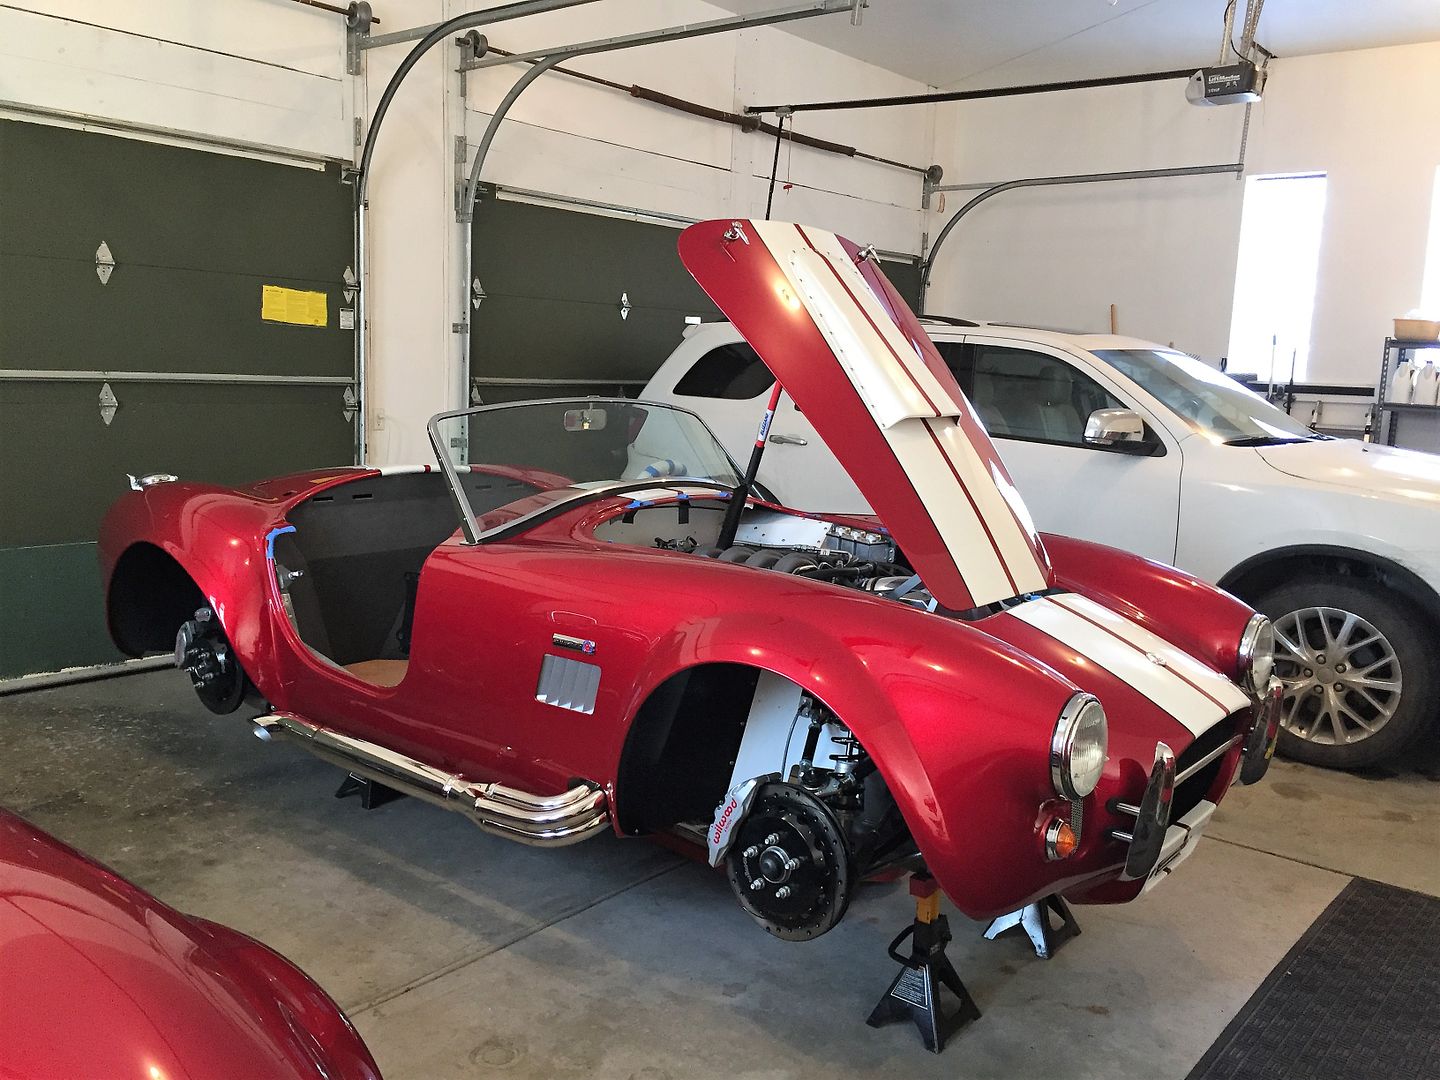
    These are just quick walk-around pics in the garage, but here it is home. The hood and trunk lid don't have final gaps or height set yet. Scoop installation also not finished. #7750 is just visible in one of the pics. Seeing them side-by-side confirms the candy red of the new build is just slightly "redder" than #7750. Really loving the look of the black pinstripes. Doesn't look quite as shiny in my garage with a handful of 100 watt incandescent bulbs as it did under the lights at the paint shop. But it's amazing.


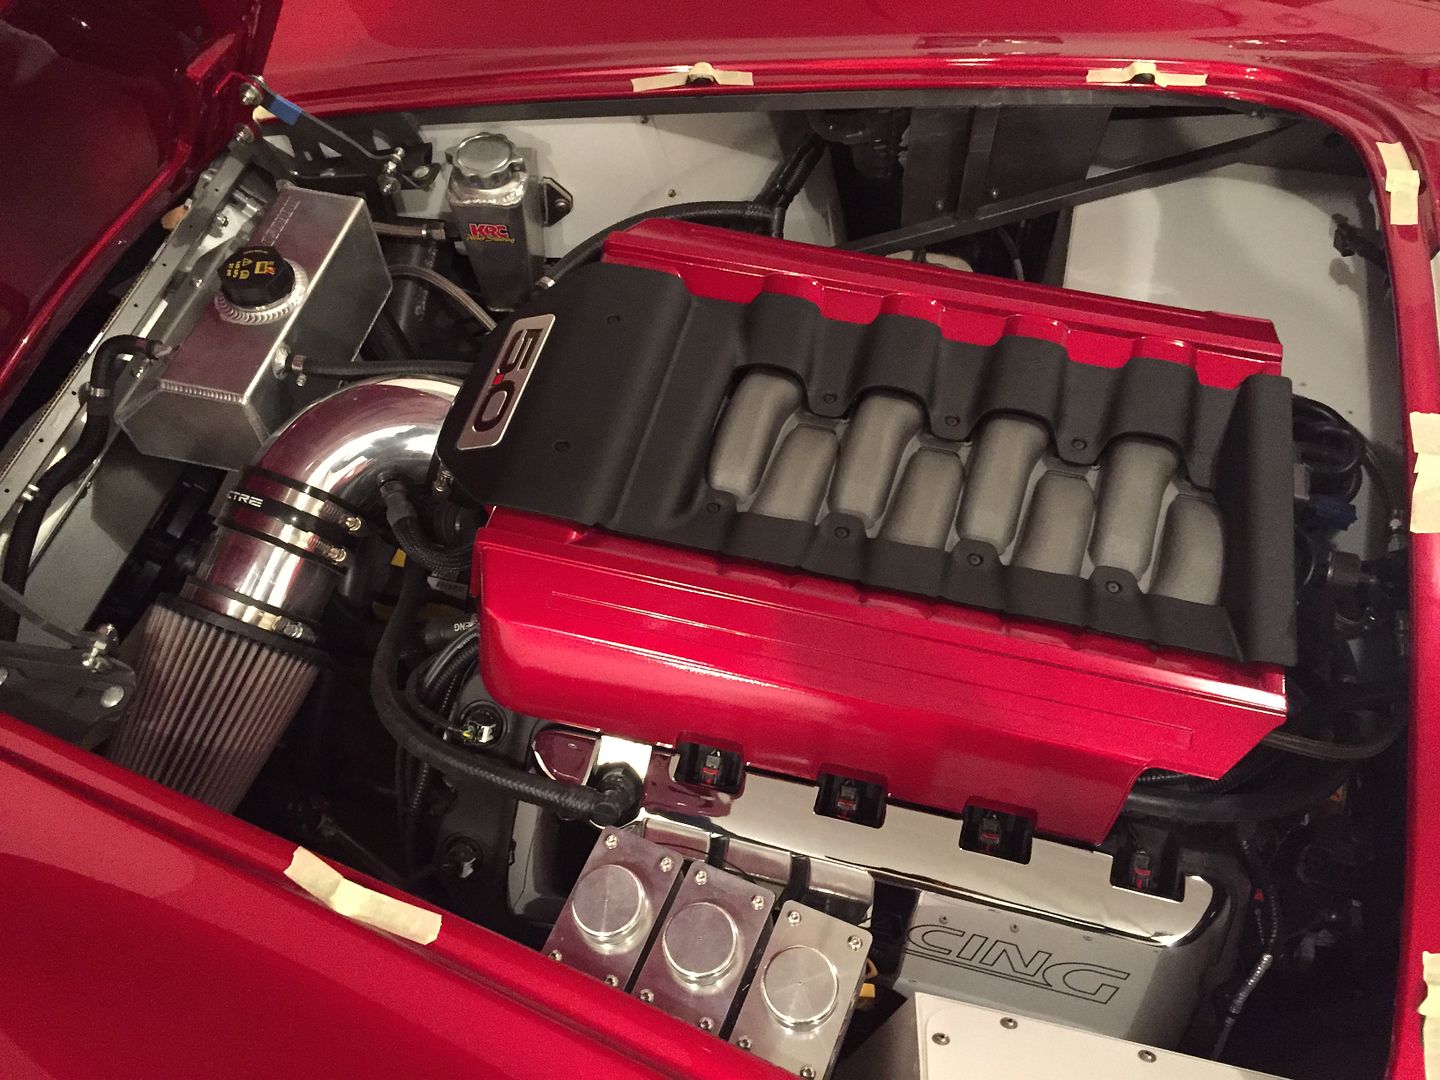
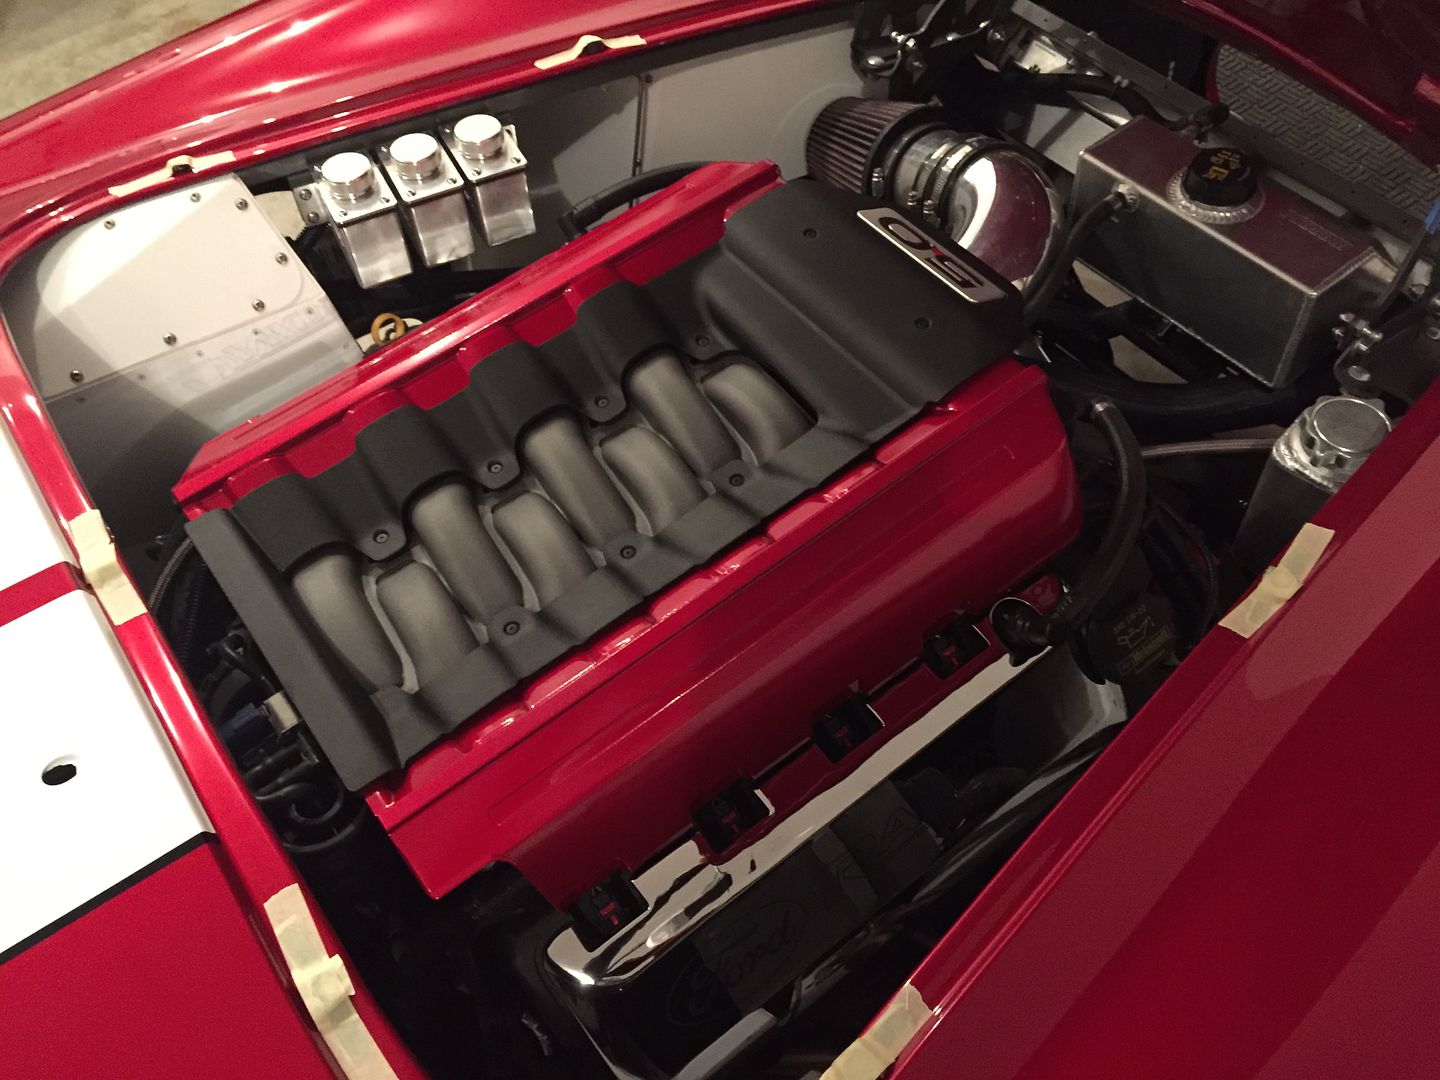
    Quickly snapped on the chrome coil covers and took a couple pictures of the almost finished engine compartment. As you can see, had part of the engine cover painted the body color. I like it, but I think I will add some black stripes in the recessed areas on the sides. That would make it look even better. Rick did an amazing job keeping everything wrapped during the whole paint process. I didn’t clean anything before these pics. The cockpit and underside are just as clean.


    That's it for paint progress pics. Tomorrow I’ll start down my final assembly list. All of the parts are staged in the basement and ready to go on. Biggest work will be cockpit carpet where I have some adjusting to do around the 2bking modified DS footbox wall, and then the trunk carpet. But home stretch now!
    Last edited by edwardb; 01-27-2017 at 10:39 PM.
    Build 1: Mk3 Roadster #5125. Sold 11/08/2014. Build 2: Mk4 Roadster #7750. Sold 04/10/2017. Build Thread
    Build 3: Mk4 Roadster 20th Anniversary #8674. Sold 09/07/2020. Build Thread and Video. Build 4: Gen 3 Type 65 Coupe #59. Gen 3 Coyote. Legal 03/04/2020. Build Thread and Video
    Build 5: 35 Hot Rod Truck #138. LS3 and 4L65E auto. Rcvd 01/05/2021. Legal 04/20/2023. Build Thread. Sold 11/9/2023.

  4. #524
    Papa's Avatar
    Join Date
    Dec 2016
    Location
    Mexico, MO
    Posts
    5,602
    Post Thanks / Like
    Absolutely beautiful!
    My Build Thread: http://thefactoryfiveforum.com/showt...ter-Build-9754
    (Most viewed Roadster build thread on this forum!)

    Delivered: 6/17/2017
    First Start: 12/30/2017
    Completed: 12/7/2019
    Legal: 1/30/2020

    Member of the Mile-Hi Cobra Club
    Dave's Cobra YouTube Channel: https://www.youtube.com/channel/UCbk...npK1UZHj4R-bYQ
    Agora 1:8 Scale Cobra Build: https://thefactoryfiveforum.com/show...l-Build-Thread

  5. #525
    Senior Member wareaglescott's Avatar
    Join Date
    Apr 2016
    Location
    Auburn, AL
    Posts
    2,146
    Post Thanks / Like
    Looks amazing Paul! Congrats.
    Like what you did with the engine cover. I have been thinking about that as well. Did your painter have to take it apart at all? I looked at mine and it seems like it has some type of rubber/plastic fastener. I was wondering if I took it apart if I could find those to get it back together.
    MK4 #8900 - complete kit - Coyote, TKO600, IRS - Delivered 6/28/16 First Start 10/6/16 Go cart - 10/16/16 Build completed - 4/26/17 - 302 days to build my 302 CI Coyote Cobra - Registered and street legal 5/17/17
    Build Thread http://thefactoryfiveforum.com/showt...e-build-thread
    PHIL 4:13 INSTAGRAM - @scottsrides

  6. #526
    Senior Member edwardb's Avatar
    Join Date
    Feb 2011
    Location
    Lake Orion, Michigan
    Posts
    10,567
    Post Thanks / Like
    Quote Originally Posted by wareaglescott View Post
    Like what you did with the engine cover. I have been thinking about that as well. Did your painter have to take it apart at all? I looked at mine and it seems like it has some type of rubber/plastic fastener. I was wondering if I took it apart if I could find those to get it back together.
    Nope. Thought about taking it apart, but after looking at it we left it together and he just masked it off. You can buy the separate pieces in the aftermarket in different colors, materials (e.g. carbon fiber), so it's not uncommon to take them apart. I think they're reassembled with regular hardware versus trying to match the plastic parts of the original.
    Build 1: Mk3 Roadster #5125. Sold 11/08/2014. Build 2: Mk4 Roadster #7750. Sold 04/10/2017. Build Thread
    Build 3: Mk4 Roadster 20th Anniversary #8674. Sold 09/07/2020. Build Thread and Video. Build 4: Gen 3 Type 65 Coupe #59. Gen 3 Coyote. Legal 03/04/2020. Build Thread and Video
    Build 5: 35 Hot Rod Truck #138. LS3 and 4L65E auto. Rcvd 01/05/2021. Legal 04/20/2023. Build Thread. Sold 11/9/2023.

  7. #527

    Steve >> aka: GoDadGo
    GoDadGo's Avatar
    Join Date
    Feb 2015
    Location
    Slidell, Louisiana
    Posts
    6,567
    Post Thanks / Like
    Blog Entries
    1
    That's One Great Looking Looking Car!

    When will you be building your next one?

    Just kidding about building another one, but you do have a knack for putting these Big A__ Models together.

    Have A Great Day!


    Steve

  8. #528
    Senior Member
    Join Date
    Oct 2016
    Location
    Fayetteville WV
    Posts
    256
    Post Thanks / Like
    Amazing color and paint!

    A wonderful car!

    Hope the snow goes away quickly so we can see the finish in the sunlight.

    Congrats, Paul

    Len
    1972 Corvette Stingray 350 c.i. Manual Steering & Brakes
    2003 H-D Softail Deuce 88 c.i. TwinCam
    Gen 3 Coupe Dreamer

  9. #529
    Senior Member 2FAST4U's Avatar
    Join Date
    Feb 2011
    Posts
    1,006
    Post Thanks / Like
    Absolutely beautiful

  10. #530
    Senior Member
    Join Date
    Apr 2016
    Location
    Fenton MI
    Posts
    184
    Post Thanks / Like
    Beautiful build! I stumbled upon this after seeing your maxjax for sale, didn't realize you were so close. Would love to see this in person some day!

  11. #531
    Senior Member RickP's Avatar
    Join Date
    Feb 2016
    Location
    Boyertown, PA
    Posts
    683
    Post Thanks / Like
    Just gorgeous Paul. Love the engine treatment.

  12. #532
    Senior Member edwardb's Avatar
    Join Date
    Feb 2011
    Location
    Lake Orion, Michigan
    Posts
    10,567
    Post Thanks / Like
    Thanks for the positive reinforcement guys. It's up on jack stands with the wheels off getting all the final assembly done. I'll post some pics when it's further along. Pretty routine stuff right now.

    Quote Originally Posted by Shawn818c View Post
    Beautiful build! I stumbled upon this after seeing your maxjax for sale, didn't realize you were so close. Would love to see this in person some day!
    Hey neighbor! I'll be at the Detroit Autorama Feb 24 - 26. Or give me a shout and drop over if you like. Or drop in on one of the Great Lakes Cobra events when the weather warms up. I assume you have an 818? Lots of Factory Five guys in the club who would be interested in seeing your car.
    Build 1: Mk3 Roadster #5125. Sold 11/08/2014. Build 2: Mk4 Roadster #7750. Sold 04/10/2017. Build Thread
    Build 3: Mk4 Roadster 20th Anniversary #8674. Sold 09/07/2020. Build Thread and Video. Build 4: Gen 3 Type 65 Coupe #59. Gen 3 Coyote. Legal 03/04/2020. Build Thread and Video
    Build 5: 35 Hot Rod Truck #138. LS3 and 4L65E auto. Rcvd 01/05/2021. Legal 04/20/2023. Build Thread. Sold 11/9/2023.

  13. #533
    Senior Member
    Join Date
    Mar 2011
    Location
    Heart of Dixie, Alabama
    Posts
    1,852
    Post Thanks / Like
    Everything is super! Were black pinstripes considered for the inside edges of the white body stripes?
    Engine bay is sooo clean.
    20th Anniversary Mk IV, A50XS Coyote, TKO 600, Trunk Drop Box, Trunk Battery Box, Cubby Hole, Seat Heaters, Radiator hanger and shroud.

  14. #534
    Senior Member edwardb's Avatar
    Join Date
    Feb 2011
    Location
    Lake Orion, Michigan
    Posts
    10,567
    Post Thanks / Like
    Quote Originally Posted by Railroad View Post
    Everything is super! Were black pinstripes considered for the inside edges of the white body stripes?
    Engine bay is sooo clean.
    Thanks. No, didn't consider pinstripes anywhere but on the outside. That would be a good look too. I've seen it before. But I probably would opt for a narrower pinstripe.
    Build 1: Mk3 Roadster #5125. Sold 11/08/2014. Build 2: Mk4 Roadster #7750. Sold 04/10/2017. Build Thread
    Build 3: Mk4 Roadster 20th Anniversary #8674. Sold 09/07/2020. Build Thread and Video. Build 4: Gen 3 Type 65 Coupe #59. Gen 3 Coyote. Legal 03/04/2020. Build Thread and Video
    Build 5: 35 Hot Rod Truck #138. LS3 and 4L65E auto. Rcvd 01/05/2021. Legal 04/20/2023. Build Thread. Sold 11/9/2023.

  15. #535
    Not a waxer Jeff Kleiner's Avatar
    Join Date
    Feb 2011
    Location
    Bloomington, Indiana
    Posts
    8,067
    Post Thanks / Like
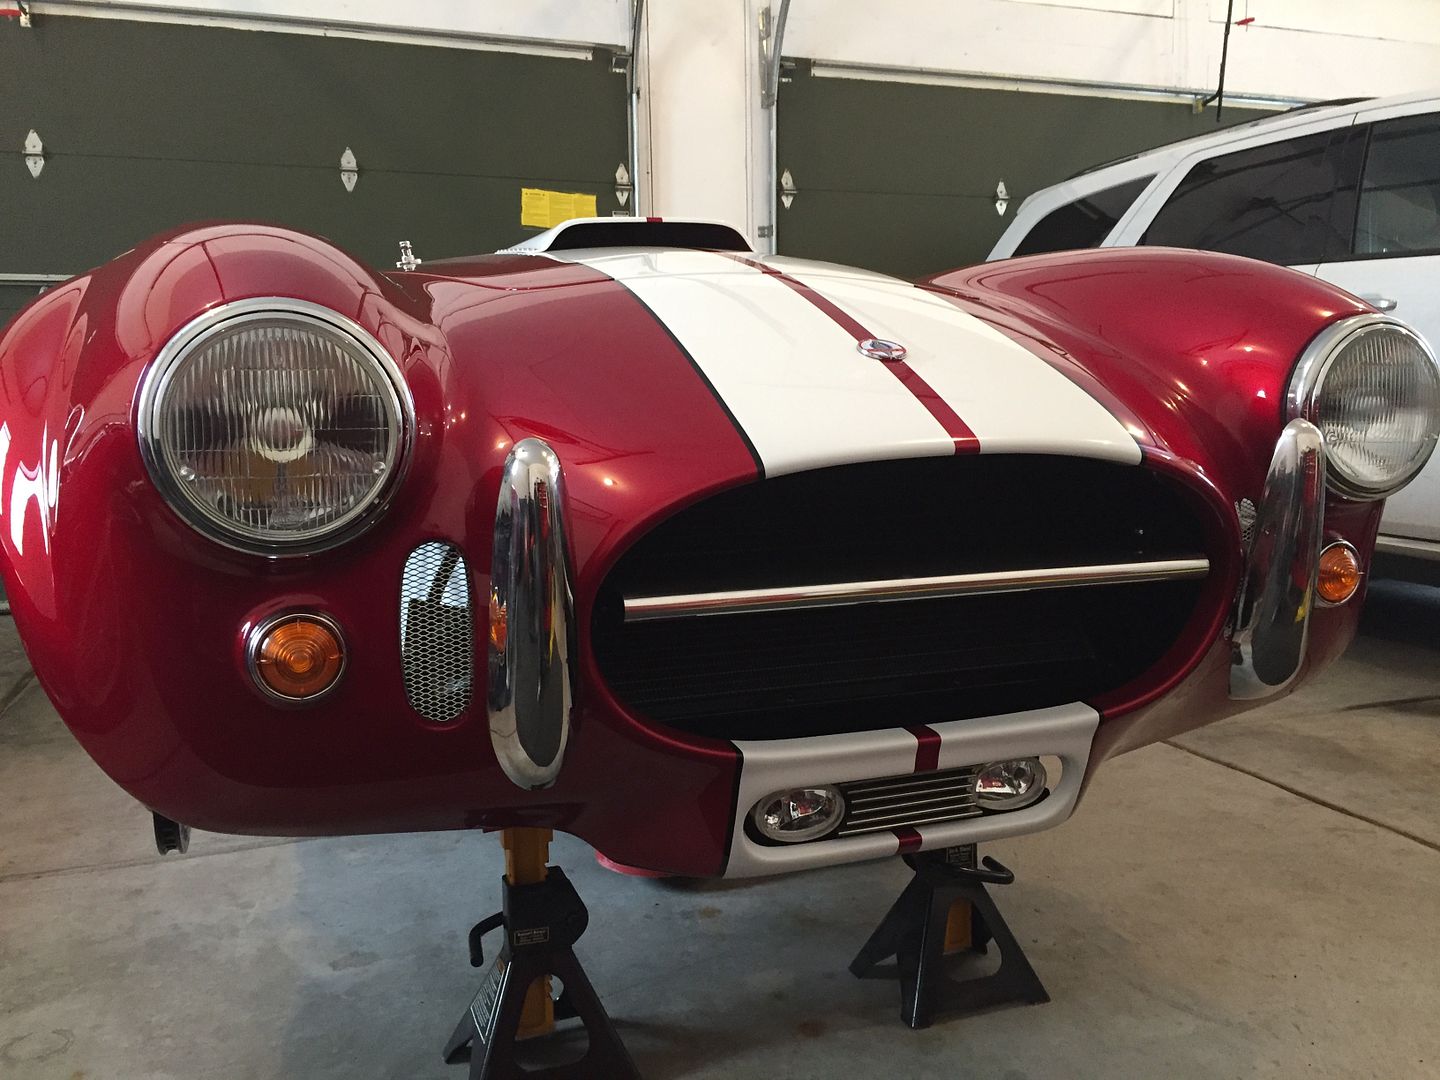
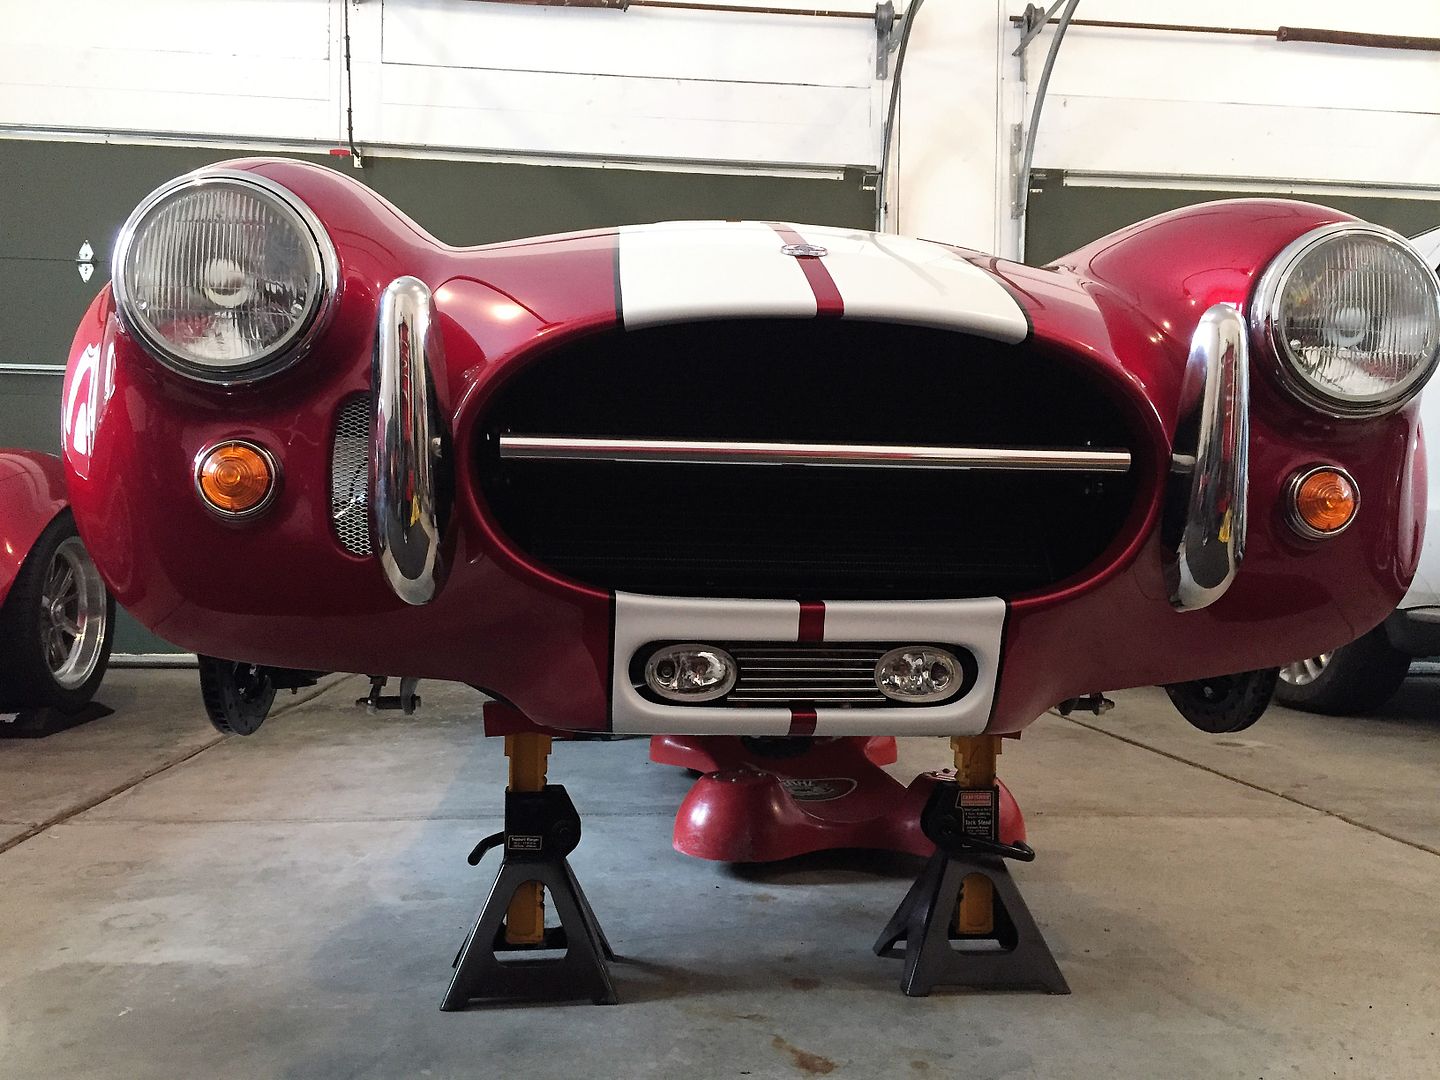
    Great color combination...almost as if you modeled it after a little die cast Cobra (or maybe it was the other way around) Enjoy the final assembly; for me that's always the icing on the cake!
    Jeff

  16. #536
    Senior Member edwardb's Avatar
    Join Date
    Feb 2011
    Location
    Lake Orion, Michigan
    Posts
    10,567
    Post Thanks / Like
    Quote Originally Posted by Jeff Kleiner View Post
    Great color combination...almost as if you modeled it after a little die cast Cobra (or maybe it was the other way around) Enjoy the final assembly; for me that's always the icing on the cake!
    Jeff
    Yeah that little die cast Cobra is very much like #7750 and a spitting image of the new build. I generally have it in my display when I go to car shows. I think the little kids like it as much as the big one.
    Last edited by edwardb; 09-27-2022 at 08:15 AM.
    Build 1: Mk3 Roadster #5125. Sold 11/08/2014. Build 2: Mk4 Roadster #7750. Sold 04/10/2017. Build Thread
    Build 3: Mk4 Roadster 20th Anniversary #8674. Sold 09/07/2020. Build Thread and Video. Build 4: Gen 3 Type 65 Coupe #59. Gen 3 Coyote. Legal 03/04/2020. Build Thread and Video
    Build 5: 35 Hot Rod Truck #138. LS3 and 4L65E auto. Rcvd 01/05/2021. Legal 04/20/2023. Build Thread. Sold 11/9/2023.

  17. #537
    Junior Member
    Join Date
    Jan 2017
    Posts
    15
    Post Thanks / Like
    Gorgeous!

  18. #538
    Senior Member
    Join Date
    Apr 2016
    Location
    Ohio
    Posts
    249
    Post Thanks / Like
    What a beautiful car. You've done a fantastic job, Paul. It's nice that you've shared all the fine details that help us all so much in our builds. Just beautiful!!!

  19. #539
    Senior Member edwardb's Avatar
    Join Date
    Feb 2011
    Location
    Lake Orion, Michigan
    Posts
    10,567
    Post Thanks / Like

    Final Assembly Progress

    Since getting the build home from paint last Friday, I’ve been chugging away at the final assembly steps. Won’t detail everything I’ve done, but basically front and rear are done, electrical now completely done (and everything works!), trunk lid completely aligned and finalized, filler and cap installed, and a lots of little stuff. These are pictures from this afternoon.


    A couple things to wrap up and then I’m going to work on the cockpit carpeting. Once that’s in, I can finalize everything going into the cockpit. I’m planning to carpet the trunk as well, but prioritizing that until last. I can do Autorama three weeks from now without a carpeted trunk. Not my choice, but can if I have to.

    Two items to detail a little further. First, true confession. I’m doing all LED lighting, most of which is a package from Watson’s Streetworks. Includes replacement red and amber 1157’s, headlights, and solid state flashers. Side note, you can see the LED headlights in the pictures I posted. Hard to tell exactly from these pics, but they’re a bit flatter than the standard halogens. Some will be OK with that. Others maybe not. But boy are they bright. I like them a lot. For the 1157’s, the bags are marked ESD sensitive and the bulbs are in ESD bags. So other than a quick look and test when received some months ago, I left them in the bags and did all the wiring and installation with the regular incandescent bulbs. With that complete, I proceeded to install them. About half were loose in the sockets and were intermittent. Ugh! Upon further review, I could see the spring loaded piece inside the bulb bases with the two contacts was not moving freely in some cases. So the contacts weren’t firmly against the contacts on the bulbs. Didn’t seem to affect the incandescents, but sure did the LED replacements. Upon further review found the self-inflicted problem. When I put the weather packs on all the fixtures, I had the brilliant idea to remove the rubber piece on the base of each fixture and replace with a piece of adhesive lined shrink sleeving that covered the base and about 3/4-inch of the harness. This, so I thought, would provide some added strain relief and also weather proofing. Good ideas, right? But what I really did was prevent the wires from moving in and out of the base which caused the spring loaded contacts to have very little free movement. Not good. I ended taking all the weather packs off (thank goodness for that pin extraction tool), removing the adhesive lined shrink sleeving, and replacing with a larger size non-adhesive shrink sleeving that didn’t pinch the wires out the base of the bulb. The original rubber covers that came with the bulbs were long gone. Problem solved! All contacts inside the bulbs now moved freely, the LED 1157’s locked in firmly, and all work perfectly.

    I’ve received several questions about whether the LED lights are brighter than the stock incandescent 1157’s. The short answer is yes. These are. How much is relative I guess. I don’t have any way to measure them. But they’re clearly very bright even in daylight. Two other comments. One of the characteristics of LED’s is they reach their full intensity very quickly. Faster than incandescents which ramp up a bit when they light. I think this also makes them appear brighter. Especially when blinking like for turn signals and hazards. The other observation is I replaced the incandescent 1157’s in #7750 with some off-the-shelf LED’s from Advance Auto a year or so ago. They seemed OK at the time, but these bulbs from Watson’s are clearly much brighter. Better quality or newer technology? Who knows.

    The other kind of big deal was how I spent my day yesterday. Earlier in the build thread I described how I installed a 255 lph in-tank electric fuel pump and 3/8-inch feed and return lines. The Factory Five Coyote instructions say to use a 255 lph pump with the stock provided lines. The Ford Racing Coyote crate instructions say to use a 190 lph pump and don’t (as I recall) talk about fuel line size. I opted for the larger pump, and since my Aeromotive regulator recommended 3/8-inch lines for both feed and return, went with that. This all has been widely discussed in multiple threads. The fuel pump hangar that came with my pump from Breeze had a 3/8-inch feed but a 1/4-inch return. Thinking that was the best I was going to do, installed it and all has been working OK. Over the past months though there has been new discussion about this. Mark now has a 3/8-inch return kit that goes into the top of the tank to replace the 1/4-inch return for high capacity fuel pumps. I really didn’t want to go that way. Then I found out about a new Mustang pump hangar from Pro-M Racing that has both 3/8-inch feed and return lines. Plus it has an extended return tube inside to prevent aeration, and it has 6AN fittings standard. No adapters required. I didn’t relish having to make the swap, but this all sounded good so ordered one a while back. They’ve been backordered, so it didn’t arrive until Monday. I was going to save this until after the show as well. But looking at what was already apart or not installed yet, it would be way easier to do it now. So yesterday I went for it. I dropped the tank and removed the old hangar and pump. Easy and pretty quick. What I found though were two gotchas. The spade connectors on the very large gauge wires on the new hangar weren’t going to work with the butt connectors on the Walbro pump I needed to swap over. Plus the new hangar requires some reliefs to be cut into the tank opening to fit it through. A trip to West Marine found the exactly right shrink sleeve reducing butt connectors. Upon further review, found the reliefs were necessary to clear the extended return tube. Not needed once everything was through the hole. I found I didn’t need to cut the reliefs nearly as much as shown if I just pushed the tube a bit as it was going in (a bit flexible and went right back) so that wasn’t too bad. So the new hangar with swapped pump is installed, the tank back in the chassis. My existing 6AN lines matched prefectly to the new hangar. That was pretty lucky. The Le Mans cap, fill tube, ground strap, and rear splash guards all installed. The pressure at the regulator is a few pounds different now, so will need to adjust that. I'm assuming that means I now have less restriction. I didn’t run the engine yet. This is the hangar I installed. http://www.promracing.com/fuel-suppl...-mustangs.html. Check the video. It makes a pretty good case for this change.

    The sun was shining today. First time in a couple weeks. That’s the way it is in Michigan winter… But the sun was shining in through the garage windows hitting the new paint color. Wow! I think I’m really going to like this color. That’s it for now. More progress tomorrow. Maybe some more pictures this weekend.
    Last edited by edwardb; 02-01-2017 at 11:52 PM.
    Build 1: Mk3 Roadster #5125. Sold 11/08/2014. Build 2: Mk4 Roadster #7750. Sold 04/10/2017. Build Thread
    Build 3: Mk4 Roadster 20th Anniversary #8674. Sold 09/07/2020. Build Thread and Video. Build 4: Gen 3 Type 65 Coupe #59. Gen 3 Coyote. Legal 03/04/2020. Build Thread and Video
    Build 5: 35 Hot Rod Truck #138. LS3 and 4L65E auto. Rcvd 01/05/2021. Legal 04/20/2023. Build Thread. Sold 11/9/2023.

  20. #540
    Senior Member
    Join Date
    Feb 2011
    Location
    Myrtle Beach, SC
    Posts
    2,108
    Post Thanks / Like
    Paul-

    She looks great, and I really like that black pinstripe! It really brings a unique element to the center stripes.

    As I have said before, you do very nice work, and the quality shows throughout your build thread!

    Good luck as you finish up, and at your first show!

    Regards,

    Steve

  21. #541
    RR20AC's Avatar
    Join Date
    Jul 2015
    Location
    Puyallup/WA
    Posts
    394
    Post Thanks / Like
    Blog Entries
    1
    The color is awesome, Paul. Your gaps look perfect. Thanks for the show. I'm looking at the rear bumper after just adding the bumper mod and not sure how that all tightens up like that. Do you thread it all the way in to the over riders first then lock the whole thing in place with nuts inside the body? Can't wait to see it done sitting outside in the sun.
    20th Anniversary MK4 Roadster, #8752, 18 of 20, Delivered 12/03/15, 1st Start 01/28/2017, off to paint 4/13/2017, Forte 351w/ Holley EFI, Forte throttle linkage, TKO 600/Forte Hyd. Clutch, UniSteer Electra Steering, RT's turn Signals, many Breeze parts, Paint by the Jeff Miller. Finished on 10/08/2017. 500 mile inspection on 10/21/2017, 3000 mile inspection on 1/14/19.

  22. #542
    Not a waxer Jeff Kleiner's Avatar
    Join Date
    Feb 2011
    Location
    Bloomington, Indiana
    Posts
    8,067
    Post Thanks / Like
    Quote Originally Posted by RR20AC View Post
    ...I'm looking at the rear bumper after just adding the bumper mod and not sure how that all tightens up like that...
    Not sure how Paul goes about it but here's how I do 'em:

    http://www.ffcars.com/forums/17-fact...upler-mod.html

    Cheers,
    Jeff

  23. #543
    Senior Member edwardb's Avatar
    Join Date
    Feb 2011
    Location
    Lake Orion, Michigan
    Posts
    10,567
    Post Thanks / Like
    Quote Originally Posted by RR20AC View Post
    The color is awesome, Paul. Your gaps look perfect. Thanks for the show. I'm looking at the rear bumper after just adding the bumper mod and not sure how that all tightens up like that. Do you thread it all the way in to the over riders first then lock the whole thing in place with nuts inside the body? Can't wait to see it done sitting outside in the sun.
    Thanks. It's coming together. I do the rear bumpers slightly different. I don't use an additional bolt. But either way works. Both are described in the thread Jeff linked.

    What I did: First the threads in the overriders have to be drilled out. No easy way to do the coupler mod and still have the threads in the overriders. So with the couplers bolted onto the chassis previously, assemble in the following order: Threaded rod through the body, nut and washer threaded on, then thread the rod all the way into the coupler. Then lightly tighten the inside nut against the washer and onto the inside of the body. Then on the outside, I install in order a neoprene washer against the painted body, washer, spacer, bumper, spacer, overrider, washer, and finally a lock nut. The length of the spacers will determine how far the bumper and overriders extend from the body and each other. It takes some patience to reach behind the brackets in the overriders and get the nuts started. Then it takes some more patience to reach behind with wrenches to tighten. But it can be done.
    Last edited by edwardb; 02-02-2017 at 05:06 PM.
    Build 1: Mk3 Roadster #5125. Sold 11/08/2014. Build 2: Mk4 Roadster #7750. Sold 04/10/2017. Build Thread
    Build 3: Mk4 Roadster 20th Anniversary #8674. Sold 09/07/2020. Build Thread and Video. Build 4: Gen 3 Type 65 Coupe #59. Gen 3 Coyote. Legal 03/04/2020. Build Thread and Video
    Build 5: 35 Hot Rod Truck #138. LS3 and 4L65E auto. Rcvd 01/05/2021. Legal 04/20/2023. Build Thread. Sold 11/9/2023.

  24. #544
    RR20AC's Avatar
    Join Date
    Jul 2015
    Location
    Puyallup/WA
    Posts
    394
    Post Thanks / Like
    Blog Entries
    1
    Thanks guys for the quick reply, I off to work so I will have to digest this later. Great info.
    20th Anniversary MK4 Roadster, #8752, 18 of 20, Delivered 12/03/15, 1st Start 01/28/2017, off to paint 4/13/2017, Forte 351w/ Holley EFI, Forte throttle linkage, TKO 600/Forte Hyd. Clutch, UniSteer Electra Steering, RT's turn Signals, many Breeze parts, Paint by the Jeff Miller. Finished on 10/08/2017. 500 mile inspection on 10/21/2017, 3000 mile inspection on 1/14/19.

  25. #545
    Senior Member Duke's Avatar
    Join Date
    Dec 2015
    Location
    Taxachusetts
    Posts
    401
    Post Thanks / Like
    Paul, quick question on your hood opening bumper guards. When you install them are you riveting through the 3/4 tubes on the side of the opening or just through the body?

  26. #546
    Senior Member edwardb's Avatar
    Join Date
    Feb 2011
    Location
    Lake Orion, Michigan
    Posts
    10,567
    Post Thanks / Like
    Quote Originally Posted by Duke View Post
    Paul, quick question on your hood opening bumper guards. When you install them are you riveting through the 3/4 tubes on the side of the opening or just through the body?
    I attach the hood bumpers with small sheet metal screws into the fiberglass. It's a pretty fair distance down to the 3/4 inch tubes (1/4 inch or more below the glass body, filled with cushioning) and I don't try to reach it. I've not tried to attach the perimeter of the hood to the 3/4 inch tubes on any of my builds. It's never been an issue. This topic used to be discussed some, but haven't seen it for awhile. People do it both ways.

    One other comment. Some use D-tube cushioning around the hood opening rather than bumpers. Some even attach it to the underside of the hood which is really clean looking. I've tried D-tube before, but couldn't get the hood aligned the way I liked it. There's quite a bit of variation in the distance between the bottom of the hood and the lip around the opening. I use a couple different size bumpers and even then adjust the size sometimes so the hood sits flush with the body. Working on that exact step today actually. About done.
    Build 1: Mk3 Roadster #5125. Sold 11/08/2014. Build 2: Mk4 Roadster #7750. Sold 04/10/2017. Build Thread
    Build 3: Mk4 Roadster 20th Anniversary #8674. Sold 09/07/2020. Build Thread and Video. Build 4: Gen 3 Type 65 Coupe #59. Gen 3 Coyote. Legal 03/04/2020. Build Thread and Video
    Build 5: 35 Hot Rod Truck #138. LS3 and 4L65E auto. Rcvd 01/05/2021. Legal 04/20/2023. Build Thread. Sold 11/9/2023.

  27. #547
    Not a waxer Jeff Kleiner's Avatar
    Join Date
    Feb 2011
    Location
    Bloomington, Indiana
    Posts
    8,067
    Post Thanks / Like
    Quote Originally Posted by edwardb View Post
    ...Some use D-tube cushioning around the hood opening rather than bumpers. Some even attach it to the underside of the hood which is really clean looking. I've tried D-tube before, but couldn't get the hood aligned the way I liked it. There's quite a bit of variation in the distance between the bottom of the hood and the lip round the opening. I use a couple different size bumpers and even then adjust the size sometimes so the hood sits flush with the body. Working on that exact step today actually. About done.
    You hide the bumpers inside the "D" molding. I'll show you how when I see ya' at Open House or LCS but you have to promise not to tell Miller that I'm giving away more of the secrets

    Jeff

  28. #548
    Senior Member edwardb's Avatar
    Join Date
    Feb 2011
    Location
    Lake Orion, Michigan
    Posts
    10,567
    Post Thanks / Like
    Quote Originally Posted by Jeff Kleiner View Post
    You hide the bumpers inside the "D" molding. I'll show you how when I see ya' at Open House or LCS but you have to promise not to tell Miller that I'm giving away more of the secrets

    Jeff
    Interesting... I assume still on the body hood lip vs. on the underside of the hood.
    Build 1: Mk3 Roadster #5125. Sold 11/08/2014. Build 2: Mk4 Roadster #7750. Sold 04/10/2017. Build Thread
    Build 3: Mk4 Roadster 20th Anniversary #8674. Sold 09/07/2020. Build Thread and Video. Build 4: Gen 3 Type 65 Coupe #59. Gen 3 Coyote. Legal 03/04/2020. Build Thread and Video
    Build 5: 35 Hot Rod Truck #138. LS3 and 4L65E auto. Rcvd 01/05/2021. Legal 04/20/2023. Build Thread. Sold 11/9/2023.

  29. #549
    Not a waxer Jeff Kleiner's Avatar
    Join Date
    Feb 2011
    Location
    Bloomington, Indiana
    Posts
    8,067
    Post Thanks / Like
    Quote Originally Posted by edwardb View Post
    Interesting... I assume still on the body hood lip vs. on the underside of the hood.
    When hiding bumpers, yes. I have applied "D" seal to the underside of hoods (all things being equal I prefer it) but only when bumpers were not required except for the usual rear center one.

    Jeff

  30. #550
    Senior Member Duke's Avatar
    Join Date
    Dec 2015
    Location
    Taxachusetts
    Posts
    401
    Post Thanks / Like
    Thanks guys, exactly what I was looking for. I noticed on mine when I clamped down the body to the 3/4 tubes it made a mess of the body to hood lines. I figured very few people did this even though the instructions still call for it considering I see people go to paint without the holes drilled for the bumpers.

    Jeff, thanks for the heads up on the seals. Another one of my concerns/thoughts when sealing the engine bay.

  31. #551
    Senior Member edwardb's Avatar
    Join Date
    Feb 2011
    Location
    Lake Orion, Michigan
    Posts
    10,567
    Post Thanks / Like

    More Final Assembly

    Over halfway through my list of final assembly items. One of the open items was to seal the gap between the body and the chassis in front of the doors. For my other builds I’ve used the expanding foam that Factory Five provides, but that needs to be applied before installing the body. Some use other fill materials, also installed before the body goes on. Because of the decision to paint this body on, which I didn’t completely expect, nothing was installed beforehand. I was a little dreading this step, but turned out to be pretty easy. Before installing the side louvers, side pipes, and front splash guards, I removed the doors (which I was planning to do anyway in advance of working on the carpet), and removed the bolts on the underside of the body. This allowed me to flex the body sides out just a bit. Then I used two pieces of the 2-1/4 x 2-1/4 x 42 air conditioner seal foam from Ace Hardware that Jeff Kleiner recommends. I cut each side to length, tapered the ends a bit, and successfully pushed them into position from the wheel well side. Them put the bolts back into the underside, installed the louvers, installed the GAS-N side pipes and hangars, and installed the front splash guards. No gaskets on the side pipes. Just Permatex Ultra Copper sealant. Really happy with how the side pipe installation turned out. Took a couple wedges, but the final result with the GP Headers is by far the best of the builds I’ve done. Then installed the windshield.

    After those steps, starting to look even more finished, even with a snow brush holding the hood up.


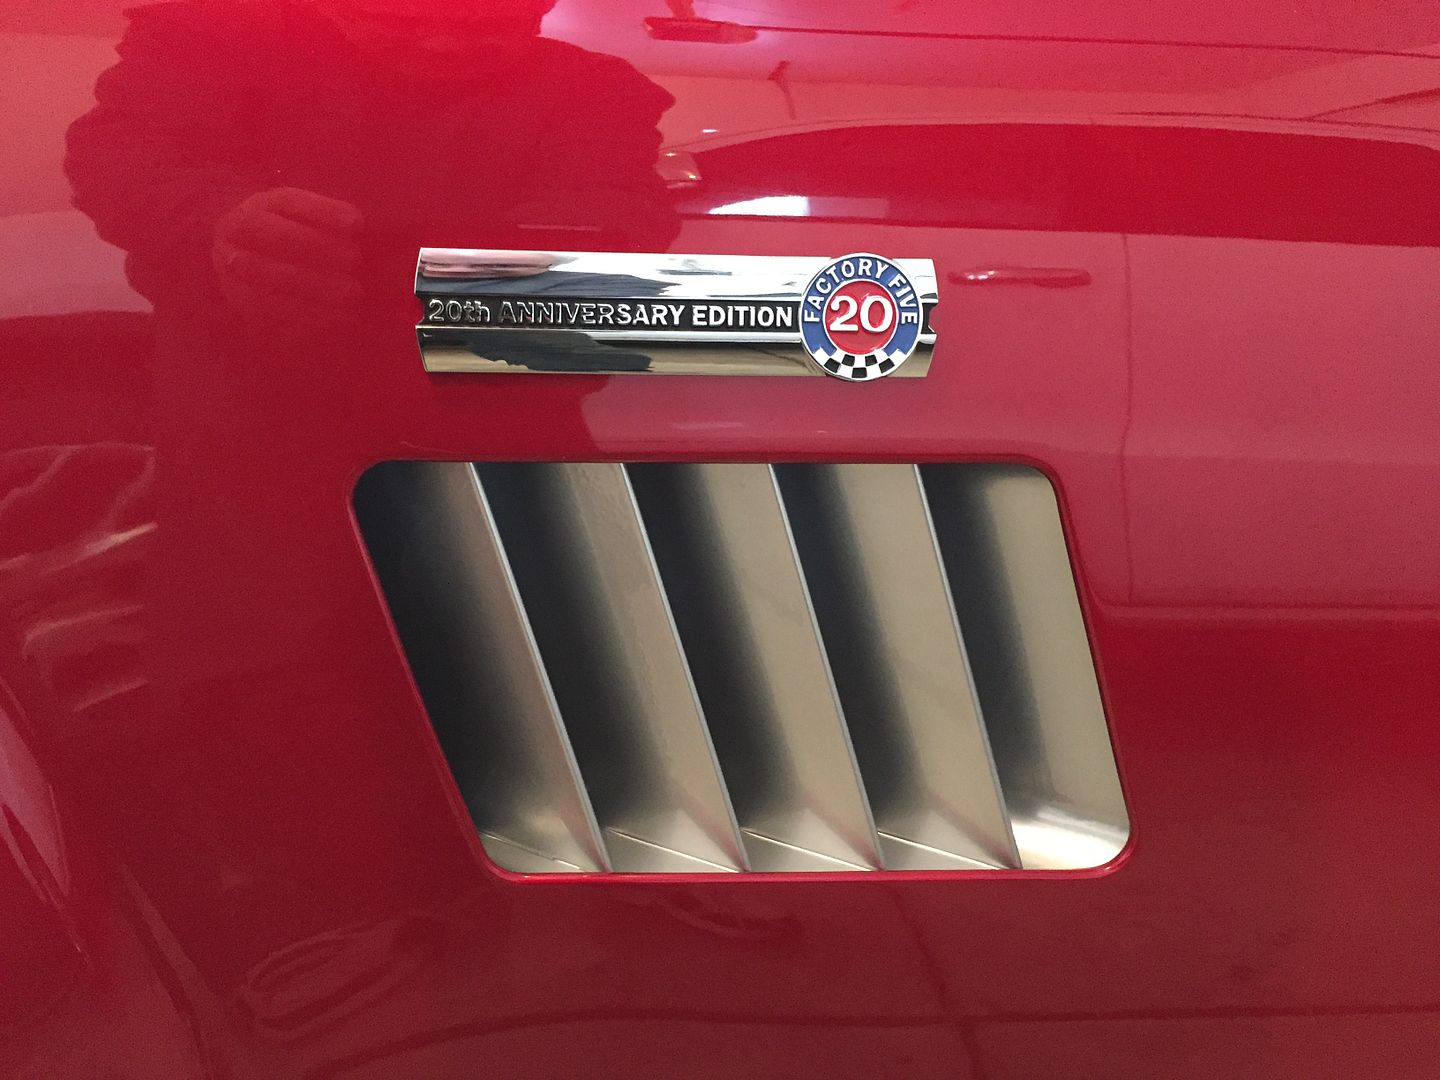
    Finally got to stick on those 20th Anniversary badges. Pretty cool. Those are the Factory Five upgraded louvers that I had silver powder coated.


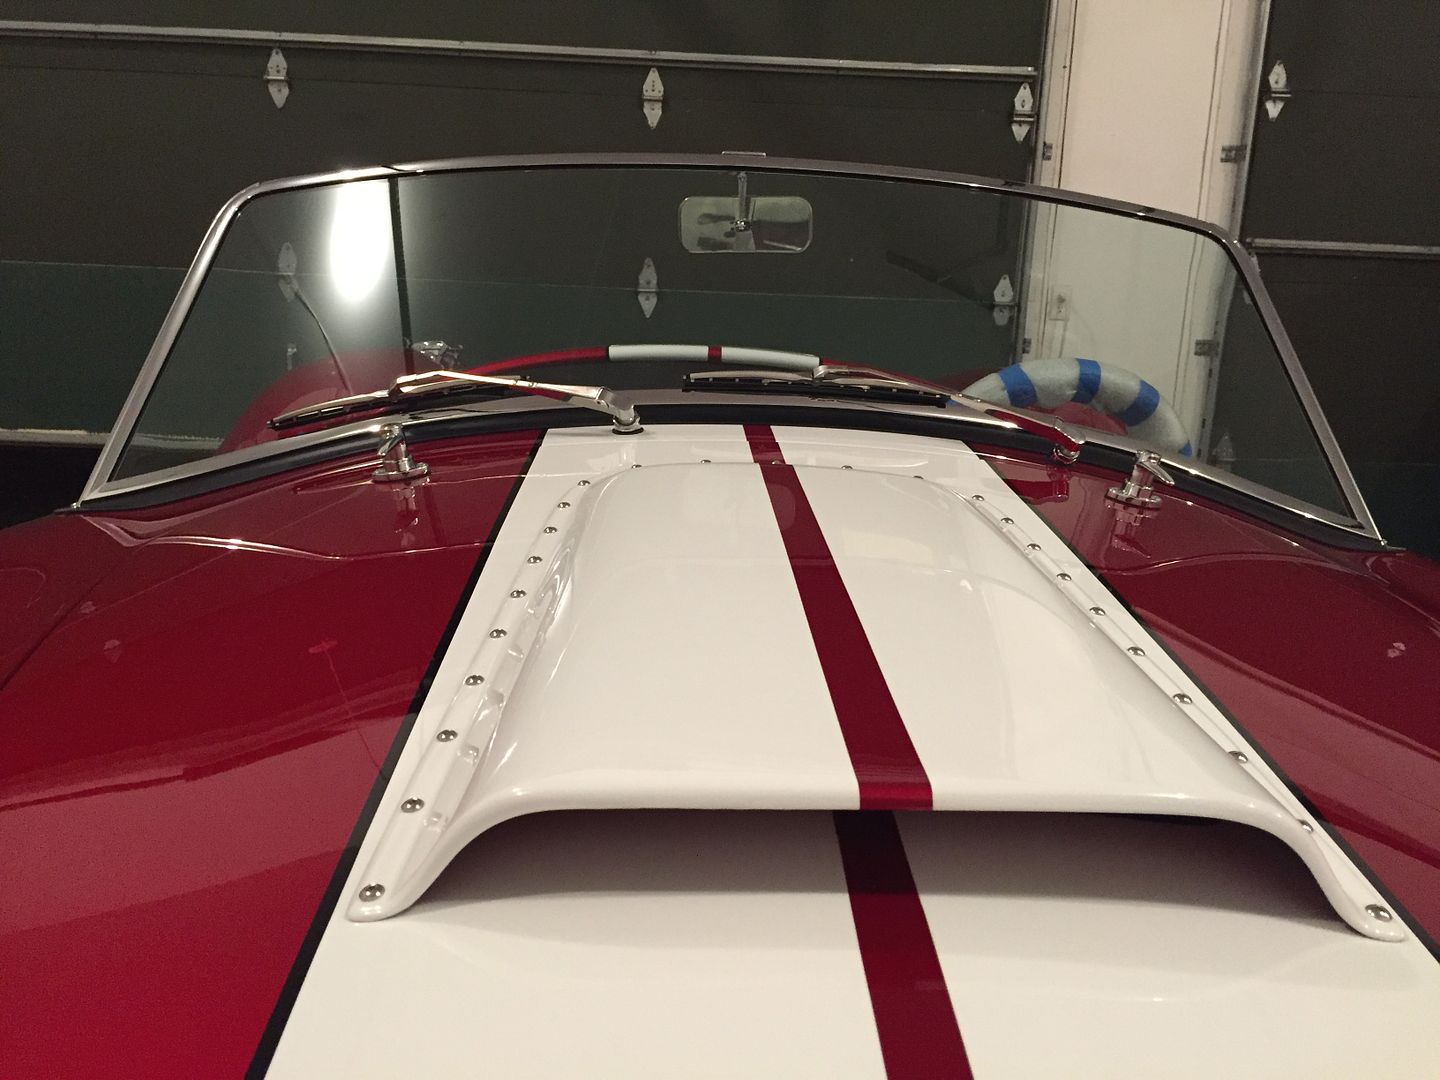
    Completed the wiper installation. I mentioned earlier in the build thread that this wiper setup from Factory Five, new with the kit in August 2015, appears to be a different supplier than in the past. The wheelboxes are noticeably different and work very well. The shafts are a bit longer than before so the wiper arms seems to stand out a bit. But all OK. Low, high, park all working. Another hint that is mentioned a lot but I’ll go ahead and show here since I know there are a number of first time builders. The parked wipers look much better and more finished if the arms are bent so that the blades are parallel to the bottom of the windshield. The PS takes more bending than the DS. I put the tip in a smooth jaw vise and bump the arm with a hammer. I put some heat with a propane torch on the PS because of the additional bend. Then polished out the slight discoloration. The DS bent OK without any heat. Look like this when you’re done:


    Today I finished the hood installation. Ended up with 10 bumpers around the perimeter and I’m really happy with how it lines up. Had to adjust the hinges just a bit. I know some guys struggle with these. Don’t claim to be an expert or very fast at it, but kind of getting the hang of it. The main tip is to close the hood, then reaching from underneath, loosen the mounting bolts just enough to where the hood can be bumped/pushed into position, then re-tighten from underneath. I do them one axis at a time. First side-to-side, then up and down. Couple of the bolts are not easy to reach, but it can be done. With everything adjusted and the gas struts installed, called it done.

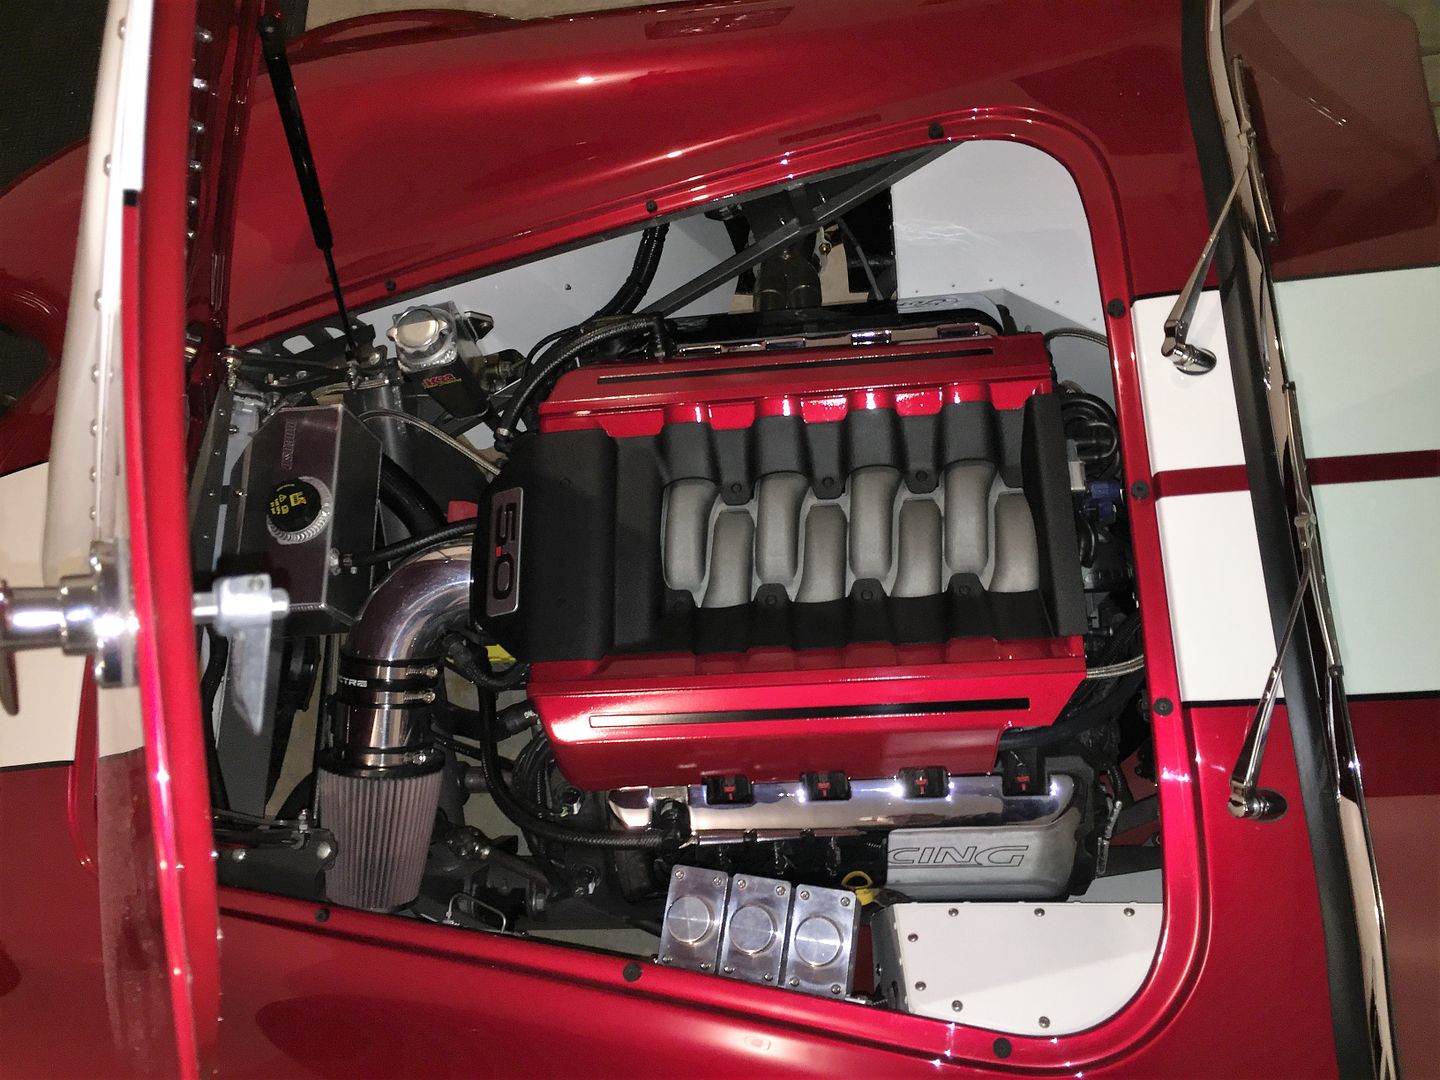
    I mentioned before I wanted to add some black stripes to the painted Coyote engine cover. Thought about using some pinstripe tape, but couldn’t find anything that wide. Then thought about paint, but really didn’t want to go that way. I stopped by a vinyl sign shop and they sold me couple feet of gloss black vinyl. Cut some strips and applied them wet. I like it. Nice complement to the black pinstripes on the body. Engine compartment now 100% done.


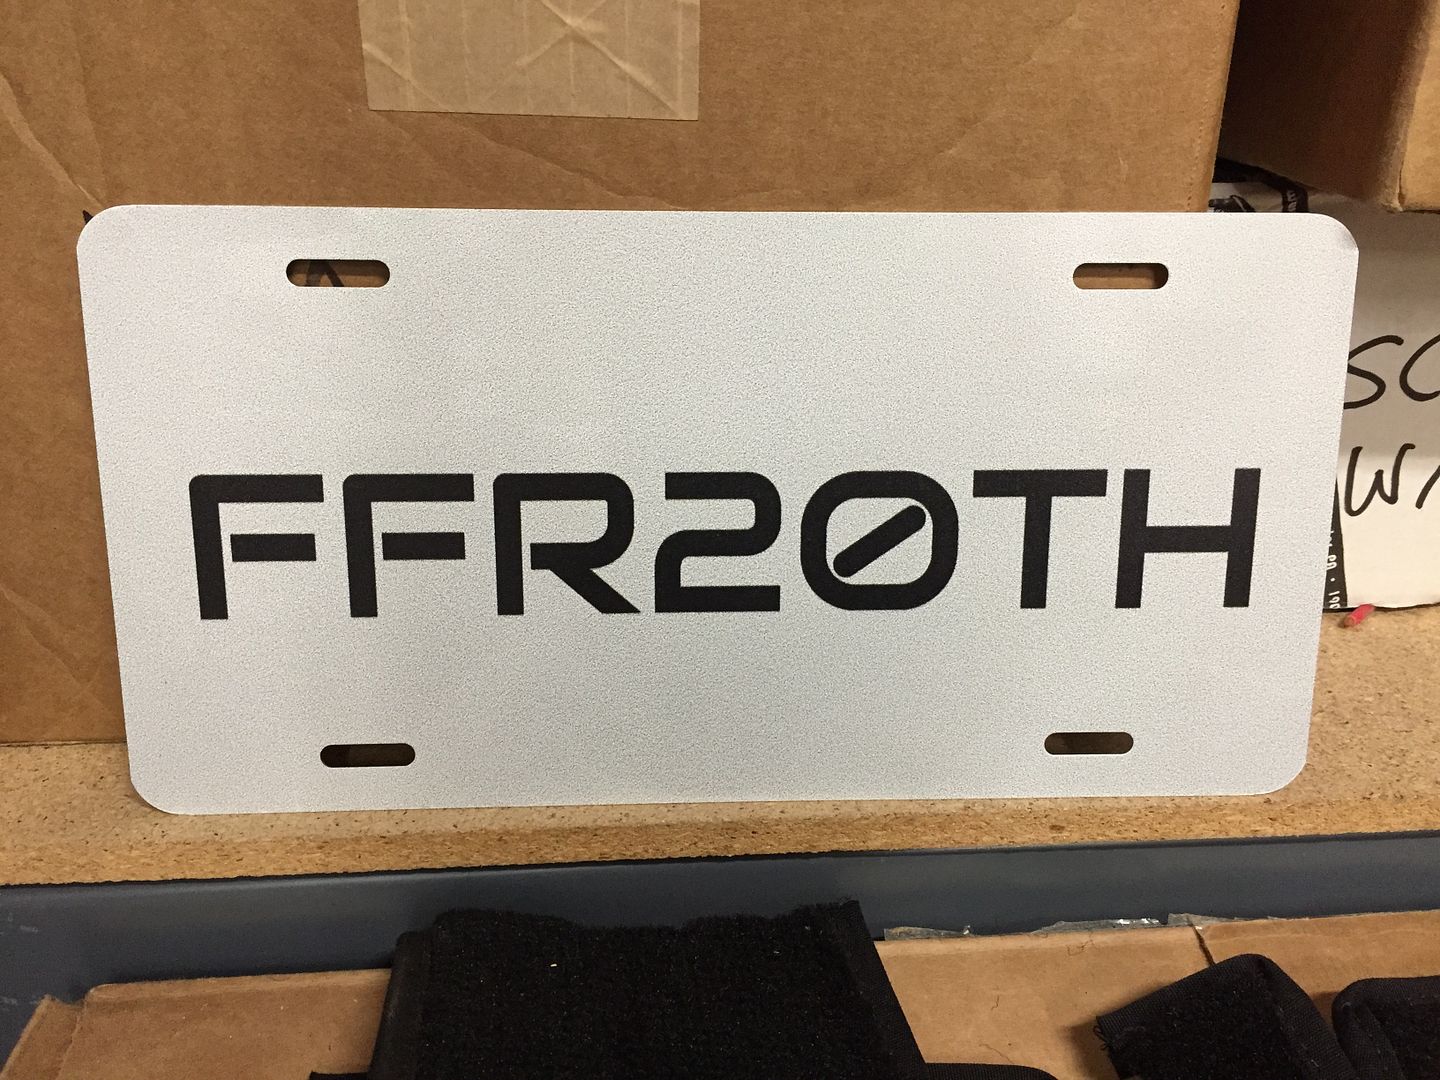
    Finally, I’m still at least a couple weeks away from starting the Michigan title and license process. And it will be some weeks after that before I have my license plate. It’s not a real big deal, but I would prefer to have something hanging on the license plate bracket for Autorama. I thought about making something, but then the other day found a company in Austin, Texas that does custom printing including license plate sizes. Mainly I think for people who want something custom for the front where an actual front plate isn’t required. I had a real simple plate made up. It’s painted .040 aluminum with printed on lettering. An introductory special, free shipping, and it was in my mailbox in 4 days. Not bad. This is probably what my real plate will be, but I’m guessing Michigan won’t have this font. This will be perfect for the big car show, and a nice souvenir of the build for my man wall afterwards.


    Monday I will start carpeting the cockpit.
    Last edited by edwardb; 03-22-2017 at 10:34 AM.
    Build 1: Mk3 Roadster #5125. Sold 11/08/2014. Build 2: Mk4 Roadster #7750. Sold 04/10/2017. Build Thread
    Build 3: Mk4 Roadster 20th Anniversary #8674. Sold 09/07/2020. Build Thread and Video. Build 4: Gen 3 Type 65 Coupe #59. Gen 3 Coyote. Legal 03/04/2020. Build Thread and Video
    Build 5: 35 Hot Rod Truck #138. LS3 and 4L65E auto. Rcvd 01/05/2021. Legal 04/20/2023. Build Thread. Sold 11/9/2023.

  32. #552

    Steve >> aka: GoDadGo
    GoDadGo's Avatar
    Join Date
    Feb 2015
    Location
    Slidell, Louisiana
    Posts
    6,567
    Post Thanks / Like
    Blog Entries
    1
    As Always, Your Cars Look Great!

  33. #553
    Senior Member
    Join Date
    Apr 2016
    Location
    Ohio
    Posts
    249
    Post Thanks / Like
    If mine turns out half as good as yours I'll be a happy camper. Going to be a show stopper at Autorama. .

  34. #554
    Senior Member Dave Howard's Avatar
    Join Date
    Feb 2012
    Location
    North Bay, Ontario
    Posts
    534
    Post Thanks / Like
    I installed 1/2 round ( or D ) style self adhesive weather stripping around the hood opening. Small round holes were cut in the locations where the buttons are mounted and the weather stripping went overtop. Helped to hide the buttons and made for a cleaner look. The same weather stripping was used around the door openings to seal the doors when closed.

  35. #555
    Senior Member edwardb's Avatar
    Join Date
    Feb 2011
    Location
    Lake Orion, Michigan
    Posts
    10,567
    Post Thanks / Like
    Quote Originally Posted by JRL16 View Post
    If mine turns out half as good as yours I'll be a happy camper. Going to be a show stopper at Autorama.
    Thanks! Getting close to the finish line. Show is two weeks away.

    Quote Originally Posted by Dave Howard View Post
    I installed 1/2 round ( or D ) style self adhesive weather stripping around the hood opening. Small round holes were cut in the locations where the buttons are mounted and the weather stripping went overtop. Helped to hide the buttons and made for a cleaner look. The same weather stripping was used around the door openings to seal the doors when closed.
    I'm familiar with that D tube. I use it on the doors as well. Works great. For the hood, some of the bumpers I had to use are tall (.40) and nearly the same width as the D tube. They're not going to cover up very easily. I'm OK with how the bumpers look. Thanks.
    Build 1: Mk3 Roadster #5125. Sold 11/08/2014. Build 2: Mk4 Roadster #7750. Sold 04/10/2017. Build Thread
    Build 3: Mk4 Roadster 20th Anniversary #8674. Sold 09/07/2020. Build Thread and Video. Build 4: Gen 3 Type 65 Coupe #59. Gen 3 Coyote. Legal 03/04/2020. Build Thread and Video
    Build 5: 35 Hot Rod Truck #138. LS3 and 4L65E auto. Rcvd 01/05/2021. Legal 04/20/2023. Build Thread. Sold 11/9/2023.

  36. #556
    Senior Member edwardb's Avatar
    Join Date
    Feb 2011
    Location
    Lake Orion, Michigan
    Posts
    10,567
    Post Thanks / Like

    Final Assembly Cockpit

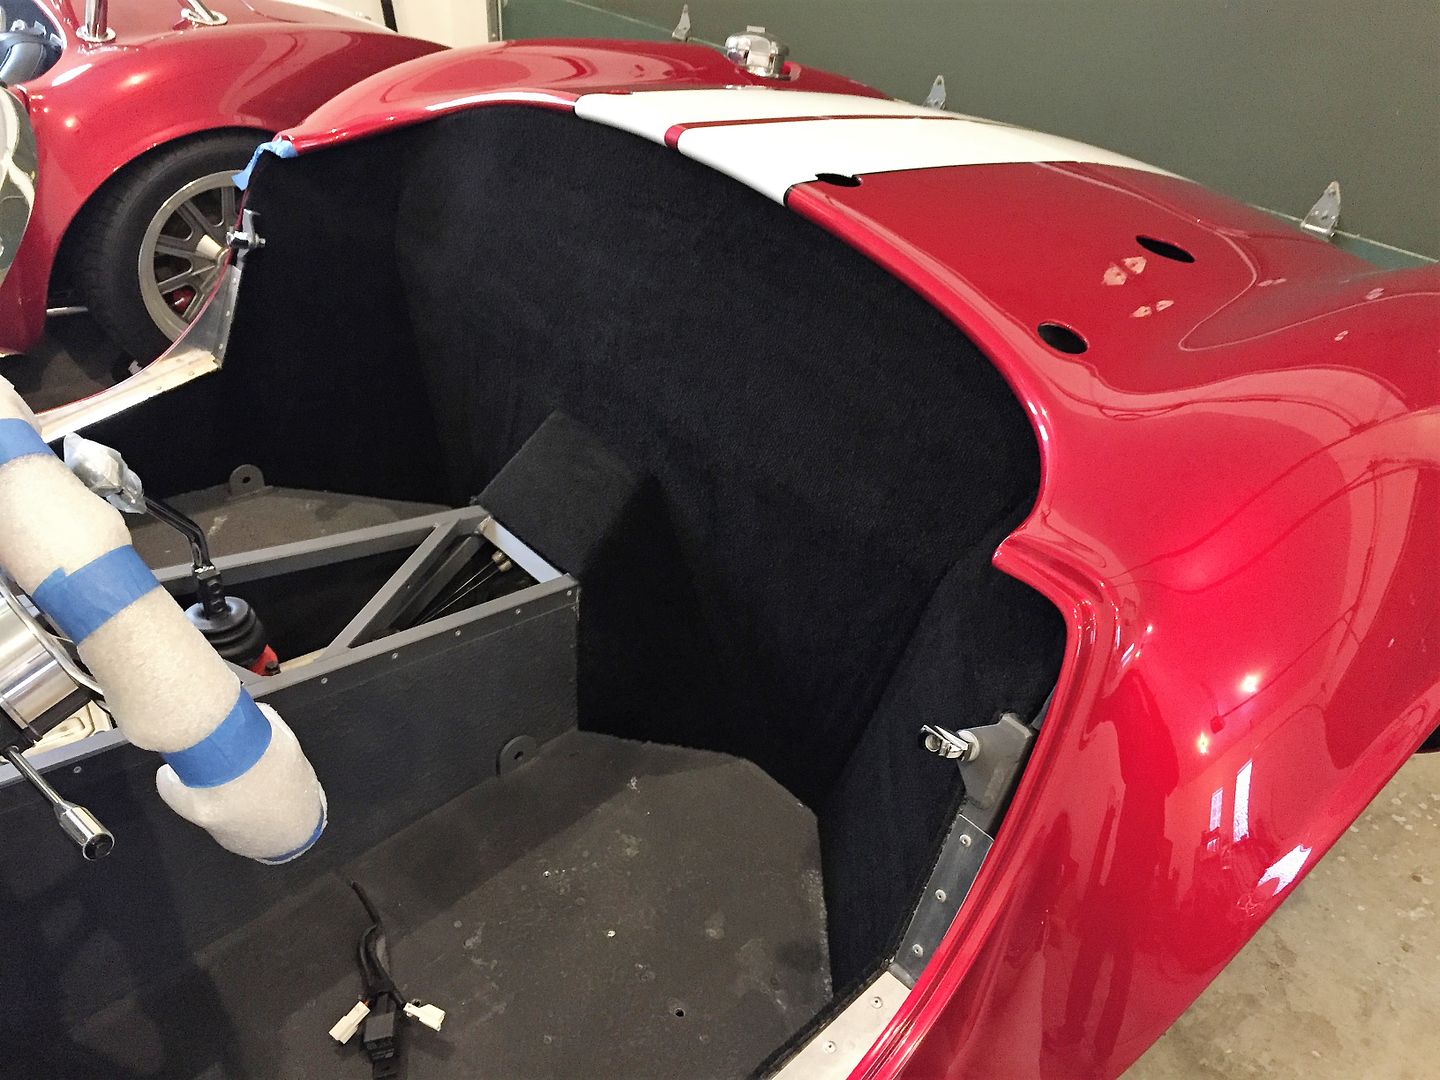
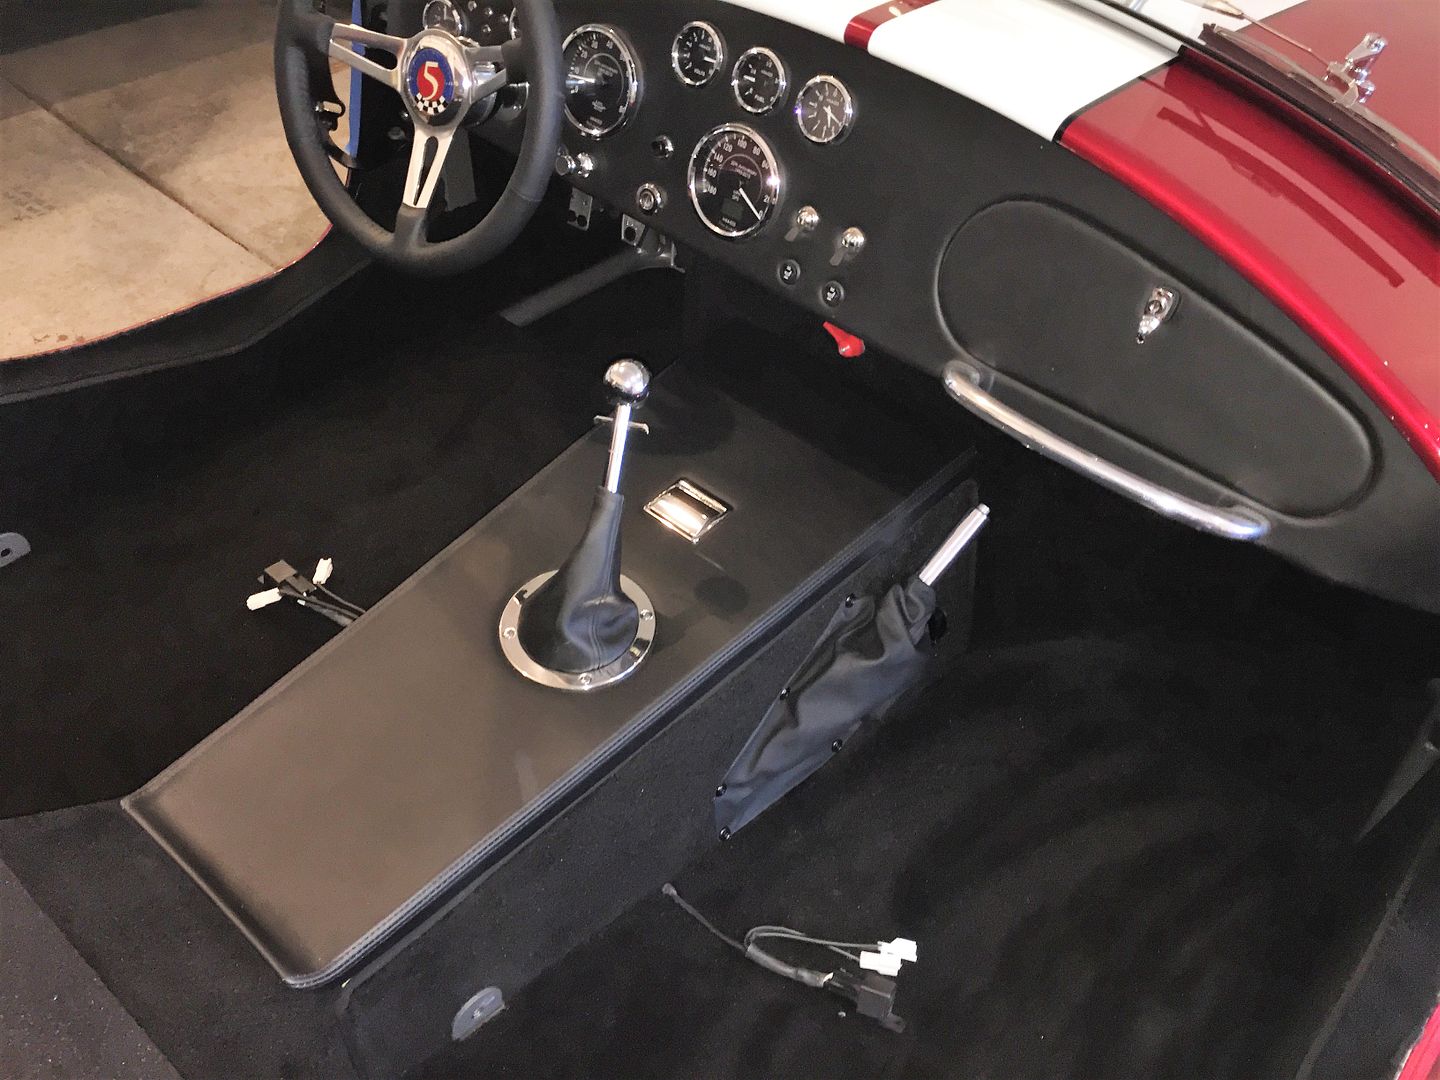
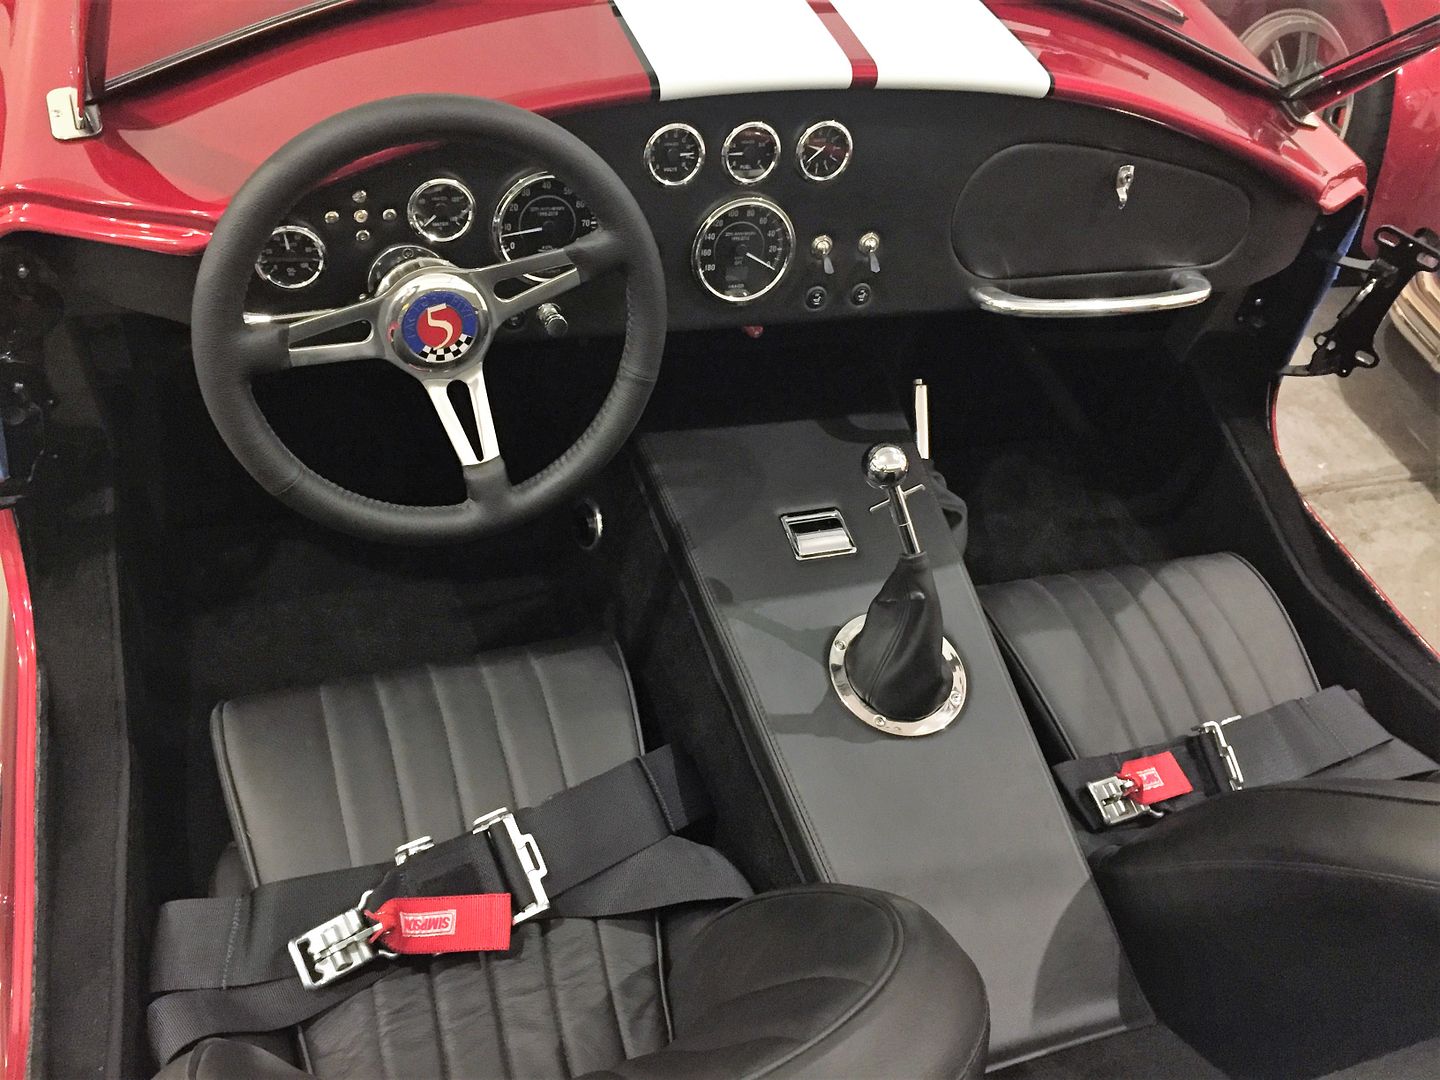
    Today I nearly finished the cockpit. Just a couple small details remaining. Cockpit carpet is 100% done. Transmission tunnel cover installed, lap belts installed, seats installed. Here are some details and pics.

    Back wall carpet done. My favorite go-to carpet adhesive is DAP 00443 Weldwood Outdoor Carpet Adhesive. It may seem like overkill (and it probably is) but it works really well. I've tried about everything, and like this the best. You spread it on one surface with a notched trowel. I use a 1/8-inch. Pretty easy and no overspray. Then push the carpet into place. You can move and reposition as necessary until it’s right where you want it. But it also grabs quite well. A little rolling and it’s done. If any glue gets on the carpet, cleans easily with mineral spirits. I also use DAP Gel contact cement for smaller pieces. But that’s instant grab. Both products are really strong smelling and need good ventilation. I also turn off my garage heater. For obvious reasons.


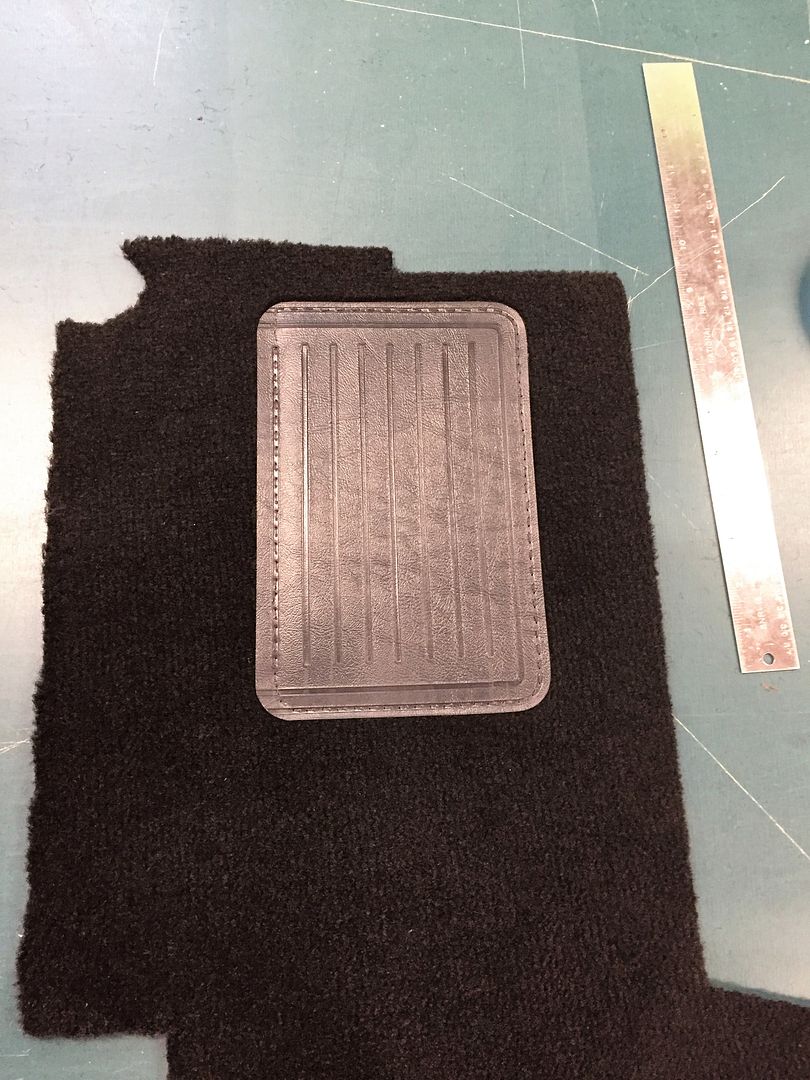
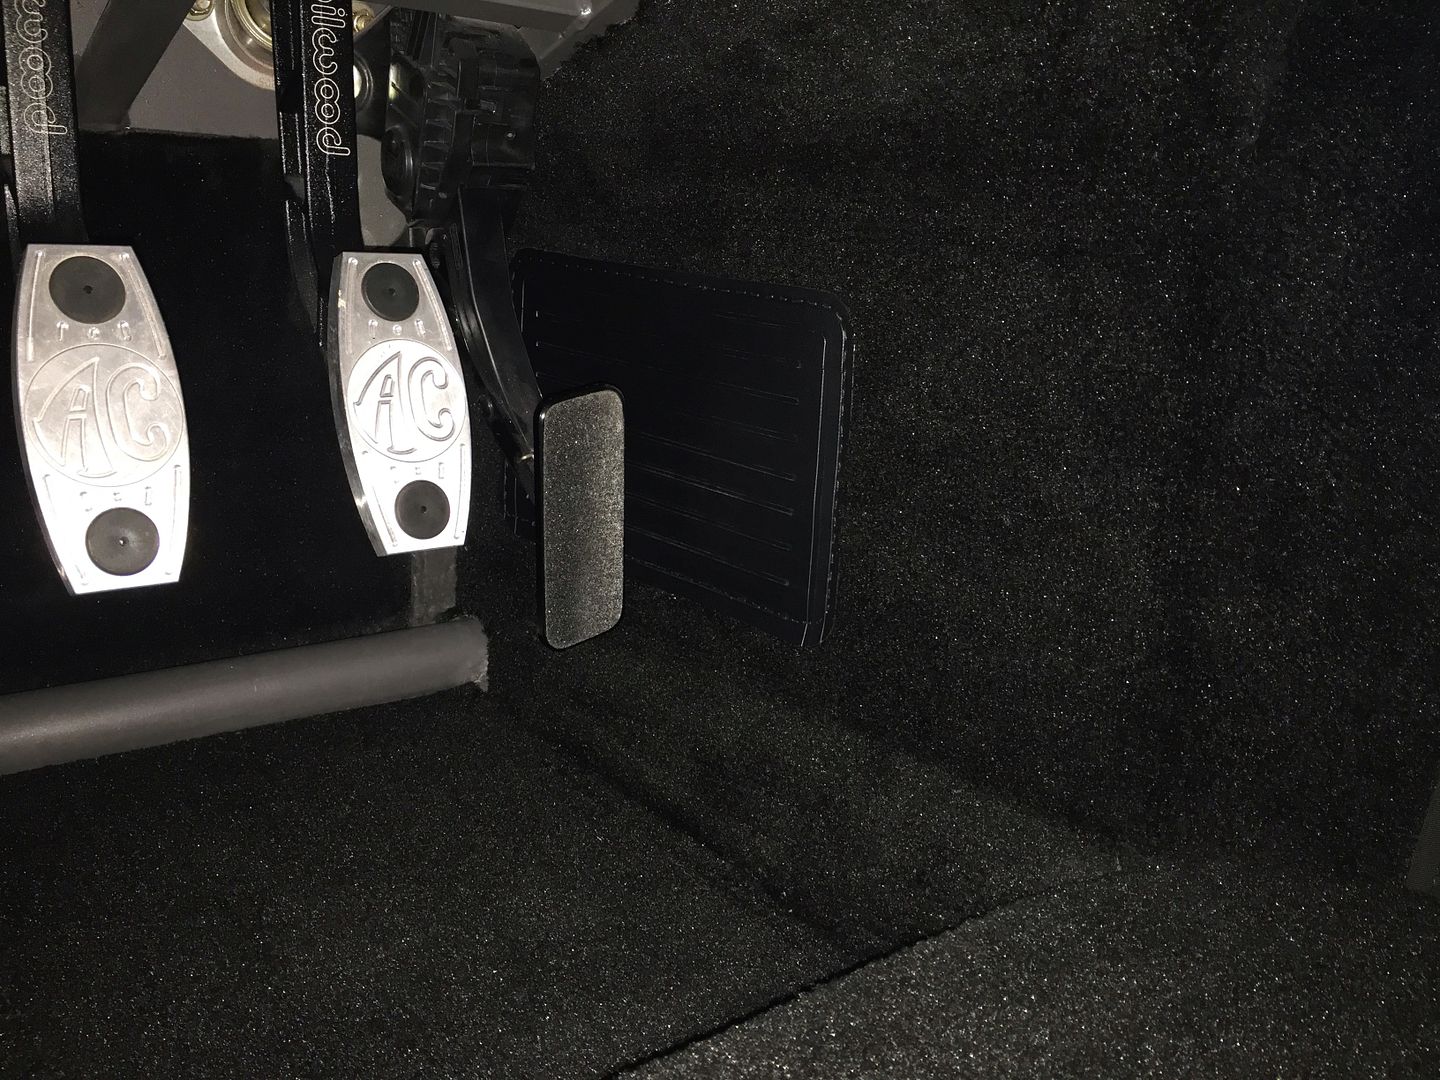
    I like to add a plastic pad by the accelerator pedal. Saves wear and tear on the carpet, plus makes the pedal easier and smoother to operate. After determining the location, I shave back the carpet some, then glue it in place with some weights overnight. Then stitch around the edges. Keeps the edges from lifting. That’s my hand stitching. Don’t look too close.


    Then with the carpet installed and pad in the desired location.


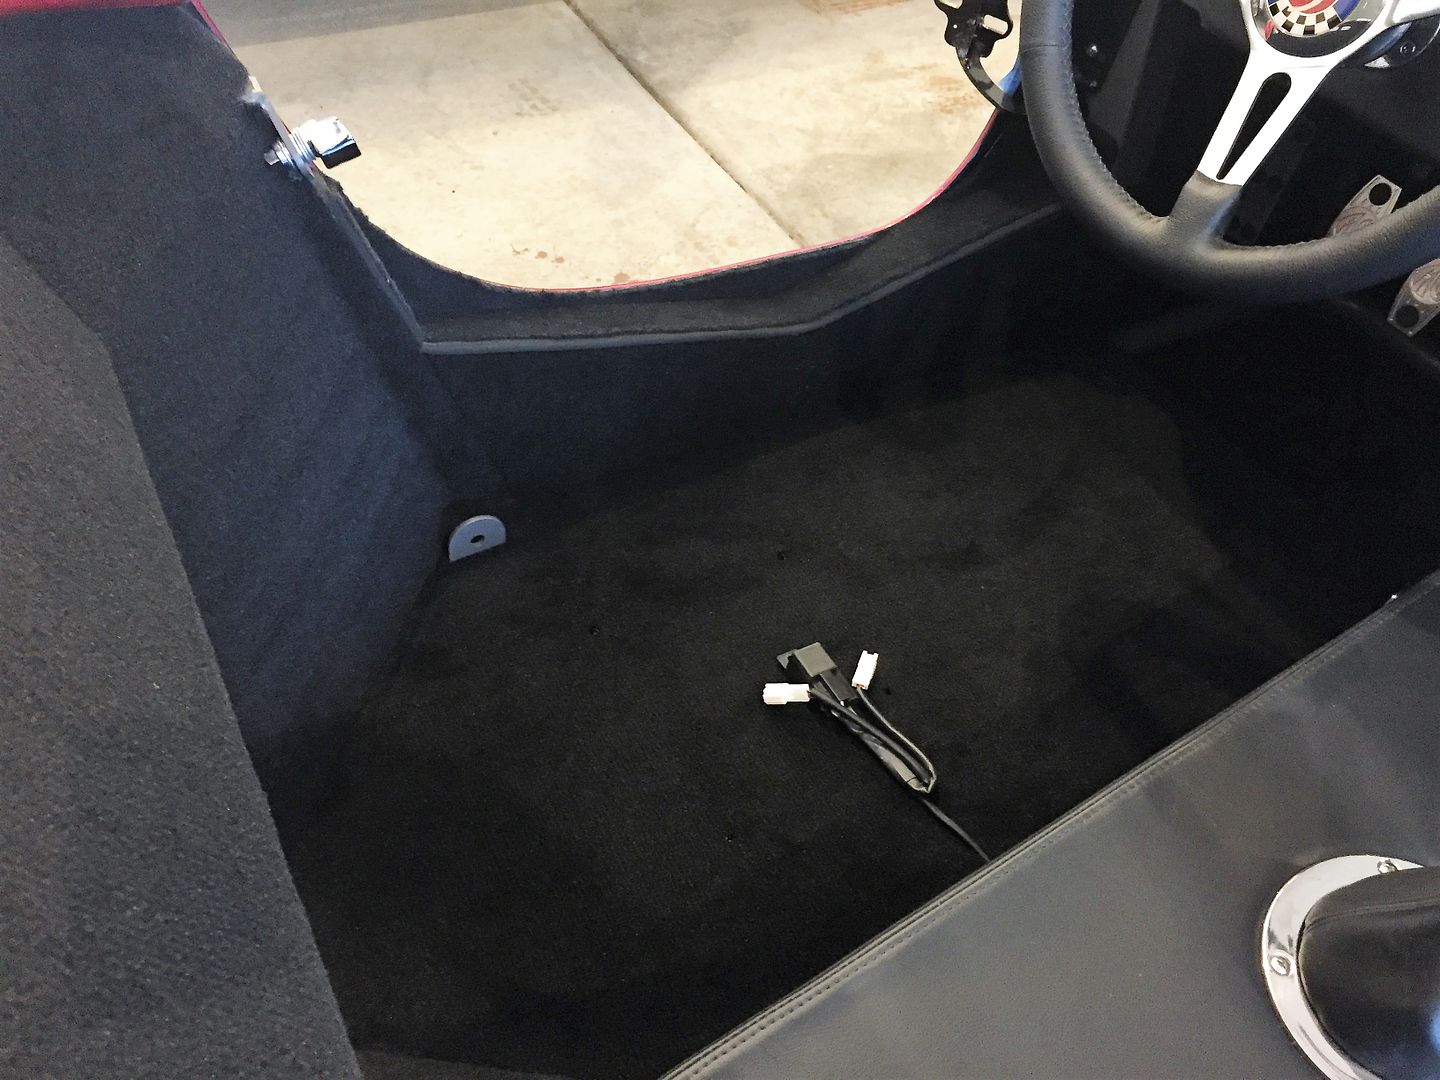
    Carpet all done, tunnel cover in place, e-brake boot installed. Those wires are for the heated seats. But then you knew that.


    This shows some of the edging I described in a previous update. A nice improvement over the raw edge that would normally be in that location.


    Seats and lap belts in. I’ll do the shoulder belts after the trunk carpet is installed.


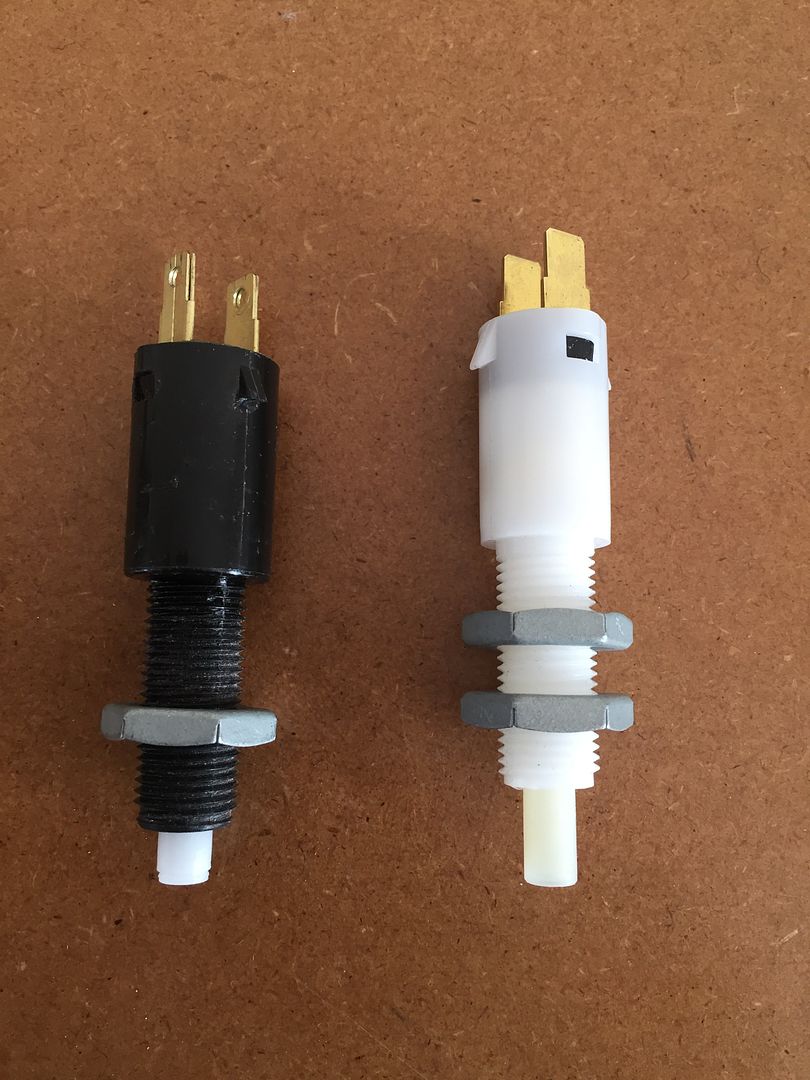
    Tomorrow I’ll get started on the trunk carpet. Hopefully done by this weekend. One other quick update. After getting all the lights installed after it came back from paint, I went out to the garage on several occasions and the brake lights were stuck on. Couple times over night. Rattled the pedal and they went back off. Fortunately the LED bulbs are pretty easy on the battery, so didn’t run it down. But still… I had noticed before that the brake pedal switch was very sensitive. Just the lightest touch on the pedal and the lights went on. I tried to adjust it, but no difference. The brake arm was tight against the switch housing and the button in as far as it would go. Even then, it will still turn on by itself. One switch I had came with the kit. The other is a Painless 80172. I needed a second switch for the Coyote top clutch switch, so bought the Painless. They look identical, so I really don’t know which one failed. I did a little research and found the ACDelco D885 is a direct replacement. It’s cheaper than the Painless, and I’ve had good luck with actual branded ACDelco OEM style parts in the past, so picked one up. Right away I could see it was different. The plunger is longer and the switch occurs in the travel. Not with the button all the way in. I changed to this switch (so much fun working under the dash in the footwell…) and it works perfectly and is easy to adjust. Here are the two switches side-by-side. The ACDelco part is on the right.


    Two weeks from today is my delivery date for Autorama. Don’t want to be overconfident, but feel really good about being ready. Not many parts left in the basement.
    Last edited by edwardb; 02-11-2017 at 10:49 PM.
    Build 1: Mk3 Roadster #5125. Sold 11/08/2014. Build 2: Mk4 Roadster #7750. Sold 04/10/2017. Build Thread
    Build 3: Mk4 Roadster 20th Anniversary #8674. Sold 09/07/2020. Build Thread and Video. Build 4: Gen 3 Type 65 Coupe #59. Gen 3 Coyote. Legal 03/04/2020. Build Thread and Video
    Build 5: 35 Hot Rod Truck #138. LS3 and 4L65E auto. Rcvd 01/05/2021. Legal 04/20/2023. Build Thread. Sold 11/9/2023.

  37. #557
    Senior Member edwardb's Avatar
    Join Date
    Feb 2011
    Location
    Lake Orion, Michigan
    Posts
    10,567
    Post Thanks / Like

    Final Assembly, Almost Done

    Only a couple parts left in the basement, and nothing loose in the garage. So I guess that means I’m almost done. This will be a short update (by my standards...) and probably the last one before everything is done. Not a whole lot to report on actually.

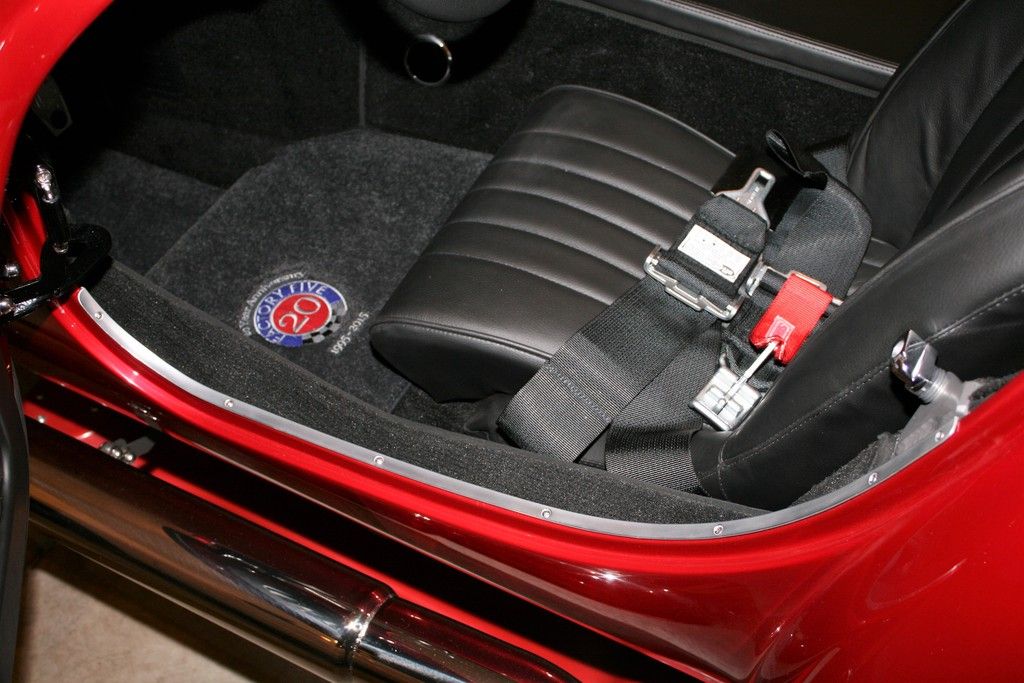
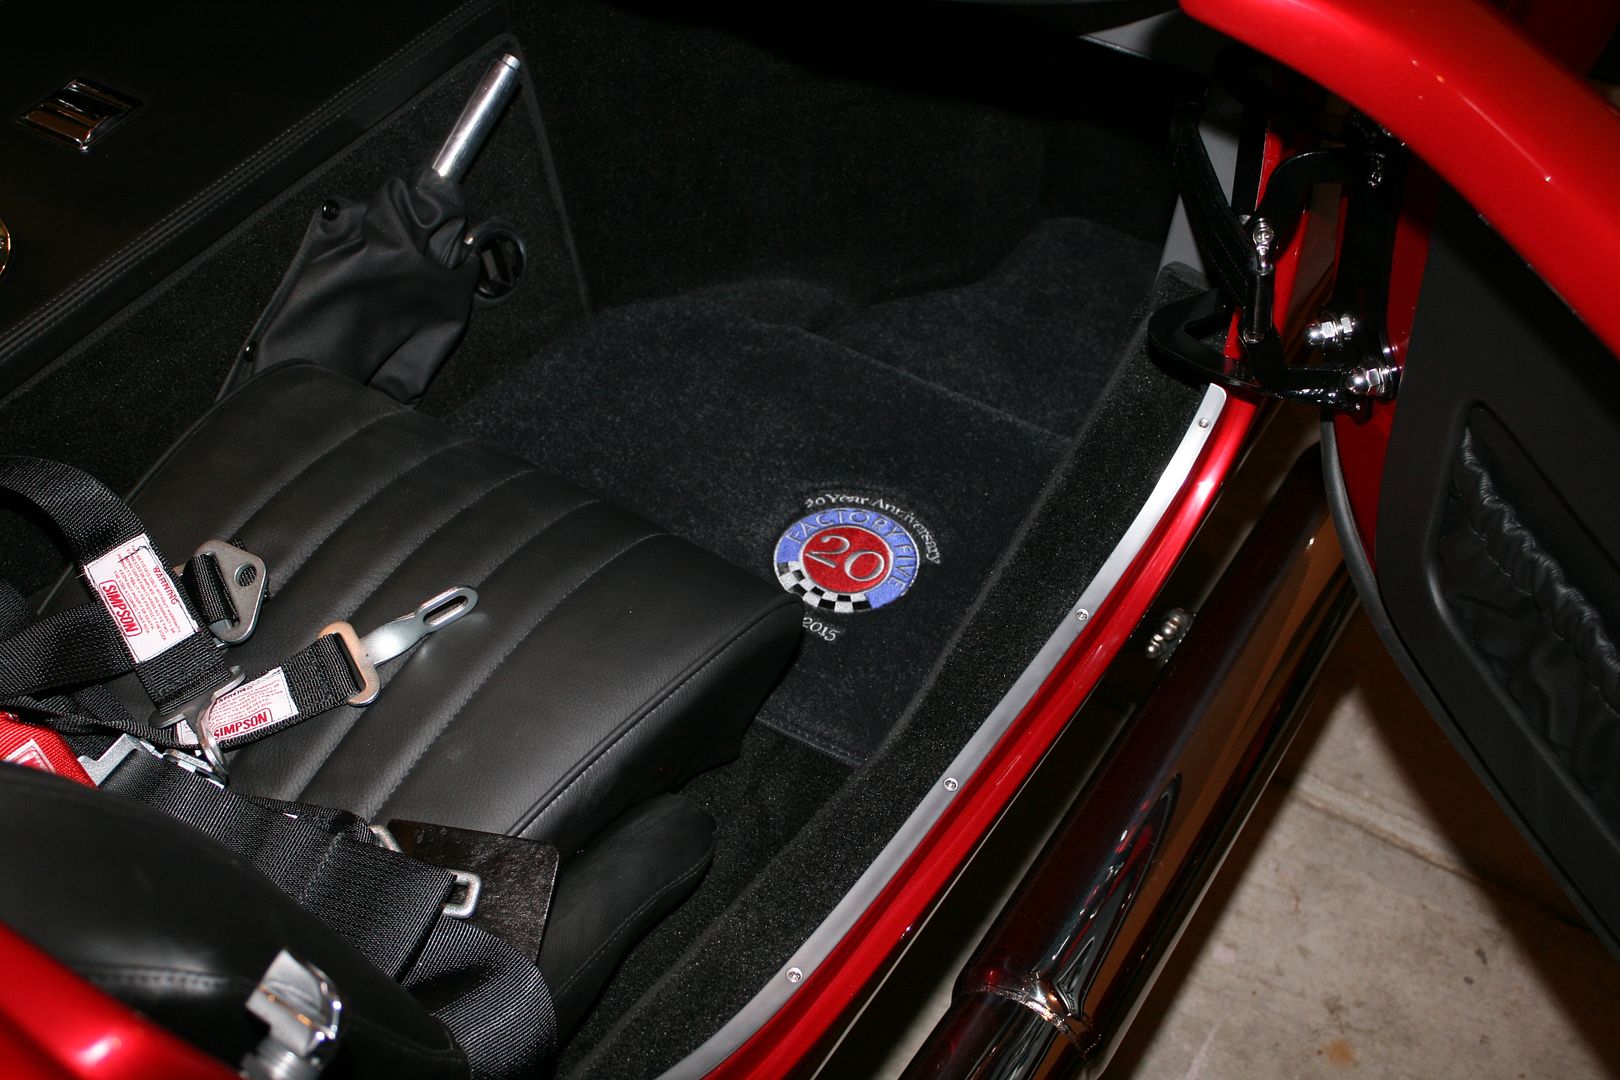
    On my last two builds I used the Dark Water Customs aluminum door sill trim instead of the Factory Five supplied plastic channel sill trim. I don’t remember the Mk3 being too hard. But I really struggled with #7750. The curves didn’t fit the opening all that well, I had interference with the door hinges, and the Mk4 interior sill and carpet are quite different than the Mk3 so it takes a lot of trimming to get the aluminum to fit properly. But the final result looks good, stays on, and is quite durable. So early in this build I put a pair on the Dark Water wish list and some weeks later heard they were ready to ship. My first attempts this time around were similar to #7750. It was going to a bit of a challenge. Even considered just using the standard plastic channel pieces. Then it occurred to me why do they need to go so far up, including behind the hinges? Why not just cut them off below the hinges, similar to how the provided plastic channel installs? That made a huge difference and still looks fine. A little tweaking on the bends, some trimming to clear the carpet, and installed them. Very happy I didn’t give up on them. Also dropped in the special logo floor mats. Fit perfectly and look nice.


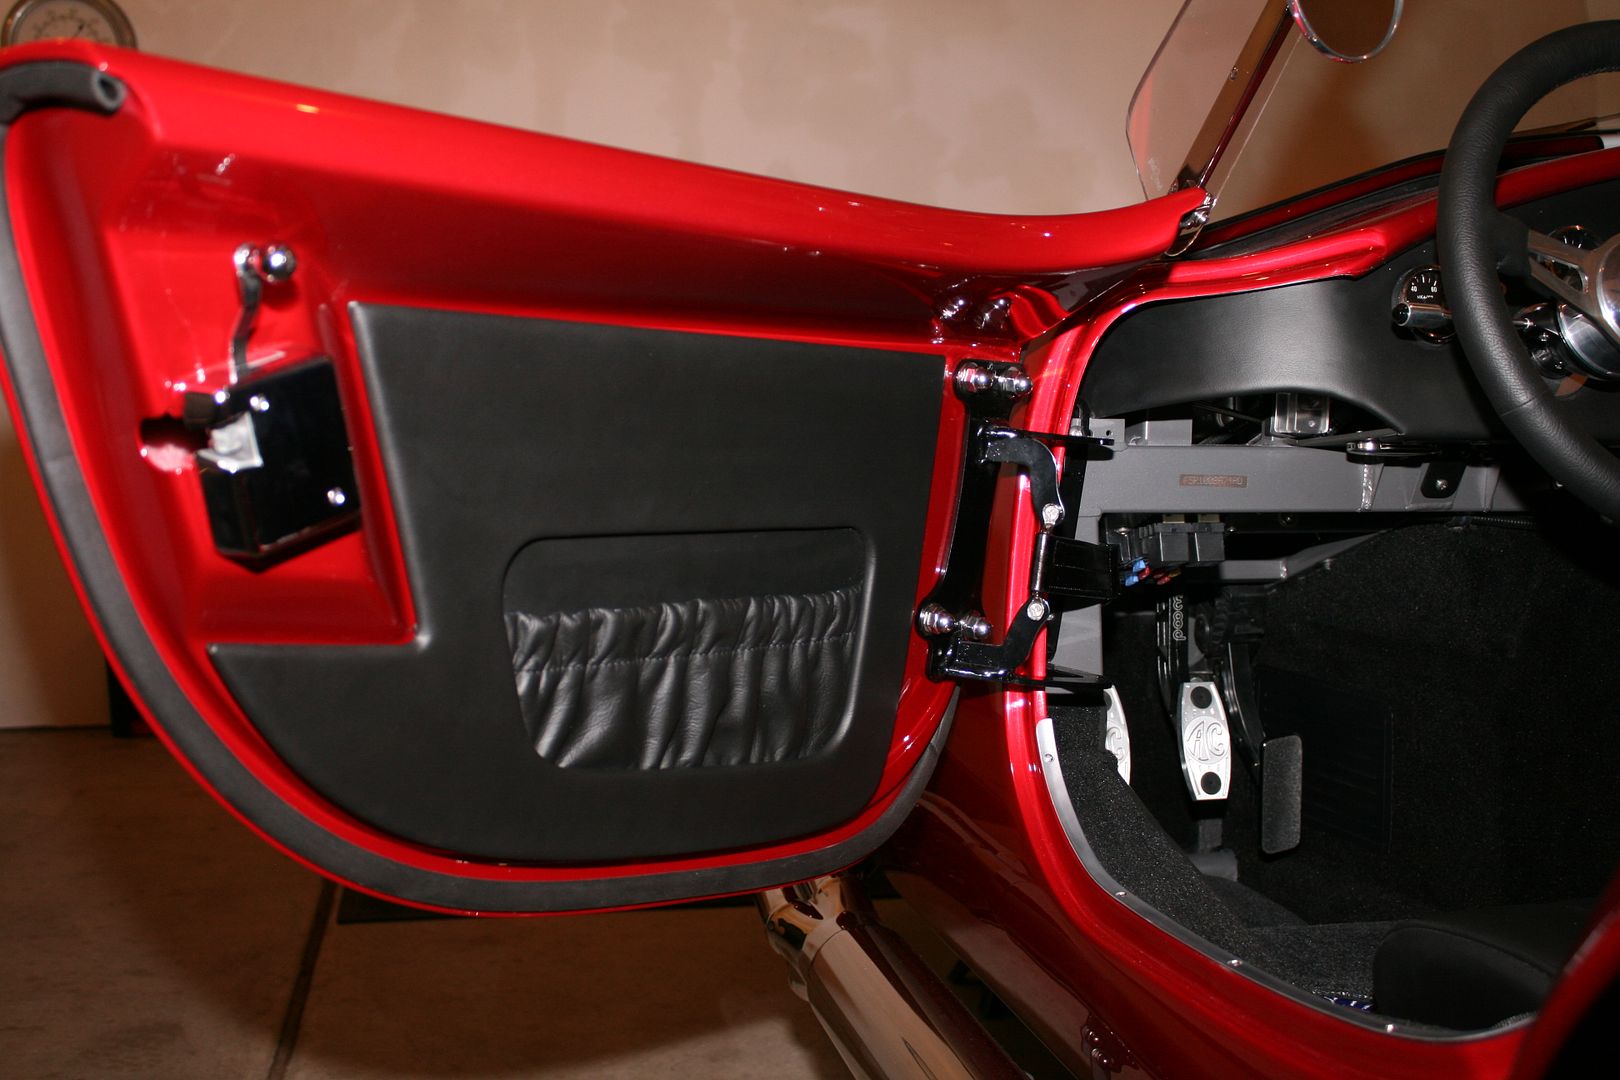
    With the door sills in place and most of the interior done, hung the doors. Just the slightest final adjustments and they fit and close nicely. Also added the leather door cards I showed earlier. The 3M Dual Lock Reclosable Fastener material I described before seems rock solid for now. We’ll see how they do in the real world. Also hooked up the leather catch straps and added the D-tube seal around the door perimeters.


    For my other two builds, once the doors were finally installed and adjusted using washers under the catches on the body, I removed the washers, measured the final thickness, and replaced with spacers. I used thickwall aluminum tubing and (of course) give them a little polish before installing. This time around, there are just a few washers on each side. Fewer than in the past. Maybe I’m getting lazy (or just ready to be done) but I decided they don’t look bad. Tonight I used a small brush and touched them up with the matching powder coat color and called them done.

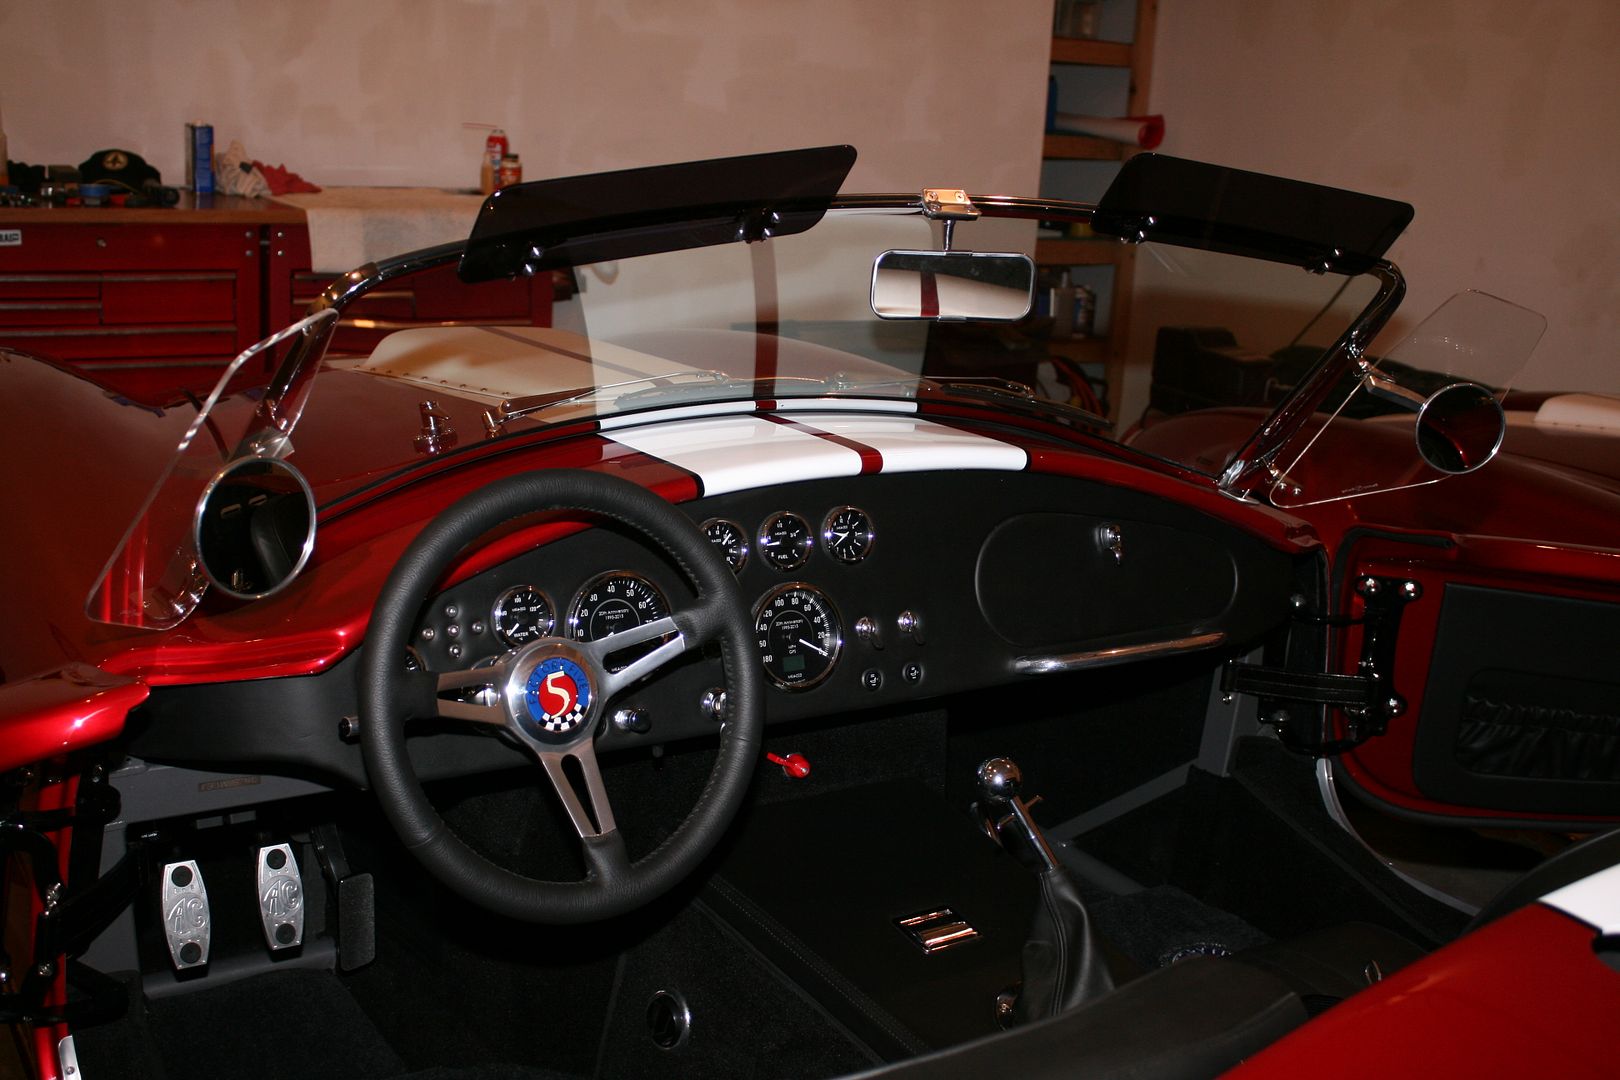
    Then mounted the windwings and visors. I had them all pre-assembled including the Breeze mirrors. Quick and easy to finish.


    Also tonight I mounted the H3R fire extinguisher on the back wall centered between the seats. It’s mounted high enough to be completely clear of elbows, etc, for driver and passenger. No picture.

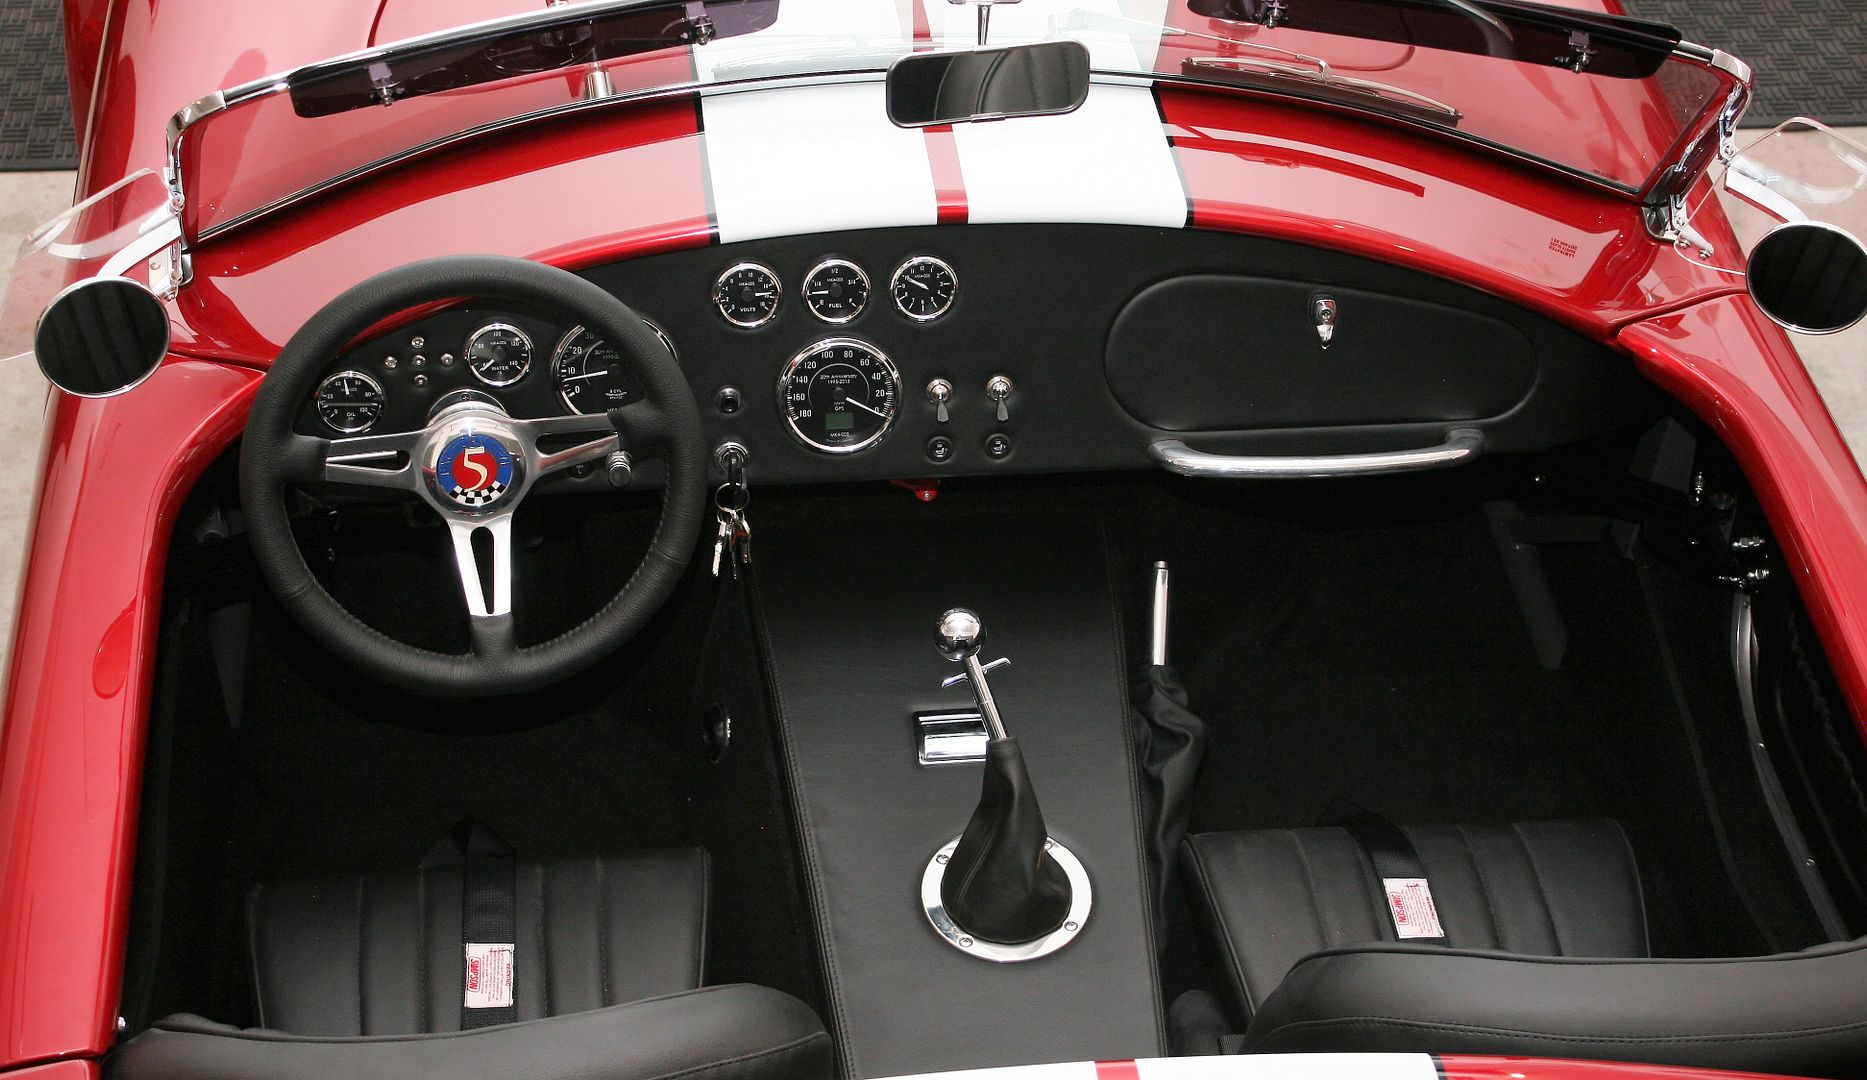
    Today I took this overhead shot and it’s the last piece of the car sign I’m making. Even though I noticed when it was all done my center rear view mirror is pointed at the passenger instead of the driver. Oh well. I do my own signs with Microsoft Publisher and have them printed on foam board at FedEx Kinkos. Turn out really nice and for a bit over $30 a good deal. I looked at having a professional sign made for #7750. Some really nice stuff out there, but add a zero to that cost and maybe you’ll have something.


    I’m down to trunk carpet, roll bars, and the last of the Simpson harness pieces. Put the wheels/tires back on, one more ride height check, and that’s it. I’ll post some pics then including the setup at Cobo for Autorama. Then planning to close the build thread.
    Last edited by edwardb; 02-12-2017 at 08:04 AM.
    Build 1: Mk3 Roadster #5125. Sold 11/08/2014. Build 2: Mk4 Roadster #7750. Sold 04/10/2017. Build Thread
    Build 3: Mk4 Roadster 20th Anniversary #8674. Sold 09/07/2020. Build Thread and Video. Build 4: Gen 3 Type 65 Coupe #59. Gen 3 Coyote. Legal 03/04/2020. Build Thread and Video
    Build 5: 35 Hot Rod Truck #138. LS3 and 4L65E auto. Rcvd 01/05/2021. Legal 04/20/2023. Build Thread. Sold 11/9/2023.

  38. #558
    Senior Member wareaglescott's Avatar
    Join Date
    Apr 2016
    Location
    Auburn, AL
    Posts
    2,146
    Post Thanks / Like
    Looks amazing Paul!
    I have the same rear view mirror mount. Are there any tips or tricks to mounting it or is it pretty straight forward?
    MK4 #8900 - complete kit - Coyote, TKO600, IRS - Delivered 6/28/16 First Start 10/6/16 Go cart - 10/16/16 Build completed - 4/26/17 - 302 days to build my 302 CI Coyote Cobra - Registered and street legal 5/17/17
    Build Thread http://thefactoryfiveforum.com/showt...e-build-thread
    PHIL 4:13 INSTAGRAM - @scottsrides

  39. #559
    Senior Member Dave Howard's Avatar
    Join Date
    Feb 2012
    Location
    North Bay, Ontario
    Posts
    534
    Post Thanks / Like
    Quote Originally Posted by wareaglescott View Post
    Looks amazing Paul!
    I have the same rear view mirror mount. Are there any tips or tricks to mounting it or is it pretty straight forward?
    A word of caution to those folks intending to install the Premium Top. The wind wings need to swing inward in order to properly mount the soft top and side windows. Using the Breeze mirrors mounted to the windshield frame will impact the proper installation of the top.

  40. #560
    Senior Member edwardb's Avatar
    Join Date
    Feb 2011
    Location
    Lake Orion, Michigan
    Posts
    10,567
    Post Thanks / Like
    Quote Originally Posted by wareaglescott View Post
    Looks amazing Paul!
    I have the same rear view mirror mount. Are there any tips or tricks to mounting it or is it pretty straight forward?
    Thanks! The Dark Water top mirror mount is pretty simple. This is my third. The supplied rear view mirror mounts easily with the supplied hardware. I did have a slight issue this time around because the supplied nuts didn't engage the slot in the windshield as solidly as I would have liked. I've had four different windshields (one from each kit plus one from another supplier) and each one was a different manufacturer. There has been slight variations for each. This one seemed the relief cut in the center top channel was slightly wider than previous ones. So the provided nuts just barely caught the corners and made the placement pretty critical. I made some little threaded plates to replace the nuts. Discussed and pictured in this previous post: http://thefactoryfiveforum.com/showt...l=1#post263363. Try yours though. It might be fine.

    Quote Originally Posted by Dave Howard View Post
    A word of caution to those folks intending to install the Premium Top. The wind wings need to swing inward in order to properly mount the soft top and side windows. Using the Breeze mirrors mounted to the windshield frame will impact the proper installation of the top.
    No top in my build plan. Thanks though.
    Build 1: Mk3 Roadster #5125. Sold 11/08/2014. Build 2: Mk4 Roadster #7750. Sold 04/10/2017. Build Thread
    Build 3: Mk4 Roadster 20th Anniversary #8674. Sold 09/07/2020. Build Thread and Video. Build 4: Gen 3 Type 65 Coupe #59. Gen 3 Coyote. Legal 03/04/2020. Build Thread and Video
    Build 5: 35 Hot Rod Truck #138. LS3 and 4L65E auto. Rcvd 01/05/2021. Legal 04/20/2023. Build Thread. Sold 11/9/2023.

Page 14 of 20 FirstFirst ... 41213141516 ... LastLast

Posting Permissions

  • You may not post new threads
  • You may not post replies
  • You may not post attachments
  • You may not edit your posts
  •  

FFMetal

Visit our community sponsor