This past week I received a copy of the IRS instructions (thanks Bob!) plus my first backorder shipment. Still a ways to go, but progress. I now have the first of the three control arms. I already had most of the hardware. But things are starting to take shape a little now. First a recap briefly mentioned in the opening post. The 2015 Mustang IRS setup requires three parts from a 2015 Mustang: The center section (differential), knuckles, and hubs. The rest of the parts are supplied by FF as part of the new IRS setup. You don't need the donor CV joints and have to install them onto new axles as in some earlier versions. FF is supplying the CV axles completed and ready to assemble into the suspension, e.g. with joints, boots, etc. Not long after ordering the kit, FF suggested I may want to start looking for the donor parts. I found complete 2015 Mustang rear suspension pallets at MPS Auto Salvage in Georgia, and picked one up. It's a "zero miles take-off" meaning the newly assembled Mustang went from the factory in Flat Rock, MI to an aftermarket performance assembly line and part of their upgrade is to replace the entire rear IRS assembly. The new IRS setup is beefy, but apparently not up to the task of the 800-900 HP aftermarket engine mods, stickier tires, etc. Although I only need a few parts off the pallet, at the time MPS wasn't selling them separately. Some other places were, but the cost for the individual pieces was higher. So, received the pallet looking like this:
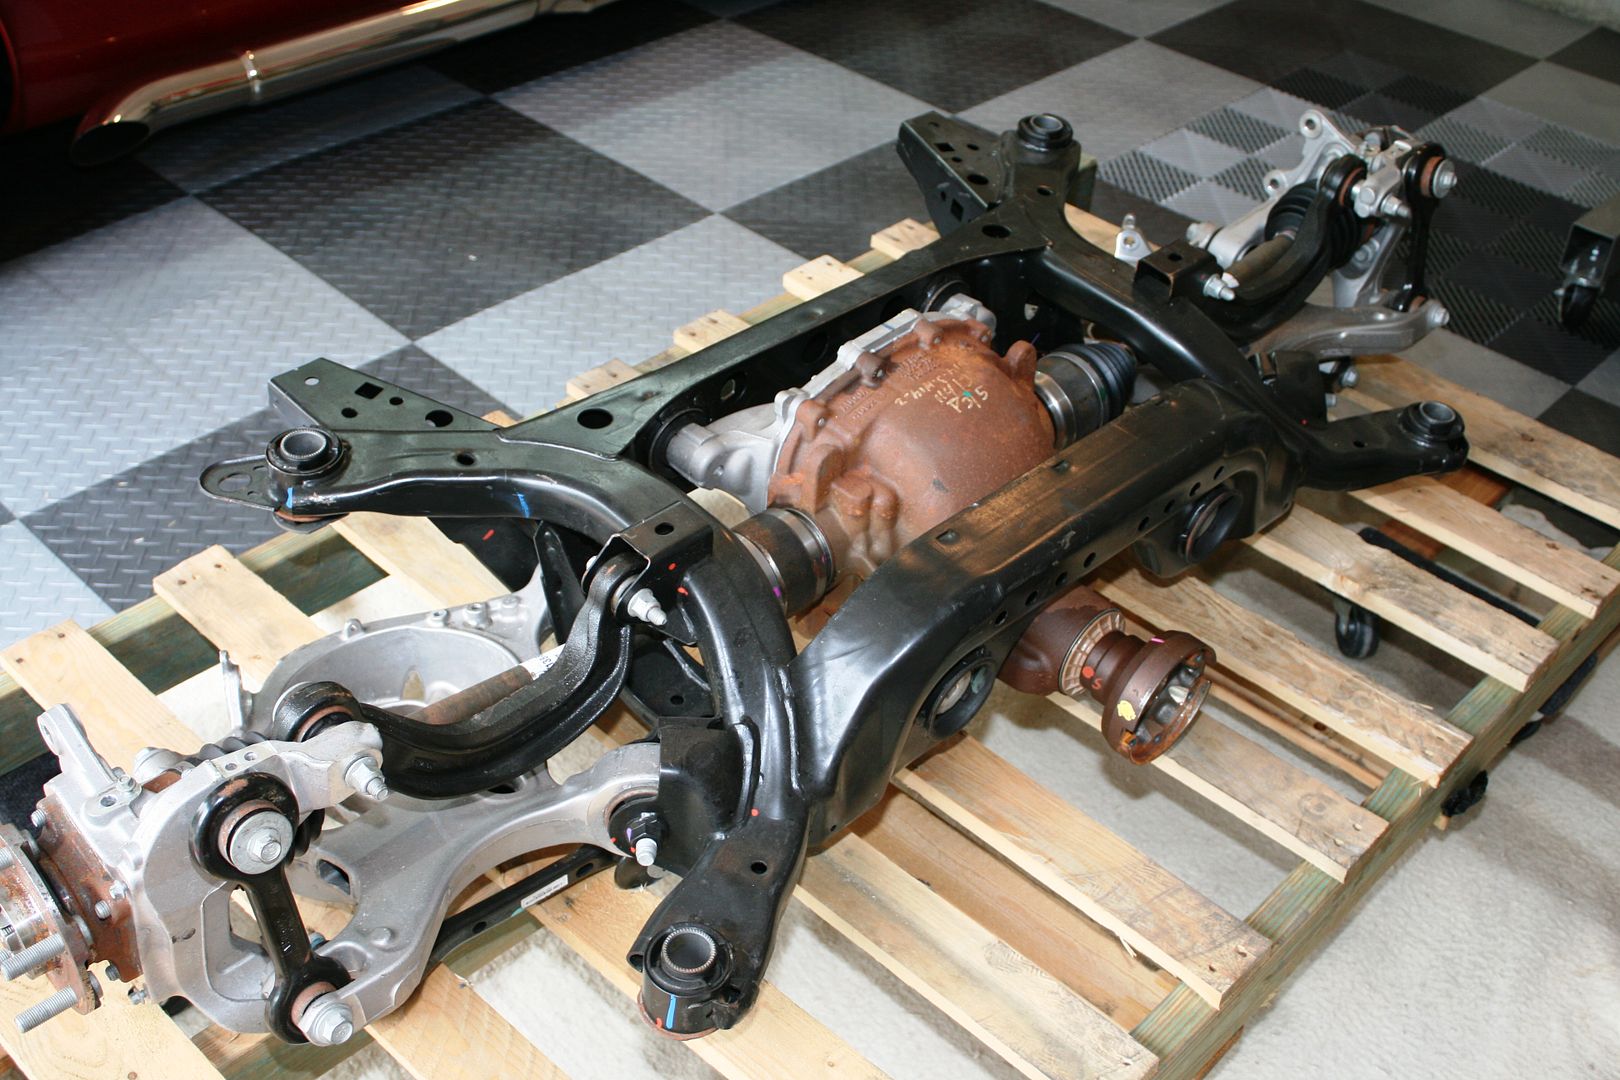
Removed the parts I needed. I'm hoping to sell the balance and recover some of the cost. In total, should be a pretty good deal. The 3.55 center section case is cast iron, and posi like all new Mustang diffs.
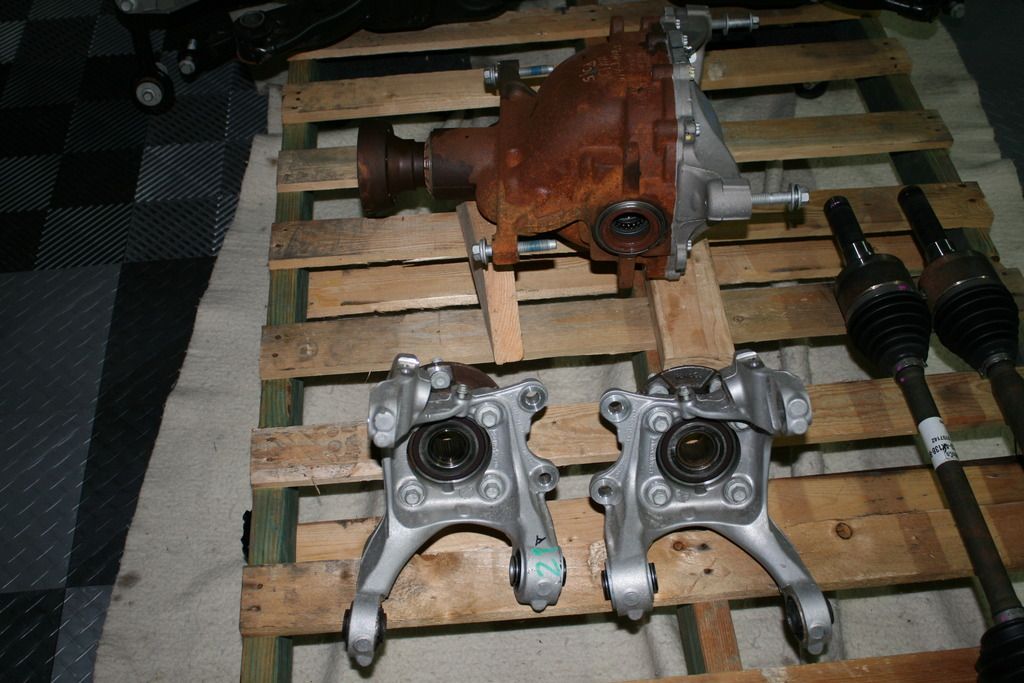
The cast iron center section had some surface rust. Not unexpected. The hubs too had a little surface rust. But the parts appeared to be exactly as advertised. Basically brand new parts. A little wire wheel action and the rust was removed off the cast iron. After thorough cleaning and degreasing, applied some POR15 to the iron and clear Dupli-Color engine spray to the rear aluminum cover. Now ready for installation.

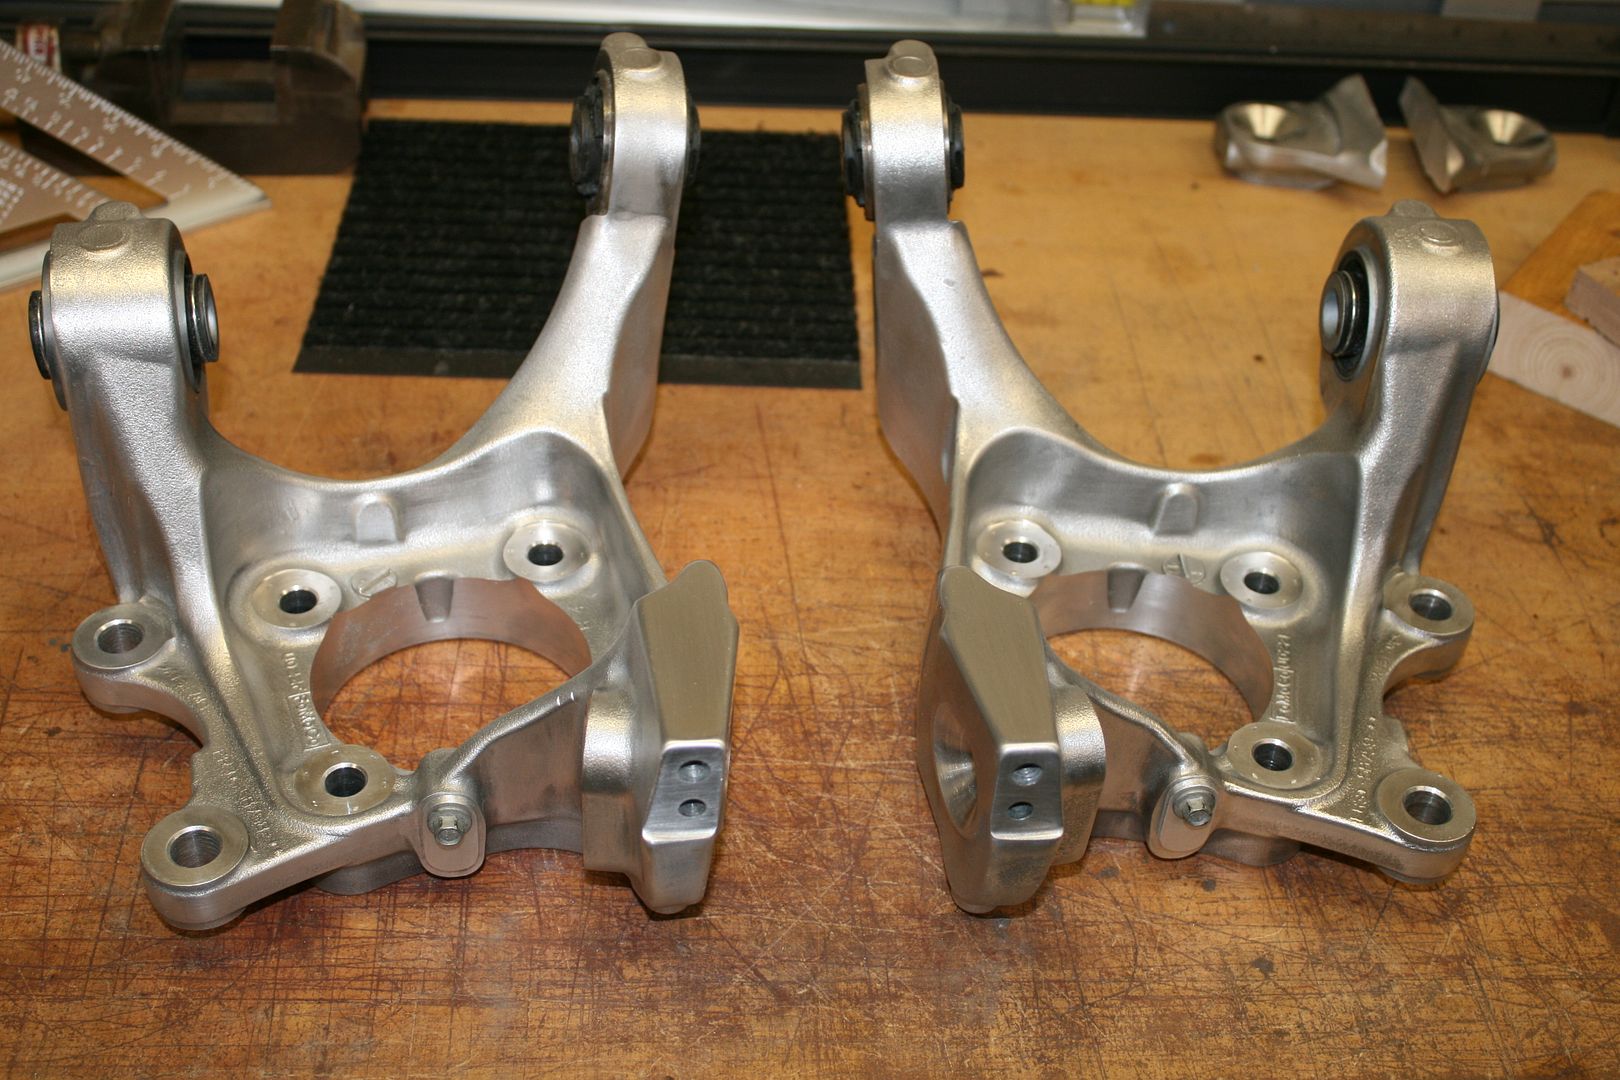
The knuckles require a piece of one of the arms to be cut off. I saw this in the pictures and write-up, but waited until the instructions were in hand giving the details. The instructions give the location and shows using a Sawzall. I don't own one, plus prefer a little more "civilized" approach. With some blocks clamped to hold the knuckles square, I cut them with a band saw. Took it slow and easy and worked fine. A little scary though, lopping off those pieces.

Cleaned up the cut using a disk sander, and then filed and sanded a little radius. I went over the complete knuckles and knocked off some of the larger casting parting lines and just cleaned up in general, and then gave them a quick coat of clear Duplic-Color like the center section. Not required at all, but I've had good luck with this stuff and should stay looking clean and nice for a while. I think they're good to go.
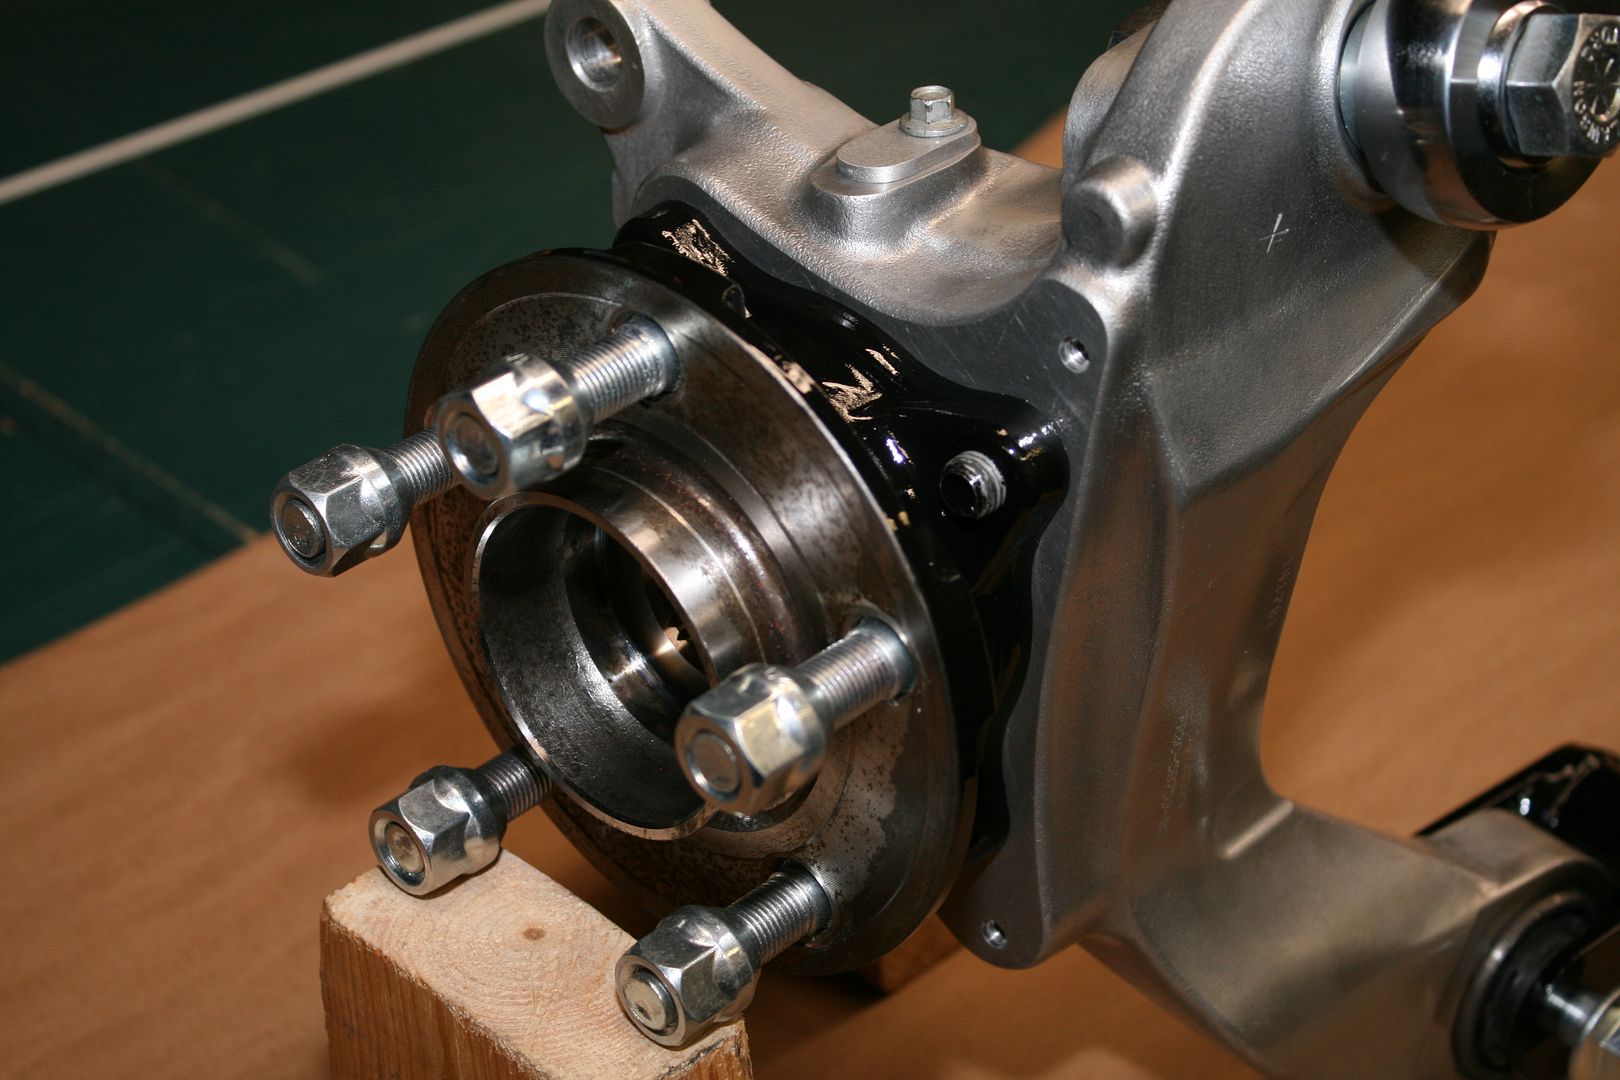
The standard Mustang wheel wheel studs need to be changed to 1/2 x 20, same as the supplied front hubs and matching the lug nuts provided with the FF wheels. The 10 new wheel studs are included with the kit. The instructions show hitting the old ones out with a hammer. I chose instead to use a short piece of black pipe and squeeze them out using my bench vise. Took some muscle, but worked OK. The instructions showed putting the new ones back in with a lug nut, washer and a ratchet. I'm apparently not strong enough because that didn't work for me. Mainly I think because it's impossible to hold the hub while putting that much torque on it. So I rummaged through my junk hardware drawer and found a hardened 1/2 x 20 nut and few hardened washers. Lubed them up good with some assembly lube, and pulled all the studs in with an air impact driver. A press would be ideal to remove and replace the wheel studs, and thought maybe I had an excuse to finally buy one. But no luck. Managed without it. Then cleaned up the exposed parts of the hubs and also applied some POR15 and put them back in the knuckles. Note this is one of many changes with the new IRS parts. The axle bearing is in a bolted in carrier. No longer necessary to press the axle bearings in and out of the aluminum knuckle itself. Also note the little cover and screw in the knuckle just above the hub. This is where the standard ABS sensor is normally mounted. I'm not going to try an ABS installation, so don't need the sensor. But didn't want to leave an open hole directly down into the axle bearings. So made a little cover out of 1/8 inch aluminum and used the sensor mounting screw to hold it in place.


 Thanks:
  Likes:


Originally Posted by edwardb
 This past week I received a copy of the IRS instructions (thanks Bob!) plus my first backorder shipment. Still a ways to go, but progress. I now have the first of the three control arms. I already had most of the hardware. But things are starting to take shape a little now. First a recap briefly mentioned in the opening post. The 2015 Mustang IRS setup requires three parts from a 2015 Mustang: The center section (differential), knuckles, and hubs. The rest of the parts are supplied by FF as part of the new IRS setup. You don't need the donor CV joints and have to install them onto new axles as in some earlier versions. FF is supplying the CV axles completed and ready to assemble into the suspension, e.g. with joints, boots, etc. Not long after ordering the kit, FF suggested I may want to start looking for the donor parts. I found complete 2015 Mustang rear suspension pallets at MPS Auto Salvage in Georgia, and picked one up. It's a "zero miles take-off" meaning the newly assembled Mustang went from the factory in Flat Rock, MI to an aftermarket performance assembly line and part of their upgrade is to replace the entire rear IRS assembly. The new IRS setup is beefy, but apparently not up to the task of the 800-900 HP aftermarket engine mods, stickier tires, etc. Although I only need a few parts off the pallet, at the time MPS wasn't selling them separately. Some other places were, but the cost for the individual pieces was higher. So, received the pallet looking like this:


 Reply With Quote