-
Hood Hinge Instructions
- 3/16, 7/64, ⅝ Drill bits, drill, measuring tape, rivet gun, marker, 3/16 hex key, ½ wrench
- Hood hinge
1.jpg
The hood hinge pivot mounts attach to the hood using rivets, the holes are predrilled in the hood liner but you may need to clean them out with a 3/16 drill bit. This is the initial install so you only need a few rivets if you are going to remove the hinge brackets prior to body painting (recommended).
2.jpg
Install the ball pivots for the hood struts on the hood using 3/16 rivets. The ball points toward the inside of the car.
3.jpg
Press the bronze bushings into the holes in the hinge arms as shown. The short hinge arms are both the same.
4.jpg
Attach the hinge arms to the arm support plate as shown using the ⅜ shoulder bolts, spacers, nylon lock nuts and washers. The spacer fits over the bronze bushing after it is pressed into the arm holes. The flange of the bronze bushings should contact the arm plate. Tighten the nuts and then back off until the arms rotate easily.
- If you tighten the nut tight and the arm still moves easily then back off the nut and adjust the washer.
5.jpg
Drivers side arm plate with arms attached
6.jpg
Driver side Hinge Assembled.
Attach the hinges to the chassis using the carriage bolts, these push in from the outside for easier adjustment.
7.jpg
Leave the bolts loose enough so that the hinge assembly can be positioned to match the hood.
8.jpg
Set the hood in place and attach the two arms to the brackets from the underside of the body.
9.jpg
Install the threaded ball studs in the hole on the long hinge arms with the ball pointed toward the outside of the car using a 5/16 locknut. Then snap the gas piston shaft onto the ball.
10.jpg
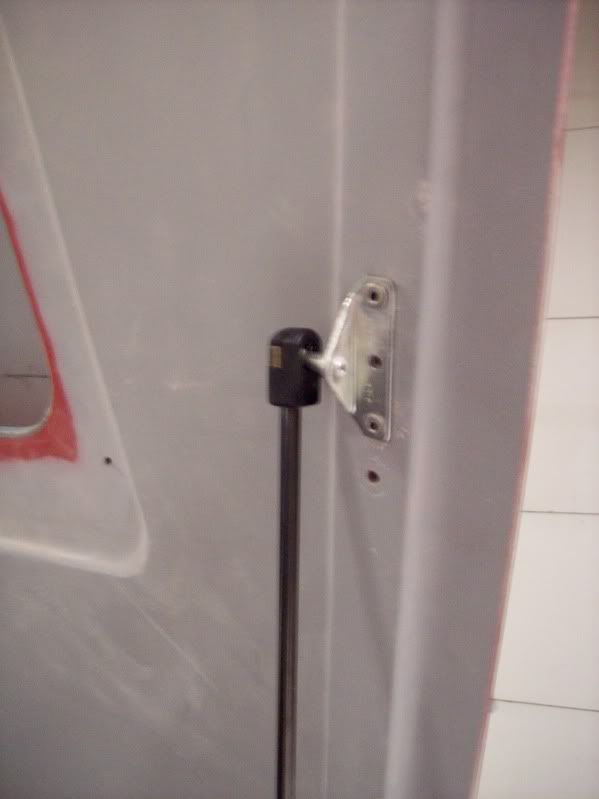
Attach the piston body end to the ball on the hood.

Completed installation
Dave Lindsey
FFR's Mad Dog
-
Junior Member

Good thread. From the number of posts I know that the instructions are lacking
-
Not a waxer

On both Mk3 and Mk4 builds I've found that the gas cylinders may bottom out before the hood is fully seated which causes a hump in the long sides when it is closed & latched. The solution is to move the hood ball socket mounting bracket rearward on the hood. Stepping it back by one of the 3 holes and drilling a new one takes care of it.
Thanks for building up the library here Mad Dog!
Cheers,
Jeff
-
Post Thanks / Like - 1 Thanks, 0 Likes


 Thanks:
  Likes:


 Reply With Quote