Last night I howled at the moon a little bit but still managed to get some stuff done.
I didn't divulge this in my last update but there was a little hiccup on the way to Da' Bat cave to pick up the body. (<-- That last line coulda' come out of a gangster movie, but I digress...) I was driving in the slow lane but still doing a healthy 65 and keeping a close eye on the chassis because all the splash guards were on the car. Sure enough, as I was watching the chassis in the mirror a gust of wind came up, I saw the rear splash guard start to wobble, and it ripped off. I saw it land on the shoulder as I quickly pulled off the freeway and stopped. Well, quickly as in on the other side of a bridge, at least 200 yards away. I hopped out of the truck and jogged back to the splash guard, which had indeed landed off the freeway and, incredibly, was unscathed save a few minor scratches!
So yes, ladies and gentlemen, you can mount the body with the splash guards (and under door aluminum) in place. Just don't drive too fast to the painter with an open trailer or you might not arrive with a complete chassis.
Getting back to the build, the ripped-off splash panel still had all the rivet heads in place so it was easy to drill everything out and re-mount it. Actually having the splash panel off the car made getting the MKIII gas pipe setup re-attached a LOT easier so there you go.

I then put some anti seize on the wheel snouts and put the rear wheels back on so I could use the scissor lift to help lower the gas tank.
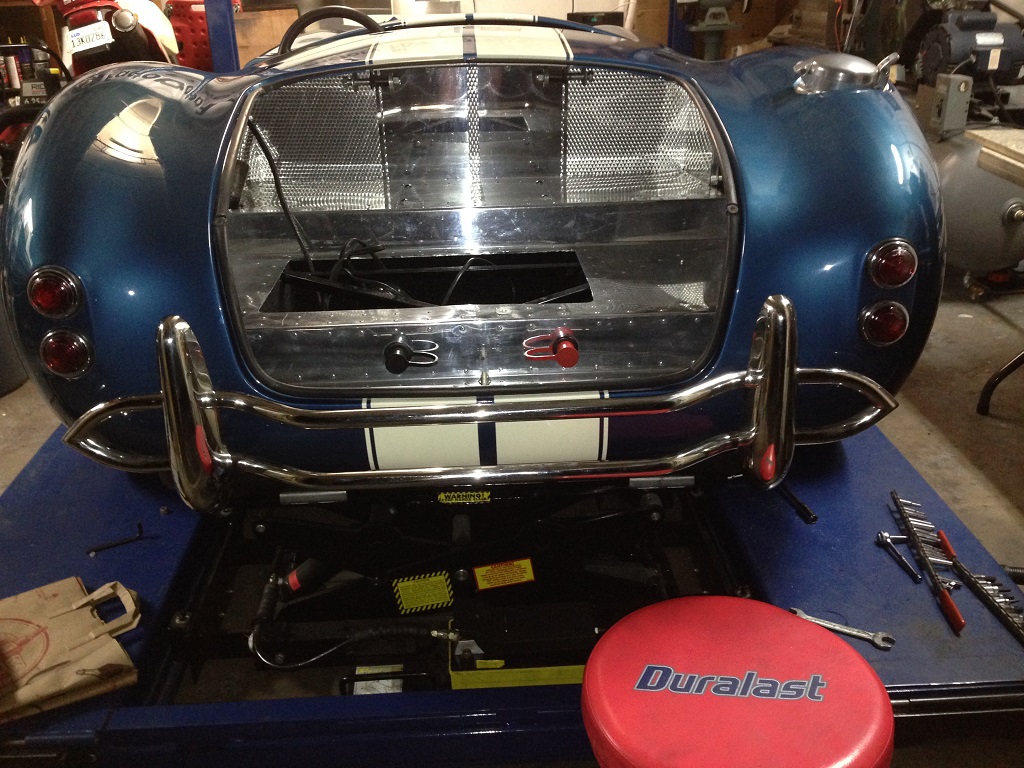
Then I mounted the rear bumper:
Like I said though, I didn't work full time on the build but did a bit of just "hanging out at the shop" with some shop neighbors. I was showing off the build and one thing they really dug is the easter egg. If you guys have read the whole thread I'm repeating myself here but the idea is to use the reflection of the polished aluminum to hide an image - the easter egg - that can only be seen from certain angles. As a test, I printed out a reversed Factory Five Logo out, measuring maybe 5" across:
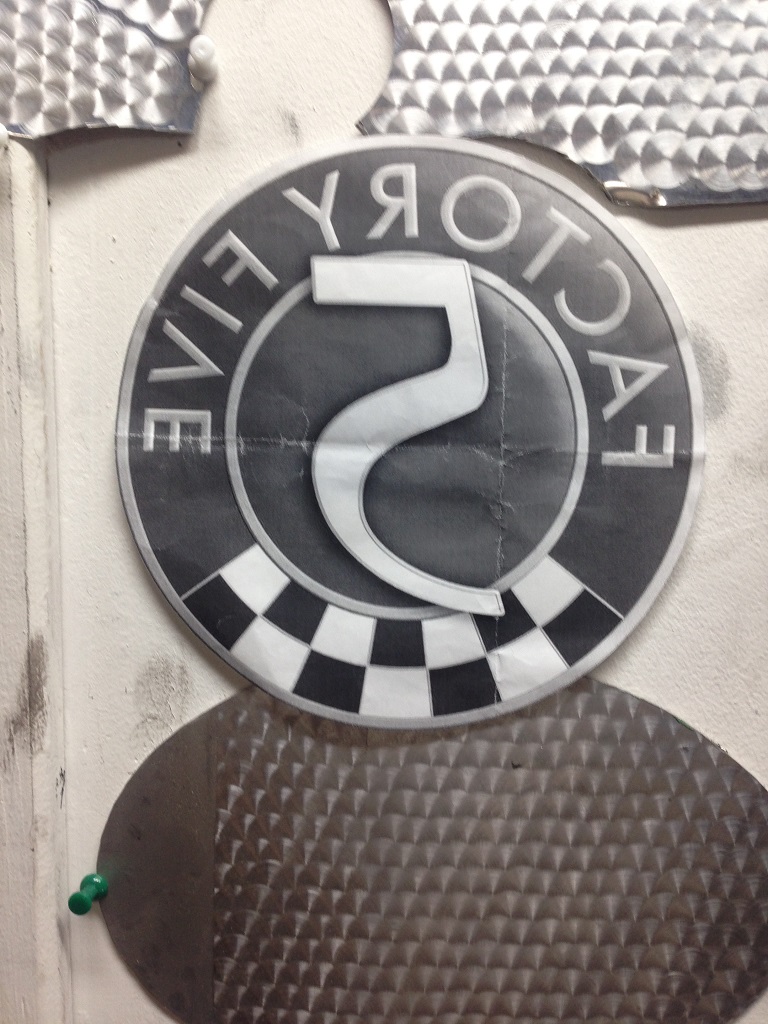
I then taped it to the engine-turned roof of the cubby. So if you are standing next to the car and you look down at the rear of the cockpit you see this:

The cool thing is the 3-d reflection makes it look like there's a deep box in the cubby, with a logo on the bottom:

In the last two shots you can see where I drilled through the roof of the cubby with a 2-1/4" hole saw for the roll bar. The body hole had been elongated a bit and so I had to guess where to drill the hole but I got SUPER lucky and the hole placement is perfect! A perfect 1/8" clearance around the roll bar. I don't need any kind of grommet. So Cool. And NOBODY will ever see it.
Last items to report from yesterday are that I took the nose aluminum and seat brackets in to get powder coated. The shop has a $45 minimum so even though I wasn't planning to do the nose aluminum I threw them in there as well. It'll help out with blacking out the front wheel well so what the heck. I also dropped by the upholstery guy again and made a definite plan to drop the car off Monday morning. At least the car has a body on it now so I won't feel like an idiot driving 2 blocks with just the chassis like I was thinking about doing before...
I'm back at it today with a plan to hit Lows or Home Depot for some expanded aluminum to do the front air intakes and then finish installing the footbox fresh air intake fittings and tubes.


 Thanks:
  Likes:


Originally Posted by David Hodgkins


 Reply With Quote


