Forte's

Visit our community sponsor

Thanks Thanks:  0
Likes Likes:  0
Page 3 of 3 FirstFirst 123
Results 81 to 102 of 102

Thread: SOLIDWORKS-Mike's 818S Build Thread

  1. #81
    Senior Member Solidworks-Mike's Avatar
    Join Date
    Feb 2016
    Location
    Las Vegas, Nevada
    Posts
    114
    Post Thanks / Like
    Quote Originally Posted by Rasmus View Post
    Welcome back. How were the rains down in Africa?

    Mixing mounting hole like that seems really goofy to me. We all know that the FFR frames aren't Toyota quality as far as dimensions down to sub millimeter precision. But that's way off. What portion of the firewall are you using as a baseline? Did you cross measure to back up your finding? Example: Left ball joint to Right firewall.

    Those outer mounting points for the lower front control arms are supposed to be for the wagon arms. Which are shorter.
    The rains down in Africa? I blessed them!

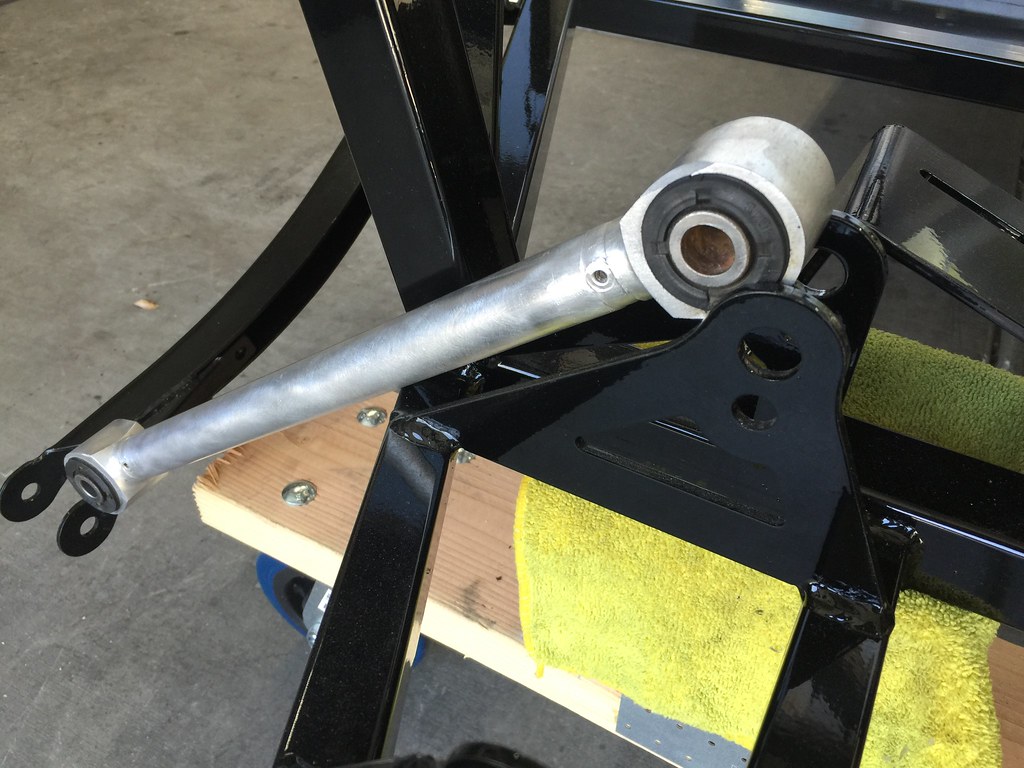
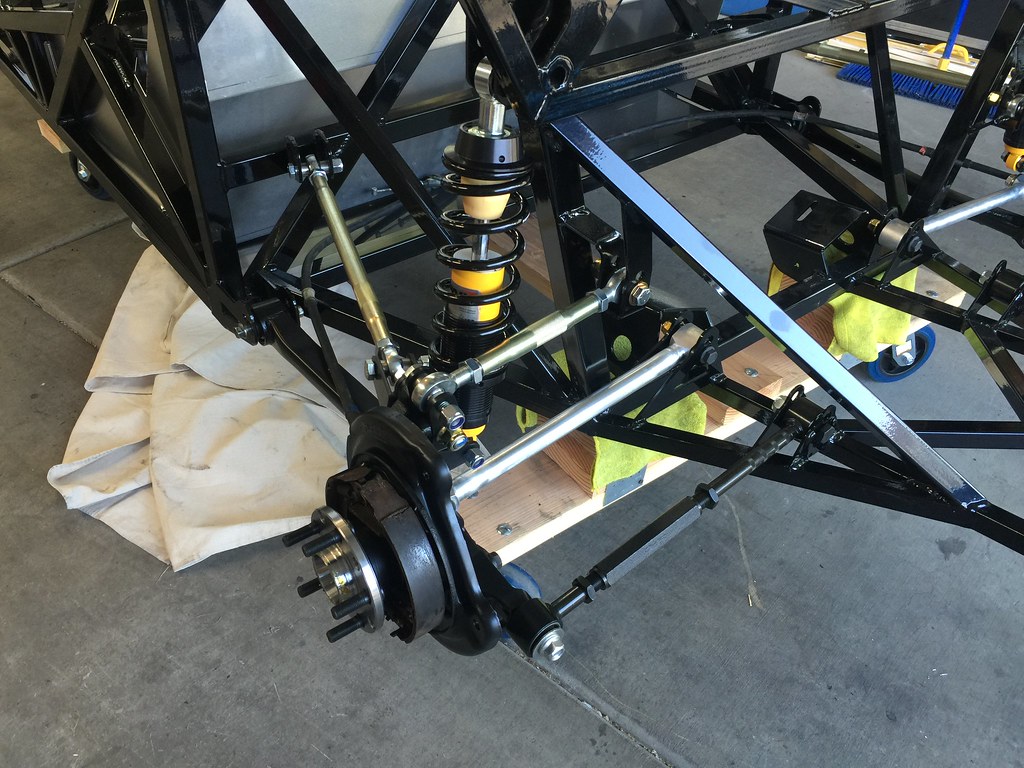
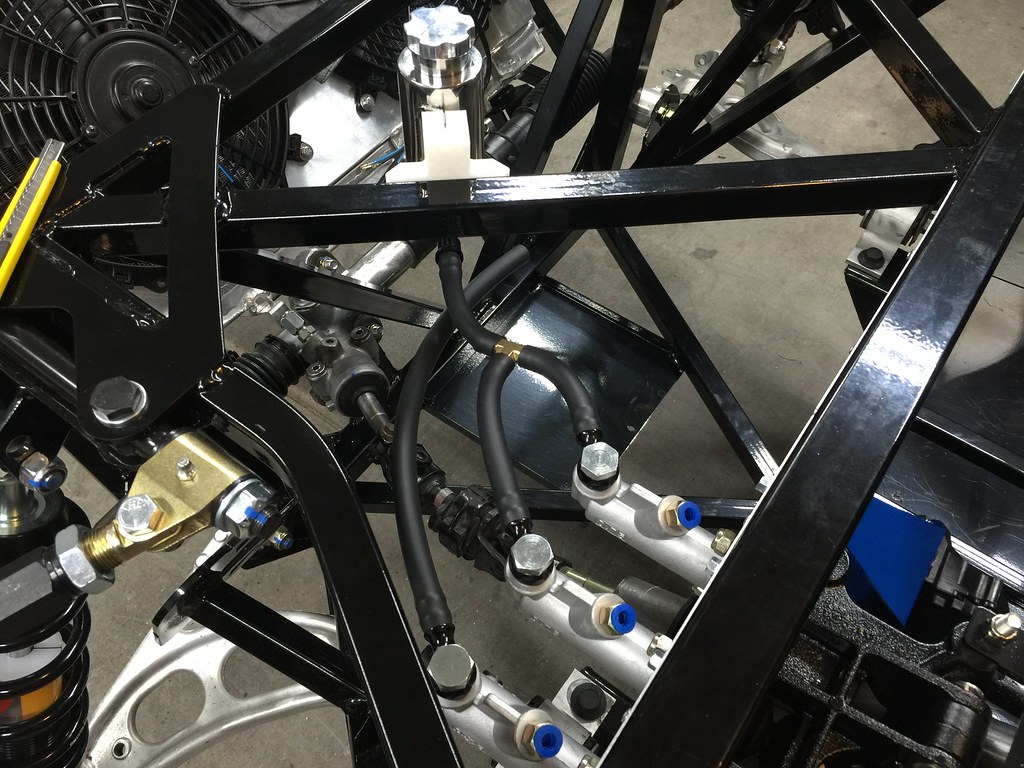
    We measured from the ball joint to the frame, but it now seems as if the real issue is the bushing being upside down according to Bob!
    818-S 2.5L Turbo Chassis Number: 404
    Kit Order Date: February 19, 2016 Kit Completion Date: March 19, 2016 Kit Ship Date: March 26, 2016 Build Start Date: April 22, 2016
    Build Thread: Click Here

  2. #82
    Senior Member Solidworks-Mike's Avatar
    Join Date
    Feb 2016
    Location
    Las Vegas, Nevada
    Posts
    114
    Post Thanks / Like
    Quote Originally Posted by Bob_n_Cincy View Post
    Hi Mike, Welcome back.
    The rear bushing on you driver side is up-side-down. Just spin it 180 on the LCA shaft and remount in the inside holes.
    Also mount the forward LCA bushing to the inside holes.

    Attachment 54122
    The squiggle in bushing need to be down on the 818.

    (edit) Your right side bushing is correct by the pictures. The squiggle in the bushing should be down.
    Many have made that mistake.
    Bob
    Bob,

    Thanks for catching that, I was hoping it was something obvious.
    818-S 2.5L Turbo Chassis Number: 404
    Kit Order Date: February 19, 2016 Kit Completion Date: March 19, 2016 Kit Ship Date: March 26, 2016 Build Start Date: April 22, 2016
    Build Thread: Click Here

  3. #83
    fasterer and furiouser longislandwrx's Avatar
    Join Date
    Aug 2012
    Location
    Long Island
    Posts
    2,540
    Post Thanks / Like
    Blog Entries
    6
    don't forget to add an additional ground strap to the intake manifold, I was told by Motive to do so.
    A well stocked beverage fridge is the key to any successful project.

  4. #84
    Senior Member Solidworks-Mike's Avatar
    Join Date
    Feb 2016
    Location
    Las Vegas, Nevada
    Posts
    114
    Post Thanks / Like
    Quote Originally Posted by longislandwrx View Post
    don't forget to add an additional ground strap to the intake manifold, I was told by Motive to do so.
    Yeah, those plastic TGV's don't conduct very well!
    818-S 2.5L Turbo Chassis Number: 404
    Kit Order Date: February 19, 2016 Kit Completion Date: March 19, 2016 Kit Ship Date: March 26, 2016 Build Start Date: April 22, 2016
    Build Thread: Click Here

  5. #85
    Senior Member Solidworks-Mike's Avatar
    Join Date
    Feb 2016
    Location
    Las Vegas, Nevada
    Posts
    114
    Post Thanks / Like
    We're working on the rear suspension today and while listing out our bolt needs before a trip to McFadden Dale i'm at this point:


    Can anyone confirm this bolt size?

    We did discover that the control arm has two different bolt sizes (M12 and M14 at the spindle).
    Last edited by Solidworks-Mike; 05-21-2016 at 01:20 PM.
    818-S 2.5L Turbo Chassis Number: 404
    Kit Order Date: February 19, 2016 Kit Completion Date: March 19, 2016 Kit Ship Date: March 26, 2016 Build Start Date: April 22, 2016
    Build Thread: Click Here

  6. #86
    Senior Member Solidworks-Mike's Avatar
    Join Date
    Feb 2016
    Location
    Las Vegas, Nevada
    Posts
    114
    Post Thanks / Like
    Wrapped up the weekend in the garage by cleaning up the trans and hanging the rear suspension.

    Before


    After:


    Then we moved on to the rear suspension:


    Next it's on to the brakes then the cooling and brake lines.
    818-S 2.5L Turbo Chassis Number: 404
    Kit Order Date: February 19, 2016 Kit Completion Date: March 19, 2016 Kit Ship Date: March 26, 2016 Build Start Date: April 22, 2016
    Build Thread: Click Here

  7. #87
    Senior Member Solidworks-Mike's Avatar
    Join Date
    Feb 2016
    Location
    Las Vegas, Nevada
    Posts
    114
    Post Thanks / Like
    Spending a little bit of time on sheet metal while I wait for brake components to arrive. So might as well mount some interior panels:


    818-S 2.5L Turbo Chassis Number: 404
    Kit Order Date: February 19, 2016 Kit Completion Date: March 19, 2016 Kit Ship Date: March 26, 2016 Build Start Date: April 22, 2016
    Build Thread: Click Here

  8. #88
    Senior Member UnhipPopano's Avatar
    Join Date
    Mar 2016
    Posts
    344
    Post Thanks / Like
    One reported issue is that over time the long suspension bolt corrodes with the cast iron making its removal difficult. The forums discussing this recommend using a liberal amount of anti sizing lubricant. The information for Lock-Tight and similar products identify not to mix the two. Anyone have advice on how to apply both? Would applying a mask to the threads for insertion help?

  9. #89
    Senior Member AZPete's Avatar
    Join Date
    Feb 2011
    Location
    Scottsdale, AZ
    Posts
    2,374
    Post Thanks / Like
    Mike, now's the time to make a rear-rear firewall. That's an aluminum panel between the front of the engine and the rear firewall frame - it gives you a clean protected place for wiring, ECU, fuel tank, etc. I did mine after putting the engine in and it was tough, so do it before the engine if you want it.
    Here's a thread about this firewall: http://thefactoryfiveforum.com/showt...ewall-Aluminum
    Last edited by AZPete; 05-25-2016 at 11:20 AM. Reason: added link
    818S/C : Chassis #25 with 06 WRX 2.5 turbo, ABS, cruise, PS, A/C, Apple CarPlay, rear camera, power windows & locks, leather & other complexities. Sold 10/19 with 5,800 miles.
    Mk3 Roadster #6228 4.6L, T45, IRS, PS, PB, ABS, Cruise, Koni's, 17" Halibrands, red w/ silver - 9K miles then sold @ Barrett-Jackson Jan 2011 (got back cash spent).

  10. #90
    Senior Member
    Join Date
    Jun 2015
    Posts
    678
    Post Thanks / Like
    One of these should come with the kit, but for the sake of your hands, buy one!
    http://www.ebay.com/itm/PROFESSIONAL...IAAOSw-zxWoVbi

  11. #91
    Senior Member Solidworks-Mike's Avatar
    Join Date
    Feb 2016
    Location
    Las Vegas, Nevada
    Posts
    114
    Post Thanks / Like
    Quote Originally Posted by RetroRacing View Post
    One of these should come with the kit, but for the sake of your hands, buy one!
    http://www.ebay.com/itm/PROFESSIONAL...IAAOSw-zxWoVbi
    Agreed, it was one of the first tools I picked, it's not shown in the pics. I use the manual rivet gun in tight spots.
    818-S 2.5L Turbo Chassis Number: 404
    Kit Order Date: February 19, 2016 Kit Completion Date: March 19, 2016 Kit Ship Date: March 26, 2016 Build Start Date: April 22, 2016
    Build Thread: Click Here

  12. #92
    Senior Member Solidworks-Mike's Avatar
    Join Date
    Feb 2016
    Location
    Las Vegas, Nevada
    Posts
    114
    Post Thanks / Like
    Quote Originally Posted by AZPete View Post
    Mike, now's the time to make a rear-rear firewall. That's an aluminum panel between the front of the engine and the rear firewall frame - it gives you a clean protected place for wiring, ECU, fuel tank, etc. I did mine after putting the engine in and it was tough, so do it before the engine if you want it.
    Here's a thread about this firewall: http://thefactoryfiveforum.com/showt...ewall-Aluminum
    Ive been debating on building one or not actually.
    818-S 2.5L Turbo Chassis Number: 404
    Kit Order Date: February 19, 2016 Kit Completion Date: March 19, 2016 Kit Ship Date: March 26, 2016 Build Start Date: April 22, 2016
    Build Thread: Click Here

  13. #93
    Senior Member Solidworks-Mike's Avatar
    Join Date
    Feb 2016
    Location
    Las Vegas, Nevada
    Posts
    114
    Post Thanks / Like
    Since the mounting bracket for the brake reservoir is on back order I thought I'd make my own since my 3D printer is working again. Anyone see an issue with the location I'd like to mount it?


    818-S 2.5L Turbo Chassis Number: 404
    Kit Order Date: February 19, 2016 Kit Completion Date: March 19, 2016 Kit Ship Date: March 26, 2016 Build Start Date: April 22, 2016
    Build Thread: Click Here

  14. #94
    Senior Member STiPWRD's Avatar
    Join Date
    Jan 2014
    Location
    Leesburg, VA
    Posts
    1,624
    Post Thanks / Like
    That could interfere with the wiper depending on which solution you go with.

  15. #95
    Moonlight Performance
    Hindsight's Avatar
    Join Date
    May 2014
    Location
    Atlanta
    Posts
    3,402
    Post Thanks / Like
    Just ensure its higher than the master cylinder. That location may make it tough to R&R the battery.

  16. #96
    Senior Member Solidworks-Mike's Avatar
    Join Date
    Feb 2016
    Location
    Las Vegas, Nevada
    Posts
    114
    Post Thanks / Like
    Quote Originally Posted by STiPWRD View Post
    That could interfere with the wiper depending on which solution you go with.
    Good point, might flip it to the other side of the bar and closer to the upper a-arm. Will only need wipers to pass visual inspection once.
    818-S 2.5L Turbo Chassis Number: 404
    Kit Order Date: February 19, 2016 Kit Completion Date: March 19, 2016 Kit Ship Date: March 26, 2016 Build Start Date: April 22, 2016
    Build Thread: Click Here

  17. #97
    Senior Member Solidworks-Mike's Avatar
    Join Date
    Feb 2016
    Location
    Las Vegas, Nevada
    Posts
    114
    Post Thanks / Like
    Quote Originally Posted by Hindsight View Post
    Just ensure its higher than the master cylinder. That location may make it tough to R&R the battery.
    Height was what I was most concerned with in terms of closing the hood. It looks like the outlet will be right at the same height as the master cylinders, but the reservoir will be higher. the battery is pretty far away from this area and shouldn't be an issue.
    818-S 2.5L Turbo Chassis Number: 404
    Kit Order Date: February 19, 2016 Kit Completion Date: March 19, 2016 Kit Ship Date: March 26, 2016 Build Start Date: April 22, 2016
    Build Thread: Click Here

  18. #98
    Senior Member Solidworks-Mike's Avatar
    Join Date
    Feb 2016
    Location
    Las Vegas, Nevada
    Posts
    114
    Post Thanks / Like
    Got a little more work done the last few nights, mainly with the master cylinders and pedals:


    Went to the local hose supply store and bought actual brake fluid line so I don't have any issues down the road by using the supplied 'multi-use' hose:


    Got the reservoir mounted:


    The kit only came with one reservoir, so can I tee the clutch master cylinder into the brake cylinder feed lines and have all three share the same reservoir?


    And yes, I still have to put the hose clamps on.
    818-S 2.5L Turbo Chassis Number: 404
    Kit Order Date: February 19, 2016 Kit Completion Date: March 19, 2016 Kit Ship Date: March 26, 2016 Build Start Date: April 22, 2016
    Build Thread: Click Here

  19. #99
    Senior Member Solidworks-Mike's Avatar
    Join Date
    Feb 2016
    Location
    Las Vegas, Nevada
    Posts
    114
    Post Thanks / Like
    Well after some deep thought and reflections on what life has in store for me the next few years, I've decided I'm going to sell the kit before I finish it. Here is a link to the for sale thread:

    http://thefactoryfiveforum.com/showt...818S-Las-Vegas

    Asking $17,500 for everything, have about $20k invested and I am negotiable on the price. What the pictures and build thread don't show is that the brake lines are about 90% complete and I put on all new brake components including rotars and calipers. Next thing to do will be the cooling lines and then its ready for motor and trans and then wiring followed up with electrical harness.

    Hoping someone will want to take it over.
    818-S 2.5L Turbo Chassis Number: 404
    Kit Order Date: February 19, 2016 Kit Completion Date: March 19, 2016 Kit Ship Date: March 26, 2016 Build Start Date: April 22, 2016
    Build Thread: Click Here

  20. #100
    Senior Member
    Join Date
    Aug 2016
    Posts
    831
    Post Thanks / Like
    Oh man, that TRANSMISSION!! Beautiful! Sorry to hear you're letting go.

  21. #101
    Senior Member
    Join Date
    Jun 2013
    Location
    Bowling Green, KY
    Posts
    1,382
    Post Thanks / Like
    Sorry to hear and feel your pain the time for these projects can be tough. Looks like someone will get a great deal and start on a 818S.

  22. #102
    Senior Member Frank818's Avatar
    Join Date
    Jun 2013
    Location
    QC, Canada
    Posts
    5,732
    Post Thanks / Like
    Sorry to hear that.

    Wayne will certainly be a buyer, might want to PM him and I believe you aren't that far from Sweet Home Alabama.
    Frank
    818 chassis #181 powered by a '93 VW VR6 Turbo GT3582R
    Go-karted Aug 5, 2016 - Then May 19+21, 2017
    Tracked May 27/July 26, 2017
    Build time before being driveable on Sep 27, 2019: over 6000h
    Build Completed Winter 2021

Page 3 of 3 FirstFirst 123

Posting Permissions

  • You may not post new threads
  • You may not post replies
  • You may not post attachments
  • You may not edit your posts
  •  

Brown County Customs

Visit our community sponsor