FormaCars

Visit our community sponsor

Thanks Thanks:  0
Likes Likes:  0
Results 1 to 21 of 21

Thread: Upper Control Arm/Upper Ball Joint mount Question

  1. #1
    Well Used Member boat737's Avatar
    Join Date
    Feb 2016
    Location
    So. Bay (So. Calif.)
    Posts
    873
    Post Thanks / Like

    Upper Control Arm/Upper Ball Joint mount Question

    Man, it seems the more I read threads and forums, the more questions I have.

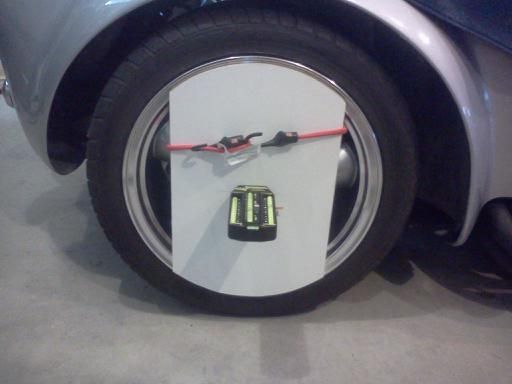
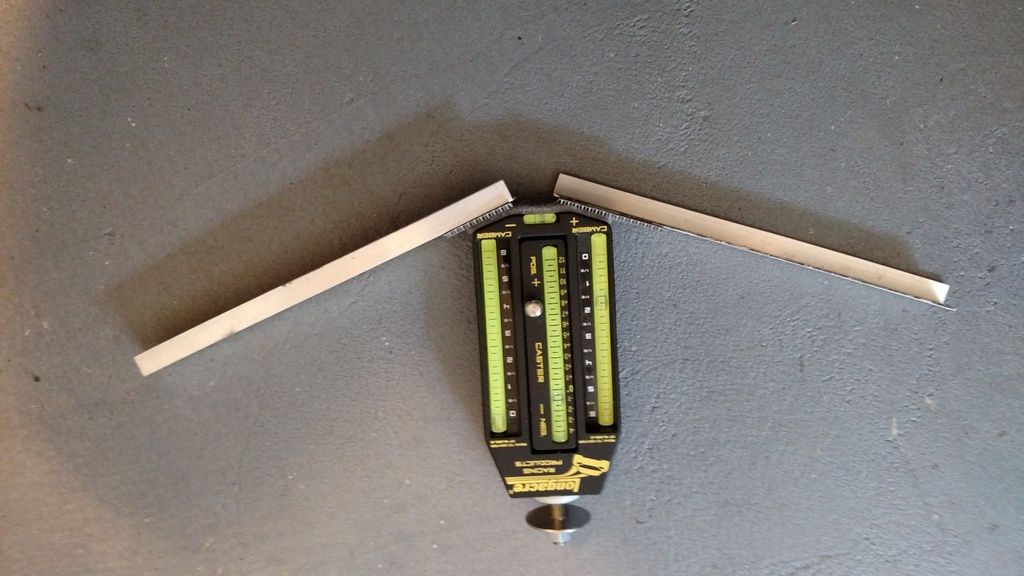
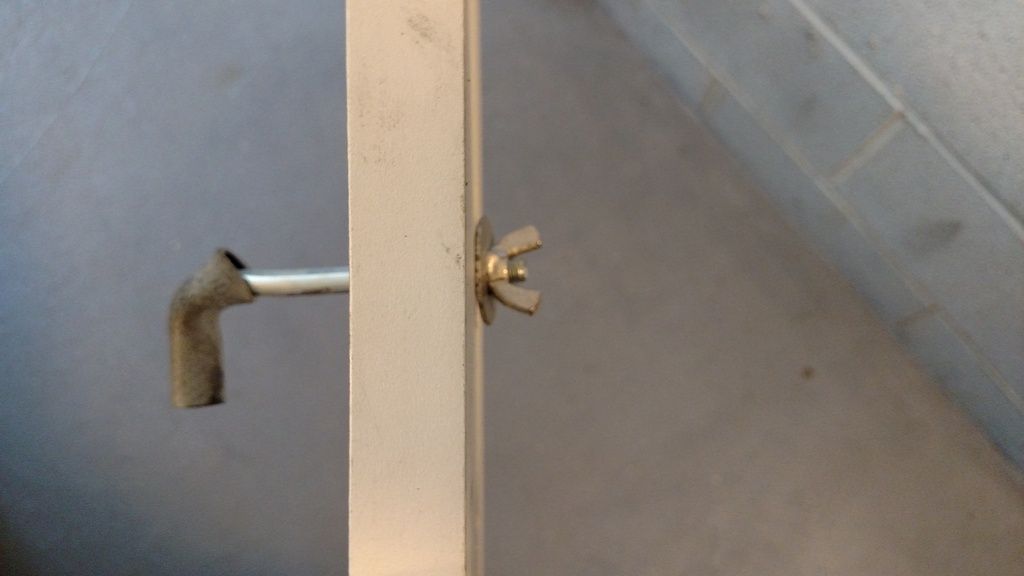
    This hour's question: After reading numerous threads about the UCA and UBJ, I noticed on mine that the bracket/mount that holds the upper ball joint is the same on both sides (identical brackets), that is it's not a symmetrical Left and Right set of brackets/mounts. (The welded lug is on the Left side of the bracket on both, so that it ends up on the forward side for the left UCA, and on the rear side for the Right.) Is this correct? It seems a little out of place on the right side, but looks a bit more correct on the left side. I don't think I can turn one upside down, because then the ball joint pin would not point "outward".

    Any input? Thanks.
    Attached Images Attached Images
    Last edited by boat737; 06-25-2016 at 01:38 PM.
    If Brute Force doesn't work, you're not using enough of it.
    Basic Stuff: MK4 Complete Kit #8439, Wilwood's, 17" Halibrands. Extra Stuff: Stainless brake and fuel lines, Breeze cooling, Battery mount, SS Roll Bar. Old Fart Stuff: Heater, Seat Heaters, Footbox Fresh Air, Stereo, Keyless ignition, Power Steering, Hyd Clutch.
    Young & Dumb Stuff: 427w Dart, TKO600, 3 link Moser M9/Ford 9", 3.5:1, Eaton TruTrac Posi. Graduation Thread

  2. #2
    Member dmoran's Avatar
    Join Date
    Feb 2016
    Location
    Crownsville, MD
    Posts
    87
    Post Thanks / Like
    Yes, that's the way it is. It really bugged me too, I really like symmetry. Just as long as the grease fittings are on top and the ball joints point outward, you are okay.
    Mk4 Roadster #8843. Kit Pickup: 03/19/2016
    Roush Performance 331 SRXE Crate Engine, TKO-600, 3-link rear, 17x9 and 17x10.5 Halibrand wheels w/ Nitto NT05 tires
    Doug's Mk4 Build Thread - Annapolis, MD

  3. #3
    Senior Member CraigS's Avatar
    Join Date
    Feb 2011
    Location
    Blacksburg, Va
    Posts
    4,729
    Post Thanks / Like
    The ball joint plates are the same on both sides so what you have is correct. I may look a little weird but geometrically it is fine. The points that matter in a UCA are the center lines of each chassis mount (inside the pivots) and the center axis of the ball joint. Those plates could be any manner of weird shapes, but as long as those three points/lines are correct, you are good to go.
    FFR MkII, 408W, Tremec TKO 500, 2015 IRS, DA QA1s, Forte front bar, APE hardtop.

  4. #4
    Well Used Member boat737's Avatar
    Join Date
    Feb 2016
    Location
    So. Bay (So. Calif.)
    Posts
    873
    Post Thanks / Like
    Quote Originally Posted by CraigS View Post
    The ball joint plates are the same on both sides so what you have is correct. I may look a little weird but geometrically it is fine. The points that matter in a UCA are the center lines of each chassis mount (inside the pivots) and the center axis of the ball joint. Those plates could be any manner of weird shapes, but as long as those three points/lines are correct, you are good to go.
    So far, I'm no where near ready for the alignment stage, but I have a picture of a member's dimensions to get it in the ball park, I hope. Of my two pictures above, do you see any obvious problems or mis-alignments?
    20130911_210143_zps2ba5b2e2.jpg
    If Brute Force doesn't work, you're not using enough of it.
    Basic Stuff: MK4 Complete Kit #8439, Wilwood's, 17" Halibrands. Extra Stuff: Stainless brake and fuel lines, Breeze cooling, Battery mount, SS Roll Bar. Old Fart Stuff: Heater, Seat Heaters, Footbox Fresh Air, Stereo, Keyless ignition, Power Steering, Hyd Clutch.
    Young & Dumb Stuff: 427w Dart, TKO600, 3 link Moser M9/Ford 9", 3.5:1, Eaton TruTrac Posi. Graduation Thread

  5. #5
    Senior Member CraigS's Avatar
    Join Date
    Feb 2011
    Location
    Blacksburg, Va
    Posts
    4,729
    Post Thanks / Like
    Looks fine to me. I recommend you do your own alignment. Here is a source for tools.
    Caster camber;
    http://www.longacreracing.com/produc...y+-+NO+ADAPTER
    Toe in
    http://www.longacreracing.com/produc...etitle=Toe+Bar
    FFR MkII, 408W, Tremec TKO 500, 2015 IRS, DA QA1s, Forte front bar, APE hardtop.

  6. #6
    Well Used Member boat737's Avatar
    Join Date
    Feb 2016
    Location
    So. Bay (So. Calif.)
    Posts
    873
    Post Thanks / Like
    Quote Originally Posted by CraigS View Post
    Looks fine to me. I recommend you do your own alignment. Here is a source for tools.
    Caster camber;
    http://www.longacreracing.com/produc...y+-+NO+ADAPTER
    Toe in
    http://www.longacreracing.com/produc...etitle=Toe+Bar
    Ohhh... Now you got my attention. I get to learn something new AND get new tools (not sure the wife will be so happy though). The alignment is something that I have never considered or thought that I could do. But this is definitely something that I would like to try. (As Jeff Spicoli says, "I can fix it!)

    Concerning the caster/camber gauge above, how does one attach it to the alloy wheels? (it says there are no adapters) Do the wheels have to come off to get to the spindle or rotor? (the unit referenced above doesn't have an adapter, how does that attach to the spindle?)

    I know the alignment specs have been in numerous threads, but... Any chance you got those handy? (all street, no track. Planning on the standard 255/40R17 and 315/35R17's)

    Thanks (is it Craig?) a bunch.
    Last edited by boat737; 06-27-2016 at 09:22 AM.
    If Brute Force doesn't work, you're not using enough of it.
    Basic Stuff: MK4 Complete Kit #8439, Wilwood's, 17" Halibrands. Extra Stuff: Stainless brake and fuel lines, Breeze cooling, Battery mount, SS Roll Bar. Old Fart Stuff: Heater, Seat Heaters, Footbox Fresh Air, Stereo, Keyless ignition, Power Steering, Hyd Clutch.
    Young & Dumb Stuff: 427w Dart, TKO600, 3 link Moser M9/Ford 9", 3.5:1, Eaton TruTrac Posi. Graduation Thread

  7. #7
    Senior Member CraigS's Avatar
    Join Date
    Feb 2011
    Location
    Blacksburg, Va
    Posts
    4,729
    Post Thanks / Like
    longacre has several adaptors available but nothing that works well for us. I made mine like this from a piece of a 12 inch shelf.

    I have now made a "J" bolt w/ rubber hose on the "J" section so I can latch onto the wheel spoke. Sometimes still use the bungee depending on the wheel style.
    Most recently I helped Carl Williams w/ his MkIV alignment. We were able to get about 7 deg caster and set it at 1/4 deg negative camber and about 3/32 total toe in. That caster is for a power steering car. Otherwise it would be about 3 deg. You can get more caster if you shorten the UCA rear sleeve a bit, maybe 1/4 inch off each end. I like 8 deg but w/o shortening the sleeve you can't get that much. This really is the only way to go. It's maybe $240 including shipping etc for the tools. You don't have to deal w/ a gomer at an alignment shop, and you can redo it for free for the rest of your life. These cars are so unusual it is hard to find an alignment guy who has a clue, and I am pretty sure, if you find one, you will pay more than the $240. Just so you know, the first alignment will be quite time consuming. Learning the tools etc you need to plan 6 hours. But, once you understand it, you can do all your other cars too.
    FFR MkII, 408W, Tremec TKO 500, 2015 IRS, DA QA1s, Forte front bar, APE hardtop.

  8. #8
    Well Used Member boat737's Avatar
    Join Date
    Feb 2016
    Location
    So. Bay (So. Calif.)
    Posts
    873
    Post Thanks / Like
    Awesome. Yeah, I forgot to mention it is (will be) power steering.

    That is such a simple idea on that mount. I can't believe I didn't think of that, having a simple mind myself.

    I have seen some posts mentioning shortening the rearward upper arm, but never paid any attention to them because it wasn't going to be me that was going to have to mess with it. ("Not my job", eh?) But now I guess it will be.
    So... if you have to shorten the adjusting sleeve a 1/2 inch (1/4 inch each end?), then do you also have to also shorten each of the heim joint threads (the ball joint thread, as well as the welded thread on the upper ball joint mount) going into the sleeve a similar amount? (that is so they will not bottom out against each other inside the sleeve?) And I remember reading about the 'coil over' spring interfering with the Forward upper control arm. Will that be a problem?
    Just to be certain, the numbers I should be setting are 3/32" total toe in (is there a difference between toe in and total toe in?), 8 deg positive caster, and 1/4 negative camber, correct?

    I'll be ordering up the two tools shortly. Thanks again.
    If Brute Force doesn't work, you're not using enough of it.
    Basic Stuff: MK4 Complete Kit #8439, Wilwood's, 17" Halibrands. Extra Stuff: Stainless brake and fuel lines, Breeze cooling, Battery mount, SS Roll Bar. Old Fart Stuff: Heater, Seat Heaters, Footbox Fresh Air, Stereo, Keyless ignition, Power Steering, Hyd Clutch.
    Young & Dumb Stuff: 427w Dart, TKO600, 3 link Moser M9/Ford 9", 3.5:1, Eaton TruTrac Posi. Graduation Thread

  9. #9
    Senior Member CraigS's Avatar
    Join Date
    Feb 2011
    Location
    Blacksburg, Va
    Posts
    4,729
    Post Thanks / Like
    Sorry I am so late getting back to you. Re;shortening sleeve. Yes 1/4 inch per end. The couple that I have done, there was plenty of thread inside the sleeve. No guarantees but you should be OK. There can be problems w/ the front sleeve getting close to the spring but usually it clears. If not, replace the upper shock mount sleeve so you can move the shock as far back between the mounts as possible. You could cut one sleeve down to about 1/8 inch long for the rear, move the other piece to the front and add one 1/2 inch washer if needed. I always speak in terms of total toe in. If you were on a real alignment machine it might read individual left and right toe in and also total. For us, we use total. If you shorten the rear sleeve you can get more camber too, but I keep it to a minimum for the street. All camber does, on a car driving straight, is wear out the inside edge of the tire. I have seen too many cars w/ the inside edge showing cords while the rest of the tire still had 3/16 tread and the casual driver never sees that inside edge. Good luck and don't be afraid to ask more questions.
    FFR MkII, 408W, Tremec TKO 500, 2015 IRS, DA QA1s, Forte front bar, APE hardtop.

  10. #10
    Well Used Member boat737's Avatar
    Join Date
    Feb 2016
    Location
    So. Bay (So. Calif.)
    Posts
    873
    Post Thanks / Like
    Thanks CraigS. Just got back into town and almost missed this one. They propagate down the list so fast.

    I got my alignment tools and am ready, but the car isn't yet. Need tires, engine, body on... you know, all the small nit-noid things.

    Another question though. Is there a good or accepted order in which to align the front end? Toe, caster, camber, or caster, camber, toe? I can see where each one will have an effect on the other two, so it seems obvious that it is a 2, or 3, or 4 step process to get all three adjustments set, and then check and do them and again, and check and adjust again. So I would think there would be a proper or better order to do the adjustments.

    Thanks again.
    If Brute Force doesn't work, you're not using enough of it.
    Basic Stuff: MK4 Complete Kit #8439, Wilwood's, 17" Halibrands. Extra Stuff: Stainless brake and fuel lines, Breeze cooling, Battery mount, SS Roll Bar. Old Fart Stuff: Heater, Seat Heaters, Footbox Fresh Air, Stereo, Keyless ignition, Power Steering, Hyd Clutch.
    Young & Dumb Stuff: 427w Dart, TKO600, 3 link Moser M9/Ford 9", 3.5:1, Eaton TruTrac Posi. Graduation Thread

  11. #11
    Member JRD56's Avatar
    Join Date
    Oct 2014
    Location
    Olathe, KS
    Posts
    94
    Post Thanks / Like
    Craig, a late reply here but I have a question about your alignment technique. Do you use turning plates under the front tires?

    Regards

    Jim

  12. #12
    Junior Member
    Join Date
    May 2016
    Location
    Yorktown, Va
    Posts
    26
    Post Thanks / Like
    I am used to stringing and aligning circle track stock cars. When I finish my kit it will be weird making all the wheels want to go in the same direction. Not sure why people would ever need to turn right but I am willing to give it a try!

  13. #13
    Senior Member Duke's Avatar
    Join Date
    Dec 2015
    Location
    Taxachusetts
    Posts
    401
    Post Thanks / Like
    Quote Originally Posted by CraigS View Post
    longacre has several adaptors available but nothing that works well for us. I made mine like this from a piece of a 12 inch shelf.

    I have now made a "J" bolt w/ rubber hose on the "J" section so I can latch onto the wheel spoke. Sometimes still use the bungee depending on the wheel style.
    Most recently I helped Carl Williams w/ his MkIV alignment. We were able to get about 7 deg caster and set it at 1/4 deg negative camber and about 3/32 total toe in. That caster is for a power steering car. Otherwise it would be about 3 deg. You can get more caster if you shorten the UCA rear sleeve a bit, maybe 1/4 inch off each end. I like 8 deg but w/o shortening the sleeve you can't get that much. This really is the only way to go. It's maybe $240 including shipping etc for the tools. You don't have to deal w/ a gomer at an alignment shop, and you can redo it for free for the rest of your life. These cars are so unusual it is hard to find an alignment guy who has a clue, and I am pretty sure, if you find one, you will pay more than the $240. Just so you know, the first alignment will be quite time consuming. Learning the tools etc you need to plan 6 hours. But, once you understand it, you can do all your other cars too.
    When you get a moment would you mind posting a few more pictures of your homemade setup?

  14. #14
    Well Used Member boat737's Avatar
    Join Date
    Feb 2016
    Location
    So. Bay (So. Calif.)
    Posts
    873
    Post Thanks / Like
    Quote Originally Posted by JRD56 View Post
    Craig, a late reply here but I have a question about your alignment technique. Do you use turning plates under the front tires?
    Regards
    Jim
    Quote Originally Posted by boat737 View Post
    Thanks CraigS.

    Another question though. Is there a good or accepted order in which to align the front end? Toe, caster, camber, or caster, camber, toe? I can see where each one will have an effect on the other two, so it seems obvious that it is a 2, or 3, or 4 step process to get all three adjustments set, and then check and do them and again, and check and adjust again. So I would think there would be a proper or better order to do the adjustments.

    Thanks again.
    Looks like CraigS is MIA for a bit. I am anxious for his expertise here. I was wondering if the wheel skates would do the trick? (They would probably have to be under each wheel.)
    Last edited by boat737; 08-11-2016 at 12:21 AM.
    If Brute Force doesn't work, you're not using enough of it.
    Basic Stuff: MK4 Complete Kit #8439, Wilwood's, 17" Halibrands. Extra Stuff: Stainless brake and fuel lines, Breeze cooling, Battery mount, SS Roll Bar. Old Fart Stuff: Heater, Seat Heaters, Footbox Fresh Air, Stereo, Keyless ignition, Power Steering, Hyd Clutch.
    Young & Dumb Stuff: 427w Dart, TKO600, 3 link Moser M9/Ford 9", 3.5:1, Eaton TruTrac Posi. Graduation Thread

  15. #15
    Senior Member Duke's Avatar
    Join Date
    Dec 2015
    Location
    Taxachusetts
    Posts
    401
    Post Thanks / Like
    Quote Originally Posted by boat737 View Post
    Looks like CraigS is MIA for a bit. I am anxious for his expertise here. I was wondering if the wheel skates would do the trick? (They would probably have to be under each wheel.)
    For measuring 20 deg you can always use the degree tool on your phone (iphone > compass > degree tool). Just remember to reset it to zero against the wheel first before turning.

  16. #16
    Senior Member edwardb's Avatar
    Join Date
    Feb 2011
    Location
    Lake Orion, Michigan
    Posts
    10,568
    Post Thanks / Like
    Quote Originally Posted by boat737 View Post
    Looks like CraigS is MIA for a bit. I am anxious for his expertise here. I was wondering if the wheel skates would do the trick? (They would probably have to be under each wheel.)
    I've tried several different home brew methods to simulate pro turning plates that I just couldn't justify. Best method? Couple of layers of heavy duty trash bags under each from tire. I just take one of the big can liners, cut it into four pieces, and put two under each front wheel. Works great. Almost zero friction.
    Build 1: Mk3 Roadster #5125. Sold 11/08/2014. Build 2: Mk4 Roadster #7750. Sold 04/10/2017. Build Thread
    Build 3: Mk4 Roadster 20th Anniversary #8674. Sold 09/07/2020. Build Thread and Video. Build 4: Gen 3 Type 65 Coupe #59. Gen 3 Coyote. Legal 03/04/2020. Build Thread and Video
    Build 5: 35 Hot Rod Truck #138. LS3 and 4L65E auto. Rcvd 01/05/2021. Legal 04/20/2023. Build Thread. Sold 11/9/2023.

  17. #17
    Senior Member CraigS's Avatar
    Join Date
    Feb 2011
    Location
    Blacksburg, Va
    Posts
    4,729
    Post Thanks / Like
    Sorry I missed this thread. Was at the beech last week. Re: 20 deg. Note on the outer end of the gauge I linked to the corners are not square. The surface of those corners are your 20 deg. I made a couple if 6 inch long pieces of 1/16x1" aluminum and attach them to those corners w/ velcro. You could tape on pieces of cardboard cut like my aluminum pieces. Having a 6 inch pointer is a lot easier than that 1/2 inch surface. Just eyeball that it is parallel to the side of the car. Don't kill your self w/ accuracy, you will be doing this many times as you get closer and closer, so ,if one reading is off a bit, you will be taking several more to make it right. I don't use anything for turning. I usually work by myself and need the wheel to stay at the 20 deg while I let go of the steering wheel (of course it snaps back a bit so you turn a little more than you need.) When it is sitting at the 20 deg you need to level the tool using the outer bubble before you can zero or read you caster. See the bubble between the + and - marks near the velcro? The process starts w/ a 20 deg turn so the wheel you are measuring is out at the front. Level the gauge, zero the caster bubble, and turn 20 deg to the other direction. Level the gauge to get your caster reading. While turning from one side to the other you pass through straight ahead. You can stop if you want, level the gauge, and get a camber reading. I usually start by eyeballing toein so it is reasonably close. Then caster and camber happen pretty much at the same time. Adjusting both sleeves at the same time affects camber w/ minimal effect on caster. Making one sleeve longer and the other sleeve shorter by the same amount affects caster w/ minimal effect on camber. I put a piece of tape on the top of each sleeve so I can make adjustments whole turns at a time to start. When you get close your changes will be maybe 1/4 turns. BTW. When you tighten the jam nuts, the length of the sleeve increases. So those final readings/adjustments need to be made w/ the jam nuts at least snugged after each change. My 20 deg pointers

    My 'J' bolt which works fine on my Bullitt wheels but not on Carls FFR Halibrands

    Once caster and camber of both wheels are set, now to toein. Set the steering wheel so the spokes are level. Kneel down in front of a front tire and look along the outer surface to see where the front tire is aimed at the rear tire. Or grab a piece of wood trim about 8 ft long, hold it against the outer surfaces of the front tire and see where the other end is in relation to the rear tire. Usually you end up w/ about an inch of the rear tire tread visible outside of the front tire. The ideal here is many fold:
    - The total toein approx 1/16-3/32
    - Both tierods the same over all length
    - Steering wheel centered
    - Both front tires set so the same amount of rear tire tread is visible (the total toein could be correct but the tires are both aiming off to left or right, not good)
    You can drive it w/ the steering wheel off center and the tirods not the same as long as the other two are good. But eventually you want them all correct. This can get to be a real pain on a MkIV. If the tierods are different lengths, or the wheel is a little off, that can be fixed by rotating offset aluminum rack bushings. They can only do so much though. If you need more, you need to pull the rack mount bolts, move the rack enough to seperate the steering column at the splines and rotate it a spline or so. This is tedious as heck. Carl and I moved his splines 4-5 times before we got it right. One more BTW. There is such a thing as tire pull created by the internal construction of the tire. So you can get all the above absolutely perfect and end up the the wheel a bit off center when you drive it. If this happens, adjust one tierod a bit longer and the other tierod shorter by the same amount. I usually work in flats, the flat part your open end wrench engages. (Of course i have never found a wrench that fits any Mustang rack but it looks like one should) If your wheel is off to the left, you need to adjust so you aim the wheels more to the left-the right tierod shorter and left tierod longer.
    Last edited by CraigS; 08-12-2016 at 12:58 PM.
    FFR MkII, 408W, Tremec TKO 500, 2015 IRS, DA QA1s, Forte front bar, APE hardtop.

  18. #18
    Well Used Member boat737's Avatar
    Join Date
    Feb 2016
    Location
    So. Bay (So. Calif.)
    Posts
    873
    Post Thanks / Like
    Hey Craig, 'nother question fer ya.

    The Longacre instructions for the toe-bar say to index off the widest part of the tire. Wouldn't it be more accurate to do it off the rim? Even though you are indexing on a shorter radius, it seems the tire sidewall can vary, especially with raised letters and such. At least the rim is machined pretty stable all the way around.
    If Brute Force doesn't work, you're not using enough of it.
    Basic Stuff: MK4 Complete Kit #8439, Wilwood's, 17" Halibrands. Extra Stuff: Stainless brake and fuel lines, Breeze cooling, Battery mount, SS Roll Bar. Old Fart Stuff: Heater, Seat Heaters, Footbox Fresh Air, Stereo, Keyless ignition, Power Steering, Hyd Clutch.
    Young & Dumb Stuff: 427w Dart, TKO600, 3 link Moser M9/Ford 9", 3.5:1, Eaton TruTrac Posi. Graduation Thread

  19. #19
    Senior Member Duke's Avatar
    Join Date
    Dec 2015
    Location
    Taxachusetts
    Posts
    401
    Post Thanks / Like
    ^^Much appreciated Craig!

  20. #20
    Senior Member CraigS's Avatar
    Join Date
    Feb 2011
    Location
    Blacksburg, Va
    Posts
    4,729
    Post Thanks / Like
    I agree indexing off the wheel should be more accurate but the problem is that it is narrower than the sidewall bulge. So, depending which measuring tool you use, it might be difficult to close it down to measure to the rim edge and then get it back off the tire to measure the other side. All the Hunter alignment pieces mount to the wheel rim so they like it better. I just do the tire.
    FFR MkII, 408W, Tremec TKO 500, 2015 IRS, DA QA1s, Forte front bar, APE hardtop.

  21. #21
    Well Used Member boat737's Avatar
    Join Date
    Feb 2016
    Location
    So. Bay (So. Calif.)
    Posts
    873
    Post Thanks / Like
    Yup, I see the problem there. Unless I could devise a way to get that locator to get back to exactly the same spot after relocating it, the measurement would be off. Sounds like a challenge. Possibly another small ring on the plunger with a set screw to remember the first dimension? Maybe not, I got me enough challenges just on the car right now...

    Thanks Craig.
    If Brute Force doesn't work, you're not using enough of it.
    Basic Stuff: MK4 Complete Kit #8439, Wilwood's, 17" Halibrands. Extra Stuff: Stainless brake and fuel lines, Breeze cooling, Battery mount, SS Roll Bar. Old Fart Stuff: Heater, Seat Heaters, Footbox Fresh Air, Stereo, Keyless ignition, Power Steering, Hyd Clutch.
    Young & Dumb Stuff: 427w Dart, TKO600, 3 link Moser M9/Ford 9", 3.5:1, Eaton TruTrac Posi. Graduation Thread

Posting Permissions

  • You may not post new threads
  • You may not post replies
  • You may not post attachments
  • You may not edit your posts
  •  

Brown County Customs

Visit our community sponsor