BluePrint Engines

Visit our community sponsor

Thanks Thanks:  0
Likes Likes:  0
Results 1 to 23 of 23

Thread: The push forward - Engine, foot-box and dash

  1. #1
    Senior Member SingleMaltWSKY's Avatar
    Join Date
    Jan 2016
    Posts
    240
    Post Thanks / Like

    The push forward - Engine, foot-box and dash

    Thought I would share some of the modifications that we're doing so I y'know......fit.

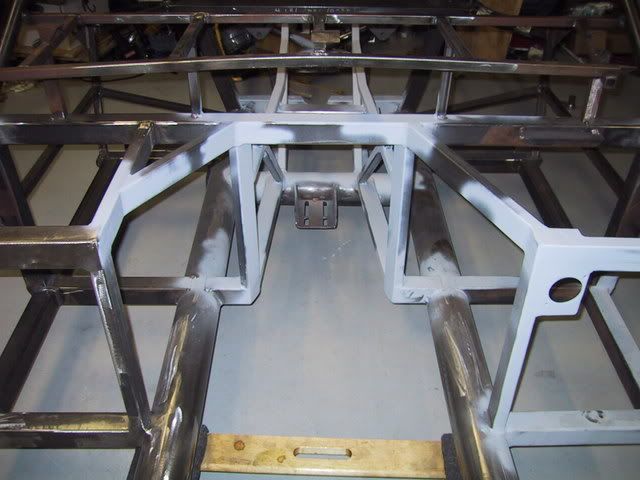
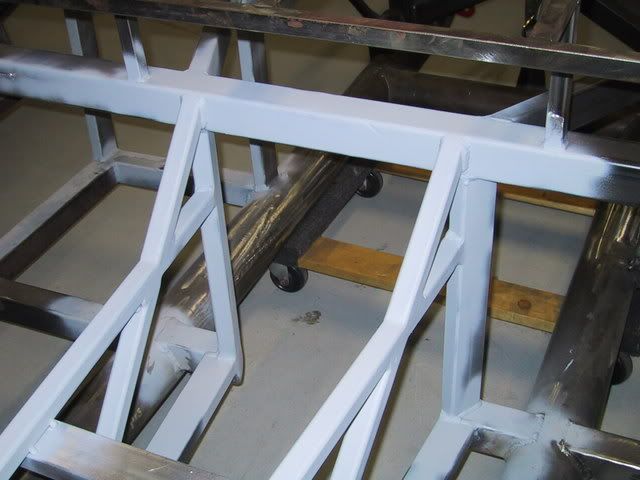
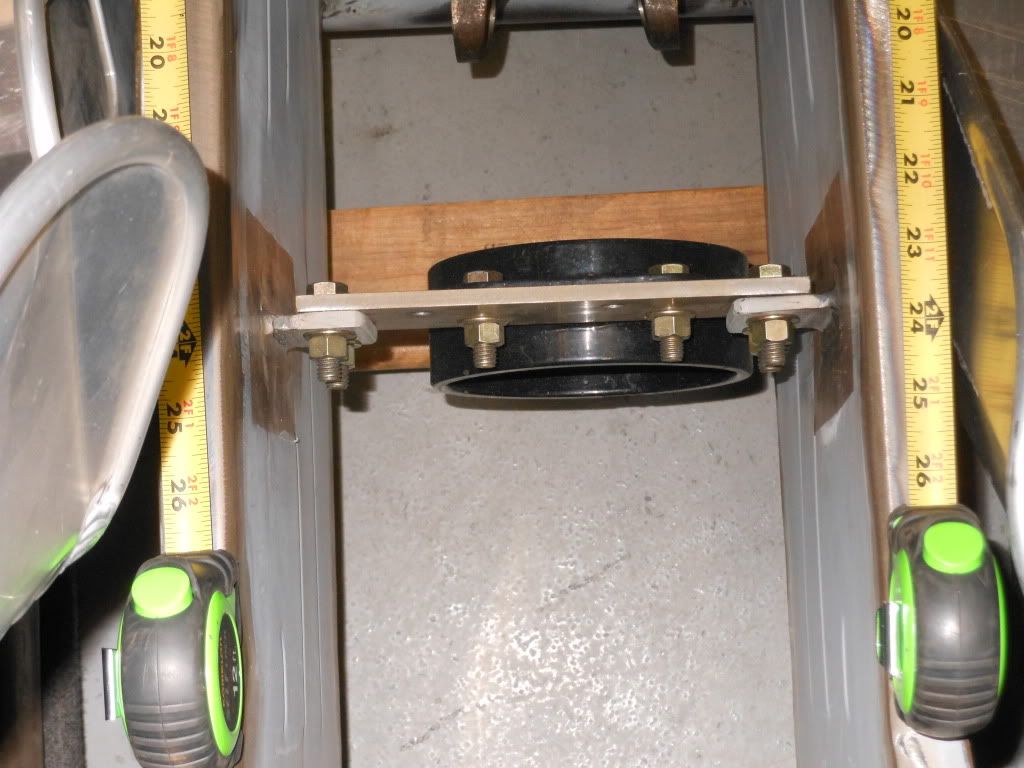
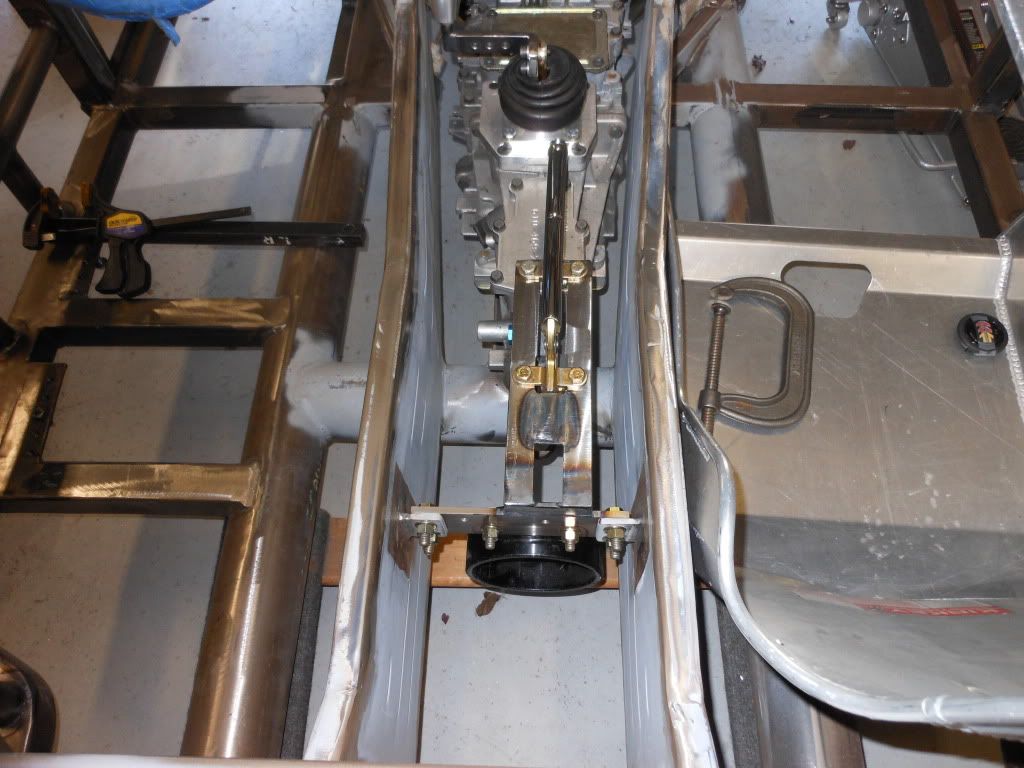
    The engine is being pushed forward 4.5 inches, cutting the back 3/4 off of the engine mount and using the existing front vertical plate portion as the "new back" of the engine mount. This will allow us to then push forward the drivers side foot box as well as the dash.

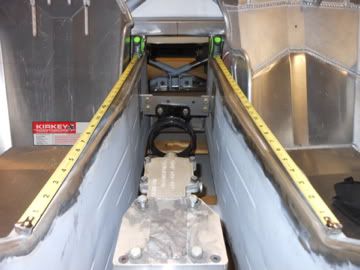
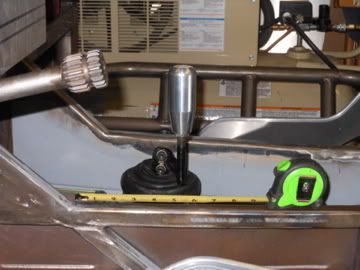
    The A-pillars are remaining in place, only the horizontal dash bar is being repositioned, and in turn also push forward the steering wheel and dash surface about 1 to 1.5 inches. We chose this route instead of trying to push the seat back, the gains we get in additional foot and leg room should be a real bonus.

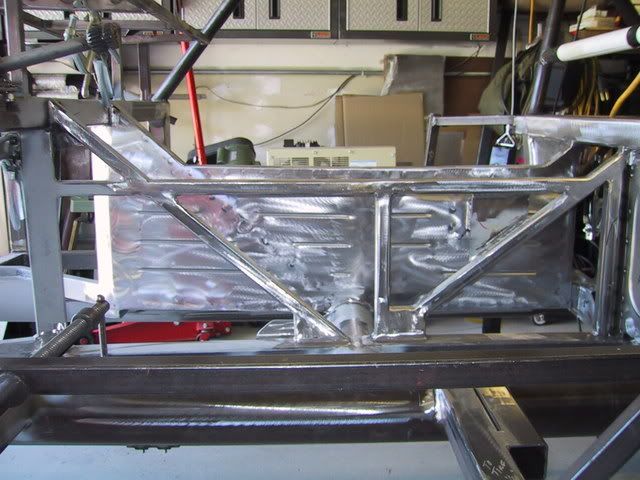
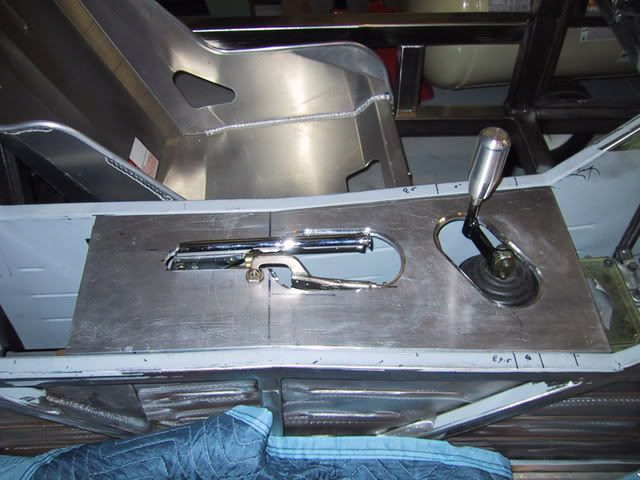
    The existing footbox has been completely removed and replaced, along with a cut into the box section steel on the left leg of the foot box entry - this is to help widen and hopefully gain some comfort on those longer trips.
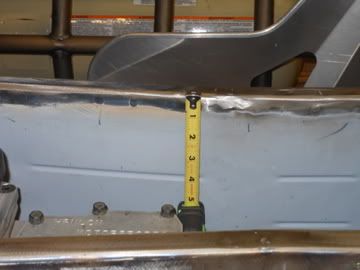
    A section has also been cut out of the primary rail on the drivers side to help widen the foot area.

    Once we have the engine placed and the transmission in place, the plan is to look at the possibility of narrowing the transmission tunnel to gain more width in the cabin for both the driver and passenger - still scheming on that one.

    Steering plate.jpgfloor beam1.jpgEngine mount cut.jpgtop down.jpggrind.jpgFloor beam 3.jpgnew floor.jpgFloor new.jpgwiden reinforce.jpgfloor beam 4.jpg

  2. #2
    Senior Member SingleMaltWSKY's Avatar
    Join Date
    Jan 2016
    Posts
    240
    Post Thanks / Like

  3. #3
    Senior Member MisterAdam's Avatar
    Join Date
    Mar 2011
    Location
    Brentwood NH
    Posts
    178
    Post Thanks / Like
    as a mechanical engineer my head almost exploded!!! i cannot believe how you have compromised the structural integrity of the chassis. I hope you are getting FEA guidance on this mod. just my 2 cents

  4. #4
    Senior Member SingleMaltWSKY's Avatar
    Join Date
    Jan 2016
    Posts
    240
    Post Thanks / Like
    Quote Originally Posted by MisterAdam View Post
    as a mechanical engineer my head almost exploded!!! i cannot believe how you have compromised the structural integrity of the chassis. I hope you are getting FEA guidance on this mod. just my 2 cents
    My father is a mechanical engineer as well - and yes, everything we are removing is being replaced with something stronger than the original. This is something we have done before with different chassis with great success. I completely understand your concerns though :-)

    EDIT - also, the pictures are only of the start of the process - not the finished product as an FYI.
    Last edited by SingleMaltWSKY; 07-22-2016 at 01:15 PM.

  5. #5
    Senior Member MisterAdam's Avatar
    Join Date
    Mar 2011
    Location
    Brentwood NH
    Posts
    178
    Post Thanks / Like
    in that case....great mod!! haha. looks like it will increase the cabin space considerably. will be watching this thread to see the final product.

  6. #6
    Senior Member SingleMaltWSKY's Avatar
    Join Date
    Jan 2016
    Posts
    240
    Post Thanks / Like
    Quote Originally Posted by MisterAdam View Post
    in that case....great mod!! haha. looks like it will increase the cabin space considerably. will be watching this thread to see the final product.
    Trust me - I'm not an engineer - and when my father started showing me where to cut and how much of our brand new chassis........wow.
    Lots of new metal and welding to come for this mod.

  7. #7
    Senior Member MPTech's Avatar
    Join Date
    Feb 2011
    Location
    St. Louis, MO
    Posts
    1,181
    Post Thanks / Like
    Blog Entries
    8
    Wow! That looks significant. How tall are you?

    What are you going to do for headers? custom, J-pipes, something else?

    Nice work
    F5R #7446: MK4, 302, T5 midshift, 3.55 Posi IRS, 17" Halibrands
    Delivered 4/4/11, First start 9/29/12, Licensed 4/24/13, off to PAINT 2/15/14!! Wahoo!

  8. #8
    Senior Member SingleMaltWSKY's Avatar
    Join Date
    Jan 2016
    Posts
    240
    Post Thanks / Like
    Quote Originally Posted by MPTech View Post
    Wow! That looks significant. How tall are you?

    What are you going to do for headers? custom, J-pipes, something else?

    Nice work
    I'm 6'4" and mostly legs and feet (SUPER attractive, I know..../s). This should give us a LOT more leg room.

    The engine is also getting pushed forward that 4.5 inches, so that will help header clearance getting around the foot boxes. The angle of the exhaust exit at the body is still in the original spot with this design. I will post more as we go.
    Pushing the engine forward also allows for transmission tunnel modification as the T56 will be more forward and the tunnel width can be brought down.

  9. #9
    Trick Tool Maker, Super Moderator Hankl's Avatar
    Join Date
    Feb 2011
    Location
    Northern CA
    Posts
    671
    Post Thanks / Like
    Blog Entries
    1
    Here's what I did to my tunnel.


    Hankl
    Last edited by Hankl; 07-23-2016 at 02:42 AM.
    “If you didn’t have enough time to do it right the first time. How come you always have time to go back and do it again?” FFR1000186CP

    Understeer is when you hit the wall with the front of the car and oversteer is when you hit the wall with the rear of the car.
    Horsepower is how fast you hit the wall and torque is how far you take the wall with you.

  10. #10
    Senior Member SingleMaltWSKY's Avatar
    Join Date
    Jan 2016
    Posts
    240
    Post Thanks / Like
    Great looking work Hank - how much space have you gained in width? Or was that the goal?


    Quote Originally Posted by Hankl View Post
    Here's what I did to my tunnel.


    Hankl

  11. #11
    Member
    Join Date
    Feb 2011
    Posts
    69
    Post Thanks / Like
    since you are cutting and welding. I highly recommend the mark dougherty dropped floor mod. he dropped the driver side seat floor and wow what a difference.
    It feels like a production car. My head is no longer hitting the rollbar. more leg room from sitting further back. Just more ergonomically correct than the original. pics are on here or ffcars (username mikemoen) of what he did. essentially he cut the 4 in frame along the driver compartment horizontally and then welded steel plate in its place. finished product probably stronger than original.

  12. #12

    Join Date
    May 2011
    Location
    Pittsburgh, PA
    Posts
    728
    Post Thanks / Like
    I like it. I also agree that if interior space is the goal, you may as well drop the floor as suggested above. At 5' 10.5" I wish I would have done so. Also, when I moved my steering shaft bearing (on the front of the footbox) inboard (toward the passenger side) by a mere 1", I could barely get the rack and pinion and steering shaft to fit because that 1" move had taken up almost all of the free play needed for assembly. So, if you don't have that aspect of the mod figured out, give some thought to how you will make the steering shaft work now that the lower support bearing looks to be some inches forward.

    I will also say that you can probably get the footbox better sealed up from water intrusion by doing something like what you and Hank are doing. Carry on!

  13. #13
    Trick Tool Maker, Super Moderator Hankl's Avatar
    Join Date
    Feb 2011
    Location
    Northern CA
    Posts
    671
    Post Thanks / Like
    Blog Entries
    1
    Quote Originally Posted by SingleMaltWSKY View Post
    Great looking work Hank - how much space have you gained in width? Or was that the goal?
    Basically FFR made the tunnel to be symmetrical with the trans and not with the cockpit. The passengers side was narrower than the drivers side and my mod made the passenger/driver space symmetrical. Also I wasn't really fond of the rearward down slope to the tunnel, so I changed that also. The new tunnel also allowed me to build an internal mount for the driveshaft loop and E-brake mount, which is part of the driveshaft loop mount also.


    The Lokar E-brake is in the mock up position, it will actuality be just below the top surface of the tunnel when finished.


    Here's a picture of the mount.

    Hank
    Last edited by Hankl; 07-24-2016 at 10:49 AM.
    “If you didn’t have enough time to do it right the first time. How come you always have time to go back and do it again?” FFR1000186CP

    Understeer is when you hit the wall with the front of the car and oversteer is when you hit the wall with the rear of the car.
    Horsepower is how fast you hit the wall and torque is how far you take the wall with you.

  14. #14
    Senior Member
    Join Date
    Feb 2011
    Location
    Myrtle Beach, SC
    Posts
    2,108
    Post Thanks / Like
    SMW-

    I really like the mods you are doing. I have mad respect for those of you that have the skills to take on the chassis as you have! It's not just the work you are doing, but also the vision and talent to make it all work. Very impressive.

    I look forward to see where you end up taking this! Awesome work!

    Regards,

    Steve

  15. #15
    Senior Member SingleMaltWSKY's Avatar
    Join Date
    Jan 2016
    Posts
    240
    Post Thanks / Like
    Hankl:

    Thanks so much for the shots and the feedback on your tunnel mod. I'll be taking this information back to the garage for some more head scratching.

    mmoen:

    I really like the seat drop mod as well, and we looked at that. I have test fitted the Kirkey seat and we have some ideas around placing slider rails on the side of the seat as opposed to the bottom for forward back movement, this will also gain us a couple inches of height as the seat will be nearly against the floor or as close as possible. We also have a mod pencilled out for widening of the rear seating section - this is a combination of narrowing of the transmission tunnel as well as adjustment of the frame to the rear left of the driver to better position the back of the seat relative to the steering wheel and pedals when it is pushed all the way back.

    More soon

  16. #16
    Senior Member SingleMaltWSKY's Avatar
    Join Date
    Jan 2016
    Posts
    240
    Post Thanks / Like
    Here's a shot of the some the square-tube section that have been added to the now enlarged footbox. This is still rough (haven't broken out the grinder yet).

    Rough Footbox.jpg

  17. #17
    Junior Member
    Join Date
    Jul 2016
    Posts
    5
    Post Thanks / Like
    Wow
    I'm impressed.
    Can I hire you to do mine?! Lol

  18. #18
    Senior Member stack's Avatar
    Join Date
    Feb 2011
    Location
    Macedon, NY
    Posts
    320
    Post Thanks / Like
    very cool build. keep the pictures coming

    stack
    FFR MKI Roadster FFR2202K Built in 2000 sold
    FFR Hot Rod #39 under construction

  19. #19
    Senior Member SingleMaltWSKY's Avatar
    Join Date
    Jan 2016
    Posts
    240
    Post Thanks / Like
    An update and some shots on the seating rebuild,

    We have basic wood for the pedal mock up, the width gained in this modification allows for a full dead pedal and a decent amount of freedom for pedal placement.

    The motor mounts are in place – 4 3/8 inch forward and the pedal mock-up shows the seat in more or less my fathers driving position (mine will be further back). There is at least 2 ½ inches of rearward movement left. The design allows +/- 3/8” pedal movement side to side on each pedal and relative pedal height can be adjusted to suit as long as we retain sufficient travel for full clutch disengagement and braking. I think I’ll build in an adjustable pedal stop for the clutch pedal so we don’t put undue force on the clutch master at the end of travel.

    More to come in the future - gaining a very large amount of space inside.


    Attached Images Attached Images
    Last edited by SingleMaltWSKY; 08-03-2016 at 10:43 AM.

  20. #20
    Mark Dougherty's Avatar
    Join Date
    Feb 2011
    Location
    Hershey PA
    Posts
    722
    Post Thanks / Like
    Looking great
    I'll be watching
    ��
    The traveling Builder
    717-773-5624

  21. #21
    Senior Member SingleMaltWSKY's Avatar
    Join Date
    Jan 2016
    Posts
    240
    Post Thanks / Like
    One more image - because 'forum pic limitations'


  22. #22

    Steve >> aka: GoDadGo
    GoDadGo's Avatar
    Join Date
    Feb 2015
    Location
    Slidell, Louisiana
    Posts
    6,567
    Post Thanks / Like
    Blog Entries
    1
    And Folks Thought I Was Crazy For Moving Things Around To Fit!

    Hope everything works out for you all.

    Make It Your Own Gents!

  23. #23
    Senior Member SingleMaltWSKY's Avatar
    Join Date
    Jan 2016
    Posts
    240
    Post Thanks / Like
    Just posted a blog update with more details and pictures of this modification that is on-going. I will post more on the forum as we get closer to completing this particular mod. WAY more to come.

    https://vjjfactoryfive.wordpress.com...cations-begin/

    Full blog site here:
    https://vjjfactoryfive.wordpress.com/

Posting Permissions

  • You may not post new threads
  • You may not post replies
  • You may not post attachments
  • You may not edit your posts
  •  

Martin's Dent and Collision Shop

Visit our community sponsor