Boig Motorsports

Visit our community sponsor

Thanks Thanks:  0
Likes Likes:  0
Page 2 of 3 FirstFirst 123 LastLast
Results 41 to 80 of 86

Thread: Usudno's 4 generation MK IV build

  1. #41
    Senior Member
    Join Date
    Oct 2016
    Posts
    407
    Post Thanks / Like
    Tomorrow is our scheduled delivery day, I have yet to hear back from Jim on specifics. It may be that he is running behind a day or so. That being said bothering him has been the last thing on my mind. Unfortunately Pop never made it out of the hospital. He passed away due to complications from his surgery. I appreciate everyone's thoughts and prayers for him. That being said, D day will be a welcomed distraction. I'm not sure if its possible but I would like to change the name of my build thread if possible. If anyone has any idea how to go about it I would appreciate it. I plan to take several D day pictures and I have scheduled the day off tommorow in hopes that Jim makes it. If I don't hear from him by noon time today I may give him a ring. I'd like to spend the day here doing inventory if possible.

    Thanks again

    Scott

  2. #42
    Senior Member
    Join Date
    Feb 2011
    Posts
    104
    Post Thanks / Like
    Scott,

    Sorry to hear about your Pop, Never a good time. I am sure that one of the administrator's could change the name of your build thread.

    Steve

  3. #43
    Senior Member
    Join Date
    Oct 2016
    Posts
    407
    Post Thanks / Like
    I will reach out to one of the. Thank you. I just received a call from Jim with Stewart Transportation. He will be here between 7-8 a.m.

  4. #44
    Senior Member
    Join Date
    Oct 2016
    Posts
    407
    Post Thanks / Like
    D-Day has come and gone. Jim was great. We had to adjust our plans on the fly but all went well. My kids had a blast getting it all out of the truck and unpacked. I got a few pics of the unload but unfortunately i didn't have enough man power to get the frame on the jack stands. We will give it a go this afternoon. I will be doing inventory today but as of now I have a few items on back order that may slow things down.

    Upper steering shaft
    Traction lok bracket set
    Driver footbox front wall
    LH/RH tubular front lower control arm

    The control arms are the big one. I planned on having a roller possibly this weekend. That may not happen now. How do I go about finding ETA's on the back ordered items. I could give them a ring but I'm not sure if there is a procedure to follow or should i just play the waiting game.

    Thanks as always

    Pictures to follow this afternoon!

  5. #45
    Not a waxer Jeff Kleiner's Avatar
    Join Date
    Feb 2011
    Location
    Bloomington, Indiana
    Posts
    8,081
    Post Thanks / Like
    Yeah, you won't be able to get it on it's feet without the control arms in front or brackets in the rear. Plenty of time to fit and drill the tin though!

    Jeff

  6. #46
    Senior Member
    Join Date
    Oct 2016
    Posts
    407
    Post Thanks / Like
    Yessir. We were just discussing that over lunch!!

  7. #47
    Senior Member edwardb's Avatar
    Join Date
    Feb 2011
    Location
    Lake Orion, Michigan
    Posts
    10,575
    Post Thanks / Like
    Quote Originally Posted by Usudno View Post
    I will be doing inventory today but as of now I have a few items on back order that may slow things down.

    Upper steering shaft
    Traction lok bracket set
    Driver footbox front wall
    LH/RH tubular front lower control arm

    The control arms are the big one. I planned on having a roller possibly this weekend. That may not happen now. How do I go about finding ETA's on the back ordered items. I could give them a ring but I'm not sure if there is a procedure to follow or should i just play the waiting game.

    Thanks as always
    Congratulations on your delivery! Now the fun really begins. Yes, you need to call to get updates on your backorder items. That's a pretty short list and most/all I think are internally produced at FF. Hopefully this means you should have them relatively soon.

    Take your time with the inventory. Make sure everything is accounted for and also appears to be correct and also not damaged. You may have a few items to report in addition to your backorder follow-up.

    Personally, I recommend leaving parts in the boxes they came in. Then the box-by-box inventory listing they provided can be used to quickly locate parts when you need them.
    Build 1: Mk3 Roadster #5125. Sold 11/08/2014. Build 2: Mk4 Roadster #7750. Sold 04/10/2017. Build Thread
    Build 3: Mk4 Roadster 20th Anniversary #8674. Sold 09/07/2020. Build Thread and Video. Build 4: Gen 3 Type 65 Coupe #59. Gen 3 Coyote. Legal 03/04/2020. Build Thread and Video
    Build 5: 35 Hot Rod Truck #138. LS3 and 4L65E auto. Rcvd 01/05/2021. Legal 04/20/2023. Build Thread. Sold 11/9/2023.

  8. #48
    Senior Member
    Join Date
    Sep 2014
    Location
    Farmington, Maine
    Posts
    122
    Post Thanks / Like
    Happy for your delivery. Not many thrills that surpass that feeling. First start and go kart rank right up there as well. For myself, as a first time builder that is retired, I charged into the project with the thought of getting it done was paramount. One year later, with the chassis just setting there waiting for the painted body to be done this month, I find myself just a little bit sad that the build is over. Take your time and enjoy the process. I now know why Edwardb has built more than one.

    Rick in Maine

  9. #49
    Senior Member
    Join Date
    Oct 2016
    Posts
    407
    Post Thanks / Like
    I just finished inventory. The only things missing that arnt on the backorders are the shifter boot and e brake boot. Both were supposed to be in the box with carpet, neither were there. I spoke with factory five and I should have the traction loc bracket by the end of the week. They got them back from powder coating yesterday. The front LCAs are a bit of a mystery. I got bounced from Sally to someone in purchasing to someone in shipping. The guy in shipping mentioned that they need to make them. I'm not sure if that's a good thing or bad thing.

    Inventory was honestly pretty cool. Seeing the Le Mans has cap in person, the roll bar, and a few other things really peaked my interest. Tommorow I hope to get the body off and on the buck as well as remove the panels. I still have a little grinding to do on the rear end. I may tackle that tommorow too.

    I haven't gotten a chance to get to a computer to post picks but I should get them up tommorow!

    Thanks for all of the help and support!

  10. #50
    Senior Member
    Join Date
    Oct 2016
    Posts
    407
    Post Thanks / Like
    It's a little late but here are some delivery day picturesIMG_1824.JPGIMG_1817.JPGIMG_1816.JPGIMG_1802.JPG

    And here is my little buddy Collin with the obligatory steering wheel shot. His sister took one as well but I didn't have that one handy. I am still not sure how to orient the pictures correctly. Sorry if they are upside down or not situated correctly.
    IMG_1830.JPG

    Nestled nicely in its new home.


    Inventory complete and organized with boxes labeled!
    IMG_1835.JPG

  11. #51
    Senior Member edwardb's Avatar
    Join Date
    Feb 2011
    Location
    Lake Orion, Michigan
    Posts
    10,575
    Post Thanks / Like
    Quote Originally Posted by Usudno View Post
    I just finished inventory. The only things missing that arnt on the backorders are the shifter boot and e brake boot. Both were supposed to be in the box with carpet, neither were there. I spoke with factory five and I should have the traction loc bracket by the end of the week. They got them back from powder coating yesterday. The front LCAs are a bit of a mystery. I got bounced from Sally to someone in purchasing to someone in shipping. The guy in shipping mentioned that they need to make them. I'm not sure if that's a good thing or bad thing.
    The e-brake boot is usually packed in the carpet box along with the dash vinyl. It would be easy to miss though. It's flattened in a plastic bag and could be mixed in with the carpet. The shifter boot isn't likely in the carpet box. It's usually in the box with the rest of the shifter components, e.g. shift lever, shift ball, trim ring, etc. It's a round rubber piece. Not a traditional leather (or vinyl) type boot.

    The backorder process is a little unclear to me as well. Sometimes I was put through to shipping. Other times to purchasing. For in house production parts (like the LCA's) the shipping guys usually know what's happening in the shop.
    Build 1: Mk3 Roadster #5125. Sold 11/08/2014. Build 2: Mk4 Roadster #7750. Sold 04/10/2017. Build Thread
    Build 3: Mk4 Roadster 20th Anniversary #8674. Sold 09/07/2020. Build Thread and Video. Build 4: Gen 3 Type 65 Coupe #59. Gen 3 Coyote. Legal 03/04/2020. Build Thread and Video
    Build 5: 35 Hot Rod Truck #138. LS3 and 4L65E auto. Rcvd 01/05/2021. Legal 04/20/2023. Build Thread. Sold 11/9/2023.

  12. #52
    Senior Member
    Join Date
    Oct 2016
    Posts
    407
    Post Thanks / Like
    Edwardb, I removed all of the carpet and laid it out flat in our wood shop. Both boots were supposed to be with it in the same box. Neither were. Courtney got it all straight for me this morning. She wasn't able to elaborate on the LCAs but she did tell me that the traction lok bracket would be going out today. The upper steering shaft would be the next item of importance but I can turn the wheels manually if need be for now.

  13. #53
    Senior Member wareaglescott's Avatar
    Join Date
    Apr 2016
    Location
    Auburn, AL
    Posts
    2,146
    Post Thanks / Like
    When it comes down to finding the best info about back ordered items I found Jay Kravitz to be the man with the best info! It worked best to just email him directly. [email protected]
    MK4 #8900 - complete kit - Coyote, TKO600, IRS - Delivered 6/28/16 First Start 10/6/16 Go cart - 10/16/16 Build completed - 4/26/17 - 302 days to build my 302 CI Coyote Cobra - Registered and street legal 5/17/17
    Build Thread http://thefactoryfiveforum.com/showt...e-build-thread
    PHIL 4:13 INSTAGRAM - @scottsrides

  14. #54
    Senior Member
    Join Date
    Oct 2016
    Posts
    407
    Post Thanks / Like
    Thanks wareaglescott.

  15. #55
    Senior Member MPTech's Avatar
    Join Date
    Feb 2011
    Location
    St. Louis, MO
    Posts
    1,184
    Post Thanks / Like
    Blog Entries
    8
    So sorry for your loss.
    When I started my roadster, my father was in Florida for the winter and my son had just moved to Texas. I wish I had started it sooner to engage them too, but I was able to target when they were in-town so they could help me a little.
    Once it was completed though, my dad and I took 2 trips to London, OH for the big Cobra event, 900+ miles round-trip, once in gel-coat and the next year after it was painted. We both had a great time.
    Currently planning to trailer it to San Marcos in March to meet up with my son for a few days of cruising the Texas backroads.

    I do miss the build, BUT driving it is even BETTER!

    Good luck with your build! It starts getting exciting when you begin throwing away the empty FFR boxes! That's progress!
    F5R #7446: MK4, 302, T5 midshift, 3.55 Posi IRS, 17" Halibrands
    Delivered 4/4/11, First start 9/29/12, Licensed 4/24/13, off to PAINT 2/15/14!! Wahoo!

  16. #56
    Senior Member
    Join Date
    Oct 2016
    Posts
    407
    Post Thanks / Like
    Boxes.. hell I threw away two trash cans worth of packing paper just doing inventory lol!!

  17. #57
    Senior Member
    Join Date
    Oct 2016
    Posts
    407
    Post Thanks / Like
    An update on today... I put all 4 koni coil overs together today, mainly because I wanted to work on the car but had nobody available to remove the body with me and I knew exactly which boxes they were in. I also started getting all of the parts together that will need to be finished. I will be out of town this weekend but I plan on spending the better part of Friday prepping the parts that need painting as well as the alluminum panels.

    As my contribution to this great place, I plan on creating a table of sorts as a guide to show prospective builders a list of which alluminum panels show in the engine compartment and which show on the outside of the car/wheel well areas. I have been searching for this and have been able to put together a decent list but I thought if one were to reference page 26 of the build manual and correspond the proper treatment (not required of course) to the image provided that it would be a nice tool for people.

    For all reading along, I hope to have the body off tommorow as well as most alluminum. Any tips on panel removal?? I will absolutely have gloves for myself and my son!

    Thanks as always
    Last edited by Usudno; 12-14-2016 at 07:50 PM.

  18. #58
    Senior Member wareaglescott's Avatar
    Join Date
    Apr 2016
    Location
    Auburn, AL
    Posts
    2,146
    Post Thanks / Like
    I drilled all the panels as I took them off. It took me a long time to get them off but I sure was glad when the majority of the drilling was done up front. Worked out well. Just keep in mind the panel may not be positioned ideally as it sits on the frame with the sheet metal screws they used to hold it in place. You may need to make some slight adjustments for best positioning.
    Congrats on getting going on actaul construction. Feels good doesn't it!
    MK4 #8900 - complete kit - Coyote, TKO600, IRS - Delivered 6/28/16 First Start 10/6/16 Go cart - 10/16/16 Build completed - 4/26/17 - 302 days to build my 302 CI Coyote Cobra - Registered and street legal 5/17/17
    Build Thread http://thefactoryfiveforum.com/showt...e-build-thread
    PHIL 4:13 INSTAGRAM - @scottsrides

  19. #59
    Carl carlewms's Avatar
    Join Date
    May 2012
    Location
    Nokesville, VA
    Posts
    1,125
    Post Thanks / Like
    The other two tipd ... take lots of photos pay particular attention to the overlaps between sheet metal components and mark the part number in at least one other location so that if one gets erased you still have another to refer to in the future.
    Mk 4 Roadster
    October 25, 2012 - Kit Arrives
    April 8, 2013 - Build Starts
    August 23, 2015 - Rolling Chassis/Engine & Transmission Installed
    March 26, 2016 - Go Cart

  20. #60
    Senior Member
    Join Date
    Oct 2016
    Posts
    407
    Post Thanks / Like
    Wareaglescott. I was contemplating this myself. What did you do about panels that did not fit well?? Redrill and have additional holes?

  21. #61
    Senior Member
    Join Date
    Oct 2016
    Posts
    407
    Post Thanks / Like
    Well I got the body off but fatherhood took the rest of my afternoon of cobra time away. The wife got stuck in traffic and I had to grab the kids from school and be daddy chauffeur. Collin to hitting lessons and the little one to dancing. I will probably follow wareaglescott's lead and drill the panels before removal. I will get started with that tommorow. Hopefully I can get it all drilled and removed before next Friday. I plan to begin assembly with Collin and my father by my side on Friday.

    On another note, I received a shipping notification today. 34lbs two seperate P.Os from factory five. My fingers are crossed that it's the control arms and traction lok bracket. Based off of my discussions with them, I would bet on the bracket, the 34 lbs leads me to believe the LCAs must be there as well. The only other heavy item on my back orders was the upper steering shaft and I doubt that it's very heavy. Here's to hoping!!!

    Thanks as always, I'll put up a picture of the body on the buck. I think I'm going to add an 8' shelf on one side to hold the doors, hood, and trunk. Seems like a good place to keep them out of the way.

  22. #62
    Senior Member wareaglescott's Avatar
    Join Date
    Apr 2016
    Location
    Auburn, AL
    Posts
    2,146
    Post Thanks / Like
    Quote Originally Posted by Usudno View Post
    Wareaglescott. I was contemplating this myself. What did you do about panels that did not fit well?? Redrill and have additional holes?
    They were all very close to begin with. Just slight adjustments and maybe a hole here and there a little bigger but still able to accommodate the rivet. You will see when you get into it.
    MK4 #8900 - complete kit - Coyote, TKO600, IRS - Delivered 6/28/16 First Start 10/6/16 Go cart - 10/16/16 Build completed - 4/26/17 - 302 days to build my 302 CI Coyote Cobra - Registered and street legal 5/17/17
    Build Thread http://thefactoryfiveforum.com/showt...e-build-thread
    PHIL 4:13 INSTAGRAM - @scottsrides

  23. #63
    Senior Member
    Join Date
    Oct 2016
    Posts
    407
    Post Thanks / Like
    This morning I got a lot of the alluminum that came mounted on the car drilled. I took the time to do the engine compartment and firewall areas myself. I marked the entire rear of the car and the cockpit area for Collin. There are a few places that I will probably drill and cleco to make sure they line up before he goes to town. I took a few pictures that I will post up later tonight of the drilling and the much discussed cleco overload picture. It was my first F panel but I got carried away and said what the hell. It was a good picture opportunity. Clecos are a life saver!

    Over the weekend we are going on a trip. My wife has agreed to drive which will allow me to take a look at the alluminum panel portion of the manual and start compiling a list of which panels will get which treatments. With any luck by next weeks end, I will be ready to prep and paint my engine compartment panels and possibly some visible exterior panels.

    As always thanks for reading along.

  24. #64
    Senior Member
    Join Date
    Oct 2016
    Posts
    407
    Post Thanks / Like
    So I've been a bit lazy with the updates... I have gotten the front suspension hung, brakes on and steering rack partially installed. I had both of the kids with me this afternoon and had a blast working with them. I ran into a small issue with the steering rack. I need to put the suspension under a load in order to get the tie rods lined up with the steering arms. That being said, My father has the floor jack with his T-bird. I got as far as I could tonight before the kids got hungry. Its perfect gumbo weather here!! Here are a few pics of my progress.IMG_1906.JPGIMG_1906.JPG
    Here is the passenger side suspension. It took about 3 times as long as the second drivers side. Guess which one I did first!!

    IMG_1910.JPGIMG_1908.JPG
    Here is Collin having a good time with the cleco pliers and showing off our first true accomplishment on the car!

    IMG_1912.JPGIMG_1911.JPG

    I took a break from the car Sunday and worked in the wood shop with my father. I made a little Christmas present for Collin. Here it is before the cushion and cover.

    And last but not least, tonight's progress with the kids.

    IMG_1914.JPGIMG_1924.JPGIMG_1923.JPGIMG_1922.JPGIMG_1921.JPG

  25. #65

    Steve >> aka: GoDadGo
    GoDadGo's Avatar
    Join Date
    Feb 2015
    Location
    Slidell, Louisiana
    Posts
    6,572
    Post Thanks / Like
    Blog Entries
    1
    You Are Off To A Great Start!

    You might want to make a copy of your inventory sheet and place a copy of each sheet on each box.

    It really helped me find my parts so I know it will help you too.

    C_O_N_G_R_A_T_U_L_A_T_I_O_N_S_!
    Last edited by GoDadGo; 12-20-2016 at 08:37 PM.

  26. #66
    Senior Member
    Join Date
    Oct 2016
    Posts
    407
    Post Thanks / Like
    GoDadGo, already done my man. I also scribbled my own description on most of the boxes. I have another copy of my inventory near the car as well as on my desk!! The boxes are dwendling quickly! I plan on getting all of my panels prepped and painted over the next few days. I'm at a point now we're I need them!

  27. #67
    Senior Member edwardb's Avatar
    Join Date
    Feb 2011
    Location
    Lake Orion, Michigan
    Posts
    10,575
    Post Thanks / Like
    Uh oh. You just joined the updside down LCA club. Lots of members. It's an easy mistake, and probably explains why you had trouble hooking up the tie rods. The upper ball joints should point out, with the thicker side of the ball joint mount on the outside. Like this:
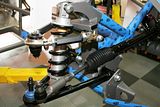


    To fix you can unbolt at the inner connector and flip them over. The inner pivots still need to have the zerk fittings point up. Again, like the pic I posted. Then you'll need to put the ball joint in from the other side.
    Last edited by edwardb; 12-20-2016 at 09:08 PM.
    Build 1: Mk3 Roadster #5125. Sold 11/08/2014. Build 2: Mk4 Roadster #7750. Sold 04/10/2017. Build Thread
    Build 3: Mk4 Roadster 20th Anniversary #8674. Sold 09/07/2020. Build Thread and Video. Build 4: Gen 3 Type 65 Coupe #59. Gen 3 Coyote. Legal 03/04/2020. Build Thread and Video
    Build 5: 35 Hot Rod Truck #138. LS3 and 4L65E auto. Rcvd 01/05/2021. Legal 04/20/2023. Build Thread. Sold 11/9/2023.

  28. #68
    Senior Member
    Join Date
    Oct 2016
    Posts
    407
    Post Thanks / Like
    I though something was up... to have the zerks pointing up, that's how they had go go but the angle of the ball joint nuckle didn't look like F5R video... so is it as simple as flipping the end with the ball joint and reinstalling??

  29. #69
    Senior Member edwardb's Avatar
    Join Date
    Feb 2011
    Location
    Lake Orion, Michigan
    Posts
    10,575
    Post Thanks / Like
    Quote Originally Posted by Usudno View Post
    I though something was up... to have the zerks pointing up, that's how they had go go but the angle of the ball joint nuckle didn't look like F5R video... so is it as simple as flipping the end with the ball joint and reinstalling??
    The only way to flip only the end would be the unscrew the adjusters, flip it, and thread them back in. To be honest, I'm not sure the combination of LH and RH threads used would allow that. Havn't tried. Maybe someone else knows.
    Build 1: Mk3 Roadster #5125. Sold 11/08/2014. Build 2: Mk4 Roadster #7750. Sold 04/10/2017. Build Thread
    Build 3: Mk4 Roadster 20th Anniversary #8674. Sold 09/07/2020. Build Thread and Video. Build 4: Gen 3 Type 65 Coupe #59. Gen 3 Coyote. Legal 03/04/2020. Build Thread and Video
    Build 5: 35 Hot Rod Truck #138. LS3 and 4L65E auto. Rcvd 01/05/2021. Legal 04/20/2023. Build Thread. Sold 11/9/2023.

  30. #70
    Not a waxer Jeff Kleiner's Avatar
    Join Date
    Feb 2011
    Location
    Bloomington, Indiana
    Posts
    8,081
    Post Thanks / Like
    Remove the ball joint plates or entire arm, unscrew the ball joints and reinstall them from the other direction. Install the arms to the chassis using the side mounts (the bolts will be horizontal) with the cross bar pivot's grease fittings pointing up. The ball joints will now angle outward. The arm on the driver's side will have the solid link (the one welded to the ball joint plate) at the forward position. On the passenger side the solid link will be at the rear. Regarding the tie rod end issue---ordinarily there is enough rotation at the joint to be able to engage the stud into the steering arm even with the suspension at droop. Your arms are installed to the spindles so that they angle outward which is correct however if they are on the wrong side the big end of the taper will be up rather than down and prevent you from being able to seat the stud. Be aware that the "RH" and "LH" markings on the arms are for the Hot Rod NOT the roadster---it is opposite so check on that.

    Good luck,
    Jeff

  31. #71
    Senior Member 2FAST4U's Avatar
    Join Date
    Feb 2011
    Posts
    1,006
    Post Thanks / Like
    Looks like someone is having a great time. Congrats and enjoy the build

  32. #72
    Senior Member
    Join Date
    Oct 2016
    Posts
    407
    Post Thanks / Like
    I am having a great time!! Woke up early and got the arms off. I will make some since if it this afternoon and start getting things prepped and painted.

  33. #73
    Senior Member
    Join Date
    Oct 2016
    Posts
    407
    Post Thanks / Like
    So I just finished flipping the ball joints and ball joint mounts on the control arms. As I'm doing them it dawns on me... Why were they shipped assembled incorrectly?? If the ball joint is installed pointing outward in the configuration that they are sent your zerk fittings point down. If the zerk fittings point up, which in my case they did, your ball joint is oriented incorrectly! It was a simple fix but having them assembled correctly would have made a simple error easily avoidable. That being said.. here are my correctly mounted control arms.
    IMG_1926.JPG

    If you guys see anything else wrong please feel free to advise me.

    As a result of correctly installing them the tie rods look like they will fit much better now! Its amazing how things work!

  34. #74
    Senior Member edwardb's Avatar
    Join Date
    Feb 2011
    Location
    Lake Orion, Michigan
    Posts
    10,575
    Post Thanks / Like
    Quote Originally Posted by Usudno View Post
    So I just finished flipping the ball joints and ball joint mounts on the control arms. As I'm doing them it dawns on me... Why were they shipped assembled incorrectly?? If the ball joint is installed pointing outward in the configuration that they are sent your zerk fittings point down. If the zerk fittings point up, which in my case they did, your ball joint is oriented incorrectly! It was a simple fix but having them assembled correctly would have made a simple error easily avoidable. That being said.. here are my correctly mounted control arms.
    IMG_1926.JPG

    If you guys see anything else wrong please feel free to advise me.

    As a result of correctly installing them the tie rods look like they will fit much better now! Its amazing how things work!
    Looks good from here. You're right. They weren't assembled the right direction from SPC, which is why this trips up so many people. Make sure you have the taper in the right direction on those steering arms. Good point from Jeff (as always). Also you probably want to snug those bolts up a bit. They need to be loosened enough to pivot when doing an alignment. Rest of the time I'd keep them tightened so the suspension doesn't flop around. Best I can see you have the LCA and UCA in the right mounting locations. Rock on!
    Build 1: Mk3 Roadster #5125. Sold 11/08/2014. Build 2: Mk4 Roadster #7750. Sold 04/10/2017. Build Thread
    Build 3: Mk4 Roadster 20th Anniversary #8674. Sold 09/07/2020. Build Thread and Video. Build 4: Gen 3 Type 65 Coupe #59. Gen 3 Coyote. Legal 03/04/2020. Build Thread and Video
    Build 5: 35 Hot Rod Truck #138. LS3 and 4L65E auto. Rcvd 01/05/2021. Legal 04/20/2023. Build Thread. Sold 11/9/2023.

  35. #75
    Senior Member
    Join Date
    Oct 2016
    Posts
    407
    Post Thanks / Like
    Yes sir, will do. Today is torque wrench day! I will be going through everything while Collin pulls off the rest of the aluminium. I plan to mark the torque bolts as I go. I'm still waiting on my upper steering shaft from Factory five. This will give me a chance to tackle the rear end Friday with some help. I have a package coming from factory five tomorrow. Hopefully its the upper steering shaft. If all goes well between my day off Friday, Saturday half a day, and Monday I hope to have a roller! Prep and paint of aluminum will start today. Thanks for the help and tips guys!

  36. #76
    Senior Member
    Join Date
    Oct 2016
    Posts
    407
    Post Thanks / Like
    Jeff, as far as the steering arms, I made sure they point towards the outsides of the car. Drivers side is on the passenger side and vice versa.

  37. #77
    Not a waxer Jeff Kleiner's Avatar
    Join Date
    Feb 2011
    Location
    Bloomington, Indiana
    Posts
    8,081
    Post Thanks / Like
    Quote Originally Posted by Usudno View Post
    ...As I'm doing them it dawns on me... Why were they shipped assembled incorrectly?
    The UCAs are not FFR exclusive parts (they come from SPC) so what is "wrong" for our application may be correct for others in which the same arm is used.

    Jeff

  38. #78
    Senior Member
    Join Date
    Oct 2016
    Posts
    407
    Post Thanks / Like
    Ahh understood!

    Today marked a milestone in my build. It was the first day that my father worked on the build with me. He has been having a tough time with Pops passing. He helped me grind down the rest of the unused bracket on the rear end. It wasn't much but he really enjoyed it and I believe it helped get his mind off of his fathers passing.

    Here he is. Hard at work!IMG_1946.JPG

    I have a good bit of help lined up for Friday. Friday's goal will be to get the rear end and 3 link installed, axle bearings and seals changed out, rear brakes installed and possibly get the brake lines run. I will be mounting the engine compartment alluminum tommorow. We got it all cleaned, sanded, and primed this afternoon. I put the first coat on all of the drivers foot box and drivers side engine panels so that I can mount the master cylinders and get the steering installed tommorow afternoon hopefully.

    I have pictures but I won't be need a computer for a while and haven't figured it how to post from my phone.

    Thanks as always
    Last edited by Usudno; 12-21-2016 at 07:18 PM. Reason: add pictures

  39. #79
    Senior Member
    Join Date
    Oct 2016
    Posts
    407
    Post Thanks / Like
    So I took advantage of a few days off and got quite a bit done on the Roadster. Rear end is now complete except for one little issue. One of the stop nuts on the pan hard bar is incorrect. I'm short a left handed thread nut and have an extra right hand threaded one. I will call Factory five and see if i can get one sent with my upper steering shaft whenever it comes in. I have the bar bolted in and left the nut off the open side so that i can drop it out and add it in. Today i ran the flexible brake lines front and rear and mounted the wheels for the first time. Wow it feels like an accomplishment. If i had the fuel level sending unit i would have popped in the gas tank and gotten it ready to drop down but its still on my back orders. Goals for this week are

    1. Brake line completion
    2. Cockpit aluminum fitting/riveting
    3. Go over all front and rear suspension bolts once more (third time is a charm)
    4. Order Engine (Tomorrow!!) I didn't think i would have been at this point this fast!
    5. Layout wiring harness

    This is what i have running through my mind, but i plan to read the manual and watch the build vids again tonight.

    I do have one question before i post up my pictures. When assembling the pedal box i kept looking for a pin to offset the clutch quadrant until i got online and realized the revision didn't use this piece. The manual and video didn't mention the revision. I got that figured out but i'm lost as to what to do for the clutch quadrant adjuster that is normally mounted onto the aluminum panel. The video shows an adjuster there. The manual doesn't show connecting the clutch cable as far as i read. I will double check tonight.

    Thanks for reading along and here are the pics

    IMG_1976.JPGIMG_1975.JPGIMG_1973.JPGIMG_1970.JPGIMG_1969.JPGIMG_1968.JPGIMG_1967.JPGIMG_1966.JPGIMG_1964.JPG

    and last but not least.. Collins Christmas presents finished up.

    He loved them both
    IMG_1960.JPG

  40. #80
    Senior Member
    Join Date
    Oct 2016
    Posts
    407
    Post Thanks / Like
    It's been a few since my last post. In the last week or so I have gotten my pedal box together, rear end complete with brakes and all, all brake lines run (except parking brake cables) fuel tank installed, fuel lines run, and I have started working on mounting the panels. I posted up on the main board about my throttle cable issue. If anyone can provide pictures or an explanation on how the cable attaches to the pedal I would appreciate it.

    This week I plan on tackling the clutch cable (I was missing the firewall spacer) and alluminum. I am still waiting on my upper steering shaft as well as my fuel level sending unit. I was told that they were expecting to have them in the wharehouse in two weeks. Some aluminum will have to wait.

    On another note.. my transmission selection has changed. I'm now going with a TKO 500 that I kind of fell into. I will be sending my driveshaft back to FFR for a swap. The transmission should be here by weeks end. The engine unfourtunaly will be about 4-5 weeks. Had I known I would get this far along this quickly, I would have ordered it at the same time as the kit. I just didn't want it laying around the shop. I will snap some pictures tommorow when I get back to it. It's really beginning to look like a car!

Page 2 of 3 FirstFirst 123 LastLast

Posting Permissions

  • You may not post new threads
  • You may not post replies
  • You may not post attachments
  • You may not edit your posts
  •  

FFMetal

Visit our community sponsor