Forte's

Visit our community sponsor

Thanks Thanks:  0
Likes Likes:  0
Page 1 of 2 12 LastLast
Results 1 to 40 of 45

Thread: Windshield Fitting

  1. #1
    Senior Member
    Join Date
    May 2014
    Location
    Burlington, WI
    Posts
    689
    Post Thanks / Like
    Blog Entries
    1

    Windshield Fitting

    Planning to start the windshield fitting and realize access to the DS frame support is almost impossible. The PS frame support is tight but reachable. Ideas welcome.
    Mk4 Roadster 20th Anniversary #8658. 04 of 20. 3.31 IRS.
    Forte 427 Dart, TKO 600, Quick Fuel 780 carb. Delivered 9/2/2015, First start/Go Cart 2/18/2017.
    Road Legal August 31, 2017

  2. #2
    Member
    Join Date
    May 2012
    Location
    Hudson Valley, NY
    Posts
    67
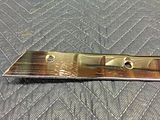
    Post Thanks / Like
    No ideas....that location is crappy

  3. #3
    Senior Member canuck1's Avatar
    Join Date
    Feb 2011
    Location
    Victoria, BC CANADA
    Posts
    162
    Post Thanks / Like
    It's a tight squeeze but we've all managed to find a way somehow. I know a ratcheting box end wrench is the best tool I have when it comes to snugging up the bolts in that tight spot.

    Sean
    MK 3.5 roadster (MK IV body retrofit to MK III chassis) 396W stroker, 4 bbl mass air EFI, QH (self-tuned), AFR 195CC Renegade, XE274HR, GP 4-1-4 SS headers, 3link, 3.73, 15" Halibrand replicas, SAI mod, bumpers, 2 X roll bars, I² electronics, PS, hydroboosted brakes: 95 GT front, custom MK VIII calipers/Cobra discs rear, FFR front, Levy rear LCA's, Forte front, VPM rear bars, CF dash, mod comp layout w/Auto Meter Ultra-Lites, Lucas tri-bar headlights, coupe taillights, painted by SRP (again!)

  4. #4
    Senior Member edwardb's Avatar
    Join Date
    Feb 2011
    Location
    Lake Orion, Michigan
    Posts
    10,567
    Post Thanks / Like
    It's tight on the DS, but as long as you don't block the opening behind the dash, you can reach back in there. One tip that makes installing the windshield a whole bunch easier that I also mentioned in my last build thread. Probably one of the best tips I’ve tried in a long time. Saw it somewhere on one of the forums and tried it for the first time. Instead of just drilling out the 1/2-inch holes in the windshield side bars, drill them 27/64-inch and cut threads with a 1/2-inch x 13 tap. Easy to cut threads in the brass. That way you only have to put in a bolt from one side in each of the holes when mounting and aligning the windshield. Way easier than bolt + nut + wrench on each side while chasing around a moving windshield. When tightened, they're nice and strong. Put a nut and washer on each bolt during final assembly, but before then they hold the windshield solidly during the build.

    Build 1: Mk3 Roadster #5125. Sold 11/08/2014. Build 2: Mk4 Roadster #7750. Sold 04/10/2017. Build Thread
    Build 3: Mk4 Roadster 20th Anniversary #8674. Sold 09/07/2020. Build Thread and Video. Build 4: Gen 3 Type 65 Coupe #59. Gen 3 Coyote. Legal 03/04/2020. Build Thread and Video
    Build 5: 35 Hot Rod Truck #138. LS3 and 4L65E auto. Rcvd 01/05/2021. Legal 04/20/2023. Build Thread. Sold 11/9/2023.

  5. #5
    Senior Member Dave Howard's Avatar
    Join Date
    Feb 2012
    Location
    North Bay, Ontario
    Posts
    534
    Post Thanks / Like
    If you're doing a father son build, now's the time to get Jr. involved again with those small hands to get at those DS windshield fasteners. Seriously, it's a tight fit but quite achievable. There are no tricks. No easy way.

    Remember to make the openings in the fibreglass body large enough so the windshield posts do no touch the body when the windshield is in the proper position. The openings from the factory are a guide and will require some enlarging.

    If you're planning on purchasing a premium top at some point, the angle of the windshield is specific. It's determined by a specific measurement between the top most screw on the windshield frame post and the back edge of the top of the door opening.

  6. #6
    Senior Member edwardb's Avatar
    Join Date
    Feb 2011
    Location
    Lake Orion, Michigan
    Posts
    10,567
    Post Thanks / Like
    Quote Originally Posted by Dave Howard View Post
    If you're planning on purchasing a premium top at some point, the angle of the windshield is specific. It's determined by a specific measurement between the top most screw on the windshield frame post and the back edge of the top of the door opening.
    From corner of rear door opening to center of top windshield mounting screw = 27 inches for the premium top. I use this measurement even though I don't plan to install a top. It seems to be about the right angle and everything fits up well.

    No one has mentioned it, but I'm hoping you've read all the threads about matching the spacing of the side bars to the chassis mounts. It's pretty common for the side bars to be a bit wider than the mounts. Use washers or some kind of spacer to fill before tightening. If you try to close the gap by tightening the mounting bolts only bad things happen. At the very least, the windshield will bow and not fit properly onto the body. That happened with a buddy of mine. But much worse, many think this is the reason windshields break. Don't be one of those guys.
    Build 1: Mk3 Roadster #5125. Sold 11/08/2014. Build 2: Mk4 Roadster #7750. Sold 04/10/2017. Build Thread
    Build 3: Mk4 Roadster 20th Anniversary #8674. Sold 09/07/2020. Build Thread and Video. Build 4: Gen 3 Type 65 Coupe #59. Gen 3 Coyote. Legal 03/04/2020. Build Thread and Video
    Build 5: 35 Hot Rod Truck #138. LS3 and 4L65E auto. Rcvd 01/05/2021. Legal 04/20/2023. Build Thread. Sold 11/9/2023.

  7. #7
    mcwho's Avatar
    Join Date
    Feb 2011
    Location
    DeBary - Florida
    Posts
    541
    Post Thanks / Like
    I was gonna call Dan Gulub at FFR and see if he could do a build video on the Windshield install.
    Baghdad Bob

    Complete Kit Delivered July 2010, serial @ 7287, Whitby Power Brakes, Whitby Tonneau, Power Steering w HEIDTS PS Valve, Hydralic clutch, 15" Wheels, BFG Tires, 331 stroker w Quick Fuel 650, RPM Heads, Air Gap Intake. IRS w 3.27, TKO-600. FFMETAL Firewall Forward, FFMETAL Dropped Battery Box in Trunk, Enlarged Passenger footbox, Breeze Cubby storage, Breeze Seat Brackets, Herbs Door Panels. Ford ruby red 12 coats.

  8. #8
    Senior Member rich grsc's Avatar
    Join Date
    Feb 2011
    Location
    O'Fallon, MO
    Posts
    3,087
    Post Thanks / Like
    Almost impossible? Its the second easiest to do. I've done over a half dozen, its not a big deal.

  9. #9
    Senior Member wareaglescott's Avatar
    Join Date
    Apr 2016
    Location
    Auburn, AL
    Posts
    2,146
    Post Thanks / Like
    Quote Originally Posted by rich grsc View Post
    Almost impossible? Its the second easiest to do. I've done over a half dozen, its not a big deal.
    Well to most it seems like a stumbling block. Most of us don't get the opportunity to do 6 of them. I for one appreciate all the constructive tips in this thread.
    MK4 #8900 - complete kit - Coyote, TKO600, IRS - Delivered 6/28/16 First Start 10/6/16 Go cart - 10/16/16 Build completed - 4/26/17 - 302 days to build my 302 CI Coyote Cobra - Registered and street legal 5/17/17
    Build Thread http://thefactoryfiveforum.com/showt...e-build-thread
    PHIL 4:13 INSTAGRAM - @scottsrides

  10. #10
    Well Used Member boat737's Avatar
    Join Date
    Feb 2016
    Location
    So. Bay (So. Calif.)
    Posts
    873
    Post Thanks / Like
    Quote Originally Posted by rich grsc View Post
    Almost impossible? Its the second easiest to do. I've done over a half dozen, its not a big deal.
    Wow. What's the first easiest?
    If Brute Force doesn't work, you're not using enough of it.
    Basic Stuff: MK4 Complete Kit #8439, Wilwood's, 17" Halibrands. Extra Stuff: Stainless brake and fuel lines, Breeze cooling, Battery mount, SS Roll Bar. Old Fart Stuff: Heater, Seat Heaters, Footbox Fresh Air, Stereo, Keyless ignition, Power Steering, Hyd Clutch.
    Young & Dumb Stuff: 427w Dart, TKO600, 3 link Moser M9/Ford 9", 3.5:1, Eaton TruTrac Posi. Graduation Thread

  11. #11
    Senior Member rich grsc's Avatar
    Join Date
    Feb 2011
    Location
    O'Fallon, MO
    Posts
    3,087
    Post Thanks / Like
    Quote Originally Posted by boat737 View Post
    Wow. What's the first easiest?
    Why, the passenger side.

  12. #12
    Out Drivin' Gumball's Avatar
    Join Date
    Feb 2011
    Location
    Blackberry Township, IL
    Posts
    2,653
    Post Thanks / Like
    Jay - Driver's side is a tough reach, but once you get it started, an assortment of long extensions and a universal joint - or two - make it possible. If I could do it with my ham fists, anyone can.
    Later,
    Chris

    "There are no more monsters to fear, and so, we have to build our own."
    Mk3.1 #7074

  13. #13
    Not a waxer Jeff Kleiner's Avatar
    Join Date
    Feb 2011
    Location
    Bloomington, Indiana
    Posts
    8,066
    Post Thanks / Like
    Driver's side like Chris said; long extension, universal joint socket and combination wrench in conjunction with some creative swearing. Passenger side is a piece of cake if you have the RF wheel and splash panel off and just work in the wheelwell. Other option there if the splash panel is installed is to lay over the fender and work from the engine compartment. As has already been mentioned shim as necessary to be sure that the windshield remains totally relaxed when the arms are tightened to the chassis. Glass don't like to bend

    Jeff

  14. #14
    Senior Member
    Join Date
    May 2014
    Location
    Burlington, WI
    Posts
    689
    Post Thanks / Like
    Blog Entries
    1
    Thanks everyone for all the feedback...very much appreciated. I will employ a combination of them all.

    Jay
    Mk4 Roadster 20th Anniversary #8658. 04 of 20. 3.31 IRS.
    Forte 427 Dart, TKO 600, Quick Fuel 780 carb. Delivered 9/2/2015, First start/Go Cart 2/18/2017.
    Road Legal August 31, 2017

  15. #15
    Out Drivin' Gumball's Avatar
    Join Date
    Feb 2011
    Location
    Blackberry Township, IL
    Posts
    2,653
    Post Thanks / Like
    Jay,

    You may also want to check out my windshield fitting thread, as I show how I installed it without the body on first so that there was no stress to the glass - as mentioned by Jeff, stress is a bad thing where glass is concerned. Key is to be able to remove the frame from the uprights without any change in the upright position - basically just a smooth fit without any bending in or out on the uprights.
    Later,
    Chris

    "There are no more monsters to fear, and so, we have to build our own."
    Mk3.1 #7074

  16. #16
    Well Used Member boat737's Avatar
    Join Date
    Feb 2016
    Location
    So. Bay (So. Calif.)
    Posts
    873
    Post Thanks / Like
    Quote Originally Posted by Gumball View Post
    Jay,

    You may also want to check out my windshield fitting thread, as I show how I installed it without the body on first so that there was no stress to the glass - as mentioned by Jeff, stress is a bad thing where glass is concerned. Key is to be able to remove the frame from the uprights without any change in the upright position - basically just a smooth fit without any bending in or out on the uprights.
    This one? http://thefactoryfiveforum.com/showt...o-avoid-cracks
    If Brute Force doesn't work, you're not using enough of it.
    Basic Stuff: MK4 Complete Kit #8439, Wilwood's, 17" Halibrands. Extra Stuff: Stainless brake and fuel lines, Breeze cooling, Battery mount, SS Roll Bar. Old Fart Stuff: Heater, Seat Heaters, Footbox Fresh Air, Stereo, Keyless ignition, Power Steering, Hyd Clutch.
    Young & Dumb Stuff: 427w Dart, TKO600, 3 link Moser M9/Ford 9", 3.5:1, Eaton TruTrac Posi. Graduation Thread

  17. #17
    Senior Member CraigS's Avatar
    Join Date
    Feb 2011
    Location
    Blacksburg, Va
    Posts
    4,728
    Post Thanks / Like
    My contribution is to throw away any type of locking nuts and get a double set of plain nuts. This way you can run the nuts on finger tight pretty easily. Adjust, shim, adjust, shim etc. Once it is right, tighten the first nut and run another one on to act as a jam nut. This way you only need a wrench for a few turns on each nut.
    FFR MkII, 408W, Tremec TKO 500, 2015 IRS, DA QA1s, Forte front bar, APE hardtop.

  18. #18

    Join Date
    Feb 2011
    Posts
    1,113
    Post Thanks / Like
    Ok, DS. 1, drop fuse block, 2. have a shot of rum, C. use a pair hemostats to reach in with the upper nut, D. have a shot of rum and stretch the cramp out of your left leg....another shot of rum for good messure. (BTW Hemostats is , well, ,,,,ok, we used them for roach clips in high school....remember , we stole them from biology class?) and have a shot of rum.. On costomer cars I fight it out with nylocks, on my car I do more like Craig (and have a shot of rum)said only I use "WIZNUTS" yep, you heard me WIZNUTS !(no , I'm not calling you wiznuts) They are serrated flange nuts that just love to lock into brass after they have a shot of rum...ba Dat......SOOOOOOO! you have options. You can ignore the "have a shot of rum's" and spend a couple hours swearing......ORRRRR! you can ignore the "advise" and spend a couple hours swearing,,,,,BUT IN A GOOD WAY!...talking all pirate , making the kids swab the deck, the wife polish the missing mast.....OH! my fave, blindefold the cat and make him walk the plank.....Your call.

  19. #19
    Senior Member
    Join Date
    May 2014
    Location
    Burlington, WI
    Posts
    689
    Post Thanks / Like
    Blog Entries
    1
    Quote Originally Posted by Gumball View Post
    Jay,

    You may also want to check out my windshield fitting thread, as I show how I installed it without the body on first so that there was no stress to the glass - as mentioned by Jeff, stress is a bad thing where glass is concerned. Key is to be able to remove the frame from the uprights without any change in the upright position - basically just a smooth fit without any bending in or out on the uprights.
    Chris,

    I just read your thread and plan to reread it. No doubt very thorough. When initially marking the 2 side brace holes on each side for drilling, I take it these need to be marked body on??

    Jay
    Mk4 Roadster 20th Anniversary #8658. 04 of 20. 3.31 IRS.
    Forte 427 Dart, TKO 600, Quick Fuel 780 carb. Delivered 9/2/2015, First start/Go Cart 2/18/2017.
    Road Legal August 31, 2017

  20. #20
    Senior Member
    Join Date
    May 2014
    Location
    Burlington, WI
    Posts
    689
    Post Thanks / Like
    Blog Entries
    1
    Quote Originally Posted by j.miller View Post
    Ok, DS. 1, drop fuse block, 2. have a shot of rum, C. use a pair hemostats to reach in with the upper nut, D. have a shot of rum and stretch the cramp out of your left leg....another shot of rum for good messure. (BTW Hemostats is , well, ,,,,ok, we used them for roach clips in high school....remember , we stole them from biology class?) and have a shot of rum.. On costomer cars I fight it out with nylocks, on my car I do more like Craig (and have a shot of rum)said only I use "WIZNUTS" yep, you heard me WIZNUTS !(no , I'm not calling you wiznuts) They are serrated flange nuts that just love to lock into brass after they have a shot of rum...ba Dat......SOOOOOOO! you have options. You can ignore the "have a shot of rum's" and spend a couple hours swearing......ORRRRR! you can ignore the "advise" and spend a couple hours swearing,,,,,BUT IN A GOOD WAY!...talking all pirate , making the kids swab the deck, the wife polish the missing mast.....OH! my fave, blindefold the cat and make him walk the plank.....Your call.
    I don't know whether I have that much Rum in the house. I wish I did as I spent , sorry , enjoyed, the last few days trying to assemble the passenger side brace to the frame with little success. No need to go into detail but a major waste of time that has just slowed the build. I am now stepping back and will revisit things Monday. Glad I am as I wouldnt want a cracked windshield on my hands. I'll reread all available posts and confident it will all work out.

    I appreciate the humor injected.

    Jay
    Mk4 Roadster 20th Anniversary #8658. 04 of 20. 3.31 IRS.
    Forte 427 Dart, TKO 600, Quick Fuel 780 carb. Delivered 9/2/2015, First start/Go Cart 2/18/2017.
    Road Legal August 31, 2017

  21. #21
    Senior Member
    Join Date
    Apr 2013
    Location
    Albuquerque, NM
    Posts
    184
    Post Thanks / Like
    Quote Originally Posted by ThickCobra View Post
    I don't know whether I have that much Rum in the house. I wish I did as I spent , sorry , enjoyed, the last few days trying to assemble the passenger side brace to the frame with little success. No need to go into detail but a major waste of time that has just slowed the build. I am now stepping back and will revisit things Monday. Glad I am as I wouldnt want a cracked windshield on my hands. I'll reread all available posts and confident it will all work out.

    I appreciate the humor injected.

    Jay
    Let me know if you're still working on it Jay, I'm long on rum at the moment and can help out in a pinch...

    -TJ

  22. #22

    Join Date
    Feb 2011
    Posts
    1,113
    Post Thanks / Like
    Harrr! There be a mate ta be givin ye a hand....full sail ahead ! MORE RUM !!!.....here kitty kitty kitty !

  23. #23
    Senior Member
    Join Date
    May 2014
    Location
    Burlington, WI
    Posts
    689
    Post Thanks / Like
    Blog Entries
    1
    Quote Originally Posted by j.miller View Post
    Harrr! There be a mate ta be givin ye a hand....full sail ahead ! MORE RUM !!!.....here kitty kitty kitty !
    Man, you are in rare form today. Somebody is obviously in a good mood.
    Mk4 Roadster 20th Anniversary #8658. 04 of 20. 3.31 IRS.
    Forte 427 Dart, TKO 600, Quick Fuel 780 carb. Delivered 9/2/2015, First start/Go Cart 2/18/2017.
    Road Legal August 31, 2017

  24. #24
    Well Used Member boat737's Avatar
    Join Date
    Feb 2016
    Location
    So. Bay (So. Calif.)
    Posts
    873
    Post Thanks / Like
    Quote Originally Posted by ThickCobra View Post
    Man, you are in rare form today. Somebody is obviously in a good mood.
    Bat's gettin' ready for my car later this Summer. Windshield and hood fitting issues and all. I'm sure I'll be his new favorite problem customer... that's the plan anyway.
    If Brute Force doesn't work, you're not using enough of it.
    Basic Stuff: MK4 Complete Kit #8439, Wilwood's, 17" Halibrands. Extra Stuff: Stainless brake and fuel lines, Breeze cooling, Battery mount, SS Roll Bar. Old Fart Stuff: Heater, Seat Heaters, Footbox Fresh Air, Stereo, Keyless ignition, Power Steering, Hyd Clutch.
    Young & Dumb Stuff: 427w Dart, TKO600, 3 link Moser M9/Ford 9", 3.5:1, Eaton TruTrac Posi. Graduation Thread

  25. #25
    Senior Member
    Join Date
    May 2014
    Location
    Burlington, WI
    Posts
    689
    Post Thanks / Like
    Blog Entries
    1
    Well, I couldn't wait till Monday to get back to the windshield. And, while I was at it, I thought I may as well see how the screws for the sun visors fit and whether they bottomed out. I was surprised to discover that the small counter sunk screws do not fit the tiny pre-drilled holes in the window frame. I thought I read someone mentioning this before. Has anyone else found this to be the case? I removed the frame from the glass with the plan of sanding down any screws that bottomed out. Thanks for the suggestion Chris.
    Mk4 Roadster 20th Anniversary #8658. 04 of 20. 3.31 IRS.
    Forte 427 Dart, TKO 600, Quick Fuel 780 carb. Delivered 9/2/2015, First start/Go Cart 2/18/2017.
    Road Legal August 31, 2017

  26. #26
    Senior Member edwardb's Avatar
    Join Date
    Feb 2011
    Location
    Lake Orion, Michigan
    Posts
    10,567
    Post Thanks / Like
    Quote Originally Posted by ThickCobra View Post
    Well, I couldn't wait till Monday to get back to the windshield. And, while I was at it, I thought I may as well see how the screws for the sun visors fit and whether they bottomed out. I was surprised to discover that the small counter sunk screws do not fit the tiny pre-drilled holes in the window frame. I thought I read someone mentioning this before. Has anyone else found this to be the case? I removed the frame from the glass with the plan of sanding down any screws that bottomed out. Thanks for the suggestion Chris.
    The last two windshields I did had metric mounting holes. The screws FF provides in the visor kit are 6-32 flat head mounting screws. I've found M3 x 0.5 mm go in perfectly. My local Ace had some M3 x 6mm long SS screws. But I found a better choice at McMaster. 90258A173 are 5mm long and a nicer looking oval head. I adjusted each one to not go any further than just inside the frame. Just a touch on the disk sander for the 5mm long ones.
    Build 1: Mk3 Roadster #5125. Sold 11/08/2014. Build 2: Mk4 Roadster #7750. Sold 04/10/2017. Build Thread
    Build 3: Mk4 Roadster 20th Anniversary #8674. Sold 09/07/2020. Build Thread and Video. Build 4: Gen 3 Type 65 Coupe #59. Gen 3 Coyote. Legal 03/04/2020. Build Thread and Video
    Build 5: 35 Hot Rod Truck #138. LS3 and 4L65E auto. Rcvd 01/05/2021. Legal 04/20/2023. Build Thread. Sold 11/9/2023.

  27. #27
    Senior Member
    Join Date
    May 2014
    Location
    Burlington, WI
    Posts
    689
    Post Thanks / Like
    Blog Entries
    1
    Quote Originally Posted by edwardb View Post
    The last two windshields I did had metric mounting holes. The screws FF provides in the visor kit are 6-32 flat head mounting screws. I've found M3 x 0.5 mm go in perfectly. My local Ace had some M3 x 6mm long SS screws. But I found a better choice at McMaster. 90258A173 are 5mm long and a nicer looking oval head. I adjusted each one to not go any further than just inside the frame. Just a touch on the disk sander for the 5mm long ones.
    This is it. I knew I has seen something on this. Thanks.
    Mk4 Roadster 20th Anniversary #8658. 04 of 20. 3.31 IRS.
    Forte 427 Dart, TKO 600, Quick Fuel 780 carb. Delivered 9/2/2015, First start/Go Cart 2/18/2017.
    Road Legal August 31, 2017

  28. #28

    Steve >> aka: GoDadGo
    GoDadGo's Avatar
    Join Date
    Feb 2015
    Location
    Slidell, Louisiana
    Posts
    6,567
    Post Thanks / Like
    Blog Entries
    1
    Guys,

    Is it the wiring harness & fuse box that is causing the big issue with regards to accessing the driver's side windshield bolts?
    Could you simply drop the fuse block down to get to the windshield bolts and then reinstall the fuse block later?
    I have plenty of room on my car, but I think it is because I moved the fuse block to the passenger side of the car.

    Steve

    FullSizeRender (2) (320x240).jpg
    Last edited by GoDadGo; 04-02-2017 at 10:15 PM.

  29. #29
    Out Drivin' Gumball's Avatar
    Join Date
    Feb 2011
    Location
    Blackberry Township, IL
    Posts
    2,653
    Post Thanks / Like
    Jay,

    Sounds like you're on the right track. I may be in your neck of the woods this Friday afternoon, so let me know if you'd like me to drop by and put eyes on anything.

    Also, I have that cap decal for you, too... been riding around with me in my truck for the past few weeks.
    Later,
    Chris

    "There are no more monsters to fear, and so, we have to build our own."
    Mk3.1 #7074

  30. #30
    Senior Member
    Join Date
    May 2014
    Location
    Burlington, WI
    Posts
    689
    Post Thanks / Like
    Blog Entries
    1
    Quote Originally Posted by Gumball View Post
    Jay,

    Sounds like you're on the right track. I may be in your neck of the woods this Friday afternoon, so let me know if you'd like me to drop by and put eyes on anything.

    Also, I have that cap decal for you, too... been riding around with me in my truck for the past few weeks.
    Come ahead. I always like to have a list of things for you to look at and provide your thoughts.

    See you then.
    Mk4 Roadster 20th Anniversary #8658. 04 of 20. 3.31 IRS.
    Forte 427 Dart, TKO 600, Quick Fuel 780 carb. Delivered 9/2/2015, First start/Go Cart 2/18/2017.
    Road Legal August 31, 2017

  31. #31
    Senior Member
    Join Date
    May 2014
    Location
    Burlington, WI
    Posts
    689
    Post Thanks / Like
    Blog Entries
    1
    Quote Originally Posted by edwardb View Post
    It's tight on the DS, but as long as you don't block the opening behind the dash, you can reach back in there. One tip that makes installing the windshield a whole bunch easier that I also mentioned in my last build thread. Probably one of the best tips I’ve tried in a long time. Saw it somewhere on one of the forums and tried it for the first time. Instead of just drilling out the 1/2-inch holes in the windshield side bars, drill them 27/64-inch and cut threads with a 1/2-inch x 13 tap. Easy to cut threads in the brass. That way you only have to put in a bolt from one side in each of the holes when mounting and aligning the windshield. Way easier than bolt + nut + wrench on each side while chasing around a moving windshield. When tightened, they're nice and strong. Put a nut and washer on each bolt during final assembly, but before then they hold the windshield solidly during the build.

    Paul,

    Did you grind the chrome off the leg in this pic?
    Mk4 Roadster 20th Anniversary #8658. 04 of 20. 3.31 IRS.
    Forte 427 Dart, TKO 600, Quick Fuel 780 carb. Delivered 9/2/2015, First start/Go Cart 2/18/2017.
    Road Legal August 31, 2017

  32. #32
    mcwho's Avatar
    Join Date
    Feb 2011
    Location
    DeBary - Florida
    Posts
    541
    Post Thanks / Like
    OK, I am gonna make I have enough of that Island Rum, then I'll look at it again. Not sure if I can drop the Fuse Panel or not. The body is on for final panel fitting before paint. Hope the Black Seal holds out.
    Baghdad Bob

    Complete Kit Delivered July 2010, serial @ 7287, Whitby Power Brakes, Whitby Tonneau, Power Steering w HEIDTS PS Valve, Hydralic clutch, 15" Wheels, BFG Tires, 331 stroker w Quick Fuel 650, RPM Heads, Air Gap Intake. IRS w 3.27, TKO-600. FFMETAL Firewall Forward, FFMETAL Dropped Battery Box in Trunk, Enlarged Passenger footbox, Breeze Cubby storage, Breeze Seat Brackets, Herbs Door Panels. Ford ruby red 12 coats.

  33. #33
    Senior Member
    Join Date
    May 2014
    Location
    Burlington, WI
    Posts
    689
    Post Thanks / Like
    Blog Entries
    1
    Quote Originally Posted by mcwho View Post
    OK, I am gonna make I have enough of that Island Rum, then I'll look at it again. Not sure if I can drop the Fuse Panel or not. The body is on for final panel fitting before paint. Hope the Black Seal holds out.
    I gotta ask. Are we havin' fun now?
    Mk4 Roadster 20th Anniversary #8658. 04 of 20. 3.31 IRS.
    Forte 427 Dart, TKO 600, Quick Fuel 780 carb. Delivered 9/2/2015, First start/Go Cart 2/18/2017.
    Road Legal August 31, 2017

  34. #34
    Out Drivin' Gumball's Avatar
    Join Date
    Feb 2011
    Location
    Blackberry Township, IL
    Posts
    2,653
    Post Thanks / Like
    Quote Originally Posted by ThickCobra View Post
    I gotta ask. Are we havin' fun now?
    Think you're havin' fun now, just wait until you're looking through that windshield...... gotta drag out this old pic yet again......

    Later,
    Chris

    "There are no more monsters to fear, and so, we have to build our own."
    Mk3.1 #7074

  35. #35
    mcwho's Avatar
    Join Date
    Feb 2011
    Location
    DeBary - Florida
    Posts
    541
    Post Thanks / Like
    OK, I looked at the windshield brackets and frame parts again.

    Am I missing something?

    Wouldn't it be easier to drill those large holes with the body removed, Did I miss something and shoulda woulda coulda drilled them before I put the body on to fit the rest of the panels.

    Hmm

    I can see that maybe marking where the holes should maybe make sense, but is there that much deviation in each build ?
    Last edited by mcwho; 04-09-2017 at 12:59 PM.
    Baghdad Bob

    Complete Kit Delivered July 2010, serial @ 7287, Whitby Power Brakes, Whitby Tonneau, Power Steering w HEIDTS PS Valve, Hydralic clutch, 15" Wheels, BFG Tires, 331 stroker w Quick Fuel 650, RPM Heads, Air Gap Intake. IRS w 3.27, TKO-600. FFMETAL Firewall Forward, FFMETAL Dropped Battery Box in Trunk, Enlarged Passenger footbox, Breeze Cubby storage, Breeze Seat Brackets, Herbs Door Panels. Ford ruby red 12 coats.

  36. #36
    Senior Member edwardb's Avatar
    Join Date
    Feb 2011
    Location
    Lake Orion, Michigan
    Posts
    10,567
    Post Thanks / Like
    Quote Originally Posted by mcwho View Post
    OK, I looked at the windshield brackets and frame parts again.

    Am I missing something?

    Wouldn't it be easier to drill those large holes with the body removed, Did I miss something and shoulda woulda coulda drilled them before I put the body on to fit the rest of the panels.

    Hmm

    I can see that maybe marking where the holes should maybe make sense, but is there that much deviation in each build ?
    Getting the right fit to the body is important to the windshield installation. You need the body in place to set the final height, front/back location, and angle of the windshield. Yes there is some room for adjustment since the holes in the frame are larger than the bolts. But I wouldn't take a chance it would provide enough adjustment. And yes I believe there is enough variation between builds that each needs to be drilled to match.
    Last edited by edwardb; 04-09-2017 at 03:58 PM.
    Build 1: Mk3 Roadster #5125. Sold 11/08/2014. Build 2: Mk4 Roadster #7750. Sold 04/10/2017. Build Thread
    Build 3: Mk4 Roadster 20th Anniversary #8674. Sold 09/07/2020. Build Thread and Video. Build 4: Gen 3 Type 65 Coupe #59. Gen 3 Coyote. Legal 03/04/2020. Build Thread and Video
    Build 5: 35 Hot Rod Truck #138. LS3 and 4L65E auto. Rcvd 01/05/2021. Legal 04/20/2023. Build Thread. Sold 11/9/2023.

  37. #37
    Senior Member rich grsc's Avatar
    Join Date
    Feb 2011
    Location
    O'Fallon, MO
    Posts
    3,087
    Post Thanks / Like
    Say what? How would you locate the correct position to mark the arms to drill the holes?? You don't drill the holes with the windshield setting on the car, you pull it off the body then drill.

  38. #38
    mcwho's Avatar
    Join Date
    Feb 2011
    Location
    DeBary - Florida
    Posts
    541
    Post Thanks / Like
    OK, we are taking about 2 sets of holes, 1 set on the brackets and the other which is part of the car frame. Its the frame holes I am talking about, not the holes on the brackets. I can easily drill the holes on the frame brackets that's not an issue.

    No one has mentioned if I drill the frame brackets first or the frame holes first. I would have thought the bracket holes should be in a standard location.

    perhaps not !

    The only place I ever saw the angle of the windshield was in the instructions for the premium soft top which someone also quoted here as 27".
    Last edited by mcwho; 04-09-2017 at 05:19 PM.
    Baghdad Bob

    Complete Kit Delivered July 2010, serial @ 7287, Whitby Power Brakes, Whitby Tonneau, Power Steering w HEIDTS PS Valve, Hydralic clutch, 15" Wheels, BFG Tires, 331 stroker w Quick Fuel 650, RPM Heads, Air Gap Intake. IRS w 3.27, TKO-600. FFMETAL Firewall Forward, FFMETAL Dropped Battery Box in Trunk, Enlarged Passenger footbox, Breeze Cubby storage, Breeze Seat Brackets, Herbs Door Panels. Ford ruby red 12 coats.

  39. #39
    mcwho's Avatar
    Join Date
    Feb 2011
    Location
    DeBary - Florida
    Posts
    541
    Post Thanks / Like
    OK, we are taking about 2 sets of holes, 1 set on the brackets and the other which is part of the car frame. Its the frame holes I am talking about, not the holes on the brackets. I can easily drill the holes on the frame brackets that's not an issue.

    No one has mentioned if I drill the frame brackets first or the frame holes first. I would have thought the bracket holes should be in a standard location.

    It seems that everyone else on this thread is talking about how to get the bolts in place, that's NOT what I am talking about, guess its time for a new thread.

    perhaps not !
    Baghdad Bob

    Complete Kit Delivered July 2010, serial @ 7287, Whitby Power Brakes, Whitby Tonneau, Power Steering w HEIDTS PS Valve, Hydralic clutch, 15" Wheels, BFG Tires, 331 stroker w Quick Fuel 650, RPM Heads, Air Gap Intake. IRS w 3.27, TKO-600. FFMETAL Firewall Forward, FFMETAL Dropped Battery Box in Trunk, Enlarged Passenger footbox, Breeze Cubby storage, Breeze Seat Brackets, Herbs Door Panels. Ford ruby red 12 coats.

  40. #40
    Senior Member edwardb's Avatar
    Join Date
    Feb 2011
    Location
    Lake Orion, Michigan
    Posts
    10,567
    Post Thanks / Like
    Quote Originally Posted by mcwho View Post
    OK, we are taking about 2 sets of holes, 1 set on the brackets and the other which is part of the car frame. Its the frame holes I am talking about, not the holes on the brackets. I can easily drill the holes on the frame brackets that's not an issue.

    No one has mentioned if I drill the frame brackets first or the frame holes first. I would have thought the bracket holes should be in a standard location.

    It seems that everyone else on this thread is talking about how to get the bolts in place, that's NOT what I am talking about, guess its time for a new thread.

    perhaps not !
    The frame holes are pre-drilled from the factory. You only need to drill the arms.
    Build 1: Mk3 Roadster #5125. Sold 11/08/2014. Build 2: Mk4 Roadster #7750. Sold 04/10/2017. Build Thread
    Build 3: Mk4 Roadster 20th Anniversary #8674. Sold 09/07/2020. Build Thread and Video. Build 4: Gen 3 Type 65 Coupe #59. Gen 3 Coyote. Legal 03/04/2020. Build Thread and Video
    Build 5: 35 Hot Rod Truck #138. LS3 and 4L65E auto. Rcvd 01/05/2021. Legal 04/20/2023. Build Thread. Sold 11/9/2023.

Page 1 of 2 12 LastLast

Posting Permissions

  • You may not post new threads
  • You may not post replies
  • You may not post attachments
  • You may not edit your posts
  •  

Replica Parts

Visit our community sponsor