Forte's

Visit our community sponsor

Thanks Thanks:  0
Likes Likes:  0
Results 1 to 8 of 8

Thread: Header clearance looks sketchy...

  1. #1
    Member
    Join Date
    Mar 2014
    Location
    Michigan
    Posts
    77
    Post Thanks / Like

    Header clearance looks sketchy...

    I'm going to go out on a limb and guess that having about a paper thickness gap between the header and the driver's foot box is no bueno... Anyone run into this? any ideas to increase clearance?
    20170621_135111.jpg

  2. #2
    PLATNUM Supporting Member
    wallace18's Avatar
    Join Date
    Apr 2012
    Location
    Trenton, Florida
    Posts
    5,382
    Post Thanks / Like
    It can be very close. I tweaked my footbox a little to give more room.

  3. #3
    Senior Member John Dol's Avatar
    Join Date
    Feb 2011
    Location
    Gorham, ME
    Posts
    1,522
    Post Thanks / Like
    If your car runs already, start her up and see if the vibration of the pipes touches the box. If not, then it should be ok.


    John
    Finished the "My Coupe, my way" project.

    http://s956.photobucket.com/albums/ae46/jdcoupe1969/
    Coupe #386,17" Team III 245 FR 315 RR, 3-link, T5, 4 wheel disk, power brakes/steering. Sniper EFI
    First start Sept. 18 2013 First go kart Sept 19 2013

  4. #4
    Senior Member AC Bill's Avatar
    Join Date
    Feb 2011
    Location
    Vancouver Island BC Canada
    Posts
    1,878
    Post Thanks / Like
    Not really enough room to put any heat proof insulation, between the two. Surely that can't be right.
    Do you have solid engine mounts?
    FFR6803RD, MK 3.1, 302 EFI, fr/rr disc brakes, WC-T5, c/w Hurst Competition Plus shifter, 3 link rear, Koni adjustable coil over shocks, dual roll bars, BBK 4-4 headers, 3.55 rear gears, BBK rear lower control arms c/w poly bushings. Ivy Green Metallic Arrived-02/08, On road 09/2010

  5. #5
    Senior Member
    Join Date
    May 2015
    Posts
    230
    Post Thanks / Like
    Here's what I did:

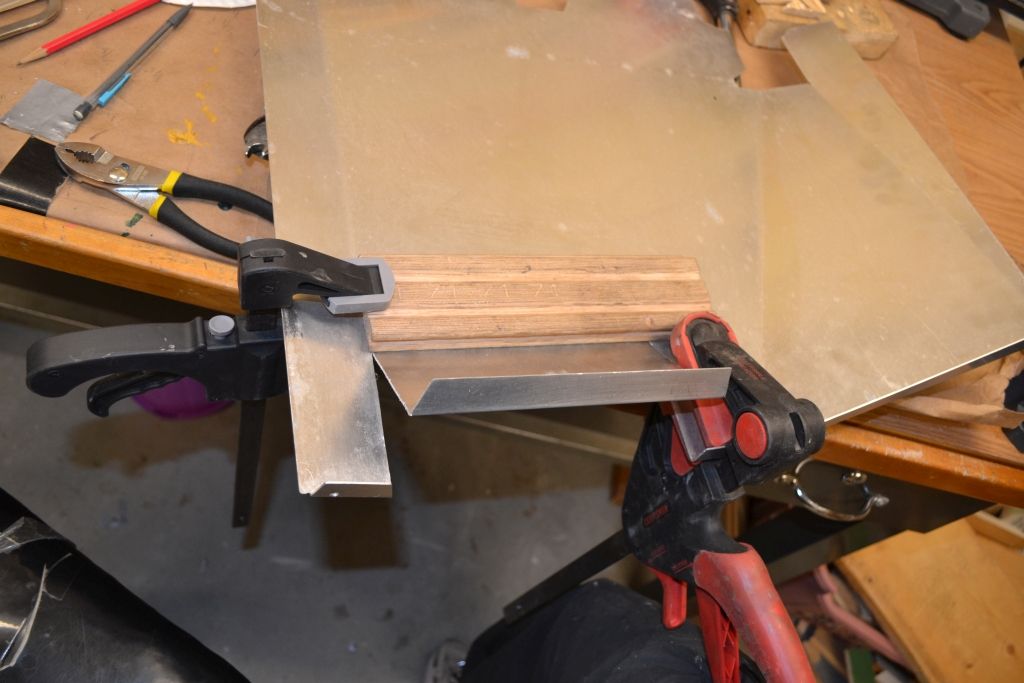
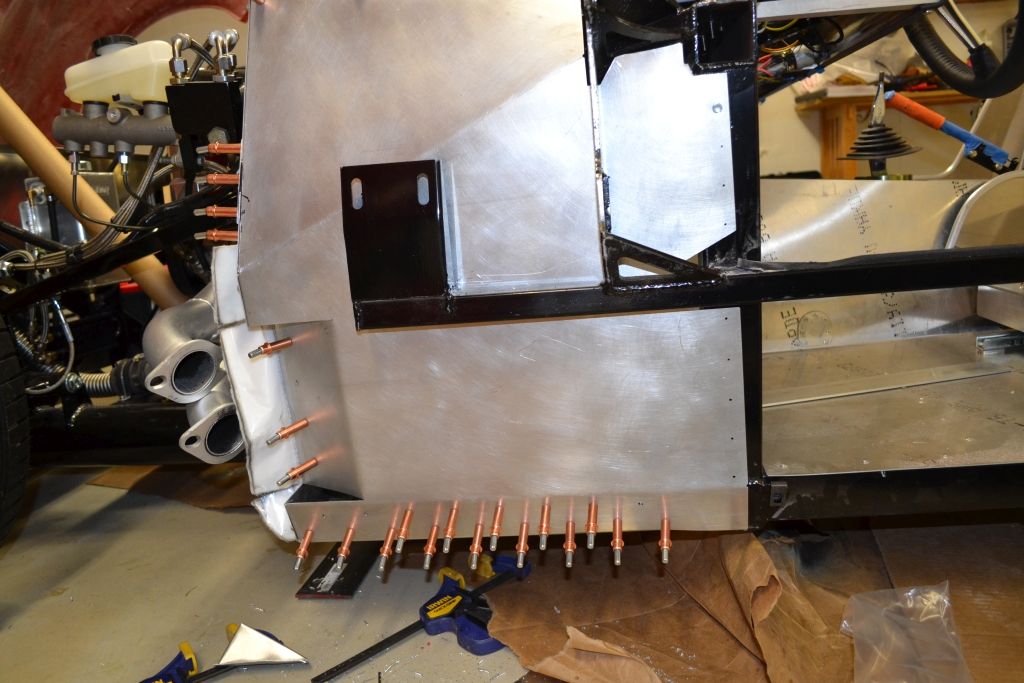
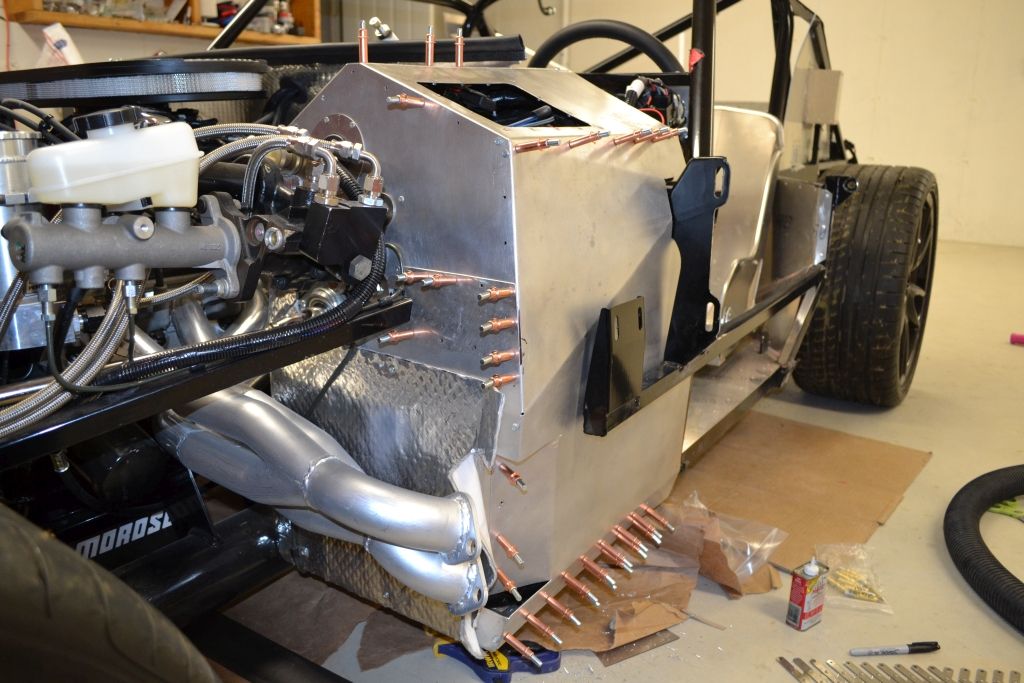
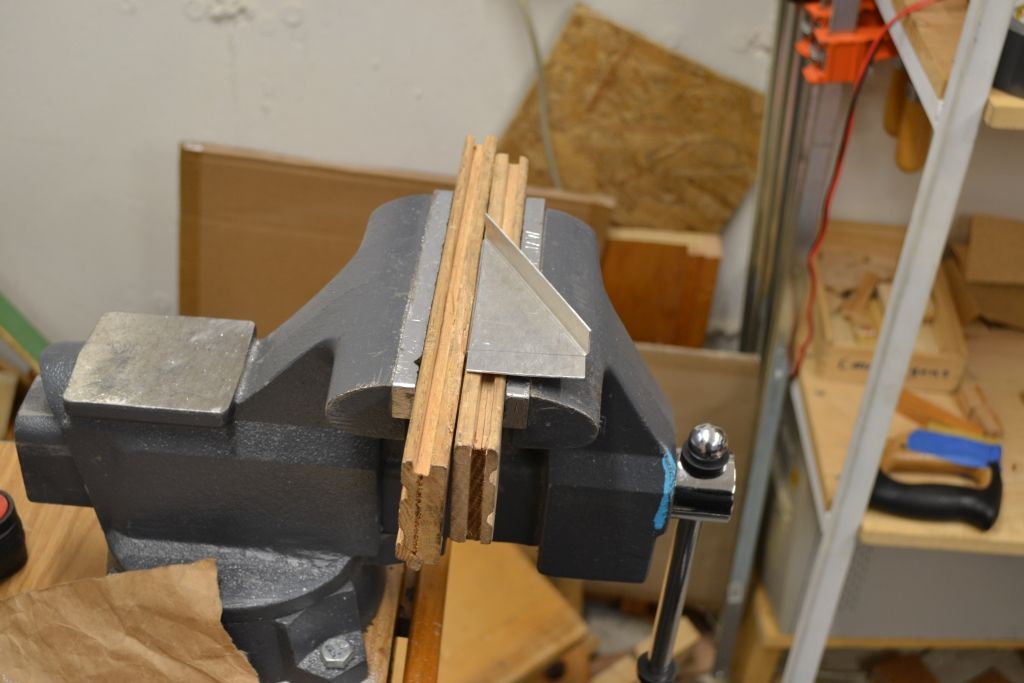
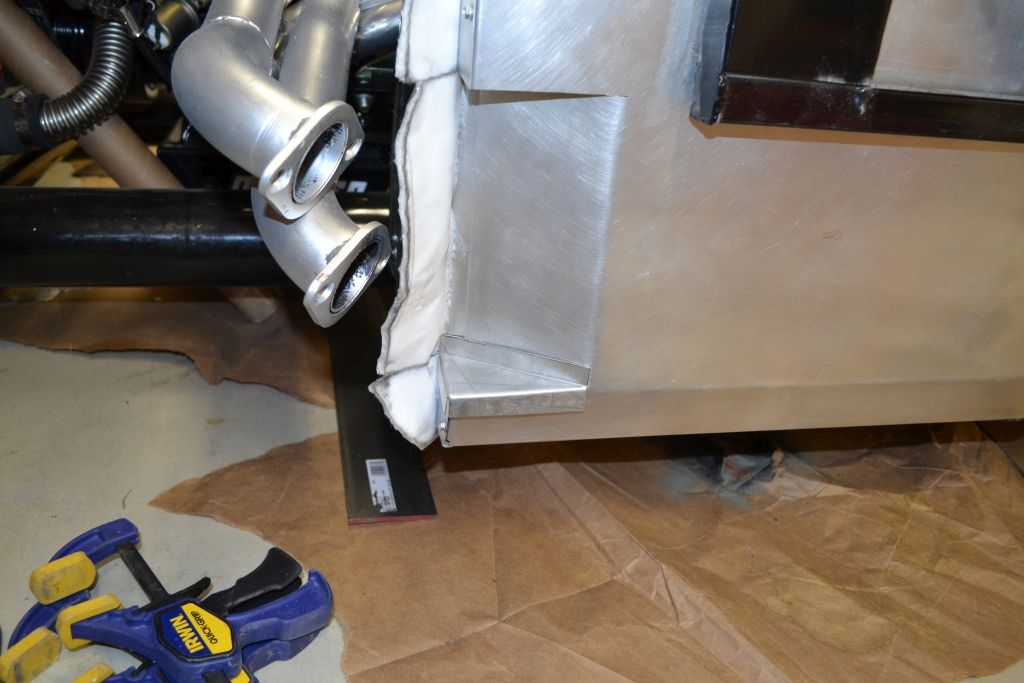
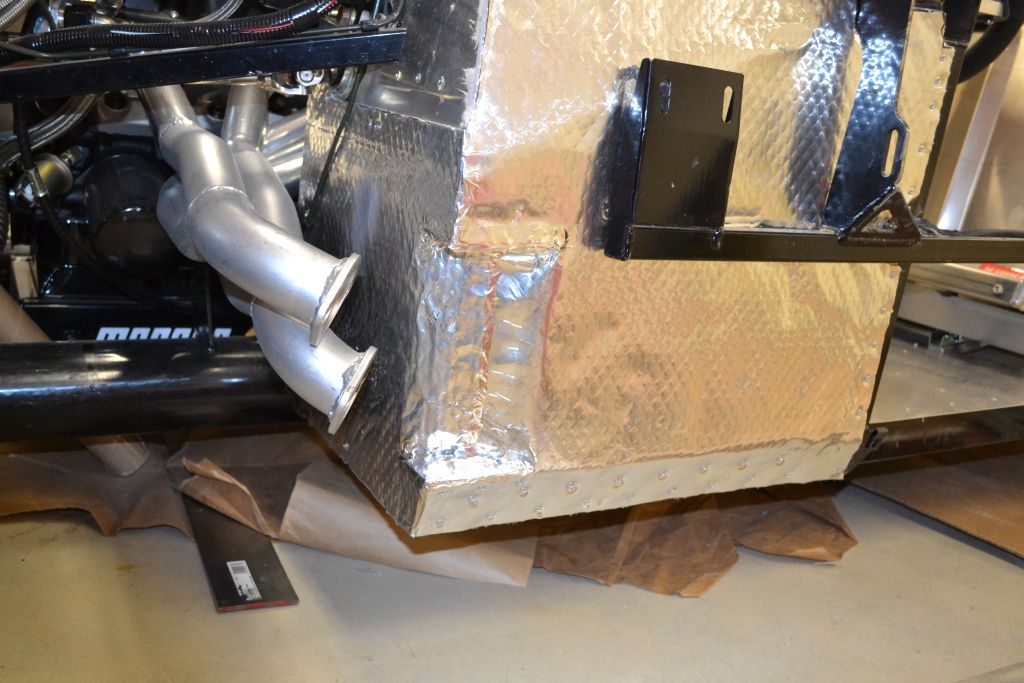
    I had to cut the aluminum a bit and bend it in so the headers and side pipes wouldn't hit the corner of the box.

    I cut the side piece and bent it up.


    Test fit it in.


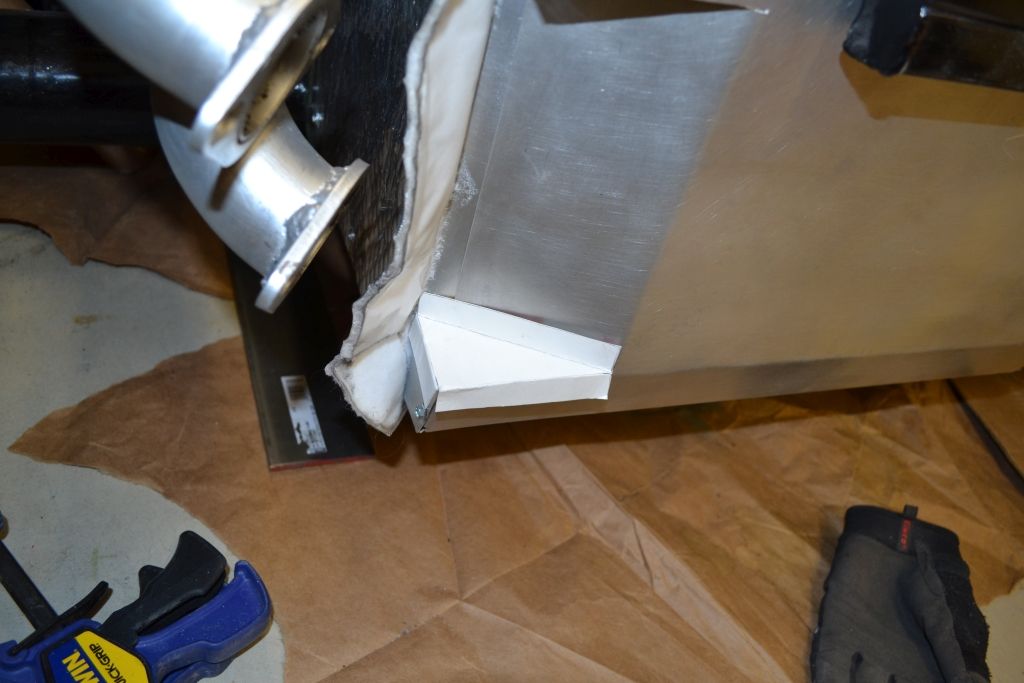
    Next was to make up some pieces above and below the cuts. First was to mock it up with cardboard.


    Then cut it and bend it up.


    Fits well.


    Now added some aluminum tape on the outside to finish it off.


    -Matt

  6. #6
    Junior Member
    Join Date
    Jun 2017
    Posts
    20
    Post Thanks / Like
    Had the same issue here with the exhaust fit and my intake hitting the top of the body.
    Turned my motor mounts around to move the motor forward 1.5" but then my trany bolt didn't fit.
    So i ended up cutting of my motor mount bolts, positioned motor where i wanted and drilled new bolts.
    Lots of work but now everything works really well.
    I wouldn't worry about this until you have everything bolted up.
    Like your exhaust, body mounted, drive shaft, engine with intake.
    Trust me, your gonna have fun mounting your exhaust. I also modified the factory hanger.
    will post some pics later.

    hope this helps

    Steve

    hope this helps

  7. #7
    Member
    Join Date
    Mar 2014
    Location
    Michigan
    Posts
    77
    Post Thanks / Like
    I came up with a simmilar plan as matt's last night I'll keep you guys posted on the finnished product. Hopefully I can make mine look as nice as his

  8. #8
    Member
    Join Date
    Mar 2014
    Location
    Michigan
    Posts
    77
    Post Thanks / Like
    Alright here's the finished product
    Screenshot_20170622-134630.png
    Screenshot_20170622-134620.png
    Not quite as pretty as Matt's work but it seals up nicely and I did it with a pair of sheet metal scissors and a vice, so I'm happy with the results

Posting Permissions

  • You may not post new threads
  • You may not post replies
  • You may not post attachments
  • You may not edit your posts
  •  

FFMetal

Visit our community sponsor