BluePrint Engines

Visit our community sponsor

Thanks Thanks:  0
Likes Likes:  0
Results 1 to 9 of 9

Thread: Another pic request, ac evaporator mounted.

  1. #1
    Senior Member
    Join Date
    Jul 2013
    Location
    Prairieville, Louisiana
    Posts
    973
    Post Thanks / Like

    Another pic request, ac evaporator mounted.

    Although I've pretty much gotten to the point where the manual can be tossed (save some body work and aluminum mounting stuff) I cannot find any details in it on where to place the ac evaporator inside the car. Do I place it as high up and to the right side as possible? How does it mount (I could probably figure that out by digging it out and looking huh)? I want to get it in place so I can choose where to mount my hydraulic pump for brakes, possibly to right of column. I've looked through some build threads but found no specifics.

    Thanks in advance!
    '33 Hot Rod
    Ordered: 3/25/17. Delivered: 5/6/17. 1st start: 8/24/18

    MK4 Roadster
    Ordered: 7/10/13. Delivered: 8/20/13. Completed: 10/26/15.
    I did everything except spray it. She ain't perfect, but she's mine.

  2. #2
    Banned
    Join Date
    Apr 2017
    Location
    Loveland, CO
    Posts
    318
    Post Thanks / Like
    I assume your unit is a universal Vintage Air GenII compac. There is not much to installing the compac or the mini. Wherever you find an aluminum thread insert in the platic housing, that's where you can attach a bracket to the unit. The downside with the compac is the hoses are all located at the top, so once the body is in place, the hoses are either difficult or impossible to service. The unit can go as far right as practical, with room to route the hoses.

    I have a mini unit in my '37 Oze and made sure that all hoses can be replaced with the dash in place.

    See post #27

    http://www.ffcars.com/forums/120-fac...rain-hose.html

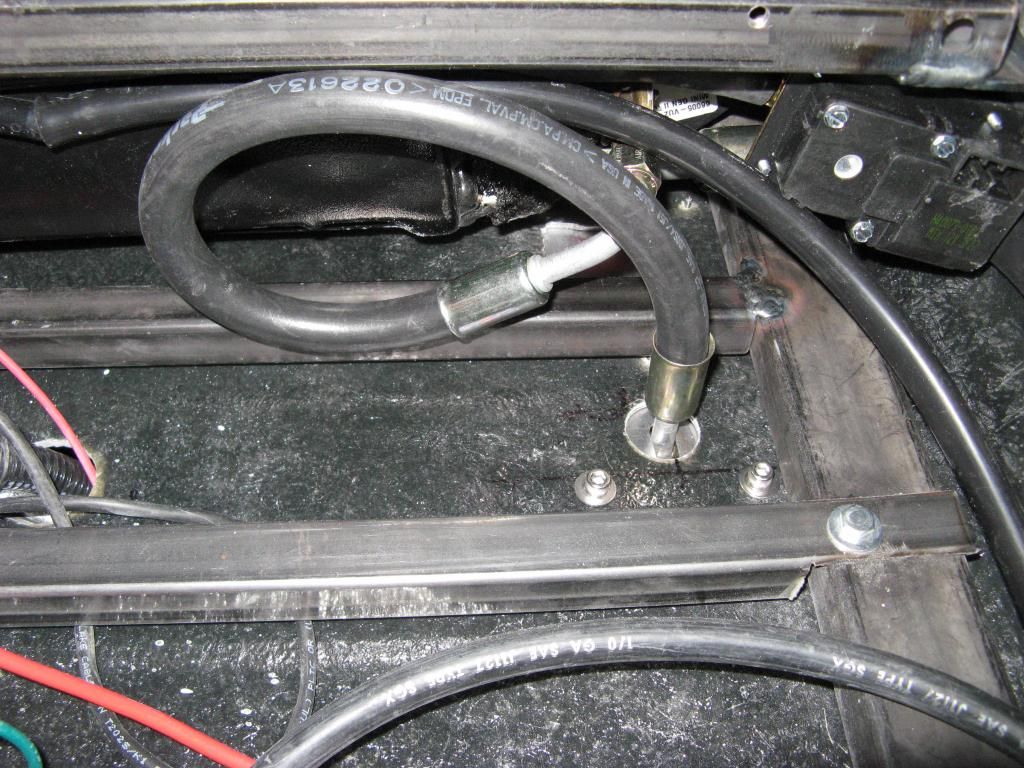
    Here's how I routed the high pressure hose through my firewall. There's an access hole in the firewall that allows the -10 suction hose to be tightened from the firewall side.


    This pic shows my first attempt at routing the high pressure line. I later changed to a different routing with an aeroquip braided stainless steel hose. The large plate allows access to the -10 suction hose and provides a pass-through for the high pressure hose to the drier.

    Last edited by DaveS53; 07-01-2017 at 08:31 AM.

  3. #3
    Senior Member
    Join Date
    May 2016
    Location
    North of sacramento Ca.
    Posts
    866
    Post Thanks / Like
    Go to ffr and go to end of complet kit, then look at additional parts, parts catalog, instructions. This will give you all instructions for all kits, just look for your kit.
    Last edited by 1932; 06-30-2017 at 03:31 PM.

  4. #4
    Senior Member kraftee's Avatar
    Join Date
    May 2013
    Location
    Gainesville, Florida
    Posts
    288
    Post Thanks / Like
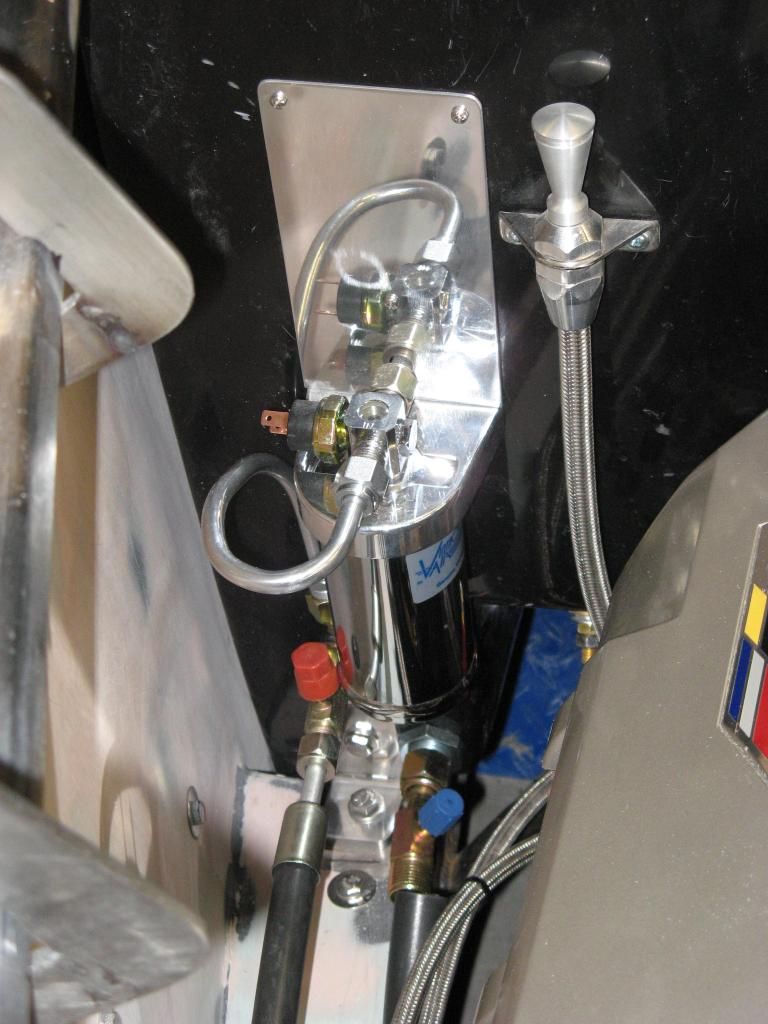
    Bought my AC from Whitby. It's the Vintage Air Mini Gen II. I like where the hoses come out of the evaporator box better than on the FFR VA unit. Mounted mine high and right on one of Mike Everson's inner firewalls.
    Attached Images Attached Images
    "If everything seems to be coming your way, you're probably in the wrong lane."

  5. #5
    Senior Member
    Join Date
    Jul 2013
    Location
    Prairieville, Louisiana
    Posts
    973
    Post Thanks / Like
    Thanks y'all!

    Not much room even to the left of it is there!
    '33 Hot Rod
    Ordered: 3/25/17. Delivered: 5/6/17. 1st start: 8/24/18

    MK4 Roadster
    Ordered: 7/10/13. Delivered: 8/20/13. Completed: 10/26/15.
    I did everything except spray it. She ain't perfect, but she's mine.

  6. #6
    Senior Member kraftee's Avatar
    Join Date
    May 2013
    Location
    Gainesville, Florida
    Posts
    288
    Post Thanks / Like
    Yeah, it's a little tight under the dash with AC - but it works great!
    "If everything seems to be coming your way, you're probably in the wrong lane."

  7. #7
    Senior Member H R Lucky's Avatar
    Join Date
    Jun 2012
    Location
    CrossRoads, Pa.
    Posts
    272
    Post Thanks / Like
    SVT,
    I also mounted mine high and right on one of Mike Everson's inner firewalls.

    Nevin
    Nevin, AKA H. R. Lucky
    33 Hot Rod sn 524 build started 3/18/2013, First Start-5/09/2015, Go Cart-6/01/2015
    5.0 Coyote engine, 9in. Ford rear, 4 Link, Wilwood 12in. front brakes
    AC, power steering, FFR 17/18in. Hot Rod wheels

  8. #8
    Senior Member
    Join Date
    Jul 2013
    Location
    Prairieville, Louisiana
    Posts
    973
    Post Thanks / Like
    Thank y'all. I found and printed the instructions and Bruce sent me a pic. I'll have room to mount my brake pump between the column mount and he ac unit I believe.
    '33 Hot Rod
    Ordered: 3/25/17. Delivered: 5/6/17. 1st start: 8/24/18

    MK4 Roadster
    Ordered: 7/10/13. Delivered: 8/20/13. Completed: 10/26/15.
    I did everything except spray it. She ain't perfect, but she's mine.

  9. #9
    Senior Member
    Join Date
    Apr 2011
    Location
    Shawnee KS< KC Burb
    Posts
    844
    Post Thanks / Like
    If you mount it too high the defrost hoses will be a PITA so it's a compromise all the way around. You can buy a plenum for that from one of
    the vendors on here. On mine I had to go a bit further to the middle because of my rollcage mount but there is ample room to go inboard so
    the hoses have more room to connect. I also felt like the plastic case was a bit weak to only mount it from the back like the manuals say so I
    made a bar to carry the front too. I didn't use the 4 way bulkhead, instead I brought the heater hoses through the firewall straight back from
    the intake valley where they run on the 3G Hemi. I used the inner firewall on mine too because it just cleans things up and gives a better way
    to insulate and seal the heat out. Camaro heater hoses have a nice 180 that hooks to the VA unit nicely and leaves more room for the AC hose
    routing. I brought my AC hoses through down low and made a kick panel to cover them where they rise to the VA unit. This layout IMO left a
    cleaner looking firewall and made the hose routing less cramped all around. The Gen 2 Kraftee used is the one that FF should be sending with
    the 33 because the bottom mount hoses just work so much better on the 33.
    Dale
    Last edited by myjones; 07-01-2017 at 07:30 AM.

Posting Permissions

  • You may not post new threads
  • You may not post replies
  • You may not post attachments
  • You may not edit your posts
  •  

Breeze

Visit our community sponsor