Thanks:
  Likes:

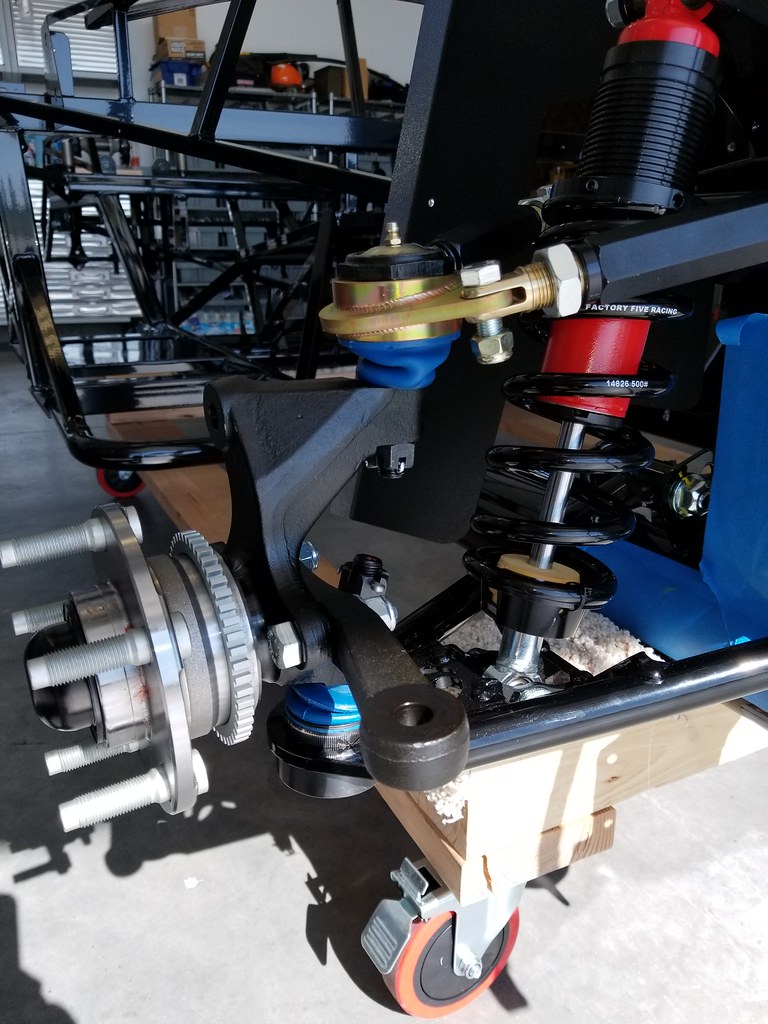
Got to the point where I was installing the spindles. The upper ball joint threaded rod is supposed to fit in the top of the spindle and the lower one the same way capped both off with the castle nuts & cotter pins. The problem is the upper ball joint rod seems too short. When I slide it into the top of the spindle, not enough of it is exposed making it impossible to thread the castle nut.
- Home
- Latest Posts!
- Forums
- Blogs
- Vendors
- Forms
-
Links

- Welcomes and Introductions
- Roadster
- Type 65 Coupe
- 33 Hot Rod
- GTM Supercar
- 818
- Challenge Series
- 289 USRCC
- Coyote R&D
- Ask a Factory Five Tech
- Tech Updates
- General Discussions
- Off Topic Discussions
- Eastern Region
- Central Region
- Mountain Region
- Pacific Region
- Canadian Discussions
- Want to buy
- For Sale
- Pay it forward
-
Gallery
- Wiki-Build-Tech

 Reply With Quote