Midwest Classic Insurance

Visit our community sponsor

Thanks Thanks:  0
Likes Likes:  0
Results 1 to 8 of 8

Thread: Door fitting help...

  1. #1
    Senior Member
    Join Date
    Oct 2016
    Location
    Palm Bay FL
    Posts
    109
    Post Thanks / Like

    Door fitting help...

    looking for help (reference / experience ) on doors on early roadster. I think I'm actually going to cut the door apart on passenger side to relocate the mounting point, gaps off and strikers aren't lining up...as always thanks

  2. #2

    Join Date
    Feb 2011
    Posts
    1,113
    Post Thanks / Like
    DON'T CUT THE DOOR APART ! Ignore where everything "looks" like it should go. Mount the door on the hinge ( not the latches for now). Get the gaps you want and a door that opens and closes. If you bevel the leading edge of the door it helps with clearance. Once you have the door trimmed work with your latches. Bolting everything where it should work.....won't. Take your time, be creative, it will come to you. Move, re-drill, space, clearance.....all part of the game . If ya get real stuck, give me a call 951-676-0191 and we'll see if we can't get you talked through it...da Bat

  3. #3
    Senior Member CraigS's Avatar
    Join Date
    Feb 2011
    Location
    Blacksburg, Va
    Posts
    4,728
    Post Thanks / Like
    Now that is one heck of an offer. Hey, even if you do get it figured out, I'd call anyway. Judging by da bat's posts here, I bet you have a real interesting conversation.
    FFR MkII, 408W, Tremec TKO 500, 2015 IRS, DA QA1s, Forte front bar, APE hardtop.

  4. #4
    Senior Member
    Join Date
    Oct 2016
    Location
    Palm Bay FL
    Posts
    109
    Post Thanks / Like
    Quote Originally Posted by j.miller View Post
    DON'T CUT THE DOOR APART ! Ignore where everything "looks" like it should go. Mount the door on the hinge ( not the latches for now). Get the gaps you want and a door that opens and closes. If you bevel the leading edge of the door it helps with clearance. Once you have the door trimmed work with your latches. Bolting everything where it should work.....won't. Take your time, be creative, it will come to you. Move, re-drill, space, clearance.....all part of the game . If ya get real stuck, give me a call 951-676-0191 and we'll see if we can't get you talked through it...da Bat
    Mr Miller, Thank you for the confidence to find a way to fit the doors. I wound up removing the hinge completely, taped the door in place and made the hinge fit the door! I do have a small issue with the front of the door not completely flush with back of fender. My question is do use filler to level the surfaces or try to shim the door out, realizing it may never be perfect.....thanks in advance, Tim Austin

  5. #5
    Senior Member CraigS's Avatar
    Join Date
    Feb 2011
    Location
    Blacksburg, Va
    Posts
    4,728
    Post Thanks / Like
    I have a few shims between the door and the hinge on my MkII.
    FFR MkII, 408W, Tremec TKO 500, 2015 IRS, DA QA1s, Forte front bar, APE hardtop.

  6. #6

    Join Date
    Feb 2011
    Posts
    1,113
    Post Thanks / Like
    Shim before filler....you can always add or take away a shim....filler is forever. (I think I just made a commercial for filler! HA !). A simple solution is always best...Da Bat

  7. #7
    Out Drivin' Gumball's Avatar
    Join Date
    Feb 2011
    Location
    Blackberry Township, IL
    Posts
    2,653
    Post Thanks / Like
    I'd never done bodywork before this and tackled it on my own, with advice from the knowledgeable sources here and a friend who owns a bodyshop.

    Biggest thing I found to getting the doors and gaps right is patience. Like Da Bat says, take your time - patience and careful work will pay dividends in final product.

    Here are a bunch of pics of my doors in process and the finished product.

    The doors needed quite a bit of work to get to this point, but notice that there is no filler on the door surface. Some report the need to fill certain areas, but I found that with patience and lots of trial-and-error, I was able to get the door very close to level without filler. In this pic, the door is nearly ready for high-build primer and block sanding.


    This one shows how I added fiberglass to the top front corner of the driver's door where it meets the cowl - also shows the process of "rolling" the edges, since this is a Mk3.1


    Adding fiberglass resin and "flox" (powdered glass & fiber) to the leading edge of the driver's door in order to make it better fit the opening - mine were trimmed rather "enthusiastically" by FFR and needed more material in order to fit the openings properly.


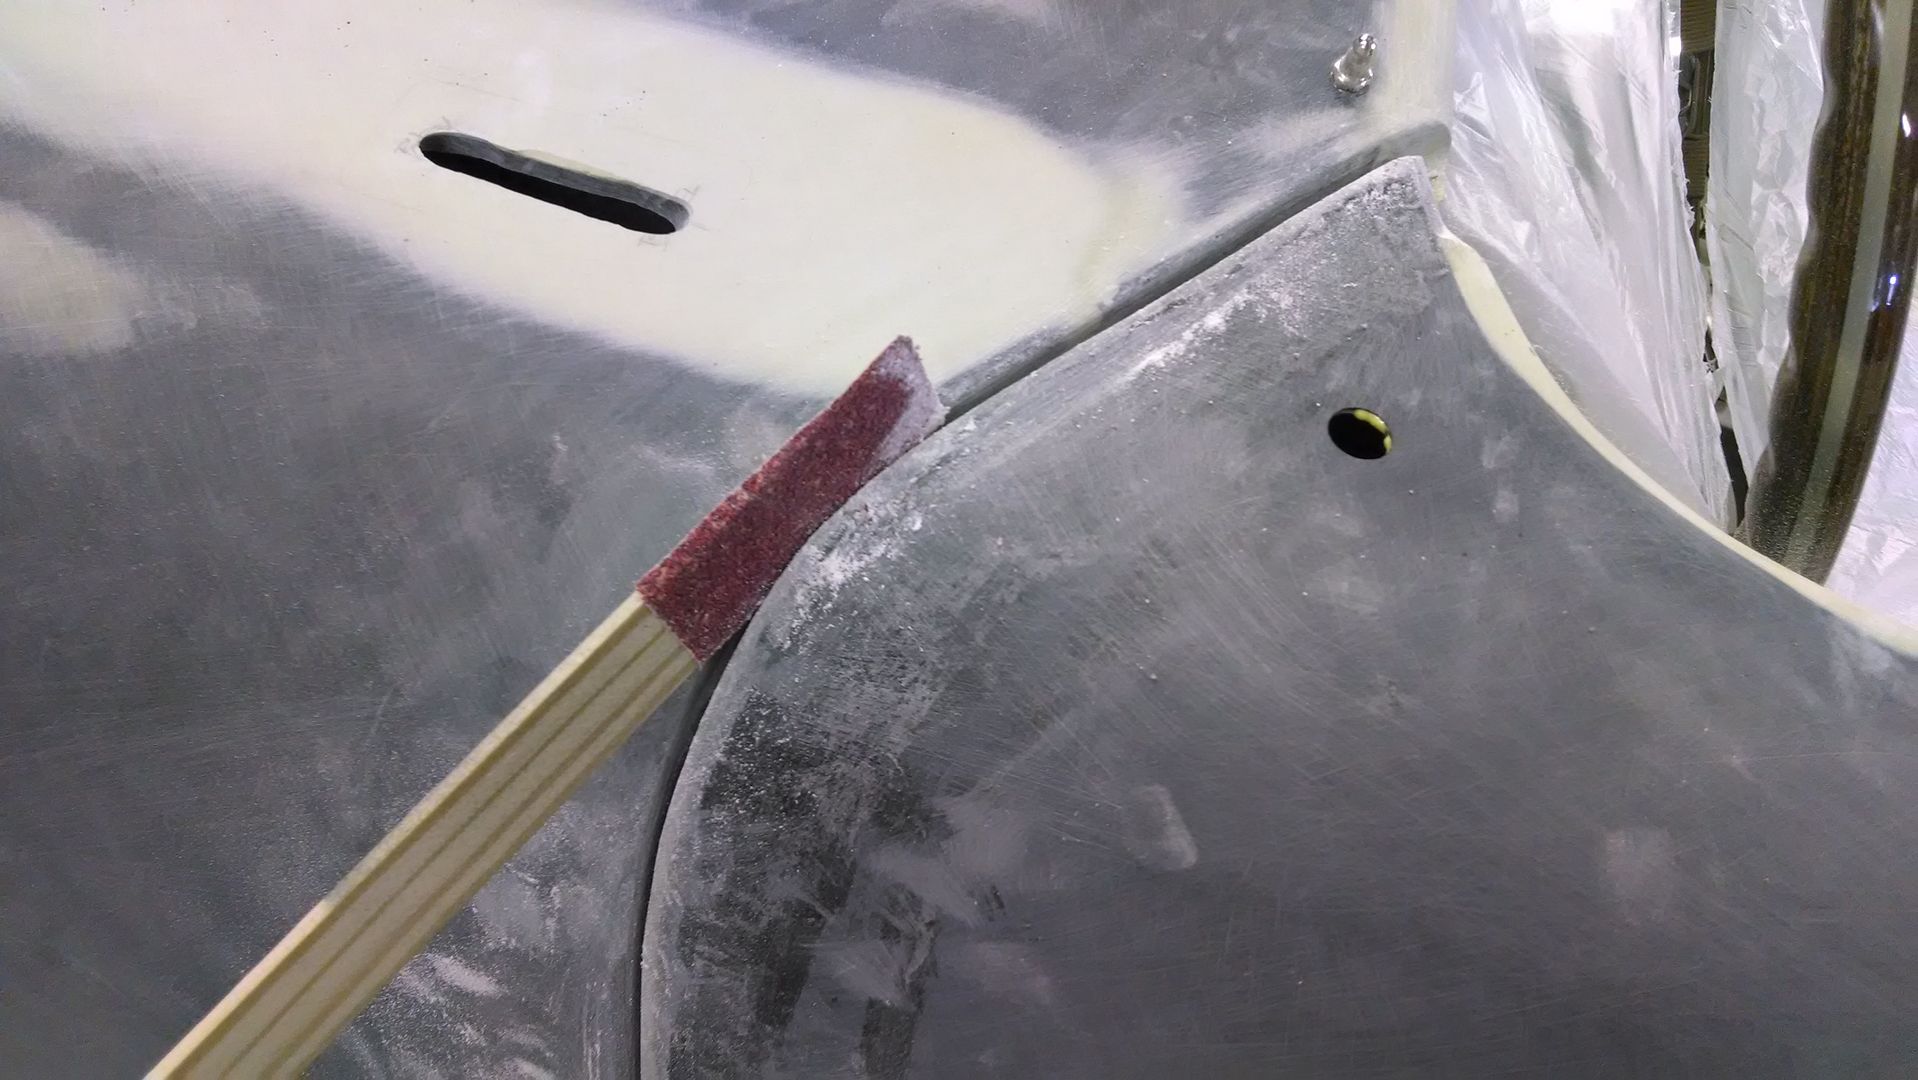
    Paint stick with adhesive sand paper used to get gaps uniform - I used three different thickness of wooden paint sticks to progressively get the gap to the size I wanted


    Not a pretty process.... another pic of making the transition from door to cowl on the driver's side look right


    Driver door to cowl nearing completion


    The finished product - note the reflected lines and the fact that this door has no skim-coat of filler on it... just a couple layers of high-build primer / sealer and some block sanding

    Last edited by Gumball; 09-28-2017 at 08:40 AM.
    Later,
    Chris

    "There are no more monsters to fear, and so, we have to build our own."
    Mk3.1 #7074

  8. #8
    Member
    Join Date
    Dec 2015
    Posts
    54
    Post Thanks / Like
    Almost makes me think I should try the body work myself. Looks good. I am interested in the vent in the fender. Think that helps dissipate the heat off the headers?

Posting Permissions

  • You may not post new threads
  • You may not post replies
  • You may not post attachments
  • You may not edit your posts
  •  

Brown County Customs

Visit our community sponsor