FormaCars

Visit our community sponsor

Thanks Thanks:  0
Likes Likes:  0
Results 1 to 38 of 38

Thread: join 347 dart with tko600 tranny -- anyone knows how to dial them?

  1. #1
    Senior Member broku518's Avatar
    Join Date
    Sep 2017
    Location
    Jupiter, FL
    Posts
    472
    Post Thanks / Like

    join 347 dart with tko600 tranny -- anyone knows how to dial them?

    Hello there.

    I am getting to the point where I would would like to join the 347 dart engine with manual tko600 transmission. I am taking the next two weeks off for holidays. But will do some garage work as well And if things go well, I would like to drop this puppy in.

    I am watching videos and asking people for tips, but would prefer to have someone come over and double check my work. This task may seem simple to some, but completely new to me. Beer and refreshment will be served

    Anyhow, if you are near Bolingbrook, 60440 please let me know. You are always welcome.

    Any tips and hints are greatly appreciated!

    Thanks,
    Broku518
    Last edited by broku518; 12-15-2017 at 03:27 PM.
    Life is short, so start living it.
    Build thread: http://thefactoryfiveforum.com/showt...-in-the-garage!
    delivery date: 10/31/2017, first start 2/24/2018, title and registration passed 6/22/2018

  2. #2
    Senior Member phileas_fogg's Avatar
    Join Date
    Jun 2015
    Location
    Fairfax Station VA
    Posts
    1,235
    Post Thanks / Like
    Before you get anything in the air, I recommend you test fit your transmission mount A-frame including its bolts. Some drop in easily, and others need "massaging". Better to find out now.


    John
    MK IV Roadster #8631
    Ford 302, Holley Terminator EFI, T5z, 3.55 Rear End, IRS, 17” Halibrand Replicas (9” front, 10.5” rear), Nitto 555 G2’s (275/40ZR17 front, 315/35ZR17 rear), Fast Freddie’s Power Steering, F5 Wilwood Brakes, FFMetal’s Firewall Forward, Forte’s Hydraulic Clutch & Throttle Linkage
    https://www.ffcars.com/threads/phile.../#post-4776313

  3. #3
    Senior Member jwebb's Avatar
    Join Date
    Apr 2017
    Location
    Longmeadow, MA
    Posts
    288
    Post Thanks / Like
    Agreed, check in advance! I needed to persuade mine after the tranny was in, not as easy!
    MK4 #9121 - Complete kit - Stroked 351, T5x, 3.55 Rear End, 3-Link - Pickup 6/17/17, 1st start 12/2/17, Go-Kart 12/9/17, Road Worthy 4/27/18

  4. #4
    Senior Member broku518's Avatar
    Join Date
    Sep 2017
    Location
    Jupiter, FL
    Posts
    472
    Post Thanks / Like
    'A-frame' ? I think I may have seen something like this in one of the boxes. Will check.

    Thanks.
    Martin
    Life is short, so start living it.
    Build thread: http://thefactoryfiveforum.com/showt...-in-the-garage!
    delivery date: 10/31/2017, first start 2/24/2018, title and registration passed 6/22/2018

  5. #5
    Senior Member jrcuz's Avatar
    Join Date
    Sep 2013
    Location
    Stafford Virginia
    Posts
    676
    Post Thanks / Like
    Also test fit your motor mounts to your engine block. I have a Dart 347 also and had to do some grinding on the motor mounts to get them to fit. I would not grind the block. Dart blocks have some webbing cast into them that interfere with the engine mounts. Good luck.
    JR
    Mk4 complete kit #9059 ordered 1/19/17 delivered 3/23/17, 2015 IRS, Fortes/DART347,TKO 600, hyd clutch, P/S, 12.88 wilwood brakes front and rear, heater/defrost and vintage gauges
    First start and go-cart 4/11/18. Taken To Whitby Motorcars Greensboro, N.C. 2/5/21 for body/paint

  6. #6
    Senior Member jrcuz's Avatar
    Join Date
    Sep 2013
    Location
    Stafford Virginia
    Posts
    676
    Post Thanks / Like
    Also I forgot to mention when you join your TKO600 to your engine you should dial indicate your bellhousing. Tremec requires this to be done to make sure the pilot shaft is within tolerance so you don't void your warrantee. Check American Powertrain's youtube video for how to do it. It's pretty easy but you will need a dial indicator and possibly some offset dowel pins.
    JR
    Mk4 complete kit #9059 ordered 1/19/17 delivered 3/23/17, 2015 IRS, Fortes/DART347,TKO 600, hyd clutch, P/S, 12.88 wilwood brakes front and rear, heater/defrost and vintage gauges
    First start and go-cart 4/11/18. Taken To Whitby Motorcars Greensboro, N.C. 2/5/21 for body/paint

  7. #7
    Senior Member broku518's Avatar
    Join Date
    Sep 2017
    Location
    Jupiter, FL
    Posts
    472
    Post Thanks / Like
    Quote Originally Posted by jrcuz View Post
    Also test fit your motor mounts to your engine block. I have a Dart 347 also and had to do some grinding on the motor mounts to get them to fit. I would not grind the block. Dart blocks have some webbing cast into them that interfere with the engine mounts. Good luck.
    JR
    Thanks jrcuz.
    I have heard about this issue reading other build. So I am anticipating this. And of course, do not grind the block. I will tweak the mounts.
    Life is short, so start living it.
    Build thread: http://thefactoryfiveforum.com/showt...-in-the-garage!
    delivery date: 10/31/2017, first start 2/24/2018, title and registration passed 6/22/2018

  8. #8
    Senior Member broku518's Avatar
    Join Date
    Sep 2017
    Location
    Jupiter, FL
    Posts
    472
    Post Thanks / Like
    Quote Originally Posted by jrcuz View Post
    Also I forgot to mention when you join your TKO600 to your engine you should dial indicate your bellhousing. Tremec requires this to be done to make sure the pilot shaft is within tolerance so you don't void your warrantee. Check American Powertrain's youtube video for how to do it. It's pretty easy but you will need a dial indicator and possibly some offset dowel pins.
    JR
    Hi jrcuz.
    The bellhousing is already attached. I am assuming Mike Forte did that part. (I can call and double check)
    All I need to do is to attach the transmission plus some clutch related parts.

    Thanks,
    Martin
    Life is short, so start living it.
    Build thread: http://thefactoryfiveforum.com/showt...-in-the-garage!
    delivery date: 10/31/2017, first start 2/24/2018, title and registration passed 6/22/2018

  9. #9
    Senior Member jrcuz's Avatar
    Join Date
    Sep 2013
    Location
    Stafford Virginia
    Posts
    676
    Post Thanks / Like
    Hi Martin I got my eng/trans from Mike also, I called him to verify if he dial indicated the bell housing and he said he didn't. Call him though you'll have to remove the clutch also to position the dial indicator so you'll need the torque specs for the clutch and bell housing.
    JR
    Last edited by jrcuz; 12-15-2017 at 12:32 PM.
    Mk4 complete kit #9059 ordered 1/19/17 delivered 3/23/17, 2015 IRS, Fortes/DART347,TKO 600, hyd clutch, P/S, 12.88 wilwood brakes front and rear, heater/defrost and vintage gauges
    First start and go-cart 4/11/18. Taken To Whitby Motorcars Greensboro, N.C. 2/5/21 for body/paint

  10. #10
    Senior Member broku518's Avatar
    Join Date
    Sep 2017
    Location
    Jupiter, FL
    Posts
    472
    Post Thanks / Like
    Quote Originally Posted by jrcuz View Post
    Hi Martin I got my eng/trans from Mike also, I called him to verify if he dial indicated the bell housing and he said he didn't. Call him though you'll have to remove the clutch also to position the dial indicator so you'll need the torque specs for the clutch and bell housing.
    JR
    Hi jrcuz.

    Thanks, I just called him, and it isn't dialed. He mentioned that the quick time bellhousing is done so well that many times you won't have to do that.
    If I am to remove the cover and the clutch -- I have no idea what I am doing here or how to measure it while putting it back together. kinda bummed about this discovery. Plus I don't have any of these measuring tools.

    Thanks,
    Martin
    Life is short, so start living it.
    Build thread: http://thefactoryfiveforum.com/showt...-in-the-garage!
    delivery date: 10/31/2017, first start 2/24/2018, title and registration passed 6/22/2018

  11. #11
    Senior Member edwardb's Avatar
    Join Date
    Feb 2011
    Location
    Lake Orion, Michigan
    Posts
    10,567
    Post Thanks / Like
    I agree the QuickTime bell housings are high quality and the risk is pretty low. But first a clarification. Dialing in a bellhousing is checking to confirm the crankshaft centerline and bellhousing bore are within a certain tight tolerance. So it's really checking both the bell housing and the block alignment to the bell housing. It's measured by putting a dial indicator on the flywheel, and with the bellhousing and block bolted together, the engine is rotated with the dial indicator tip touching the inside surface of the transmission opening in the bell. Any variation should be within the spec, usually .005-inch. If out of spec, offset dowels are used to move the bellhousing the required direction. This document describes it pretty well: https://www.hurst-drivelines.com/fil...206-15-09A.pdf. There are lots of YouTube videos as well.

    I've dial indicated two engine builds. One with a stock Ford aluminum bell. The other a QuickTime. Both were well within spec. I didn't bother with my recent Coyote + QuickTime build, because the alignment dowels are hollow with a bolt through them. Offsets won't work there, so it is what it is. All good after one season of driving.
    Build 1: Mk3 Roadster #5125. Sold 11/08/2014. Build 2: Mk4 Roadster #7750. Sold 04/10/2017. Build Thread
    Build 3: Mk4 Roadster 20th Anniversary #8674. Sold 09/07/2020. Build Thread and Video. Build 4: Gen 3 Type 65 Coupe #59. Gen 3 Coyote. Legal 03/04/2020. Build Thread and Video
    Build 5: 35 Hot Rod Truck #138. LS3 and 4L65E auto. Rcvd 01/05/2021. Legal 04/20/2023. Build Thread. Sold 11/9/2023.

  12. #12
    Seasoned Citizen NAZ's Avatar
    Join Date
    Feb 2016
    Location
    "The High Country", beautiful Flagstaff, AZ
    Posts
    2,443
    Post Thanks / Like
    I can't emphasize enough that you really do need to indicate in every bellhousing no matter how good you've heard that the manufacturer has made his bellhousing. The bell housings and the engine blocks are manufactured to a spec that has a tolerance. If one is out in one direction and the other in the opposite direction both could be "in spec" but the misalignment stack up could exceed the spec for the assembled parts. Add to that a rebuilt engine that has been line bored and you could have some serious out of tolerance concentricity. This can cause a variety of problems that could have you chasing your tail trying to resolve and worse case, cost you a transmission rebuild. Follow Tremec's recommendations and as edwardb stated, use the offset dowels to achieve the concentricity spec -- DO NOT GRIND ANYTHING and do not enlarge the dowel holes in an effort to move things around.

    It's really not rocket science to dial in a bellhousing and if you've never done it now is the time to learn. And yes, it takes some precision measuring instruments but they won't break the bank. If you don't have a dial indicator Google Enco Machinery for machinist tools at a discount. You don't need one with lots of travel -- .050" total would be sufficient and precision to .001". You'll need a mag base or you can fabricate a bracket to attach to the end of the crank if you're handy that way.

  13. #13
    Senior Member Gromit's Avatar
    Join Date
    Dec 2015
    Location
    Mass, North of Boston
    Posts
    170
    Post Thanks / Like
    Admittedly I haven't done one in a while, and the last one I built was checked before clutch install, but I am not totally convinced you need to take out the clutch to do this job. the clutch and fly wheel rotates around the Center line of the main Bearings. just get a solid location to put the indicator on.

    Chris AKA Gromit

  14. #14
    Member
    Join Date
    May 2017
    Posts
    60
    Post Thanks / Like
    Quote Originally Posted by jrcuz View Post
    Also I forgot to mention when you join your TKO600 to your engine you should dial indicate your bellhousing. Tremec requires this to be done to make sure the pilot shaft is within tolerance so you don't void your warrantee. Check American Powertrain's youtube video for how to do it. It's pretty easy but you will need a dial indicator and possibly some offset dowel pins.
    JR
    YouTube videos show you how to do this! It’s essential and is way easier than it sounds!

  15. #15
    Brandon #9196 TexasAviator's Avatar
    Join Date
    May 2016
    Posts
    679
    Post Thanks / Like
    As Edward and naz has already stated you should check the bell housing. And in some cases should have machining done on high rev 7500 rpm setups. If anything check it for piece of mind.

    https://youtu.be/Ct937By1spM

    Also check the input shaft clearance past the clutch surface to verify your shaft is not putting pressure or interfering the crank end play. This can kill crank bearings and ruin an engine. Saw a guy do this when installing a short fox bellhousing on a long 95 ford t5 shaft.

  16. #16
    Seasoned Citizen NAZ's Avatar
    Join Date
    Feb 2016
    Location
    "The High Country", beautiful Flagstaff, AZ
    Posts
    2,443
    Post Thanks / Like
    Tremec states that the runout must be within .005" (five-thousandths of an inch). Most folks don't deal with dimensions that small on a daily basis so to put some prospective on it that's roughly the thickness of an average human hair. Pull out your feeler gauges and look at a .005" leaf and ask yourself if you really want to chance that your combination is good enough.

    Something to consider:
    Parts are mode to a spec. Specs have tolerances and in manufacturing it is common to see +/- tolerances greater than Tremec's .005". The more complicated the process or higher speed of production the larger the tolerance is. Parts made with tolerances are assembled with other parts to make assemblies. The more parts the greater the tolerance stack up and therefor the larger the variation from nominal.

  17. #17
    Senior Member jrcuz's Avatar
    Join Date
    Sep 2013
    Location
    Stafford Virginia
    Posts
    676
    Post Thanks / Like
    Hi Martin, check with your local chain auto parts stores they may have the tools you need including a dial indicator to loan you.
    JR
    Mk4 complete kit #9059 ordered 1/19/17 delivered 3/23/17, 2015 IRS, Fortes/DART347,TKO 600, hyd clutch, P/S, 12.88 wilwood brakes front and rear, heater/defrost and vintage gauges
    First start and go-cart 4/11/18. Taken To Whitby Motorcars Greensboro, N.C. 2/5/21 for body/paint

  18. #18
    Senior Member broku518's Avatar
    Join Date
    Sep 2017
    Location
    Jupiter, FL
    Posts
    472
    Post Thanks / Like
    Thank you ALL for the feedback.
    Indeed, it does seems to be an easy task. It is just that , 3 kids around, and doing this type of work. Oh well, learn and overcome.

    I am hopeful that I can do that with clutch in place.

    Doing this check will give me a piece of mind and something new to learn. I should know by now that this build is taking me to some interesting routes I should have never dream of.

    Thanks for your support!
    Martin

  19. #19
    Mark Eaton's Avatar
    Join Date
    Apr 2017
    Location
    Medford, Oregon
    Posts
    756
    Post Thanks / Like
    Martin,

    I'm glad you started this thread I had no idea about dialing in my bell housing. I emailed Forte and got a similar response that you did. Further, I have watched several youtube videos and am not very impressed with the quality of equipment being used or the accuracy with which those guys seem to be doing this. Hm, I'm not sure I will to be able to improve on what a master engine builder(Forte) already put together. I tempted to leave it as he made it...

    Mark
    MK4 #9130 , complete kit, arrived 8/10/2017, Street Legal 2/14/2020.
    DART SHP 347, EFI, TKO600, IRS
    http://thefactoryfiveforum.com/showt...n-Build-Thread

  20. #20
    Senior Member karlos's Avatar
    Join Date
    Aug 2013
    Location
    Littleton, CO
    Posts
    412
    Post Thanks / Like
    Check it now while you have easy access and before any potential misalignment causes problems down the road. It's really pretty easy to do and you don't need elaborate or expensive equipment. A dial indicator and a magnetic base is all that's required. The dial indicator I had; the magnetic base was a cheapy from Harbor Freight, less than $20 if I recall correctly. Worked fine for the intended purpose.

    As was pointed out above, the allowable misalignment is really small. My setup was not within spec despite using quality parts (Ford racing block, Quicktime bell) and required a pair of offset dowel pins to correct. If you're running a Tremec transmission it's really important to make sure the centerlines are concentric within 0.005" else the input shaft bearing will become unhappy in short order.


  21. #21
    Mark Eaton's Avatar
    Join Date
    Apr 2017
    Location
    Medford, Oregon
    Posts
    756
    Post Thanks / Like
    Ok I'll do it. So, you take the clutch off then put the bell housing back on to check alignment? Then I need a clutch alignment tool to put the clutch back on? Do I have to check the alignment on the flywheel as well? I saw that on one of the youtube videos.

    -Mark
    MK4 #9130 , complete kit, arrived 8/10/2017, Street Legal 2/14/2020.
    DART SHP 347, EFI, TKO600, IRS
    http://thefactoryfiveforum.com/showt...n-Build-Thread

  22. #22
    Senior Member edwardb's Avatar
    Join Date
    Feb 2011
    Location
    Lake Orion, Michigan
    Posts
    10,567
    Post Thanks / Like
    Quote Originally Posted by Mark Eaton View Post
    Ok I'll do it. So, you take the clutch off then put the bell housing back on to check alignment? Then I need a clutch alignment tool to put the clutch back on? Do I have to check the alignment on the flywheel as well? I saw that on one of the youtube videos.

    -Mark
    That's how I've done it. It might be possible to attach the dial indicator with the clutch still installed, but that's not how I've done it. If you don't have a clutch alignment tool, they're less than $5. You just need one that matches the diameter and splines of your trans input shaft. I wouldn't do anything with the flywheel.

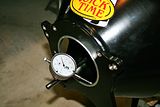
    I found this picture of me doing the check on my Quicktime/DART 347 build. Mine was in spec. As I recall, wasn't off more than .002 - .003 all the way around. I purchased the dial indicator with magnetic base at a local tool store. I think it was around $75. I've used it for a number of things. Never can have too many tools.

    Last edited by edwardb; 12-18-2017 at 08:06 AM.
    Build 1: Mk3 Roadster #5125. Sold 11/08/2014. Build 2: Mk4 Roadster #7750. Sold 04/10/2017. Build Thread
    Build 3: Mk4 Roadster 20th Anniversary #8674. Sold 09/07/2020. Build Thread and Video. Build 4: Gen 3 Type 65 Coupe #59. Gen 3 Coyote. Legal 03/04/2020. Build Thread and Video
    Build 5: 35 Hot Rod Truck #138. LS3 and 4L65E auto. Rcvd 01/05/2021. Legal 04/20/2023. Build Thread. Sold 11/9/2023.

  23. #23
    Seasoned Citizen NAZ's Avatar
    Join Date
    Feb 2016
    Location
    "The High Country", beautiful Flagstaff, AZ
    Posts
    2,443
    Post Thanks / Like
    Mark, you are checking the concentricity of the crankshaft to the bellhousing register where the trans mates to it (see the edwardb photo above) . I find it easier to remove the clutch and sometimes even the flywheel. However, if you can mount a dial indicator solidly to the clutch and check runout of the register (I.D. of the hole the trans mates with) on the trans end of the bellhousing then you won't have to disassemble the clutch.

  24. #24
    Senior Member karlos's Avatar
    Join Date
    Aug 2013
    Location
    Littleton, CO
    Posts
    412
    Post Thanks / Like
    I think you can make it work without having to remove the clutch. Just need to solve the problem of the hole in the center of the pressure plate, which is where you need the magnetic base of the dial indicator to go. Thinking a couple of thin rectangular steel plates, one in front of the diaphragm fingers and one behind with a pair of small screws in between to clamp them together. Kinda like shown below.

    No access to the back of the internal plate, so you’ll need a tapped hole or a nut plate or nutsert in that location.


    Last edited by karlos; 12-18-2017 at 11:03 AM.

  25. #25
    Senior Member broku518's Avatar
    Join Date
    Sep 2017
    Location
    Jupiter, FL
    Posts
    472
    Post Thanks / Like
    I am getting the tool tomorrow in the mail from Amazon, $25 bucks. I am too, hoping not to mess with the clutch.
    Silly question, how do I turn the crankshaft? Tried to spin the pulley, no luck. I see a bolt there, but not sure what direction to start turning.
    (perhaps I need to call a neighbor. He is wearing the Captain America t shirt)

    Thanks,
    Martin
    Life is short, so start living it.
    Build thread: http://thefactoryfiveforum.com/showt...-in-the-garage!
    delivery date: 10/31/2017, first start 2/24/2018, title and registration passed 6/22/2018

  26. #26
    Seasoned Citizen NAZ's Avatar
    Join Date
    Feb 2016
    Location
    "The High Country", beautiful Flagstaff, AZ
    Posts
    2,443
    Post Thanks / Like
    When I build an engine I always add a crankshaft turning nut made by Comp Cams. Search sites like Speedway Motors and you'll find them. These are held in place by a cap screw that holds the damper on the front of the crank. It has a large flange area and the clamping force of the fastener on that large flange keeps it from loosening. If you use the OEM cap screw holding the damper you will likely over tighten it (or loosen it if turning it backwards). There are many reasons for manually rotating your engine beyond indicating a bellhousing so these are a must have IMO.

    Don't forget to pull the plugs or the compression will make turning the crank a real chore.

  27. #27
    Senior Member jrcuz's Avatar
    Join Date
    Sep 2013
    Location
    Stafford Virginia
    Posts
    676
    Post Thanks / Like
    Hi Martin, I just used a socket on the crankshaft pulley and turned it in a clockwise direction. I did it with the spark plugs in but it would be easier if you remove them. It may be a lot easier to place the dial indicator magnetic base if you remove the clutch. I also removed 1 bolt holding the flywheel to the crankshaft. If you do remove the clutch you will need a clutch alignment tool, I got this one from Summit racing #MCL-105313-F for $4.46 it makes reinstalling the clutch very easy. I also got the offset dowel pins from Summit. Just get the torque specs for the bell housing, clutch and flywheel bolts from Mike Forte. I had never done this before and was surprised how well it went.
    JR
    Mk4 complete kit #9059 ordered 1/19/17 delivered 3/23/17, 2015 IRS, Fortes/DART347,TKO 600, hyd clutch, P/S, 12.88 wilwood brakes front and rear, heater/defrost and vintage gauges
    First start and go-cart 4/11/18. Taken To Whitby Motorcars Greensboro, N.C. 2/5/21 for body/paint

  28. #28
    Senior Member broku518's Avatar
    Join Date
    Sep 2017
    Location
    Jupiter, FL
    Posts
    472
    Post Thanks / Like
    Sweet Jesus, this was so easy. I think the hardest part was to setup that dial tool magnet. I had to remove the clutch. Neighbor Hulk was turning the crankshaft.
    Everything was within the specs.
    UP:0.000
    DOWN: 0.003
    LEFT:0.000
    RIGHT:0.002

    I measured twice.
    Now will remove the bell housing, attach the clutch using the alignment tool and torque everything to specs. Great excersize.
    Tomorrow will attempt to join tko600

    Thanks!
    Martin
    Last edited by broku518; 12-19-2017 at 05:46 PM.

  29. #29
    Seasoned Citizen NAZ's Avatar
    Join Date
    Feb 2016
    Location
    "The High Country", beautiful Flagstaff, AZ
    Posts
    2,443
    Post Thanks / Like
    You can now take comfort in the fact that you have verified your set-up is in spec and pride in knowing you did the job right with no short cuts.

  30. #30
    Senior Member jrcuz's Avatar
    Join Date
    Sep 2013
    Location
    Stafford Virginia
    Posts
    676
    Post Thanks / Like
    Well done Martin.
    JR
    Mk4 complete kit #9059 ordered 1/19/17 delivered 3/23/17, 2015 IRS, Fortes/DART347,TKO 600, hyd clutch, P/S, 12.88 wilwood brakes front and rear, heater/defrost and vintage gauges
    First start and go-cart 4/11/18. Taken To Whitby Motorcars Greensboro, N.C. 2/5/21 for body/paint

  31. #31
    Senior Member Gromit's Avatar
    Join Date
    Dec 2015
    Location
    Mass, North of Boston
    Posts
    170
    Post Thanks / Like
    Very good. A job worth doing is worth doing right..

    And

    It's all about having the right tools for the job.

    Chris AKA Gromit

  32. #32
    Brandon #9196 TexasAviator's Avatar
    Join Date
    May 2016
    Posts
    679
    Post Thanks / Like
    Nice work. Feels good to move on and know you have everything right for the next phase of the build.

  33. #33
    Senior Member
    Join Date
    Nov 2017
    Posts
    765
    Post Thanks / Like
    I like to check the final assembly (before installation in the car) by releasing the clutch manually and spinning the clutch from the output of the transmission (this centers clutch on the input shaft / pilot bearing final assembly - better than you can get it with the clutch alignment tool). This check is easy with a clutch fork - difficult if using a concentric throwout bearing.

    Then release pressure plate and check input shaft to clutch plate play (again using the output of the tranny to move the input shaft) - there should be very little freeplay - but perceptible - you're just looking for enough radial freeplay to show the clutch plate is not in any way binding on the input shaft.

    2- Rotate engine 90 degrees without releasing clutch and recheck - should be the same freeplay.

    3- Rotate engine 90 more degrees + recheck.

    4- Rotate engine 90 more degrees + recheck.

    5- Done.


    Again this is all pretty easy to do + observe if the bellhousing has an opening for a clutch release fork - it can be near impossible with a bellhousing made for a concentric throwout.


    But it's a nice check of the final assembly (where possible).

  34. #34
    Member
    Join Date
    Feb 2011
    Location
    Rhode Island
    Posts
    62
    Post Thanks / Like
    Broku518,
    So you took the bell housing off, removed the clutch, put the bell housing back on checked the runout then removed the bell housing again reinstalled the clutch and then reinstalled the bell housing again.

    You realize that with the machining tolerances that the bell housing is not in the exact location it was in when you checked the runout so the measurements you have were for that location and not for where the bell housing resides now.
    FFR 6760 Mk 3.1 Fortes Dart 427 TKO 600 3.55 3 Link Solid Axle

  35. #35
    Senior Member edwardb's Avatar
    Join Date
    Feb 2011
    Location
    Lake Orion, Michigan
    Posts
    10,567
    Post Thanks / Like
    Quote Originally Posted by BigUgly View Post
    Broku518,
    So you took the bell housing off, removed the clutch, put the bell housing back on checked the runout then removed the bell housing again reinstalled the clutch and then reinstalled the bell housing again.

    You realize that with the machining tolerances that the bell housing is not in the exact location it was in when you checked the runout so the measurements you have were for that location and not for where the bell housing resides now.
    Two words. Alignment dowels. What he did was the exact proper and well established process.
    Build 1: Mk3 Roadster #5125. Sold 11/08/2014. Build 2: Mk4 Roadster #7750. Sold 04/10/2017. Build Thread
    Build 3: Mk4 Roadster 20th Anniversary #8674. Sold 09/07/2020. Build Thread and Video. Build 4: Gen 3 Type 65 Coupe #59. Gen 3 Coyote. Legal 03/04/2020. Build Thread and Video
    Build 5: 35 Hot Rod Truck #138. LS3 and 4L65E auto. Rcvd 01/05/2021. Legal 04/20/2023. Build Thread. Sold 11/9/2023.

  36. #36
    Seasoned Citizen NAZ's Avatar
    Join Date
    Feb 2016
    Location
    "The High Country", beautiful Flagstaff, AZ
    Posts
    2,443
    Post Thanks / Like
    BigUgly, as a former tooling machinist dealing with tolerances down to .00005" I can agree with your assessment -- there will be a change, albeit a very small change. However, as edwardb pointed out this is a well established procedure and the .005" runout spec takes the slight alignment variance into account. So all is good with the world and we will remain in orbit with no danger of Earth plummeting into the Sun. Rock on Broku518 -- all is in control.

  37. #37
    Senior Member broku518's Avatar
    Join Date
    Sep 2017
    Location
    Jupiter, FL
    Posts
    472
    Post Thanks / Like
    BigUgly - I wondered the same thing. But did it anyways.

    Now, I am working on attaching the tko600. Kinda puzzled about the fork. There is some pivot bolt inside. Not sure how to measure...

  38. #38
    Member
    Join Date
    Feb 2011
    Location
    Rhode Island
    Posts
    62
    Post Thanks / Like
    broku518,

    As long as you put your mind at ease, thats what counts, and you learned some new things. Also, contrary to those "Two words. Alignment dowels", those alignment dowels and the holes they go into also have tolerances, if they didn't they wouldn't fit into each other. Your good, now get the TKO600 bolted up and into the chassis.

    BigUgly
    FFR 6760 Mk 3.1 Fortes Dart 427 TKO 600 3.55 3 Link Solid Axle

Posting Permissions

  • You may not post new threads
  • You may not post replies
  • You may not post attachments
  • You may not edit your posts
  •  

Stewart Transport

Visit our community sponsor