FormaCars

Visit our community sponsor

Thanks Thanks:  0
Likes Likes:  0
Results 1 to 18 of 18

Thread: engine install tips/hints

  1. #1
    Senior Member broku518's Avatar
    Join Date
    Sep 2017
    Location
    Jupiter, FL
    Posts
    472
    Post Thanks / Like

    engine install tips/hints

    Hello.
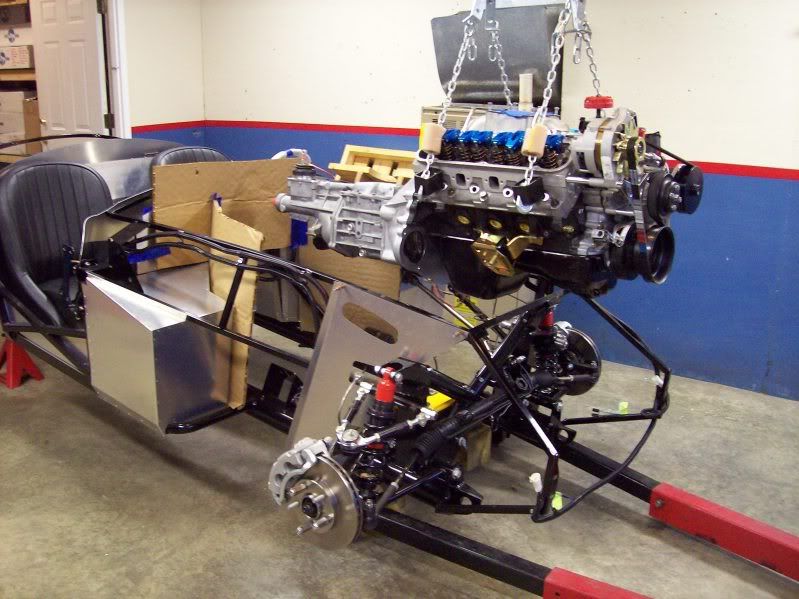
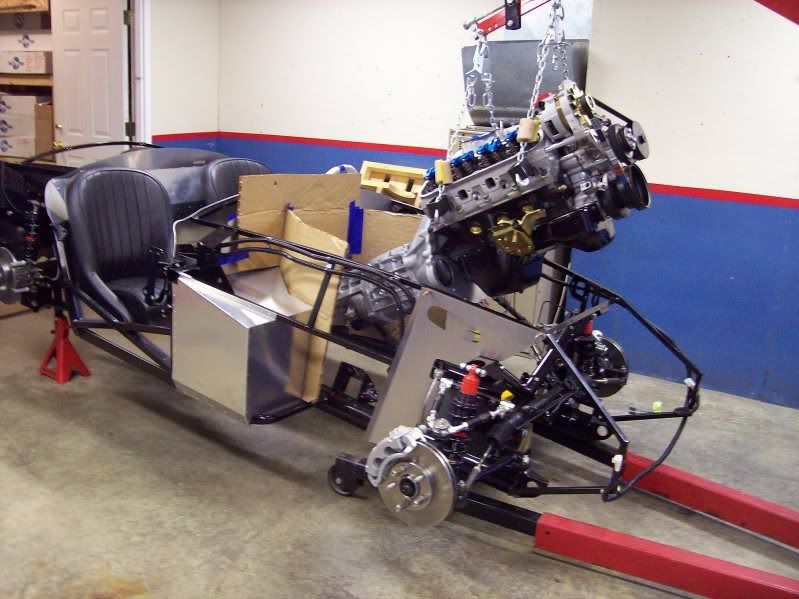
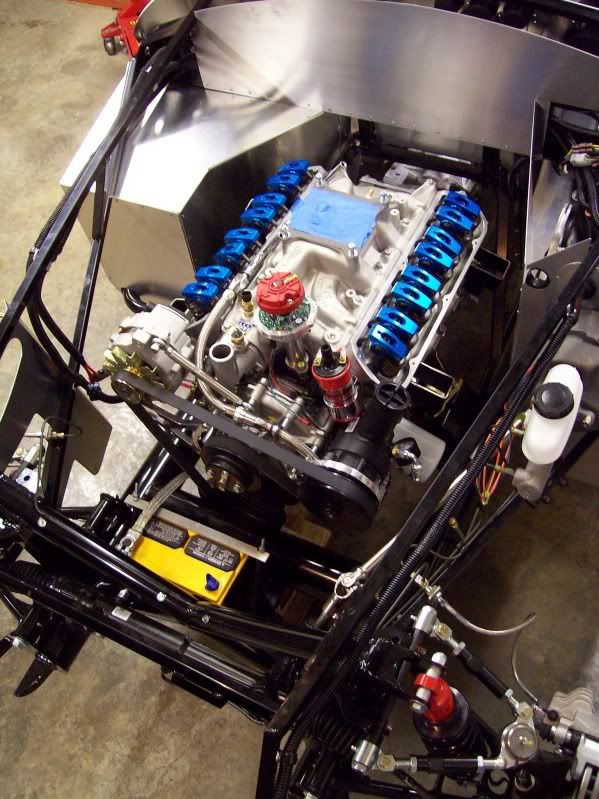
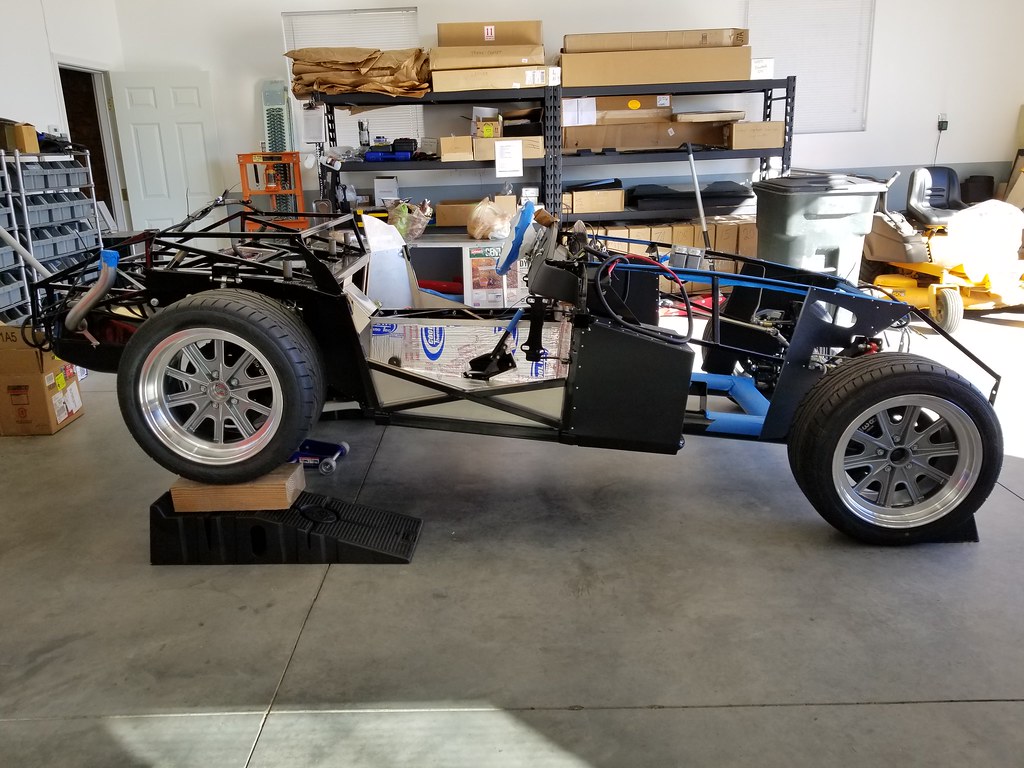
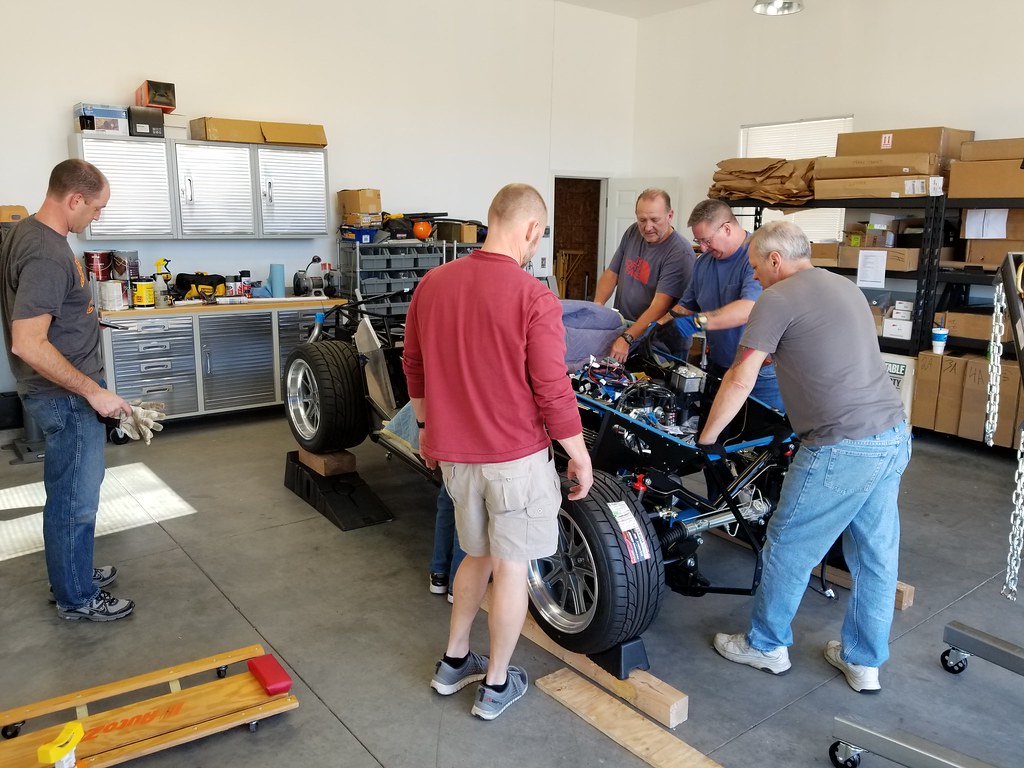
    Just wondering here. I am about to drop dart347/tko600 in. I am curious to know what should I pay attention to.
    1)I guess the engine should be leveled.
    2)When looking from below, all components ( rear end/drive shaft/ tranny/ engine) should form a straight line.
    3)When looking from the side, is it acceptable to have some degree of variations? Or angle before start using spacers.

    Thanks
    Martin

  2. #2
    Seasoned Citizen NAZ's Avatar
    Join Date
    Feb 2016
    Location
    "The High Country", beautiful Flagstaff, AZ
    Posts
    2,443
    Post Thanks / Like
    Typically an engine / trans sits at an angle of a couple degrees or so (angled down at the trans output end). If you have a carb then you will probably notice that the mating surface where the carb sets on the manifold is also angled a couple degrees down in front so that the carb sits level. As for the lateral alignment -- in a perfect world the center-line of the crankshaft should be aligned with the rear end pinion shaft. Some engines are offset to one side or the other and will only pose a problem if this offset results in the driveshaft angled excessively and the shorter the driveshaft the less offset that can be tolerated. However, the crankshaft plane must be parallel to the pinion shaft plane or you will be setting yourself up for out of phase vibration.

    Search the forums for "pinion angle" to get a better understanding of why the angle of the pinion shaft must match the angle of the crankshaft. It has to do with phasing of the u-joints and is true for vertical as well as horizontal.

  3. #3
    Unconventional Builder Joee's Avatar
    Join Date
    Feb 2011
    Location
    Hatboro PA
    Posts
    143
    Post Thanks / Like
    I have found the best way to get it in is to have the front end lower than the back end of the car. So jack up the rear or put rear tires on blocks or ramps. It will just line itself up; motor on motor mounts and trans tail shaft on trans mount. I find it easiest to install tans A frame and mount after the motor and trans are in. Then go under and install A frame. With respect to everything lining up that you may need to work on once motor n trans are in. You may or may not need to shim the trans mount to raise the tail shaft then next is the pinion angle adjustments.
    Roadster Mk3 5294, 302 Comp XE276HR cam, AFR 185 heads, 650 Quick fuel carb, Air Gap intake, T-5 3.55 gear Levy Upper & Lower Front and Rear control arms Purch Jan 2008 Tagged Mar 2012 Best ET 12.14 @113** SOLD 4/8/18 **
    YouTube Videos: Current performance - https://www.youtube.com/channel/UC7c...86xO3U4l4RtVMQ Older build - http://www.youtube.com/user/joeembery#p/u My Pics:
    http://s207.photobucket.com/user/Joe...?sort=6&page=1

  4. #4

    Steve >> aka: GoDadGo
    GoDadGo's Avatar
    Join Date
    Feb 2015
    Location
    Slidell, Louisiana
    Posts
    6,572
    Post Thanks / Like
    Blog Entries
    1
    Ditto / Lift The Rear & Slide It In:
    https://youtu.be/3f1Q4aS5SG4

    Ottid / Lift The Rear & Slide It Out:
    https://youtu.be/Vhbftk4AP4k
    Last edited by GoDadGo; 12-25-2017 at 06:33 PM.

  5. #5
    Senior Member phileas_fogg's Avatar
    Join Date
    Jun 2015
    Location
    Fairfax Station VA
    Posts
    1,235
    Post Thanks / Like
    In contrast to JoeE, I prefer to have the transmission A-frame in place before installing the engine-transmission assembly. I don't believe there's any compelling argument either way; it's just a matter of which pros outweigh the other cons. If you're doing the job alone, then you're probably better off installing the A-frame like JoeE - after the engine-transmission assembly is in place.

    Either way you do it, however, be sure to test fit the A-frame BEFORE getting anything in the air. My A-frame required significant grinding on the forward legs before it would fit.


    John

    P.S. I found this thread http://thefactoryfiveforum.com/showt...-Pinion-Angle) to be extremely helpful in understanding the pinion angle adjustments.
    MK IV Roadster #8631
    Ford 302, Holley Terminator EFI, T5z, 3.55 Rear End, IRS, 17” Halibrand Replicas (9” front, 10.5” rear), Nitto 555 G2’s (275/40ZR17 front, 315/35ZR17 rear), Fast Freddie’s Power Steering, F5 Wilwood Brakes, FFMetal’s Firewall Forward, Forte’s Hydraulic Clutch & Throttle Linkage
    https://www.ffcars.com/threads/phile.../#post-4776313

  6. #6
    Not a waxer Jeff Kleiner's Avatar
    Join Date
    Feb 2011
    Location
    Bloomington, Indiana
    Posts
    8,081
    Post Thanks / Like
    Get the chassis as high as is practical (make sure your jackstand placement won't interfere with the hoist legs as you roll it into position) with the nose down and tail up. An engine leveler is invaluable and makes it a 10 minute one man job.


    I always do 'em with the A frame out. Good luck!

    Jeff

  7. #7
    Papa's Avatar
    Join Date
    Dec 2016
    Location
    Mexico, MO
    Posts
    5,609
    Post Thanks / Like
    I just did this, and the advice you are getting is the same I received and it was definitely easier than I expected. I installed mine with the A-Frame in place and had no issues, but this seems to be one area that there is disagreement over. I think you'll be fine either way.

    Get the back of the car up and be sure that your engine stand will still fit under the front (I had to raise the front of the car a few inches).


    Get the engine angled to clear the front of the chassis where the radiator mounts to.


    Use lots of friends and take your time. Angle the engine and lower a bit, adjust the angle, push back a bit and lower a bit more, repeat until the mounts are properly sitting on the frame, and admire your work!


    Things to watch for:

    I had someone guiding the trans in from under the car.
    Remove the yoke from the trans if it's installed. Remember that your FFR drive line has a yoke installed already.
    Be sure the engine and trans mounts are in place before you start.
    Have a jack handy incase you need it.
    Have the beer on ice for when the job is done!
    My Build Thread: http://thefactoryfiveforum.com/showt...ter-Build-9754
    (Most viewed Roadster build thread on this forum!)

    Delivered: 6/17/2017
    First Start: 12/30/2017
    Completed: 12/7/2019
    Legal: 1/30/2020

    Member of the Mile-Hi Cobra Club
    Dave's Cobra YouTube Channel: https://www.youtube.com/channel/UCbk...npK1UZHj4R-bYQ
    Agora 1:8 Scale Cobra Build: https://thefactoryfiveforum.com/show...l-Build-Thread

  8. #8
    Senior Member Itchief's Avatar
    Join Date
    Aug 2017
    Location
    Southern WV
    Posts
    376
    Post Thanks / Like
    I installed the shifter after installing the motor and transmission it made it easier to work through this the tunnel

    I also filled the transmission through the shifter until the oil ran out of the fill plug

    Rick
    #8475 Complete Kit Delivered Nov 2014, started Nov 2015, Street Legal Apr 2016, Paint and Interior Completed Aug 2017, 390 BBF, March accessory kit, MSD Atomic EFI and Ready to run, TKO 500 with MidShift kit, hooker headers, 3 link, track lock with 3.55, sway bars, power steering, wipers, heater

  9. #9
    Member Scotty's65's Avatar
    Join Date
    May 2013
    Posts
    55
    Post Thanks / Like
    I'll second Papa, it is much easier with the rear up in the air a little bit and I think as far as the driveshaft is concerned it is better to have a slight angle either left or right or up and down as the u joints work better, are quieter and last longer with a slight angle so the bearings are engaged as opposed to dead straight where they will be "floating"

    My .02

    Scott
    2014 Mustang GT Track Pack
    F5 MKII (sold)
    MKIV soon
    "When in doubt go to full throttle, it may not solve the problem but it will end the suspense"

  10. #10
    Senior Member broku518's Avatar
    Join Date
    Sep 2017
    Location
    Jupiter, FL
    Posts
    472
    Post Thanks / Like
    Great info, Thanks! I was mostly confused about the driveshaft angles. Now it is clear, from reading info above.
    I will raise the car up and will have A-frame in place.

    Will get some rest tonight...tomorrow should be cozy 12F with couple inches of snow, here in Chicago area.

    Will post pictures when done.

    Thanks.
    Martin

  11. #11
    Papa's Avatar
    Join Date
    Dec 2016
    Location
    Mexico, MO
    Posts
    5,609
    Post Thanks / Like
    Regarding drive line and pinion angle settings, this video posted a wile back by GoDadGo cleared up the confusion for me.

    https://www.youtube.com/watch?v=Idk3...ature=youtu.be
    My Build Thread: http://thefactoryfiveforum.com/showt...ter-Build-9754
    (Most viewed Roadster build thread on this forum!)

    Delivered: 6/17/2017
    First Start: 12/30/2017
    Completed: 12/7/2019
    Legal: 1/30/2020

    Member of the Mile-Hi Cobra Club
    Dave's Cobra YouTube Channel: https://www.youtube.com/channel/UCbk...npK1UZHj4R-bYQ
    Agora 1:8 Scale Cobra Build: https://thefactoryfiveforum.com/show...l-Build-Thread

  12. #12
    Senior Member broku518's Avatar
    Join Date
    Sep 2017
    Location
    Jupiter, FL
    Posts
    472
    Post Thanks / Like
    ok, engine is in! It wasn't that difficult. We raised the car up, left the A-frame in place. I was using the lift plate, so no need for engine leveler.
    Very easy to tilt or swivel in any direction.
    One thing left to figure it: I noticed the end of the tko600 was touching the round frame member. I will need to use a spacer. Any idea where I can get those?

    [url=https://flic.kr/p/21PS6nm]

    Life is short, so start living it.
    Build thread: http://thefactoryfiveforum.com/showt...-in-the-garage!
    delivery date: 10/31/2017, first start 2/24/2018, title and registration passed 6/22/2018

  13. #13
    Papa's Avatar
    Join Date
    Dec 2016
    Location
    Mexico, MO
    Posts
    5,609
    Post Thanks / Like
    Quote Originally Posted by broku518 View Post
    ok, engine is in! It wasn't that difficult. We raised the car up, left the A-frame in place. I was using the lift plate, so no need for engine leveler.
    Very easy to tilt or swivel in any direction.
    One thing left to figure it: I noticed the end of the tko600 was touching the round frame member. I will need to use a spacer. Any idea where I can get those?

    [url=https://flic.kr/p/21PS6nm]

    Congratulations! As a fellow first-timer, I know how good it feels to get the engine in.

    Dave
    My Build Thread: http://thefactoryfiveforum.com/showt...ter-Build-9754
    (Most viewed Roadster build thread on this forum!)

    Delivered: 6/17/2017
    First Start: 12/30/2017
    Completed: 12/7/2019
    Legal: 1/30/2020

    Member of the Mile-Hi Cobra Club
    Dave's Cobra YouTube Channel: https://www.youtube.com/channel/UCbk...npK1UZHj4R-bYQ
    Agora 1:8 Scale Cobra Build: https://thefactoryfiveforum.com/show...l-Build-Thread

  14. #14
    Boydster's Avatar
    Join Date
    Aug 2014
    Location
    Maryville, TN
    Posts
    1,104
    Post Thanks / Like
    Trans tail shaft spacers: I used a stack of washers until i can get the pinion angle all set, then I'll order spacers from McMaster or Ace and modify as needed. My TKO 600 also sat on the frame crossmember.
    ---Boyd---
    MkIV #9042 build thread
    www.boss427.us
    427W, TKO600, Moser 3.55 rear.
    Delivered Feb 2017, Graduated Nov 4, 2019

  15. #15
    Senior Member jrcuz's Avatar
    Join Date
    Sep 2013
    Location
    Stafford Virginia
    Posts
    677
    Post Thanks / Like
    Great work. When we dropped mine in back in August I was surprised how easy and fast it went in. I used aluminum bar stock from Mcmaster-Carr to make the transmission spacer. Also don't forget to get longer bolts when you figure out the thickness of the spacer.
    JR
    Mk4 complete kit #9059 ordered 1/19/17 delivered 3/23/17, 2015 IRS, Fortes/DART347,TKO 600, hyd clutch, P/S, 12.88 wilwood brakes front and rear, heater/defrost and vintage gauges
    First start and go-cart 4/11/18. Taken To Whitby Motorcars Greensboro, N.C. 2/5/21 for body/paint

  16. #16

    Steve >> aka: GoDadGo
    GoDadGo's Avatar
    Join Date
    Feb 2015
    Location
    Slidell, Louisiana
    Posts
    6,572
    Post Thanks / Like
    Blog Entries
    1
    Congratulations!

    That's A Good Looking Go-Kart Paw Paw!

  17. #17
    Senior Member phileas_fogg's Avatar
    Join Date
    Jun 2015
    Location
    Fairfax Station VA
    Posts
    1,235
    Post Thanks / Like
    Quote Originally Posted by Boydster View Post
    Trans tail shaft spacers: I used a stack of washers until i can get the pinion angle all set, then I'll order spacers from McMaster or Ace and modify as needed. My TKO 600 also sat on the frame crossmember.
    For sure start with a stack of washers until you get the height figured out; it's easy & cheap (probably free as I bet you've got a bunch laying about). Or use scrap bar stock if you have any.

    Congratulations!


    John
    MK IV Roadster #8631
    Ford 302, Holley Terminator EFI, T5z, 3.55 Rear End, IRS, 17” Halibrand Replicas (9” front, 10.5” rear), Nitto 555 G2’s (275/40ZR17 front, 315/35ZR17 rear), Fast Freddie’s Power Steering, F5 Wilwood Brakes, FFMetal’s Firewall Forward, Forte’s Hydraulic Clutch & Throttle Linkage
    https://www.ffcars.com/threads/phile.../#post-4776313

  18. #18
    Senior Member broku518's Avatar
    Join Date
    Sep 2017
    Location
    Jupiter, FL
    Posts
    472
    Post Thanks / Like
    Thank you ALL for your valuable feedback. I feel very fortunate to lean on this community.

    Thanks
    Martin
    Life is short, so start living it.
    Build thread: http://thefactoryfiveforum.com/showt...-in-the-garage!
    delivery date: 10/31/2017, first start 2/24/2018, title and registration passed 6/22/2018

Posting Permissions

  • You may not post new threads
  • You may not post replies
  • You may not post attachments
  • You may not edit your posts
  •  

Replica Parts

Visit our community sponsor