Forte's

Visit our community sponsor

Thanks Thanks:  0
Likes Likes:  0
Results 1 to 6 of 6

Thread: Reached a Milestone! (Windshield Install)

  1. #1
    Senior Member Alphamacaroon's Avatar
    Join Date
    Jan 2019
    Location
    Richland, WA
    Posts
    457
    Post Thanks / Like

    Reached a Milestone! (Windshield Install)

    During the assembly of your car, what was the point where you said: "After this, I won't dread anything more— this is the last thing I can completely f' up and cost me a lot of time or money to fix"? For me it was the front windshield. Seems like pretty much everything after this is "undoable". Well, I can finally say that I've reached the point of feeling no more impending doom! And it feels GOOD!

    After trying unsuccessfully to find a windshield installer, I decided to try it myself— figured hey, I can build a car, I can probably install a windshield, right? With the help of a couple of brave neighbors and a healthy dose of whiskey to lure them and to provide some much needed liquid courage, we accomplished it over the weekend!

    62716707519__3650B47A-A933-475A-AB93-1DA66164AC17.jpg
    (Pardon the paint. Still not done with the cut and buff)

    I'm really tickled with how it turned out. Other than a couple places with a little excess adhesive squished out on the inside bottom (nothing really noticeable, and certainly better than not enough), I can't say I would change much. I don't think a professional could have done any better— maybe just quicker. A few things I learned:

    1. Despite the masking tape doing an excellent job, there were a couple of small places where the glass primer bled on the glass and (gasp) on the car paint as well. I about had a heart attack because I thought it would be impossible to remove it (especially from the paint). But I found it's super easy to remove with a razor blade on the window, and I was able to remove it from the paint with pure ethanol (I used reagent grade 100% ethanol, but I'm sure isopropyl/rubbing alcohol would do the same). The alcohol easily removed the primer without any noticeable change to the clearcoat. If you're curious, I used 3m primer and adhesive.

    2. Everything I read seemed to say that wool daubers were the go-to choice for applying the primer, but I found that 1" chiseled foam paint brushes from the hardware store were by far the best. Don't be afraid to put on the primer quite thick and wet— it has the consistency of ink and it takes quite a bit to get it to cover well. Don't stress if it looks like a horrible butchered paint job on the back-side of the glass— better to lay it on thick and clumpy than miss any spots. As long as your glass is nice and clean, the side that matters will look absolutely beautiful. Also, don't worry about getting complete coverage on the first pass, it will take a couple of coats (with a little drying time between) to fill in all the spots.

    3. I bought a couple of Harbor Freight suction cups, and my experience would say, don't bother. The window is curved so much that it was nearly impossible to get them to attach, and when I did, I didn't trust them. Because the window is so curved, as long as you make good alignment marks, it's pretty easy to set it down by hand on the center of the bottom edge, and then lean it back into place.

    4. An electric caulking gun would have been really nice. I was actually able to lay a nice bead down by hand, but that wasn't the problem— it took nearly all my strength (and I'm a big guy) to squeeze the adhesive out continually. I don't know if maybe I didn't puncture the tube well enough (I thought I did), or maybe the weather being a little on the cooler side made it more viscous, or maybe the tube was bent or defective— whatever it was, I could barely finish the entire bead without crying uncle. My hands and fingers were shaking the whole time and nearly useless afterwards. And keep in mind, this was with the applicator tip being cut quite large with the V-shape on the side like pros recommend.

    4. If you get any adhesive anywhere you don't want, a trick I learned a few years ago with acrylic adhesive is that it can be wiped off very easily with WD40. Otherwise if you try to wipe it dry it just turns into an impossible to remove smear.

    5. I decided to go sans border weather stripping— I just like the look better. The window seems to fit very nicely and symmetrically enough. It was difficult to get the inset exactly the same from top-to-bottom, but at least it's symmetrical from side-to-side. I'm a pretty harsh judge and I'm happy with it.

    6. As inspired by edwardb's build, using some lumber wrapped in towels and some ratchet straps is essential to getting the sides of the windows to seat and lay down properly.

    Anyway, I'm really happy and excited to get past this! Hopefully this means some graduation pictures will be coming soon...
    Last edited by Alphamacaroon; 11-16-2020 at 02:12 AM.
    Cheers,

    --jim

    Build 1: Gen III Type 65 Coupe, Gen II Coyote

  2. #2
    Senior Member edwardb's Avatar
    Join Date
    Feb 2011
    Location
    Lake Orion, Michigan
    Posts
    10,592
    Post Thanks / Like
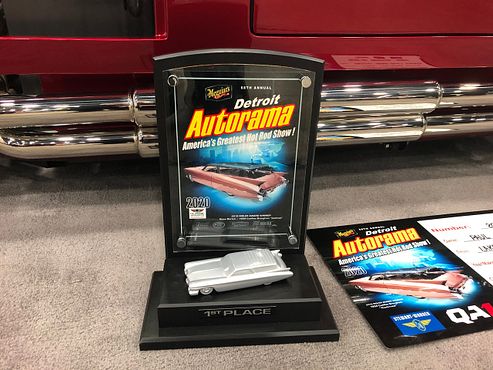
    Looks good! I agree. It was a big relief to get that part done. Was one of my big worries too. Funny you mention about a little excess adhesive showing on the inside as not being noticeable. That was one of two things the judges at the Detroit Autorama found and marked my Coupe down for. I have a very slight amount of excess in the inside lower corner on the driver side. I cleaned it up as best I could, but decided the risk/reward for possibly messing up the frit wasn't worth it so left it alone. Sure enough, they found it.
    Build 1: Mk3 Roadster #5125. Sold 11/08/2014. Build 2: Mk4 Roadster #7750. Sold 04/10/2017. Build Thread
    Build 3: Mk4 Roadster 20th Anniversary #8674. Sold 09/07/2020. Build Thread and Video. Build 4: Gen 3 Type 65 Coupe #59. Gen 3 Coyote. Legal 03/04/2020. Build Thread and Video
    Build 5: 35 Hot Rod Truck #138. LS3 and 4L65E auto. Rcvd 01/05/2021. Legal 04/20/2023. Build Thread. Sold 11/9/2023.

  3. #3
    Senior Member John Dol's Avatar
    Join Date
    Feb 2011
    Location
    Gorham, ME
    Posts
    1,522
    Post Thanks / Like
    Looks great Jim!
    I think most people are intimidated by this job, but it really isn't that hard in the end. I also just went for it and the result is great!

    John
    Finished the "My Coupe, my way" project.

    http://s956.photobucket.com/albums/ae46/jdcoupe1969/
    Coupe #386,17" Team III 245 FR 315 RR, 3-link, T5, 4 wheel disk, power brakes/steering. Sniper EFI
    First start Sept. 18 2013 First go kart Sept 19 2013

  4. #4
    Senior Member Alphamacaroon's Avatar
    Join Date
    Jan 2019
    Location
    Richland, WA
    Posts
    457
    Post Thanks / Like
    Quote Originally Posted by edwardb View Post
    Looks good! I agree. It was a big relief to get that part done. Was one of my big worries too. Funny you mention about a little excess adhesive showing on the inside as not being noticeable. That was one of two things the judges at the Detroit Autorama found and marked my Coupe down for. I have a very slight amount of excess in the inside lower corner on the driver side. I cleaned it up as best I could, but decided the risk/reward for possibly messing up the frit wasn't worth it so left it alone. Sure enough, they found it.
    Hah, nice tidbit of info! If I remember correctly, you still came out on top in that show right? It's funny— there are a hundred little things that you as the builder notice and wish you could change, but when you point them out to most people they say they don't notice it. But I guess when that is your job...

    I've been thinking a lot about how I could perfect it, but just as you mention, that frit primer tends to scrape off fairly easily so I would also be worried about causing more damage than I fix. A couple of thoughts I had that I may revisit down the road:

    1. Using some rubber stamp carving tools to carefully carve out some of the acrylic. They make some pretty tiny ones that would allow you to get into the crevice and do a fairly precision job.
    2. Stuffing and hand shaping some black butyl tape in the crevice around the inside edge— would (hopefully) end up looking like a nice uniform seal around the crevice with something that is fairly forgiving and easy to work with.
    Cheers,

    --jim

    Build 1: Gen III Type 65 Coupe, Gen II Coyote

  5. #5
    Senior Member edwardb's Avatar
    Join Date
    Feb 2011
    Location
    Lake Orion, Michigan
    Posts
    10,592
    Post Thanks / Like
    Quote Originally Posted by Alphamacaroon View Post
    Hah, nice tidbit of info! If I remember correctly, you still came out on top in that show right? It's funny— there are a hundred little things that you as the builder notice and wish you could change, but when you point them out to most people they say they don't notice it. But I guess when that is your job...

    I've been thinking a lot about how I could perfect it, but just as you mention, that frit primer tends to scrape off fairly easily so I would also be worried about causing more damage than I fix. A couple of thoughts I had that I may revisit down the road:

    1. Using some rubber stamp carving tools to carefully carve out some of the acrylic. They make some pretty tiny ones that would allow you to get into the crevice and do a fairly precision job.
    2. Stuffing and hand shaping some black butyl tape in the crevice around the inside edge— would (hopefully) end up looking like a nice uniform seal around the crevice with something that is fairly forgiving and easy to work with.
    The Dow Black Betaprime 5504G I used isn't particularly soft or fragile. I had some 3M that I experimented with and it's definitely less fragile than that. But any damage on the backside would show through terribly on the front through the glass, so I'm leaving it alone. It's just in one corner. The rest is OK. The judge was using a flashlight and looking in every nook and cranny. But yeah, still did OK.

    Build 1: Mk3 Roadster #5125. Sold 11/08/2014. Build 2: Mk4 Roadster #7750. Sold 04/10/2017. Build Thread
    Build 3: Mk4 Roadster 20th Anniversary #8674. Sold 09/07/2020. Build Thread and Video. Build 4: Gen 3 Type 65 Coupe #59. Gen 3 Coyote. Legal 03/04/2020. Build Thread and Video
    Build 5: 35 Hot Rod Truck #138. LS3 and 4L65E auto. Rcvd 01/05/2021. Legal 04/20/2023. Build Thread. Sold 11/9/2023.

  6. #6
    Member
    Join Date
    Jul 2018
    Posts
    81
    Post Thanks / Like
    Quote Originally Posted by edwardb View Post
    The Dow Black Betaprime 5504G I used isn't particularly soft or fragile. I had some 3M that I experimented with and it's definitely less fragile than that. But any damage on the backside would show through terribly on the front through the glass, so I'm leaving it alone. It's just in one corner. The rest is OK. The judge was using a flashlight and looking in every nook and cranny. But yeah, still did OK.

    Did, OK, Heck you did great!!

Posting Permissions

  • You may not post new threads
  • You may not post replies
  • You may not post attachments
  • You may not edit your posts
  •  

FFMetal

Visit our community sponsor