Forte's

Visit our community sponsor

Thanks Thanks:  0
Likes Likes:  0
Page 1 of 3 123 LastLast
Results 1 to 40 of 85

Thread: Stack's Hot Rod Build Page

  1. #1
    Senior Member stack's Avatar
    Join Date
    Feb 2011
    Location
    Macedon, NY
    Posts
    320
    Post Thanks / Like

    Stack's Hot Rod Build Page

    12/22/08

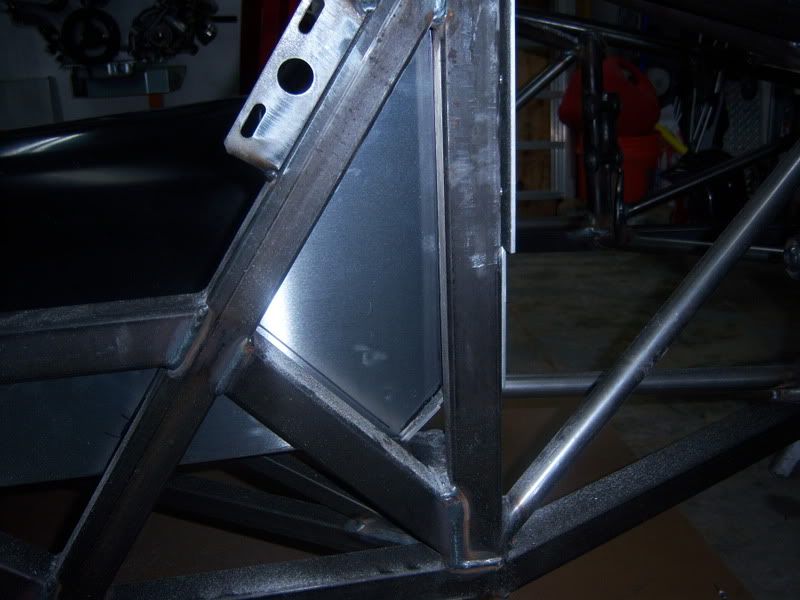
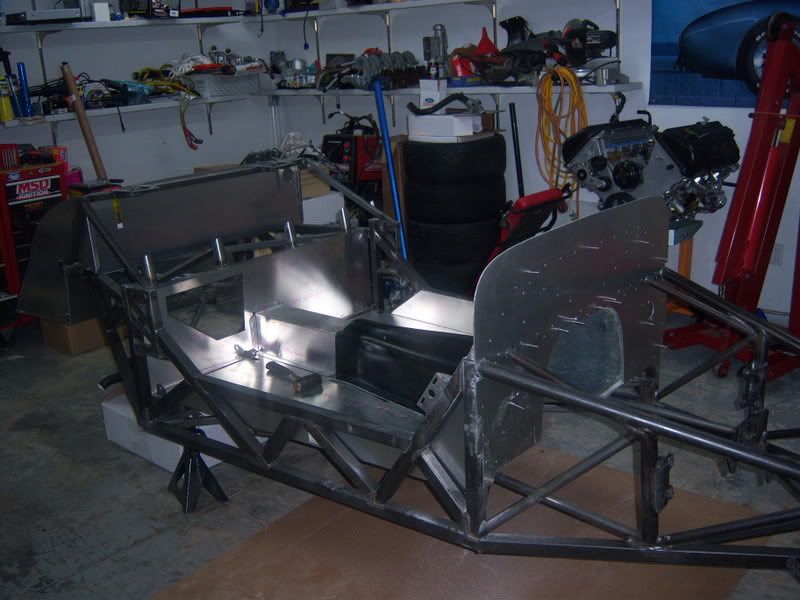
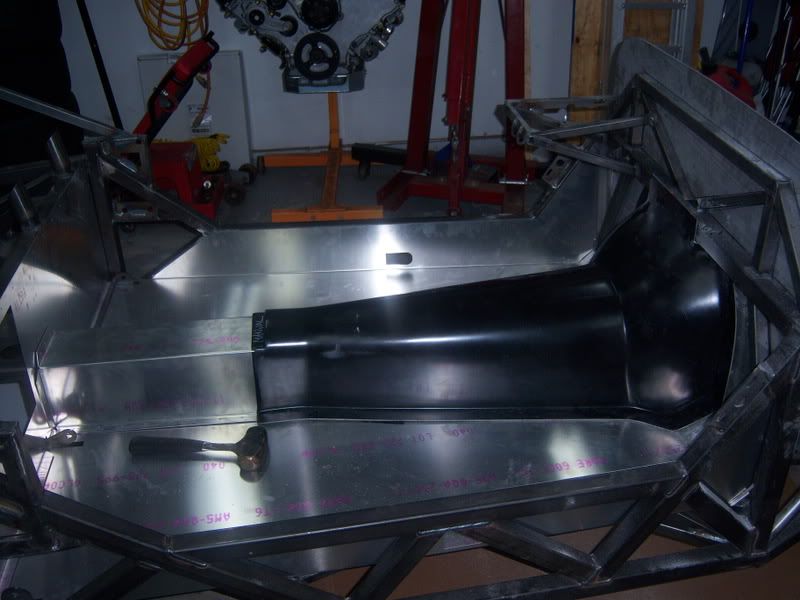
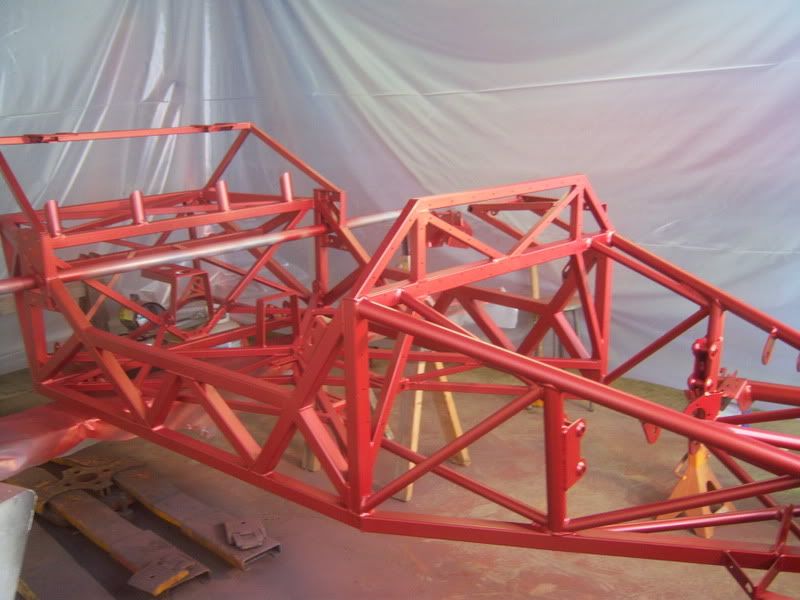
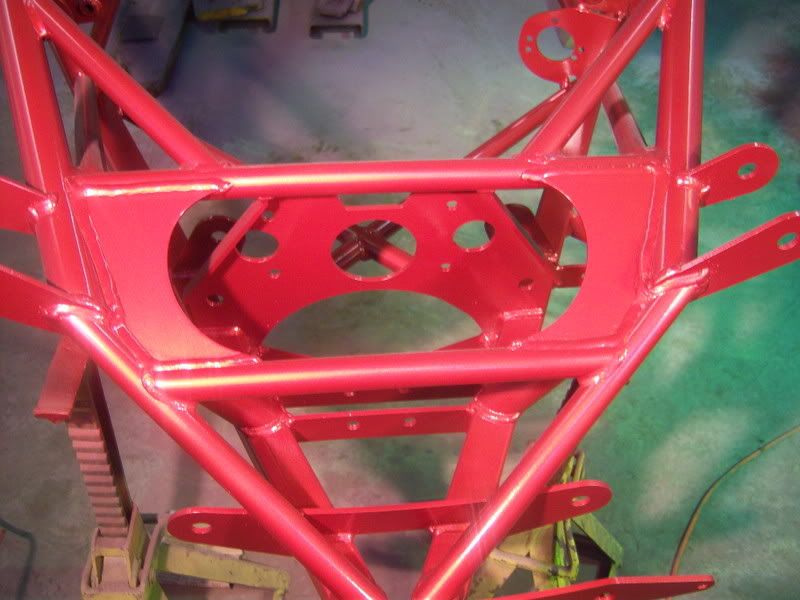
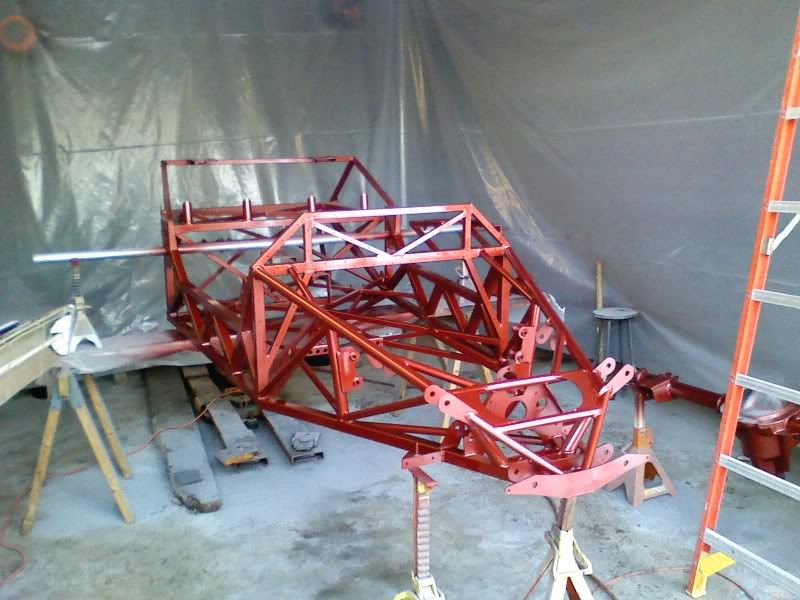
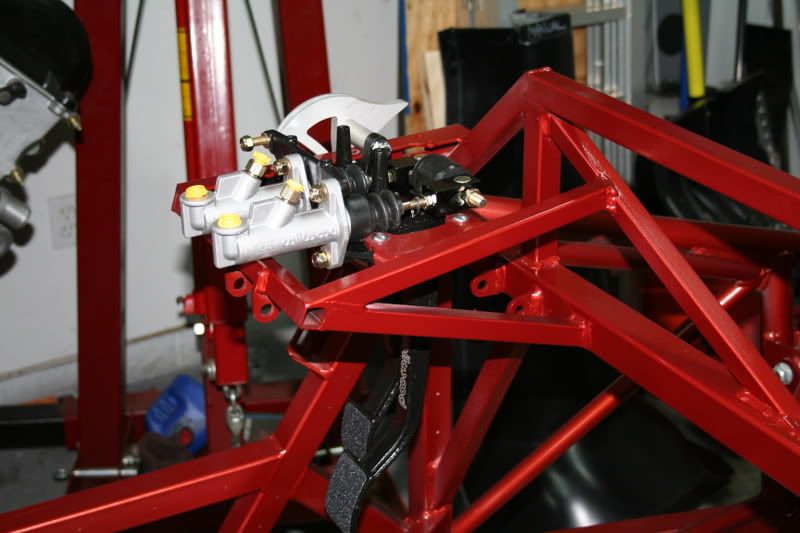
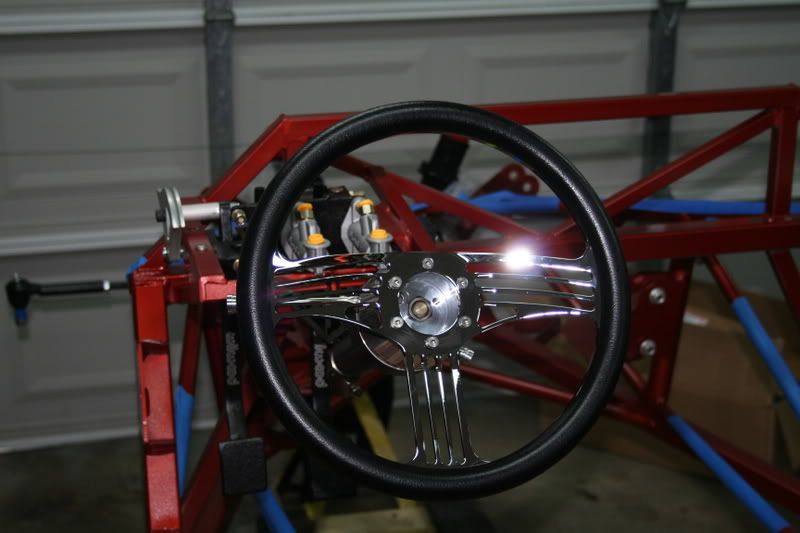
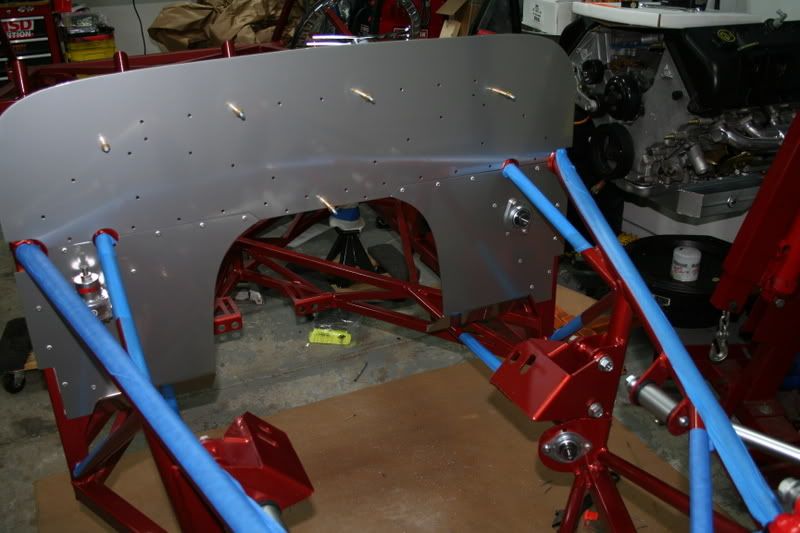
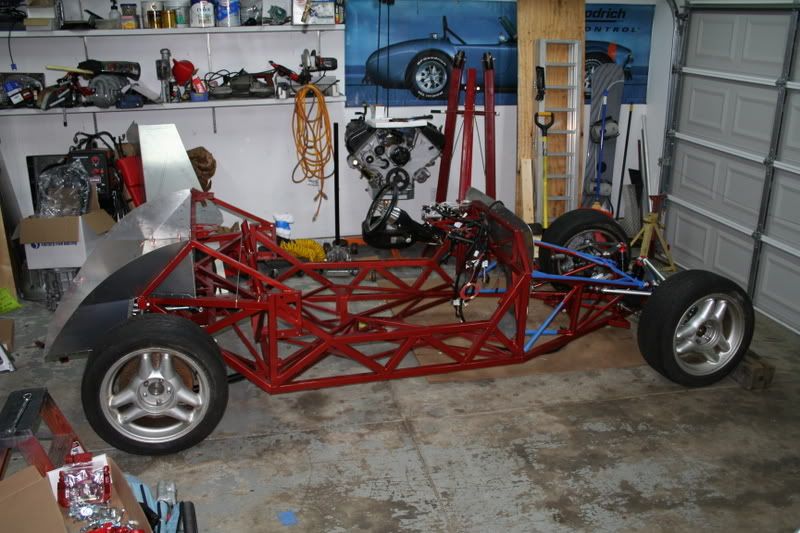
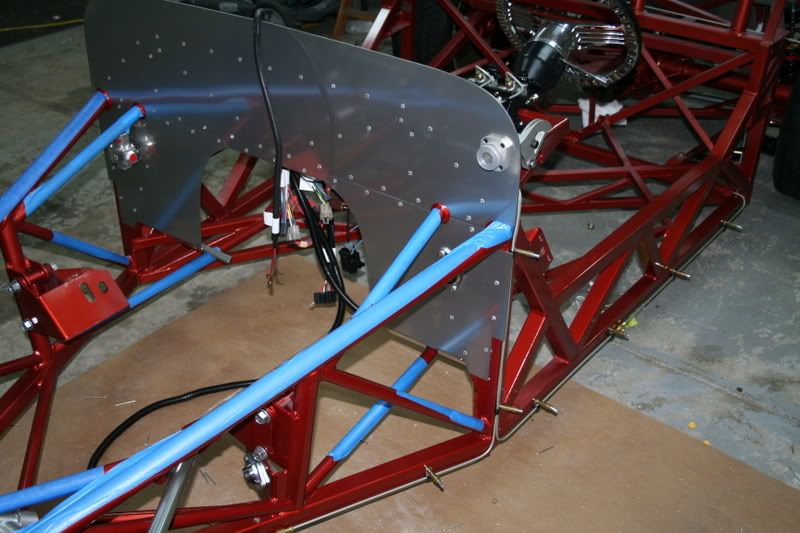
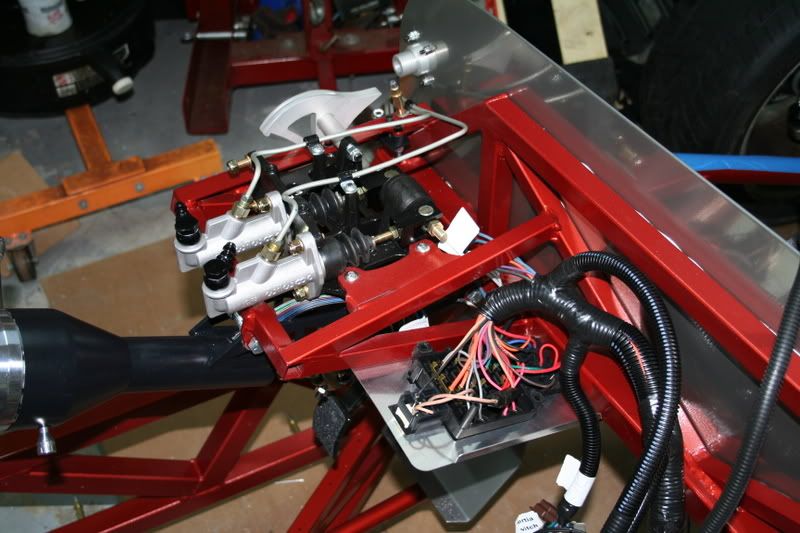
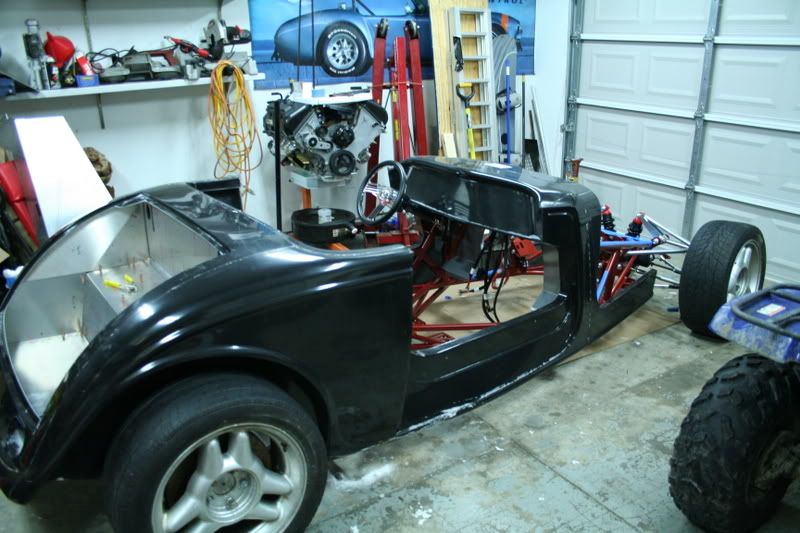
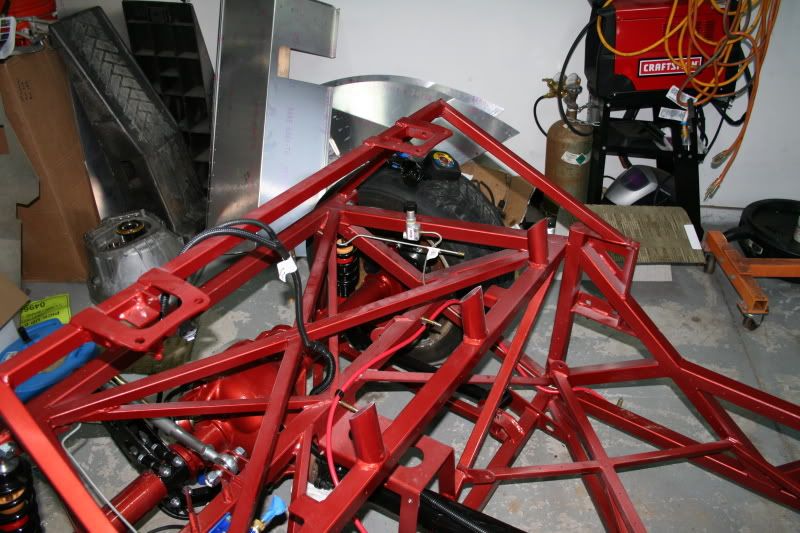
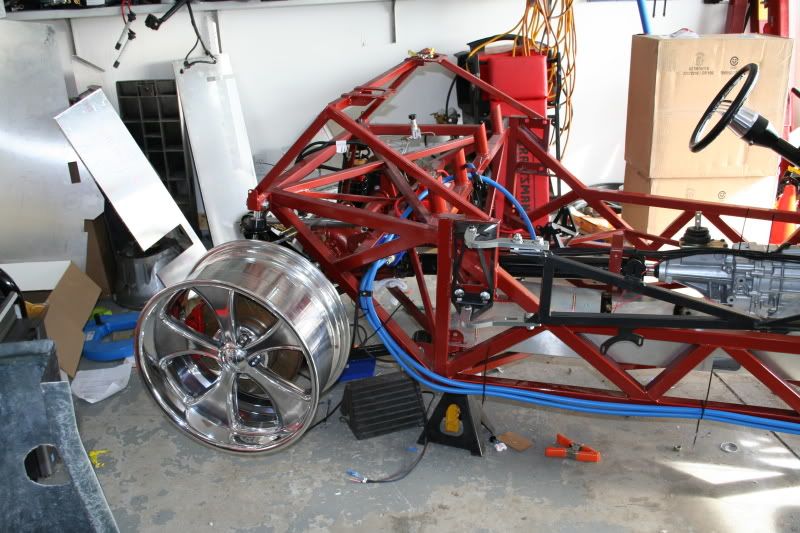
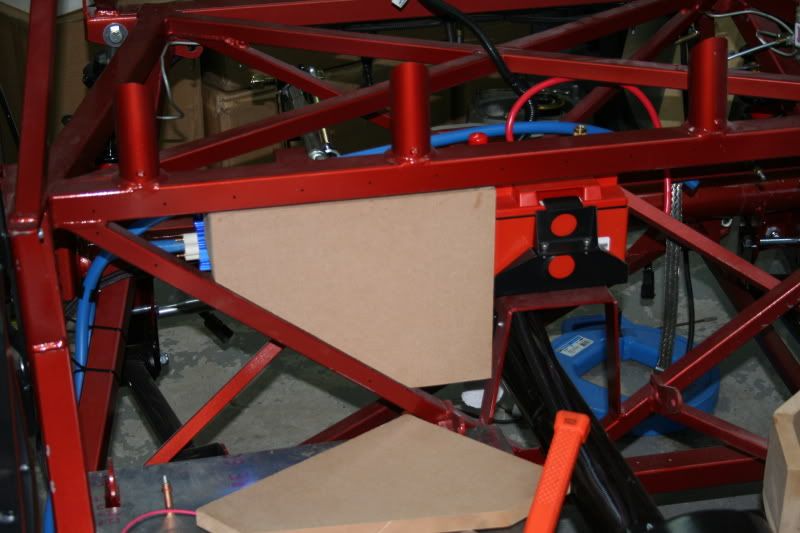
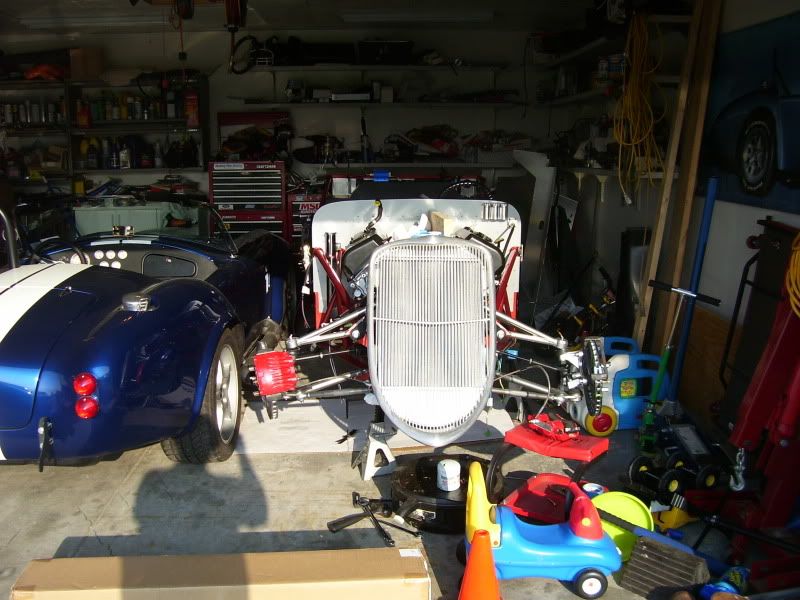
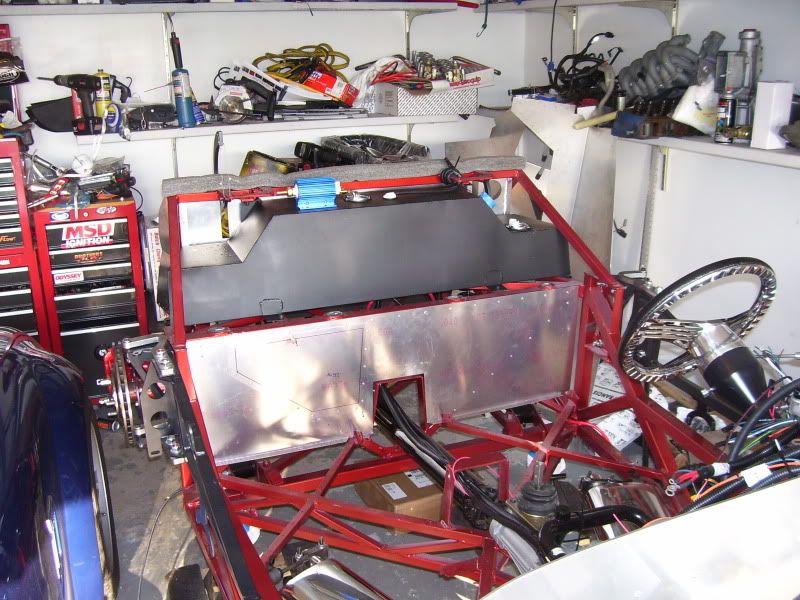
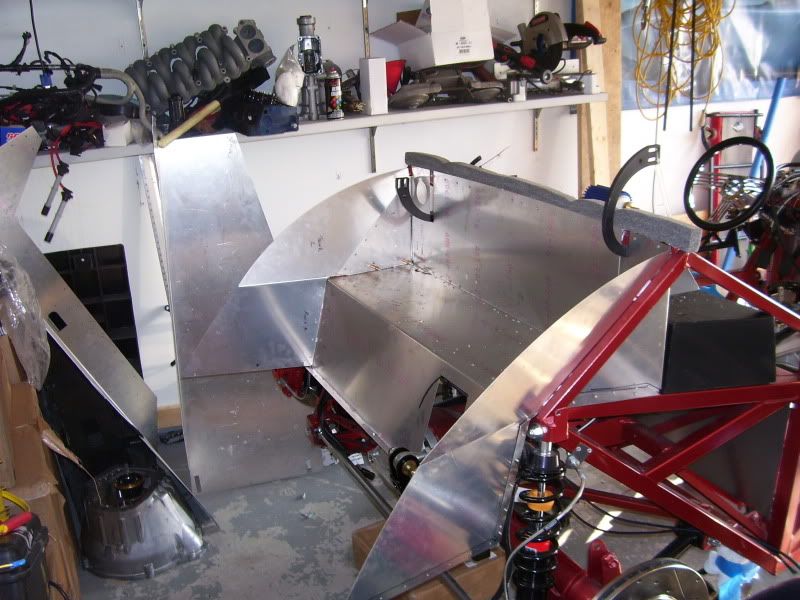
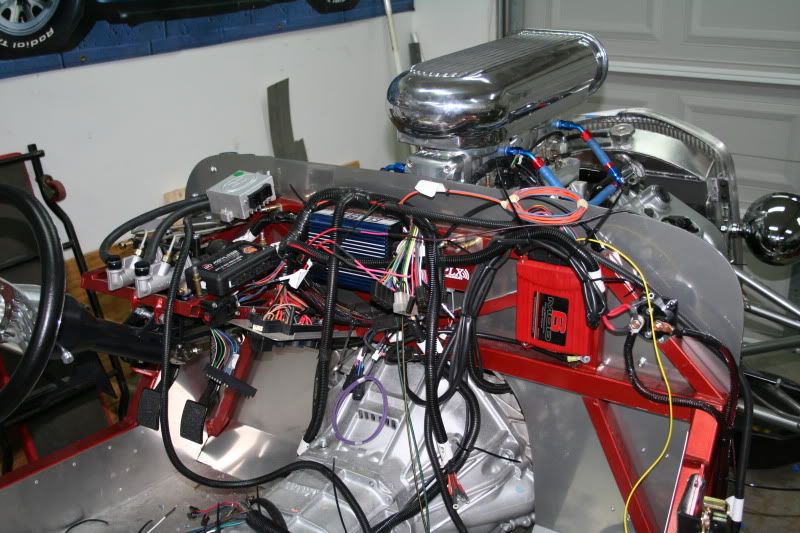
    Well the parts are adding up quick I figured I would get started on my Build page.

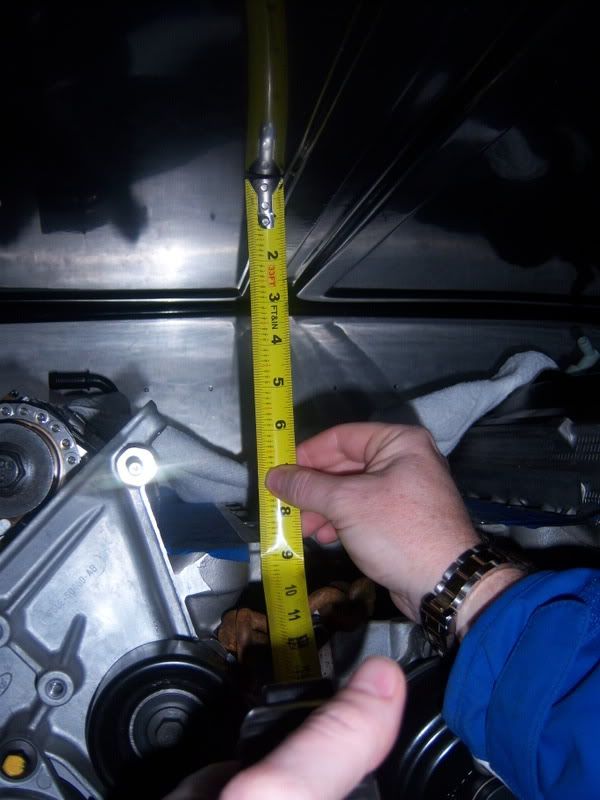
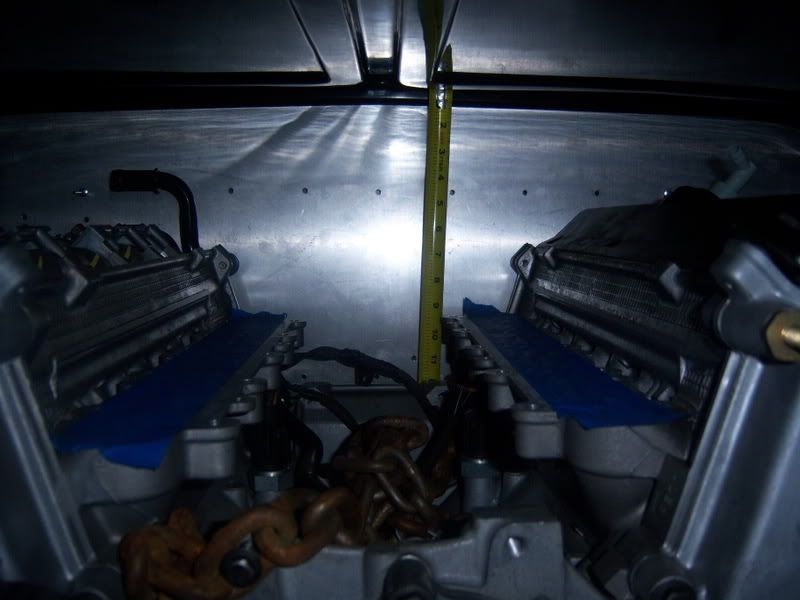
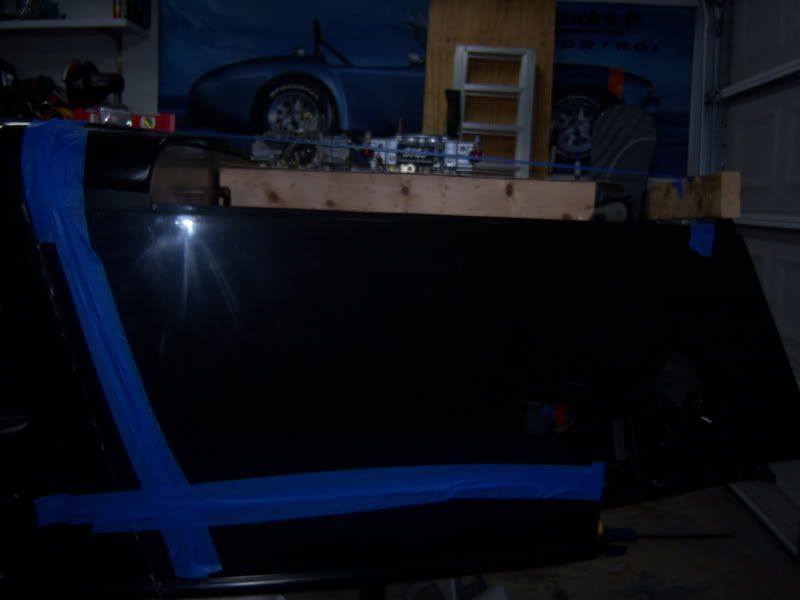
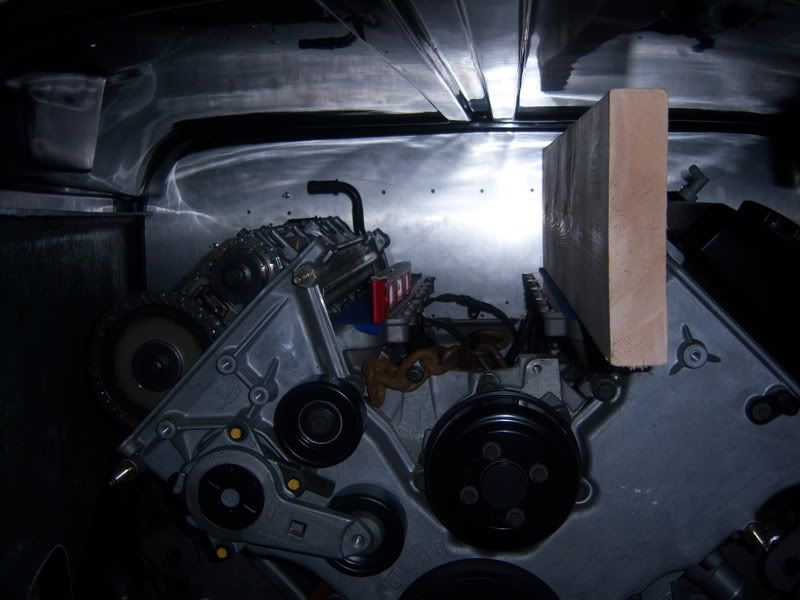
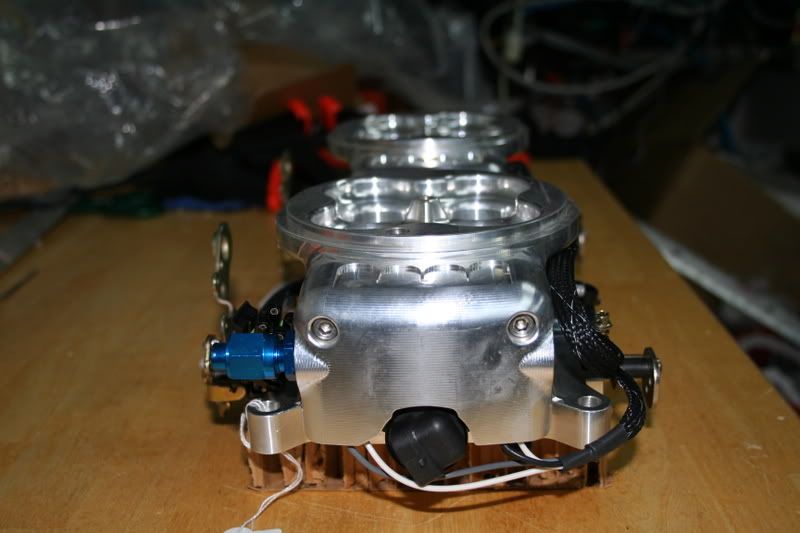
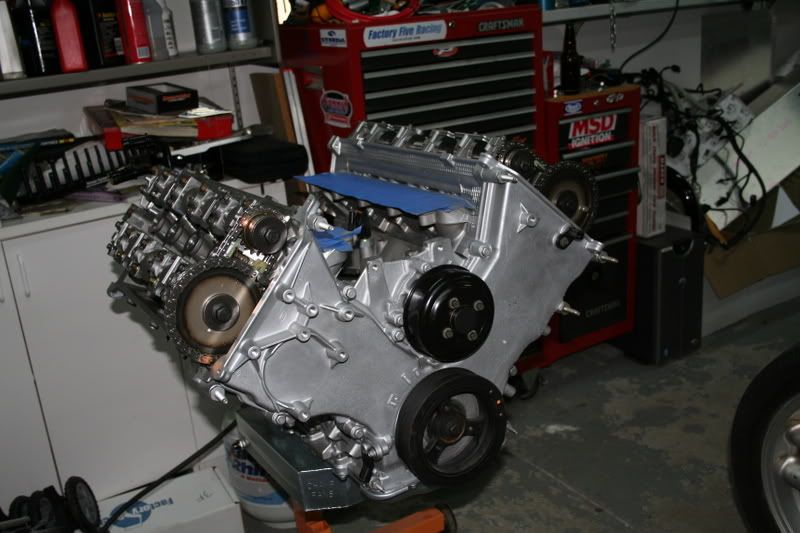
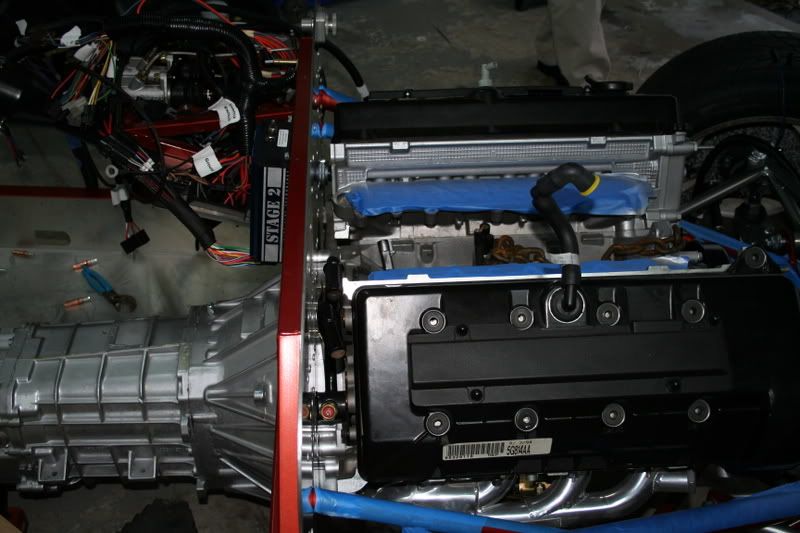
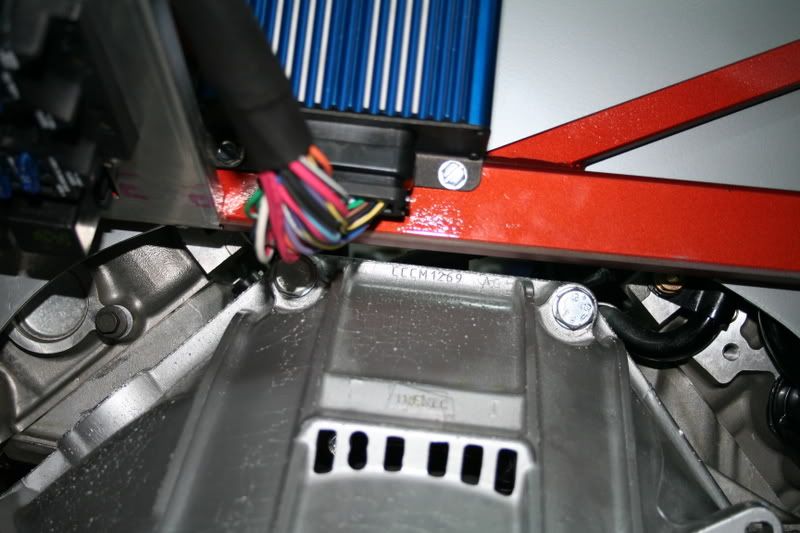
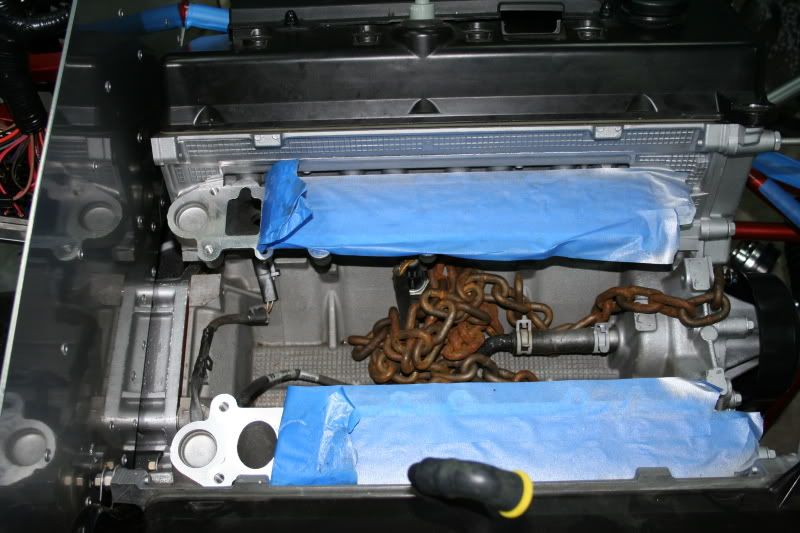
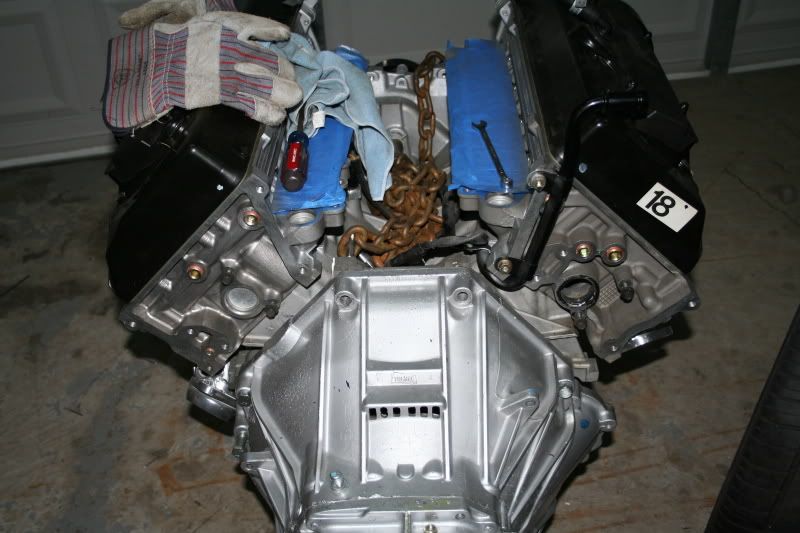
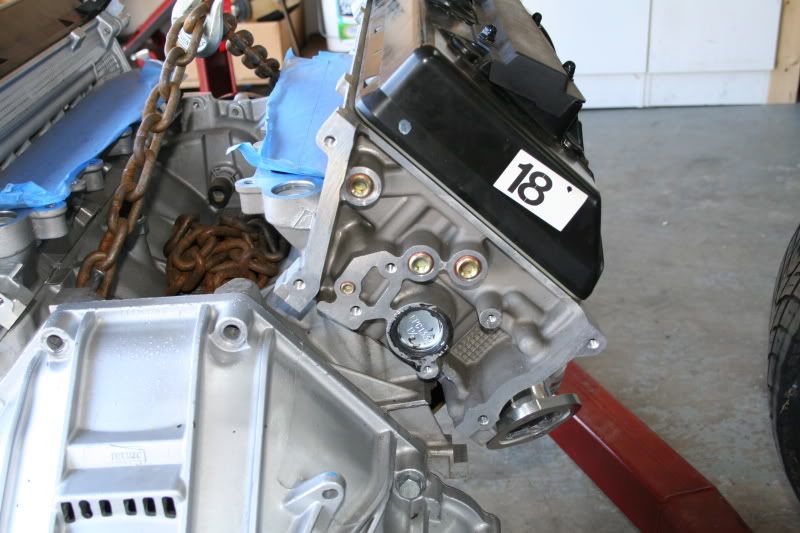
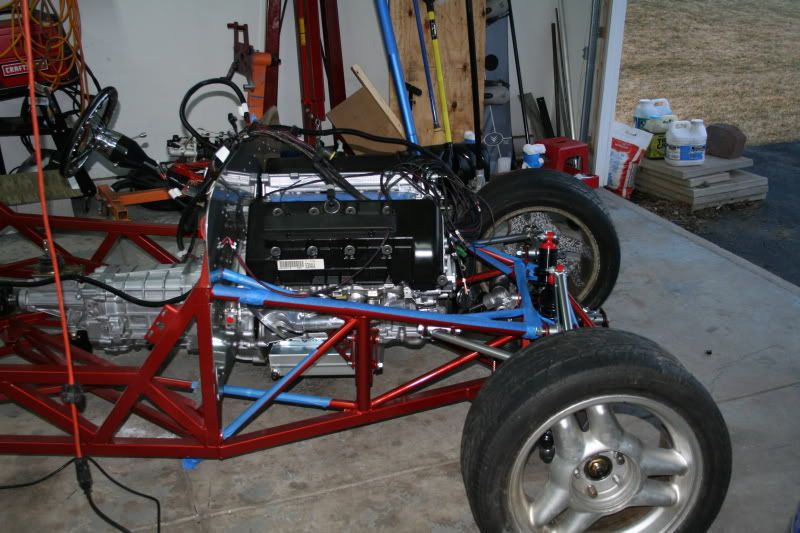
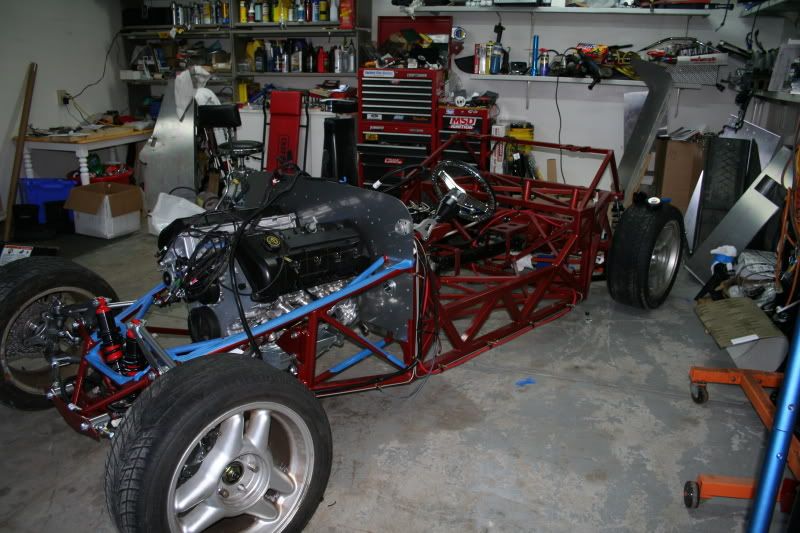
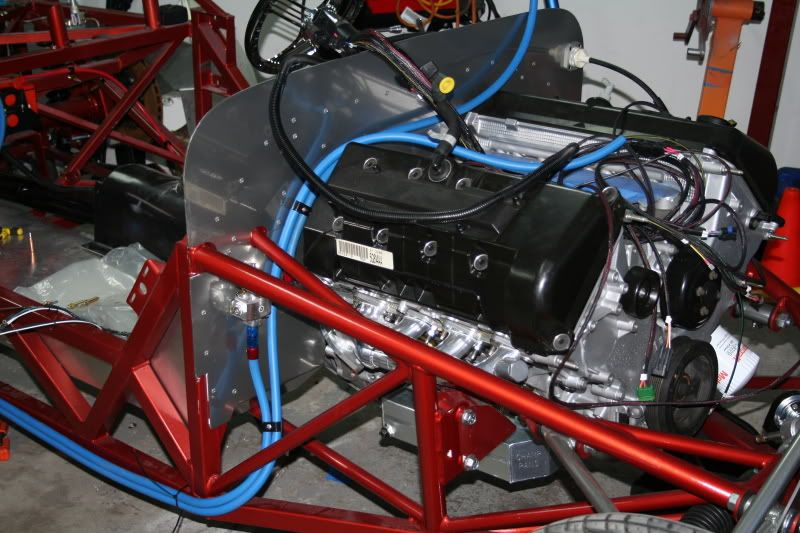
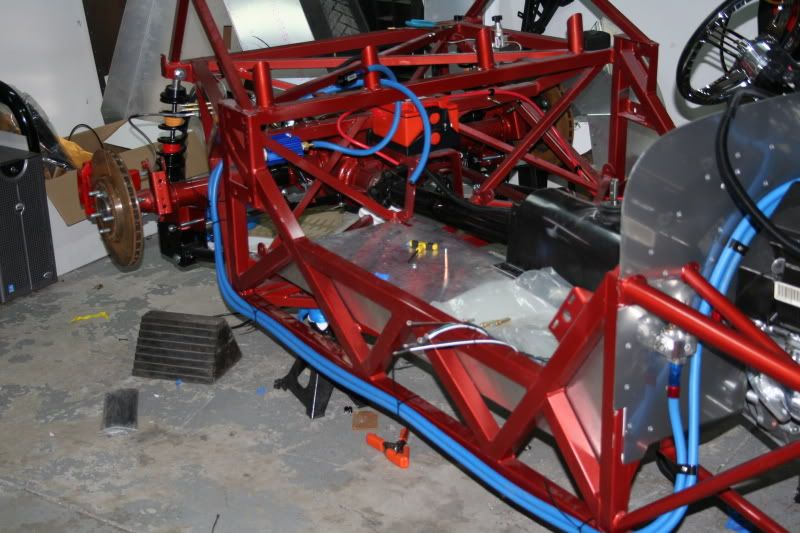
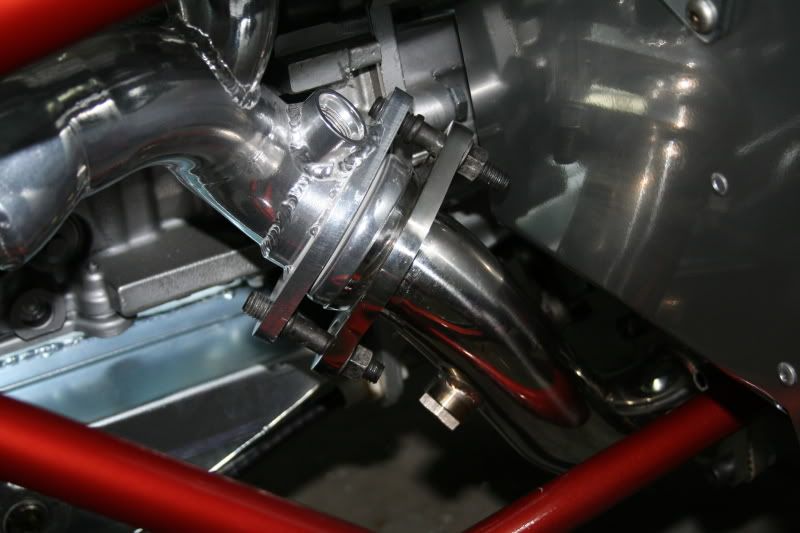
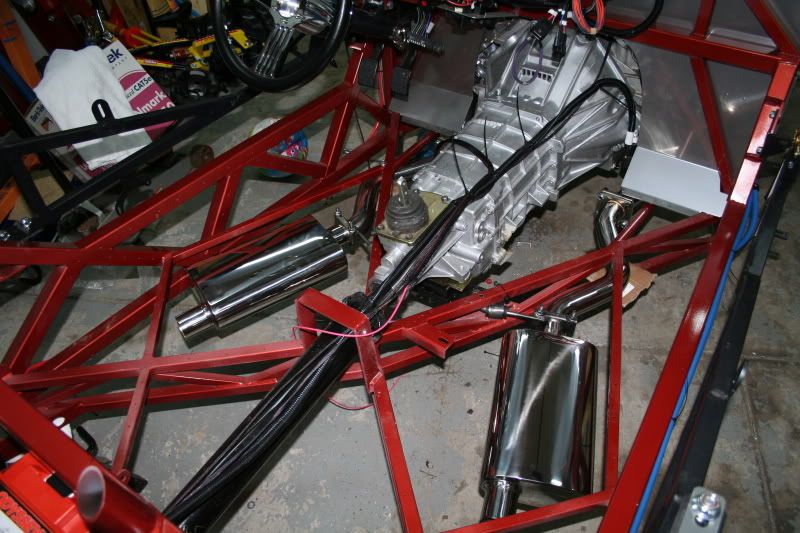
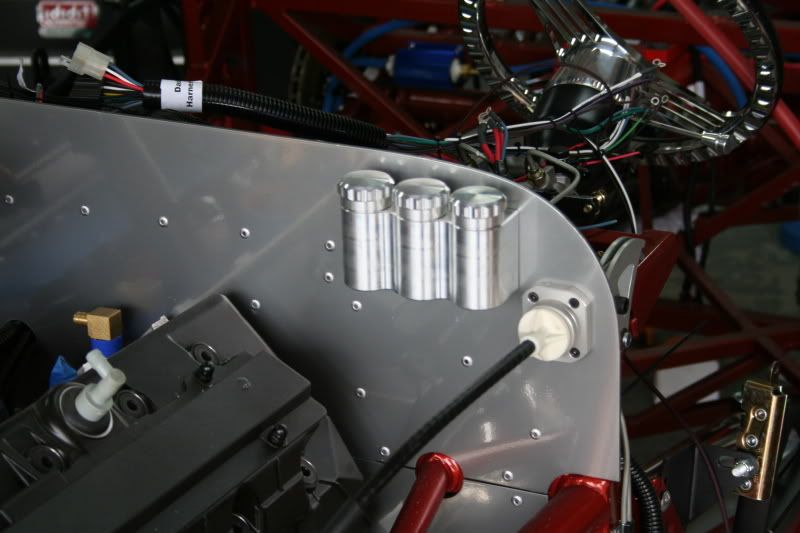
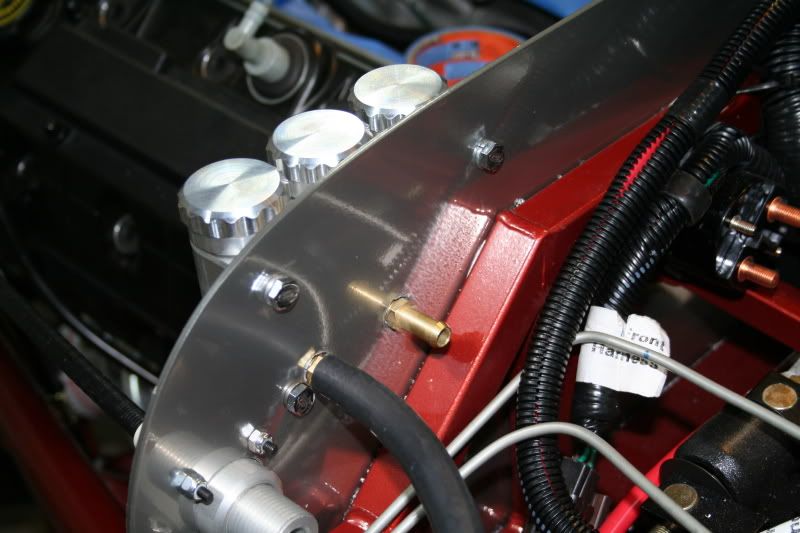
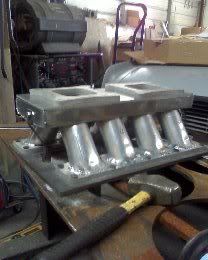
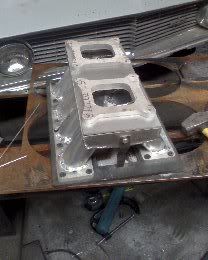
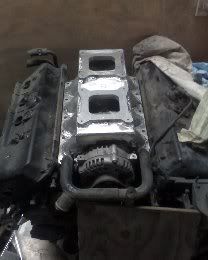
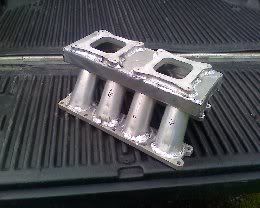
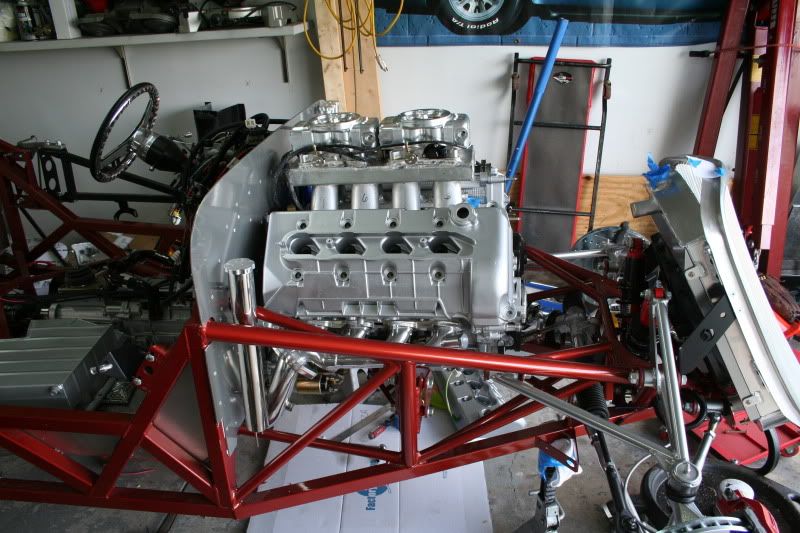
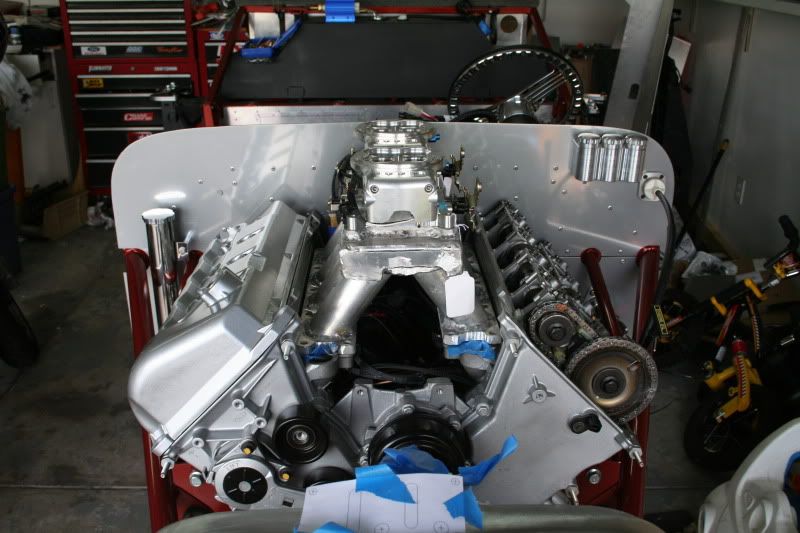
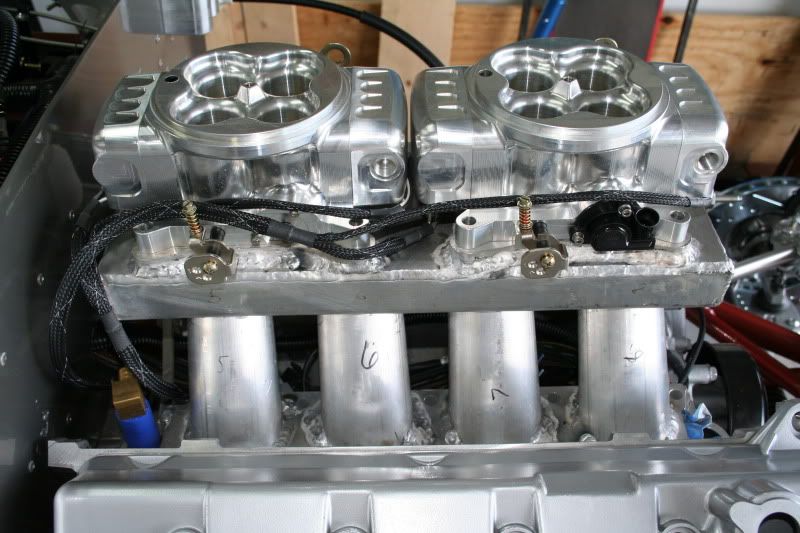
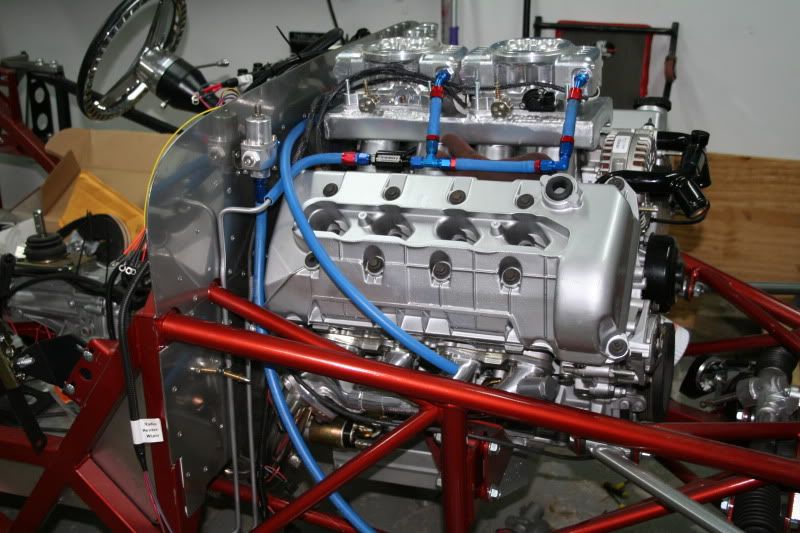
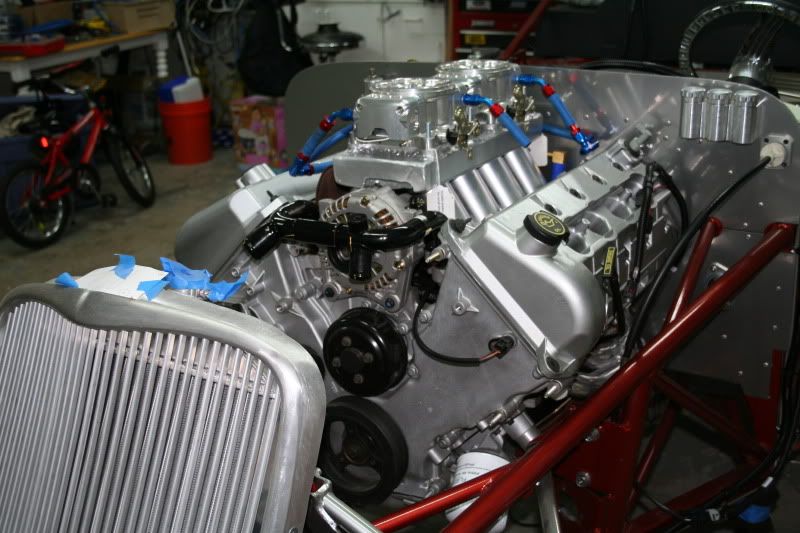
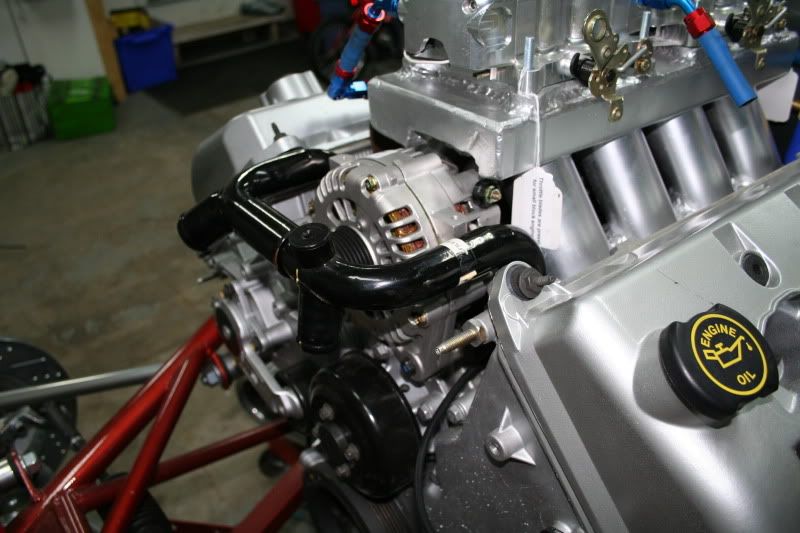
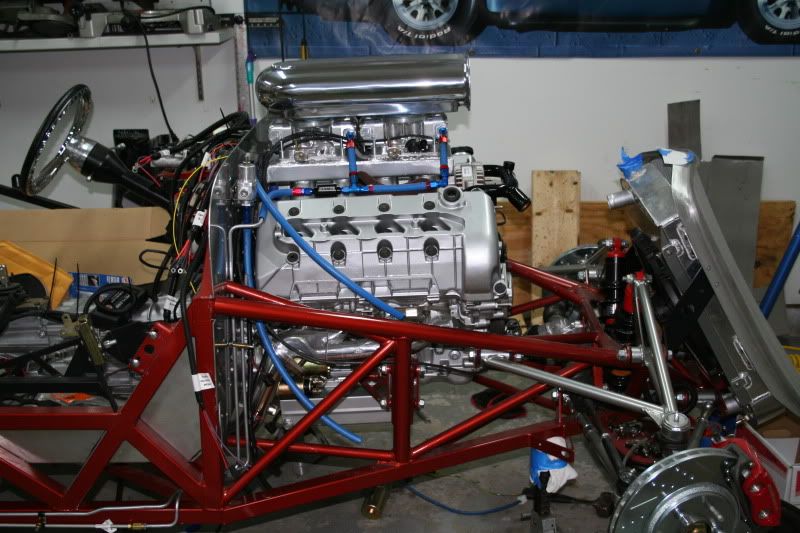
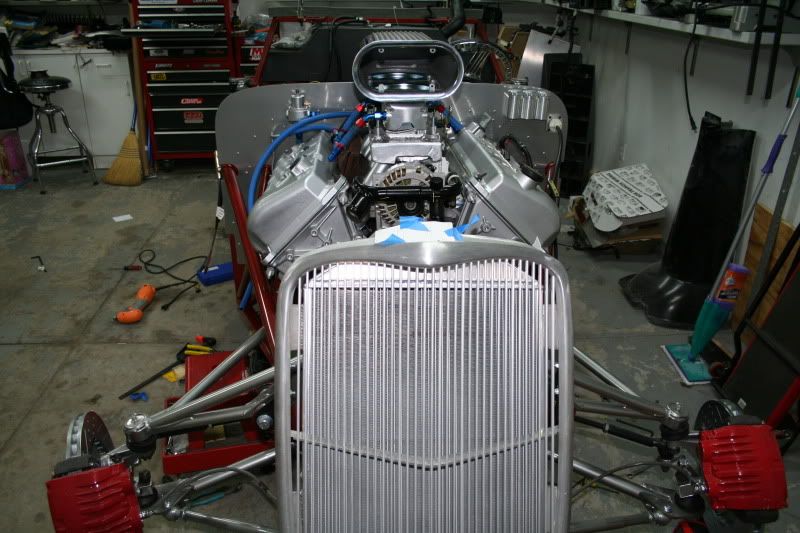
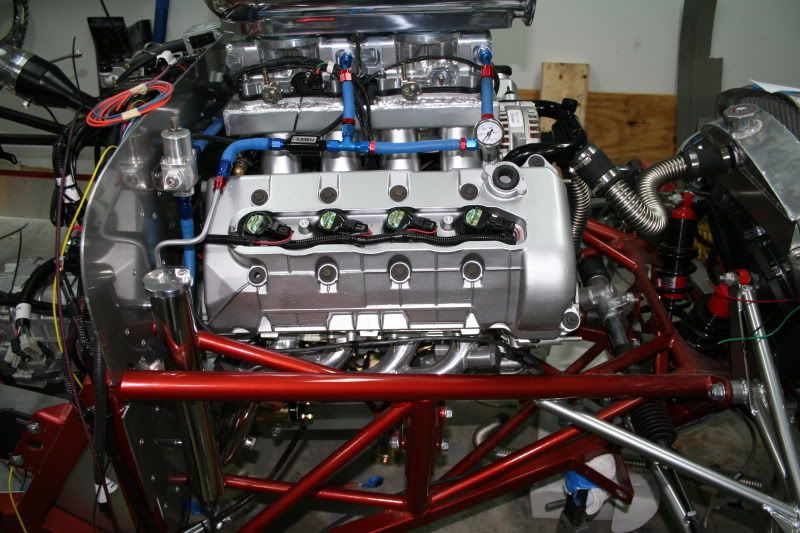
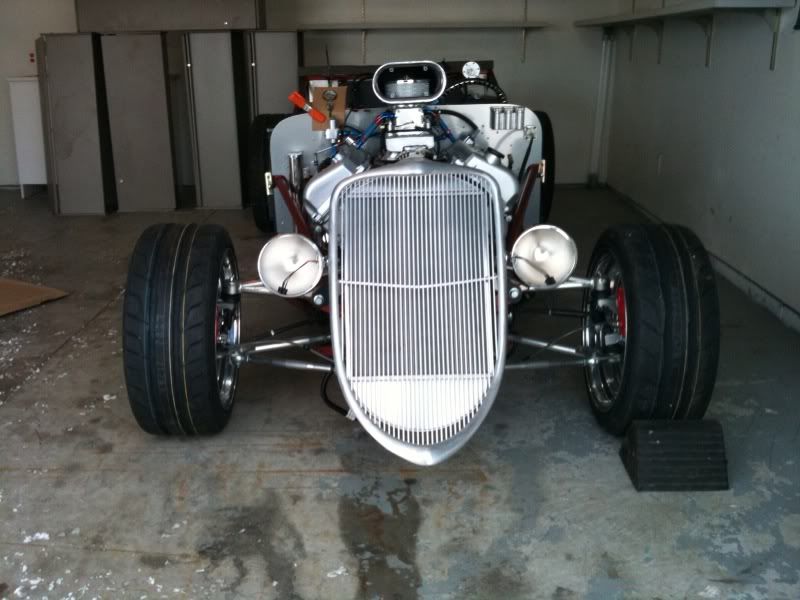
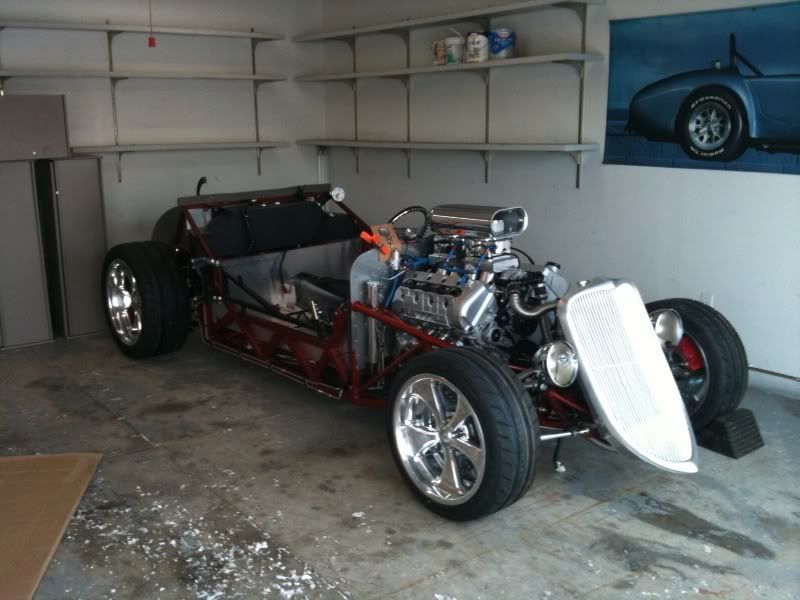
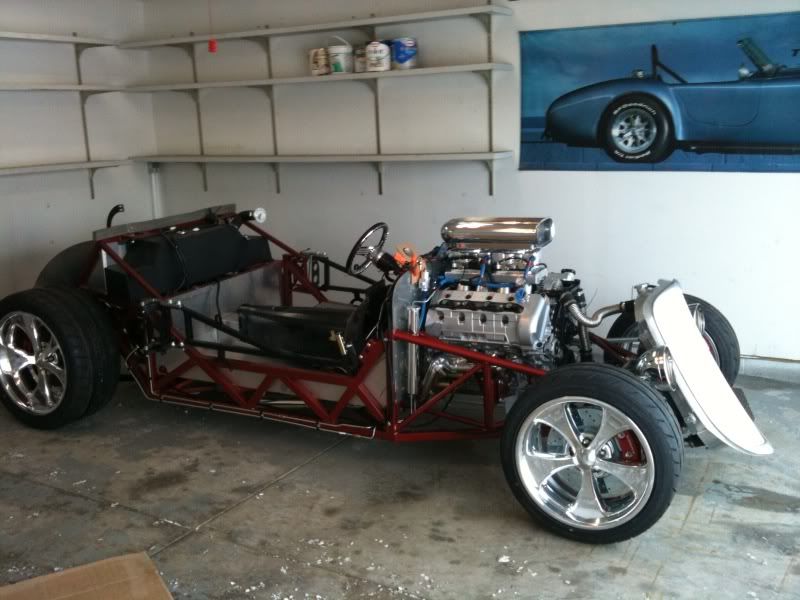
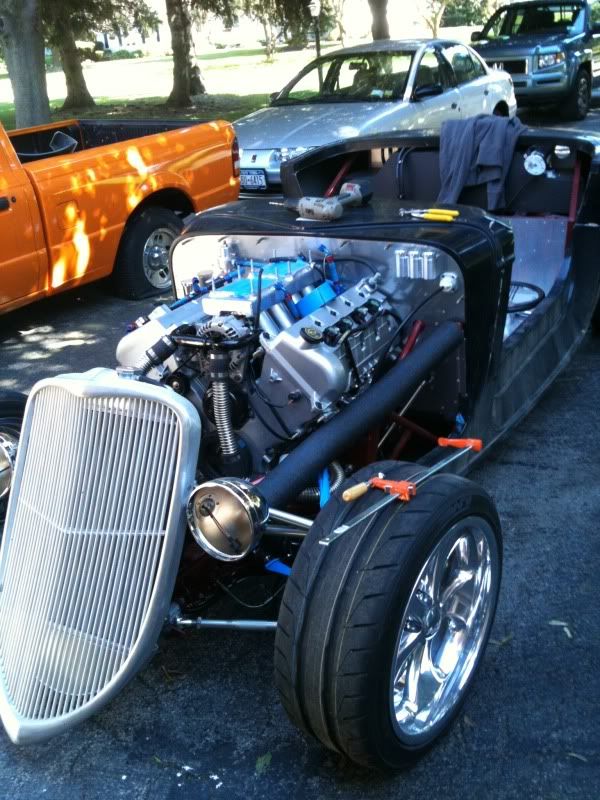
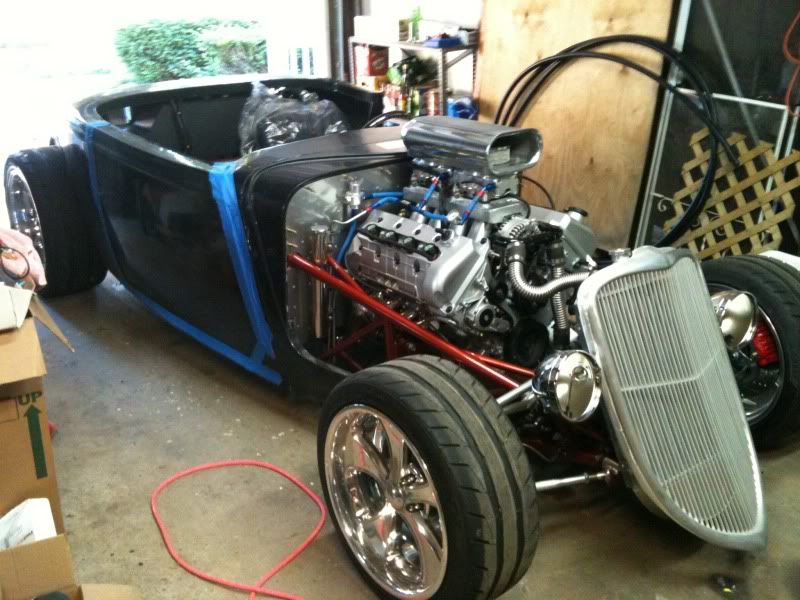
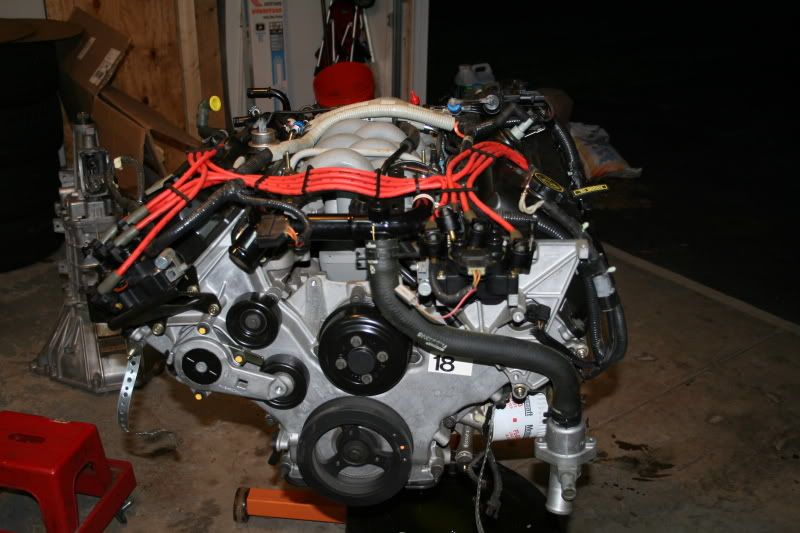
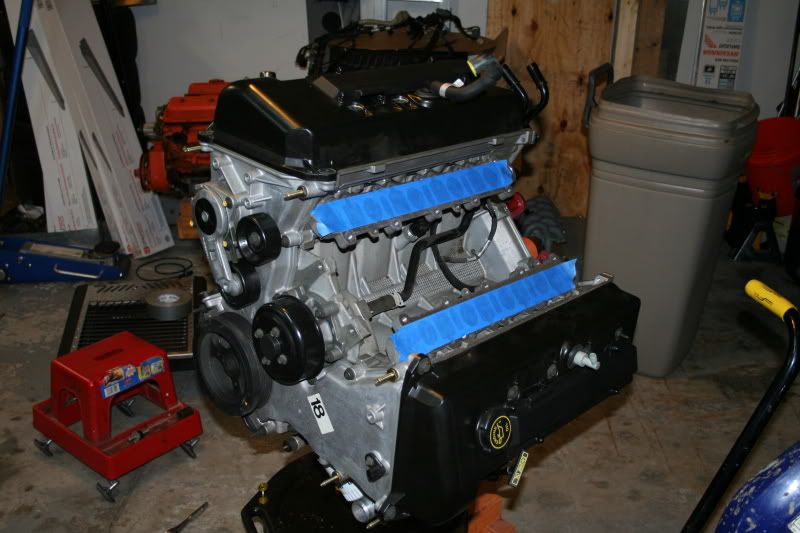
    Here is the motor. It is from a 94/95 Lincoln MKVIII. This was left over NOS from ford. It has a build date of 8/94 so not sure which model year it is from. I drained the oil and began teardown of the unneeded parts. This engine has never been fired.


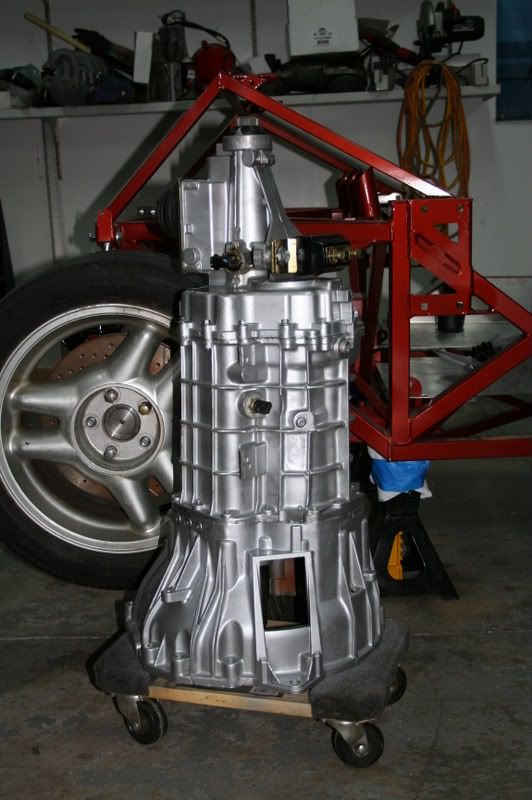
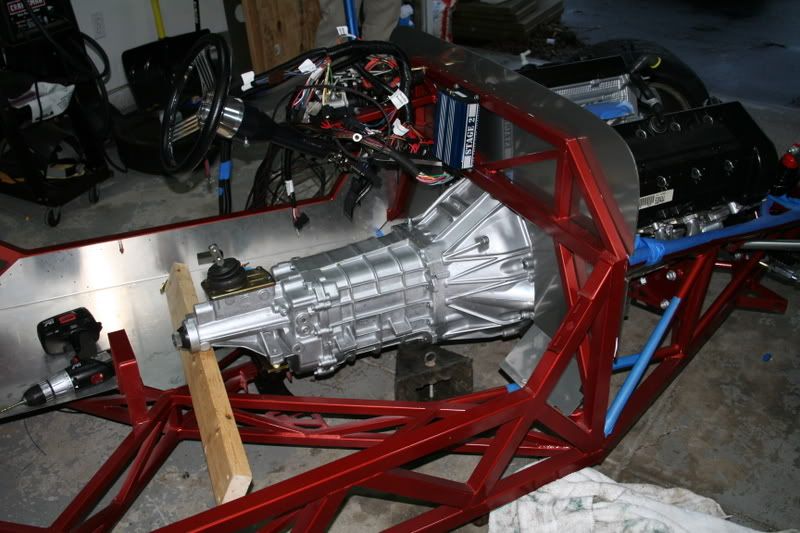
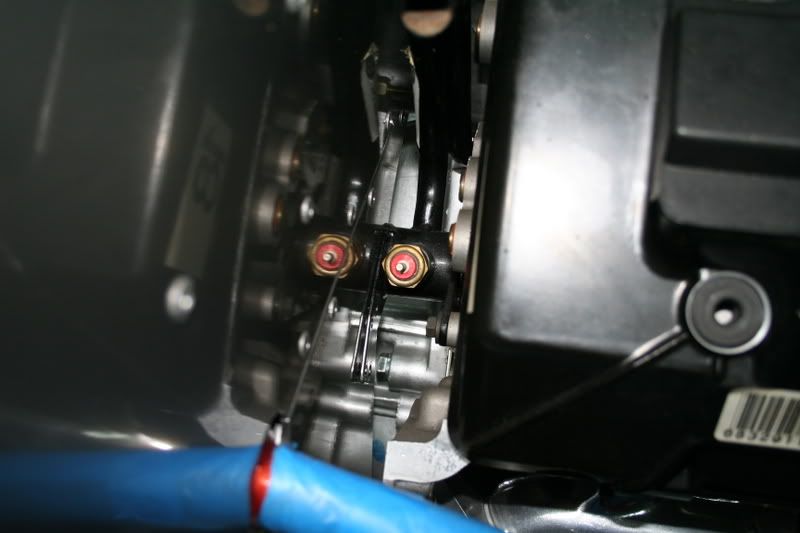
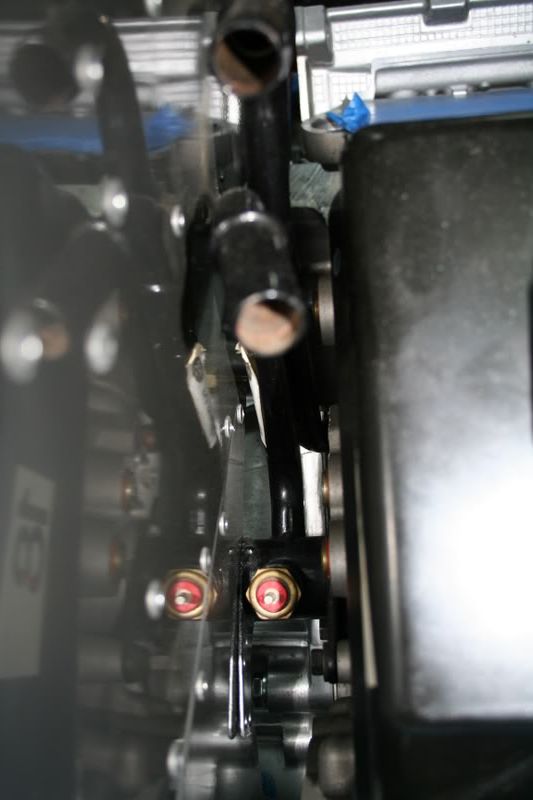
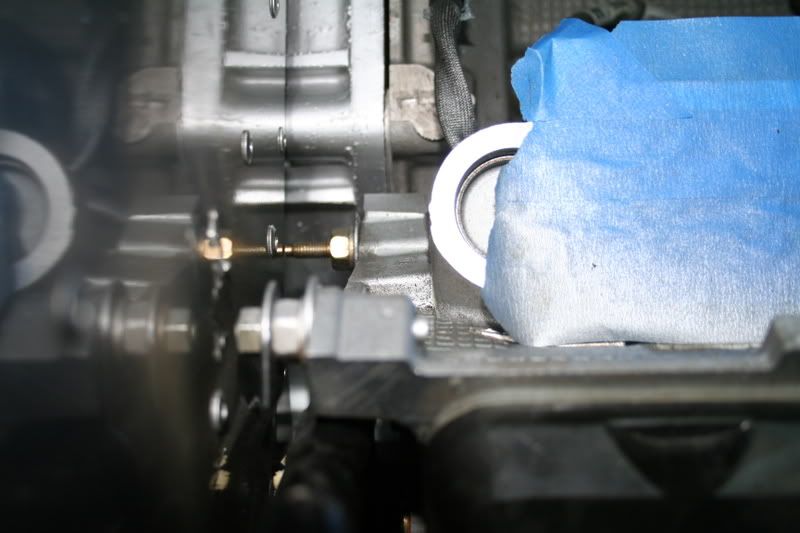
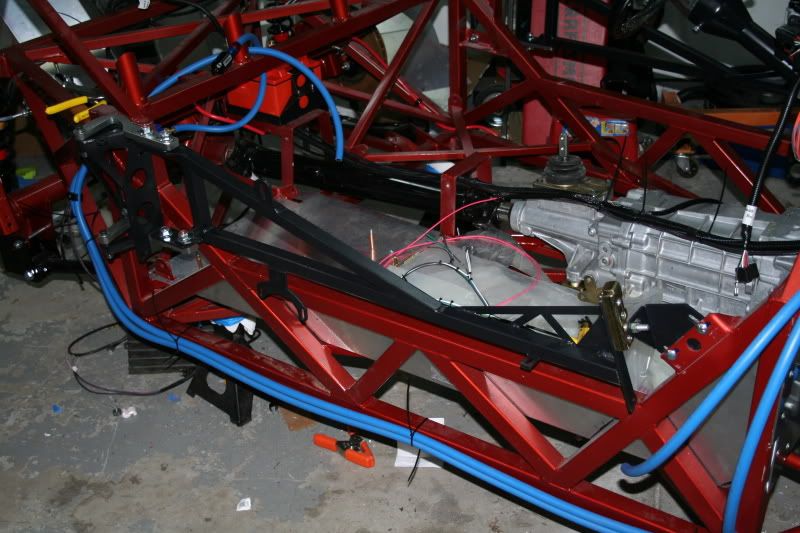
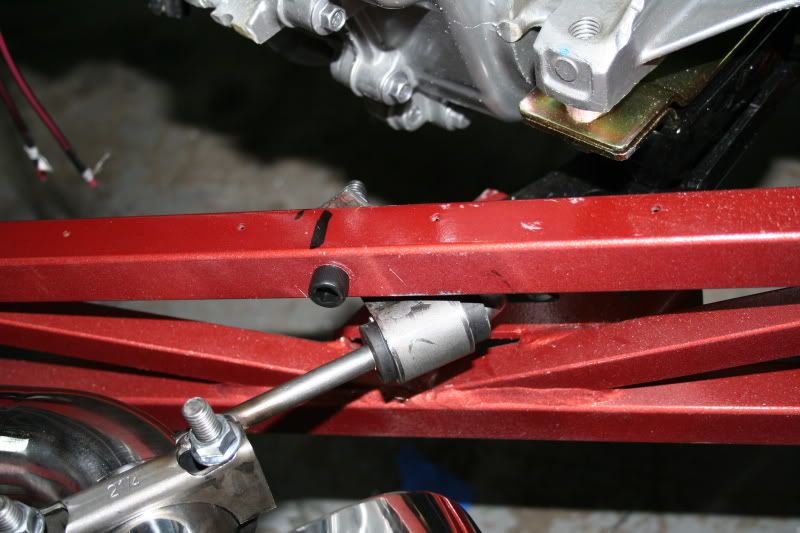
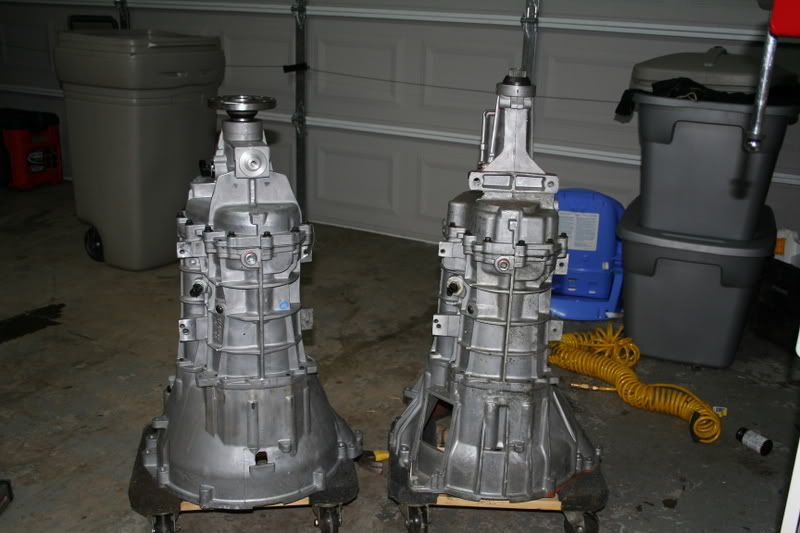
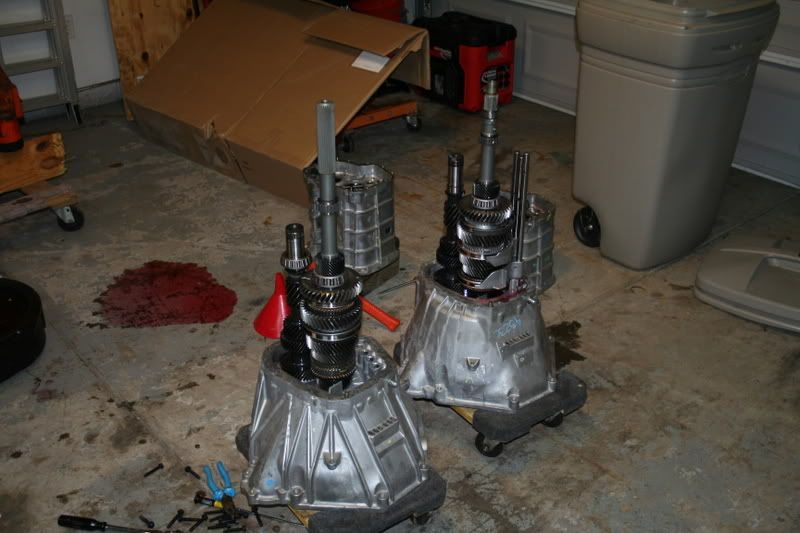
    Here is the Transmission. I purchased a tremec 3560 again left over stock from the 07 mustang builds. Well turns out this trans is not usable unless I change the shifter location and run a different drive shaft. I then planed on changing the main shaft and tail housing. Well that does not work either. The main body on the 99-04, and 05+ 3560s are different. Turns out the only part of the case that is interchangable is the bell housing. the 99-04 has a cable operated clutch and the 05+ is hydraulic. Not sure on what to do with the trans now.


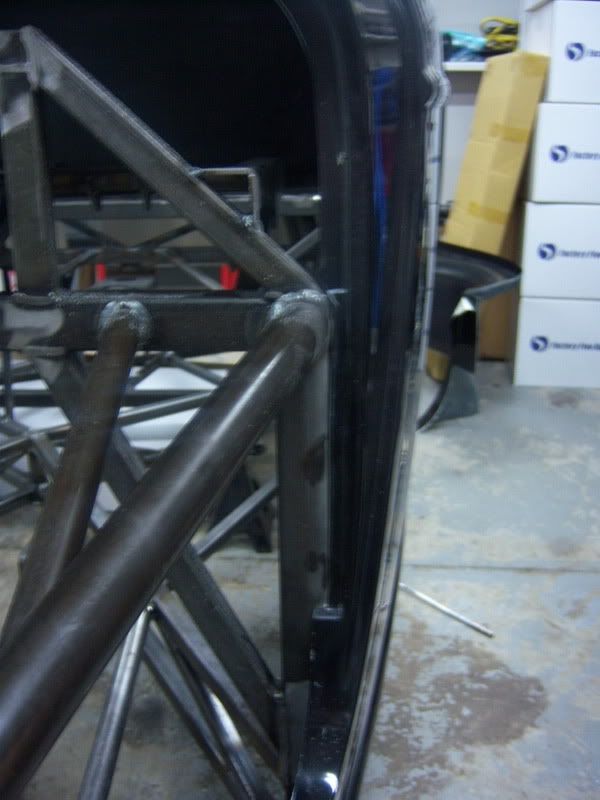
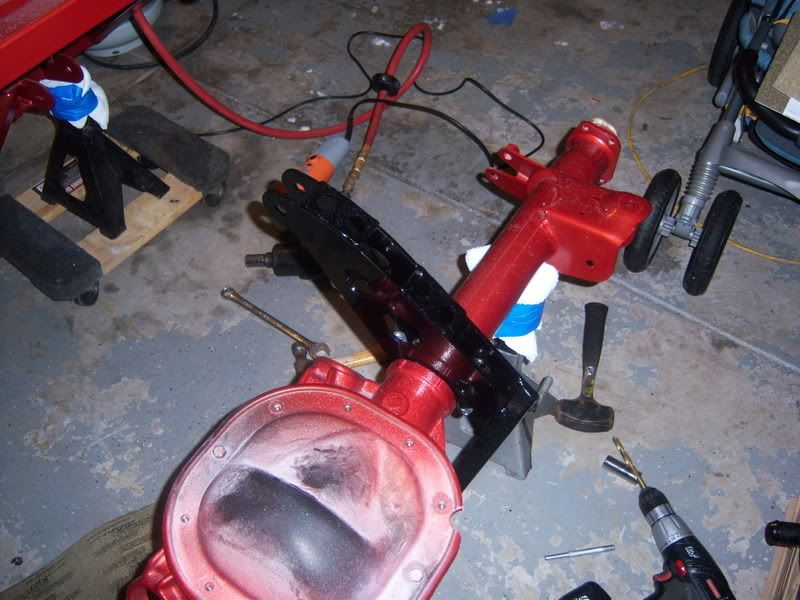
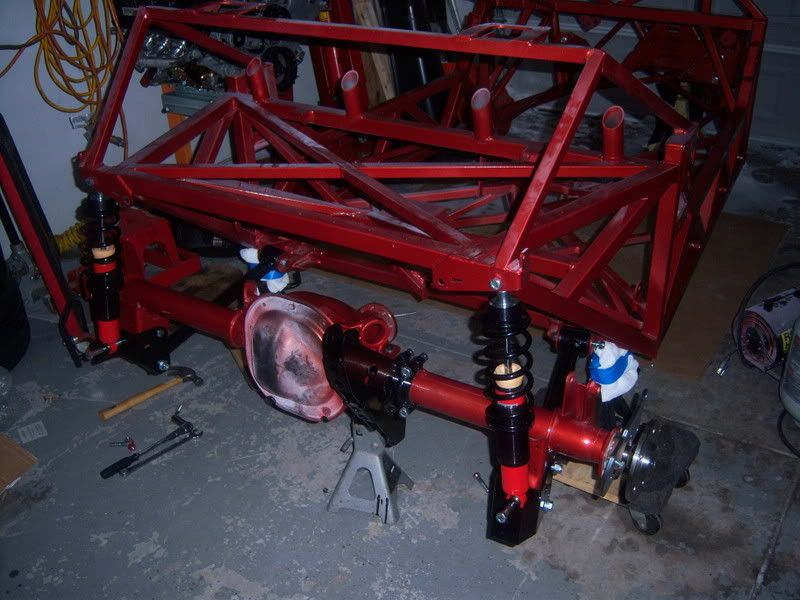
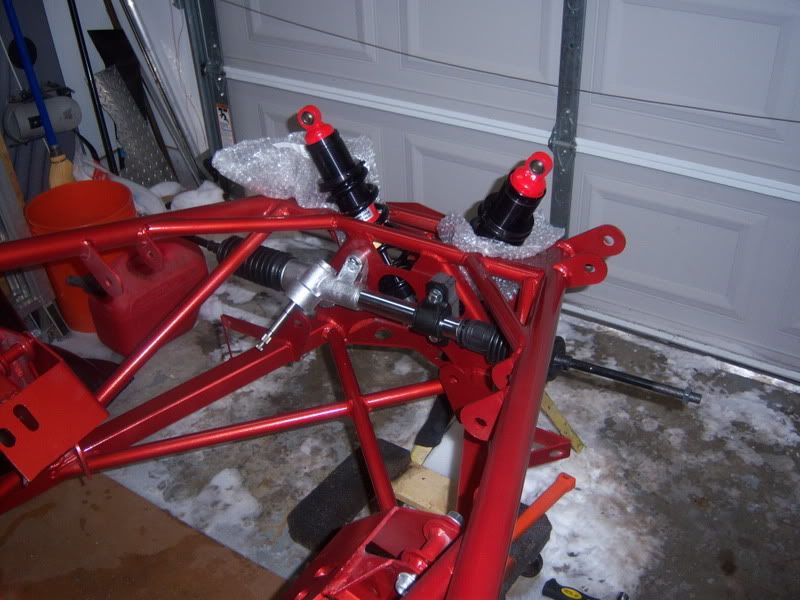
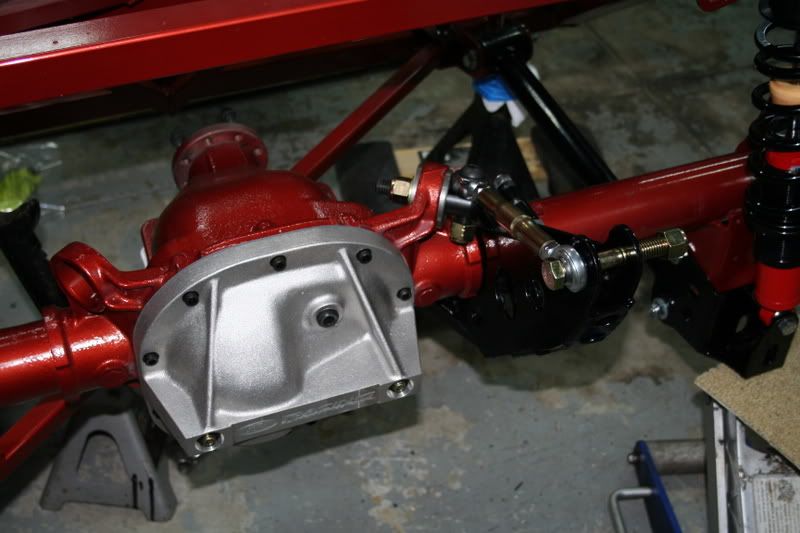
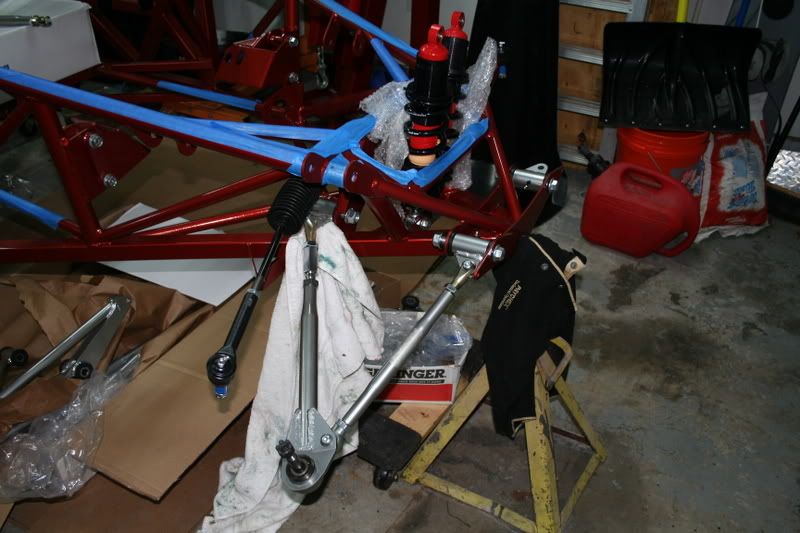
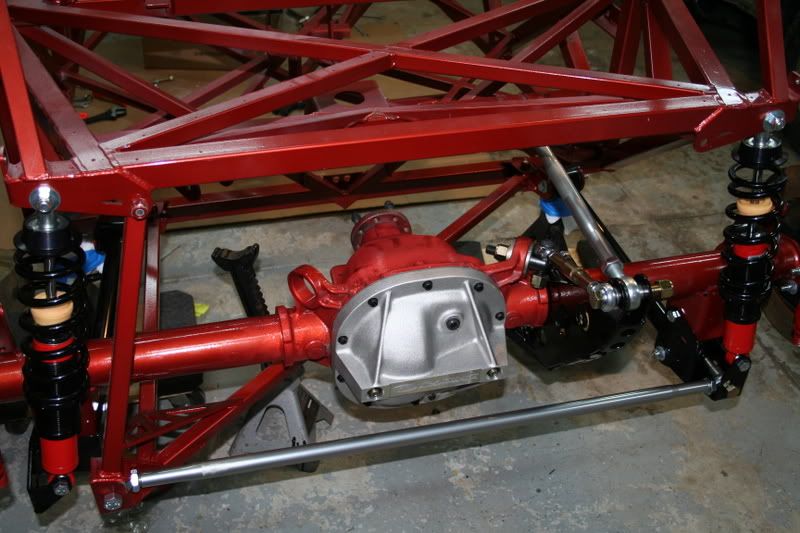
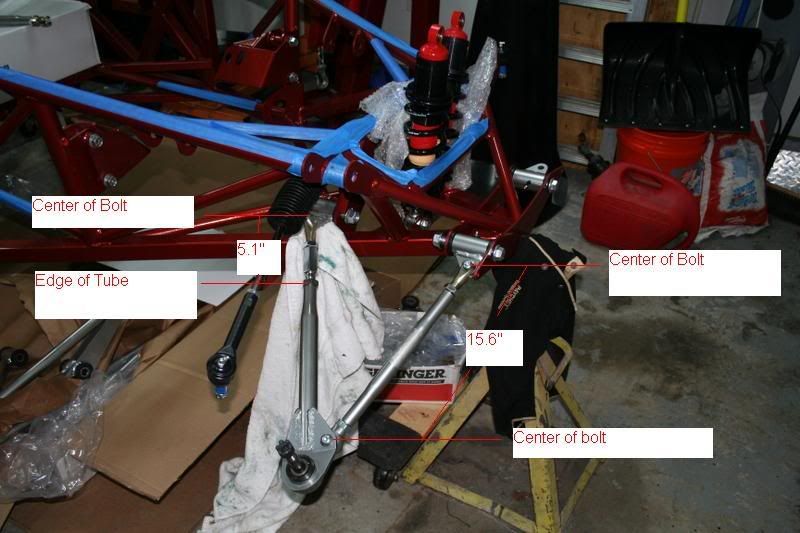
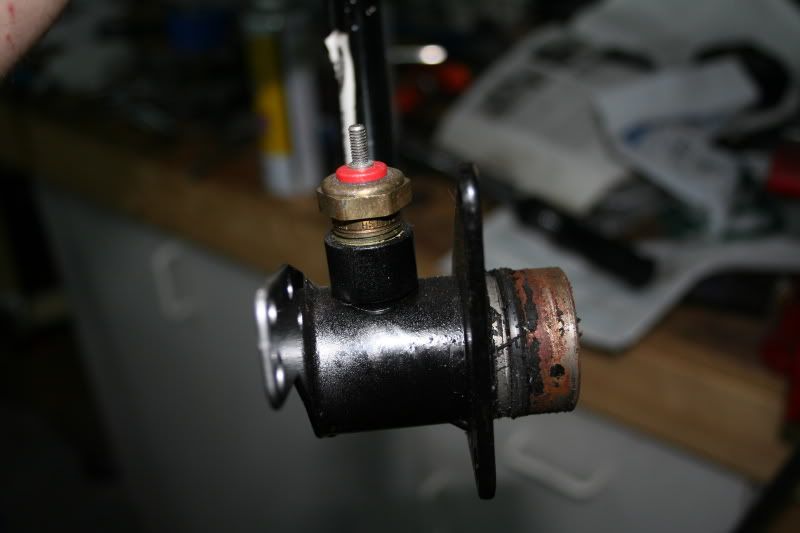
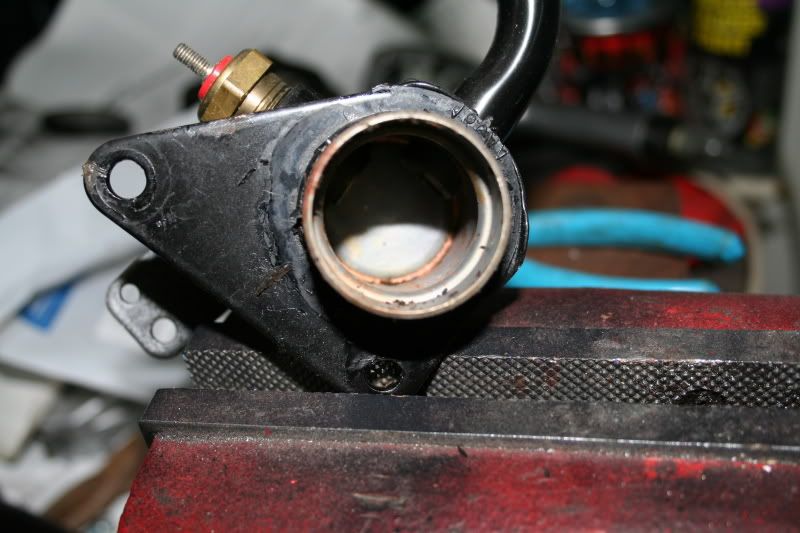
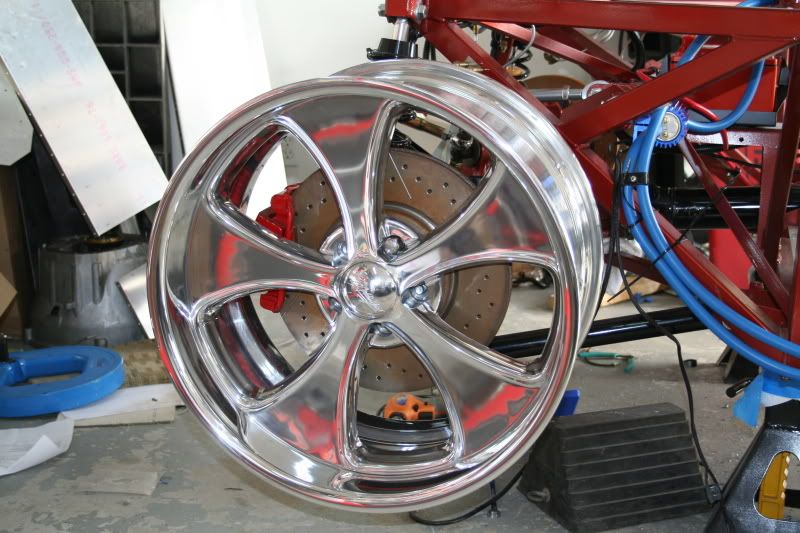
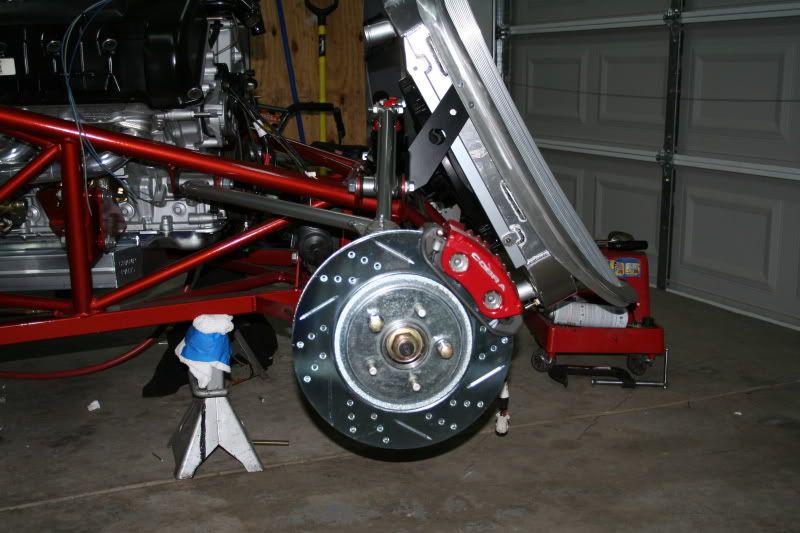
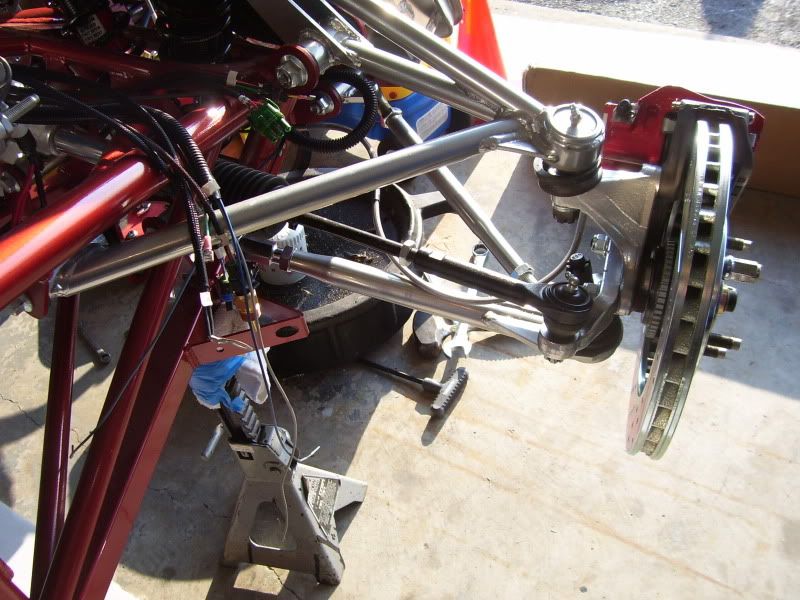
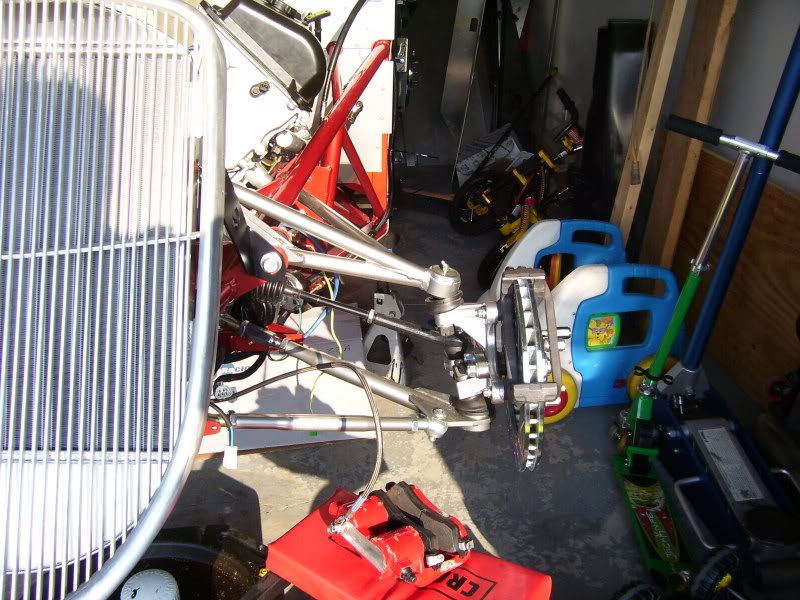
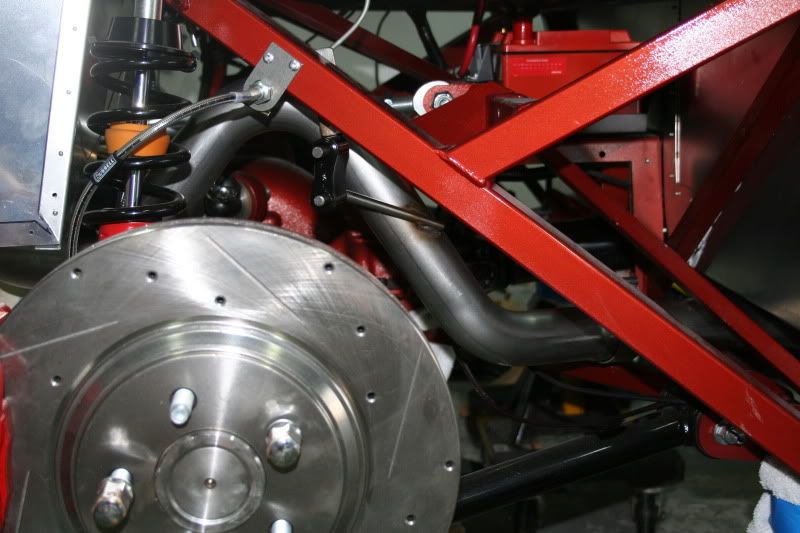
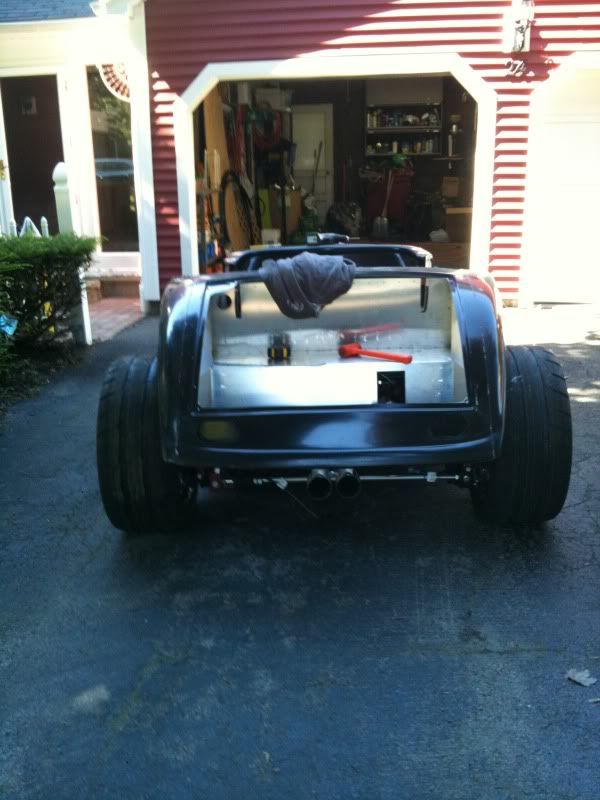
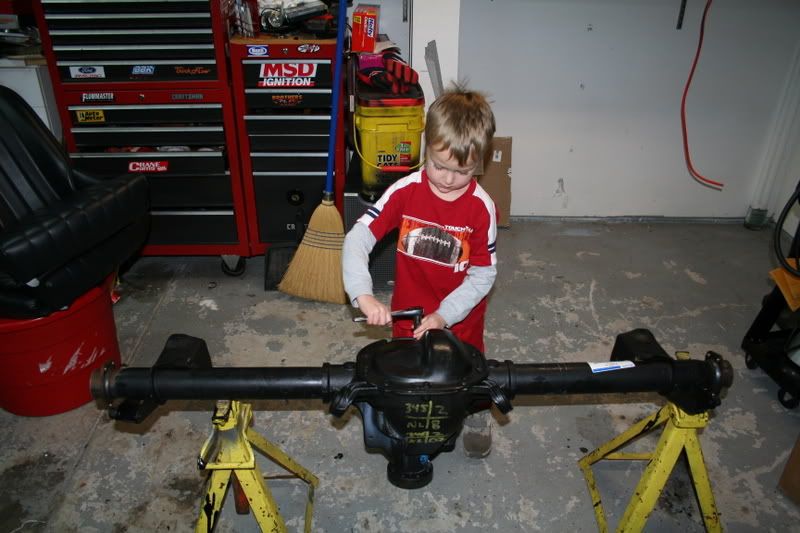
    The rearend is from ford racing. (thanx max). I will be running 3.73 gears. Here is the boy getting the rear cover open so we can test fit the axels I got from VegasVogal.


    12/31/08

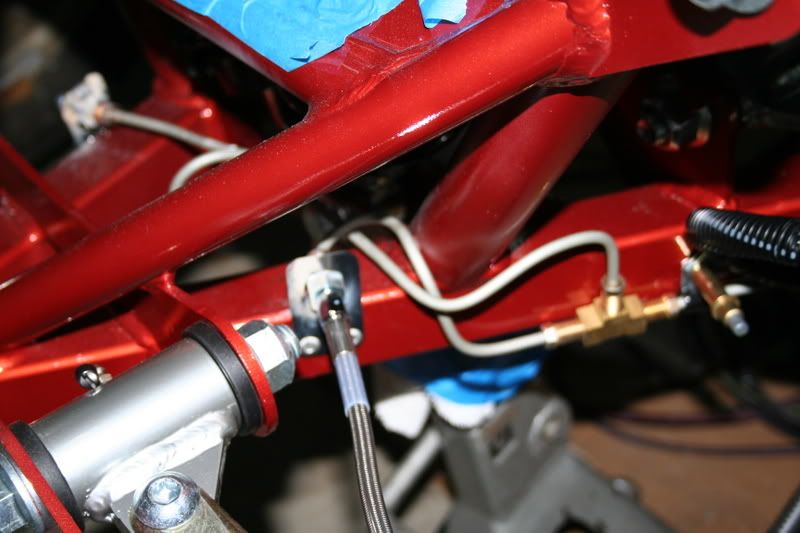
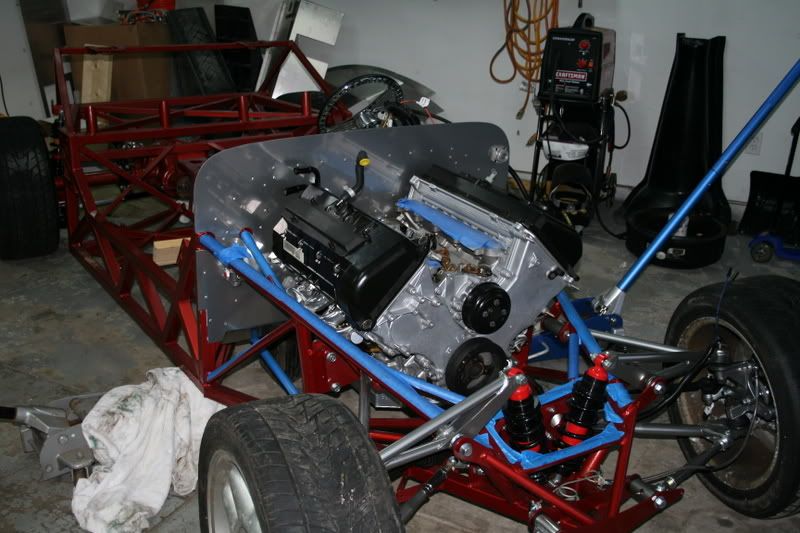
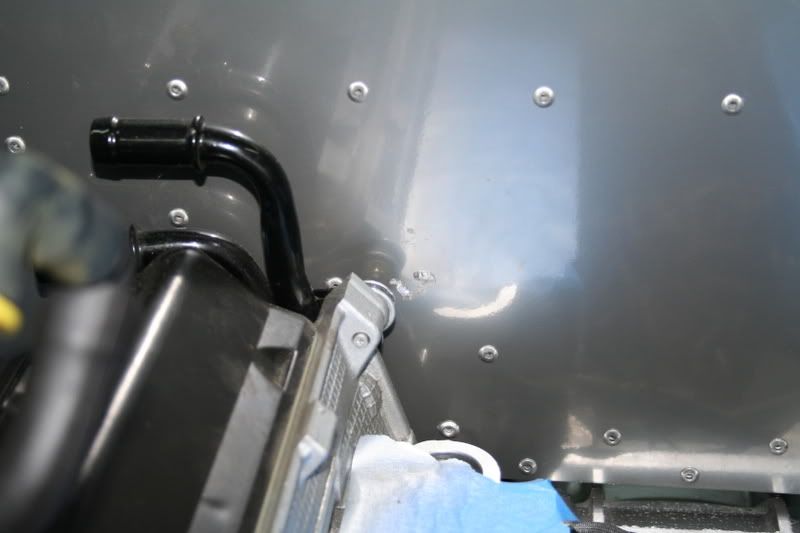
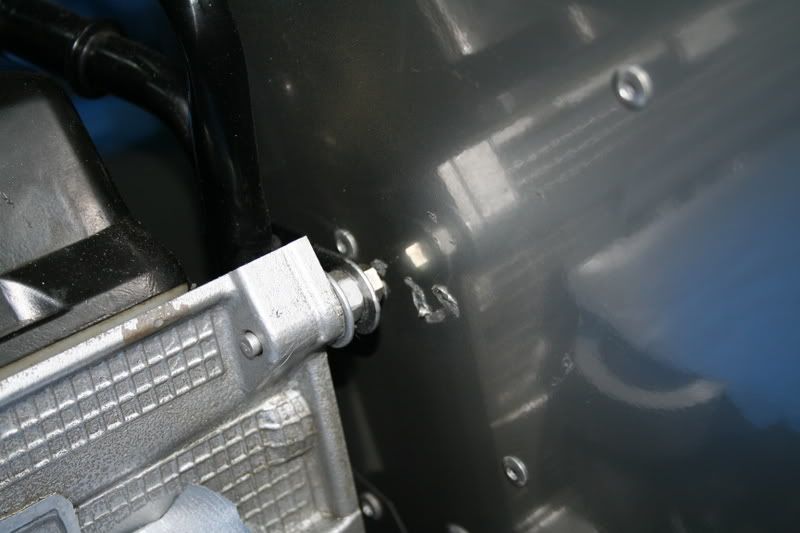
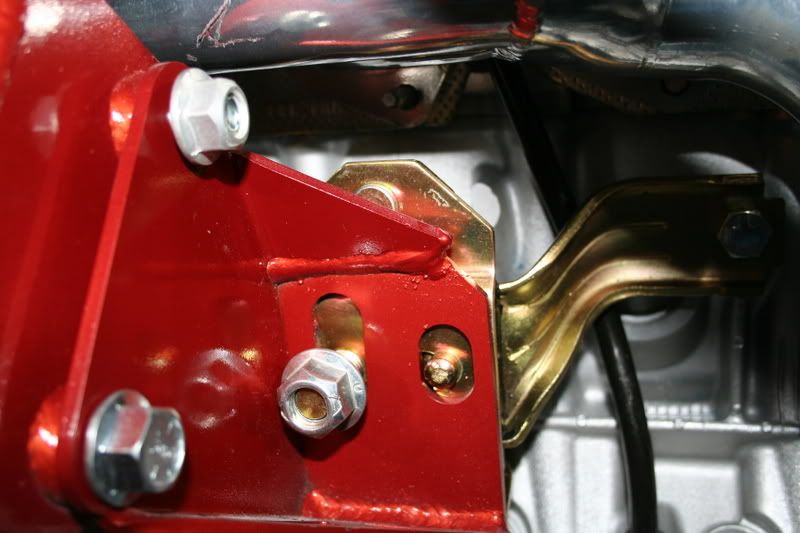
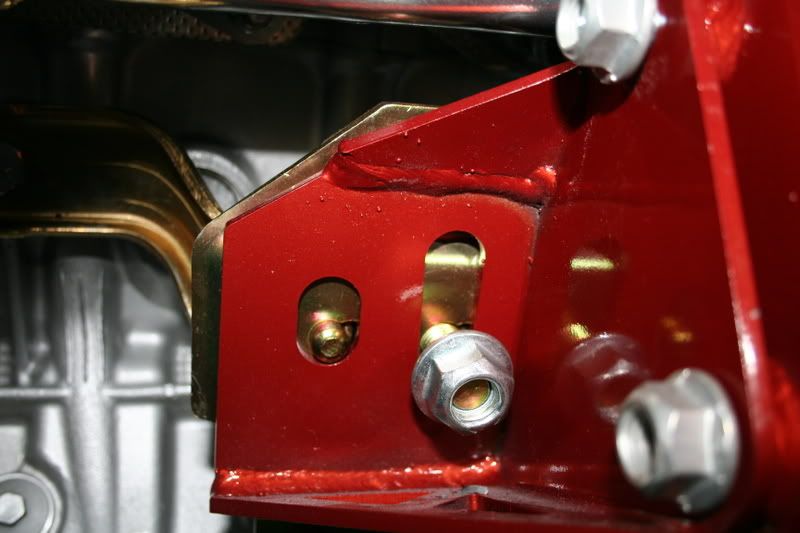
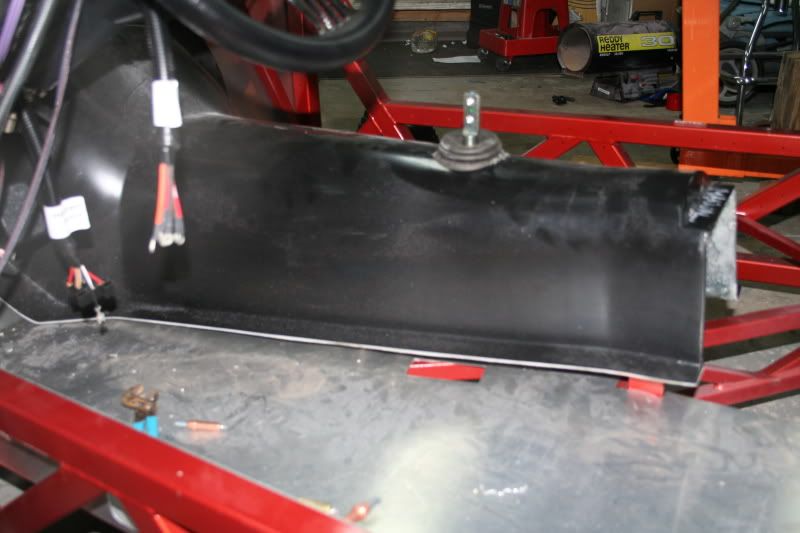
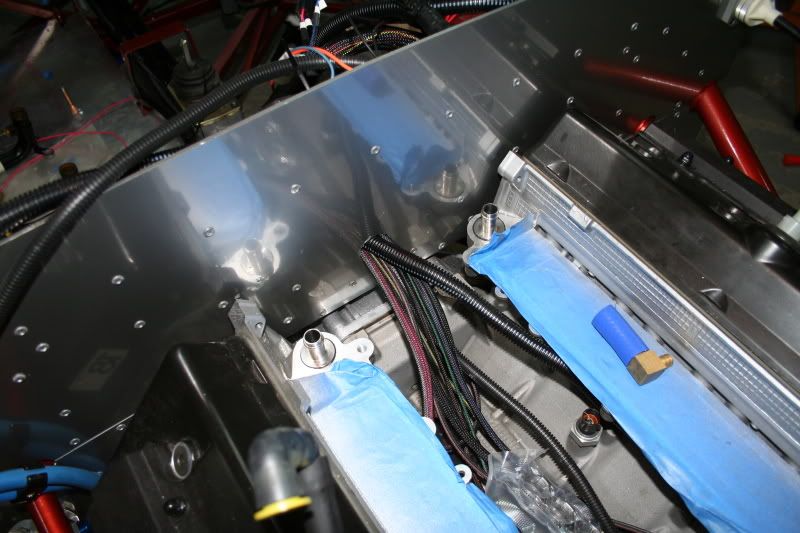
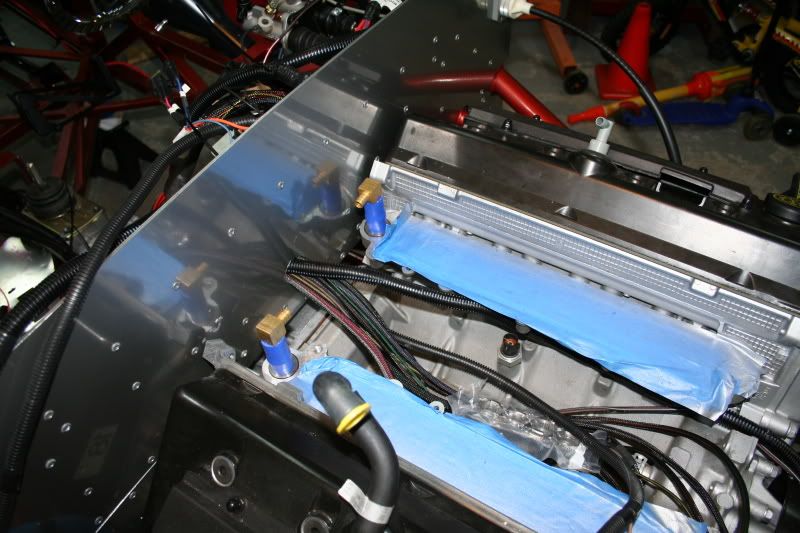
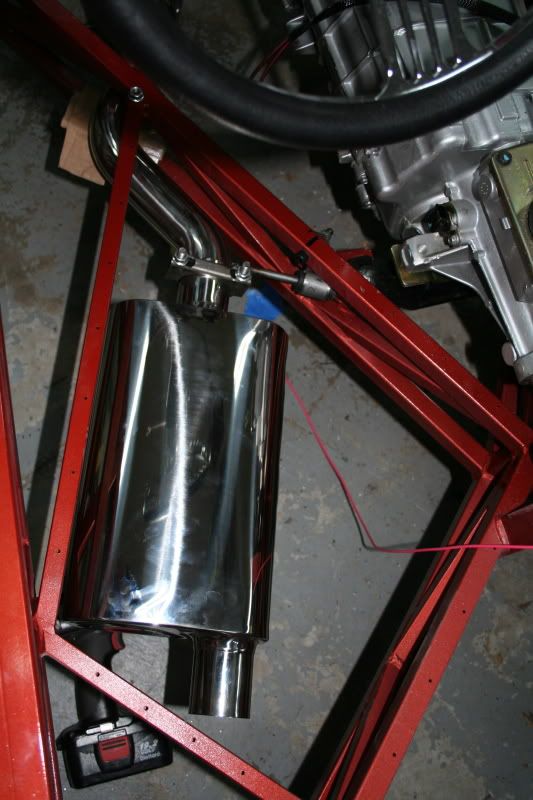
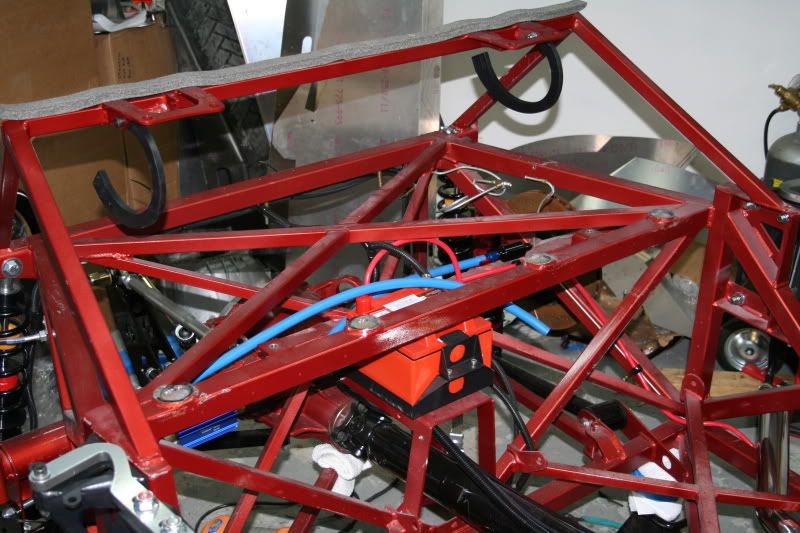
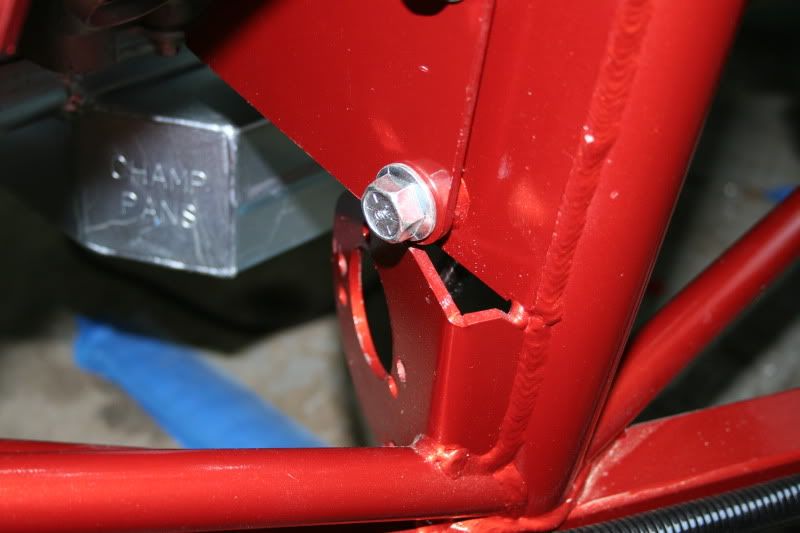
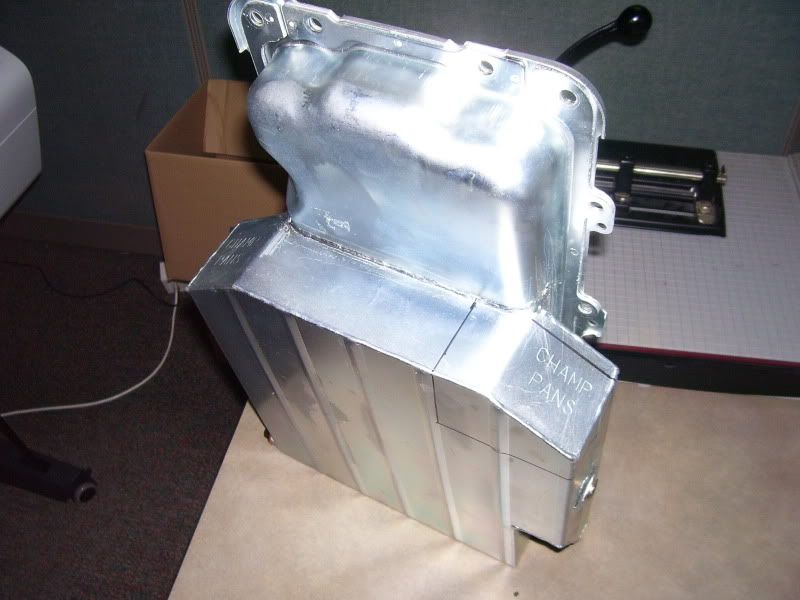
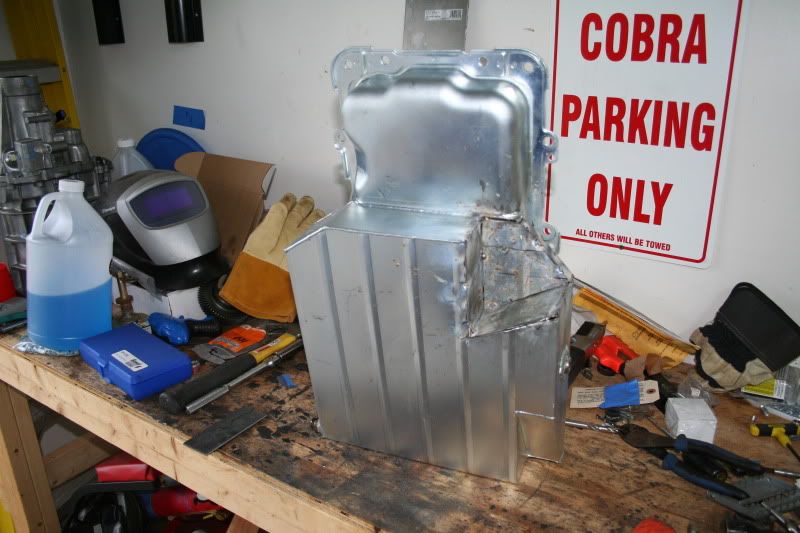
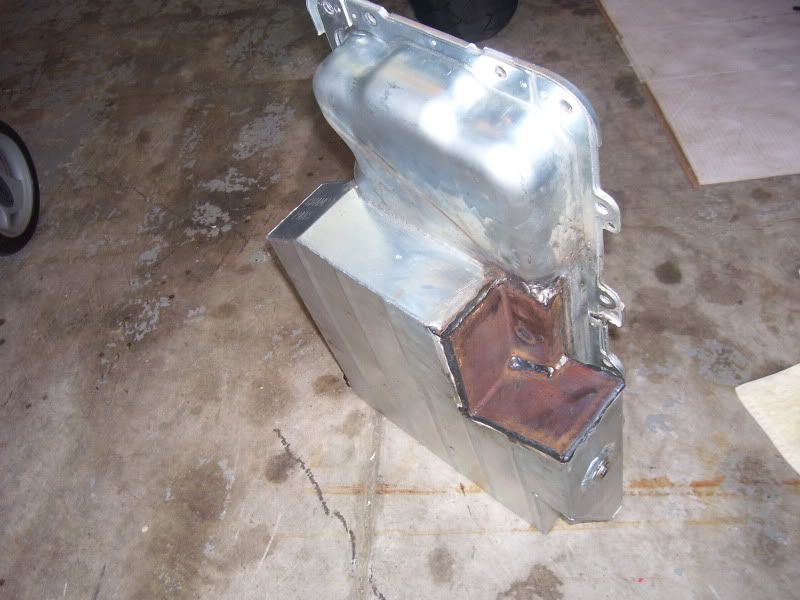
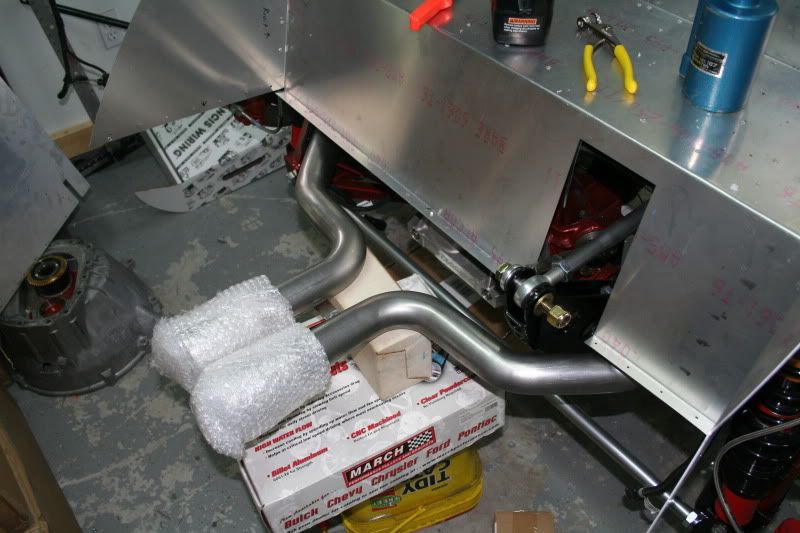
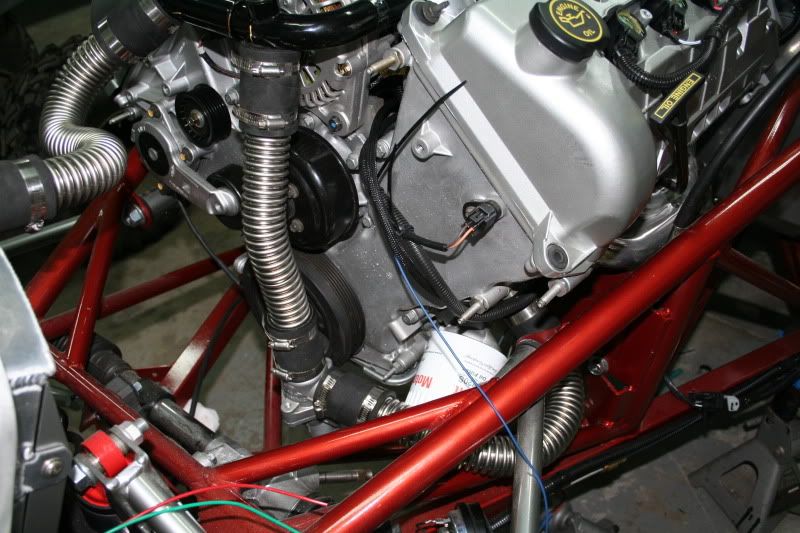
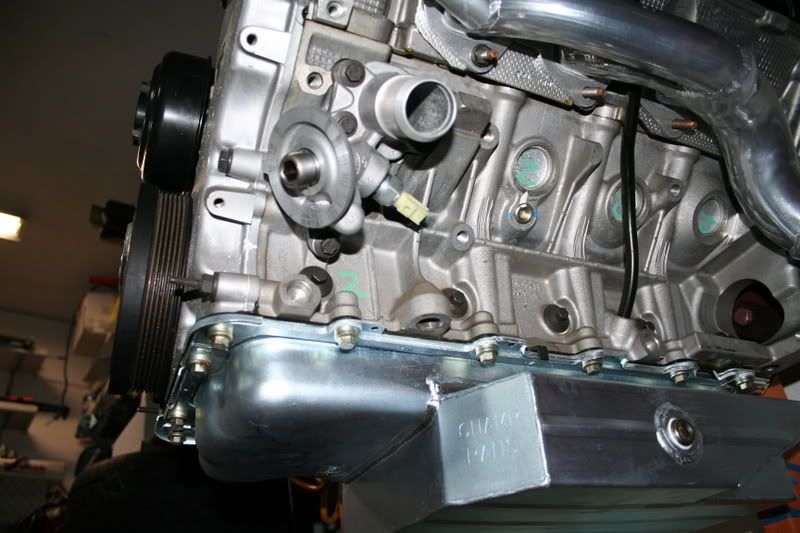
    Got to work on things a little bit more today. I installed a Champ Pan that I picked up from Richard at North Race Cars. The fit is perfect, but I had to shorten 4-5 of the stock mounting bolts to get them on.

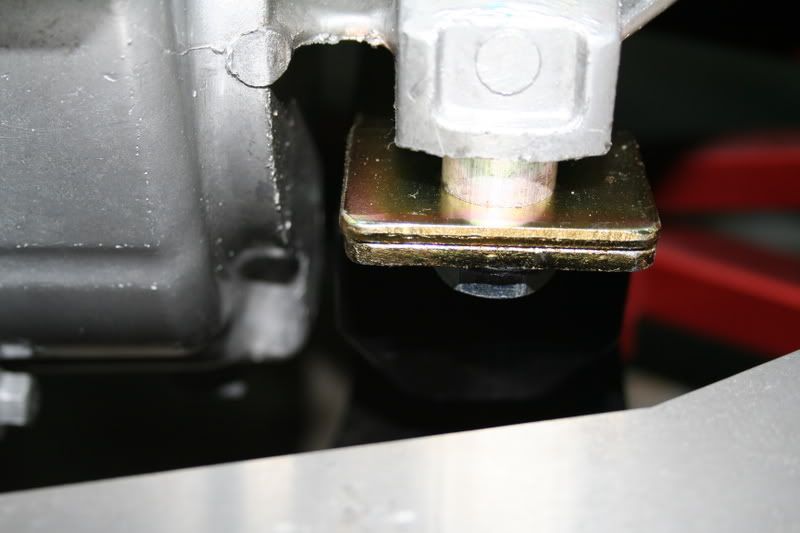
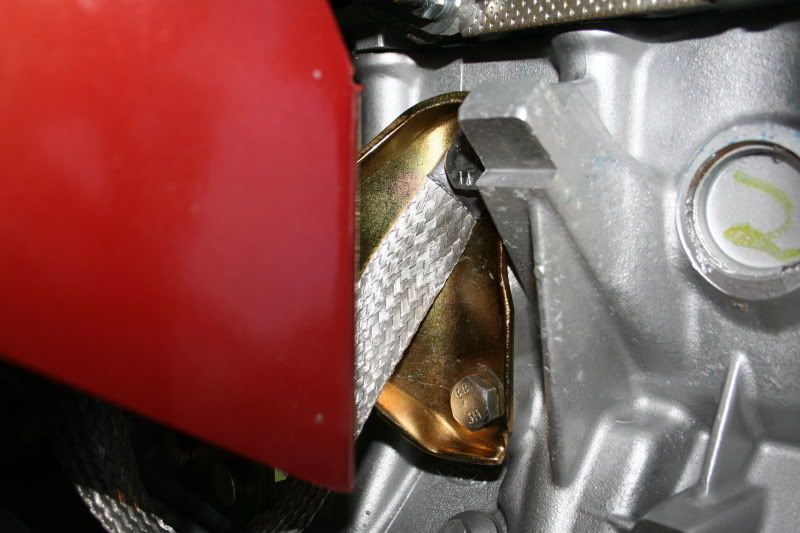
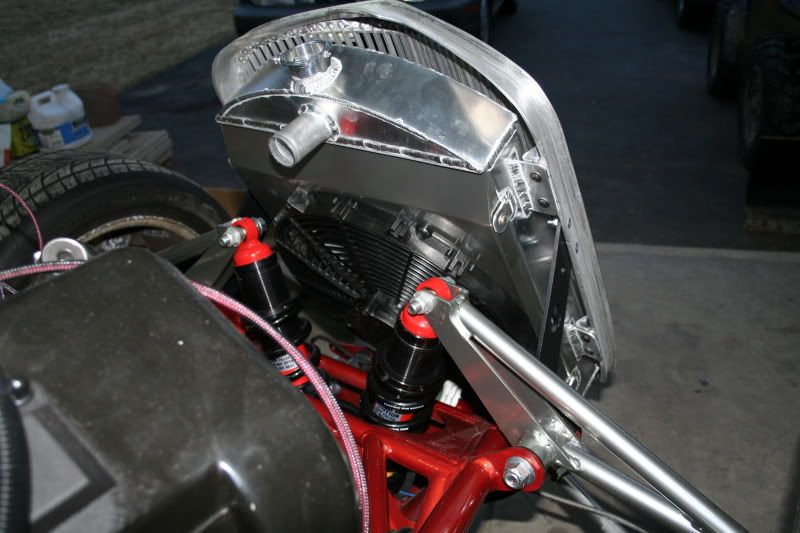
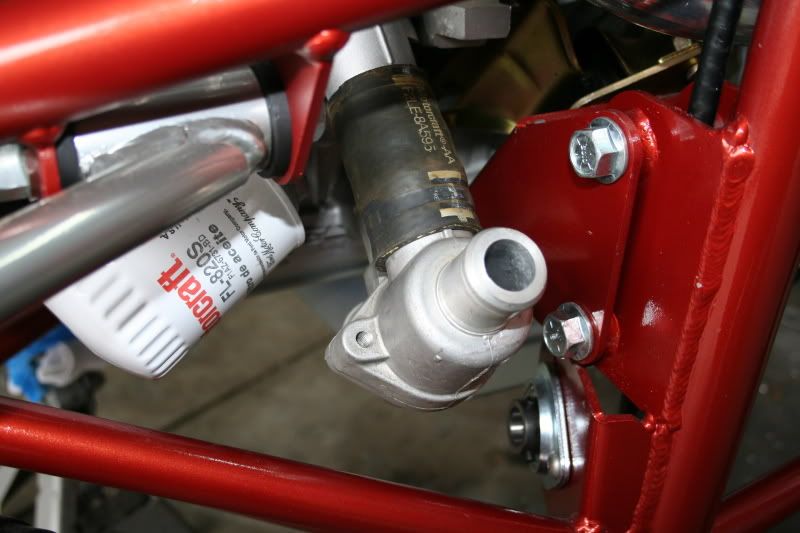
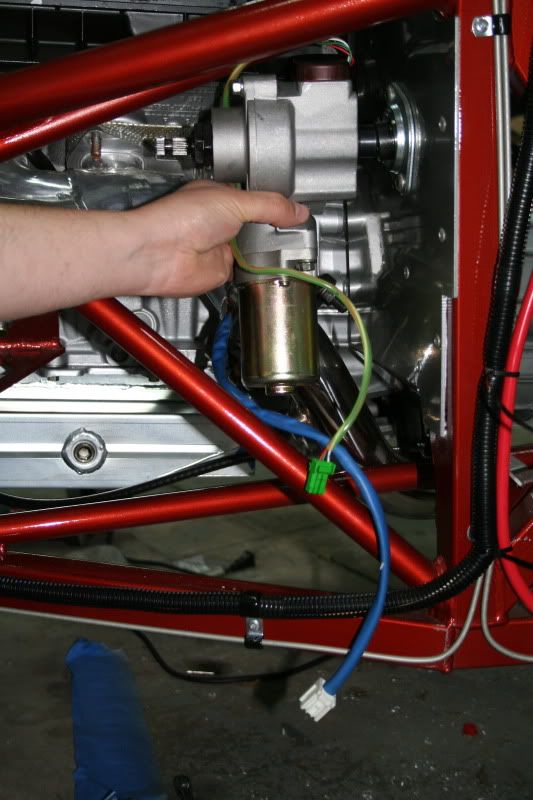
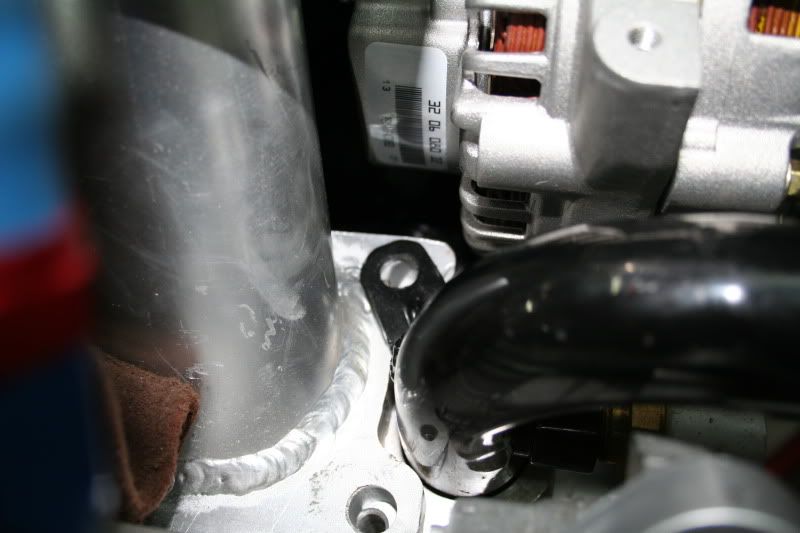
    I also installed a ford explorer water outlet/oil filter housing. This was recomended by FFR and is in the manual if you are using a 4.6 motor.


    More to come

    stack
    Last edited by stack; 02-21-2011 at 09:40 AM.

  2. #2
    EFI Rules and Carbs Drool Arrowhead's Avatar
    Join Date
    Feb 2011
    Location
    Stillwater, NY
    Posts
    599
    Post Thanks / Like
    Dude, you got to get rockin and rollin! Syracuse Nats isn't that far away. (Of course I'll have some excuse for why mine won't be ready)

  3. #3
    33 Hot Rod Builder geoffav's Avatar
    Join Date
    Feb 2011
    Location
    Enterprise, AL
    Posts
    458
    Post Thanks / Like
    I feel your pain Stack. My duties at work changed about a year ago and I'm just starting to see the light at the end of the tunnel. I actually took today through Thursday off to clean the garage and organize my junk so I can get back to work on the car.

    Something I noticed last night -- I fell asleep right away and woke up rested. It never occurred to me work has been dragging me down.

    I don't know whether to start my build thread from day one or just start from today???? I might do like Arrowhead but drastically shorten the "other site" version. About once a month I notice a HR with a 3 digit chassis number and feel bad. I get over that pretty fast when I notice mine is still safely in the garage and 100% paid for. We will be done soon enough.

  4. #4
    Senior Member stack's Avatar
    Join Date
    Feb 2011
    Location
    Macedon, NY
    Posts
    320
    Post Thanks / Like

    1/3/09

    We just left factory five with hot rod #39. 6 hours or so and I can start building. I have a full page of back ordered item including shocks, hard top, control arms, pedal box, fuel tank, radiator, steering shaft, and other small misc parts.

    Factory five did however forget to powder coat my frame so they gave me a credit and some money back. I am not very upset about it because I orginally wanted the frame to match the body color. I guess now it will.

    Here are some pics of the big day


    On a side note we saw frame #33 in the jig still. not sure who ordered that one in advance but they have skipping that one. Also we meet Paul there picking up his hot rod and bringing it back to Long Island.

    The blue and silver car is in the show room and I got to sit in it for the photo. THe red car is in R&D and they are fitting the first hard top out of the mold. They also mounted new doors and are testing the power windows.

    I did see on other hot rod kit but for got the name on it. It was going out via stewart. Sorry Geoff it was not yours.


    Also they started formming the hot rod body panels with the computerized router and my car was the 4 or 5 car done. All others were done by hand.

    Trying hard to make up time the GPS says we will be back at 4:15. I am sure we can beat that

    stack

    1/4/09

    Work began on the Hot Rod itself today. I do not have many of the parts required to start at the begining of the manual. Instead I started at step 84 mouning the firewall. The body needs to be on for this so I figured I should do it before the body comes off.

    HotRod pickup thread is here - http://www.ffcars.com/forums/showthread.php?t=204919

    Here I am marking and drilling the many holes for the 3/16 rivets.


    I needed to trim some of the fiberglass on both the driver side and passenger side where it meets the frame. See pics below.


    stack

  5. #5
    Senior Member stack's Avatar
    Join Date
    Feb 2011
    Location
    Macedon, NY
    Posts
    320
    Post Thanks / Like

    1/5/09

    Randy J. came over today and we installed the motor. I needed to do this to measure for my custom intake manifold. There is not alot of clearence under the hood but I think i can make my ideas work.

    Here is the motor installed with the hood on.


    Also could not resist

  6. #6
    Senior Member stack's Avatar
    Join Date
    Feb 2011
    Location
    Macedon, NY
    Posts
    320
    Post Thanks / Like

    1/6/09

    Finished the final engine mockup today. Here is a couple shots with my makeshift intake manifold. The real one will be about the same height and allow the front carb to stick out of the hood 2" and the rear car about 1". These are some carbs I had lying around. The tape line is where the hood would be. I measured with it on and off.


    Tomorrow the engine comes back out and the body comes off.

    stack

  7. #7
    Senior Member stack's Avatar
    Join Date
    Feb 2011
    Location
    Macedon, NY
    Posts
    320
    Post Thanks / Like

    1/7/09

    Work continued tonight. The body was removed but not untill I trimmed the upper pass side of the firewall alum. I have found as have others the body must be off slightly and I used my angle grinder to remove 1/16 or so of material.

    Once the firewall was to my likeing we began mouning the floor pan. Again we found it needed to be trimmed alittle. The first area was the forward most part of the alum floor. This section runs vertical and sticks out past the vertical tube that the firewall mounts to. If it is not trimmed the firewall will not sit flush. The next spot was also where the floor meets the lower firwall panels on both the driver and passenger side. I had to trim about 1/8" off the 45 deg.


    I also found that the tranmission tunnel needed a little work. I began grining off the high spots in the underside of the fiberglass. this was needed on the whole mouning surface and where the the fiberglass trans tunnel meets the alum drve shaft cover. I also ended up shortening the alum drive shaft cover by 1" so it did not go o far under the fiberglass.


    Also I did double check the motor mounts the motor is as low as it can go. The oil pan is just about flush with the bottom of the frame.


    more tomorrow

    1/8/09
    Started on drilling the floor pan today. After marking the tubing from beneath I spaced the holes every few inches. I spent as much time today marking and drilling holes as I did yesterday getting everything to fit just right.

    Tip:

    The driver and passenger floor panel are the same. They are just bent differenly and are mirror images of each other. After marking and drilling the passenger side just mate the driver and passenger side together and drill through both. Everything will line up perfect and you will have the rivets in the same place on both panels. Almost make you not want to install carpet.


  8. #8
    Senior Member stack's Avatar
    Join Date
    Feb 2011
    Location
    Macedon, NY
    Posts
    320
    Post Thanks / Like

    1/10/09

    I have been working on the alum, panels for the last 2 days. Having alot of clamps makes things easier. I did not get any clekos and I am really regreting it. I will order some this week. It takes lots of time to mark and drill all of these panels straight. One tip is to use the included rivit spacing tool. This tool is found in the box marked with kit alum panels.

    Also found these two side panels for the rear cockpit sides. They are on the p[acking list but I did not see them in the manual. It was not hard to figure out were they went, but they do go in before the main piece of the floor. Might be helpfull to have them in before marking the floor for drilling.


    Here is the rivit spacing tool


    Most of the brackets and suspension parts are going out to powder coating on monday. The frame will be ready for paint in a couple days as well.

    1/20/09

    Got home from NC last night and there were more parts on the door step. Factory five shipped me some back ordered parts.

    Roll Bars, Tail Lights, Clutch quadrant, trans mount, upper control arms, master cylinders and remote res., and some other small stuff. Nothing compairs however to what showed up from Retrotek Speed.

    Check these out.


    stack

  9. #9
    Senior Member stack's Avatar
    Join Date
    Feb 2011
    Location
    Macedon, NY
    Posts
    320
    Post Thanks / Like

    1/24/09

    Today was the day we started on the frame. We spent alot of time doing prep to get all of the oil and grease off from the steel manufacturing. Also it is really cold here now and it took alot of time to get the garage warm enough for painting.

    Bare Frame ready for paint

    Next step was metal etch primer. This was recomended beacuse we were painting bare steel.


    Then sandable gray primer. This is so the color will come out right as it was made to spray over gray primer.


    We finished off the day by wetsanding which is really fun for those that have not done it.

    For future refrence, painting costs alot more money then the FFR powder coat. The 329 they charge is a real deal. I have 500 into the paint and supplies, and if you have to pay someone to do this for you are talking atleast 1200-1500.

    Paint goes on tomorrow.

    1/25/09

    Frame is painted. Man that was alot of work, some it fun and some of it not so fun. Glad it turned out well. Now I can begin assembly.

    Here is my buddy Todd laying down some paint


    Frame after paint

    Frame with 2 coats of clear

    Of course the color is not right in the picture. My camera would not take a good shot of it for some reason. I will try again tomorrow with my better camera and in the sunlight.

    Color is Daytona Sunset Orange Metalic 05/06 Corvette. DSOM for short

    stack

  10. #10
    Senior Member stack's Avatar
    Join Date
    Feb 2011
    Location
    Macedon, NY
    Posts
    320
    Post Thanks / Like

    1/27/09

    I stopped by my buddy Todd's house last night and snaped this pic with my cell. The color look alittle better in this pics but is still not close the real color


    The past couple days I have been working with the guy making my intake manifold. The intake will be a sheetmetal alum tunnel ram style.

    Here are a couple pics of what I am having him build for me


    stack

  11. #11
    Senior Member stack's Avatar
    Join Date
    Feb 2011
    Location
    Macedon, NY
    Posts
    320
    Post Thanks / Like

    1/28/09

    Well today is the last day I could work on the car for 2 weeks. It is going to be a long withdrawl. Me and the boy were able to get the banana bracket installed. I had to remove the powder coating from the curved mounting surfance and drill the holes to remove any welding spatter that got in there.

    We also installed the traction lock brackets, mounted the rear shocks, and installed the lower control arms.


    Then it was time to install the rear end onto the frame.


    1/29/09

    The Boss let me go home early today so I was able to get a couple more things done before I leave for san diego.

    I mounted the front shocks to the frame and did have to take the grinder to the .32 spacers that are required. I think I ended up taking off 1/16 - 1/8 inch of material. They would just not fit out of the box.


    I then mounted the steering rack and as others have done before me I had to remove some material from two tabs that stick out near the mounting surface. Here is the best pic I could get after install.


    Well that is it for 2 weeks. I spoke to the powder coater and all of my parts will be ready when I return and then she will roll.

    stack

  12. #12
    Senior Member stack's Avatar
    Join Date
    Feb 2011
    Location
    Macedon, NY
    Posts
    320
    Post Thanks / Like

    2/11/09

    Work Continued tonight on the rearend assembly. I installed the rear wheel studs and then slide the axels into place. Capped the rear end off with a Ford Racing rearend cover. Also picked up a 3 link brace from Craig Mapstone at Vintage performance.


    Installed the rear 13" brakes

    And installed the pedal box.


    Still waiting on the powder coating to be completed and work can begin on the front end.

    More tomorrow.

    2/12/09

    Work continued tonight on the steering column. I painted it satin black so it goes with my black interior. Then installed the steering wheel. It is a very nice wheel and the chrome in it is great.


    In this pic I installed the brake light switch. I put this on because I had to move it after the first time I put it on. The bracket need to go towards the front of the car when attaching it to the cast Wilwood pedal assembly.


  13. #13
    Senior Member stack's Avatar
    Join Date
    Feb 2011
    Location
    Macedon, NY
    Posts
    320
    Post Thanks / Like

    2/13/09

    Picked up my parts from the powder coater today. I had all of the front suspension done the the almost chrome color. Everything was then clearcoated. Started assembly of the front control arms and then began installation.


    I will wait till I get another set of hands to install the uppers. They are a bit ackward and I don't want to scratch anything.


    Well off to moochfest. Back to work on sunday

    2/15/09

    Was able to install the upper control arms today with the help of locall FFR owners Randy J and Jeff W. The steering rack needed to come out again to clearance the remainder of the tabs off. At the full drop of the shock the greese fitting was hitting the steering rack. I ended up cutting all of the tabs off.


    Also the bolts included with the control arms look different than the manual. Tha manual shows hex bolts and I got allen head. I also think they are too short. If these are for something else let me know. They were included in the package with the spindle bolt, caps and spacers.


    Here is the front end almost complete. I think the powder coating came out great. Wish I thought to have the tie rods done.

  14. #14
    Senior Member stack's Avatar
    Join Date
    Feb 2011
    Location
    Macedon, NY
    Posts
    320
    Post Thanks / Like

    2/17/09

    Tonight I finished installing the panhard bar and upper link. I think they look great in the almost chrome powder coat. I used so anti sieze on the threads so they would turn easily. I should probably take off the Vintage performance bar and send that out so they match. Maybe on the next trip to the powder coater.


    I then began installation of the firewall. The driver side lower is permantly mounted using the 3/16 rivets. I plan on installing a fuel pressure regulator on the passenger side lower firewall panel so I attached that temp. The top piece of the fire wall still need my master cylinder res units and the clutch adjuster assembly.


    I attached this becase the colors look so cool.


    stack

  15. #15
    Senior Member stack's Avatar
    Join Date
    Feb 2011
    Location
    Macedon, NY
    Posts
    320
    Post Thanks / Like

    2/18/09

    Are the bolts maybe for mounting the calipers. My back order sheet show 4 bolts on back order I wonder if these are the ones. Also I took some measurments off the blue and silver car for a base alignment spec and will post them shortly.

    stack

    Base alignment specs from FFR blue and silver car. I am sure they have not really aligned this car as it does not run.


    Did not have alot of time to work on things tonight, so I tackled a couple small items. I mounted the fuel pressure regulator on the passenger side lower firewall panel. I then installed the pass thru for the steering arm into the engine compartment. Finished the pedal box by installing the clutch switch and stop.


    2/21/09

    Almost Ready to Flintstone

    --------------------------------------------------------------------------------

    Mounted up some rims and tires I have lying around from my old mustang so I could get the car on the ground. This thing is LOW. Just waiting on the steering knuckles from FFR so I can Flintstone.


    Today I worked on the brake lines. I decided to run them on the outside of the 1.5 square tubes as this spot is hidden by the body. I don't want to see them when I have the hood and sides off. Also got the clutch cable ajuster mounted. I will need to get longer braided lines as both sets that I have are to short.


    Mounted the fuse panel and my buddy Dustin will be over to help do the wiring. I could do it, but he wires machines for a living and it will look tons better. Decided not to get an ISIS and spend the extra money on wheels. I will get a Guard Dawg RF entry system though.


    stack

  16. #16
    Senior Member stack's Avatar
    Join Date
    Feb 2011
    Location
    Macedon, NY
    Posts
    320
    Post Thanks / Like

    2/23/09

    Mounted the body tonight with the help of Randy J. I wanted to double check the wheels and backspacing before ordering.


    These wheel are from a 94 mustang and are 17x8. Tires are 245/45r17. Backspacing is 5 3/4" and there is a 1.5 - 1.75" clearance between the body and the wheel. I can always add a small spacer if I need to. The front wheels will work with the same backspace.


    3/2/09

    I have been out of town for work the last few day and leave again tomorrow. This weekend We began on the wiring. The fuse panel is mounted along with the RetroTek EFI computer. I tried to save as much room as possible for the heat/AC system that will go on the passenger side of the dash. There are a tone of wires and the harness does not apear to have circuits for power windows and door locks.

    Here is a shot of the fuse panel and computer mounted. I drilled a hole through the trans tunnel as suggested in the manual. This looked to be the only way the harness would work with out extending wires on the efi and main harness


    I also ordered some 27" braided brake lines for the front. Because I ran my lines differently than the manual suggest they were short. These are 3/8 banjo to 3an. I ordered adapter to convert them to the standard 1/8NPT. I tack welded these adapters into the supplied brackets from FFR to test the fit.


    This weekend I hope to drop in the motor and trans. We will see

    stack

  17. #17
    Senior Member stack's Avatar
    Join Date
    Feb 2011
    Location
    Macedon, NY
    Posts
    320
    Post Thanks / Like

    3/8/09

    Did not get as much done this weekend as I wanted,but yesterday I got the transmission put back together. It really was not that hard with the available manuals online. After that I painted the engine and transmission. I used a rattle can alum color with clear coat. Looks pretty good. I hope to mate the engine and trans tomorrw night and then put them in the car.

    stack


    3/10/09

    Engine is in

    --------------------------------------------------------------------------------

    I was able to get the engine in tonight with the help of a couple friends. It was alot of work to get it installed and I hope it never needs to come out. There are a couple problems that I can forsee and will make a seperate post about those.

    Engine is a 4.6 DOHC from a 94 Lincoln. I got it as a left over so it is new never run. The transmission is a Tremec 3650 spec from 99-04 mustangs.


    See my other post on problems that came up and more pics here. http://www.ffcars.com/forums/showthread.php?t=211283

  18. #18
    Senior Member stack's Avatar
    Join Date
    Feb 2011
    Location
    Macedon, NY
    Posts
    320
    Post Thanks / Like

    Hotrod 4.6 DOHC installation problems

    I was able to get the engine in the hotrod tonight here are a couple problems that I came accross. Hopfully Eric and the guys at F5 can help me out.

    1994 Lincoln 4.6 DOHC
    04 Spec Tremec 3650 Trans

    First problem is the heater hose thing on the back of the block is about 1/1000 of an inch from the firewall. Here are a couple pics. There are also a couple screws that I need to cut off. You can see were one screw hit the firewall.


  19. #19
    Senior Member stack's Avatar
    Join Date
    Feb 2011
    Location
    Macedon, NY
    Posts
    320
    Post Thanks / Like


    Next is the trans mount. In these pics you can see the engine is alll the way down in the mounts, but the trans will not attach the mount. Mounts are the 4.6 mounts according to the pic in the manual. I need like a 1 inch spacer or something. I am using the inclosed spacers on the trans mount. If I let the trans drop any lower the engine hits the firewall.


  20. #20
    Senior Member stack's Avatar
    Join Date
    Feb 2011
    Location
    Macedon, NY
    Posts
    320
    Post Thanks / Like

    3/12/09

    Engine to come back out

    --------------------------------------------------------------------------------

    Well have to pull the engine again. I don't think there is any way to get the engine and trans in with the water plug on the back of the head. Problem is the motor will need to move forward 1/2 inch or so to allow the trans to tilt down and bolt to the mount. My water plug measures 1 3/4 inches. More info on that click here http://www.ffcars.com/forums/showthread.php?t=211283


    Here is a pick of the transmission with the tunnel installed. You can see ther transmission need to drop down in the back and it just can't with the water plug installed. If we move the engine forward then we may have problems later with the exhaust. So what to do.


    I am going to check into using the top ports on both heads and plug the one on the back.


    Also where is ride height measured in the front of the car. With the shocks all the way down I measure around 6"


    3/13/09
    Engine is Back Out

    --------------------------------------------------------------------------------

    Took the engine back out this afternoon. I then removed the water plug for the heater and checked it out. There is no way to modify the existing plug. Also the bolt paterns on the left and right head are also different. Not sure if just ordering 96 mustang units will work even though they do not stick out as far. may need to plug the holes and use the ones on top of the head.


    One idea I had was since I am having a intake manifold custom made I could have the guy make the mounting surface of the intake large enouge to cover the 2 water jacket holes on the rear of the head. Then drill them out and tap for 8an and run my own hoses to the heater. I can add a temp sensor to it as well. let me know your thoughts.

  21. #21
    Senior Member stack's Avatar
    Join Date
    Feb 2011
    Location
    Macedon, NY
    Posts
    320
    Post Thanks / Like

    3/14/09

    Engine is back in again

    --------------------------------------------------------------------------------

    Got alot done on the car today. stopped by the machine shop today and picked up a freeze plug for the back of the passenger side head. Also contacted evenflow for their cooling mod. Talked to them for a little while and explained the situation. We came up with several different ideas to make things work. I will post the info when we decide on one.

    Here is the engine with the freeze plug installed. I used a 1.5" that I picked up at the machine shop.

    Also was able the reinstall the engine, run the battery cable, bend up the rear brake line and install the valve. Things are starting to come together.


    The engine is not perfectly level but I do not have the car at ride height. Once the new wheels go on I am sure things will level out. having a 28" wheel in the back will help.


    stack

  22. #22
    Senior Member stack's Avatar
    Join Date
    Feb 2011
    Location
    Macedon, NY
    Posts
    320
    Post Thanks / Like

    3/17/09

    Tonight I worked on some misc. things. Still having problems with the trans tunnel. For some reason it does not want to fit over the trans and then the alum on the passenger side. I took a pic of the problem. Looks like the cover is hitting the transmission on the inside. might need to cut a hole and make a bump. I am not sure if the auto cover is any larger or not. Will contact F5 on that.


    Installed engine ground cable. I connected this from the frame engine mount bolts to the poly mount on the engine block. I try to hide this stuff as much as possible.


    Brake bias adjuster will come up through the floor on the trunk for adjustment.

    Ordered my fuel lines. I decided to go with the Russel blue hose stuff. I have used braided before and thought I would give this stuff a try. Should get it in by the end of the week.

    I also heard from the guy building my intake manifold. Sounds like he is getting started on it this week.

  23. #23
    Senior Member stack's Avatar
    Join Date
    Feb 2011
    Location
    Macedon, NY
    Posts
    320
    Post Thanks / Like

    3/17/09

    Clutch cable placement. I ran the clutch cable through the driver side engine mount. This kept it away from the header and it has a nice bend to it. I also removed the silver mounting bracket as it was in the way and not needed.


    Solinoid and fuel pump cut off switch mounting locations. This is not like the manual, but I am saving room for the heat and AC system


    3/18/09
    I did not get to much done tonight. I did paint the inner door frames and some brackets. I installed the radiator mounting brackets as well. A heads up for those powder coating parts that plan to leave the engine exposed, send out these brackets with your other stuff. I was to lazy to send them out so I just painted them. Would have prefered to have them to match the frame but I am out of that paint.


    I ordered tons of parts today to finish the fuel system and an Odessey battery. Will get plenty done this weekend

    3/21/09

    Worked on the fuel system today. I used Russell Blue hose with push on fittings. Well they do not push on easily that is for sure. I ran the feed and return lines along the passenger side lower square tube.


    Also installed the Odessey battery and mouning bracket.

    Mike Everson's fan shroud is a really nice piece and looks good with chrome powder coat.

    Front Grill mounted

    May work on the wiring tomorrow
    stack

  24. #24
    Senior Member stack's Avatar
    Join Date
    Feb 2011
    Location
    Macedon, NY
    Posts
    320
    Post Thanks / Like

    3/22/09

    Well I drilled a hole in the firewall for the efi and sending unit wiring. The wiring was not long enough to go around and I wanted to get it done before installation of the fiberglass transmission tunnel. I think the hole will work out fine as you will not see it once the intake manifold is in place. The wires will also be hidden in the valley between the heads. I will install a gromet later.

    I mounted the passenger door frame when Randy J. was over showing me his Lotus. Must say that is one sweet car. The door opens and closes really well. Just need the doors from FFR now.


    3/23/09

    The Gen1 cooling mod adapters came in today from evenflowcooling. They are stainless steel and press in. This will help with the drivers side head cooling issues and allow me to run a heater as I have blocked off the ports on the rear of the passenger side head. I used a socket and a long extension to beat them into the holes. I also used a dab of RTV on them to make sure they stay put and don't leak.


    The two ports will tie together and then run throught the heater core and back to the rear of the pump.


    3/25/09
    Wheels are Here

    --------------------------------------------------------------------------------

    Well 3 out of 4 anyway. Had to stay home from work this morning to meet the FedEx driver. They took one of my wheels off the truck last night for some reason. He will bring it back tomorrow. Here they are


    stack

  25. #25
    Senior Member stack's Avatar
    Join Date
    Feb 2011
    Location
    Macedon, NY
    Posts
    320
    Post Thanks / Like

    3/29/09

    Worked on the doors some more today. The driver door frame is installed and they open pretty well. Just waiting on the door skins from ffr.


    The door mouoning instructions from Mike Everson are very helpful. You can find them here
    http://www.ffcars.com/forums/showthr...ighlight=doors

    Also thinking of installing a subwoofer in the rear cockpit wall see thread here.
    http://www.ffcars.com/forums/showthread.php?t=213172

    3/31/09

    I have been working on the sub woofer ideas that I have. The link to that post is here http://www.ffcars.com/forums/showthr...=1#post1895827.

    The starter I order came intoday and I installed that. Just waiting on stuff from FFR. My doors and rivnut tool ship tomorrow. 5 People ahead of me for hard tops and gas tanks.

    I also mounted up the remote thermostat for the 4.6. I am wondering if I need this at all because there really is no good place to install it. I have it mocked up here


    stack

  26. #26
    Senior Member stack's Avatar
    Join Date
    Feb 2011
    Location
    Macedon, NY
    Posts
    320
    Post Thanks / Like

    4/05/09

    There is not alot I can do without parts. I did get the front calipers and rotors mounted. I spent some time working on the sub box idea from this post . You can see more pics of it here http://www.ffcars.com/forums/showthr...70#post1900670

    here are some pics of the sub box and calipers


    I am thinking about drilling a 3/16 hole in the lower rear control arm to use a mounting clip for the brake line. Anyone see any problems with doing this?


    4/09/09
    Got my exhaust pipes in from FFR tonight but received two right hand sides, one 4.6 and one 302. Oh well I will get it straightened out with FFR in the morning. I will try and install the right side exhaust this weekend. For those that don't know the whole exhaust is polished stainless and looks awesome. Here is a pic


    Alot of time is being spent figuring out what exhaust is what. There is a big exhaust discussion here http://www.ffcars.com/forums/showthread.php?t=214161

    4/15/09

    I have not posted in a while as I am out of town. I am currently in sunny CA and will be onsite for the Hot Rod Magizne 1 week build next week. Just thought I would leave a status on things as I will not be working on my car for the next 2 weeks.

    Hot Rod Fuel Cell

    I received an email with tracking info from FFR today. My tank has shipped and should be delivered on 4/17.

    Intake Manifold

    I talked to the guy making my intake and he sent the drawings I made off to a machine shop to have it cut on a water jet machine. It should be a couple more weeks on that.

    Hard Top and Doors

    I received a call from Fed EX and they have my hard top. I think the doors are with it as well. It will be delivered to my house tomorrow 4/16.

    Exhaust

    I traded Joe Leone my right side 302 pipe for his left side 4.6. He has confirmed that my pipe fit his car so he is sending me the driver side pipe.

    Digital Gaurd Dawg

    I finally received the push button start security from DGD. Their tech called me yesterday about taking pics for their new web page. We also talked about a new revision that will add on to the existing system adding buttons on the fob for the doors and trunk, as well as alarm. Said possibly in Aug 09.


    That is it for now. I will take pics and post them of the Hot Rod build if I am allowed.

    4/18/09
    I am not home this week but I will be working on the Hot Rod Magizne 1 Week build. see pics here http://www.ffcars.com/forums/showthr...69#post1912869

    stack

  27. #27
    Senior Member stack's Avatar
    Join Date
    Feb 2011
    Location
    Macedon, NY
    Posts
    320
    Post Thanks / Like

    4/28/09

    Worked a little last night on installing the exhaust. My allergies would not allow me to work any longer so this is as I got.


    Work continued tonight on the passenger side exhaust.


    Here is a pic of the muffler. It is polished stainless and is a straight thru design


    This is the large crate F5 sent me with my hard top in it. Maybe I can make my son a fort with the empty box.


    When I was in LA for the hot rod magazine build I picked up some cool parts from LK motorsports. Check them out below

    Custom Headliner, Custom stiched waterfall cover, horn button for the ffr wheel, water over flow bottle, and a billit brake reservoir.


    stack

  28. #28
    Senior Member stack's Avatar
    Join Date
    Feb 2011
    Location
    Macedon, NY
    Posts
    320
    Post Thanks / Like

    5/6/09

    Have not spent alot of time on the hotrod this week. After coming home from CA and then planning my trip back there for this week there has not been alot of time left.

    I made a quick autocad template of the brake reservior that I got from LK. After drilling the holes and mounting it I am thinking that it is going to interfer with the hood pins. I may need to move it and possibly order a new firewall because of the holes. Anyway here are some pics


    I also cut off the roll bar mounts for the dual hoops and ordered the single rool bar from ffr. I like that look much better.


    Back out to CA. I can hopfully take some better pics of the HRM car while I am there

    stack

  29. #29
    Senior Member stack's Avatar
    Join Date
    Feb 2011
    Location
    Macedon, NY
    Posts
    320
    Post Thanks / Like

    5/16/2009

    I tried mounting my power steering unit from ffr, but my champ pan is in the way. The pan is to nice to just cut out a section and weld it back up, so I am looking into other options.

    This seams the only other place I can put it. Mount it right to the firewall. Does not look too bad, but what about the heat.


    5/27/09
    Got the power steering unit mocked up and marked up the oil pan. Here is a pic of the area I will be cutting out and rewelding. Should provide plenty of clearence for the unisteer motor


    Still waiting on the knuckles for the unisteer from ffr then steering will be complete.

    5/31/09

    I have been working on the oil pan and will have some pics up probably tomorrow. I had to cut a much larger section out than I originally thought.

    6/2/09
    Spoke with F5 this morning and they are shipping me the rest of my steering parts for the unisteer, and my convertable windshield. Should have the steering done this week along with the modified oil pan.

    Here is the large section I needed to take out of the Champ pan so it would fit the Hot Rod with the Unisteer power steering setup. I have a friend that will weld it up for me. Then I get to spend the time to get all of the metal particals out of it.

    Richard mentioned that he may be able to get the pan modified to fit the hotrod if there was enough people interested. Other wise the stock pan is looking pretty good.


  30. #30
    Senior Member stack's Avatar
    Join Date
    Feb 2011
    Location
    Macedon, NY
    Posts
    320
    Post Thanks / Like

    6/8/09

    Worked on the hotrod a little on saturday. I installed the trunk alum and the rear cockpit wall. Also began working on the front suspension. I shortened the front lower control arm 1" on the passenger side as directed in this thread. http://www.ffcars.com/forums/showthread.php?t=219808

    Will do the driver side after I confirm everything is OK. Looks like the tie rods are to long now. Need to get the car on the ground to confirm.


    Here are some pics

    Front Passenger side after shortening the control arm 1"


    Driver side unmodified

    Front of car


    Here are some pics of the alum. panels installed


    stack

  31. #31
    Senior Member stack's Avatar
    Join Date
    Feb 2011
    Location
    Macedon, NY
    Posts
    320
    Post Thanks / Like

    6/14/09

    Here are a couple sneek peek pics of my intake. should have it by the end of the week.


    6/17/09

    more intake manifold sneek peaks.


    Should have it friday for some better picks


    6/19/09

    Oil pan in now finished minus paint and can be put back on. Can't wait the intake comes today


    stack

  32. #32
    Senior Member stack's Avatar
    Join Date
    Feb 2011
    Location
    Macedon, NY
    Posts
    320
    Post Thanks / Like

    6/20/09

    Intake finally came in after 20 weeks of waiting. Look like it will work out great. The welds look better up close but it still needs to be cleaned up a bit. Now I need to order the MSD Mod6 so it can run.


    just got back from detroit and found my new exhaust pipes waiting from Lk waiting for me. I fabed them up quick (30 min) and they fit perfectly. If you are on the fence get them.


  33. #33
    Senior Member riptide motorsport's Avatar
    Join Date
    Feb 2011
    Location
    Fort Lauderdale Fl.
    Posts
    3,296
    Post Thanks / Like
    Thats a great looking intake, what are you going to use to fire the car? Steven
    FFR Daytona Type 65 Coupe
    67 427 Cobra
    57' Belair
    72 Pinto Wagon ,306" 1/4 miler
    34 5 window coupe Ford
    2003 Mustang GT
    99' ZX9
    85 Goldwing

    All toys still in the Scuderia!


    Every Saint has a past..................every sinner a future

    Don't take yourself so seriously........no one else does.

    You never see a motorcycle parked outside a Psychiatrists office.

  34. #34
    Senior Member stack's Avatar
    Join Date
    Feb 2011
    Location
    Macedon, NY
    Posts
    320
    Post Thanks / Like


    10/27/09

    Well after almost 4 months of no progress on the 33 the build resumes. During this time I have been traveling alot and working on the house. Now that the house stuff is done for now back to the car stuff.

    I finally have everything needed to make the car run so that is my next goal. A bunch of AN fittings will arive tomorrow and I have the day off so that is what I will be working on. Then it is on to the wiring.

    I hope to resume posting some pics tomorrow with more progress

    stack

    10/28/09
    Here are the pics as promised. I spent the day working on the fuel lines and a couple other odds and ends.

    Here are the fuell lines as they come from the tank. I was going to use some blue hose and AN fittings all the way from the tank, but decided to use hard line after the HOT ROD MAG car. These hoses and fittings are included in the kit and attach to the included 5/16 efi rated fuel hose. These hoses run down to under the tank and connect the the hard lines with the included barb fittings. I planed on using the 5/16 line for the pressure side and the 1/4 for the return, but ended up replacing the 1/4" line with more 5/16". This is because once I get up to the front I need to convert to 6AN and there is not an adapter to go from 1/4 to 6AN.


    I also used the included fuel filter bracket but instead used the fuel filter that came with the Retrotek EFI.

    Fuel Lines run on the outside of the frame. I figure the only thing that will hit them in an accident is a lawn mower.

    Once the hard lines get up front they will convert to AN and run through the throttle body, then back to the regulator and to the tank.

  35. #35
    Senior Member stack's Avatar
    Join Date
    Feb 2011
    Location
    Macedon, NY
    Posts
    320
    Post Thanks / Like

    10/28/09

    I also finally picked up an alternator and installed it for a test fit. I found that the battery cable connection would hit my manifold, so I took it off and modified it to be on the side of the alternator instead of the top.


    I then cut the mounting tabs off the water crossover tube and relocated them.


    Here are the lines as they come up the front of the firewall. They will be mostly hidden by my overflow tank. I hope they are not to close to the header. I think they are about 6" away.


    And here are a couple pics with the air cleaner installed. I am thinking maybe I don't need a hood. We will see


    stack

  36. #36
    Senior Member stack's Avatar
    Join Date
    Feb 2011
    Location
    Macedon, NY
    Posts
    320
    Post Thanks / Like

    11/9/09

    Work continued today. The weather was nice so i used some of my vacation time to get some work done.

    The fuel system is now completed and I started work on the cooling system. I ended up suing the included flexable stainless hose and rubber ends. Hope they work out OK. Still need 2 more hose ends if anyone has a couple left over.


    This pic shows the remote thermostat housing. I will fab up a bracket to hold it in this position. I pulled out the 1/2 hose fitting and used a 1/2 NPT tape to plug the hole. I will not be using a degas bottle and instead will be using an overflow bottle.


    The electrical is almost done. I have a couple wires left to connect for the MSD and efi computers along with the steerining column wiring and the gauges. I hope to get the car started on friday.

    Put the head lights on for fun.


    stack

  37. #37
    Senior Member stack's Avatar
    Join Date
    Feb 2011
    Location
    Macedon, NY
    Posts
    320
    Post Thanks / Like

    12/28/09

    Stack's first start

    --------------------------------------------------------------------------------

    Some of the guys were over yesterday and we attempted a first start of the hot rod. I worked all day to get everything ready and we got set for a 4pm startup. I had trouble with the MSD and Retrotek computers. Neither would talk with my pc and I could not figure it out yesterday. I followed the directions even and still nothing.

    So anyway everyone get there at 4 and we did a couple safety checks and decided to turn the key and see what happens.

    On the first turn of the key the engine cranked. We let it crank for 5 seconds and then repeated. On the third try the engine fired ran for a couple seconds then died. We kept trying to repaet our first success but it was not going to happen. We could only get it to run when wwe put a little gas in the throttle bodies.

    The fuel pressue is 40psi when the computer turns on the pump, but then drops to 0 when the fuel pump turns off. we even tried running the pump continuesly but still no go. I will reread the Retrotek manual and see if I can figure out the problem.

    We have some of it on video and maybe Randy will post it on here. I will say the car is loud. I was standing up front trying to work the throttle and did not get to hear it from the LK exhaust.

    Thnaks to Randy J, Jeff Walker, my dad and brother for helping out and video taping. I call it a small success that it fired so we are almost there.

    more to come
    stack


    First Start Video From Randy J.


    12/31/09
    Ok i reattempted the first start today. I connected the Retrotek EFI computer to the MSD tach output, and connected the 12v ignition leads directly to the ignition switch. They kept losing power during cranking. I used and older laptop that I had at home that had a serial port and it connected right up to the ECM. I set the throttle position sensor according to the directions and turned the key.

    I backfired first then fired right up on the second turn of the key.

    Here is the real first start video. The loud noise before the car is running is my garage heater. I should have turned it off but forgot. My 6 year old held the camera so it may be a little shakey.
    http://static.photobucket.com/player...k/101_4222.flv

    1/26/10
    Better engine start video

    --------------------------------------------------------------------------------

    Here is a better engine start video I took the other day with my iphone


    stack

  38. #38
    Senior Member stack's Avatar
    Join Date
    Feb 2011
    Location
    Macedon, NY
    Posts
    320
    Post Thanks / Like

    2/1/10

    New Sneakers

    --------------------------------------------------------------------------------

    Here are a couple pics of the car on the ground with my wheels and tires.


    Wheels are Boyd Coddington 18x8 and 20x10

    3/26/10
    Got back to work on the car again today. I am finding it hard to get motivated but worked on some wiring and should have the unisteer done tomorrow. I will then work on the Digital Gaurd dog keyless ignition system. Not much to take pics of but i will when i get more done.

    5/16/10
    Hot Rod moved under it's own power for the first time yesterday. The idle is really high and i have the screws backed out all the way. I guess I need to redo the Throttle position sensor calibration or I have a vacuum leak. Need to work on that more tomorrow.

    enjoy
    Last edited by stack; 02-21-2011 at 01:44 PM.

  39. #39
    Senior Member stack's Avatar
    Join Date
    Feb 2011
    Location
    Macedon, NY
    Posts
    320
    Post Thanks / Like

    7/6/10

    Back to work on the Hot Rod again. i was able to get in two fulls days of work on it over this holiday weekend. Saturday was body fitting day. I finished up some misc. wiring and got everything ready to mate the body to the frame. It went on with little trouble and I had lots of hands helping out.


    Here is the car right after the body was put on

    Here is a pic showing the LK exhaust. It fits perfectly and looks great with the polished tips

    The front is held on by some Clekos for now

    And here is the test fit of the passenger door


    stack

  40. #40
    Senior Member stack's Avatar
    Join Date
    Feb 2011
    Location
    Macedon, NY
    Posts
    320
    Post Thanks / Like

    2/21/11

    Car project has been at a stand still. Sometimes life gets in the way of progress but hope to continue on the hotrod real soon. My new house should be completed around April 1st and then I can move the project from my parents garage to mine. I am sure my mother hates parking outside this winter.

    I will have to start all over and get organized again. My tools are scattered between my storage unit and my parents house. Going to be several weeks of just putting things away.

    Would like to throw down some U-Coat it on my new garage floor before I make a mess of it so that may delay things further.

    Hope to get it on the road this year even if it is still in gel coat.

    more to come

    stack

Page 1 of 3 123 LastLast

Posting Permissions

  • You may not post new threads
  • You may not post replies
  • You may not post attachments
  • You may not edit your posts
  •  

Replica Parts

Visit our community sponsor