Very Cool Parts

Visit our community sponsor

Thanks Thanks:  0
Likes Likes:  0
Page 1 of 12 12311 ... LastLast
Results 1 to 40 of 478

Thread: What did you do on your GTM today?

  1. #1
    Senior Member VD2021's Avatar
    Join Date
    Feb 2011
    Location
    Central, FL
    Posts
    958
    Post Thanks / Like
    Blog Entries
    2

    What did you do on your GTM today?

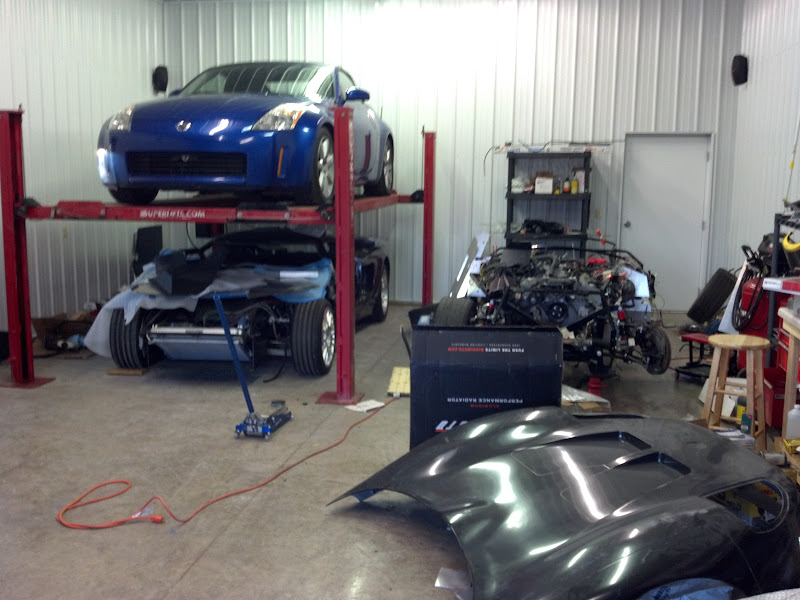
    I've been reading a thread like this in the roadster section. It's an entertaining read so I thought let's start one here. This way there's a place to post trivial stuff like putting gas in the tank or tightening a lugnut......Huge milestones, right?...... Just kidding. Now, big or small, lets see what you did today.
    R/s
    Vidal
    CURRENT STATUS: Interior Rework and Bodywork.
    GenII GTM #331. Delivered (23/9/10)
    BUILD LOG AND WEBSITE:
    http://gtmbuild.weebly.com/ .

  2. #2
    Senior Member
    Join Date
    Feb 2011
    Location
    San Diego
    Posts
    1,961
    Post Thanks / Like
    Well, I didn't do it today, but I did it last night, and the night before that, and the night before that...

    For about 3-4 months now I have been laying body filler and sanding...and sanding...and sanding.

    Doesn't look like I'm even half way done.

    Did I mention I hate dust?
    www.myraceshop.com

    GTM solution kits
    Corvette and Race parts

  3. #3
    Senior Member beeman's Avatar
    Join Date
    Feb 2011
    Location
    Indiana
    Posts
    1,489
    Post Thanks / Like
    I cleaned the shop up last night, put the Z up on the rack for the winter. Pondering a few body mods on the GTM. My 2 1/2 yo daughter climbed into the GTM and said it was NEAT!

    Attached Images Attached Images
    MK3.1 2004 Mach 1 donor. ABS, PS, TC.
    GTM #304 LPE 525hp LS3
    2000 C5 Lingenfelter LS1@489hp
    1999 Corvette FRC/Z06 track car

  4. #4
    LCD Gauges's Avatar
    Join Date
    Apr 2011
    Location
    Toronto, Ontario
    Posts
    1,545
    Post Thanks / Like
    Blog Entries
    3
    I made a list of things to tackle next. I'll be working on the headlight buckets, and hood flashing for the remainder of the week/weekend. Most of my off-time (away from the car)
    has been researching tools and fiberglass prep techniques.

    I'm also working on a lead for an engine, and comparing various trans-axles which will likely come within the next two months. Installing the engine will be a turning point in
    the process from what I can tell: finishing up the wiring, closing up internal panels, interior, etc.

    Same question back to you!
    Last edited by LCD Gauges; 11-02-2011 at 02:37 PM.
    Custom LCD Gauges , Data Loggers, Control Touch Screens
    www.LCDdash.com \\ 647-522-9953 \\ Voice & Text
    Proud new owner of GTM Gen 1., #105 - 08/27/11
    LQ9 Powered, G96.00 6 speed transaxle

  5. #5
    Senior Member VD2021's Avatar
    Join Date
    Feb 2011
    Location
    Central, FL
    Posts
    958
    Post Thanks / Like
    Blog Entries
    2

    I made this

    I actually finished it a few days ago.
    Attached Images Attached Images
    R/s
    Vidal
    CURRENT STATUS: Interior Rework and Bodywork.
    GenII GTM #331. Delivered (23/9/10)
    BUILD LOG AND WEBSITE:
    http://gtmbuild.weebly.com/ .

  6. #6
    LCD Gauges's Avatar
    Join Date
    Apr 2011
    Location
    Toronto, Ontario
    Posts
    1,545
    Post Thanks / Like
    Blog Entries
    3
    I wont believe it until I see a video (or two, or three)!!!
    Custom LCD Gauges , Data Loggers, Control Touch Screens
    www.LCDdash.com \\ 647-522-9953 \\ Voice & Text
    Proud new owner of GTM Gen 1., #105 - 08/27/11
    LQ9 Powered, G96.00 6 speed transaxle

  7. #7
    Senior Member VD2021's Avatar
    Join Date
    Feb 2011
    Location
    Central, FL
    Posts
    958
    Post Thanks / Like
    Blog Entries
    2
    Quote Originally Posted by 00SS_M6LS1 View Post
    I wont believe it until I see a video (or two, or three)!!!
    ???
    R/s
    Vidal
    CURRENT STATUS: Interior Rework and Bodywork.
    GenII GTM #331. Delivered (23/9/10)
    BUILD LOG AND WEBSITE:
    http://gtmbuild.weebly.com/ .

  8. #8
    LCD Gauges's Avatar
    Join Date
    Apr 2011
    Location
    Toronto, Ontario
    Posts
    1,545
    Post Thanks / Like
    Blog Entries
    3
    Ooops, I missed your bolded post title. I thought you meant you finished the car and I wanted to see a video.

    The gauge cluster looks incredible. YOu have some talent for that sort of thing.
    Custom LCD Gauges , Data Loggers, Control Touch Screens
    www.LCDdash.com \\ 647-522-9953 \\ Voice & Text
    Proud new owner of GTM Gen 1., #105 - 08/27/11
    LQ9 Powered, G96.00 6 speed transaxle

  9. #9
    Senior Member VD2021's Avatar
    Join Date
    Feb 2011
    Location
    Central, FL
    Posts
    958
    Post Thanks / Like
    Blog Entries
    2
    Quote Originally Posted by 00SS_M6LS1 View Post
    I thought you meant you finished the car and I wanted to see a video.
    Tino,
    Oh how I wish that was true......
    R/s
    Vidal
    CURRENT STATUS: Interior Rework and Bodywork.
    GenII GTM #331. Delivered (23/9/10)
    BUILD LOG AND WEBSITE:
    http://gtmbuild.weebly.com/ .

  10. #10
    LCD Gauges's Avatar
    Join Date
    Apr 2011
    Location
    Toronto, Ontario
    Posts
    1,545
    Post Thanks / Like
    Blog Entries
    3
    Soon Vidal, soon! If it makes you feel any better, I'm running up against more issues. The headlight buckets seem to have the lamp bores too close to the edge
    and divider. It's not easy to drill the holes for the alignment pins. I'll need to add some epoxy filler to make it all work.

    On top of that, the rivet tool that came with my kit is missing the insert to grab the shank of the rivets...delays, and more delays! I guess I'll be throwing a bit more
    money toward this project yet.
    Custom LCD Gauges , Data Loggers, Control Touch Screens
    www.LCDdash.com \\ 647-522-9953 \\ Voice & Text
    Proud new owner of GTM Gen 1., #105 - 08/27/11
    LQ9 Powered, G96.00 6 speed transaxle

  11. #11
    Senior Member
    Join Date
    Feb 2011
    Location
    San Diego
    Posts
    1,961
    Post Thanks / Like
    More cutting. GTM body has now been cut into 32 seperate pieces!!
    Attached Images Attached Images
    www.myraceshop.com

    GTM solution kits
    Corvette and Race parts

  12. #12
    Senior Member VD2021's Avatar
    Join Date
    Feb 2011
    Location
    Central, FL
    Posts
    958
    Post Thanks / Like
    Blog Entries
    2
    Quote Originally Posted by crash View Post
    More cutting. GTM body has now been cut into 32 seperate pieces!!
    Wow!
    R/s
    Vidal
    CURRENT STATUS: Interior Rework and Bodywork.
    GenII GTM #331. Delivered (23/9/10)
    BUILD LOG AND WEBSITE:
    http://gtmbuild.weebly.com/ .

  13. #13
    Senior Member VD2021's Avatar
    Join Date
    Feb 2011
    Location
    Central, FL
    Posts
    958
    Post Thanks / Like
    Blog Entries
    2
    Driver's side full side intake (Thomas#142 full door scoop) installed.
    Attached Images Attached Images
    Last edited by VD2021; 09-23-2012 at 06:35 PM.
    R/s
    Vidal
    CURRENT STATUS: Interior Rework and Bodywork.
    GenII GTM #331. Delivered (23/9/10)
    BUILD LOG AND WEBSITE:
    http://gtmbuild.weebly.com/ .

  14. #14
    Senior Member Presto51's Avatar
    Join Date
    Feb 2011
    Location
    Catonsville, Maryland
    Posts
    578
    Post Thanks / Like
    Quote Originally Posted by crash View Post
    More cutting. GTM body has now been cut into 32 seperate pieces!!
    Well it’s really, finally confirmed, Crash is a glutton for punishment
    "May you be in heaven a full half hour before the Devil knows you're dead"

  15. #15
    Member kabacj's Avatar
    Join Date
    Mar 2011
    Location
    Long Island
    Posts
    1,103
    Post Thanks / Like
    Quote Originally Posted by crash View Post
    More cutting. GTM body has now been cut into 32 seperate pieces!!
    Thats pretty agressive Crash. I know you are building a race car and rubbing is racing as they say. Id hate to have to redo your 35 piece body! . Kinda nice to just order new glass from the factory.

    That said, im looking fwd to see your mods. I guess if you need to do repair, clearly chopping off a few panels from a new body will be childs play compared to this effort.


    John
    XTF #2
    build start date June 19 2023

    GTM # 344
    Build Start December 2010
    First track day April 2013

  16. #16
    Senior Member
    Join Date
    Feb 2011
    Posts
    119
    Post Thanks / Like
    Quote Originally Posted by crash View Post
    More cutting. GTM body has now been cut into 32 seperate pieces!!
    Awesome!

  17. #17
    LCD Gauges's Avatar
    Join Date
    Apr 2011
    Location
    Toronto, Ontario
    Posts
    1,545
    Post Thanks / Like
    Blog Entries
    3
    Quote Originally Posted by crash View Post
    More cutting. GTM body has now been cut into 32 seperate pieces!!
    You should change your screen name to "craZY"!

    Is that the latest trick for reducing front end drag?

    Vidal,

    I'm liking the side vent inserts. How/Where/ and $$$?
    Custom LCD Gauges , Data Loggers, Control Touch Screens
    www.LCDdash.com \\ 647-522-9953 \\ Voice & Text
    Proud new owner of GTM Gen 1., #105 - 08/27/11
    LQ9 Powered, G96.00 6 speed transaxle

  18. #18
    Senior Member
    Join Date
    Feb 2011
    Location
    San Diego
    Posts
    1,961
    Post Thanks / Like
    Quote Originally Posted by kabacj View Post
    Thats pretty agressive Crash. I know you are building a race car and rubbing is racing as they say. Id hate to have to redo your 35 piece body! . Kinda nice to just order new glass from the factory.

    That said, im looking fwd to see your mods. I guess if you need to do repair, clearly chopping off a few panels from a new body will be childs play compared to this effort.


    John
    Actually there is currently 5 gallons of body filler into this project, and I have 10 more sitting on the shelf. This will not be a usable body when I am done with it. It will be too heavy and not strong enough...I'll leave the rest to your imagination, but let's just say that repairs won't be a problem.

    Still, this has taken twice as long as I had hoped with the summer "honey do" projects, which still aren't entirely complete, but since it's been raining, I HAVE to stay indoors, so cutting, filling, and sanding has been the order of the day!
    www.myraceshop.com

    GTM solution kits
    Corvette and Race parts

  19. #19
    Senior Member beeman's Avatar
    Join Date
    Feb 2011
    Location
    Indiana
    Posts
    1,489
    Post Thanks / Like
    Quote Originally Posted by crash View Post
    More cutting. GTM body has now been cut into 32 seperate pieces!!
    Are you going with fixed front fenders and a smaller hood? I'm pondering that myself...
    MK3.1 2004 Mach 1 donor. ABS, PS, TC.
    GTM #304 LPE 525hp LS3
    2000 C5 Lingenfelter LS1@489hp
    1999 Corvette FRC/Z06 track car

  20. #20
    Senior Member
    Join Date
    Feb 2011
    Location
    San Diego
    Posts
    1,961
    Post Thanks / Like
    Quote Originally Posted by beeman View Post
    Are you going with fixed front fenders and a smaller hood? I'm pondering that myself...
    Nope. Just cutting out the stuff that will have minor changes done to it...

    I was pondering last night and have decided that those front fenders will need to be cut in half AGAIN, so I think I will be approaching the 35 number of seperate pieces!

    The rear is coming out spectacular, at least I think it is, and I have been documenting it all so at some point, hopefully, I will have some process videos to show all exactly what I have done. Don't want to show/say too much at this point, but while it is a slow process, it is coming along nicely.

    I should note that one of my criteria for "coming out spectacular" is in the fact that I have made a bunch of performance enhancing improvements, yet the car should be recognizable as a GTM and really not look any different "at first glance" to a "normal" GTM. To me, this is actually much more difficult than taking the easy way out of just throwing some flares on and some wider tires and calling it good. Not that there's anything wrong with that, but it's not the look I'm going for here.
    www.myraceshop.com

    GTM solution kits
    Corvette and Race parts

  21. #21
    Senior Member
    Join Date
    Feb 2011
    Location
    Houston TX
    Posts
    374
    Post Thanks / Like

    Slowly, Slowly

    Northwest Harris-20111107-00269.jpgNorthwest Harris-20111107-00271.jpgI managed to sneak about an hour tonight to finish off the passenger side exhaust and induction. The driver’s side is tacked together and does not require too much to complete it. All that the engine bay needs is some wire wrapping and to fabricate the wing and latch mount. Man it’s getting hard to find time lately but I can't wait to get this thing fired up again to make sure that I have not screwed anything up during the reconfig.

  22. #22
    Junior Member
    Join Date
    Nov 2011
    Posts
    1
    Post Thanks / Like
    ^^^^^^^^wow^^^^^^^^^

  23. #23
    Senior Member VD2021's Avatar
    Join Date
    Feb 2011
    Location
    Central, FL
    Posts
    958
    Post Thanks / Like
    Blog Entries
    2
    Created a list to decide what I will tackle this weekend.
    R/s
    Vidal
    CURRENT STATUS: Interior Rework and Bodywork.
    GenII GTM #331. Delivered (23/9/10)
    BUILD LOG AND WEBSITE:
    http://gtmbuild.weebly.com/ .

  24. #24
    Senior Member VD2021's Avatar
    Join Date
    Feb 2011
    Location
    Central, FL
    Posts
    958
    Post Thanks / Like
    Blog Entries
    2
    Quote Originally Posted by 00SS_M6LS1 View Post
    Vidal,

    I'm liking the side vent inserts. How/Where/ and $$$?
    Thomas#142. Tom is a vender on the other forum.

    I'm fortunate in that Tom has moved back to Florida and his shop is only 1.5hrs away.

    I'll have to check on the $ because I also have his rear deck spoiler with integrated LED brake light and a few other custom pieces he makes.

    He is an extremely talented with composites and fabrication. His side window scoops are on a lot of GTMs (finished and still building). I actually got to help lay up the full side scoops on the molds last Friday.

    Here's a link that has both the full behind the door scoop and the side window scoops.
    http://www.ffcars.com/forums/42-fact...dow-scoop.html
    R/s
    Vidal
    CURRENT STATUS: Interior Rework and Bodywork.
    GenII GTM #331. Delivered (23/9/10)
    BUILD LOG AND WEBSITE:
    http://gtmbuild.weebly.com/ .

  25. #25
    Member
    Join Date
    Feb 2011
    Posts
    51
    Post Thanks / Like
    Decided to put antifreeze in my gtm 284 and try to start it. Glad I did because I have two leeks. One where the temperature sender goes into the block and the other the water pump it self. I think I may have broken the temp sender when I was trying to get the imi 140 starter in . Time to take it all apart. I hope I can get the water pump off with out pulling the motor.
    Leonard

  26. #26
    Senior Member VD2021's Avatar
    Join Date
    Feb 2011
    Location
    Central, FL
    Posts
    958
    Post Thanks / Like
    Blog Entries
    2
    Quote Originally Posted by 00SS_M6LS1 View Post
    Vidal,

    I'm liking the side vent inserts. How/Where/ and $$$?
    Tino,
    I just spoke to Tom. The full scoops are $250 +shipping which may be about $40 to Canada.

    I was going to stick with the standard opening even after looking at them in his shop in the summer. The eye-opener was when I saw them side by side with my then current opening. It immediately became apparent that my current little rectangle was inadequate compared to taking advantage of the full opening.

    I considered adding louvers to the full door scoops before installing, but wanted to see them with the forward wheel well panel in place. After seeing it with the panel in I am going to leave it just as it is. I am not planning to put anything (not even a mesh) on the back side. It has a sinister look as it is. Once it's on the road and if there becomes a problem with debris then I'll consider a mesh, but as of now I plan on leaving it as is.
    Last edited by VD2021; 11-10-2011 at 08:20 AM.
    R/s
    Vidal
    CURRENT STATUS: Interior Rework and Bodywork.
    GenII GTM #331. Delivered (23/9/10)
    BUILD LOG AND WEBSITE:
    http://gtmbuild.weebly.com/ .

  27. #27
    Senior Member VD2021's Avatar
    Join Date
    Feb 2011
    Location
    Central, FL
    Posts
    958
    Post Thanks / Like
    Blog Entries
    2
    Quote Originally Posted by lrt1941 View Post
    Decided to put antifreeze in my gtm 284 and try to start it. Glad I did because I have two leeks. One where the temperature sender goes into the block and the other the water pump it self. I think I may have broken the temp sender when I was trying to get the imi 140 starter in . Time to take it all apart. I hope I can get the water pump off with out pulling the motor.
    Leonard
    Leonard,
    Sometimes it seems we take a step forward and then two back. I've had a few of those on the build.

    The good news is that you shouldn't have a problem removing the water pump. I took mine off so I could install the engine by myself and don't recall any problems putting it back on.
    R/s
    Vidal
    CURRENT STATUS: Interior Rework and Bodywork.
    GenII GTM #331. Delivered (23/9/10)
    BUILD LOG AND WEBSITE:
    http://gtmbuild.weebly.com/ .

  28. #28
    Senior Member The Stig's Avatar
    Join Date
    Feb 2011
    Location
    Charlotte, NC
    Posts
    2,004
    Post Thanks / Like
    Quote Originally Posted by VD2021 View Post
    Leonard,
    Sometimes it seems we take a step forward and then two back. I've had a few of those on the build.

    The good news is that you shouldn't have a problem removing the water pump. I took mine off so I could install the engine by myself and don't recall any problems putting it back on.
    Hi Leonard,

    Taking the pump off and putting it back on is pretty easy. But make sure, if you do this, to have a set of replacement gaskets. Some people get away with re-using the original gaskets, but you really don't want to keep taking the pump off. The gaskets are 3 or 4 dollars each at your local parts store.

    Also, while you have the pump off, check the bolts that hold the rear cover on, to make sure that they are snug.
    The Stig

    Some say, that I only know two facts about ducks, (both being wrong); and that if I could be bothered, I could solve the "da Vinci Code" in 47 seconds...
    All I know is that I'm called "The Stig".
    GTM #0081

  29. #29
    Member
    Join Date
    Feb 2011
    Posts
    51
    Post Thanks / Like
    Vidal and Stig
    Thanks for your input. The part that make me up set is that I had the engine gone thru and up graded before I put it in the car. The sending unit is not the problem for the first leak. Either the head has a plug that was left out or there is something wrong with the way the head was put on . Head gasket or O -ring. I hope I can get the water pump rebuilt. I will dig into it further .
    Leonard

  30. #30
    Senior Member VD2021's Avatar
    Join Date
    Feb 2011
    Location
    Central, FL
    Posts
    958
    Post Thanks / Like
    Blog Entries
    2
    Cut the passenger side full side air intake opening and prepped it for be glassed tomorrow.
    Attached Images Attached Images
    Last edited by VD2021; 11-11-2011 at 08:41 PM.
    R/s
    Vidal
    CURRENT STATUS: Interior Rework and Bodywork.
    GenII GTM #331. Delivered (23/9/10)
    BUILD LOG AND WEBSITE:
    http://gtmbuild.weebly.com/ .

  31. #31
    Senior Member VD2021's Avatar
    Join Date
    Feb 2011
    Location
    Central, FL
    Posts
    958
    Post Thanks / Like
    Blog Entries
    2
    Glassed in the passenger side full air side intake scoop.
    Attached Images Attached Images
    Last edited by VD2021; 11-13-2011 at 09:27 AM.
    R/s
    Vidal
    CURRENT STATUS: Interior Rework and Bodywork.
    GenII GTM #331. Delivered (23/9/10)
    BUILD LOG AND WEBSITE:
    http://gtmbuild.weebly.com/ .

  32. #32
    Member
    Join Date
    Feb 2011
    Posts
    51
    Post Thanks / Like
    Replaced the water pump. Not to bad of a job and have the missing plug for the head on order from local chev dealer. All is well till the next screw up.
    Leonard

  33. #33
    Senior Member
    Join Date
    Feb 2011
    Location
    Houston TX
    Posts
    374
    Post Thanks / Like
    Northwest Harris-20111113-00277.jpgNorthwest Harris-20111113-00279.jpgNorthwest Harris-20111113-00280.jpgAlmost fished the driver’s side exhaust today.
    Managed to complete the wiring routing and wrapping before the hardware went in.
    Should be able to fire this thing up again during the week and I can't wait to do some donuts and go-cart the hell out of this thing before I start playing with the body work.
    Vids to follow!!!

  34. #34
    Senior Member VD2021's Avatar
    Join Date
    Feb 2011
    Location
    Central, FL
    Posts
    958
    Post Thanks / Like
    Blog Entries
    2
    Tires arrived and were mounted on the wheels.
    Attached Images Attached Images
    R/s
    Vidal
    CURRENT STATUS: Interior Rework and Bodywork.
    GenII GTM #331. Delivered (23/9/10)
    BUILD LOG AND WEBSITE:
    http://gtmbuild.weebly.com/ .

  35. #35
    Senior Member VD2021's Avatar
    Join Date
    Feb 2011
    Location
    Central, FL
    Posts
    958
    Post Thanks / Like
    Blog Entries
    2
    Created this weekend's plan for what I want to get accomplished this weekend.
    R/s
    Vidal
    CURRENT STATUS: Interior Rework and Bodywork.
    GenII GTM #331. Delivered (23/9/10)
    BUILD LOG AND WEBSITE:
    http://gtmbuild.weebly.com/ .

  36. #36
    Member spytech's Avatar
    Join Date
    Feb 2011
    Posts
    88
    Post Thanks / Like
    flipped the front shocks the other day.

  37. #37
    Senior Member VD2021's Avatar
    Join Date
    Feb 2011
    Location
    Central, FL
    Posts
    958
    Post Thanks / Like
    Blog Entries
    2
    Quote Originally Posted by spytech View Post
    flipped the front shocks the other day.
    N,
    Is it too late in the season for a test run to see how it feels now?
    R/s
    Vidal
    CURRENT STATUS: Interior Rework and Bodywork.
    GenII GTM #331. Delivered (23/9/10)
    BUILD LOG AND WEBSITE:
    http://gtmbuild.weebly.com/ .

  38. #38
    Junior Member Sheldon's Avatar
    Join Date
    Nov 2011
    Posts
    3
    Post Thanks / Like
    Adjusted the driver's seat... again... I think I have it where I want it now. I'm not overly tall, so I can't just put it against the firewall like a tall guy could. The car is ready for paint. I have to wait for a couple of weeks for that, so I'm just goofing off with a few odds and ends.

    Jon Gen I

  39. #39
    Senior Member fact5racer's Avatar
    Join Date
    Feb 2011
    Posts
    557
    Post Thanks / Like
    Worked on wiring, finished the headlights with a plug soa s to unplug the lights with one plug when removing the nose. Also played with wiper some. Gonna do some soundproofing this week before carpeting the interior.

  40. #40
    Member kabacj's Avatar
    Join Date
    Mar 2011
    Location
    Long Island
    Posts
    1,103
    Post Thanks / Like

    My Mendiola is finally here!

    I opened the crate with my new Mendiola Transaxle!

    Boy its a nice piece of hardware. Everything is put together very well. Every fastener, the safety wired parts, the paint pen marked bolts so you can see if they are tight, the cadmium plated parts. Super nice. Even the crate is well built! My son (7) wanted to use it as a toy box. Even kids can see how well made this stuff is.

    Last edited by kabacj; 12-18-2011 at 11:01 AM.
    XTF #2
    build start date June 19 2023

    GTM # 344
    Build Start December 2010
    First track day April 2013

Page 1 of 12 12311 ... LastLast

Tags for this Thread

Posting Permissions

  • You may not post new threads
  • You may not post replies
  • You may not post attachments
  • You may not edit your posts
  •  

Martin's Dent and Collision Shop

Visit our community sponsor