-
Senior Member

Anybody familiar with Butcher Block Countertops?
I'm doing a down-to-the-studs kitchen remodel and it's almost time to buy my countertops. There are a lot of how-to videos online regarding sealing butcher blocks with with NSF approved oil, staining it, or both.
Great instructions with the finishing oil - once a day for a week, once a week for a month, once a month for a year, then twice a year. OR - it could be treated with poly. Etc., etc.
The appearance I'm looking for is slightly-darker-than-natural. The problem is I don't know what material to start with and how to get there. I'm also not sure if butcher block darkens over time.
The online selections from say Home Depot or Lowes are Red Oak, Acacia, Baltic Birch, European Ash, and others.
Any advice regarding the entire installation is welcome.
Butcher_Block_Countertops_in_SeattleWA.jpg
-
David aka Ducky2009

If you're actually going to use the counter top as a cutting board, don't poly it.
MK4 Build #9035 Delivered 2/17/17, First Start & Go-Kart 6/2/17, Licensed 9/1/17
Paint - Lightning Blue Metallic, No Hood Scoop, No Stripes
Gen 2 Coyote Engine & TKO-600. Solid Axle, 8.8-3.55, Power Steering, Power Brakes, Dual Roll Bars
Heater and Glove Box, Drop Trunk, Wipers, Radio, FFR Vintage Gauges, Custom Dash
Build Thread:
http://thefactoryfiveforum.com/showt...MK4-Build-9035
-
Probably good advice not to poly if using as a kitchen countertop, but here are a couple of pictures of the countertop I did for my wife's craft room with poly over un-stained oak.
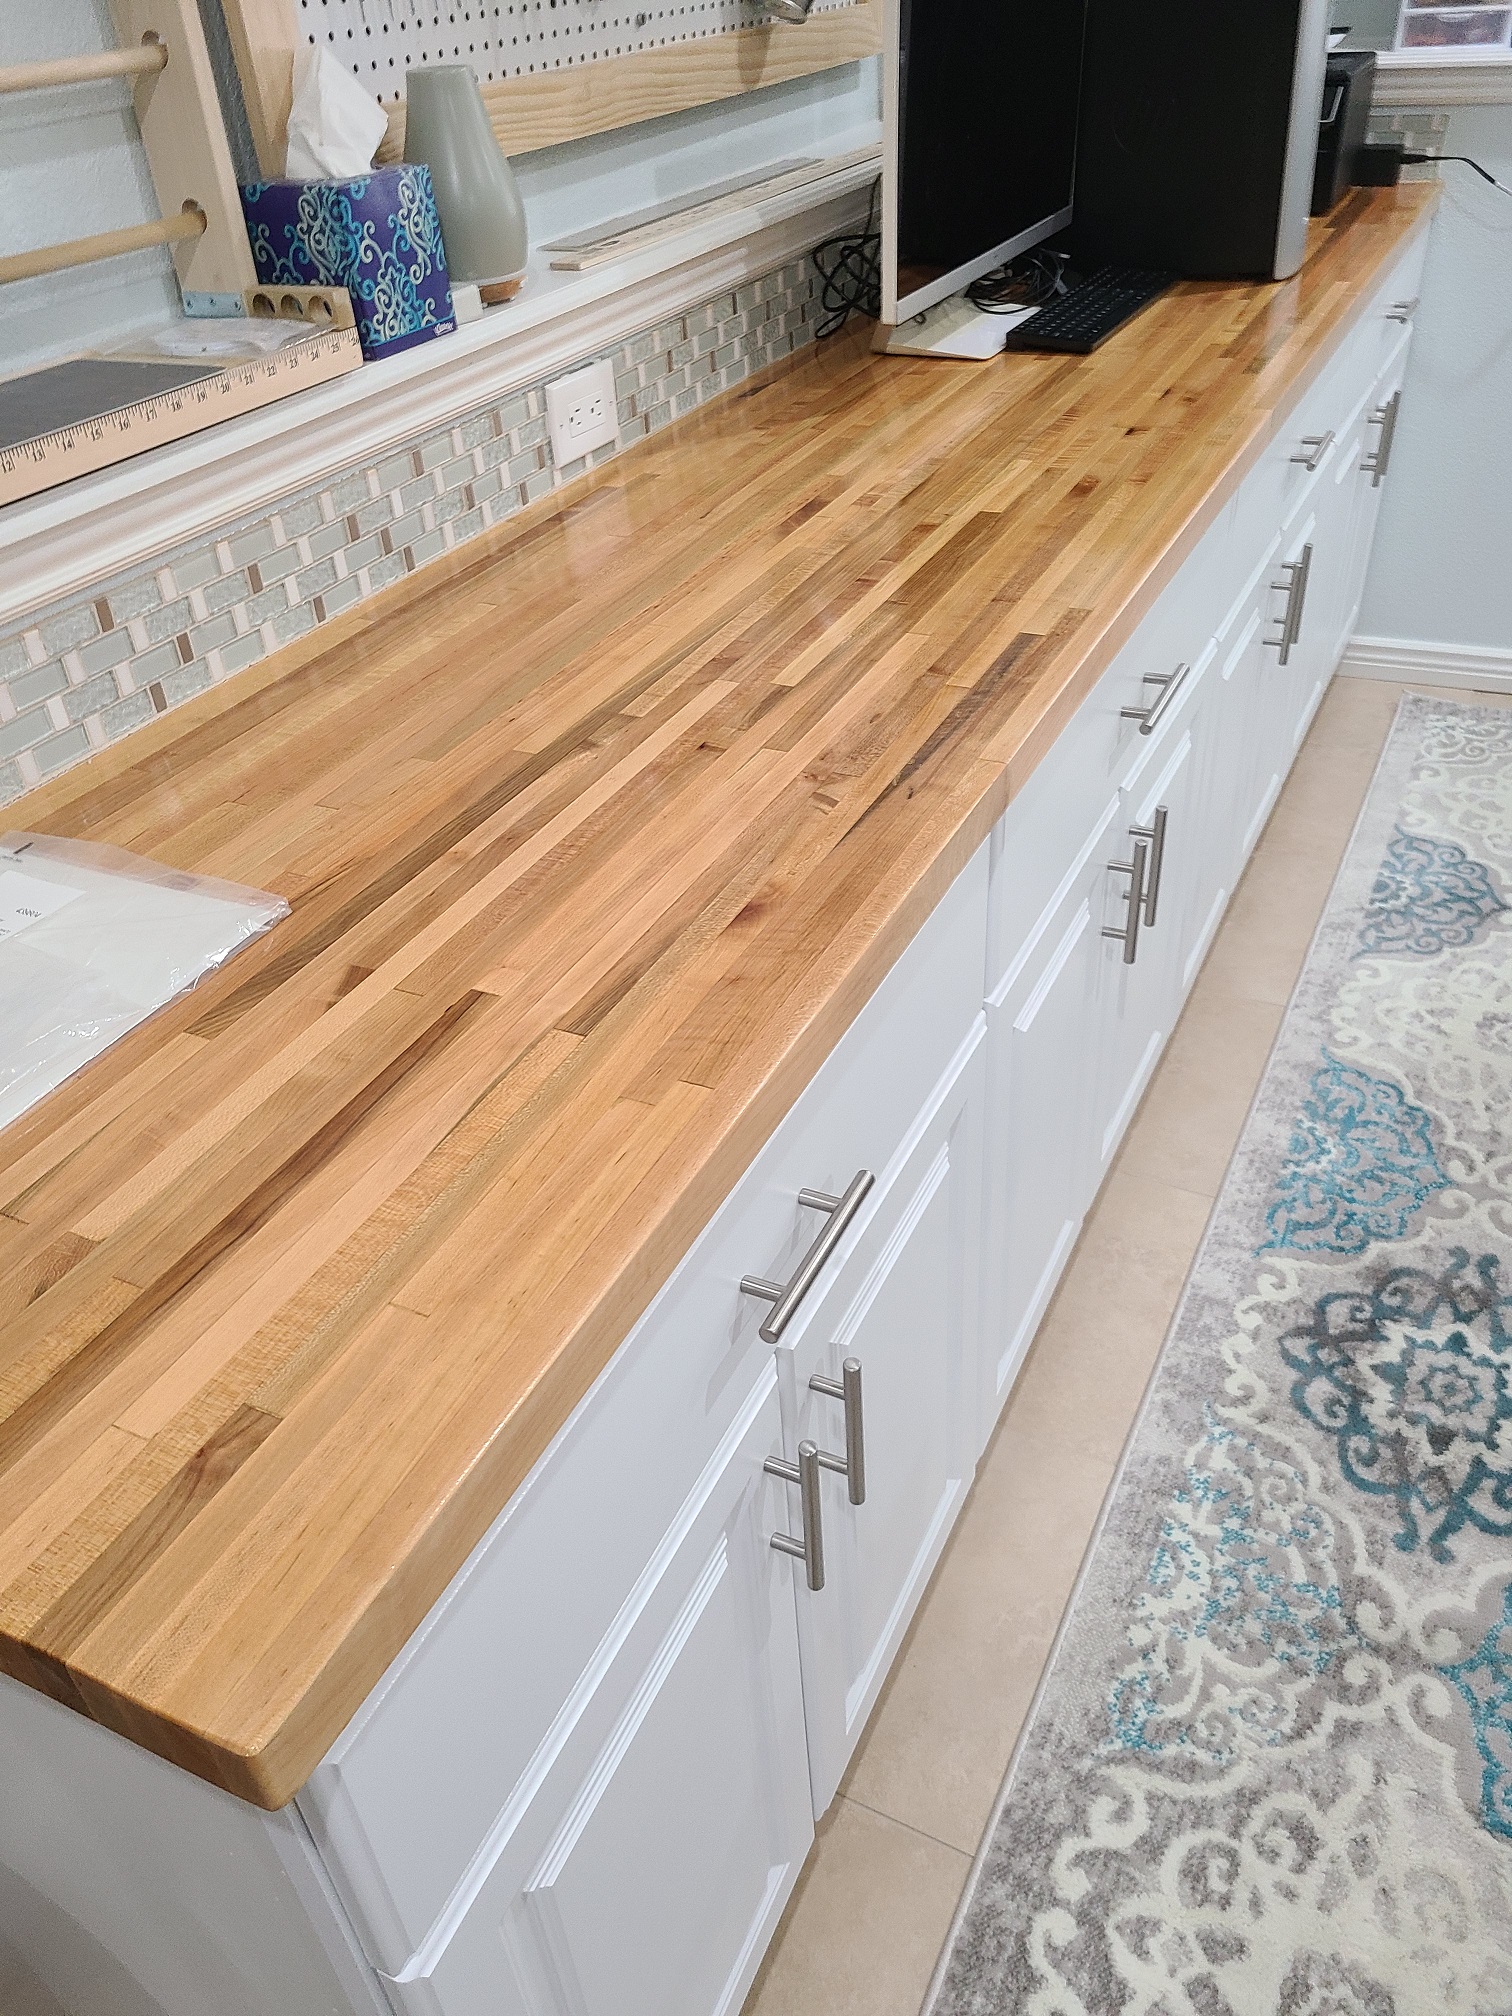
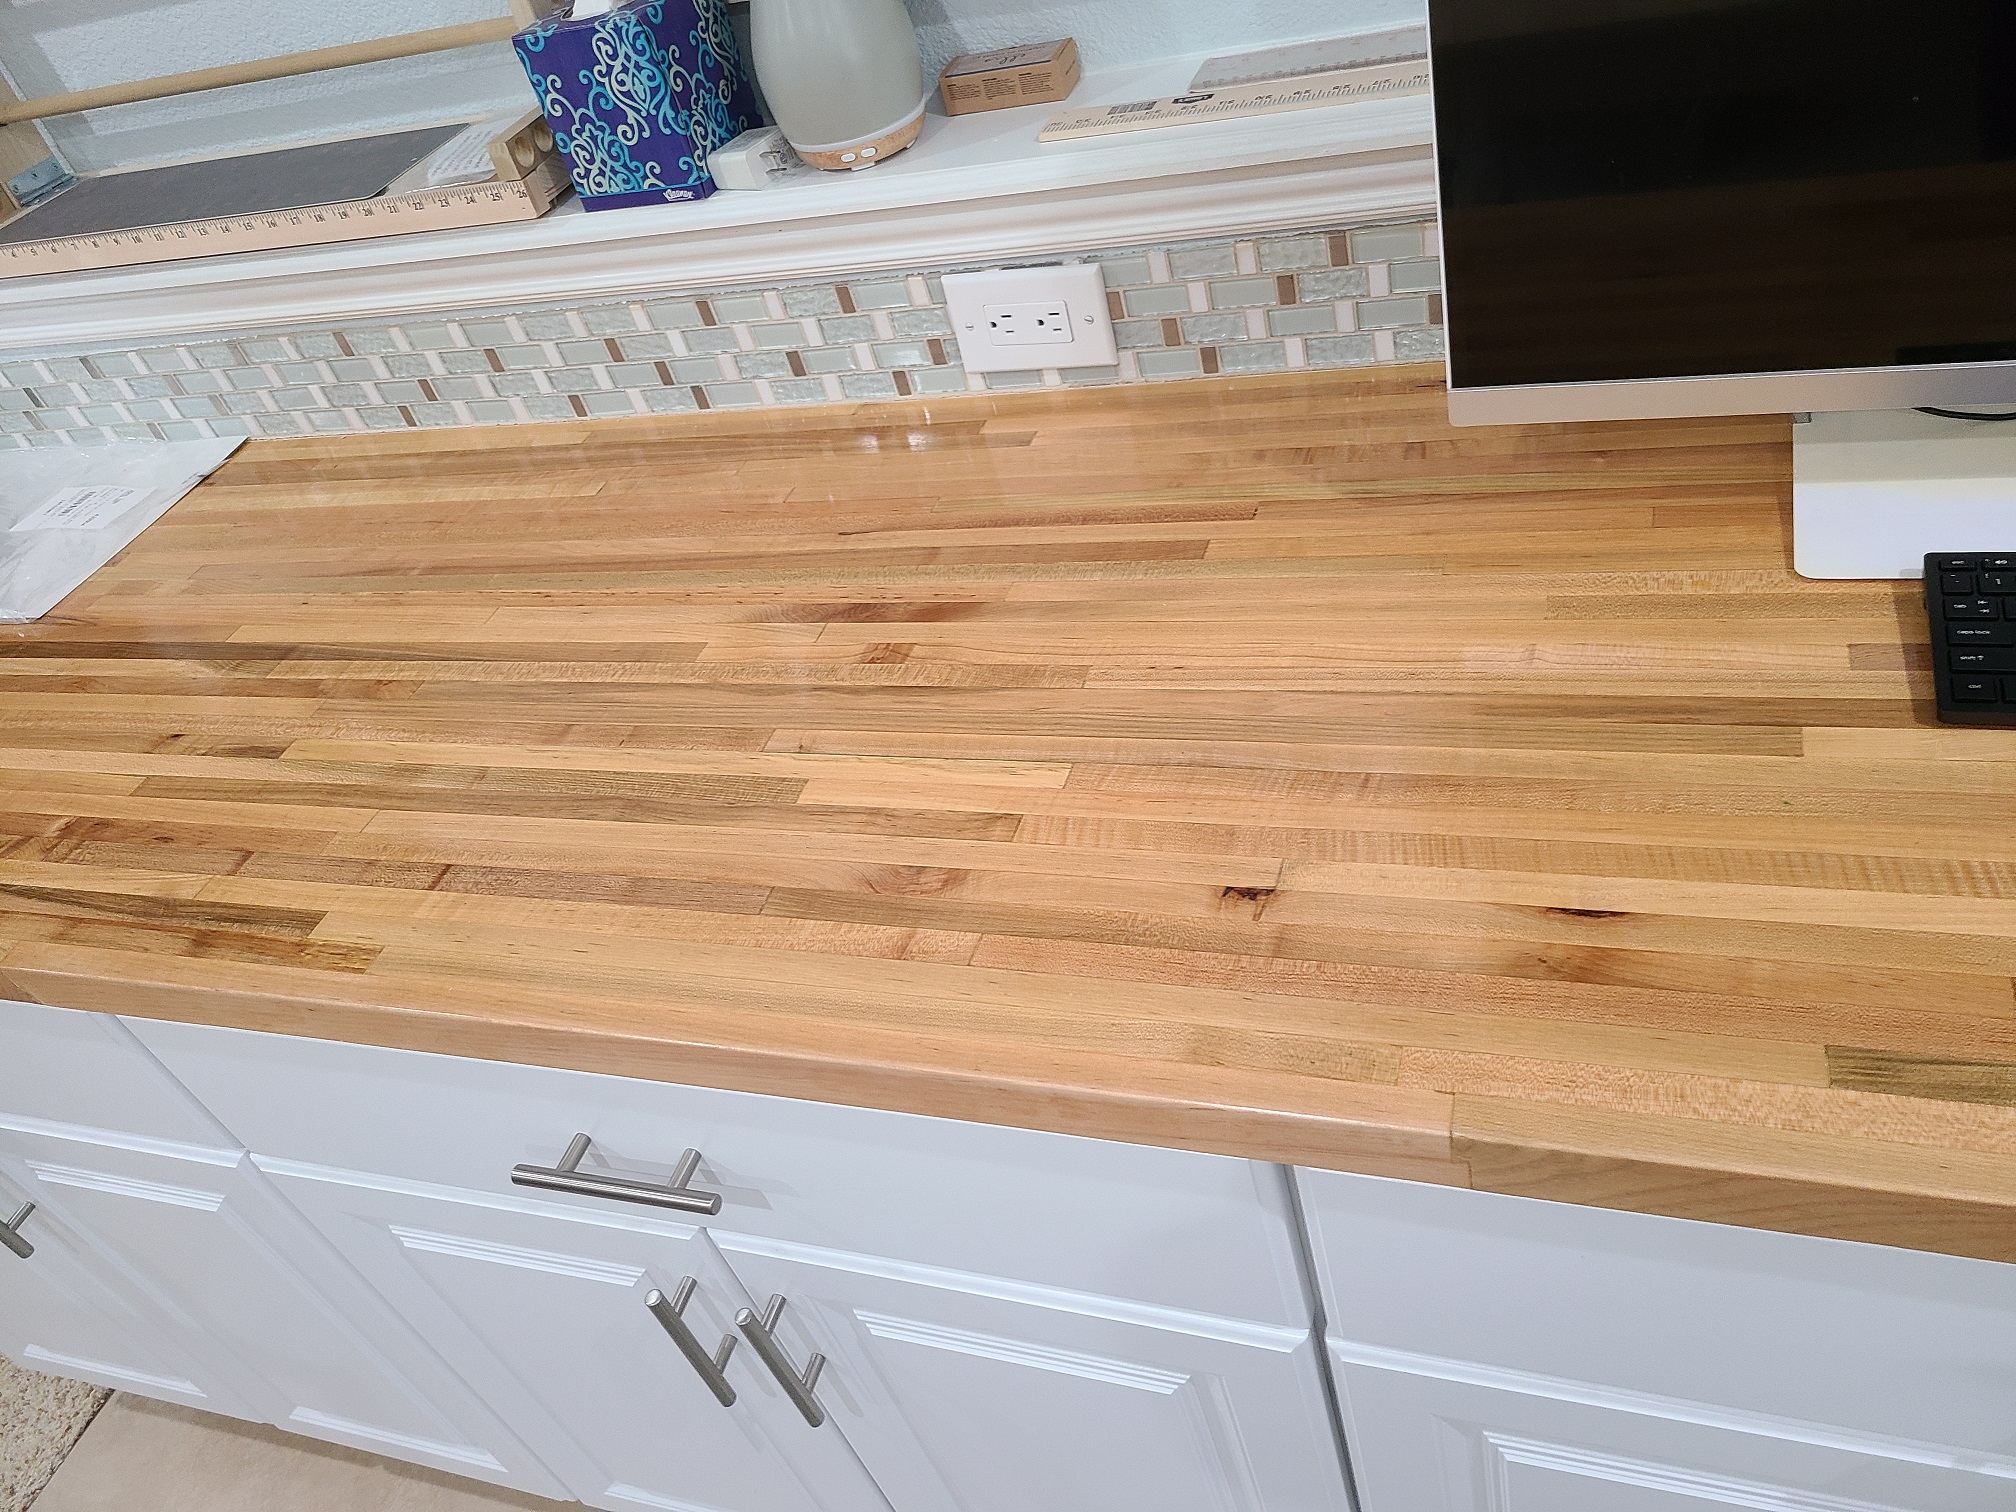
I bought the top from Lumber Liquidators in a 12' length and cut it down to 10' for the room I did. The poly is about eight coats sanding between each coat to get a nice smooth surface.
https://www.llflooring.com/c/butcher...-counter-tops/
-
Post Thanks / Like - 0 Thanks, 1 Likes
-
My Dad was a butcher for 40 years and worked for A&P. They had to remove all butcher blocks because they could'nt be properly cleaned , He's 97 now so this was quite while ago , Ed
-
I made an island with a hard maple butcher block top for my last house. I bought the wood from a local woodworking supplier and he kinda thought I was nuts for buying large pieces of wood to then cut into 2" strips to glue back together, maybe he was right. I used Watco clear butcher block oil from HD for the protectant and it gave more of a glossy finish, nearly looked like poly. I reapplied the Watco every quarter or when it started to look "raw". One thing to keep in mind is that your wood will grow/shrink with humidity and temperature changes and you need to allow for this so it doesn't crack. There are multiple ways to do this, I used some clips.
We used the top for about 3 years before moving and cut everything other than raw meat on it (sanitation as mentioned earlier). It was really nice to not have to get a cutting board out. I never really noticed any change in the coloring, always a natural look, the only change was the marks from the knife. The knife marks would fade a bit when the Watco was reapplied though.
-
A while back I was doing some research on butcher block tops and came across this site that offered quite an array of different finishes.
https://hardwood-lumber.com/wood-finishes/
I never ordered from them so can't speak to their quality or pricing, but I found the site pretty helpful in understanding all the different finishing options out there for butcher block tops.
MkIV Roadster build: Gen 2 Coyote, IRS, TKO600. Ordered 10/24/18. Delivered 1/29/19. Engine installed 8/8/21. First start 9/12/21. First go-kart 9/17/21. Off to paint 4/11/22. Back from paint 12/30/22.
Build thread here.
-
Senior Member

Our island countertop is butcher block while the rest of the countertops are granite. Makes a nice contrast. It is treated with butcher block oil. It is safe for food prep and prevents staining. It does slightly darken the wood and make any grain standout better. Should be retreated a couple of times in a year. Just wipe it on with a clean rag, let it sit for a bit, then wipe of the excess with a dry rag. Don’t use the countertop for 24 hours after treating.
Don’t throw the rags in the garbage. Spontaneous combustion has been known to happen. I burn mine in the outdoor fire pit.
HTH
Norm
Mk4 base kit 7721, 331 Stroker, Holley Sniper EFI, Wipers, Heater, Whitby Soft Top, Drop trunk mod and more
-
I bet the oil folks are using is mineral oil - about the only oil that is food safe and won't turn rancid when exposed to air.
Contact Boos butcher blocks in Effingham IL. You see their cutting boards on every food network cooking show. They sell different materials depending on the circumstances.
Greg
-
Senior Member
The photos of the OAK above is about what I want. I will skip on the poly - makes sense that's not the best for a kitchen.
The only cutting I will do is on a cutting board I will make from the scrap from the sink cutout. I have one of those sinks that have the ledge to fit a cutting board inside the sink.
The island, which is on wheels will be Caesarstone, maybe a quartz or marble color.
I will have one mitered corner with a 15 inch "L" and I'm sure I can join the edge with a Craigs Jig and pocket screws.
The only thing that makes me nervous is the sink cutout - I hope I can get it straight with consistent curves for the corners. Regarding the curved corners, I've never had good luck with a jig saw. Even a brand-new blade always seems to be flimsy, and never seems to cut perfectly square to the top surface.
EDIT: It's an under-mount sink so the sink cutout is visible.
EDIT AGAIN: Look at the attached picture. Maybe the corners of the sink cutout don't need to be rounded after all, or at least not as rounded as I was originally picturing in my mind.
SINk.JPG
Last edited by NiceGuyEddie; 08-26-2021 at 11:30 AM.
-
Drill the four corners with a bit of whatever radius you want, then connect the four holes with the jig saw.
MkIV Roadster build: Gen 2 Coyote, IRS, TKO600. Ordered 10/24/18. Delivered 1/29/19. Engine installed 8/8/21. First start 9/12/21. First go-kart 9/17/21. Off to paint 4/11/22. Back from paint 12/30/22.
Build thread here.
-
Senior Member
I would make the corners with a fine tooth hole saw and cut up to them with a good blade on a circular saw with a good guide. Cut from the top and just until you touch the hole then finish the cut with a hand saw. To prevent splintering on the cross cuts score the wood with a sharp utility knife along the outside of the intended cut. Rough sand off any imperfections then put a 1/4 radius on the top of the opening with a router then finish sand.
Practice this on scrap first until you’re comfortable with the technique required. The tricky part is the plunge cuts with the circular saw.
I can’t recall seeing an under mount sink in a butcher block countertop. The edges of the wood are going to get a lot of water contact and get beat up from dishes going in and out of the sink (or at least they would at my house).
Good Luck
Norm
Mk4 base kit 7721, 331 Stroker, Holley Sniper EFI, Wipers, Heater, Whitby Soft Top, Drop trunk mod and more
-
I've done two butcherblock tops. I've used waterlox on both of them and have been very happy with the results of it. It keeps it looking nice for a long time. I applied about 5 coats each time.
-
Senior Member
OK - the good news is due to my layout, I need to buy (2) 8' pieces. If I screw up the cutout for the sink, I can always cut it and use that section for the short side of the "L".
-
Senior Member

I installed butcher block 6 years ago . My buddy has a counter top shop . I purchased them in slabs the back splash you can get already cut in 4”x 8’ lengths. The inside corners are tough that’s why my buddy cut it out for me . He added biscuits and a screw mechanism underneath to tighten up the 45 degree area but that takes work with a router underneath the top . Joe did all my cut work and I installed them myself. Easy peasy just use silicone to glue them down. I use mineral oil to freshen them up . Yes the more work you do oiling then the darker they get . Sun pays a factor as well it dries out the wood faster. 1E1C7773-7B75-4C45-98CA-7CF022B16D44.jpg
FFR 35 p/u # 0016 Dart 347 TKO 600
-
Senior Member

I like to use Tried and True Varnish Oil - https://www.triedandtruewoodfinish.c...s/varnish-oil/. It is a penetrating linseed oil that brings out the grain and adds depth, safe as a countertop finish. If you need some extra protection you can add a few coats of wipe on satin poly - it will still keep the hand rubbed finish look.
I also like Waterlox too, it is a more durable finish that can be spot refinished if needed. I find the original formula better than the low VOC.
-
Senior Member


Originally Posted by
NiceGuyEddie

The photos of the OAK above is about what I want. I will skip on the poly - makes sense that's not the best for a kitchen.
The only cutting I will do is on a cutting board I will make from the scrap from the sink cutout. I have one of those sinks that have the ledge to fit a cutting board inside the sink.
The island, which is on wheels will be Caesarstone, maybe a quartz or marble color.
I will have one mitered corner with a 15 inch "L" and I'm sure I can join the edge with a Craigs Jig and pocket screws.
The only thing that makes me nervous is the sink cutout - I hope I can get it straight with consistent curves for the corners. Regarding the curved corners, I've never had good luck with a jig saw. Even a brand-new blade always seems to be flimsy, and never seems to cut perfectly square to the top surface.
EDIT: It's an under-mount sink so the sink cutout is visible.
EDIT AGAIN: Look at the attached picture. Maybe the corners of the sink cutout don't need to be rounded after all, or at least not as rounded as I was originally picturing in my mind.
SINk.JPG
I really like butcher block counter tops and was looking at walnut with maple coming in second. One thing though, I would highly suggest you have the right type of sink for it or you surround your sink with stone of some form about 12” out on both sides. The reason is no matter the protection you use, water and wood just don’t do well together long term. You can definitely have butcher block right up to a sink but you need to be proactive such as drying up any standing water/drips on it, put soap dispenser in a dish of some form, not directly on the wood itself (see pic below), etc. You will need to oil at least twice a year but that is the easy part of things so no worries there.
3EFC62BB-0AF2-45C4-B36A-33D17D4191F9.png
Pic above came from this blog that actually details out the concerns and how to go about cutting your corners, etc.
https://abeautifulmess.com/diy-butch...dermount-sink/
Last edited by KDubU; 08-27-2021 at 07:30 AM.
Kyle
Complete Kit pickup 09/05/2015, 351w, QF680, 3.55, 3-Link, 15" Halibrands with MT's, Painted Viking blue with Wimbledon white stripes on 03/15/2017. Sold in 08/2018 and totally regret it.
-
Member

I just put butcher block counters in our condo in North Carolina. Natural Birch butcher block counter top from Lowe's and Waterlox Satin finish. Great finish and easy to apply.
Attachment 152751
-
Senior Member

Several years ago I had Michigan Maple Block Co make up some custom sized maple counter tops for our kitchen. I finished it with their "Good Stuff". My wife has been very happy with the finish.
https://www.butcherblock.com/product...ance-and-care/
-
Senior Member

I installed BB in my kitchen remodel on the breakfast bar. It was pennies on the dollar compared to granite. It has held up well. I oiled it once and have not needed to touch it since. I used the left overs (comes 26" cut it down to 18") and made a cutting board.

Last edited by Blitzboy54; 09-30-2021 at 12:48 PM.
MK4 #10008 - Ordered 10/06/20, Delivered 03/03/21, First Start 7/22/21, First Go Kart 7/24/21
Paint by Metal Morphous 5/14/22, Legally registered 6/8/22, Graduated 7/20/22
Build Thread
https://thefactoryfiveforum.com/show...been-delivered
Complete Kit, Ford 306, Sniper/Dual Sync, T5, Hydraulic clutch
-
I love that people are big fans of butcherblock. I always thought I was an outlier because we've had it in our homes.
-
Senior Member
I will be ordering the butcher block countertops very soon. They are made of Baltic Birch.
I have a different sink now and it's an undermount sink, but the butcher block won't over-hang over the sink so I don't have to worry about the bottom exposed edge.
There is a waterjet place that we use at work - they will experiment with a scrap of the butcher block that is 1-3/4" thick. If it cuts well, I'll use them to cut the hole for my sink.
I will update with pictures as I go along, my goal is to have running water again by Thanksgiving.
-
Senior Member
Originally Posted by
Blitzboy54
I installed BB in my kitchen remodel on the breakfast bar. It was pennies on the dollar compared to granite. It has held up well. I oiled it once and have not needed to touch it since. I used the left overs (comes 26" cut it down to 18") and made a cutting board.
It makes absolute sense to have granite for a countertop and butcher block for an eating surface. I can't believe that people eat off of cold, rock-like surfaces like granite or marble. The dishes clank, the wine glasses clank, it's cold, and your food will even cool faster if a plate is put on a granite eating surface. Every restaurant I've even been to in my entire life had a wooden table, some with a tablecloth, most without. Sometimes it's a laminated table, but underneath is some type of wood or particle board.
I will have an island on wheels for prepping, and that island will have either granite or quartz. The rest of the kitchen will be butcherblock, including the eating surfaces.
-
Senior Member
Butcher Block Examples.png
It took a very long time to find something like this. It looks like I will go with the Birch and mineral oil.
-
Senior Member
The best part is no matter what you do you are a belt sander and away from a complete reset. I have no regrets about using it. Best of luck and share some pics when done.
MK4 #10008 - Ordered 10/06/20, Delivered 03/03/21, First Start 7/22/21, First Go Kart 7/24/21
Paint by Metal Morphous 5/14/22, Legally registered 6/8/22, Graduated 7/20/22
Build Thread
https://thefactoryfiveforum.com/show...been-delivered
Complete Kit, Ford 306, Sniper/Dual Sync, T5, Hydraulic clutch
-
Senior Member
Butcher Block Examples.pngrue.jpeglayout.JPG
I could not find the birch with square edges, it seems to only be available with factory-rounded edges. So that means if I did a butt joint on the "L", there would be a gulley where dirt and crud could live.
So I decided to do a miter joint in the corner and at the minimum, I think it will look better. My only concern is if I can cut two 45° angles true enough to have both parts line up properly. The pieces come in 8' and 4', so what I plan to do is cut the 45° angles first and then cut the square side to length. This way, I will have several chances at getting the miters correct.
The good news is the short side of the "L" isn't very long so as long as the miter line is flush I will be OK.
I have a framing square and a BORA circular saw track guide so I'm sure the lines will be straight, my only fear is will the cuts be at a 90º angle to the top.
Last edited by NiceGuyEddie; 10-22-2021 at 12:17 PM.
-
You might reach out to your local big-box home improvement stores to see if they would be willing to do the cuts for you on one of their large saws.
-
I have rock maple counter tops in my woodworking shop and like them. However, make sure that you get a wood that is hard enough for the application so that dings, dents, scrapes, etc. do not cause excessive or unwanted wear.
FFR MKIV ordered 12 July 2019. IRS, Wilwood Brakes, 18" Wheels w/MT tires, power steering, EFI, Heat. 347 Dart w/TKO-600 by Mike Forte, Holley FI, MSD coil and CD box. All new, no donor build.
-
Senior Member
Originally Posted by
Papa
You might reach out to your local big-box home improvement stores to see if they would be willing to do the cuts for you on one of their large saws.
This is a great idea - until recently, for some strange reason the Lowes store near me didn't have a panel saw and could not cut down things such as 4'x8' plywood. The Home Depot near me always had a panel saw but I rarely shop there because it is not air conditioned. It's an older Home Depot, but when it's +100° I'll drive another half mile to Lowes.
I am not sure the panel saw cuts 45º angles but I will ask.
-
Senior Member
Originally Posted by
RBachman
I have rock maple counter tops in my woodworking shop and like them. However, make sure that you get a wood that is hard enough for the application so that dings, dents, scrapes, etc. do not cause excessive or unwanted wear.
Believe it or not, I am trying for a lived-in look. The kitchen is to be new but look like grandma's house. For example, I have unfinished brass hardware and I'm going to let it tarnish.
-
Senior Member
GUYS:
Dumb question: I have a router that I used only once to trim laminate edges on the countertop that I made 17 years ago. With a long bit, can the cutout for the sink be cut with a router? I imagine I'd have to go real, real slow but I am not sure if this would work. I found zillions of videos on YouTube about cutting dado's and rabbits, but nothing like cutting out a hole for a sink.
The butcherblock is 1.75", I see they sell 2" router bits.
-
Senior Member
d134c96b36872a708d154bb66af6421a02c427d1-1.jpeg
I can't believe how much these things weigh! They are 8' in length and for some strange reason, they were shipped directly to my doorstep. If they were loaded to my truck at the store pickup it would have been easy to slide them off the truck and onto my work table. It was a bear schlepping them inside.
Lead time was only 2 weeks directly from somewhere in Northern Europe.
-
Originally Posted by
NiceGuyEddie
GUYS:
Dumb question: I have a router that I used only once to trim laminate edges on the countertop that I made 17 years ago. With a long bit, can the cutout for the sink be cut with a router? I imagine I'd have to go real, real slow but I am not sure if this would work. I found zillions of videos on YouTube about cutting dado's and rabbits, but nothing like cutting out a hole for a sink.
The butcherblock is 1.75", I see they sell 2" router bits.
Eddie,
Use a scroll saw to rough out the hole leaving only about a 1/4" of material. Then make an exact template out of 1/2" medium density fiber board. Clamp the template to the butcherblock in the exact location you want it to be. Using the router and a top bearing 1/2" straight bit (see below) follow the template with the bearing in a clockwise direction making about 1/4 - 3/8" depth cuts. You can make a series of shallow cuts eventually using the previous cut butcherblock as the template. You'll find you can remove the template once you get down into the block about 3/8" again then using the previous router cuts as your new template. Again, make shallow cuts.
When making the template, cut out the hole as close to the cut line as possible with the scroll saw. Use a new blade so the blade with not wander under your cut. Then use a wood file and sanding block to get it exact to the line. If you make a mistake and cut past the line you can make up a mix of epoxy and saw dust to fill in the mistake and file and sand it to the line.
Use a bit with a 1/2" shank bit similar to this one: https://www.rockler.com/rockler-patt...plunge-routers
Are you still going to make 45 cuts? If so and you want some pictures of my recent project out of the same butcherblock, PM me with your email and I can send you a bunch of pictures of the almost finished project in our laundry room and the way I attached the 45's together.
George
Last edited by GWL; 11-03-2021 at 10:32 PM.
-
Eddie,
I read a few more posts and can give you some ideas about cutting the 45's. You don't need a special saw guide just a straight edge and a few clamps and using a 1/8" kerf blade in your circular saw will do. The 1/8" kerf is so the blade will not wander as easily as a 1/16" blade. When you do make the cuts you need to be cutting into the wood with material on both sides of the cut. If you make a mistake and want to make another cut, again you should be into the wood so there is material on both sides of the blade. Make the 45's the priority cut and then cut them to length later with a 90 cut. I ended up doing this several times until I got my cuts just right and my corner was not exactly 90 thus the cuts were not 45's.
How long is the long 45?
What are you using for your back splash? Home Depot sells them in the Baltic Birch too.
George
-
Curmudgeon

Glad I read this thread. Getting ready to do granite counter tops and just bought a 10' piece of maple butcher block for the bar top. Never really thought about mixing materials before. I hate cold plates and this is a perfect solution for a bar top.
MKII "Little Boy". 432CI all aluminum Windsor. .699 solid roller, DA Koni shocks, aluminum IRS, Straight cut dog ring T-5, 13" four piston Brembos, Bogart wheels. BOOM!
-
This is a table I made. Rough cut the edges with a grinder then used a torch to burn areas for color differences. I put a piece of granite in the middle for hot plates.
IMG_1541.jpg
Last edited by Jeff33Ford; 11-04-2021 at 03:04 PM.
-
Post Thanks / Like - 0 Thanks, 1 Likes
 GWL
GWL liked this post
-
Senior Member
20211126_150354.jpg20211126_171942.jpg20211126_172533.jpg20211126_172711.jpg20211126_174510.jpg
UPDATE:
Thanks all for the information, advice, and encouragement. I was stressing out over the cutout for the sink because I have a flush-mounted, undermount sink and the lines have to be spot-on. The 8’ section of countertop is $325 and if I screwed up piece would be totally wasted.
First, the mistakes:
When I used the jig saw to finish the line to the corners, the center section did not drop out. Why? I forgot to set the saw blade low enough to cut through the whole thing and I had another 1/8” to go. I had to plunge-cut all four sides twice and fortunately, the lines were still straight.
I kept the saw in one place for too long and it burned a circle in the side of the wood. I was for the most part able to sand out the burn.
What went right:
Practicing, I found a traditional hole saw worked best for the corners. A spade bit did not work well, and curving a jig saw around the corner did not work well for me either. For the holes, I erred 1/32” inward, and it turns out the radius of the holes are right on the line.
I purchased a brand-new circular saw and used an aftermarket, fine-toothed blade.
What I did not know:
Using a saw guide or even a straight edge to run the saw next to did not help. It turned out it was best to scribe a right angle to your line, use that to set the front of the saw, and plunge-cut while watching the line carefully. Of course, err in the side of caution and saw 1/32” inward to the line.
I also learned treating virgin butcher block with Mineral Spirits is WILDLY satisfying.
A fine-toothed saw blade results in fine wood dust! I myself was covered after every cut and had to clean up the patio after every cut – fine sawdust is slippery!
I will update once the sink is in.
-
Senior Member
Originally Posted by
GWL
Eddie,
You don't need a special saw guide just a straight edge and a few clamps and using a 1/8" kerf blade in your circular saw will do. The 1/8" kerf is so the blade will not wander as easily as a 1/16" blade.
How long is the long 45?
George
I missed this tip, I will buy a 1/8" Kerf blade for the 45. the countertop is 25" so whatever length diagonal Chief Soh Cah Toa calculates to.... it will probably be about 36".
-
I would recommend sealing the singe edges with something as the moisture in this area will eventually stain the wood and over the long term the wood will swell and delaminate. This is from my own experience with a maple butcherblock and an undermount sink. We finished the counter with a recommended oil finish rubbed into the wood and touched up most every month but the continued splash, etc at the sink edges caused damage in less than a year. Refinished and sealed the entire top, bottom and edges with a flat polyurethane (3 coats) and finish has lasted over 4 years.
-
Senior Member
Well the good news is since it's an undermount sink the edges are flush with the sink and there is no exposed wood "under" the countertop and only the vertical faces are visible. The home is also a bit of a pied-à-terre and the sink is not used frequently. I plan to use lots and lots of mineral oil and I am confident the countertop will last longer than I will.
In any case, I am kind of obsessed with future-proofing so I will make the countertop easily removable. Instructions say to not use any adhesive to secure the countertop, use only brackets with slots that will allow the wood to expand and contract a bit.
-
Senior Member
3.jpg2.jpg1b02436ab3fb5b9081d7de3a2180b15e6e6cc45f-1.jpeg1.jpeg
Well of all the things I planned, drew in CAD, mocked up, measured, measured twice, left room for, and dry fit, I never fully mocked up the faucet. Turns out it's made for a countertop of maximum thickness of 1-1/4". I did use the black nut to see where to put the holes, but the nipple on the faucet is too short and longer ones are not available.
It of course would have been very easy to route 1/4" of that section out, but now that the sink is screwed and glued in place it's going to be a challenge to remove some material.
P.S. I was told years ago do NOT use Teflon™ tape if the connections are straight pipe with the rubber bushings inside.
Last edited by NiceGuyEddie; 12-06-2021 at 05:15 PM.


 Thanks:
  Likes:


 Reply With Quote

