-

Originally Posted by
Ltfracing

Just wondering what wheels are on it,and what size tires,thank you
Currently, It has Jegs rims, Fronts are 195/45-17 Rears are 295/50-15 but those are only temporary and what came with the car. They are being replaced with Schott Accelerators 18x9 285/40-18 & 20x11 315/35-20
-
Post Thanks / Like - 1 Thanks, 1 Likes
-
Chipping away at the "to do" list, A/C unit mounted
 20230301_190854 by F G, on Flickr
-
Post Thanks / Like - 0 Thanks, 3 Likes
-
I bet I rearranged those bulkhead fittings more than a dozen times looking for what works the best.. I think i'm close. Waiting on the Comp manifold and a bracket for the drier before I can go any further.
 20230307_202222 by F G, on Flickr
 20230307_192433 by F G, on Flickr
-
Post Thanks / Like - 0 Thanks, 2 Likes
-
As we used to say back in the day looking "sano".
Earl
1st Speedstar in Canada 31 March 2023.
Built by me 302 engine, AOD trans, 3.55 IRS.
-
Post Thanks / Like - 0 Thanks, 1 Likes
-
Consummate Learner

I'm going to steal your pic to point out a question that I have.
J1M_Firewall_Question.jpg
See the attached image: are the floorpans supposed to go on top of the bottom horizonal flange of the lower firewall pieces? (they're under in the image)
-- Mike -- TxMike64 -- @TxMGarage
Gen1.5 Hot Rod '33 #1094 (Stage 1) - 302/AOD '15 IRS - Quad Built - Build Thread
-
Originally Posted by
TxMike64
I'm going to steal your pic to point out a question that I have.
J1M_Firewall_Question.jpg
See the attached image: are the floorpans supposed to go on top of the bottom horizonal flange of the lower firewall pieces? (they're under in the image)
Great question, I do not know the answer. These were like this when I bought the unfinished kit
-
Senior Member

The firewall and footbox fronts install long before the floor pieces in both the Gen 1 and Gen 2 build manuals so they would end up under....
Steve
Gen 1 '33 Hot Rod #1104
347 with Holley Sniper & Hyperspark, TKO600, IRS, 245/40R18 & 315/30R18, DRL, Digital Guard Dog keyless Ignition
-
Post Thanks / Like - 0 Thanks, 1 Likes
-

Moderator

Originally Posted by
FF33rod
The firewall and footbox fronts install long before the floor pieces in both the Gen 1 and Gen 2 build manuals so they would end up under....
Steve
As Steve said.
James
FFR33 #997 (Gen1 chassis, Gen2 body), license plate DRIVE IT says it all!
build thread
My build: 350SBC, TKO600, hardtop, no fenders/hood, 32 grill, 3 link, sway bars, 355/30r19
Previous cars: GTD40, Cobra, tubeframe 55 Chevy, 66 Nova, 56 F100
-
Senior Member

Ditto. I had about 1/4" space between the floor and the footbox pieces. I jacked them up using a 2x4 and drilled the rivet holes. Then I gooped them with the marine adhesive, jacked them back up and 3/16 riveted them. 4 on each side.
33 Hot Rod Stage 1, Gen.2 ordered 11/11/2021 started June 12, 2022, LS3 E-Rod crate engine, Tremec TKX, 8.8 WITH 3.55 Ratio and limited slip with 31 spline axles.17X8 and18x10 Race Star wheels wrapped in Conti Extreme contact DWS tires, Mustang Cobra brakes all around. Electric PS and AC. Hard top, electric windows and bike fenders. First Start 5/31/2023. Go-Kart 6/2/2023.
-
Post Thanks / Like - 1 Thanks, 1 Likes
-
Originally Posted by
FF33rod
The firewall and footbox fronts install long before the floor pieces in both the Gen 1 and Gen 2 build manuals so they would end up under....
Steve
Originally Posted by
Mastertech5
Ditto. I had about 1/4" space between the floor and the footbox pieces. I jacked them up using a 2x4 and drilled the rivet holes. Then I gooped them with the marine adhesive, jacked them back up and 3/16 riveted them. 4 on each side.
Dang, I better read that manual a little better. Mine came with the floor panel under the lip of the firewall so I assumed that was correct.
-
Moderator
Originally Posted by
Just 1 More
Dang, I better read that manual a little better. Mine came with the floor panel under the lip of the firewall so I assumed that was correct.
Yeah, just think of the joint, one is much harder to get water through. But since you'll caulk anyway, not a huge thing.
James
FFR33 #997 (Gen1 chassis, Gen2 body), license plate DRIVE IT says it all!
build thread
My build: 350SBC, TKO600, hardtop, no fenders/hood, 32 grill, 3 link, sway bars, 355/30r19
Previous cars: GTD40, Cobra, tubeframe 55 Chevy, 66 Nova, 56 F100
-
Post Thanks / Like - 0 Thanks, 1 Likes
-
This is as good as it's going to get. Adding in the heater valve and drier really boogered things up for me in the clean and neat look. Once the body is on and the lower front skirts, it should hide a lot of it. So this is it until I get another brainfart and change it. I'll clean up the sleeving with heatshrink once everything is crimped.
20230315_205358.jpg20230315_205408.jpg20230315_205433.jpg
-
Post Thanks / Like - 0 Thanks, 1 Likes
-
Something to keep in mind - you are going to have to install the door striker mount bracket after the body goes on. It goes right behind where you have your hoses going thru the fire wall and the 2 carriage bolts install from the outside pointing in. Better figure out a technique for it now or you will be hating life a little later.
-
Post Thanks / Like - 0 Thanks, 1 Likes
-
Senior Member
Originally Posted by
Just 1 More
This is as good as it's going to get. Adding in the heater valve and drier really boogered things up for me in the clean and neat look. Once the body is on and the lower front skirts, it should hide a lot of it. So this is it until I get another brainfart and change it. I'll clean up the sleeving with heatshrink once everything is crimped.
Looks great, nice and tidy!
Steve
Gen 1 '33 Hot Rod #1104
347 with Holley Sniper & Hyperspark, TKO600, IRS, 245/40R18 & 315/30R18, DRL, Digital Guard Dog keyless Ignition
-
Post Thanks / Like - 1 Thanks, 1 Likes
-
-
Post Thanks / Like - 0 Thanks, 1 Likes
-
Senior Member
You should keep the dryer sealed up with the plugs it comes with until your ready to assemble the whole system after getting you're hoses set. The dessicant in it will absorb any moisture in the air and become saturated, then it can't do it's job for your system charge. Mine came with a 2 piece bracket and hose clamps that can be used to mount in various places. When the system is charged, you watch the sight glass on the top of the dryer for bubbles. When they stop wait 5-10 seconds and then stop charging, it's full. It should be evacuated for an hour with an AC vacuum pump before charging. If your compressor comes with the PAG oil in it you should only add 1 more ounce to the system. R134a cans are available with PAG oil in it. 1 can of that and then straight R134a. If taking it to a shop then they "should" know, but remind the Tech because I'm sure they've never done one of these before. All the cars they work on have a label that tells them how much refrigerant and oil to put in the system.
Last edited by Mastertech5; 04-01-2023 at 09:59 AM.
33 Hot Rod Stage 1, Gen.2 ordered 11/11/2021 started June 12, 2022, LS3 E-Rod crate engine, Tremec TKX, 8.8 WITH 3.55 Ratio and limited slip with 31 spline axles.17X8 and18x10 Race Star wheels wrapped in Conti Extreme contact DWS tires, Mustang Cobra brakes all around. Electric PS and AC. Hard top, electric windows and bike fenders. First Start 5/31/2023. Go-Kart 6/2/2023.
-
Post Thanks / Like - 1 Thanks, 1 Likes
-
Originally Posted by
Mastertech5
You should keep the dryer sealed up with the plugs it comes with until your ready to assemble the whole system after getting you're hoses set. The dessicant in it will absorb any moisture in the air and become saturated, then it can't do it's job for your system charge. Mine came with a 2 piece bracket and hose clamps that can be used to mount in various places. When the system is charged, you watch the sight glass on the top of the dryer for bubbles. When they stop wait 5-10 seconds and then stop charging, it's full.
100% agree with you and pretty much figure with as many times as i've had to open the drier to change mounting and hose orientation, A new one prior to charging probably wouldn't be a bad idea.
-
Senior Member
I added addition info to my post about charging your system.
-
-
04-03-2023, 09:49 AM
#100
Senior Member
I hope the lifter is ok. Does your engine have roller rockers or flat tappet? I've seen the pushrod cup in the lifter flip out in situations like that. Good luck!
33 Hot Rod Stage 1, Gen.2 ordered 11/11/2021 started June 12, 2022, LS3 E-Rod crate engine, Tremec TKX, 8.8 WITH 3.55 Ratio and limited slip with 31 spline axles.17X8 and18x10 Race Star wheels wrapped in Conti Extreme contact DWS tires, Mustang Cobra brakes all around. Electric PS and AC. Hard top, electric windows and bike fenders. First Start 5/31/2023. Go-Kart 6/2/2023.
-
04-03-2023, 04:07 PM
#101
Originally Posted by
Mastertech5
I hope the lifter is ok. Does your engine have roller rockers or flat tappet? I've seen the pushrod cup in the lifter flip out in situations like that. Good luck!
Hyd Roller, and upon further inspection after pulling the heads off.. That valve is stuck open, that rocker must have just been beating it's self to death on the valve with it stuck.. Heads are at the machine shop now getting a thorough rebuild.
-
04-03-2023, 10:46 PM
#102
Senior Member
Was the valve bent or just carbon build up? Look at your piston carefully for a mark. Roll the pushrod on a flat surface to see if it's bent. The valve spring could have coil bind if not the right ones for the cam lift. Look at the others at full valve lift when you turn the engine over by hand. I don't know how adept you are at engine building so just ignore me if you know all this stuff. The rollers on the end of the rockers should be centered on the valve stem at half lift. If not you get too much side pressure on the valves. Longer or shorter pushrods would be needed to correct accordingly. You tube has a bunch of videos on the subject. Wish you the best.
33 Hot Rod Stage 1, Gen.2 ordered 11/11/2021 started June 12, 2022, LS3 E-Rod crate engine, Tremec TKX, 8.8 WITH 3.55 Ratio and limited slip with 31 spline axles.17X8 and18x10 Race Star wheels wrapped in Conti Extreme contact DWS tires, Mustang Cobra brakes all around. Electric PS and AC. Hard top, electric windows and bike fenders. First Start 5/31/2023. Go-Kart 6/2/2023.
-
04-04-2023, 08:42 AM
#103
It gets worse... I pulled the lifters and found "crud" in the grooves, then looking at the block with a flashlight, I can see a bunch of rusty crud in the oil passages.. Looks like someone didn't clean the block good enough after bore and hone or not at all. So the block is heading to the machine shop to join the heads. Also looks like some of the valves kissed the piston so that'll get addressed as well. Complete rebuild. Hopefully we can use the crank, rods, pistons, cam & lifters. Just disassemble, clean and reassemble with proper clearances this time. Then a good engine dyno session to dyno tune it.
-
04-05-2023, 07:24 AM
#104
Moderator
Ugh. This is another of those situations where we need a button that says “I’ve been there, it really sucks, I’m sorry to hear it but it’ll be much better after you fix it”
James
FFR33 #997 (Gen1 chassis, Gen2 body), license plate DRIVE IT says it all!
build thread
My build: 350SBC, TKO600, hardtop, no fenders/hood, 32 grill, 3 link, sway bars, 355/30r19
Previous cars: GTD40, Cobra, tubeframe 55 Chevy, 66 Nova, 56 F100
-
Post Thanks / Like - 0 Thanks, 2 Likes
-
04-05-2023, 12:57 PM
#105
Senior Member
Yup, totally sucks. My 347 lasted a couple of hours before a crack in #1 turned it into a steam engine and another rebuild.
Steve
Gen 1 '33 Hot Rod #1104
347 with Holley Sniper & Hyperspark, TKO600, IRS, 245/40R18 & 315/30R18, DRL, Digital Guard Dog keyless Ignition
-
Post Thanks / Like - 0 Thanks, 1 Likes
-
04-05-2023, 04:58 PM
#106
Senior Member

Are you going to sell the jegs wheels and tires ,thank you
-
04-05-2023, 10:28 PM
#107
Senior Member
That's a tough one. At least you'll know it's right
-
04-06-2023, 08:09 AM
#108
Originally Posted by
Mastertech5
That's a tough one. At least you'll know it's right
Yeah, It wasn't money I expected to spend but now i'll know. I'm in the process of finding a transmission shop that will go through the 700R4 since I don't trust anything about this now.
-
04-06-2023, 08:09 AM
#109
Originally Posted by
Ltfracing
Are you going to sell the jegs wheels and tires ,thank you
Yes, When I'm done with them as rollers
-
04-06-2023, 11:54 AM
#110
Senior Member
Originally Posted by
Just 1 More
Yeah, It wasn't money I expected to spend but now i'll know. I'm in the process of finding a transmission shop that will go through the 700R4 since I don't trust anything about this now.
I used to rebuild those when I was working. Did more transverse ones than anything else though.
33 Hot Rod Stage 1, Gen.2 ordered 11/11/2021 started June 12, 2022, LS3 E-Rod crate engine, Tremec TKX, 8.8 WITH 3.55 Ratio and limited slip with 31 spline axles.17X8 and18x10 Race Star wheels wrapped in Conti Extreme contact DWS tires, Mustang Cobra brakes all around. Electric PS and AC. Hard top, electric windows and bike fenders. First Start 5/31/2023. Go-Kart 6/2/2023.
-
05-02-2023, 01:06 PM
#111
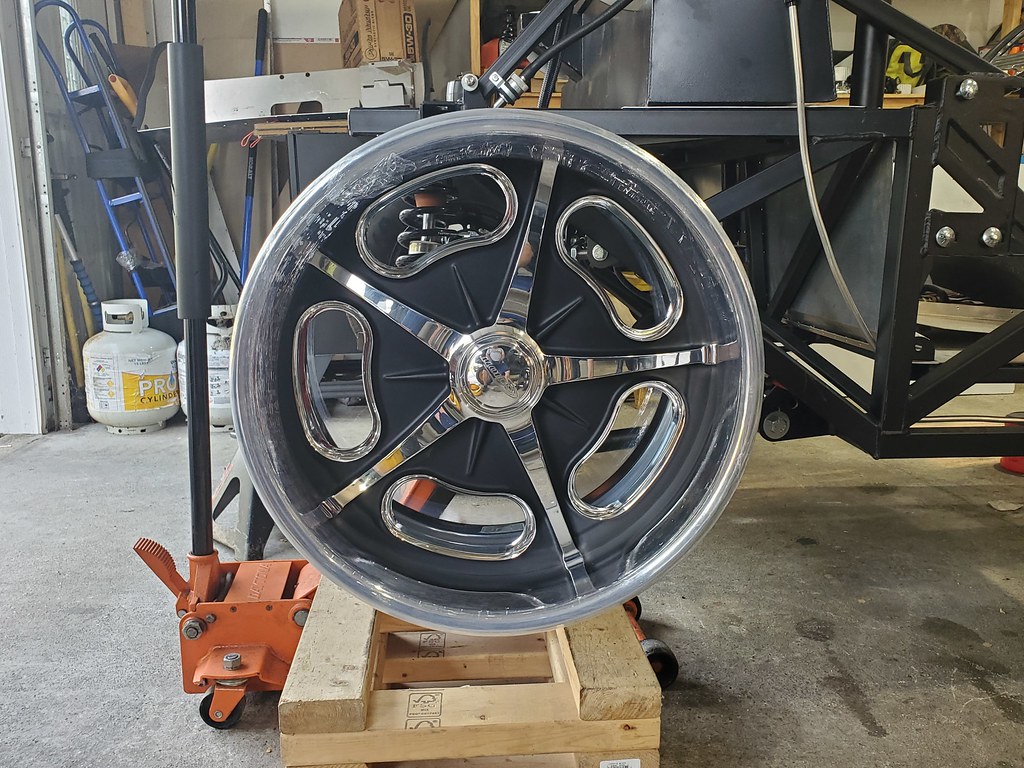
So pretty i'm never taking the plastic off.. lol
big thanks to Kim & Matt Gossett @ mcbparts.com for helping me get these from Schott Wheels. It'll probably be another year before they get on the car but so happy to have them.
20230502_131501.jpg20230502_131328.jpg20230502_131401.jpg20230502_132824.jpg
-
Post Thanks / Like - 0 Thanks, 5 Likes
-
05-02-2023, 02:52 PM
#112
Senior Member

Originally Posted by
Just 1 More
Love the Bonneville style wheels, I have similar one on my 33 except gray, not black.
Jim
20210725_104354.jpg
-
Post Thanks / Like - 0 Thanks, 1 Likes
-
06-10-2023, 06:03 PM
#113
I've been taking a break from the '33 but it was time to get back on it. Pulled the rear end, cleaned it real good, pulled the axles and replaced the seals. Wire brushed the calipers and painted them. Hopefully get it back in tomorrow with the new Ridetech lower arms and BMR uppers. Added a Moser cover just because. Has 3:73 gears
20230610_164359.jpg20230610_133030.jpg20230610_180704.jpg
-
Post Thanks / Like - 0 Thanks, 1 Likes
-
06-12-2023, 08:45 AM
#114
-
Post Thanks / Like - 0 Thanks, 1 Likes
-
06-12-2023, 10:18 AM
#115
Moderator
Looking at this closely, did you manage to offset the spacers front/rear of the LCA to make it more parallel to the car? That's what I did using Levy's LCA..
just.jpg
James
FFR33 #997 (Gen1 chassis, Gen2 body), license plate DRIVE IT says it all!
build thread
My build: 350SBC, TKO600, hardtop, no fenders/hood, 32 grill, 3 link, sway bars, 355/30r19
Previous cars: GTD40, Cobra, tubeframe 55 Chevy, 66 Nova, 56 F100
-
06-13-2023, 07:48 AM
#116
Originally Posted by
RoadRacer
Looking at this closely, did you manage to offset the spacers front/rear of the LCA to make it more parallel to the car? That's what I did using Levy's LCA..
just.jpg
Mine are dead center, no offset. It looked pretty good but now i'll have to go look at it again and see if i'm missing something. Those inner nuts are actually spacers. I drilled the threads out and used them because they were the perfect width.
-
06-13-2023, 12:48 PM
#117
Moderator
Cool, if you're ever interested in what Gordon Levy suggests (and makes sense to me), you can see how the offset spacers work in the first photo here:
https://thefactoryfiveforum.com/show...l=1#post478520
James
FFR33 #997 (Gen1 chassis, Gen2 body), license plate DRIVE IT says it all!
build thread
My build: 350SBC, TKO600, hardtop, no fenders/hood, 32 grill, 3 link, sway bars, 355/30r19
Previous cars: GTD40, Cobra, tubeframe 55 Chevy, 66 Nova, 56 F100
-
06-15-2023, 07:21 PM
#118
-
Post Thanks / Like - 0 Thanks, 2 Likes
-
06-15-2023, 07:34 PM
#119
Senior Member
Nice wheels! The two most personal things in a build are #1-wheels, #2-paint. There are 1000s of wheel designs but paint is various shades of spectrum colors.
33 Hot Rod Stage 1, Gen.2 ordered 11/11/2021 started June 12, 2022, LS3 E-Rod crate engine, Tremec TKX, 8.8 WITH 3.55 Ratio and limited slip with 31 spline axles.17X8 and18x10 Race Star wheels wrapped in Conti Extreme contact DWS tires, Mustang Cobra brakes all around. Electric PS and AC. Hard top, electric windows and bike fenders. First Start 5/31/2023. Go-Kart 6/2/2023.
-
Post Thanks / Like - 0 Thanks, 1 Likes
-
06-16-2023, 04:50 AM
#120
Senior Member
Originally Posted by
Mastertech5
Nice wheels! The two most personal things in a build are #1-wheels, #2-paint. There are 1000s of wheel designs but paint is various shades of spectrum colors.
And I'll add, that some wheels that look good with some colors just don't look right with other colors. It can be maddening when you get to the point of wheels & colors. That was the hardest part of my build was figuring out what color to go with. Then on my 55 F100 Build I'm wrapping up now, I knew the color I wanted but finding the right wheels to go with it was the biggest struggle. Ugh
Jim
-
Post Thanks / Like - 0 Thanks, 1 Likes


 Thanks:
  Likes:


 Reply With Quote