Forte's

Visit our community sponsor

Thanks Thanks:  0
Likes Likes:  0
Results 1 to 9 of 9

Thread: Any suggestions on length of gas pedal travel with mechanical linkage

  1. #1
    Out Drivin' Gumball's Avatar
    Join Date
    Feb 2011
    Location
    Blackberry Township, IL
    Posts
    2,653
    Post Thanks / Like

    Any suggestions on length of gas pedal travel with mechanical linkage

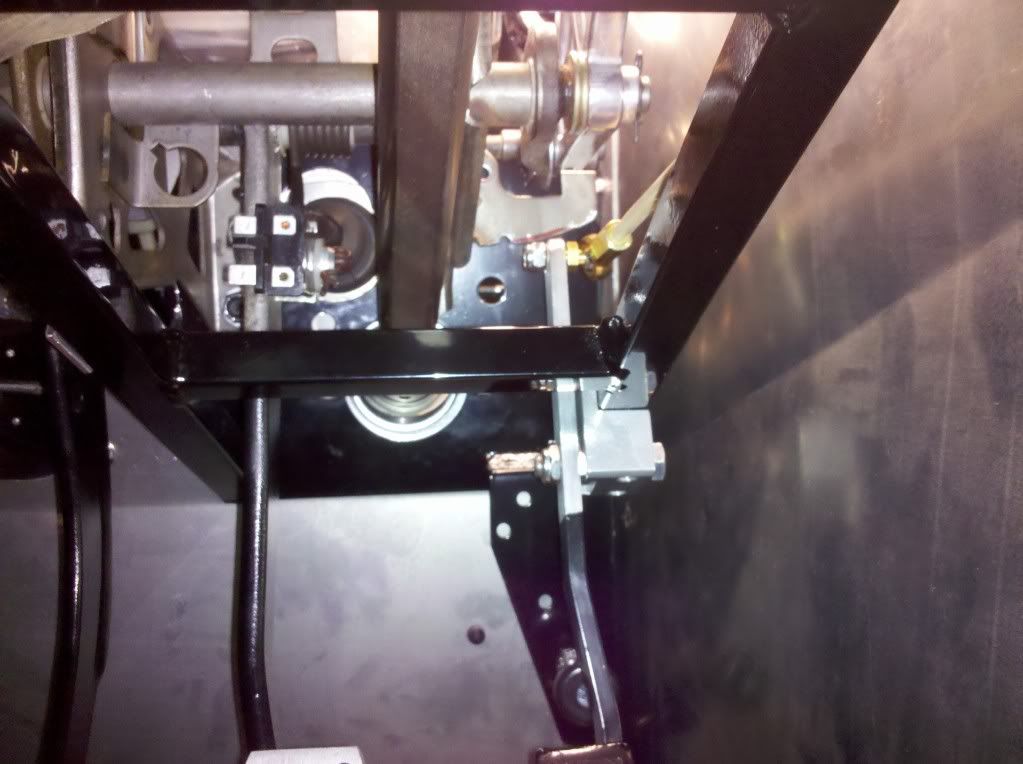
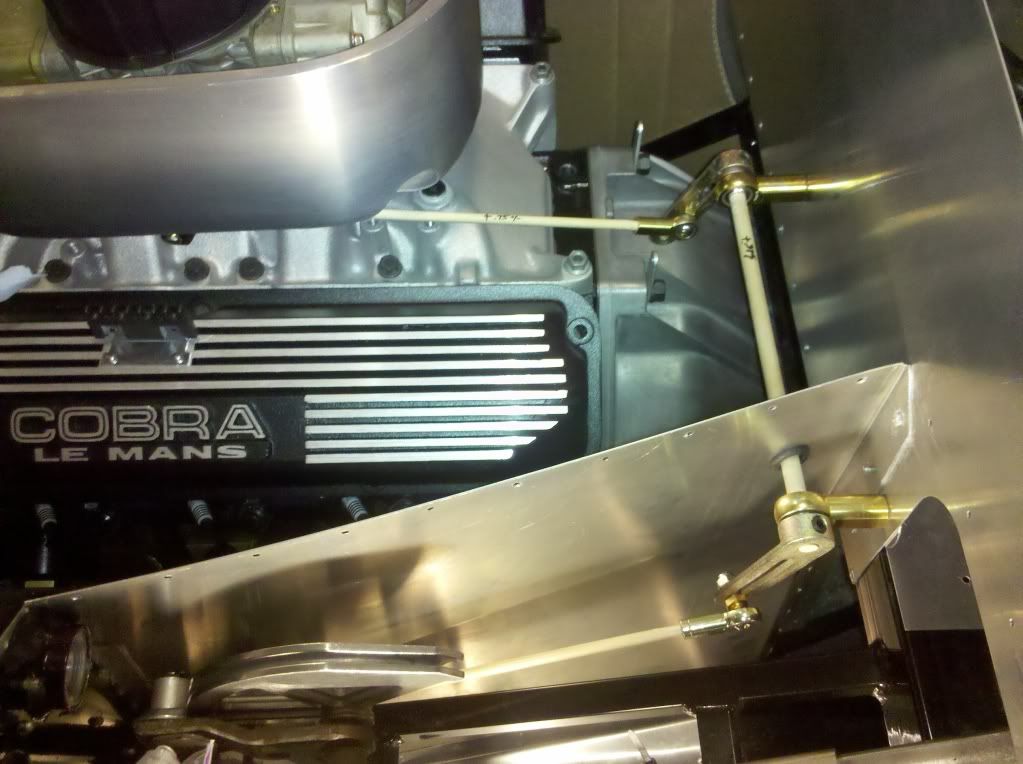
    Here's a picture of my mechanical throttle linkage mocked-up with wooden dowels. Since I have quite a range of adjustment at the gas pedal with this set-up, I'm looking for recommendations as to a good length of travel for the gas pedal. Do any of you have preferences? Given the high horsepower and low weight of these cars, I'm thinking more travel is better, but I don't want it to be too much. I'll tweak it once it's in go-kart stage, but I'm looking for a suggested starting point.

    Later,
    Chris

    "There are no more monsters to fear, and so, we have to build our own."
    Mk3.1 #7074

  2. #2
    Junior Member PhoneGUy's Avatar
    Join Date
    Oct 2011
    Posts
    22
    Post Thanks / Like
    No input, just drooling...
    ----------
    FFR7469 MKIV 15th Anniversary Edition

  3. #3
    Richard Oben's Avatar
    Join Date
    Feb 2011
    Location
    Kansas City MO
    Posts
    279
    Post Thanks / Like
    Not having done one. Logic (bad word) say that from just below the brake pedal (so you can heel and toe) to the floor should be idle to full throttle. JMHO, Richard.
    Richard Oben FFR builder www.northracecars.com

    Need help finishing your project we can help here or at your shop.

    FFR GTM #34 first GTM with working AC. 400 hp LS1 w/G50
    FFR coupe 3617CP 331 Stack EFI T-5 IRS Cobra brakes, AC/heat.
    Both cars by NRC, we can build (and have built) any FFR product.
    We also make and sell a ton of great parts for the FFR community.
    Brake kits, AC systems, #1 supplier of Team III wheels.

  4. #4
    Member ArcticSnake's Avatar
    Join Date
    Feb 2011
    Location
    Eagle River, Alaska
    Posts
    34
    Post Thanks / Like
    As Richard said above, lower than the brake pedal. I set mine up based on where the brake pedal is. I have the throttle pedal set deeper than the brakes as I dont want to hit the throttle and brakes together. As it is, you should have more than enough room to scare the %%^$@ out of you. I have full throttle response with plenty of rppm to spare before the pedal hits the metal. You "may" sense that from this pic. Nice mod, you wont regret it.

    Dan

    FFR 6459, Basque Red Pearl, Silver Sky Metallic, 408W, TKO-500, Power by ISIS, IRS, PS, PB, 15" Pin-Drive, Loads of Extras, Loads of Fun
    Delivered Jan 08 - Graduation May 09

    Build Pictures
    http://s325.photobucket.com/albums/k...bra%20Project/

  5. #5
    Not a waxer Jeff Kleiner's Avatar
    Join Date
    Feb 2011
    Location
    Bloomington, Indiana
    Posts
    8,129
    Post Thanks / Like
    I placed my Russ Thompson pedal slightly forward of the brake as Richard & Dan have mentioned. From idle to WOT the travel is 2.25" at the pedal. I find it comfortable and easy to modulate.

    Jeff

  6. #6
    Out Drivin' Gumball's Avatar
    Join Date
    Feb 2011
    Location
    Blackberry Township, IL
    Posts
    2,653
    Post Thanks / Like
    Thanks for the feedback - Jeff hit the nail on the head regarding my concern about ease of modulation.

    For those interested in doing something similar, here are the specifics: The wood dowels will be replaced with a stainless axle shaft along the firewall and two threaded rods (right/left threads for adjustability). The pedal is from Russ Thompson, with a fabricated pad to mimic the originals and the carb is a Holley 650DP in an old turkey pan that I got from another forum member. Most of the parts came from McMaster, but the lever arms were sourced from Midwest Control Products. It's a very simple mod to do and gives a great range of adjustment between throttle plate movement and pedal travel. The only real challenge was making sure that all three holes (2 in the firewall and 1 in the driver's footbox sidewall) were level and in alignment. Total cost for parts was around $75.

    I'll be happy to share more details if anyone is interested.
    Later,
    Chris

    "There are no more monsters to fear, and so, we have to build our own."
    Mk3.1 #7074

  7. #7
    Out Drivin' Gumball's Avatar
    Join Date
    Feb 2011
    Location
    Blackberry Township, IL
    Posts
    2,653
    Post Thanks / Like
    For those looking for a parts list, here's what I used - the small rod-ends for the pushrods are the captured-stud version.

    McMaster-Carr:

    3/8” stainless steel shaft (parallel to firewall) / 1141T253 / $37.64 for 36” (only need 10” or so)
    ¼” hardened steel rod for pedal and carb pushrods / 6061K61 / $14.76 for 36” (only need 24” or so)
    ¼” rod end – left hand female 28 tpi / 6072K311 / $6.87 ea / Qty. 2 (one per pushrod)
    ¼” rod end – right hand female 28 tpi / 6072K31 / $6.87 ea / Qty. 2 (one per pushrod)
    3/8” rod end – right hand female 24 tpi / 6072K175 / $5.47 ea / Qty. 2 (firewall)

    Using one-each of the left/right hand threaded rod ends for the pushrods allows you to change the length of the span by simply turning the rod one way or the other, then secure with jamb nuts.

    Midwest Control Products:

    Lever arm / Part# MCA-6 / Stock# 4106 / $8.61 ea / Qty. 2

    Misc. hardware sourced locally:

    (4) ¼” x 28 tpi nylock nuts to secure rod ends at pedal, lever arms, and throttle w/star lock washers.
    (4) ¼” x 28 tpi jamb nuts (2 left-hand / 2 right hand) to secure pushrods once adjustments are made.
    (2) 3/8” x ¾” x 24 tpi bolts to secure rod ends to firewall.

    As mentioned above, you’ll have to stiffen the firewall a bit to ensure that it doesn’t flex – I’m using 1 ½” angle behind the 3/8” bolts that go through the firewall – the angle is then riveted to the top of the 2” square tube at the bottom of the firewall.


    I was asked about pictures regarding the connection at the top of the pedal lever, which is a Russ Thompson part, and clearance of the clutch quadrant - here are a couple of detail shots of that area.


    Later,
    Chris

    "There are no more monsters to fear, and so, we have to build our own."
    Mk3.1 #7074

  8. #8
    Member Gloveman's Avatar
    Join Date
    Feb 2011
    Location
    Central Florida
    Posts
    37
    Post Thanks / Like
    Hey Gumball,

    Your post is timely as I was just about to start sourcing parts!

    Thanks

    FYI, here are a couple shots from an original, yours looks much better!

    Picture 011.jpgPicture 010.jpg
    Last edited by Gloveman; 12-16-2011 at 07:42 PM.

  9. #9
    Out Drivin' Gumball's Avatar
    Join Date
    Feb 2011
    Location
    Blackberry Township, IL
    Posts
    2,653
    Post Thanks / Like
    Gloveman - I like the spring on the original; I may have to try to incorporate that.
    Later,
    Chris

    "There are no more monsters to fear, and so, we have to build our own."
    Mk3.1 #7074

Posting Permissions

  • You may not post new threads
  • You may not post replies
  • You may not post attachments
  • You may not edit your posts
  •  

Breeze

Visit our community sponsor