BluePrint Engines

Visit our community sponsor

Thanks Thanks:  0
Likes Likes:  5
Page 17 of 51 FirstFirst ... 7151617181927 ... LastLast
Results 641 to 680 of 2016

Thread: More progress made on the body : )

  1. #641
    Senior Member
    Join Date
    Feb 2011
    Posts
    119
    Post Thanks / Like
    I would worry about galvanic corrosion between CF and Aluminum if I was building an air frame and the two were bonded together - it would weaken the bond. In your application, I don't see any concerns.

  2. #642
    Senior Member Taz Rules's Avatar
    Join Date
    Dec 2012
    Location
    BC, Canada
    Posts
    738
    Post Thanks / Like
    Quote Originally Posted by crash View Post
    I have never heard of any issues of galvanic corrosion between CF and metals. Suppose it could happen since carbon is an excellent conductor of electrons, but I think it would be more of a conduit between two dissimilar metal elements as opposed to creating the issue itself, but I have never really looked into it. I CAN tell you that battery boxes should NOT be made out of CF. The Hybrib Electric Vehicle I worked on in college had a battery tray and someone got the bright idea to make one out of CF as opposed to FG so it would "look cool". The ensuing fire when the battery terminals hit the box while it was in the car almost ended the entire program! You know, typical college engineering class stuff...it looked so good on paper...until the epic fail in practice! (not my call, BTW, as I was involved with making the three cylinder diesel fit and operate. If not for the instructor, it would have been a very fun senior project)

    I don't pretend to be an expert on the matter by any means, but I heard this could be a problem and looked it up. Here is where I got my info...


    From Boeing.com
    Galvanic coupling of materials.
    Boeing groups materials into four categories (table 1) of differing galvanic properties. The objective is to avoid coupling materials from different groups unless required by economic and weight considerations. If dissimilar metal coupling is required, proper finishing and sealing techniques and guidelines are used to prevent corrosion.

    For example, graphite fibers, which are used to reinforce some plastic structure, present a particularly challenging galvanic corrosion combination. The fibers are good electrical conductors and they produce a large galvanic potential with the aluminum alloys used in airplane structure. The only practical, effective method of preventing corrosion is to keep moisture from simultaneously contacting aluminum structure and carbon fibers by finishing, sealing, using durable isolating materials such as fiberglass, and providing drainage. Figure 14 shows the 777 carbon fiber-reinforced plastic (CFRP) floor beam design and corrosion-protection methods. An aluminum splice channel is used to avoid attaching the floor beam directly to the primary structural frame.

    From www.sciencedirect.com
    We investigate whether the presence of carbon nanotubes in previously non-conductive composites may cause galvanic corrosion. We focus on aluminum 7075 alloy and glass fiber-reinforced polymers (GFRP), where the epoxy resin is modified with multi-walled carbon nanotubes (MWCNTs). Whole aluminum bars were bonded with MWCNT/GFRP in a co-cure, or were connected electrically with the composite through a galvanic cell.

    The investigation includes characterization of the treated and baseline epoxy resin, high humidity tests at room temperature, full immersion tests in an aggressive environment, and standard galvanic coupling tests in an aggressive environment.

    Results show that coupling MWCNT/GFRP samples with aluminum 7075 causes approximately doubled corrosion rate and mass loss rate compared to baseline GFRP samples. We envision that this work will impact the research community and indicate the need of careful coupling selection and careful surface treatment between nanomaterials and conventional materials, since the ability to monitor damage in situ is very desirable.

    Also, without bothering to quote it here, found articles in The International Journal of Advanced Manufacturing Technology, and a document from the National Air Intelligence Center titled Contact Corrosion Between Carbon Fiber Reinforced Composite Materials and High-Strength Metals

    I agree with mmargos in that all of my references are from the aerospace industry, and likely don't apply to the stresses that your parts will see. Still, I thought it worth a mention, just in case.

    If the CF parts are gelcoat, then you have an insulating barrier and the problem is solved anyway. Since the pieces you are talking about are not load-bearing, you should be ok in any case. Still, I wouldn't attach carbon fiber directly to my frame or an aluminum structural support, just in case. Even the aluminum inner panels that come with the GTM, as I understand it, provide a certain amount of structure, and the material is pretty thin, so there isn't much available to sacrifice.

  3. #643
    Senior Member The Stig's Avatar
    Join Date
    Feb 2011
    Location
    Charlotte, NC
    Posts
    2,004
    Post Thanks / Like
    Quote Originally Posted by Taz Rules View Post
    I agree with mmargos in that all of my references are from the aerospace industry, and likely don't apply to the stresses that your parts will see. Still, I thought it worth a mention, just in case.

    If the CF parts are gel coat, then you have an insulating barrier and the problem is solved anyway. Since the pieces you are talking about are not load-bearing, you should be ok in any case. Still, I wouldn't attach carbon fiber directly to my frame or an aluminum structural support, just in case. Even the aluminum inner panels that come with the GTM, as I understand it, provide a certain amount of structure, and the material is pretty thin, so there isn't much available to sacrifice.
    The only Carbon Fiber pieces that I am aware of, that could come in contact with any aluminum or steel, might be the dash and engine cover, if you have one of the early GTM's (as I do).

    My engine cover is insulated inside, and I will probably not be using the dash since I'm having a complete custom interior installed. For that matter, the engine cover may be replaced also. So I think I'll be fine in that respect.

    I appreciate your concern.

    Thanks,

    Mike
    The Stig

    Some say, that I only know two facts about ducks, (both being wrong); and that if I could be bothered, I could solve the "da Vinci Code" in 47 seconds...
    All I know is that I'm called "The Stig".
    GTM #0081

  4. #644
    Senior Member The Stig's Avatar
    Join Date
    Feb 2011
    Location
    Charlotte, NC
    Posts
    2,004
    Post Thanks / Like
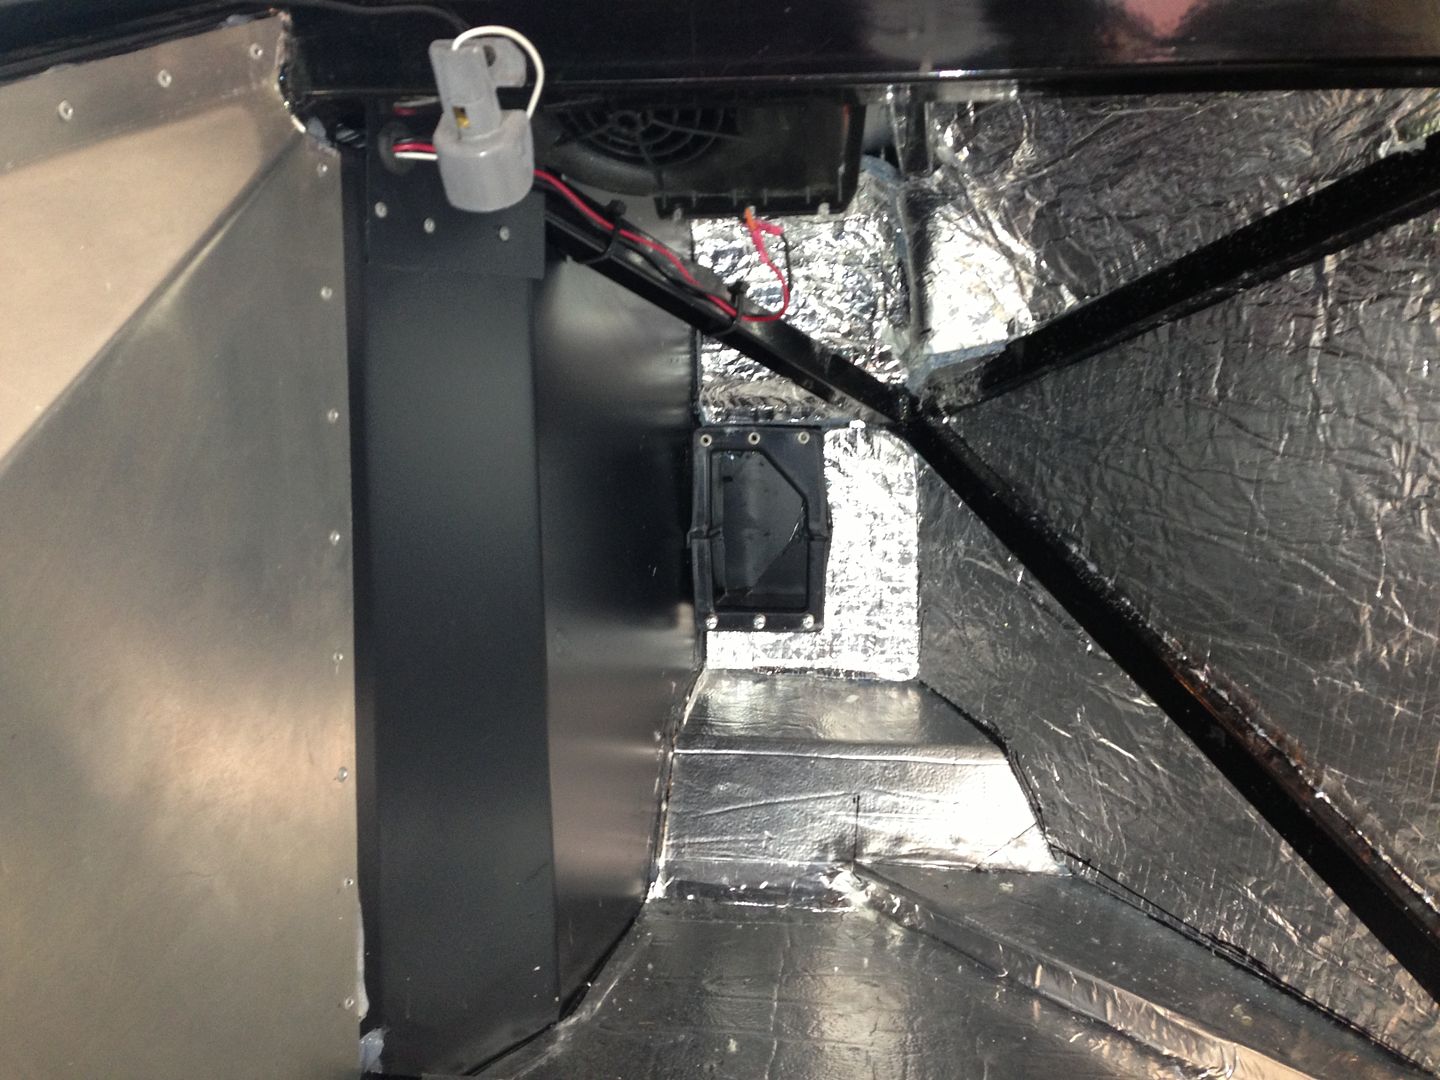
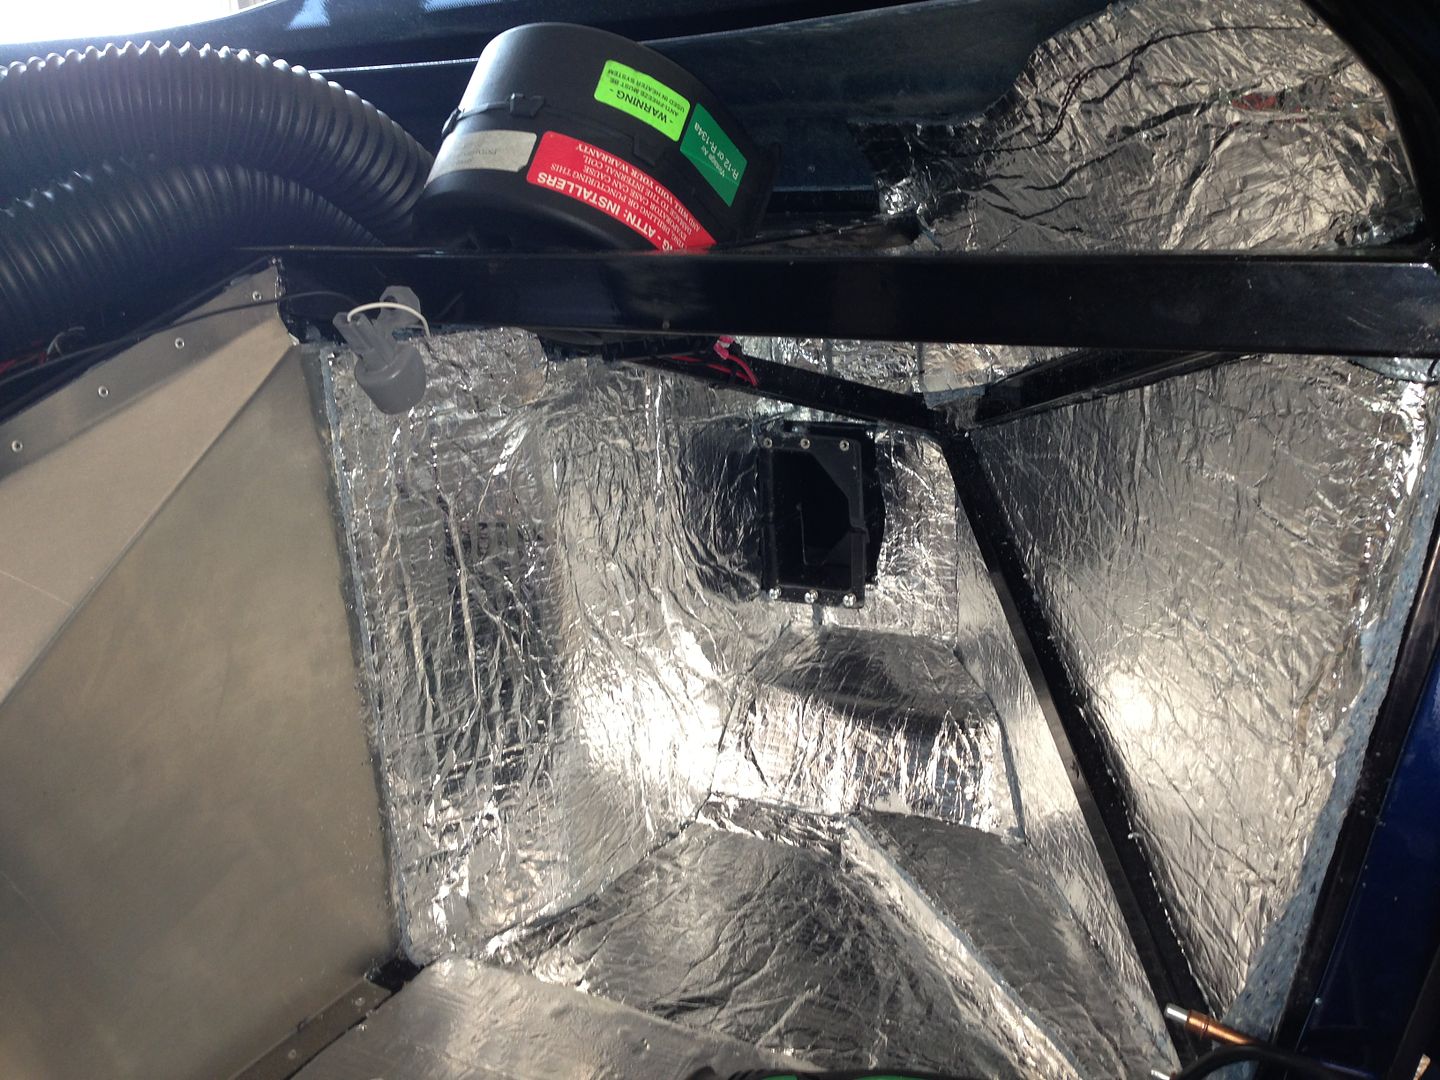
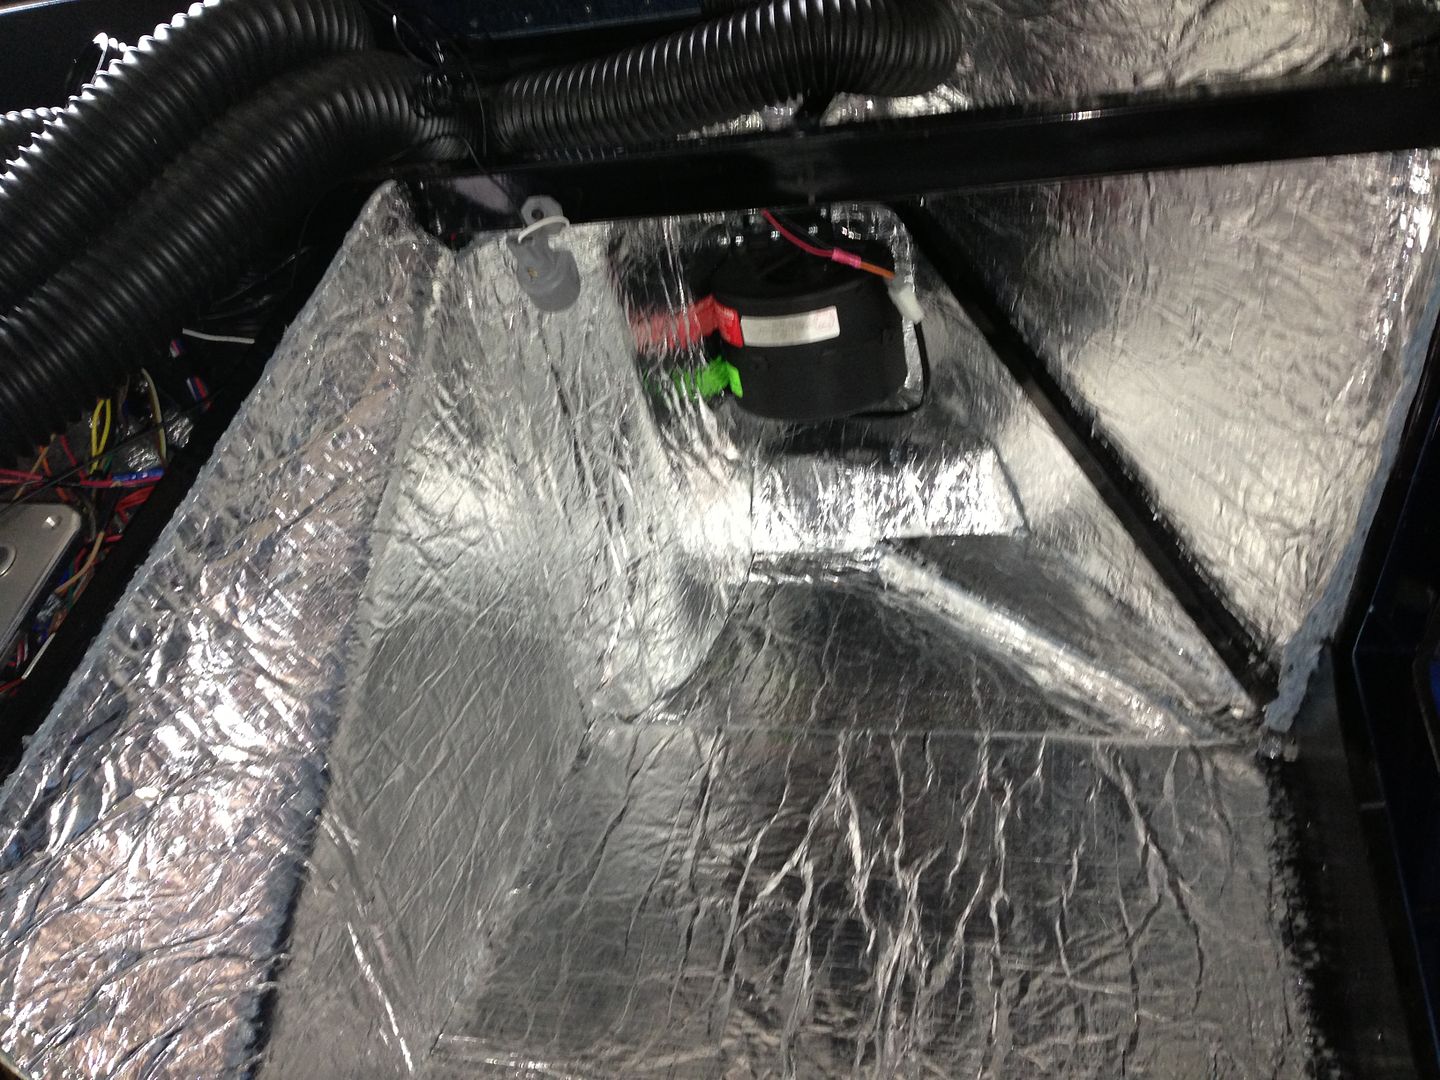
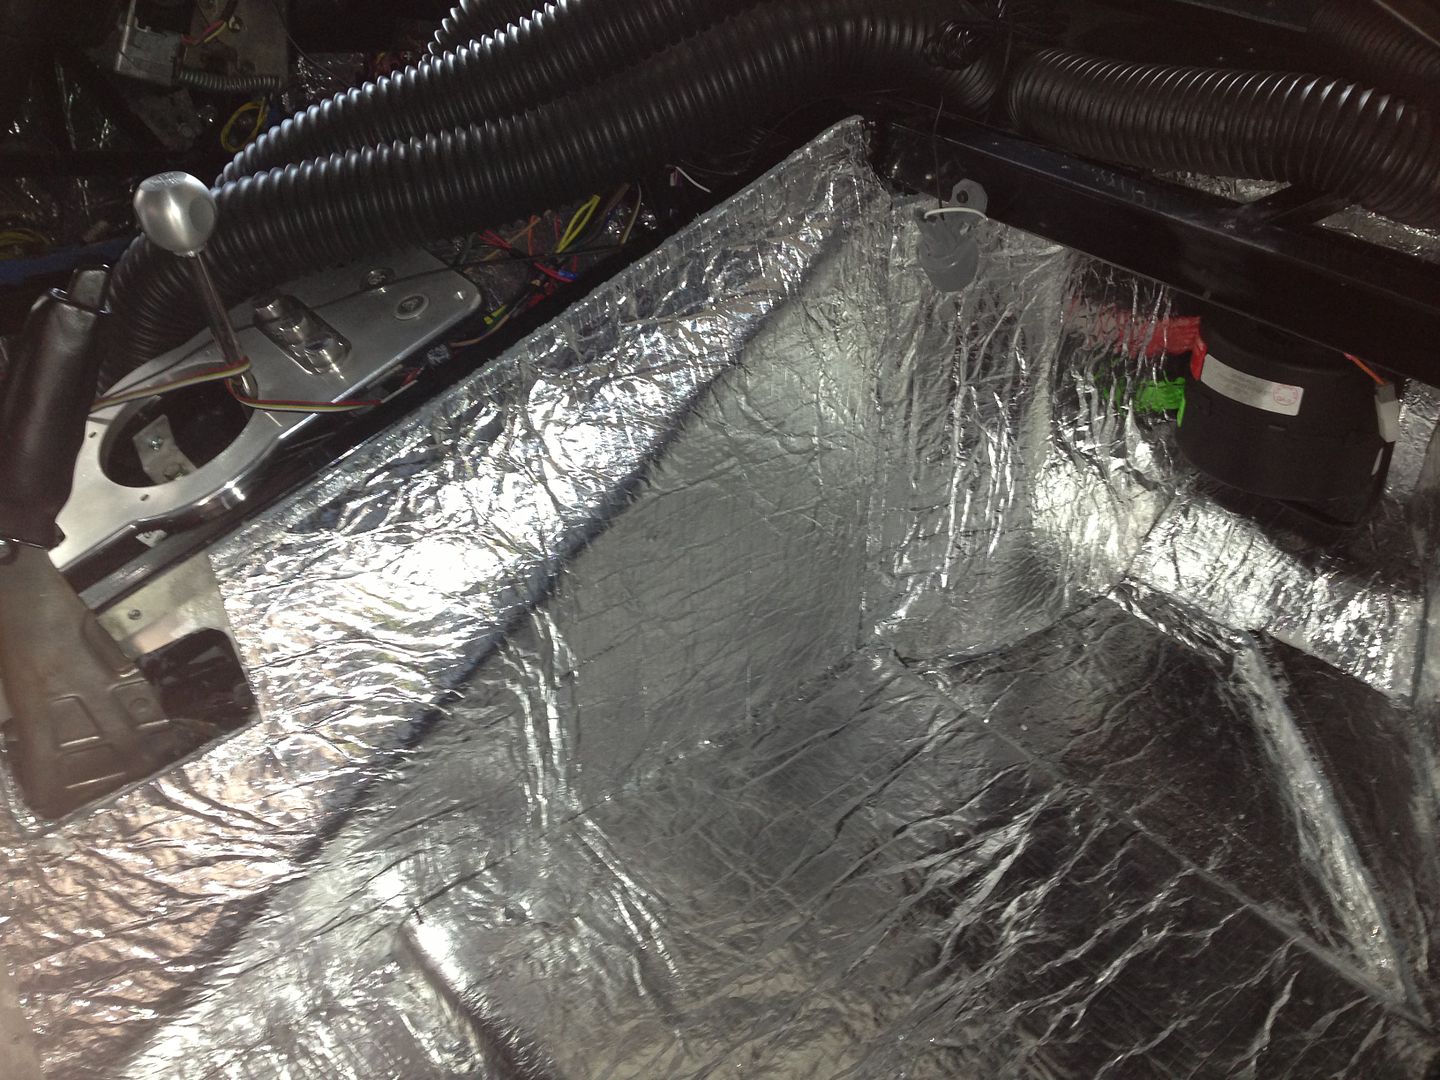
    I got the firewall and engine cover back in place, so I spent Saturday getting the sound deadener and heat shield installed in order to get the seats in. It took me most of the day to cut the dynamat to size and installed. I pulled the A/C blower out of the passenger foot box to get better access, and got everything sealed tight and covered in dynamat. I ordered the pre-cut insulation kit, which makes the job a little easier.

    But the heat and humidity here in Charlotte has been a killer... By the time I finally finished the footbox, I was completely done. I woke up this morning feeling pretty wiped out, so I decided to take the day off from the garage.

    Pam and I drove up to Lake Norman, and had a late lunch on the water. It was a very nice day. Right now, I'm feeling much better, and plan to try to get outside for a while tomorrow morning for 2 or 3 hours. Still making progress a little at the time.
    The Stig

    Some say, that I only know two facts about ducks, (both being wrong); and that if I could be bothered, I could solve the "da Vinci Code" in 47 seconds...
    All I know is that I'm called "The Stig".
    GTM #0081

  5. #645
    LCD Gauges's Avatar
    Join Date
    Apr 2011
    Location
    Toronto, Ontario
    Posts
    1,545
    Post Thanks / Like
    Blog Entries
    3
    Page 17 - no photos.

    There must be a law!
    Custom LCD Gauges , Data Loggers, Control Touch Screens
    www.LCDdash.com \\ 647-522-9953 \\ Voice & Text
    Proud new owner of GTM Gen 1., #105 - 08/27/11
    LQ9 Powered, G96.00 6 speed transaxle

  6. #646
    Senior Member The Stig's Avatar
    Join Date
    Feb 2011
    Location
    Charlotte, NC
    Posts
    2,004
    Post Thanks / Like
    True... I'll work on that...
    The Stig

    Some say, that I only know two facts about ducks, (both being wrong); and that if I could be bothered, I could solve the "da Vinci Code" in 47 seconds...
    All I know is that I'm called "The Stig".
    GTM #0081

  7. #647
    Senior Member The Stig's Avatar
    Join Date
    Feb 2011
    Location
    Charlotte, NC
    Posts
    2,004
    Post Thanks / Like
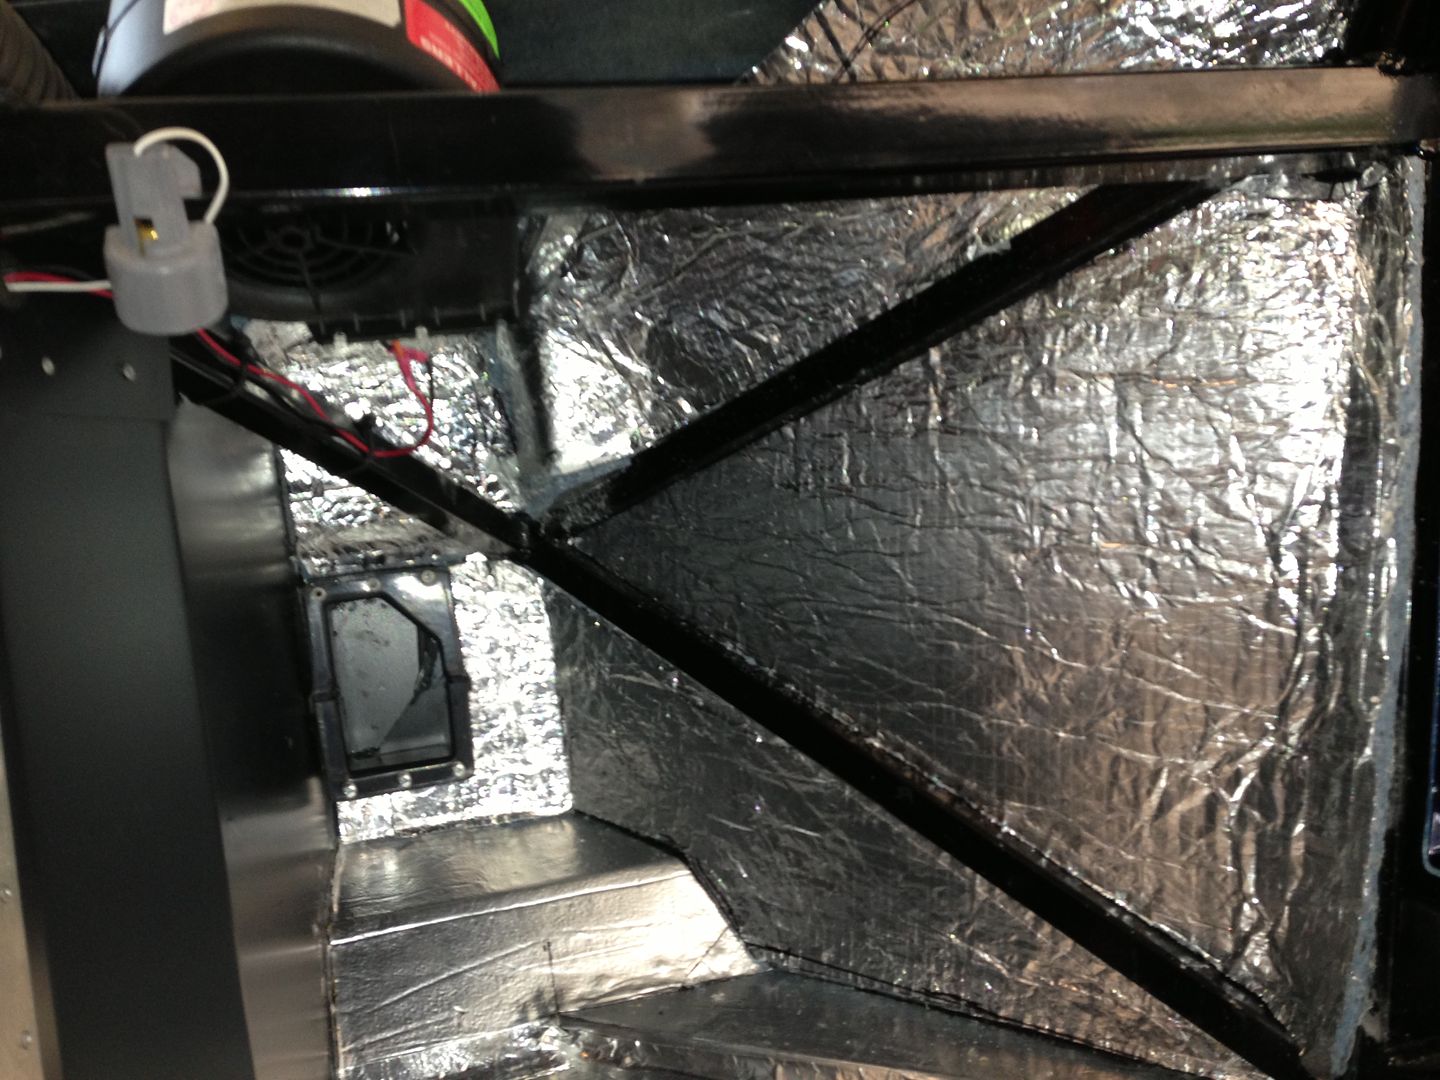
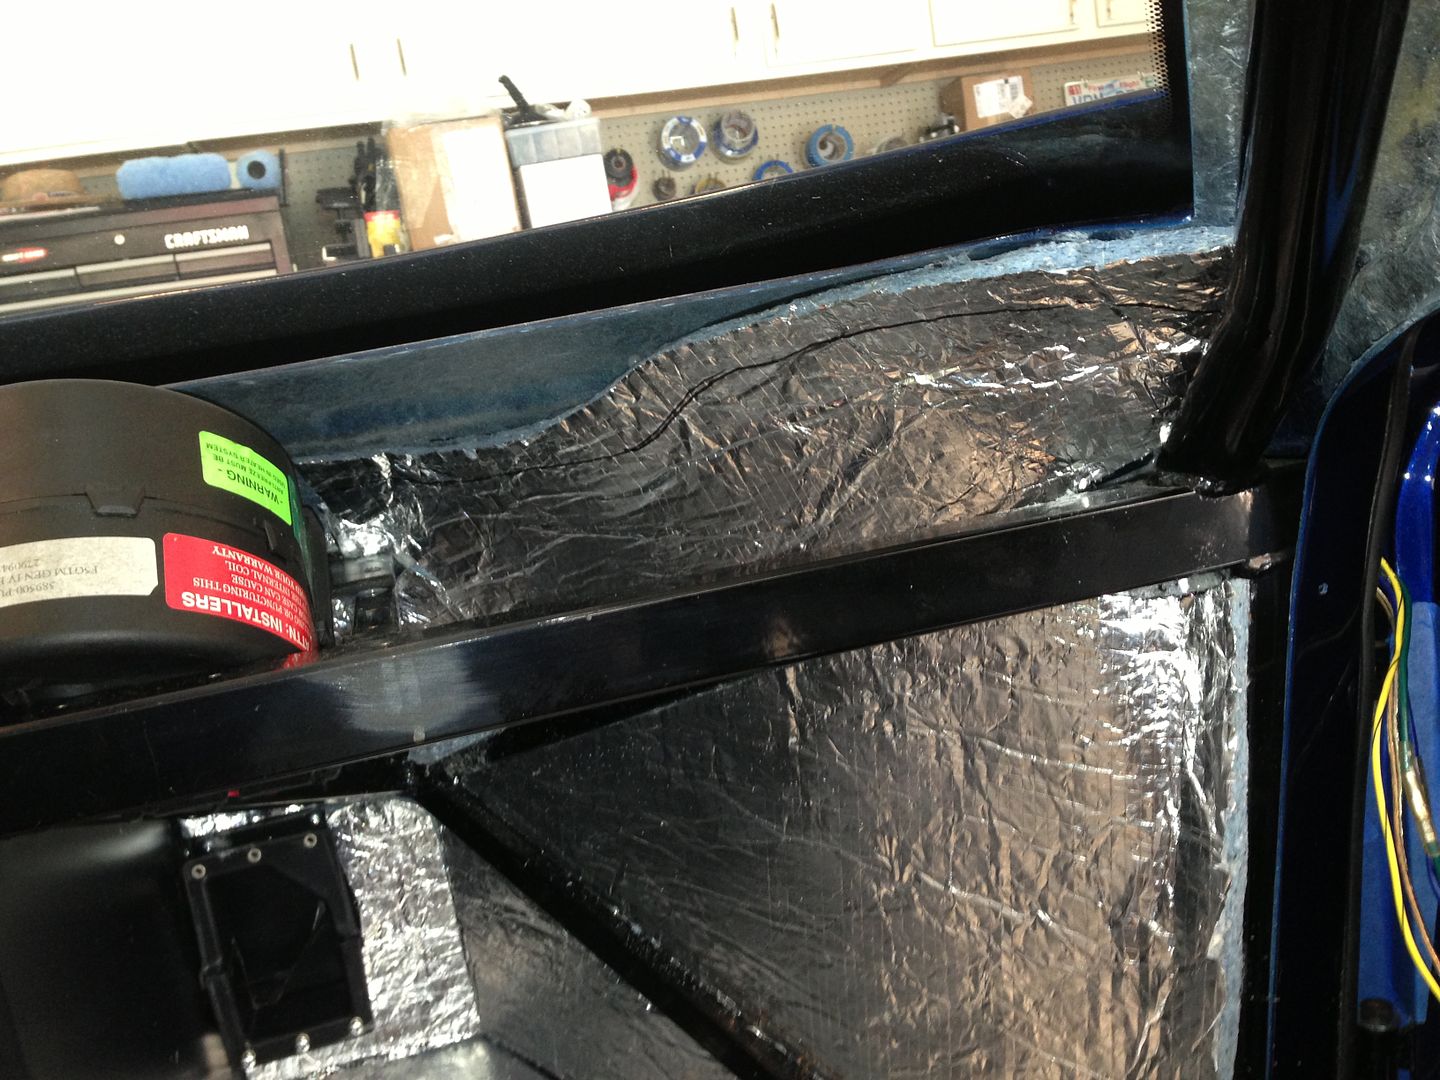
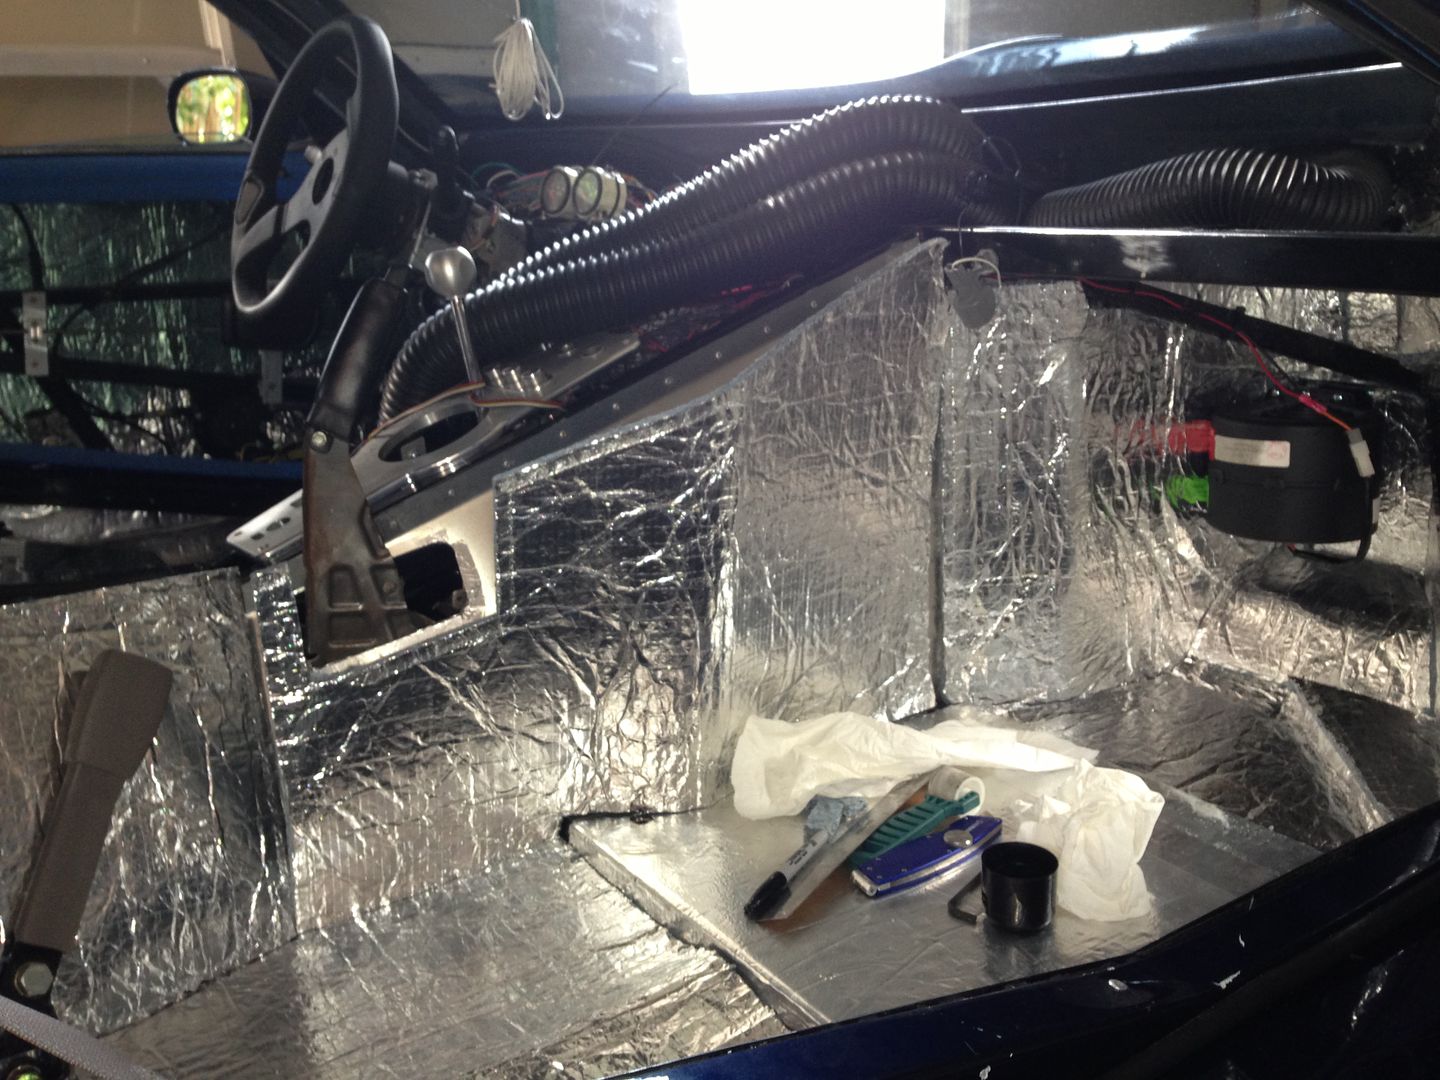
    I'm working on getting the "dynamat" sound deadener and heat shield installed. So far I've finished most of the passenger side. I'm working from home this week, so I should have some time in the evenings to do a little work here and there. If so, I should have driver and passenger sides finished up this week. I also plan to have the seats in as well.


    In this picture, you can see that the sound deadener (dynamat) is on the floor. The heat barrier has been applied to the side panel between the frame.
    I had to pull the a/c blower out of the way to get access to the panels in the foot box.


    You can also see the courtesy light for the foot box temporarily mounted on the upper frame bar. These will be permenantly located when the interior goes in.


    I still have a couple more strips to add to the body panel below the windshield.


    I almost for got to add the side panels back in. I pulled out the heat shield to do a test fit, and to trim it, and there was no panel to put it on... duhhh.

    Then I realized that the engine cover and tank covers will need to come out one last time in order to apply the heat barrier correctly on the tunnel pannels.
    Last edited by The Stig; 09-03-2013 at 09:32 AM.
    The Stig

    Some say, that I only know two facts about ducks, (both being wrong); and that if I could be bothered, I could solve the "da Vinci Code" in 47 seconds...
    All I know is that I'm called "The Stig".
    GTM #0081

  8. #648
    Senior Member The Stig's Avatar
    Join Date
    Feb 2011
    Location
    Charlotte, NC
    Posts
    2,004
    Post Thanks / Like


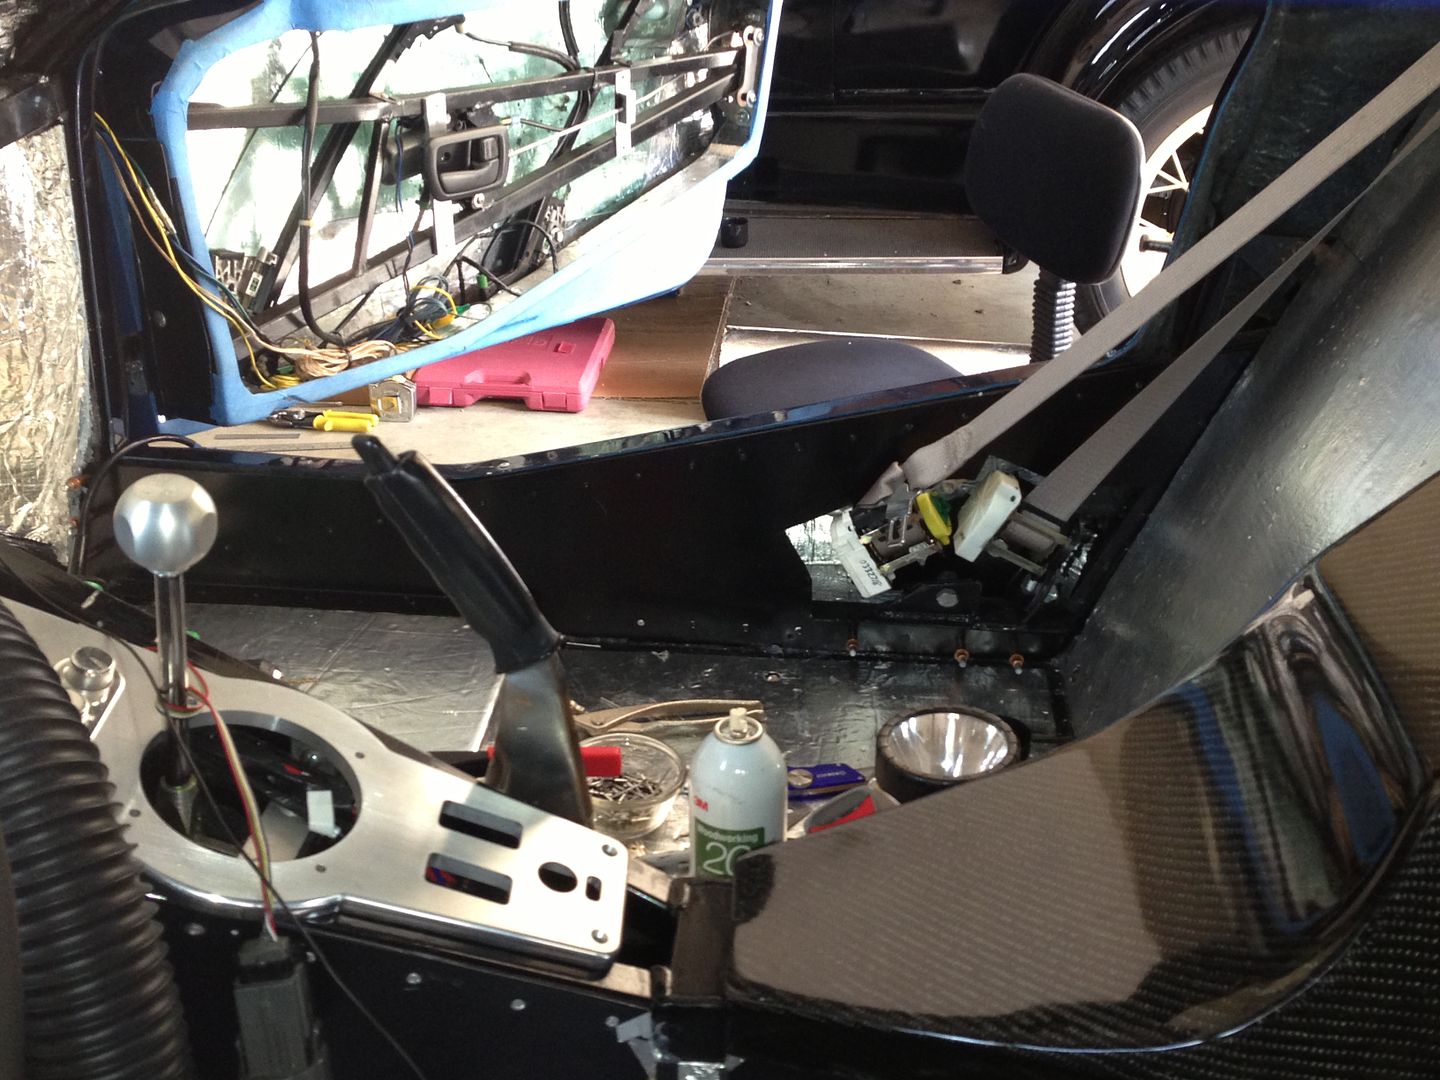
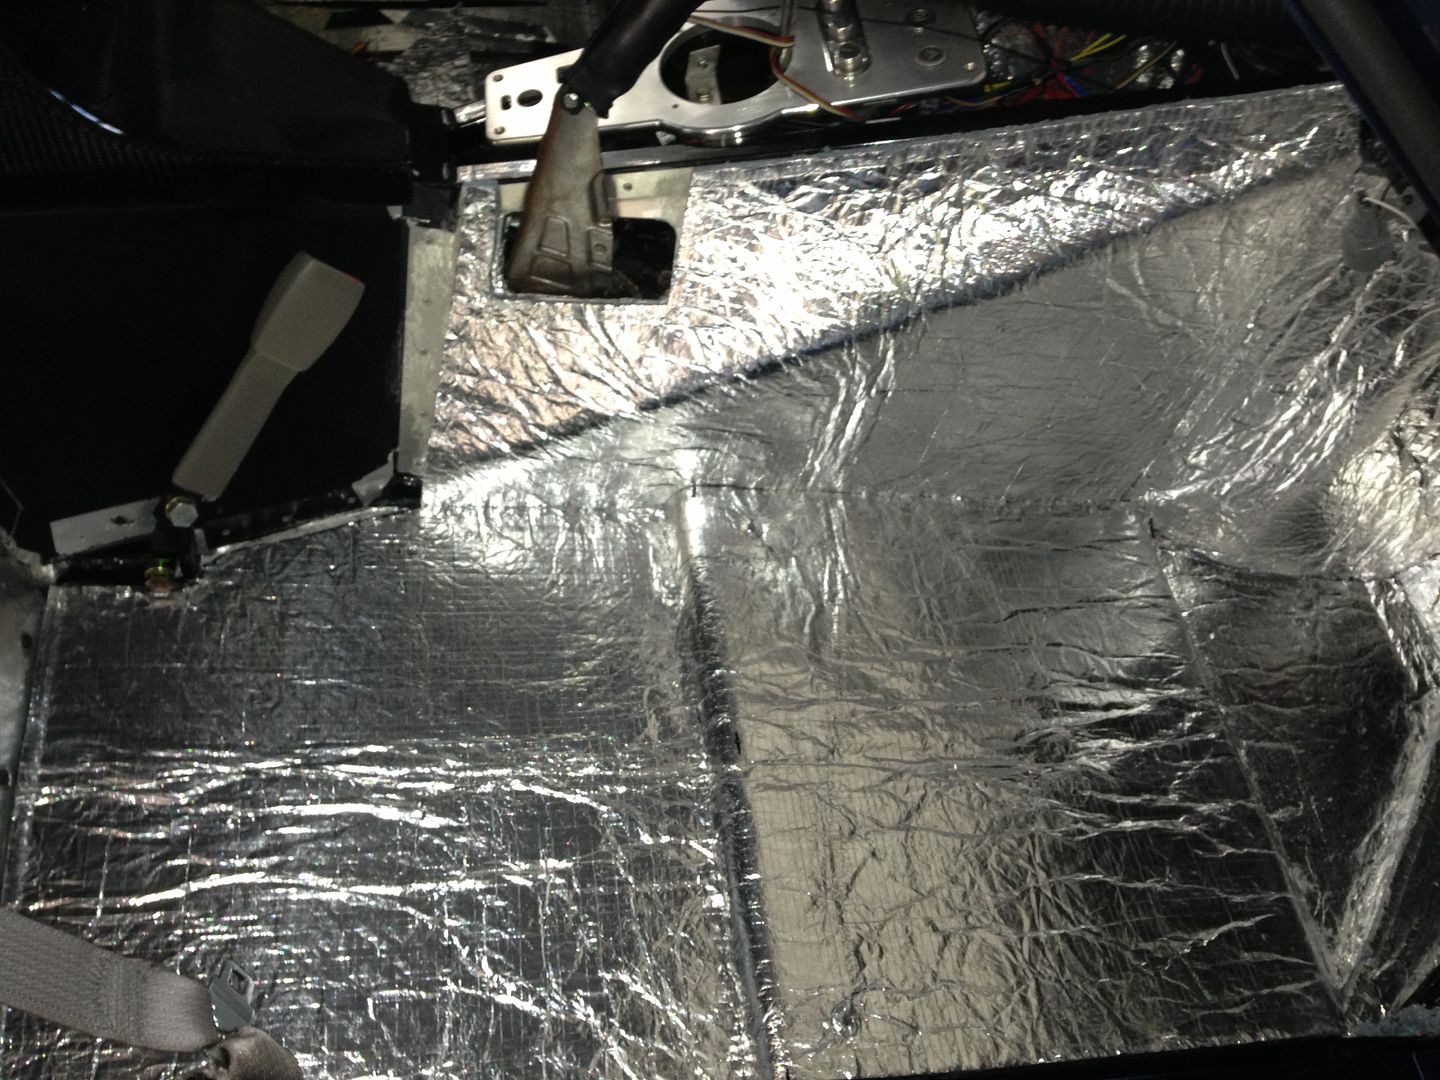
    Placing these panels into such tight spaces with contact cement on each side can be a little tricky. I trimed each piece until I had
    them fitting against one another kind of snug but not enough to bunch up. I'm trying to keep everything as flat as possible for the
    leather upholstery to lay flat and clean.


    Test fitting the tunnel panels. It took a few passes with the scissors, but they're pretty close.


    Here, you can see the foot box, forward tunnel and the seat pan/floor, have all been installed.


    That was about as clean as I can make it.


    When I have time to take the tank covers and the engine cover back out (maybe tonight), I can go ahead and get the rear tunnel panels, and the side panels covered and reinstalled.

    I still need to go back and tape all the seams with aluminum tape to finish it up.

    I'm not really looking forward to working around the pedals while trying to keep the contact glue from grabbing before I'm ready... but it'll get done.

    My brother-in-law is comming over (not this coming Saturday, but the next) to help me with sorting out the wiring of the gauges.
    Then (as i've said many times) it goes to the Interior shop...
    Last edited by The Stig; 09-03-2013 at 09:31 AM.
    The Stig

    Some say, that I only know two facts about ducks, (both being wrong); and that if I could be bothered, I could solve the "da Vinci Code" in 47 seconds...
    All I know is that I'm called "The Stig".
    GTM #0081

  9. #649
    Senior Member Kempo's Avatar
    Join Date
    Feb 2011
    Location
    Cabo Rojo,PR. USA
    Posts
    723
    Post Thanks / Like
    Looking nice and clean Mike. I used 3M spray glue for mine. It was a bit less messy than using contact cement. I found it easier to work in the the pedal area by just unscrewing the master cylinder rods from the pedals and just lifting the pedals out of the way. Your back will thank you. Keep up the good work and the updates coming.
    GenII GTM #354
    Delivered (02/09/11)

  10. #650
    Senior Member The Stig's Avatar
    Join Date
    Feb 2011
    Location
    Charlotte, NC
    Posts
    2,004
    Post Thanks / Like
    Thanks Hugo. The contact adheasive that I used is a 3M product. I don't know the exact name without going out to take a look at the can. It came with the Quiet-Ride Insullation kit that I'm using.

    I actually thought of disconnecting the pedals as well. It would make it much easier to gain access to that area. I've also been playing with the idea of switching the old "Gen-1" pedal set for the new "Gen-2" pedals because they looks so much nicer and appear to be much stronger. I just hate to remove and replace anything when I'm so close to finishing... But they sure would look better!

    I think I'll go ahead and order them so I won't have a reason not to do it. Now would be the perfect time.
    The Stig

    Some say, that I only know two facts about ducks, (both being wrong); and that if I could be bothered, I could solve the "da Vinci Code" in 47 seconds...
    All I know is that I'm called "The Stig".
    GTM #0081

  11. #651
    Member kabacj's Avatar
    Join Date
    Mar 2011
    Location
    Long Island
    Posts
    1,103
    Post Thanks / Like
    Looks Great Stig! As someone who also spent his weekend working inside the GTM passenger compartment I feel your pain! I can apreaciate all contorting you did to get that installed.
    Thanks for posting the Quiet-Ride info. I have seen that installed, but I did not realize it was a kit. Sure must make the install easier. Although my car is more race car then street car, at some point I will want to add sound deddening . Thanks for posting the info.

    John
    XTF #2
    build start date June 19 2023

    GTM # 344
    Build Start December 2010
    First track day April 2013

  12. #652
    Senior Member The Stig's Avatar
    Join Date
    Feb 2011
    Location
    Charlotte, NC
    Posts
    2,004
    Post Thanks / Like
    Quote Originally Posted by kabacj View Post
    Looks Great Stig! As someone who also spent his weekend working inside the GTM passenger compartment I feel your pain! I can apreaciate all contorting you did to get that installed.
    Thanks for posting the Quiet-Ride info. I have seen that installed, but I did not realize it was a kit. Sure must make the install easier. Although my car is more race car then street car, at some point I will want to add sound deddening . Thanks for posting the info.

    John
    Thanks John. I'm glad that the post helped.

    Yep. My back was telling me over and over that I was too old to be twisting around like that... It also showed me that there are so many things that I would sequence differently if I were to ever build another GTM. I would have definitely put this stuff in the back of the footbox while all of the dash panels were out. I would have also installed the roof heat shield while the body was off the car, and prior to paint so I could flip it upside down either on the grass or on a couple of stands so I could get to it easier.

    Live and learn I guess... Going through the process of building this car has taught me more than I would have thought. With most of it having nothing to do with building cars...

    Take care Buddy.
    Last edited by The Stig; 09-03-2013 at 07:29 PM.
    The Stig

    Some say, that I only know two facts about ducks, (both being wrong); and that if I could be bothered, I could solve the "da Vinci Code" in 47 seconds...
    All I know is that I'm called "The Stig".
    GTM #0081

  13. #653
    Senior Member sk7500's Avatar
    Join Date
    Feb 2011
    Posts
    377
    Post Thanks / Like
    Sure is a good looking car in the GTM calendar this month.

  14. #654
    Senior Member The Stig's Avatar
    Join Date
    Feb 2011
    Location
    Charlotte, NC
    Posts
    2,004
    Post Thanks / Like
    Yep, that's another cool thing that you made happen for me and the other builders! Cool Stuff!

    Thank you.

    Mike
    The Stig

    Some say, that I only know two facts about ducks, (both being wrong); and that if I could be bothered, I could solve the "da Vinci Code" in 47 seconds...
    All I know is that I'm called "The Stig".
    GTM #0081

  15. #655
    Senior Member The Stig's Avatar
    Join Date
    Feb 2011
    Location
    Charlotte, NC
    Posts
    2,004
    Post Thanks / Like
    I got the Driver's side heat shield insulation pretty much done... So imagine all the pictures from post 652 & 653 (and invert them) and you'll see where I am right now. My brother in law is coming over on Saturday to help me with getting the gauges and mirrors wired.

    Once again... Almost done!
    Last edited by The Stig; 09-08-2013 at 10:02 PM.
    The Stig

    Some say, that I only know two facts about ducks, (both being wrong); and that if I could be bothered, I could solve the "da Vinci Code" in 47 seconds...
    All I know is that I'm called "The Stig".
    GTM #0081

  16. #656
    LCD Gauges's Avatar
    Join Date
    Apr 2011
    Location
    Toronto, Ontario
    Posts
    1,545
    Post Thanks / Like
    Blog Entries
    3
    Love the aluminum shift plate; I've been thinking about something along those lines for my car (brushed). Did you have that custom made, or cut it yourself?
    Custom LCD Gauges , Data Loggers, Control Touch Screens
    www.LCDdash.com \\ 647-522-9953 \\ Voice & Text
    Proud new owner of GTM Gen 1., #105 - 08/27/11
    LQ9 Powered, G96.00 6 speed transaxle

  17. #657
    Senior Member
    Join Date
    Feb 2011
    Location
    Myrtle Beach, SC
    Posts
    2,108
    Post Thanks / Like
    Stig-

    Your car is truly a work of art! I don't know how you did all that insulation work in that small area in the heat we have had here recently. However, you did a wonderful job, just like everything else you have done on your car!

    Keep up the great work, and thanks for the updates. I can't wait to see her all finished; I am sure it is going to be stunning!!

    The finish line is getting really close...

    Regards,

    Steve

  18. #658
    Senior Member The Stig's Avatar
    Join Date
    Feb 2011
    Location
    Charlotte, NC
    Posts
    2,004
    Post Thanks / Like
    Quote Originally Posted by Lukn4trbl View Post
    Love the aluminum shift plate; I've been thinking about something along those lines for my car (brushed). Did you have that custom made, or cut it yourself?
    A couple of years ago, a forum member on the ffcars forum (Steve Inskeep) sold these for a short period of time. I bought one from him so I could get it and decide whether or not I could use it in the final design or not. You can see his GTM in the Finished GTM's thread. Silver, with a custom nose that looks a little like a Camaro.

    It holds the HVAC Controls, Power Windows, Mirror Control, and Shifter. It was meant to be something a bit more substantial than the thin steel plate that comes with the kit. It's 3/8" or so thick, the top is brushed and the edges are polished. I'm going to try to make sure it stays in the final design of the interior... We'll see.
    The Stig

    Some say, that I only know two facts about ducks, (both being wrong); and that if I could be bothered, I could solve the "da Vinci Code" in 47 seconds...
    All I know is that I'm called "The Stig".
    GTM #0081

  19. #659
    Senior Member The Stig's Avatar
    Join Date
    Feb 2011
    Location
    Charlotte, NC
    Posts
    2,004
    Post Thanks / Like
    Thank You Steve.

    You're right; the heat has been too much. And to be wedged into the foot boxes with the sun and the heat, didn't really help too much either. But I had to get it done. Gator-Aid, Water, and Vitamin Water helped a good bit.

    All of these "last steps", to get this thing finished are all extremely time consuming; at least for me... I'm trying to take my time and not screw it up.

    But you're right... It's getting much closer now. I had hoped that I would be finished by the time the "Charlotte Auto-Fair" Car Show came around this fall. But unfortunately, it'll be a little after that show... This car doesn't seem to like Car Show deadlines for some reason.
    Last edited by The Stig; 09-09-2013 at 08:10 AM.
    The Stig

    Some say, that I only know two facts about ducks, (both being wrong); and that if I could be bothered, I could solve the "da Vinci Code" in 47 seconds...
    All I know is that I'm called "The Stig".
    GTM #0081

  20. #660
    Senior Member The Stig's Avatar
    Join Date
    Feb 2011
    Location
    Charlotte, NC
    Posts
    2,004
    Post Thanks / Like
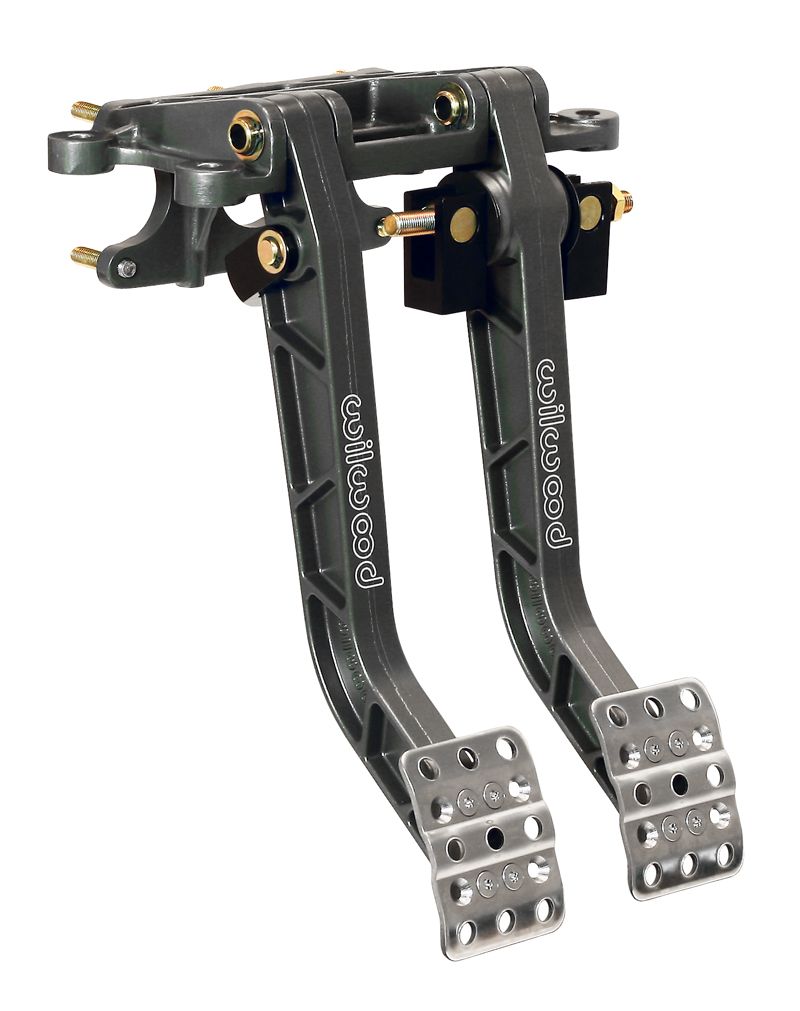
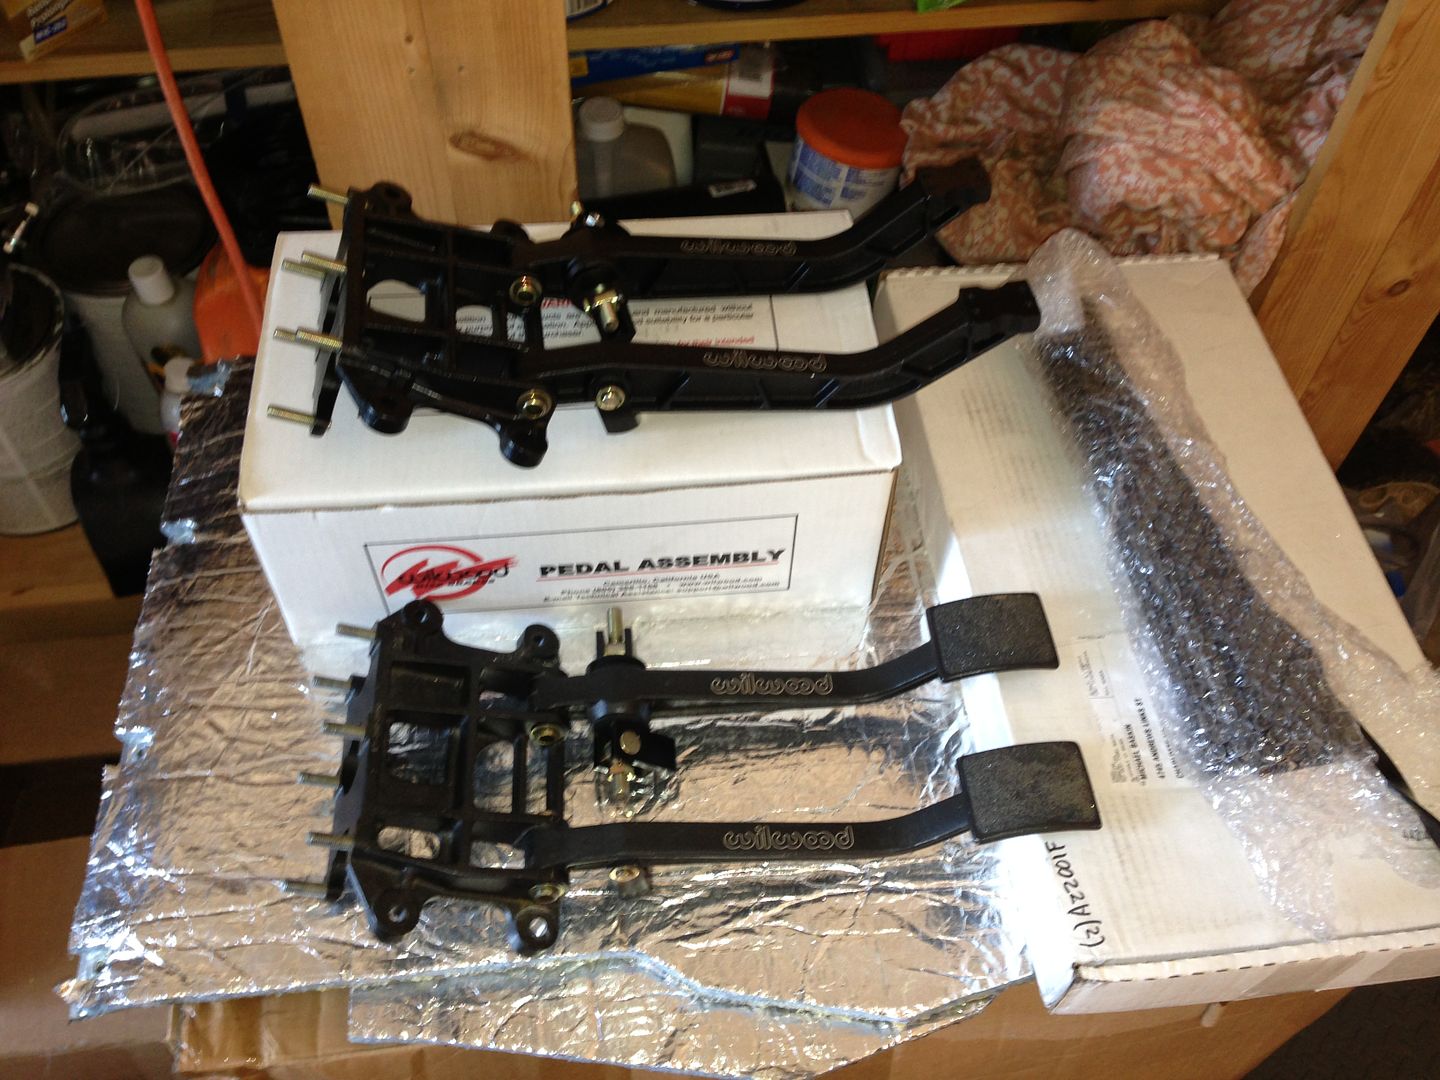
    I've been wanting to switch my brake pedals from the original Wilwood set, to the new set that come with the Gen II GTM kit. The biggest issue with it, was knowing what a monumental task it was going to be, with the body and dash panel mounted. So I waffled back and forth on whether I really wanted to tackle it...

    About a week ago, I decided that I wasn't going to swap them out if I didn't actually buy them and get them in the "shop". So I call Wilwood, and had a set sent to me...


    After pretty much an entire afternoon of cursing, and disassembly, and cursing, and more disassembly, and cursing... I got the original set out.


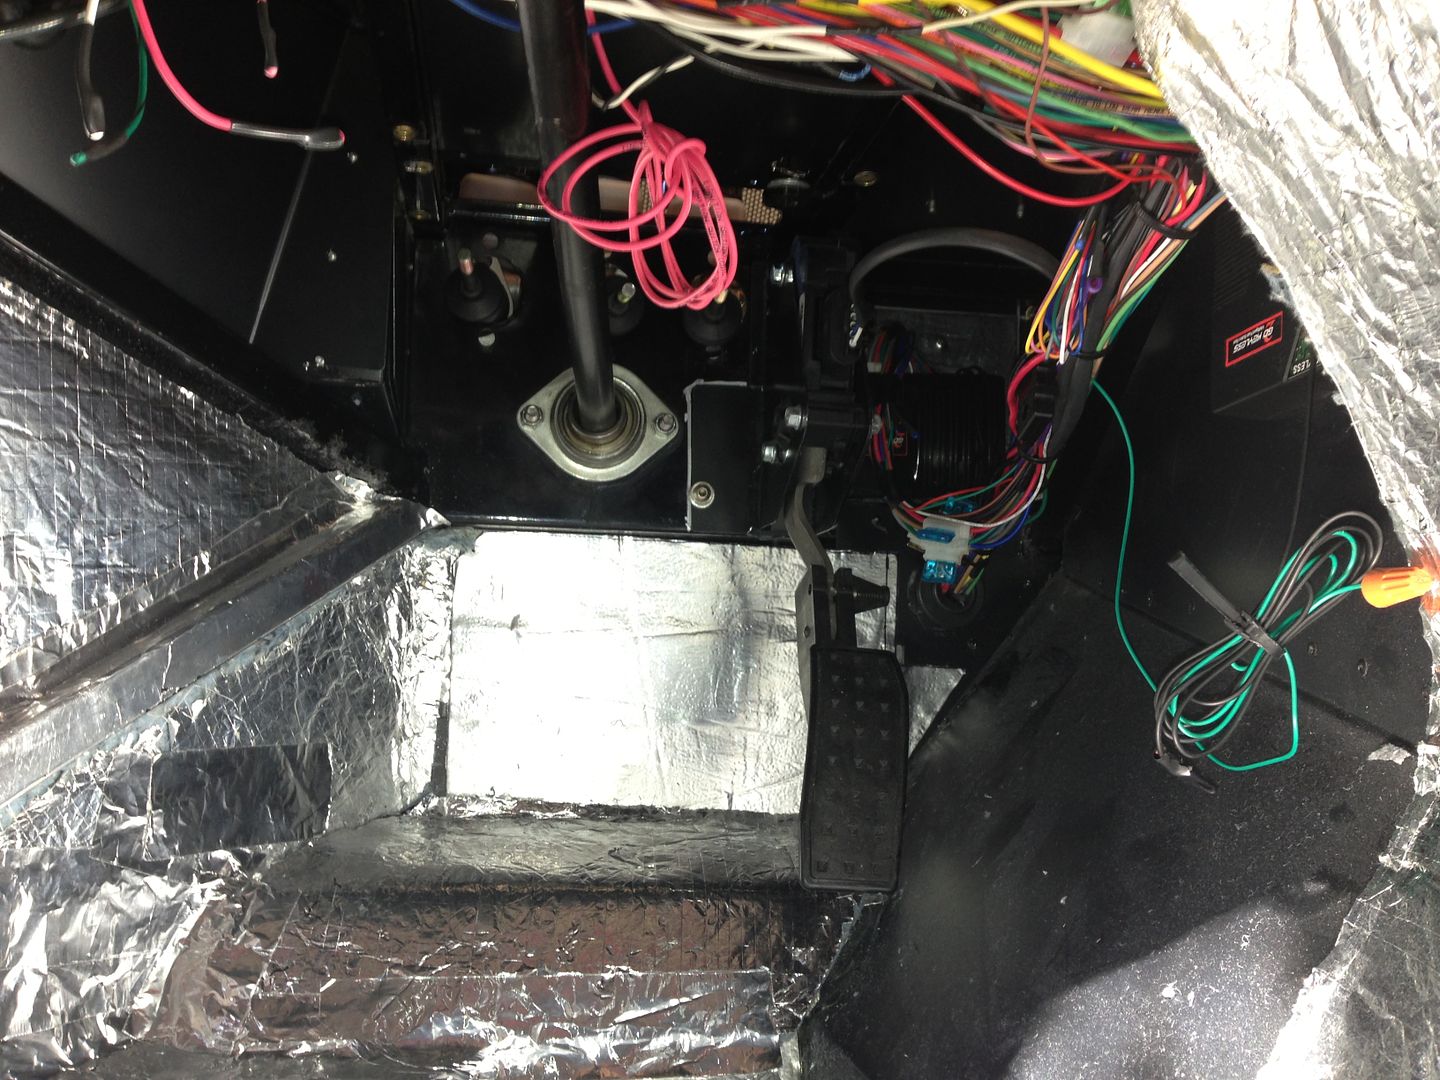
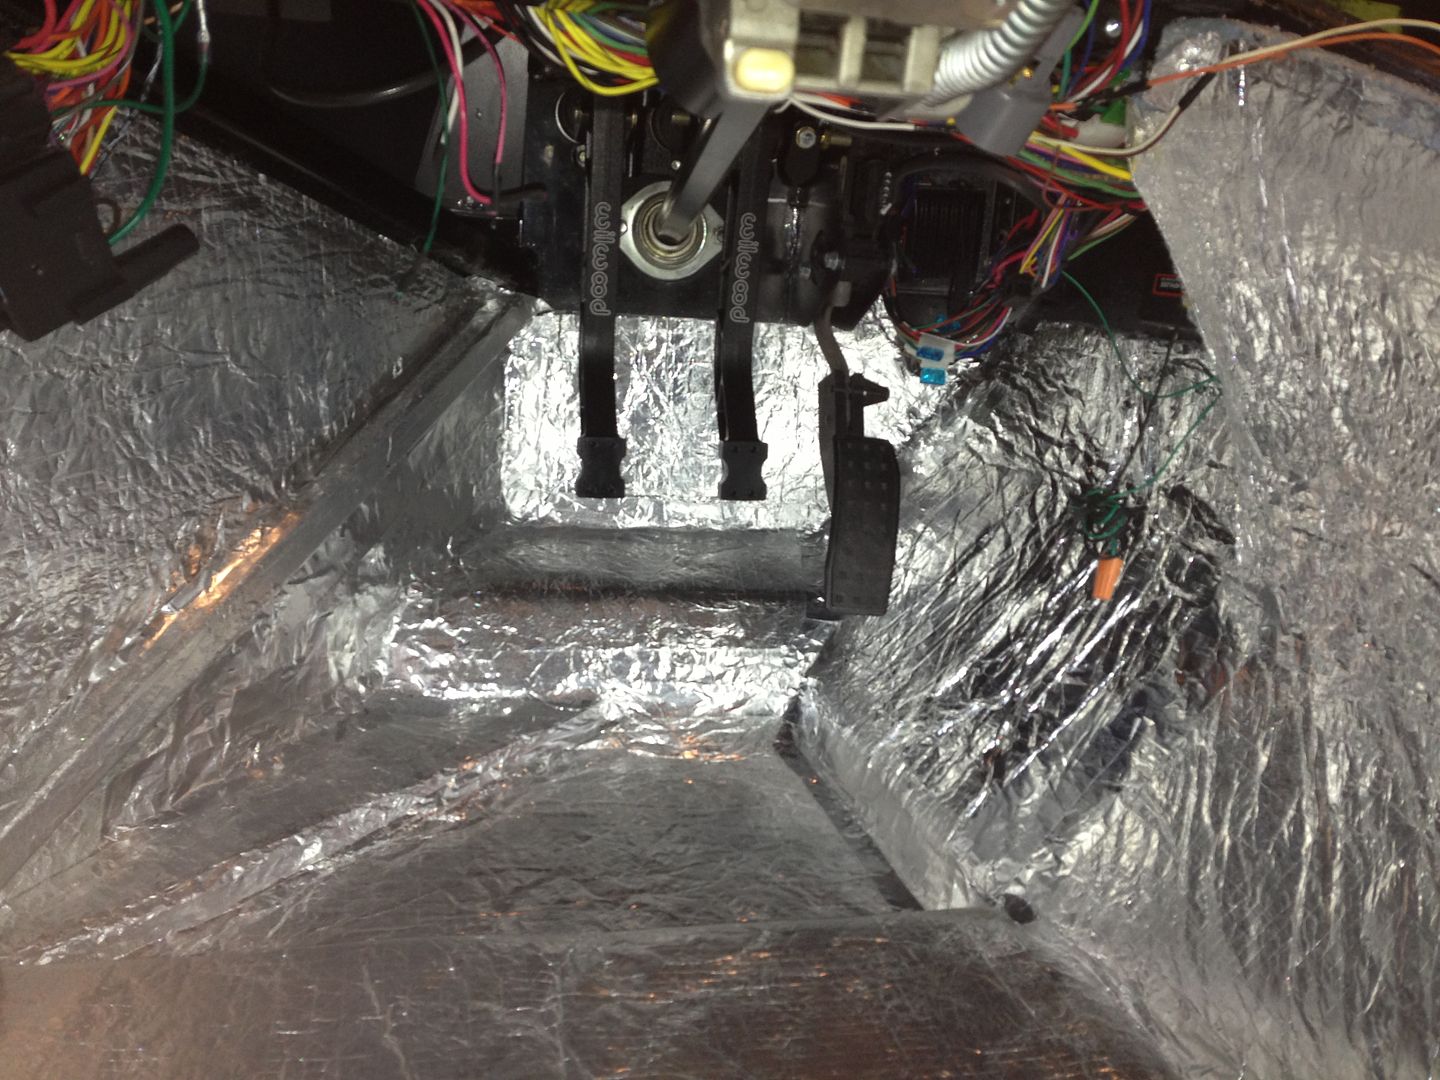
    While I hade the brake and clutch pedals out, I decided to go ahead and finish up the sound deadener and heat insulation in the driver side footbox...
    Last edited by The Stig; 09-15-2013 at 09:34 PM.
    The Stig

    Some say, that I only know two facts about ducks, (both being wrong); and that if I could be bothered, I could solve the "da Vinci Code" in 47 seconds...
    All I know is that I'm called "The Stig".
    GTM #0081

  21. #661
    Senior Member The Stig's Avatar
    Join Date
    Feb 2011
    Location
    Charlotte, NC
    Posts
    2,004
    Post Thanks / Like


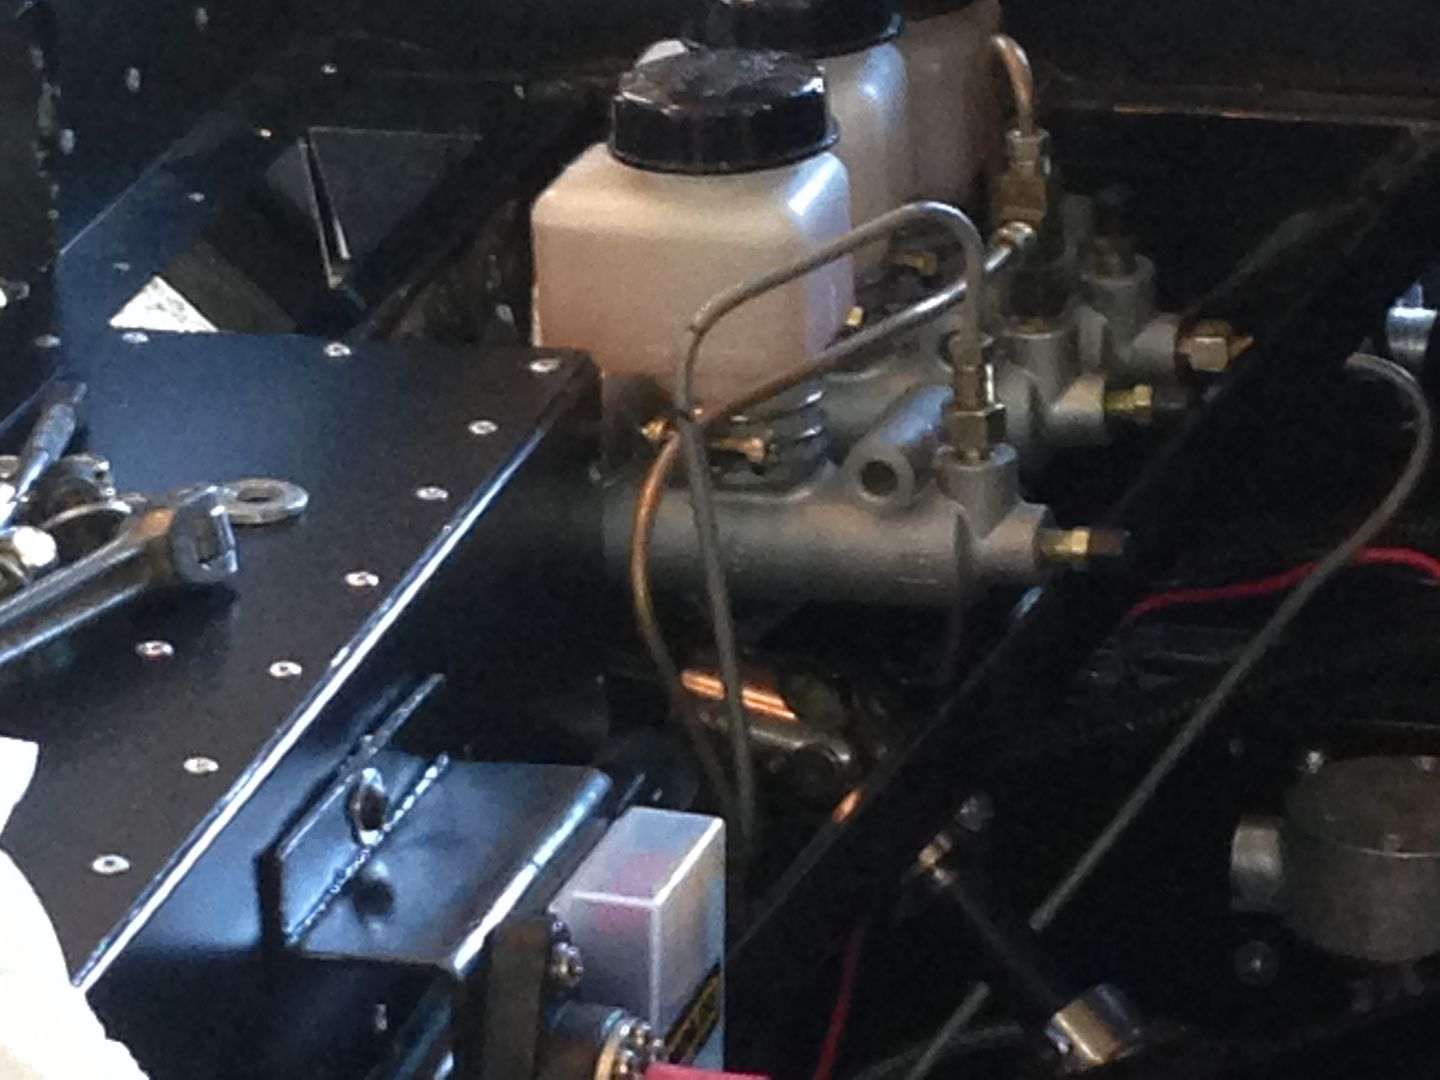
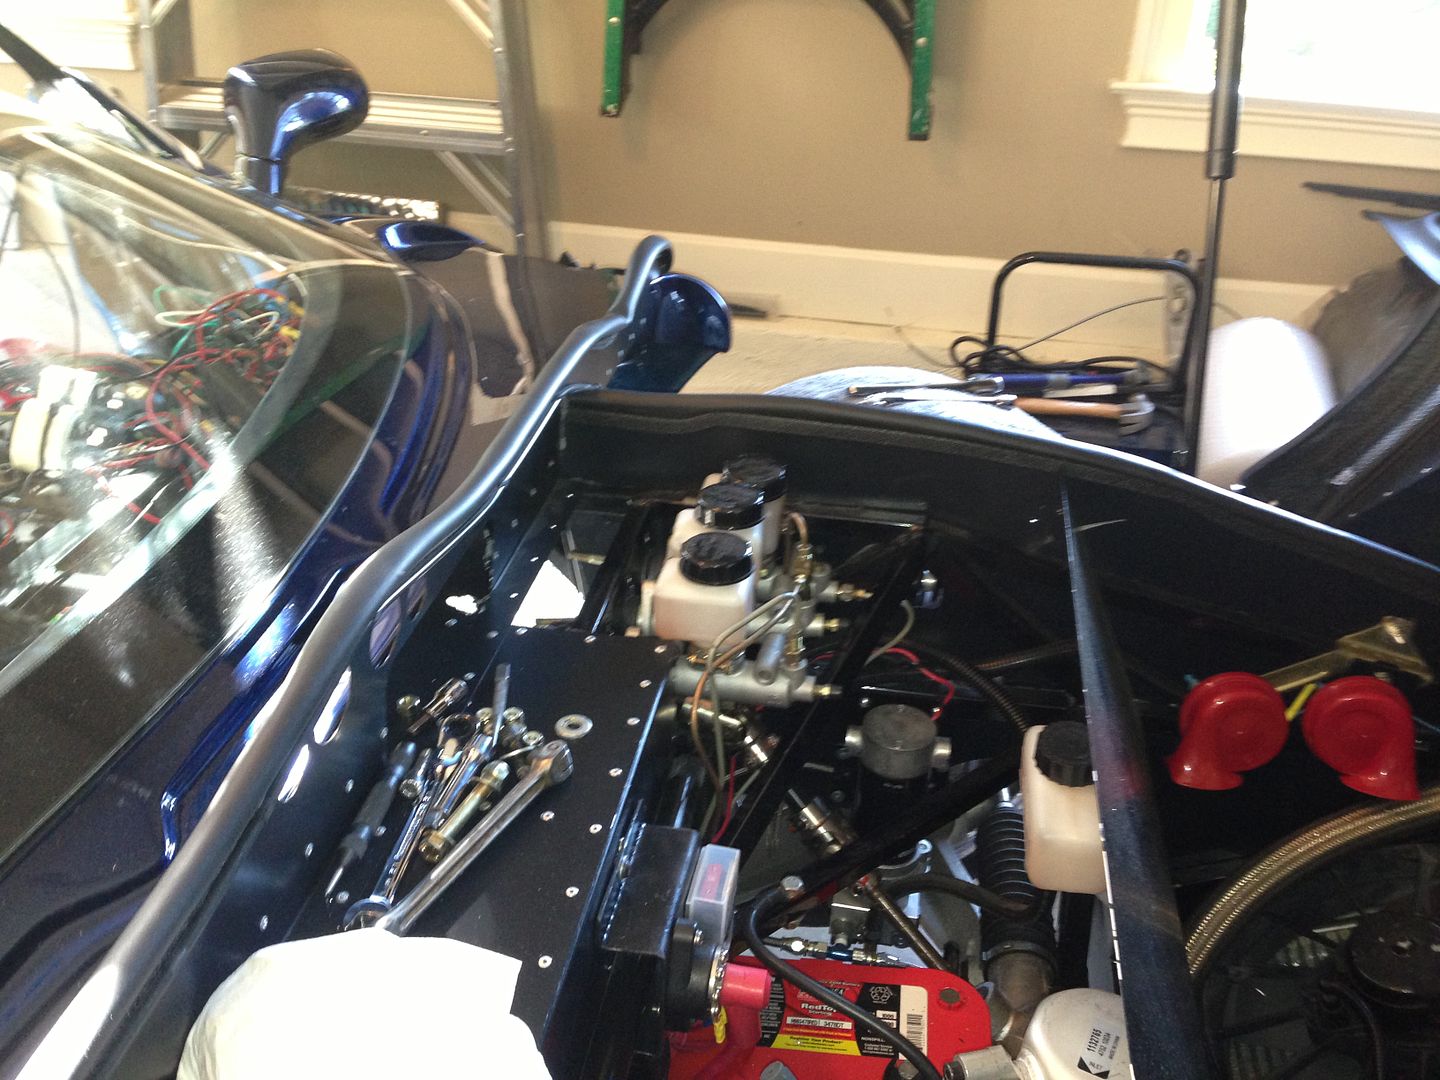
    Obviously, to get the pedals out, the mater cylinders have to be disconnected from the pedal studs... No problem. A 7/16" open end wrench and I was on my way... That worked fine for the top bolts... but let me tell you, getting to the bottom bolts is a Pain In The A$$$$$$!

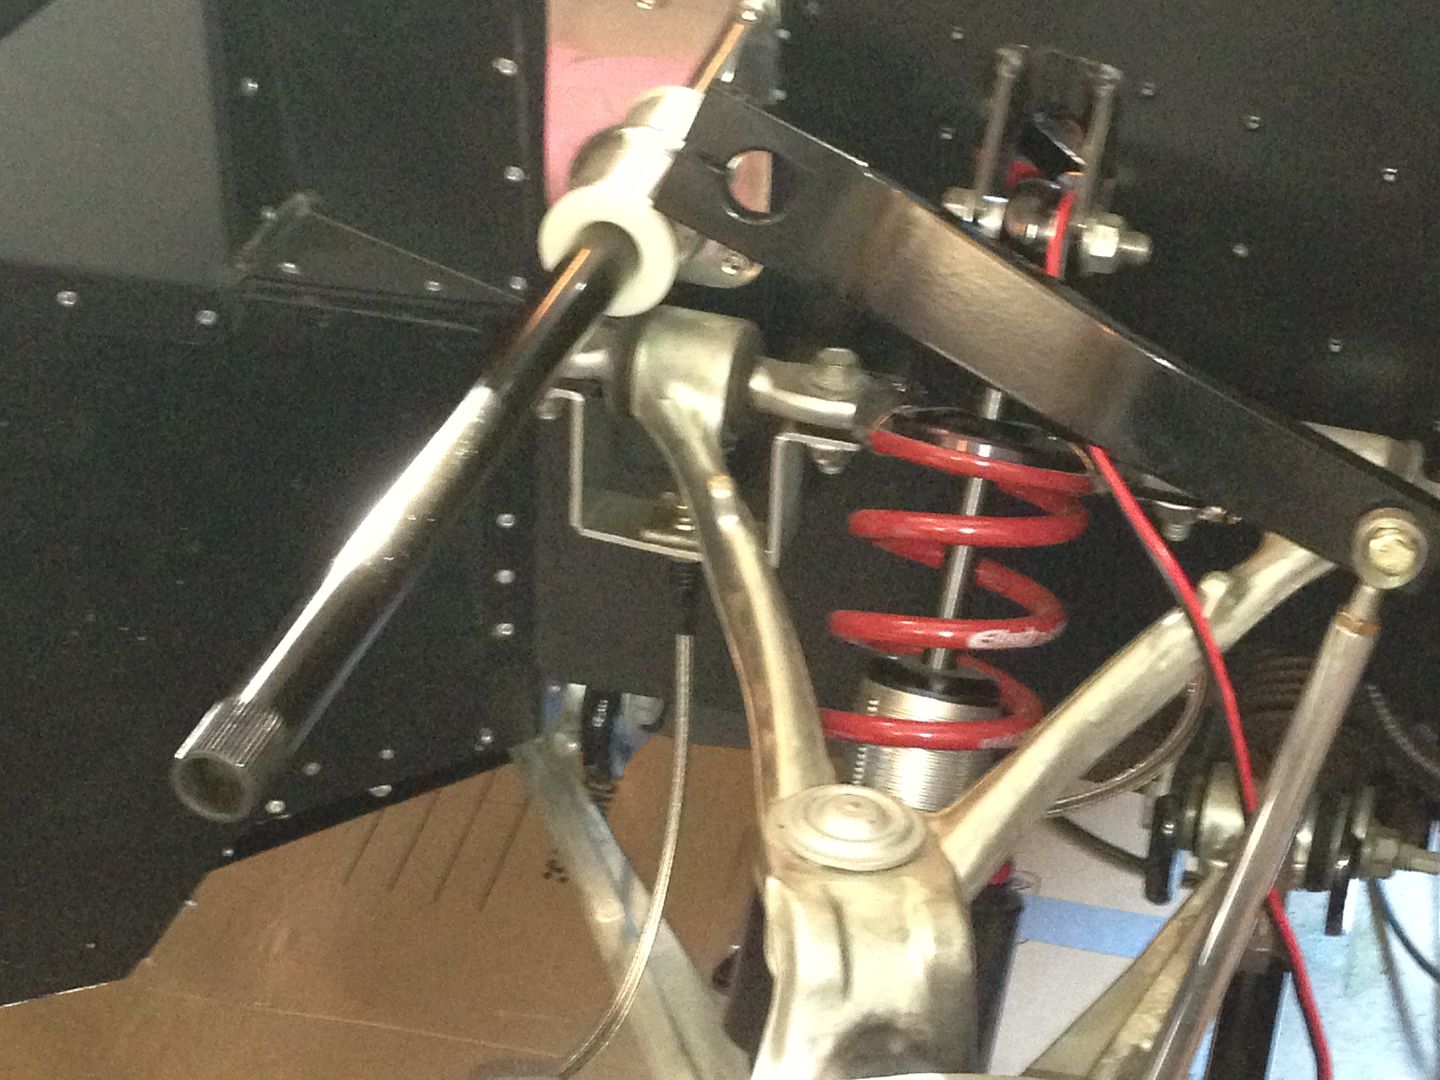
    Especially if you have installed Ted Harrison's Front Sway Bar Kit.


    So I had to disconnect both of the blades (arms) from the torsion bar, and then pull the bar out from under the master cylinders, in order to get the clearance that I needed to get to the fasteners.


    With the torsion bar pulled back, was able to get closer to the nuts on the bottom of the master cylinders, but I still couldn't get a straight shot at them with the socket extension. So I had to use a swivel attachment on the extension, in order to get the right angle.

    Understand, I have medium sized hands, and I could barely get in to manually place the swivel socket in place, and then manually back the nut off by hand, so it wouldn't drop into the twilight zone. If you're a big guy, you'll probably have to disconnect the brake lines to get the access that you'll need.

    I finally got them off and was able to move the master cylinders forward just enough to clear the studs, while also being very careful to not disturb the brake and clutch lines that were still connected.


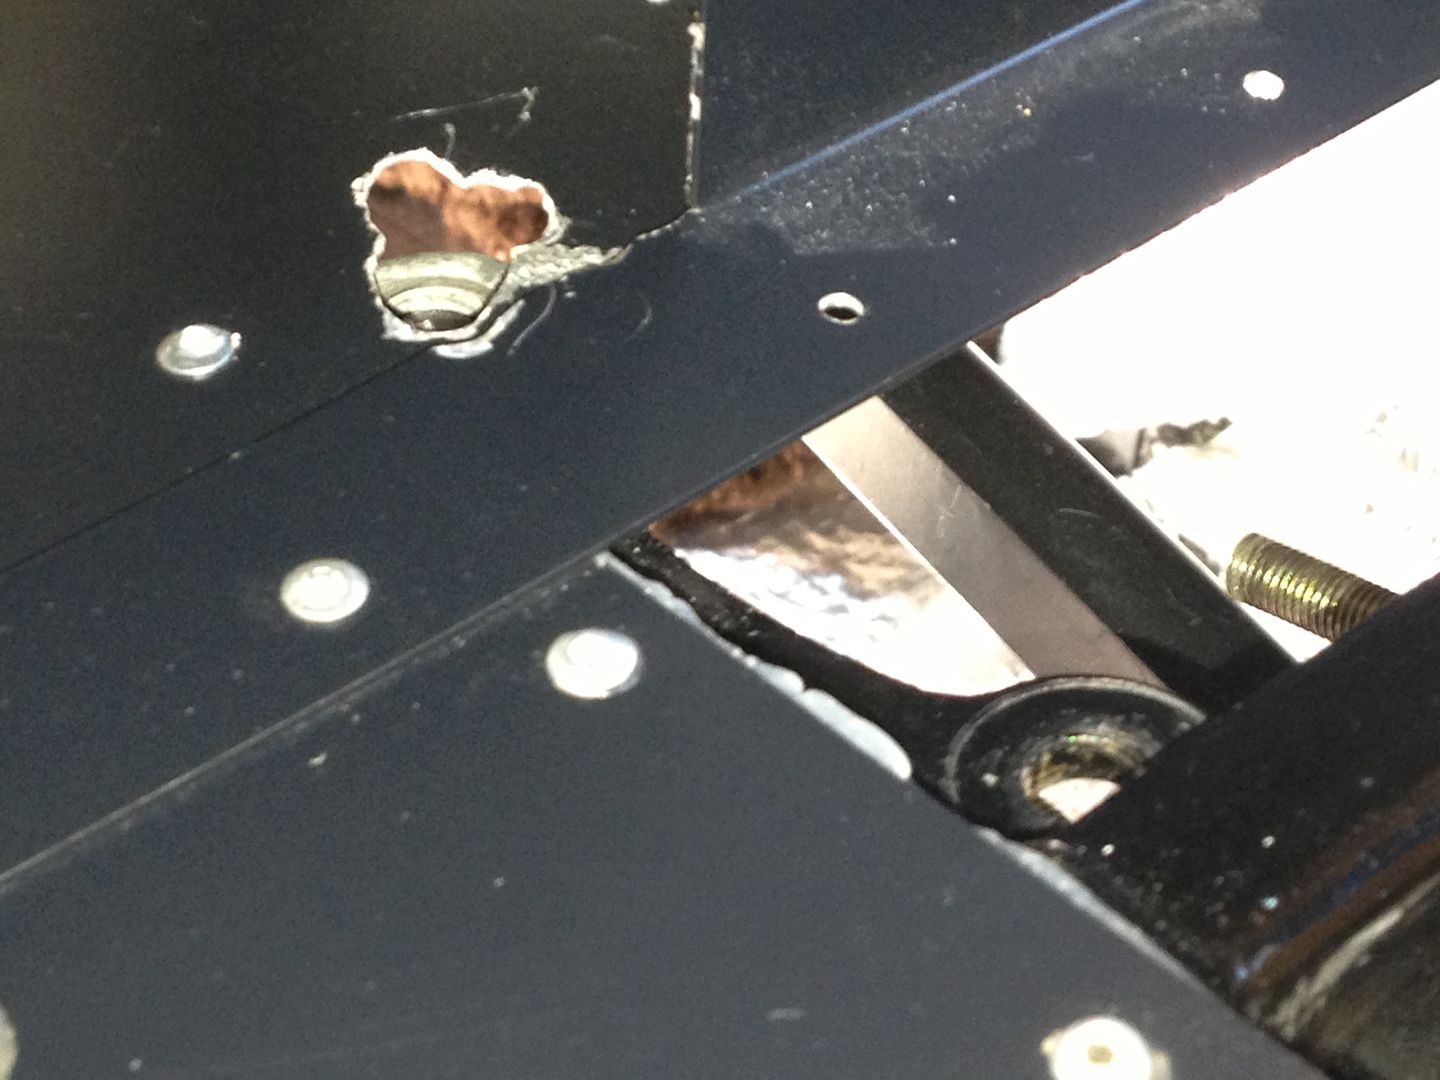
    Once I backed off the fasteners from the mounting tabs inside the foot box, I had one bolt that I could not remove, due to there being an aluminum panel riveted in place 1/2" above it. I ended up having to cut an access hole just above the bolt, so I could push the bolt up through it, freeing the pedals.

    By this time, I was 100% committed to getting these pedals out and replacing them with the newer and stronger version. After more cursing, and struggling to get the pedals to free themselves, I found myself reminding "me" that I was doing this ONLY because I decided I liked the newer pedals more than the original set.
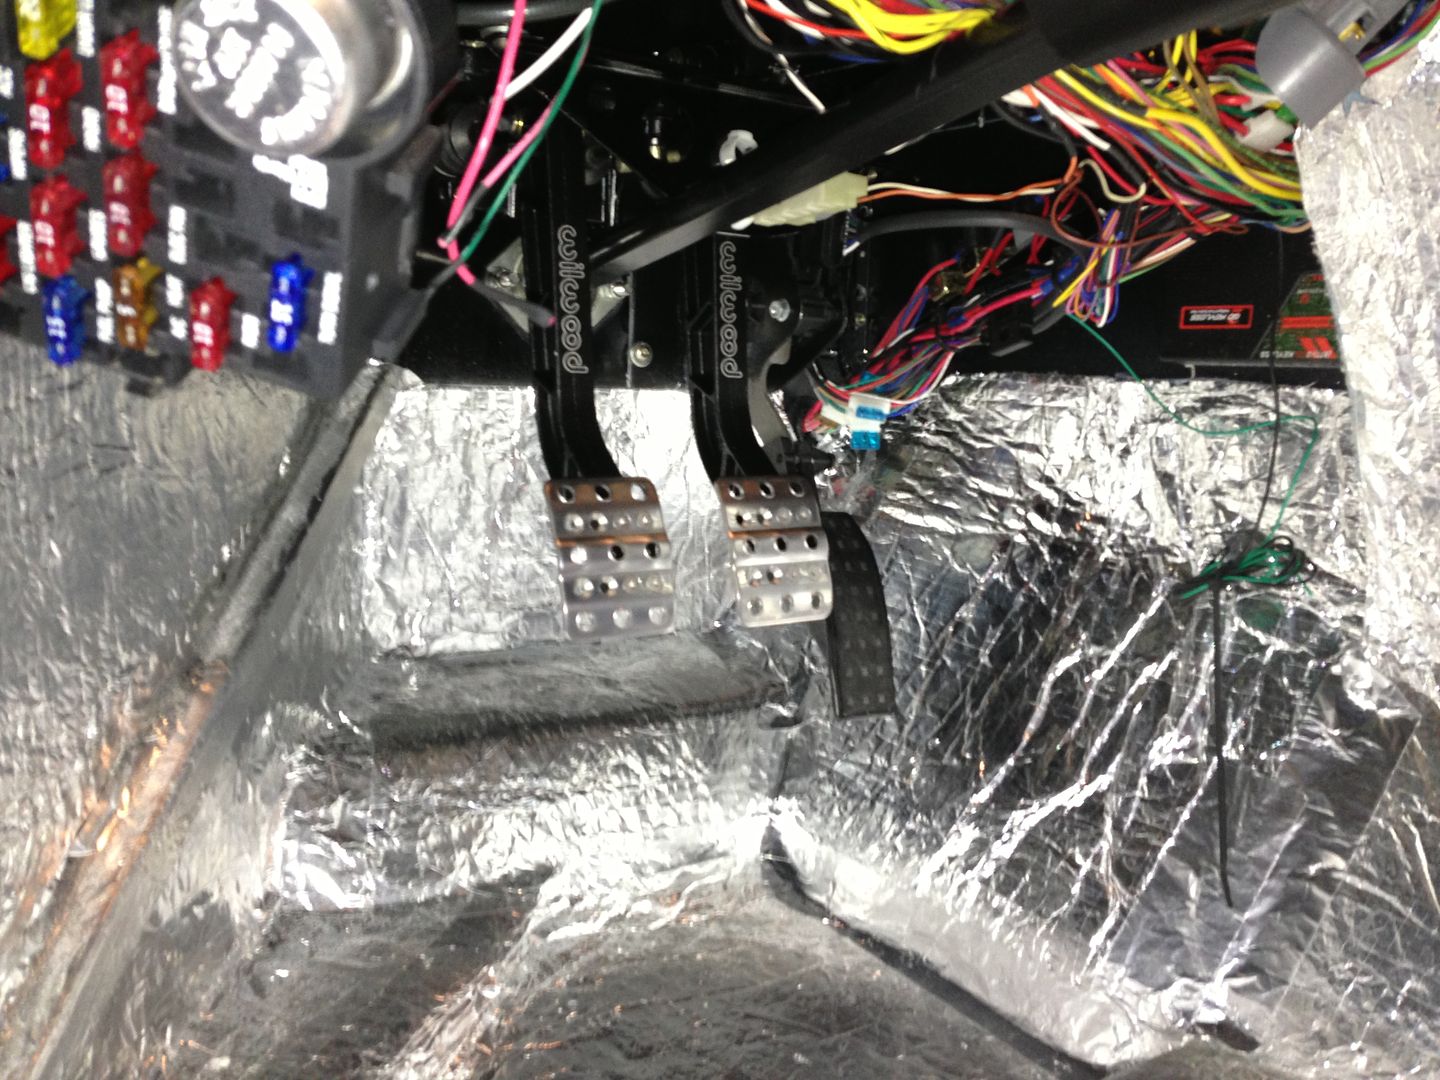
    Last edited by The Stig; 09-15-2013 at 10:56 PM.
    The Stig

    Some say, that I only know two facts about ducks, (both being wrong); and that if I could be bothered, I could solve the "da Vinci Code" in 47 seconds...
    All I know is that I'm called "The Stig".
    GTM #0081

  22. #662
    Senior Member The Stig's Avatar
    Join Date
    Feb 2011
    Location
    Charlotte, NC
    Posts
    2,004
    Post Thanks / Like
    I have to say that the new pedals went in much quicker and easier than the removal of the old ones.


    By the time I got to this stage, where I had the pedals installed, and the master cylinders re-connected, and the sway bar re-connected, and the front tires put back on the car.... I was completely worn out. I could not wedge myself upside down and backwards into the foot box again, for fear of not being able to get back out. I had climbed in and out of that foot box 10 or 15 times easy. Going in was easy enough, but getting back out was tough, and kept getting tougher.

    So I still have to connect the master cylinder rods to the pedals... That will be my project for this coming Friday. Not the easiest of tasks when you're wedged into such a tight space and you can't position your hand exactly where you need it. But it has to happen; so it will.

    So I have to make my work on Friday count. I figured it would be much easier to handle when I'm rested again.

    Saturday will be spent walking around the Charlotte Motor Speedway, taking in all the cars at the Food Lion Auto Fair / Car Show this weekend with my nephew. I'm really looking forward to it. He's about as big of a car guy as I am. It should be fun. I'm trying to talk him into doing a Cobra Build.

    But at least I was able to finally get this "mini project" behind me, and MAN does it feel good!
    Last edited by The Stig; 09-15-2013 at 11:02 PM.
    The Stig

    Some say, that I only know two facts about ducks, (both being wrong); and that if I could be bothered, I could solve the "da Vinci Code" in 47 seconds...
    All I know is that I'm called "The Stig".
    GTM #0081

  23. #663
    Senior Member The Stig's Avatar
    Join Date
    Feb 2011
    Location
    Charlotte, NC
    Posts
    2,004
    Post Thanks / Like


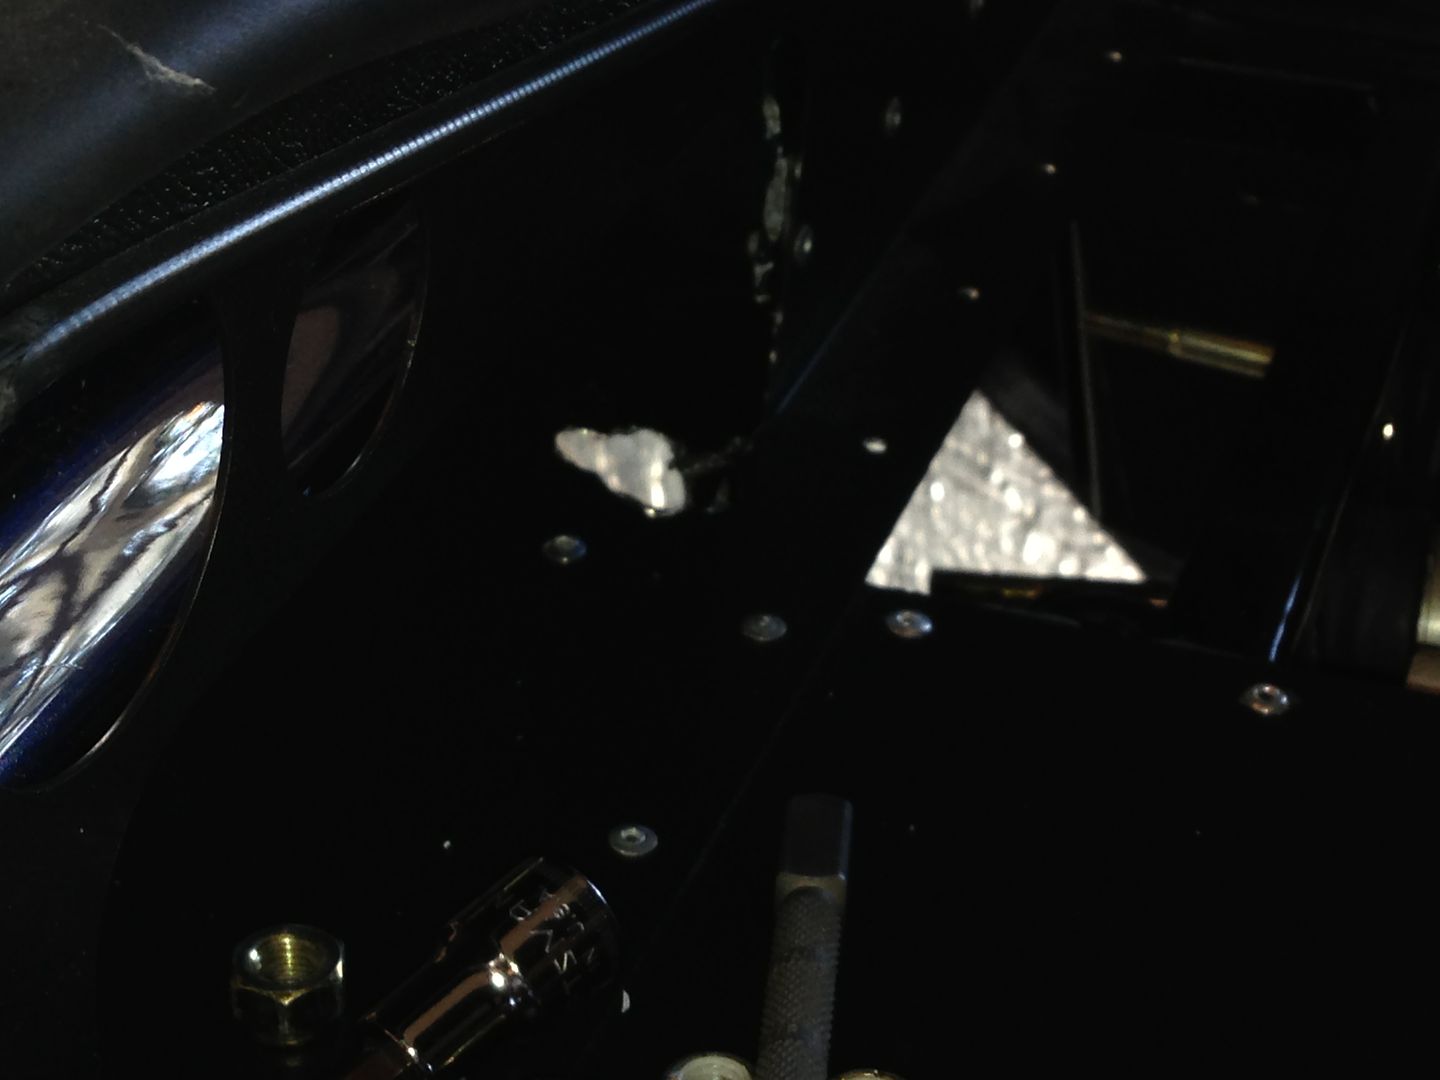
    After cutting the relief hole to remove the pedal bracket fastener, I'm left with a hole that looks a little butchered. I plan to close it up with some dynamat sound deadening material. That way it will be sealed, and if I ever have to get in there again, I can.


    I had to get a little creative when I was backing out the forward bolts from the foot box bracket. I used a breaker bar that was long enough to sit between a couple of solid parts to hold it still while I backed off the nut from inside.

    These pedals were not meant to be removed once the dash panels and the body has been permenantly installed.

    Would I do this again, knowing what I know now? Probably. But only because I have a certain look that I'm hoping to get with the interior, and the original pedals didn't really fit with that look. If I were doing an all black interior, I would have been fine with leaving them in.
    Last edited by The Stig; 09-18-2013 at 08:49 PM.
    The Stig

    Some say, that I only know two facts about ducks, (both being wrong); and that if I could be bothered, I could solve the "da Vinci Code" in 47 seconds...
    All I know is that I'm called "The Stig".
    GTM #0081

  24. #664
    Senior Member Kempo's Avatar
    Join Date
    Feb 2011
    Location
    Cabo Rojo,PR. USA
    Posts
    723
    Post Thanks / Like
    Way to go Mike. Those small details are what make a car stand out at the end.
    GenII GTM #354
    Delivered (02/09/11)

  25. #665
    Senior Member The Stig's Avatar
    Join Date
    Feb 2011
    Location
    Charlotte, NC
    Posts
    2,004
    Post Thanks / Like
    Quote Originally Posted by Kempo View Post
    Way to go Mike. Those small details are what make a car stand out at the end.
    Thanks Hugo. It wasn't fun, but I feel much better now that the new set is in.

    Mike
    The Stig

    Some say, that I only know two facts about ducks, (both being wrong); and that if I could be bothered, I could solve the "da Vinci Code" in 47 seconds...
    All I know is that I'm called "The Stig".
    GTM #0081

  26. #666
    Senior Member The Stig's Avatar
    Join Date
    Feb 2011
    Location
    Charlotte, NC
    Posts
    2,004
    Post Thanks / Like
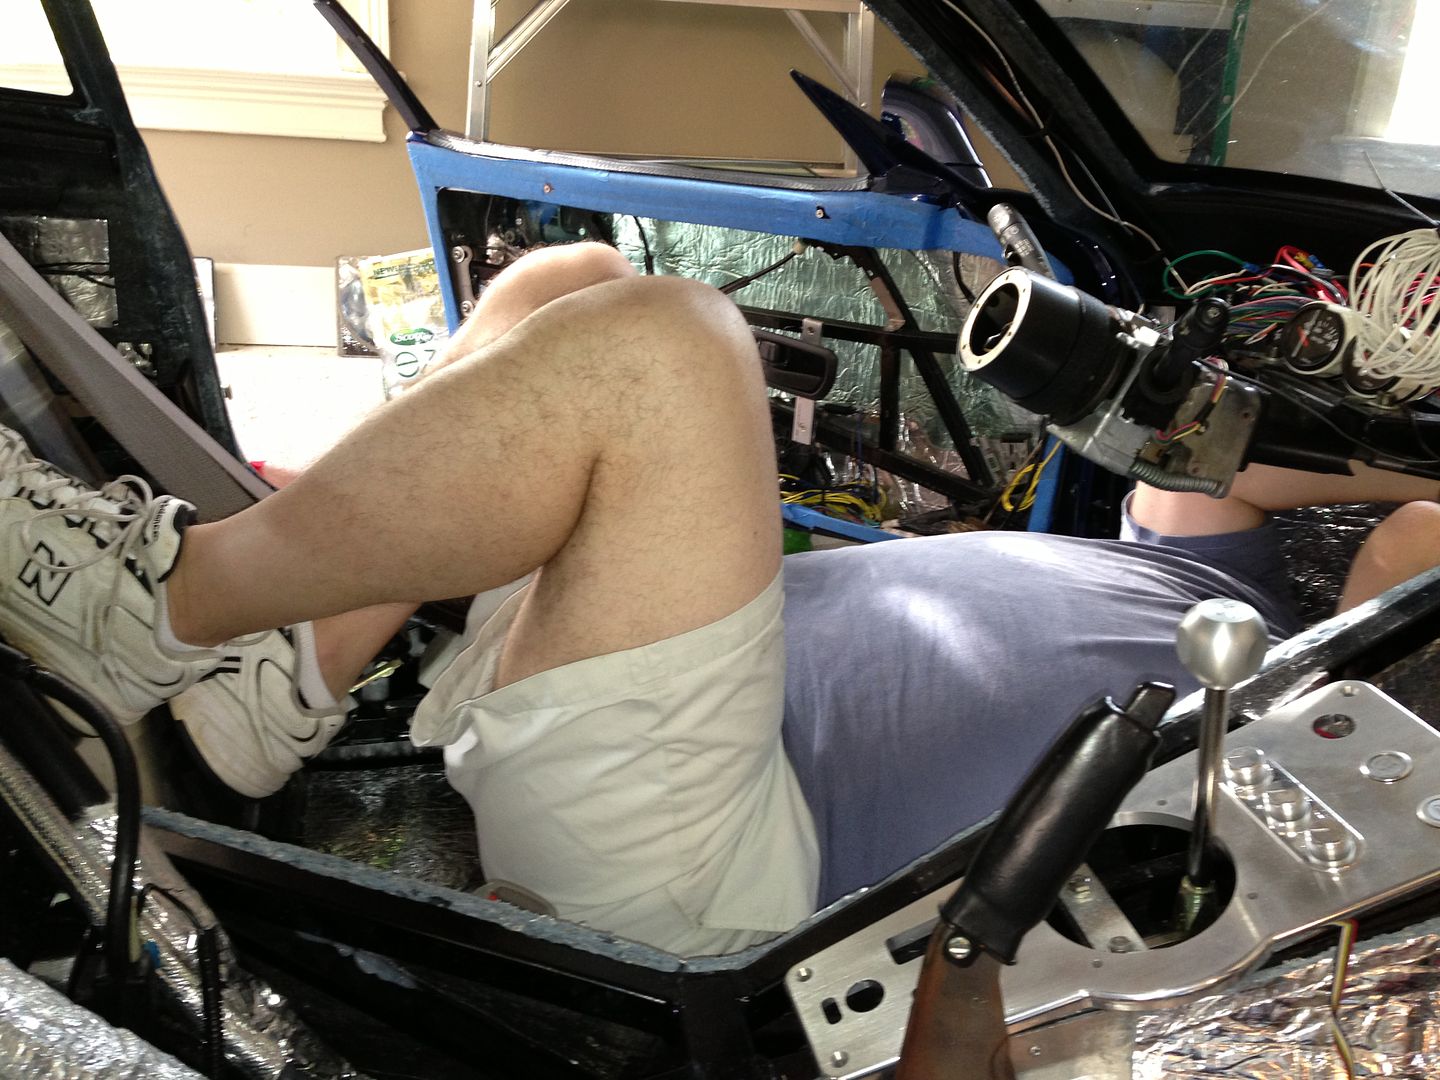
    So... I'm guessing that the GTM was not designed to fit comfortably when you're upside down and backwards... My wife, Pam, took this picture of me while I was connecting the master cylinder rods to the brake and clutch pedals. I ended up having to run a 5/16"-24 tap into the threads to get rid of the powder coating that got into the threads. But once I did that, they went in pretty easy.


    And here they are, DONE!


    Now I can go to the Autofair Car Show.

    Mike
    The Stig

    Some say, that I only know two facts about ducks, (both being wrong); and that if I could be bothered, I could solve the "da Vinci Code" in 47 seconds...
    All I know is that I'm called "The Stig".
    GTM #0081

  27. #667
    Senior Member sk7500's Avatar
    Join Date
    Feb 2011
    Posts
    377
    Post Thanks / Like
    Ive been in that position on both sides. Neither side fit me very well. Then I tried feet first. Fits much better.

    Sure is great when you have a helper, because its a real dud to have to get out of that position to get the next size tool.

  28. #668
    Senior Member Taz Rules's Avatar
    Join Date
    Dec 2012
    Location
    BC, Canada
    Posts
    738
    Post Thanks / Like
    Sexy legs, Mike

    Ever considered spinning on a pole to help fund your car?


  29. #669
    Senior Member The Stig's Avatar
    Join Date
    Feb 2011
    Location
    Charlotte, NC
    Posts
    2,004
    Post Thanks / Like
    Nope! I know myself well enough to know that there's no money to be made there...
    The Stig

    Some say, that I only know two facts about ducks, (both being wrong); and that if I could be bothered, I could solve the "da Vinci Code" in 47 seconds...
    All I know is that I'm called "The Stig".
    GTM #0081

  30. #670
    Senior Member Boz1911's Avatar
    Join Date
    May 2013
    Location
    Peachtree City
    Posts
    344
    Post Thanks / Like
    Car: Drop dead sexy!!

    Stig's legs: Not so much........

  31. #671
    Senior Member The Stig's Avatar
    Join Date
    Feb 2011
    Location
    Charlotte, NC
    Posts
    2,004
    Post Thanks / Like
    Quote Originally Posted by Boz1911 View Post
    Car: Drop dead sexy!!

    Stig's legs: Not so much........
    Thank you! According to my wife, this picture was more about wondering how I was going to get back out, than my legs... But I actually apprecaite your assessment.

    Mike
    The Stig

    Some say, that I only know two facts about ducks, (both being wrong); and that if I could be bothered, I could solve the "da Vinci Code" in 47 seconds...
    All I know is that I'm called "The Stig".
    GTM #0081

  32. #672
    Senior Member The Stig's Avatar
    Join Date
    Feb 2011
    Location
    Charlotte, NC
    Posts
    2,004
    Post Thanks / Like
    Quote Originally Posted by sk7500 View Post
    Ive been in that position on both sides. Neither side fit me very well. Then I tried feet first. Fits much better.

    Sure is great when you have a helper, because its a real dud to have to get out of that position to get the next size tool.
    You're right. But my helper went back inside after she took her pictures... To be fair though, she always asks whether or not there is anything that she can do to help, and it always seems that at the time she asks I'm doing something that only one person can do... So she does try pretty often to help.
    The Stig

    Some say, that I only know two facts about ducks, (both being wrong); and that if I could be bothered, I could solve the "da Vinci Code" in 47 seconds...
    All I know is that I'm called "The Stig".
    GTM #0081

  33. #673
    Senior Member The Stig's Avatar
    Join Date
    Feb 2011
    Location
    Charlotte, NC
    Posts
    2,004
    Post Thanks / Like
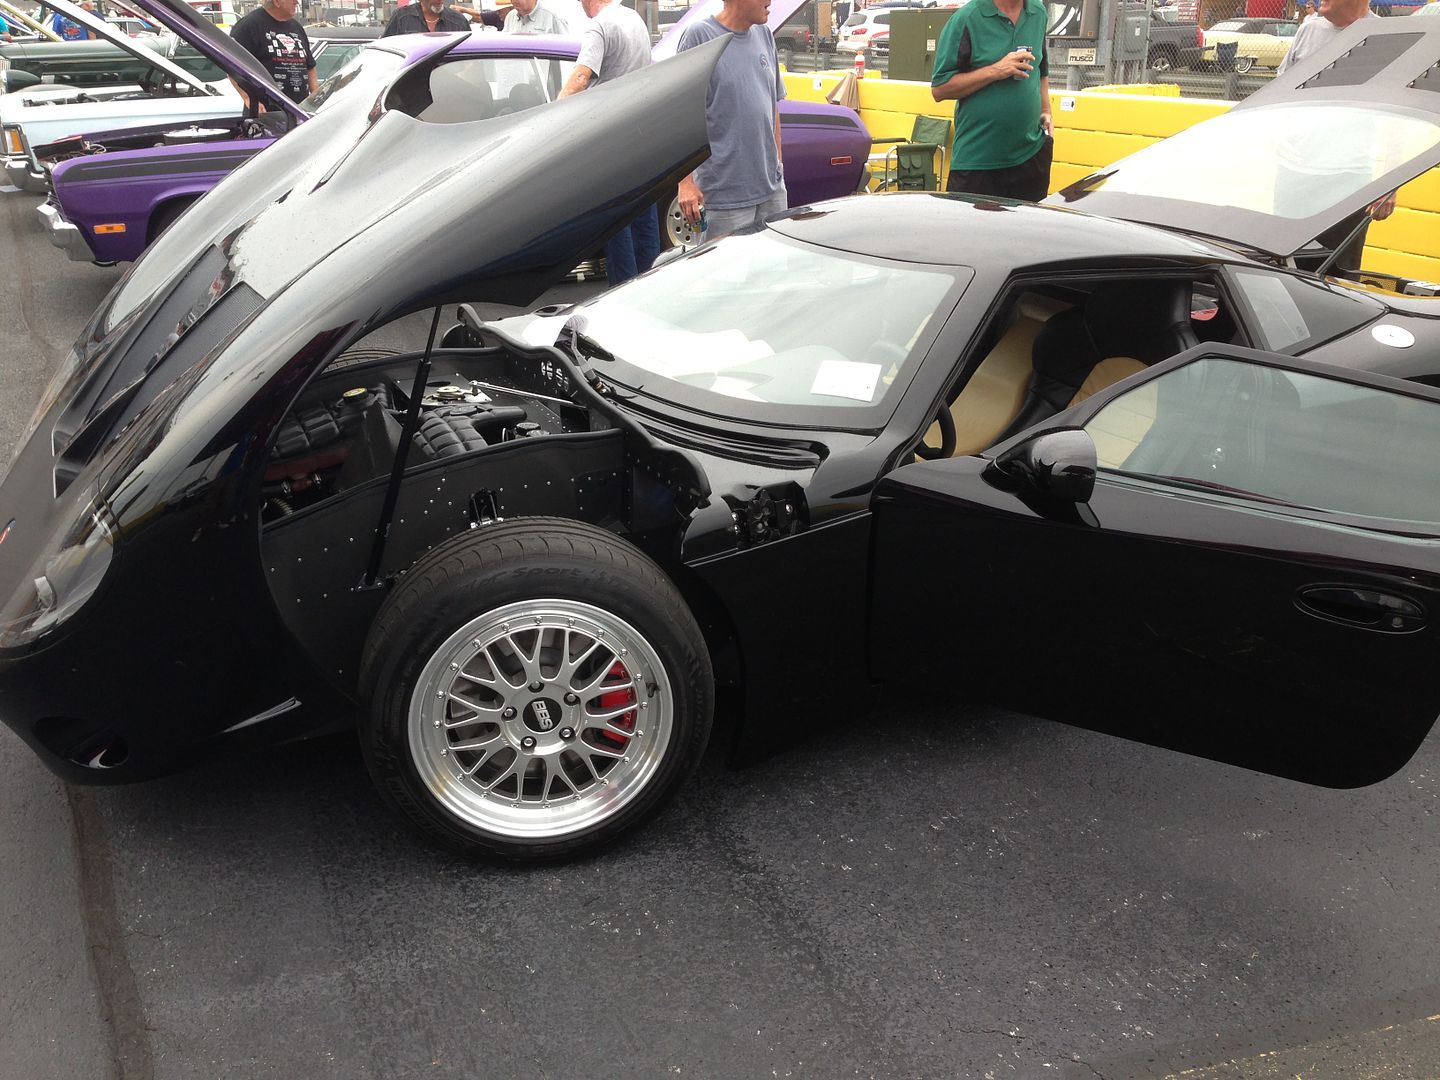
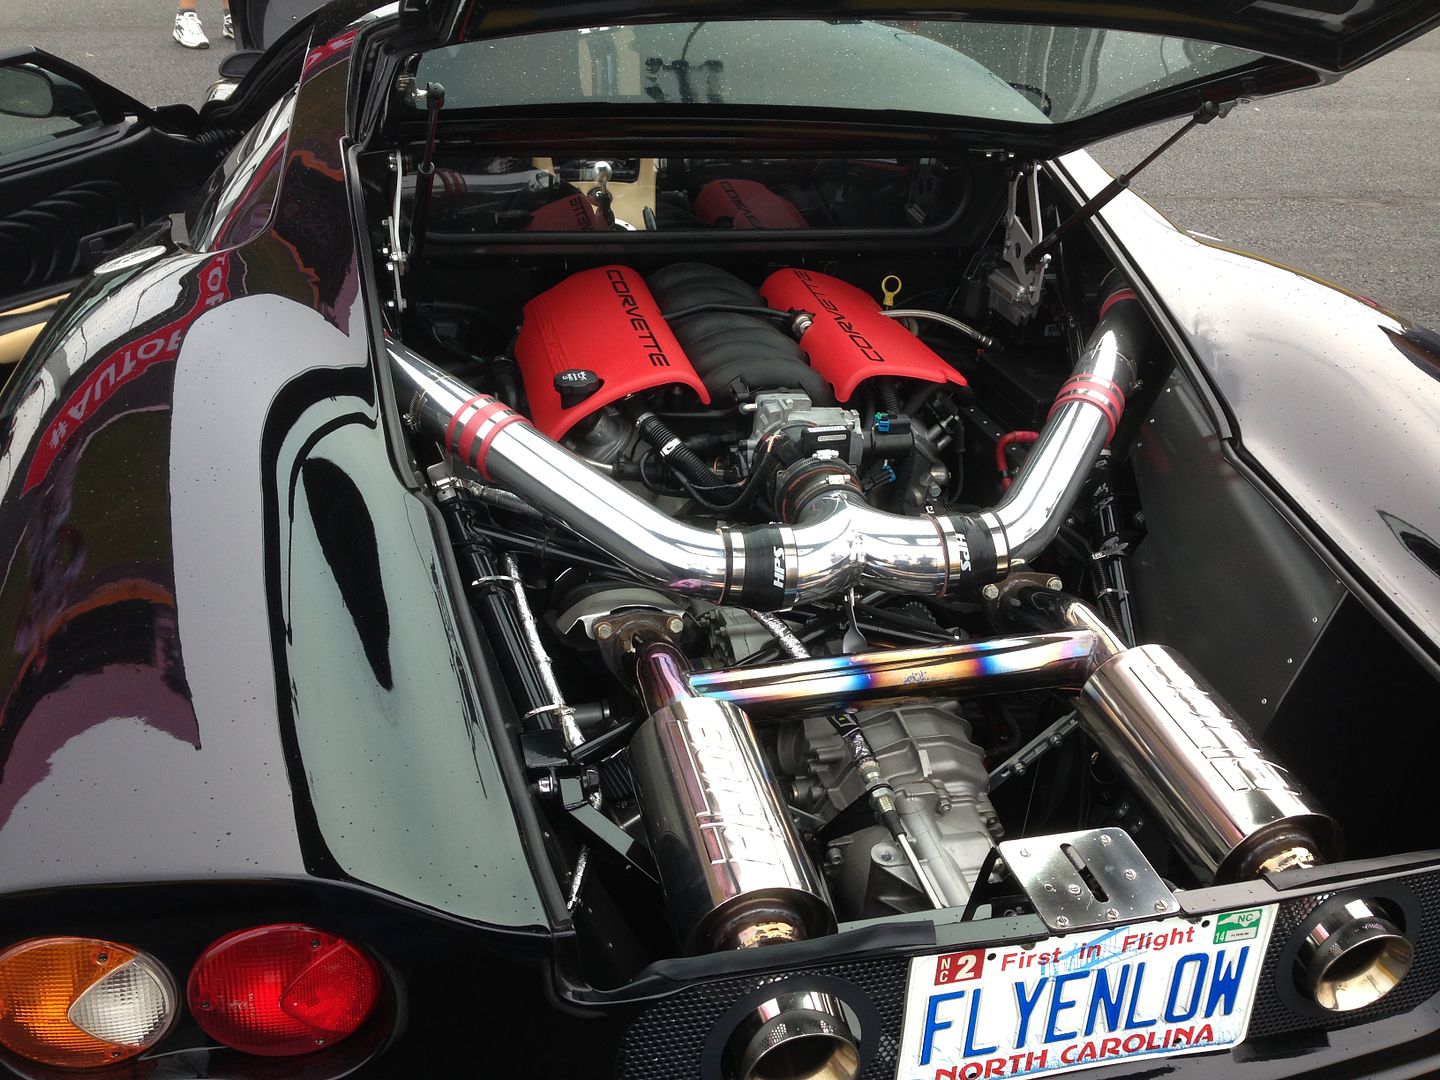
    I met a really cool guy at the Charlotte AutoFair this past weekend. Chris Knox from Lenoir, NC.

    Jeff Collins asked whether or not I had seen Chris' GTM. He had it parked on the back stretch of the speedway, and I hadn't been all the way around yet. So I walked back and saw this really COOL black GTM with a crowd of people around it.

    My nephew and I walked up to take a look, and saw Rick Williams there talking to Chris. (A two-for-one...). So I was able to catch up with one friend, and make another. It was a good day.

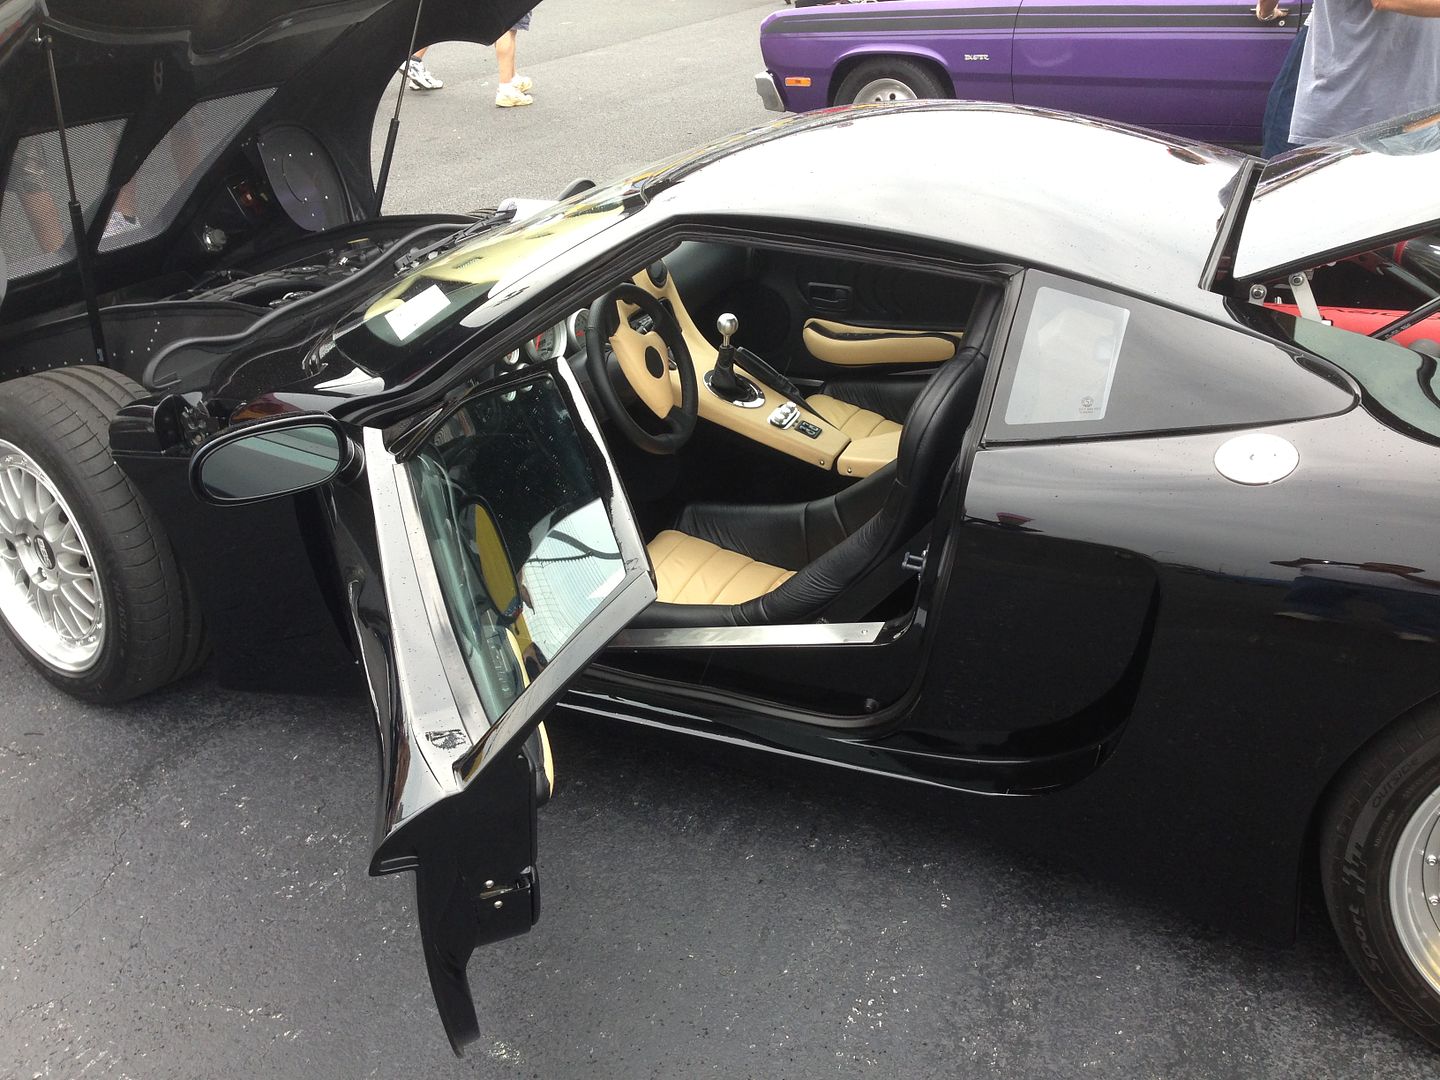
    Chris spent a little time showing us around his car, explaining things that he did. This is a VERY nice clean build. See for yourself. Dave Borden, does this car look familiar to you?


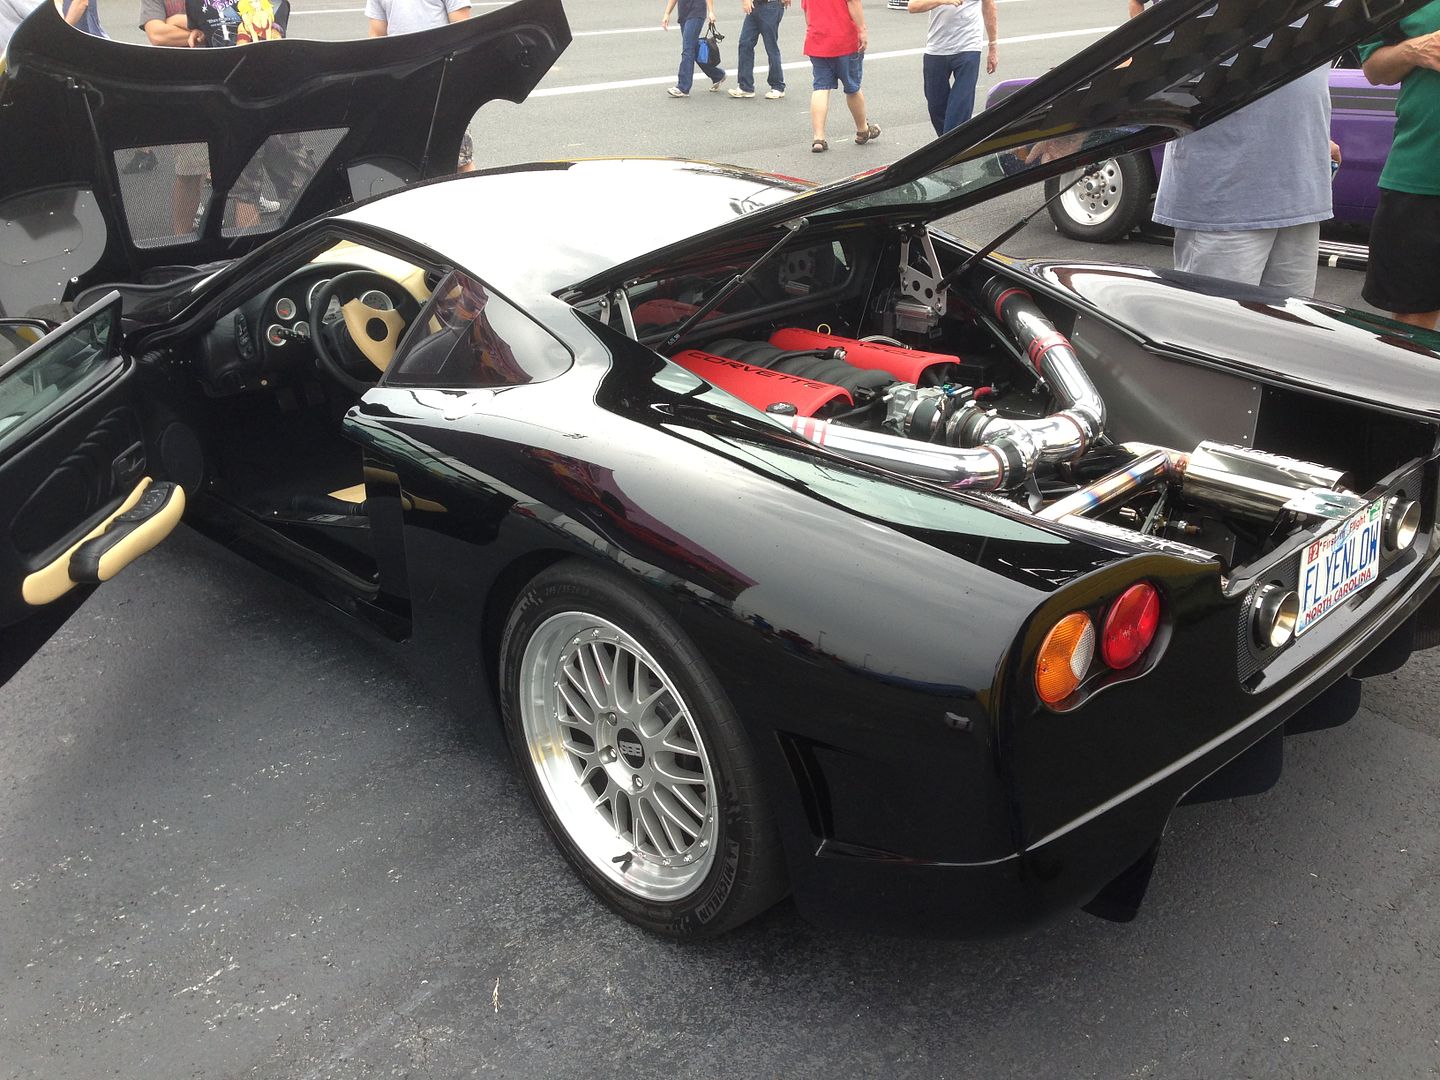
    Chris did his own upholstery. Very nice. He also included all of the Corvette electronics, including the Heads-Up display. Another thing that stood out to me, was the use of a charcoal color powder-coating on the panels. Nice contrast against the PERFECT black paint! Also, if you look closely, you'll see an OEM fluid tank that he cut and "re-welded", and then placed as a wrap around at the master cylinders. I thought that was really cool.


    He also fabbed some sweet window frames on the doors. Very cool.


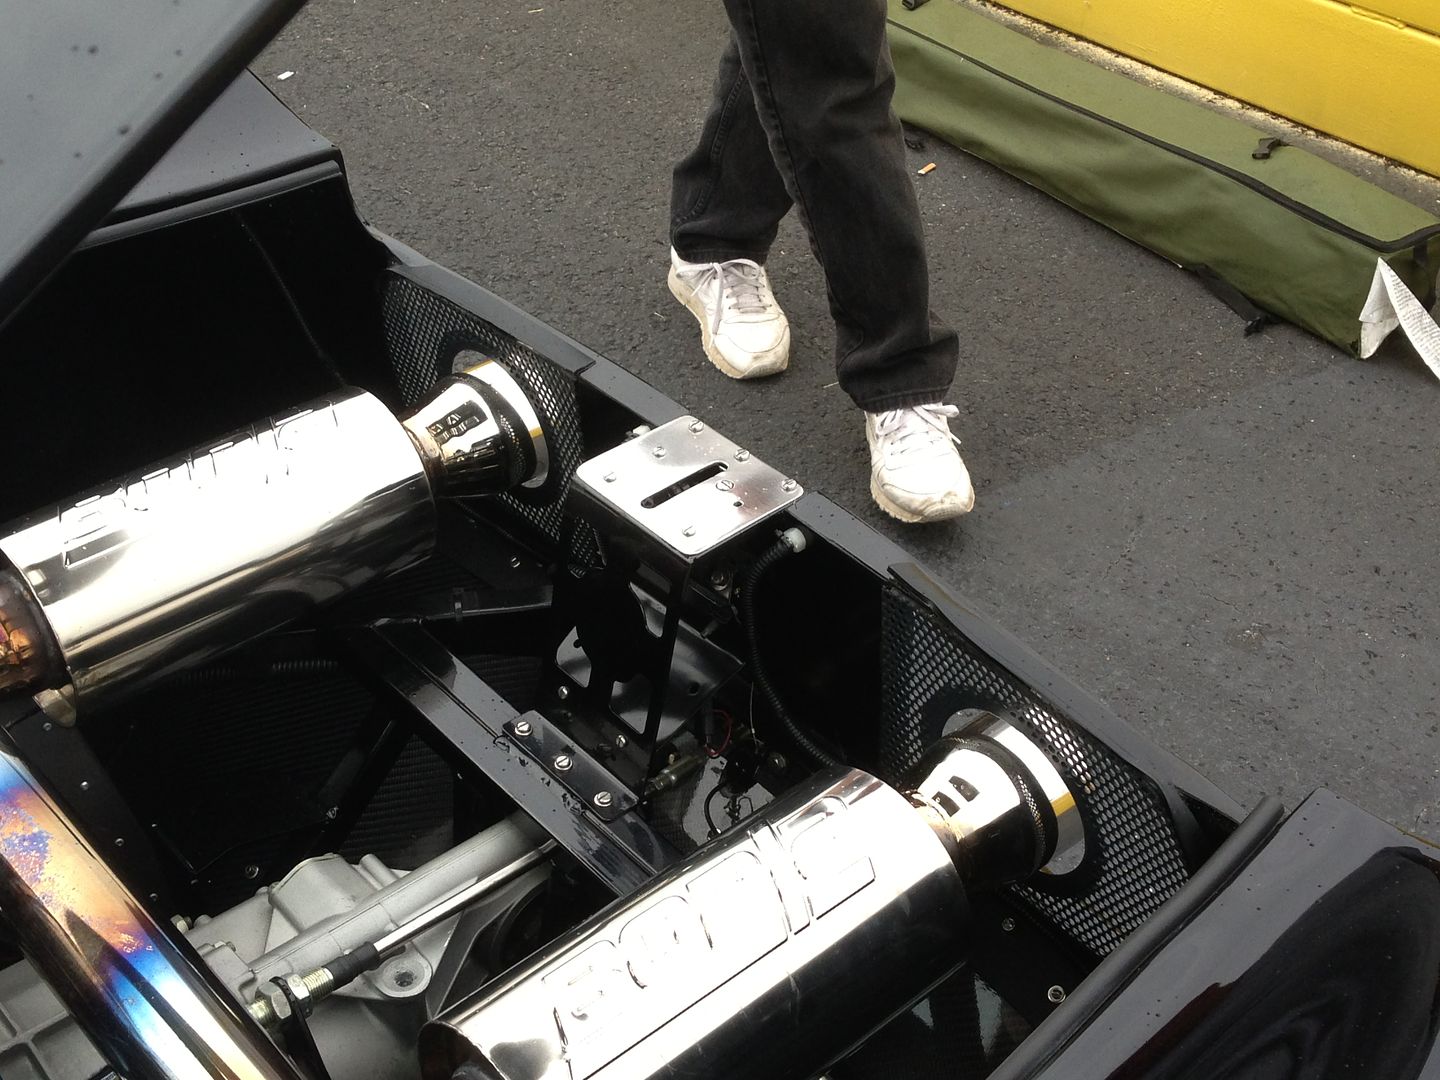
    I'm trying to locate a nice latch and striker for the rear hatch of my car. So I was paying close attention to the set up that Chris used.
    C5 rear hatch striker and latch.


    I'm sure that the personal plate correctly describes this car...


    Nice latch bracket and cover... The Borlas are pretty cool too!
    Last edited by The Stig; 09-24-2013 at 08:15 PM.
    The Stig

    Some say, that I only know two facts about ducks, (both being wrong); and that if I could be bothered, I could solve the "da Vinci Code" in 47 seconds...
    All I know is that I'm called "The Stig".
    GTM #0081

  34. #674
    LCD Gauges's Avatar
    Join Date
    Apr 2011
    Location
    Toronto, Ontario
    Posts
    1,545
    Post Thanks / Like
    Blog Entries
    3
    Nice interior accents! He using similar mufflers as my build, therefore he is cool.

    The rear mesh, muffler cutouts look great.
    Custom LCD Gauges , Data Loggers, Control Touch Screens
    www.LCDdash.com \\ 647-522-9953 \\ Voice & Text
    Proud new owner of GTM Gen 1., #105 - 08/27/11
    LQ9 Powered, G96.00 6 speed transaxle

  35. #675
    Senior Member The Stig's Avatar
    Join Date
    Feb 2011
    Location
    Charlotte, NC
    Posts
    2,004
    Post Thanks / Like
    When I got home, I started thinking about the latch and striker set up that Chris used. I figured that I would start asking around to find out how to get in touch with him, and talk to him a little more about his car. The next day, I had a PM from him, offering to help me out with the wiring of my gauges. So we worked out the schedules and he had agreed to come over on the 5th to help me knock it out.

    I've said it before... I've had the good fortune of meeting some great people on this forum, and in this hobby.
    Last edited by The Stig; 09-24-2013 at 08:17 PM.
    The Stig

    Some say, that I only know two facts about ducks, (both being wrong); and that if I could be bothered, I could solve the "da Vinci Code" in 47 seconds...
    All I know is that I'm called "The Stig".
    GTM #0081

  36. #676
    Senior Member The Stig's Avatar
    Join Date
    Feb 2011
    Location
    Charlotte, NC
    Posts
    2,004
    Post Thanks / Like
    The interior guy is coming over to my house on Friday to do a design concept. That should be interesting. Chris Knox is coming over on Saturday to help me get the last bit of wiring done. So... With a little luck... maybe I'll have this thing finished soon, so Gary won't give me grief about finding reasons not to finish it up.
    The Stig

    Some say, that I only know two facts about ducks, (both being wrong); and that if I could be bothered, I could solve the "da Vinci Code" in 47 seconds...
    All I know is that I'm called "The Stig".
    GTM #0081

  37. #677
    Senior Member The Stig's Avatar
    Join Date
    Feb 2011
    Location
    Charlotte, NC
    Posts
    2,004
    Post Thanks / Like
    I met with Steve Kurzman (Custom Stitching Co.) today. Steve owns a custom upholstery (trim) shop here in Charlotte. He took the time to drive to my house and take a look at the GTM. I was pretty pumped up when he left. Three shades of Gray, as well as brushed aluminum accents. Mercedes Benz wool carpet, with Garrett leather hides, and Alcantera accents and head liner.

    We'll be using the dash and console from the kit, but it'll be re-worked a little. I'm also going to use the roll bar covers. The center section that runs along the roof, will be cut out and filled.

    He says that it will take him 8 to 10 weeks to complete. He seemed pretty excited about doing my car. We talked through the design, all the materials, and cost.

    So I believe I've changed my mind about who will do the interior.


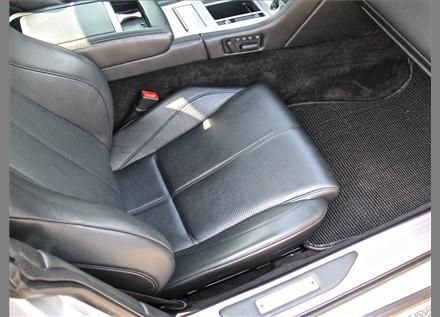
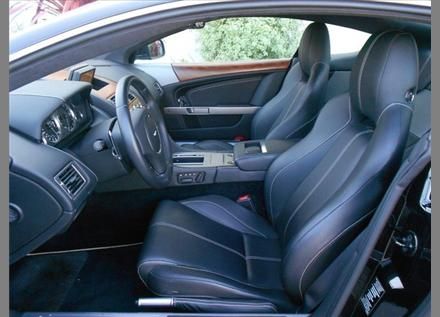
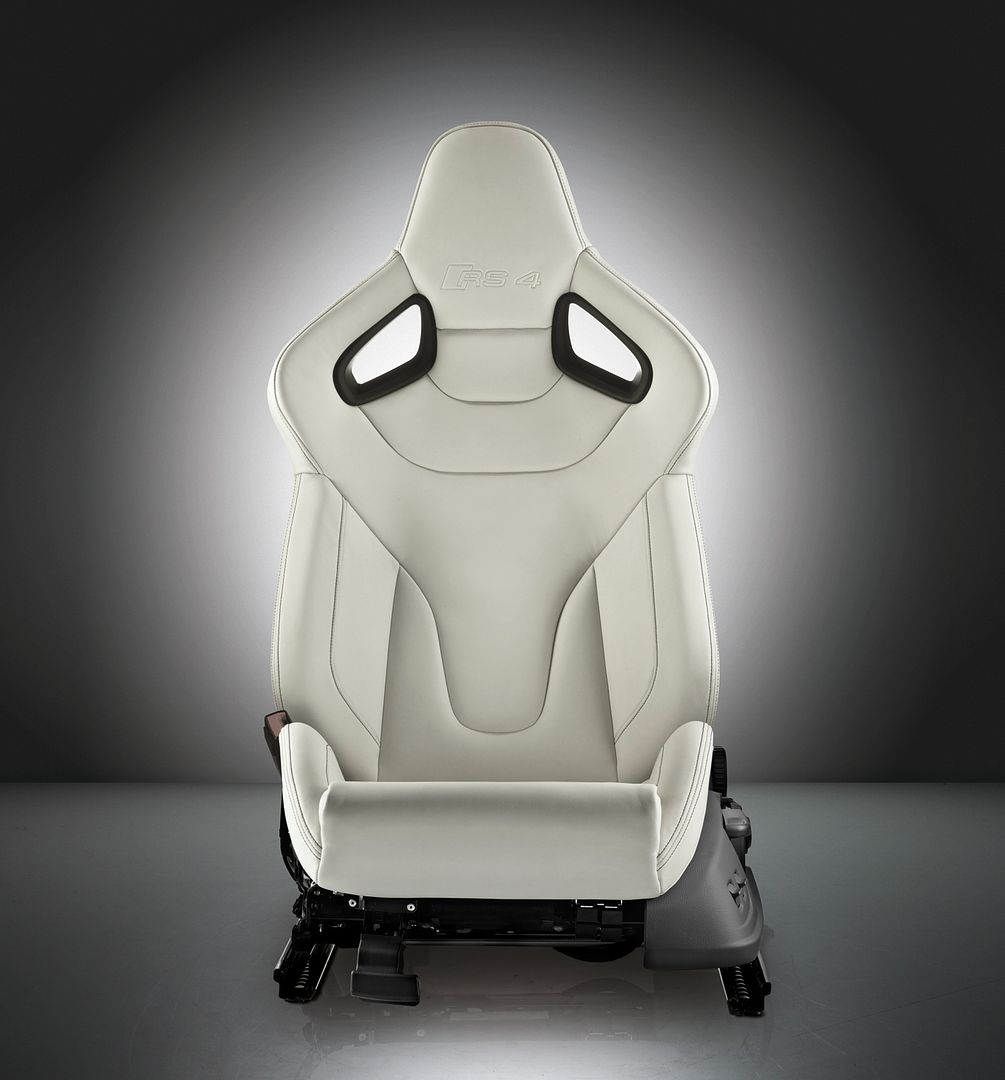
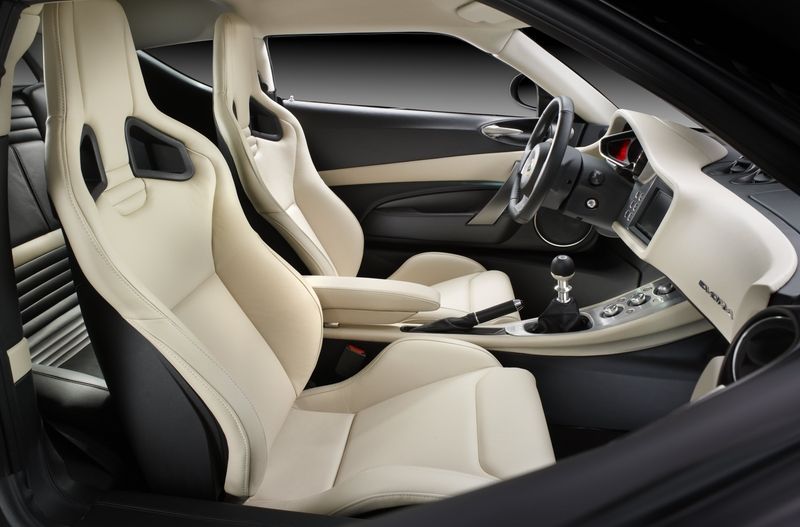
    The seats will be recovered in Gray leather with alcantera accents. The stitching will look very similar to the seats in a 2010 Aston Martin DB9.


    The actual seat will be shaped pretty much like this Recaro Seat from the Audi RS4.


    The overall look of the interior will be very similar to the Lotus Evora mixed with the Aston DB9...


    Anyone in the area, who might be interested in having some interior work done, should at least give Steve a call.
    Last edited by The Stig; 10-05-2013 at 08:49 AM.
    The Stig

    Some say, that I only know two facts about ducks, (both being wrong); and that if I could be bothered, I could solve the "da Vinci Code" in 47 seconds...
    All I know is that I'm called "The Stig".
    GTM #0081

  38. #678
    LCD Gauges's Avatar
    Join Date
    Apr 2011
    Location
    Toronto, Ontario
    Posts
    1,545
    Post Thanks / Like
    Blog Entries
    3
    Tell me more about these roll bar covers? i know somebody on this site makes them...but I don't recall the name. I've also seen a few guys make their own (Mikespms comes to mind).

    What are you cutting out, the roll bar cover, or the roll bar itself?
    Custom LCD Gauges , Data Loggers, Control Touch Screens
    www.LCDdash.com \\ 647-522-9953 \\ Voice & Text
    Proud new owner of GTM Gen 1., #105 - 08/27/11
    LQ9 Powered, G96.00 6 speed transaxle

  39. #679
    Senior Member narkosys's Avatar
    Join Date
    May 2012
    Posts
    243
    Post Thanks / Like

  40. #680
    LCD Gauges's Avatar
    Join Date
    Apr 2011
    Location
    Toronto, Ontario
    Posts
    1,545
    Post Thanks / Like
    Blog Entries
    3


    That will be mine. Thank you sir!
    Custom LCD Gauges , Data Loggers, Control Touch Screens
    www.LCDdash.com \\ 647-522-9953 \\ Voice & Text
    Proud new owner of GTM Gen 1., #105 - 08/27/11
    LQ9 Powered, G96.00 6 speed transaxle

Page 17 of 51 FirstFirst ... 7151617181927 ... LastLast

Tags for this Thread

Posting Permissions

  • You may not post new threads
  • You may not post replies
  • You may not post attachments
  • You may not edit your posts
  •  

FFMetal

Visit our community sponsor