
Visit our community sponsor

Thanks:
0

Likes:
0
-
Senior Member

Installing the Doors- a 5 part video
After doing the driver side and laboring through it, I felt that no one should have to go through this as basic as the manual puts it. So, I decided to film myself doing the passenger side to help those souls who are truly terrified (like I was) and get through it without ruining at least one side.
IMPORTANT: BEFORE YOU START DOING ANY WORK ON THE DOORS, YOU MUST MOUNT THE BODY (rear fender, door body sills, strikers etc) AND THE FIREWALL FIRST. ONLY THEN WILL YOU GET A TRUE FIT FOR ALL BODY PARTS INCLUDING THE DOORS.
The video series is by no means perfect and I'm open to criticism and ideas, but again, I'm a hack just trying to help others out. I don't know if I'll go back and redo anything in the video but just post your ideas here and the video can be used at a reference. So, if you're interested, and haven't had the pleasure of installing the doors yet, (or you have and just want a good laugh) check it out. Good luck.
P.S.-Thanks to Rumbles and KGB911 for their excellent detail in their photos and instructions that allow me to get this far. They are much more meticulous and patient than I am so again, take this video with a grain of salt and an ice cold beer.
Erik
33 Machine
Introduction
-
Senior Member
Cutting The Hinge Slots in the Door Sills
-
Senior Member
Cutting the hings slots in the Doors
-
Senior Member
Mounting the Latch and Striker
-
Senior Member
Assembling the Doors and Intermediate Trimming (and getting Closure!)
-
Senior Member
Useful tips:
Here is a little tip I forgot to add into the video. To get a perfect final door gap, get your style lines on the body matched up with the door closed and latched. Then use some 3/16 (or 1/8 depending on how large you want your gaps) masking trim tape for stuff like flames, etc and using the outer jam as a guide, tape around the outside. Once you've got that gap, simply put another line of 1/2" along that strip. Then just remove the 3/16 and you'll have your gap to remove! Here are some pics. (sorry I don't have a pic of the doors on the car as my gaps are already done)
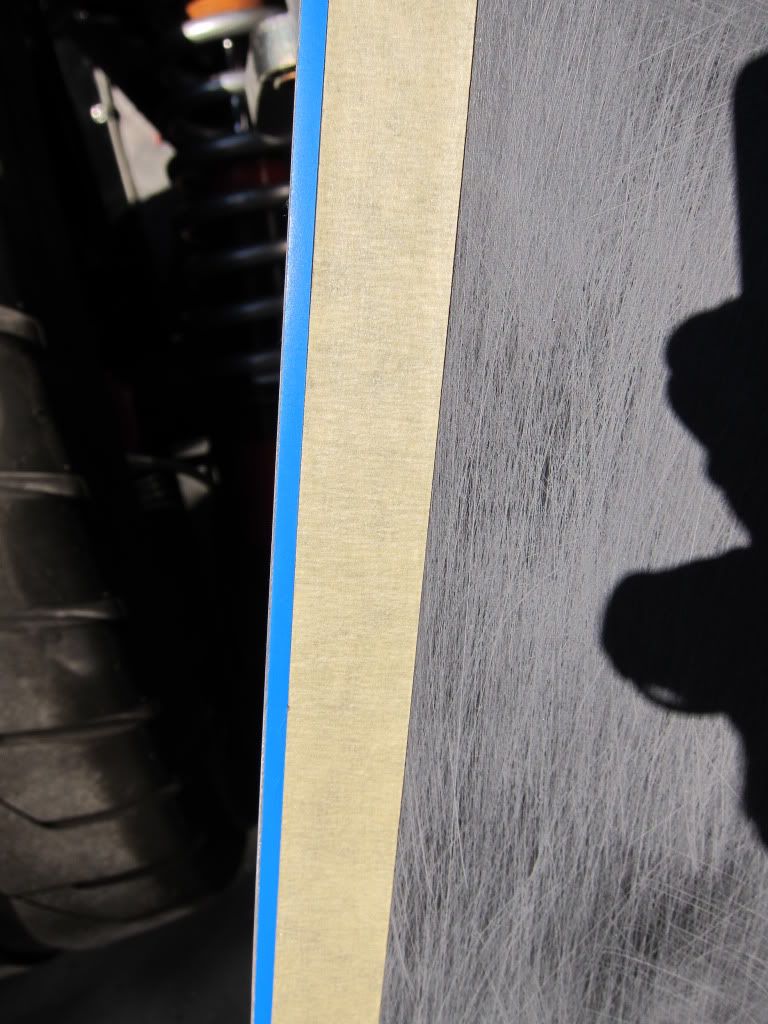
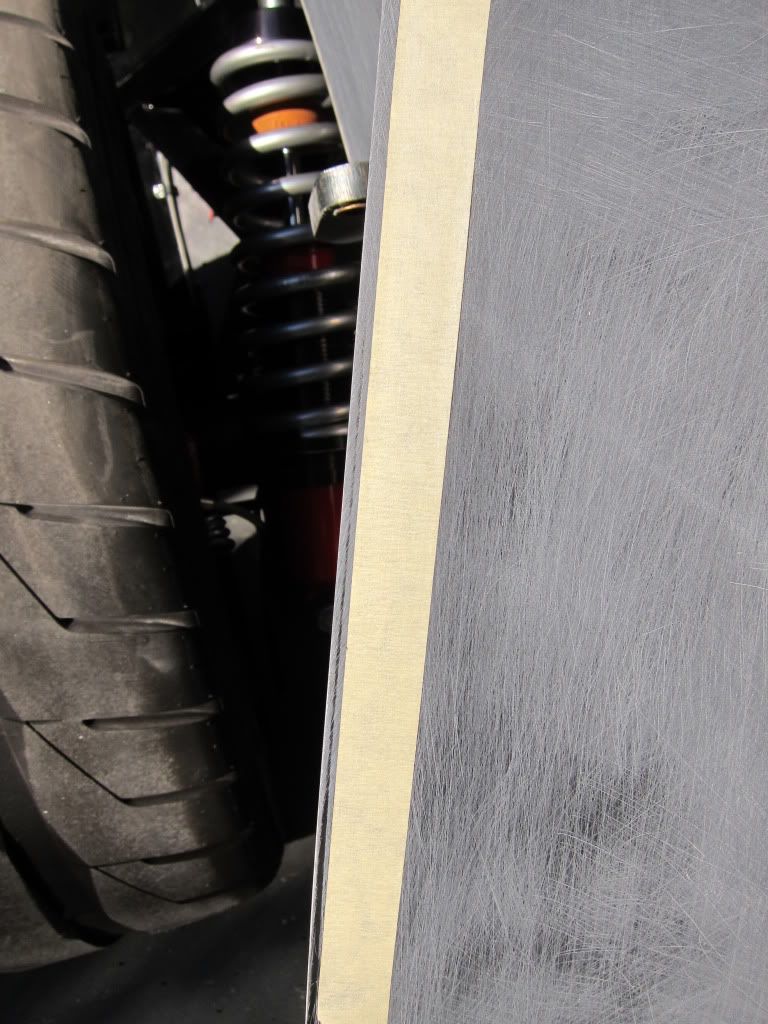
One other tip on anything like this where you may have it on and off a few times for various steps is to drill two index holes through both parts AFTER you are sure of the final alignment. That way if you want to pull the doors for painting, upholstery whatever just pin the two small holes andl save a lot of time in re-assembly.
 Posting Permissions
- You may not post new threads
- You may not post replies
- You may not post attachments
- You may not edit your posts
-
Forum Rules

Visit our community sponsor


 Reply With Quote