Forte's

Visit our community sponsor

Thanks Thanks:  1
Likes Likes:  8
Page 1 of 2 12 LastLast
Results 1 to 40 of 78

Thread: Ehansen007/33 Machine Build page

  1. #1
    Senior Member ehansen007's Avatar
    Join Date
    Mar 2011
    Location
    Aliso Viejo, CA
    Posts
    1,625
    Post Thanks / Like

    Ehansen007/33 Machine Build page

    Hey all,

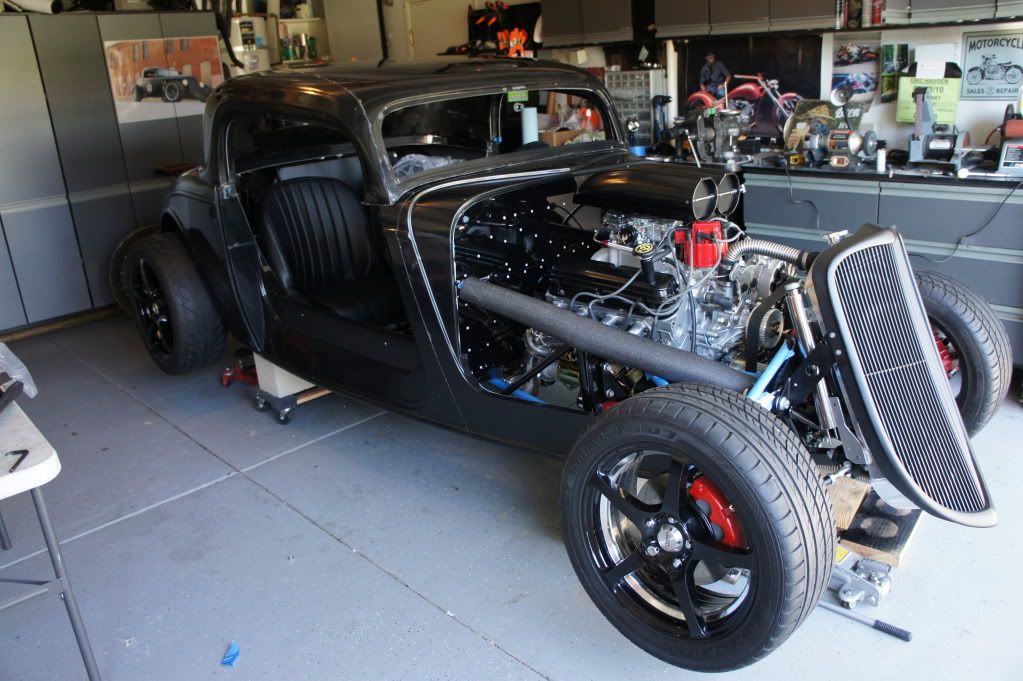
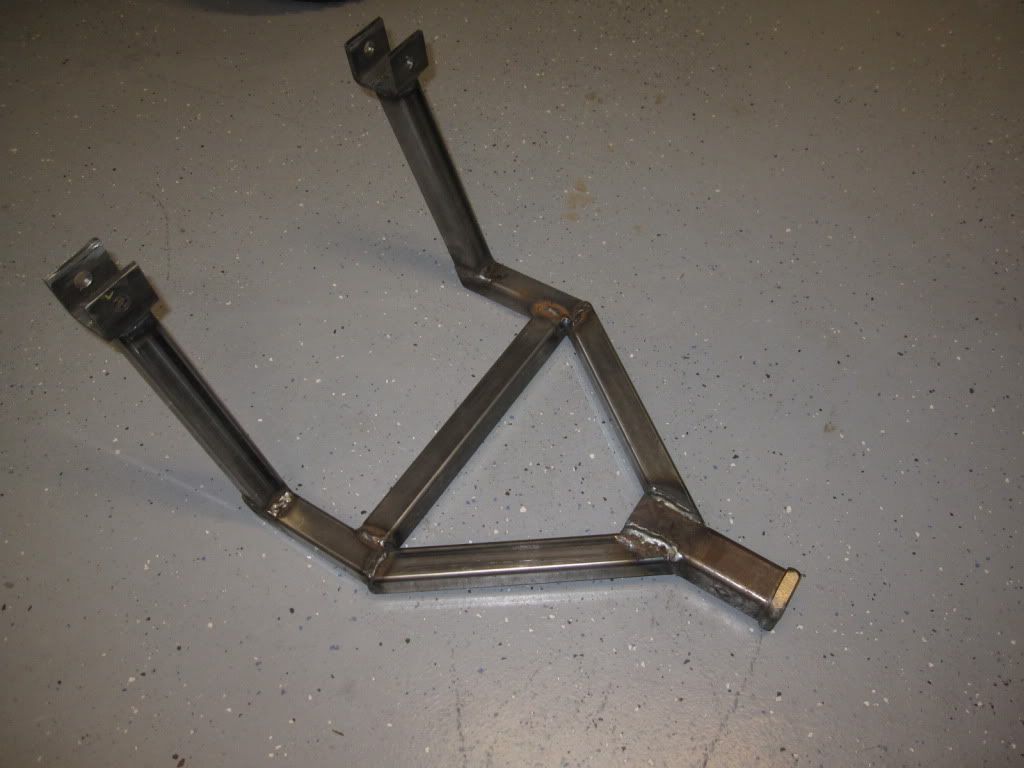
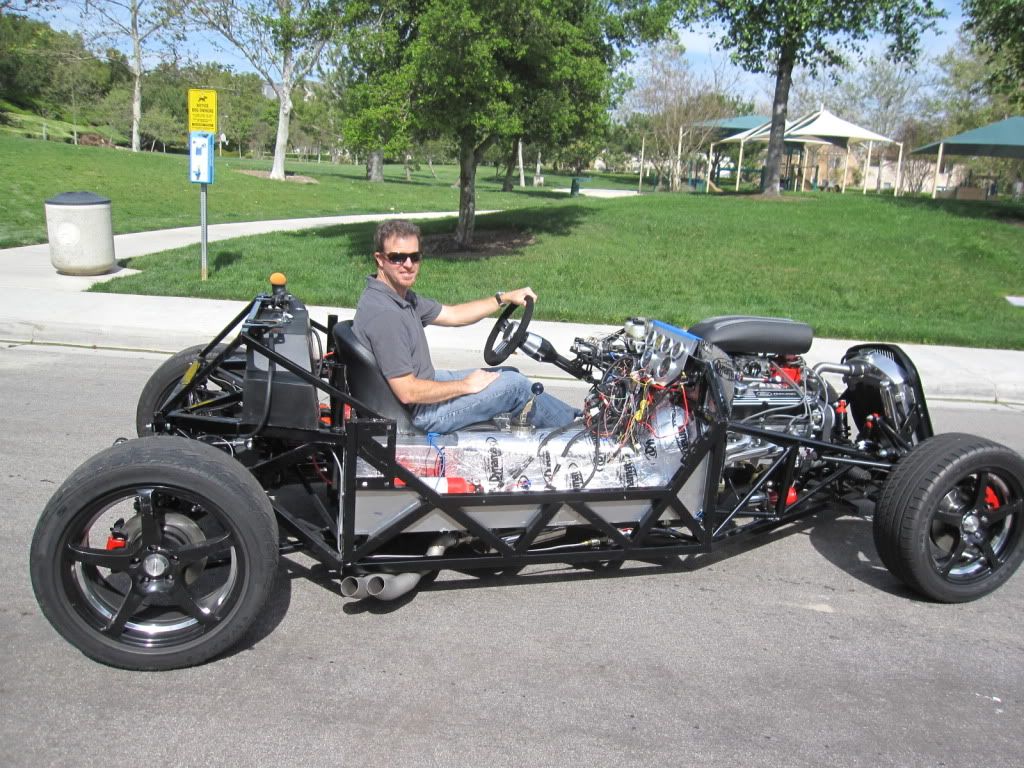
    Finally started my build today. Really excited. Just realized there were more parts than expected to powdercoat. I'm surprised the 3 link setup does not come powdercoated but since it's an option they must not do it with the frame. It took a few minutes to clean them up the welds (they got more balls sticking out than the US Men's Olympic swim team) and I'm off to the PC. Then, back to inventory!

    Here's my photobucket album!

    http://s897.photobucket.com/albums/ac177/ehansen007/

    Also, I got my rear end from a local performance shop called GRC. It was used off a mustang he swapped out for a racing rear end. Umberto over there is swapping out the bearings, converting to disc, changing the oil and even hacking off the dog ears and painting it for an even grand. It's a 2.73.

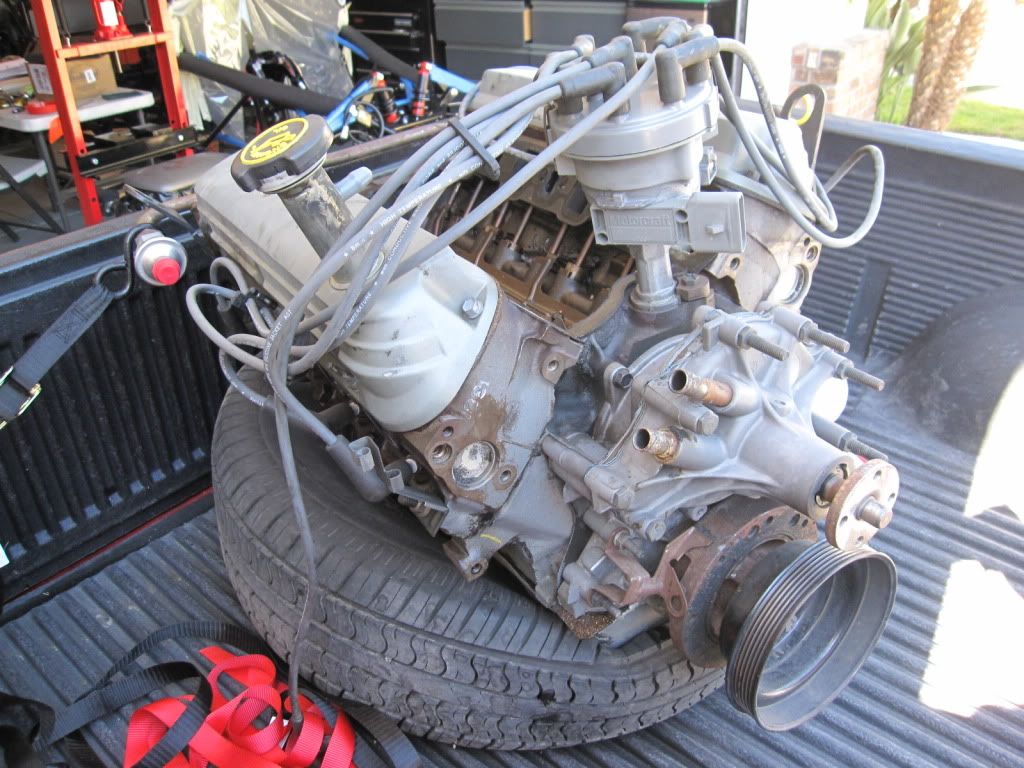
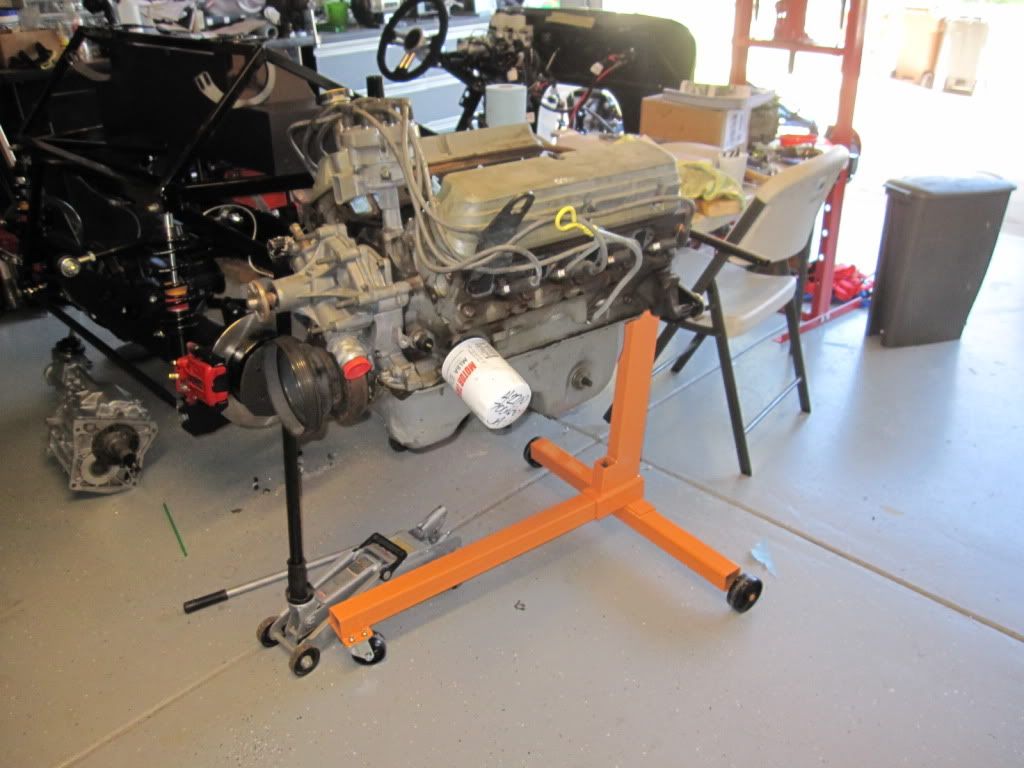
    I'm also considering having him build the motor for me since he can get me a 302 fully rebuilt with some new lifters and nice heads that should make an even 275HP or so to start. It would also come with a 3 year warranty and he's local. We'll see if I can't find something better on Craigslist before I take the plunge on that.

    Take it easy!


    Here's my photobucket album!

  2. #2
    Senior Member ehansen007's Avatar
    Join Date
    Mar 2011
    Location
    Aliso Viejo, CA
    Posts
    1,625
    Post Thanks / Like
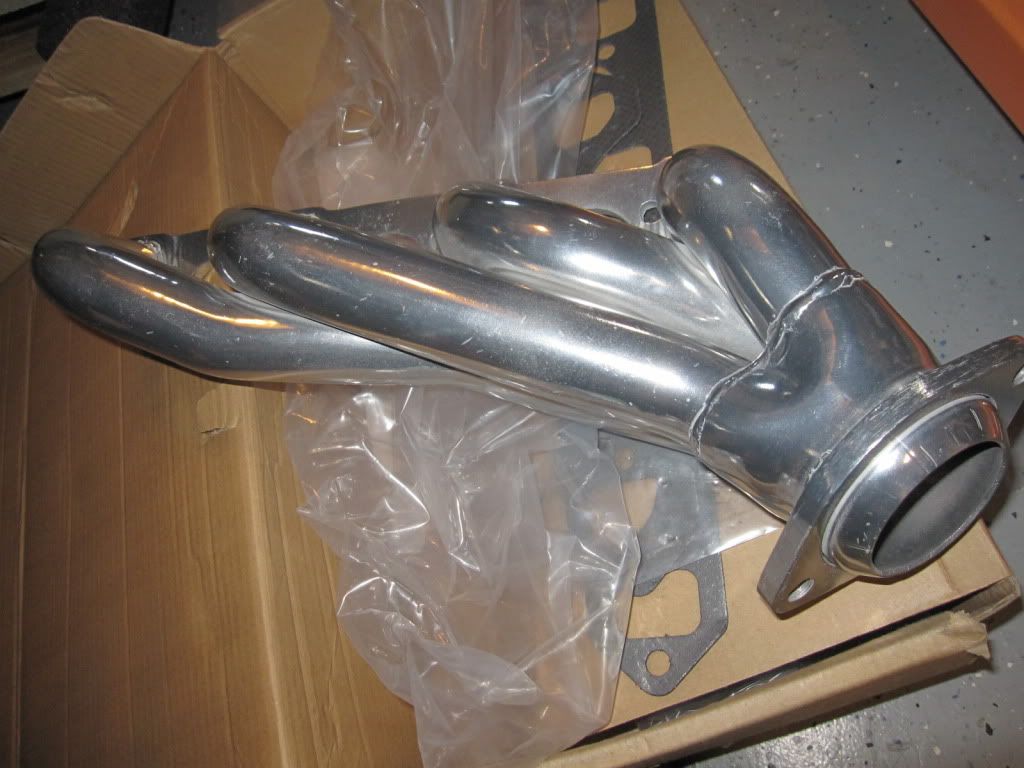
    I also just ordered some ceramic coated shorty headers off Amazon for $160!


  3. #3
    Senior Member ehansen007's Avatar
    Join Date
    Mar 2011
    Location
    Aliso Viejo, CA
    Posts
    1,625
    Post Thanks / Like
    Last weekend I built up the front end, brakes and installed the pedal box. The front end was not without it's little challenges but you just work through them little by little.


    That stud thing in the pedal box it a real PIA. They should just have Wilwood weld it in so you can tighten that low profile nut and leave it.

    It was fun fabricating the resevoir brackets. I agree that this is a personal preference and although the aftermarket ones look nice, I prefer to have them hidden as I'm trying to keep the engine compartment totally clean. If anyone wants a pair, I'll sell them for $25 shipped anywhere in the US. Just let me know. FYI, they will look much better than mine as those were just a prototype.


  4. #4
    Senior Member ehansen007's Avatar
    Join Date
    Mar 2011
    Location
    Aliso Viejo, CA
    Posts
    1,625
    Post Thanks / Like
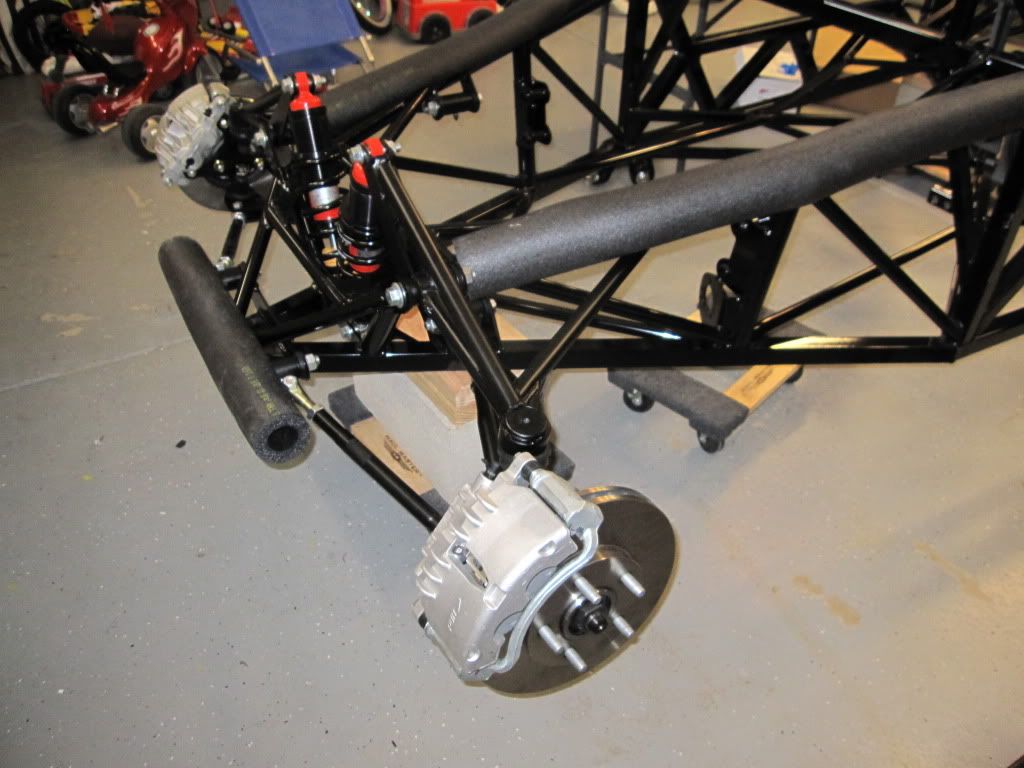
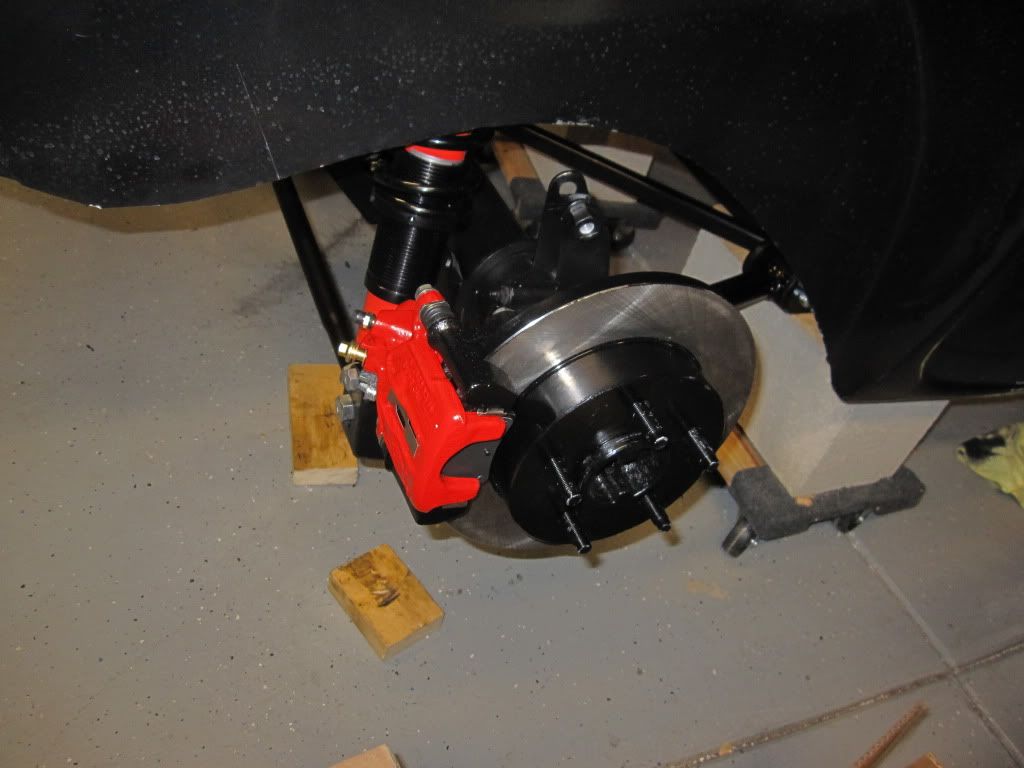
    Here's the "new-er" rear end. All new bearings and seals. I stayed with the 2.73 for now which is low but it was such a good deal, I can always change it later. I'd rather put that $300-500 towards getting the car rolling. Besides the gears look great. I plan on doing one more coat of paint on it as I was looking for a semi gloss to match the rest of the rear end and the car. I've got a new diff cover coming today which has a girdle system in it for $100 on ebay.


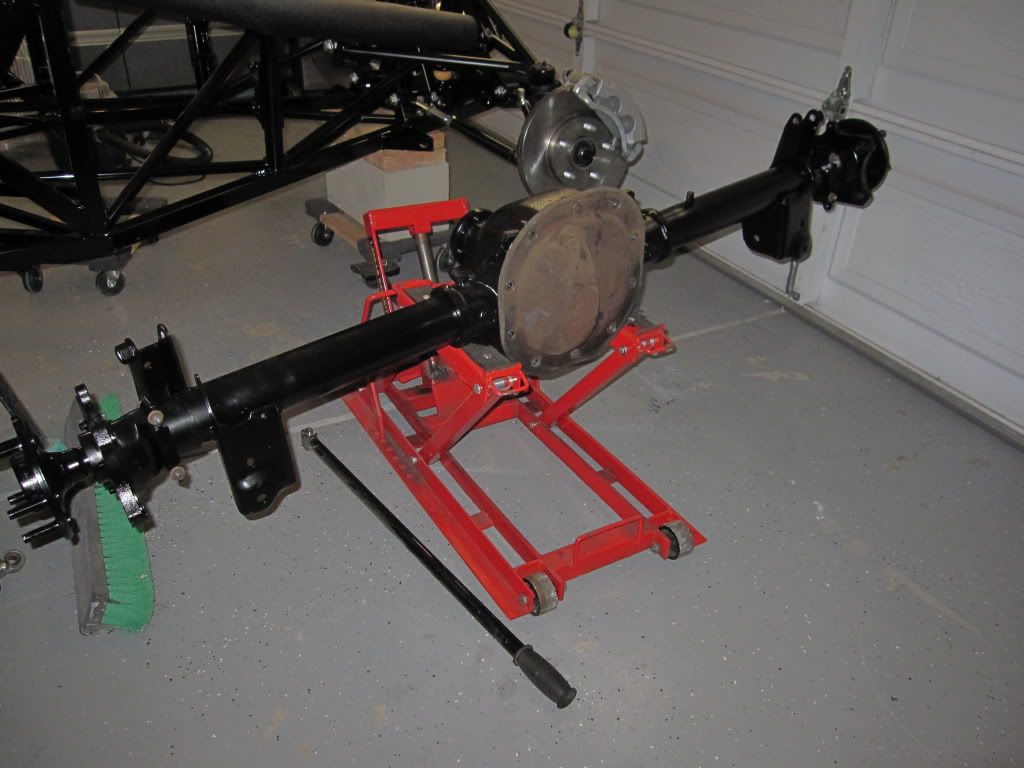
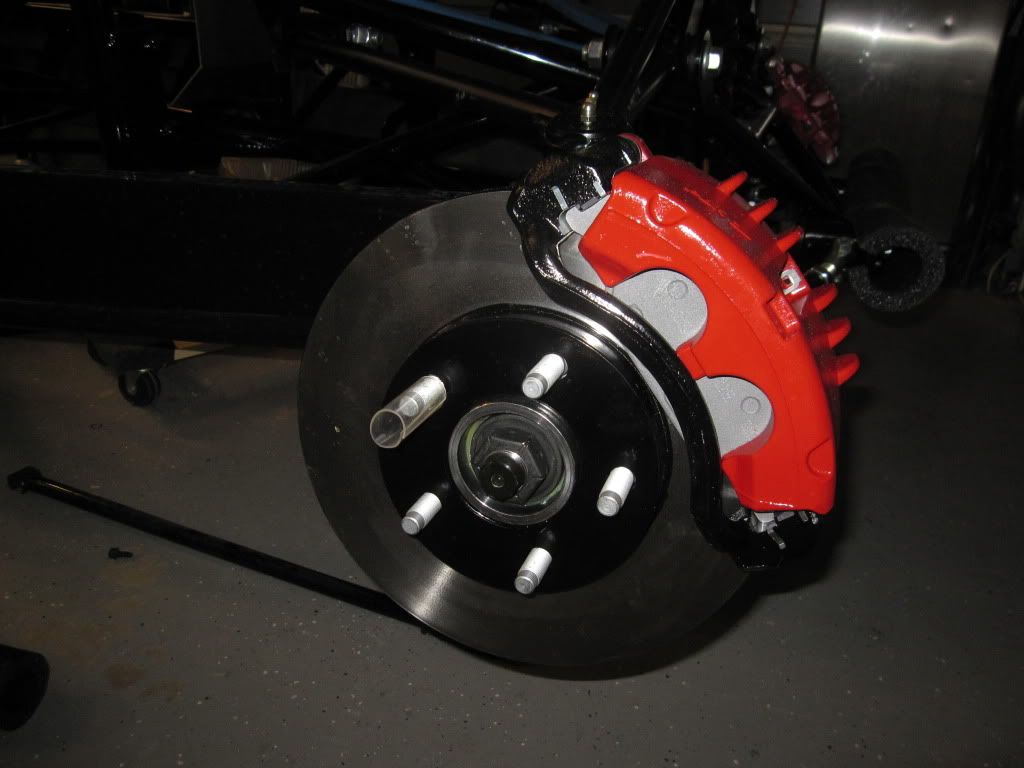
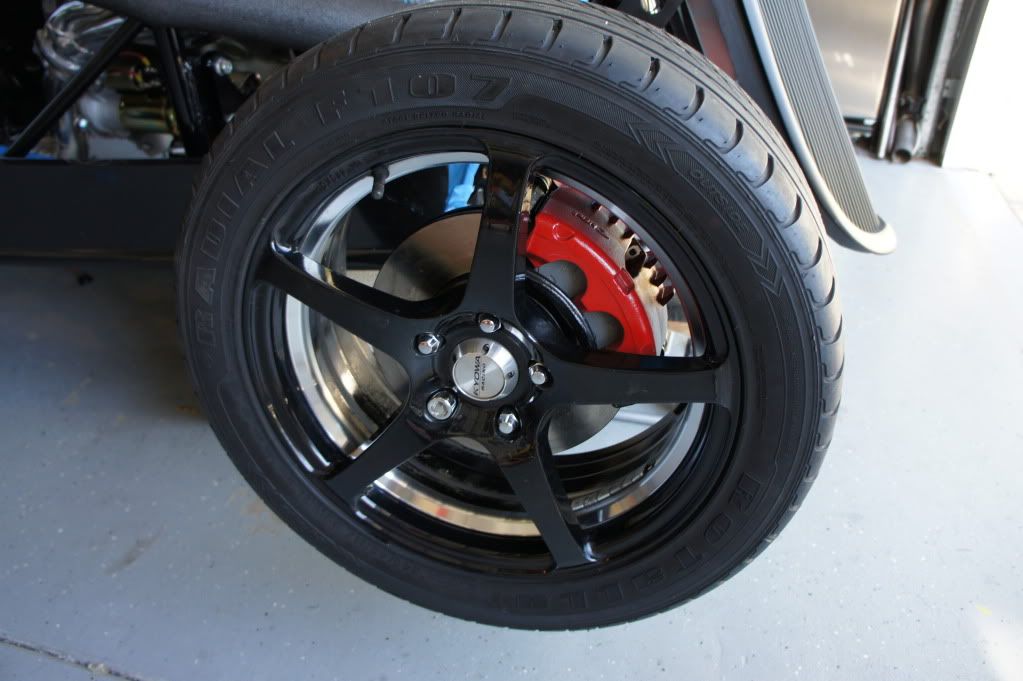
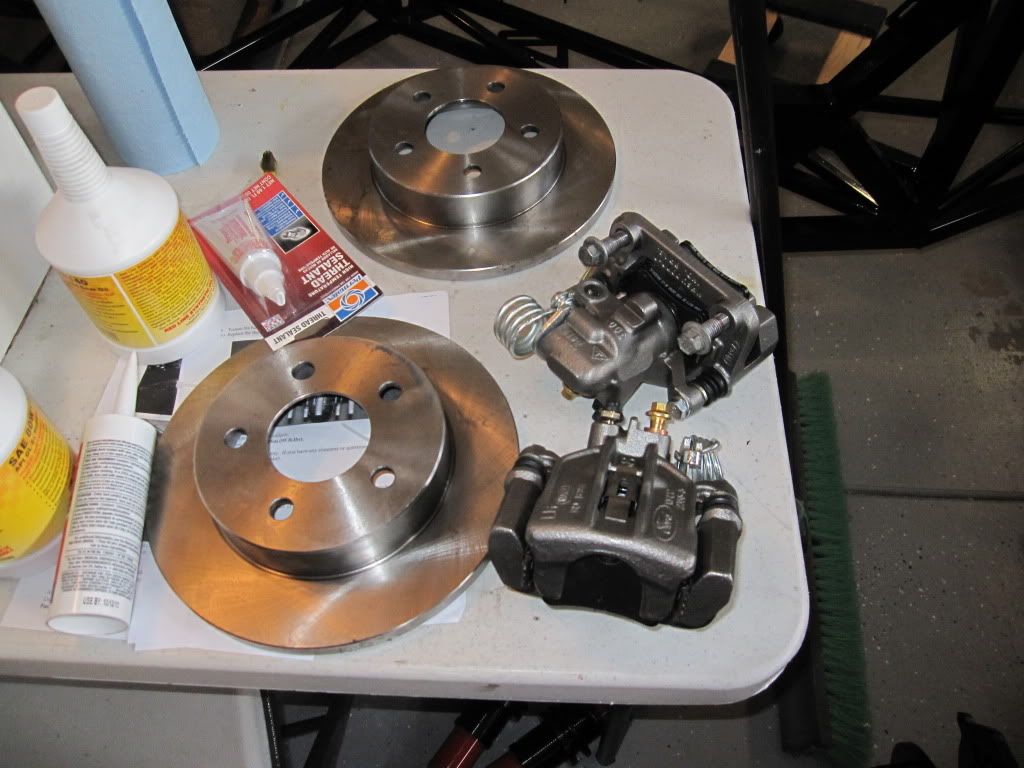
    It also came with the brake kit and the axles. I'm in between painting the calipers or leaving them silver and just painting the brackets. Not sure yet.


  5. #5
    Senior Member ehansen007's Avatar
    Join Date
    Mar 2011
    Location
    Aliso Viejo, CA
    Posts
    1,625
    Post Thanks / Like
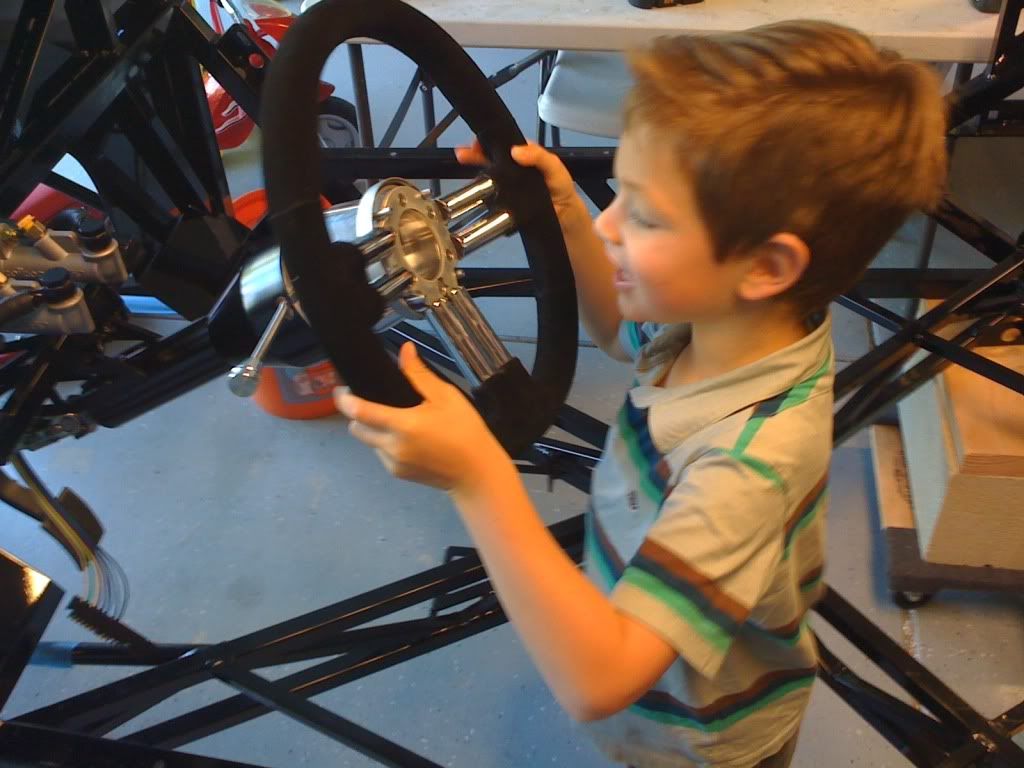
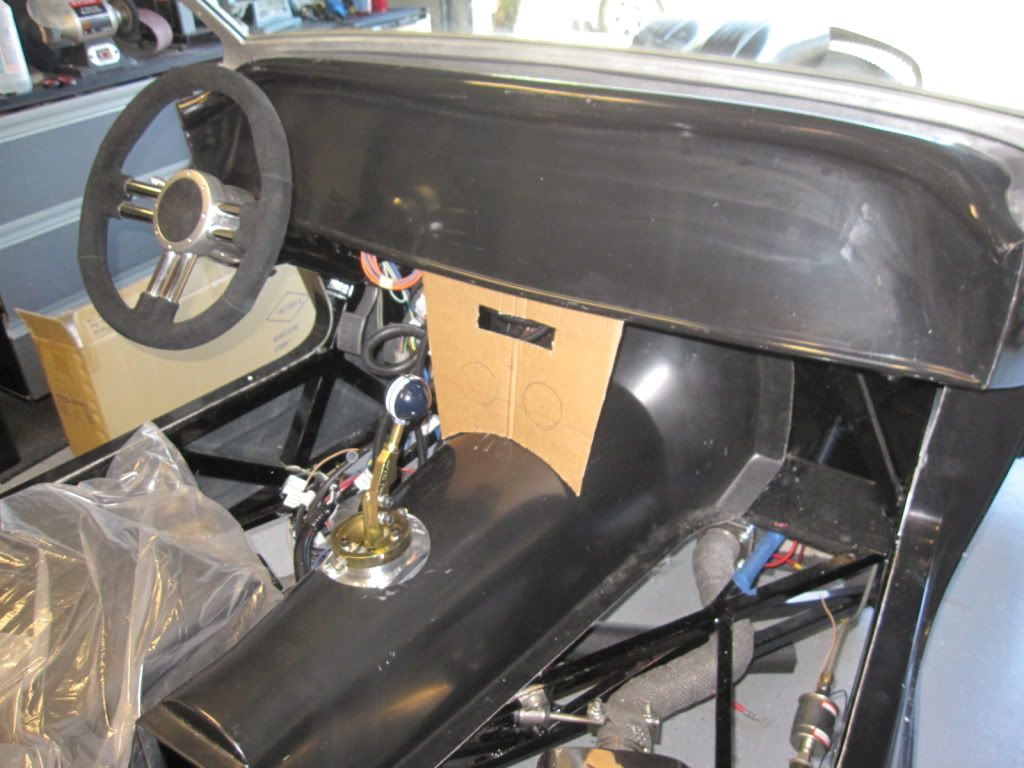
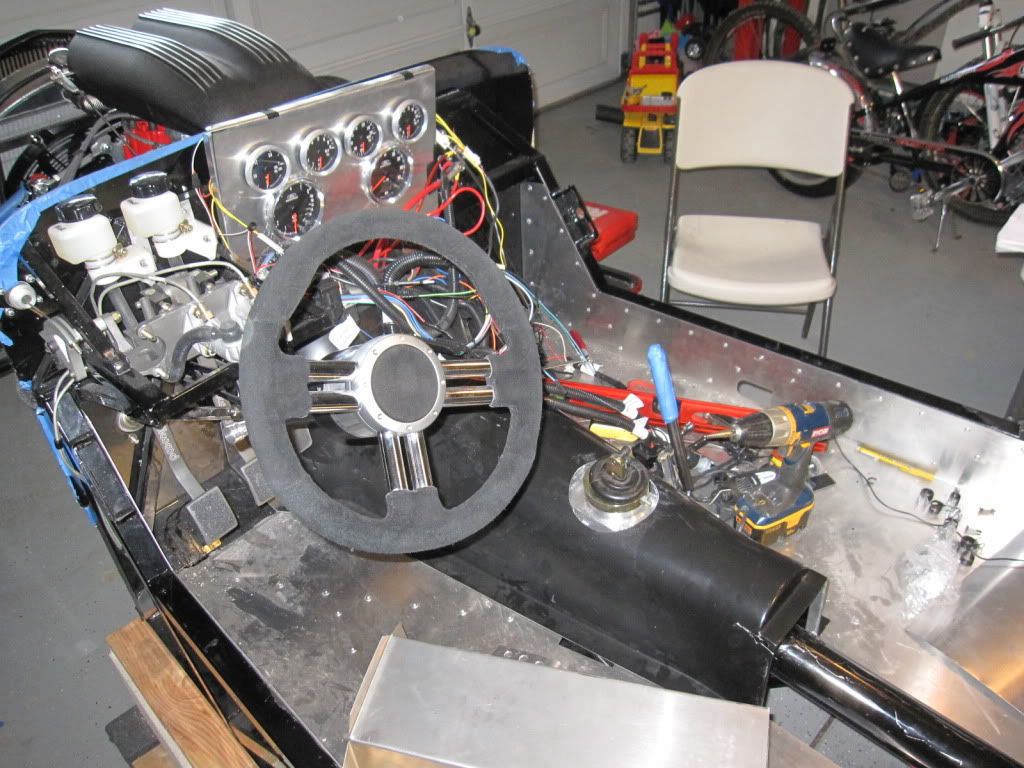
    Got my new steering wheel in and it is nice. I went with suede since I'll be cruising with the top off a lot in the summer and it wont get as hot as leather. Also, there's no better traction than suede with gloves if I'm going to take her to the track! :icon15: Even the horn button is suede! There's a good chance the chicks will probably dig this..... :shifty: I also like that it's a 350mm wheel vs a 320mm which is what most after market wheels are. I'll need that extra diameter to steer those 245s up front with no power steering!


  6. #6
    Senior Member ehansen007's Avatar
    Join Date
    Mar 2011
    Location
    Aliso Viejo, CA
    Posts
    1,625
    Post Thanks / Like
    Having learned from experience, I make sure I paint most areas of the brakes to avoid corrosion and make it easier for brake dust to wash off. I even paint most of the rotor that is not in contact with the pads to avoid rust as well. This is more important than them looking cool but while I was at it, I figured I'd follow the black and red thing FF set up with the springs/shocks.


    I also installed the rear end (which I swapped out the gears as well for a 3.55 ratio). The rear end went in fine with the exception of of the top shock mounts. The manual tells you put the bolts in from the front with the nuts on the rear so you can remove them down the road once the body is on. This is all good but there are at least three pictures showing them installing the bolt from the rear. Come on FFR! :sneaky2: Not only that, but the bolts are ridiculously long and hit the aluminum trunk panels when mocking up. Suspension components should be easy to remove on a racing chassis so having a bolt this long is not useful. I cut these down to get the trunk in. If I remove them again, I'll put in new bolts. Also, the instructions on the panhard bar are a bit off. Make sure to slide the left side eye rod into it's bracket before mounting the right side in it's bracket. Otherwise you'll never get it in!


  7. #7
    Senior Member ehansen007's Avatar
    Join Date
    Mar 2011
    Location
    Aliso Viejo, CA
    Posts
    1,625
    Post Thanks / Like
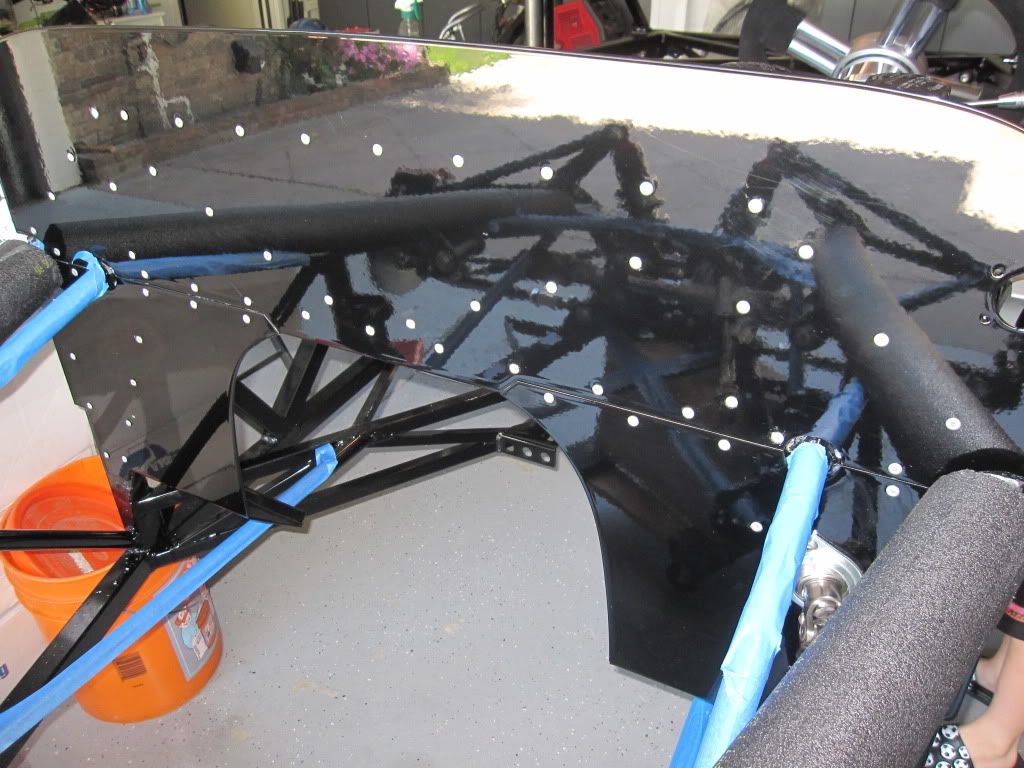
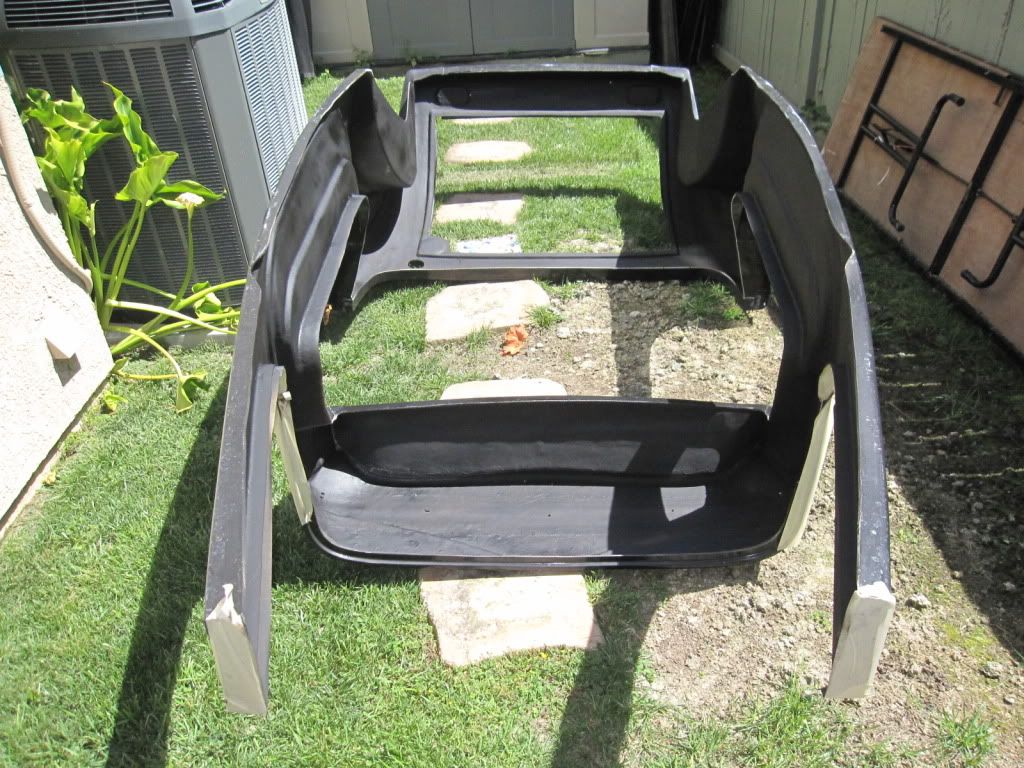
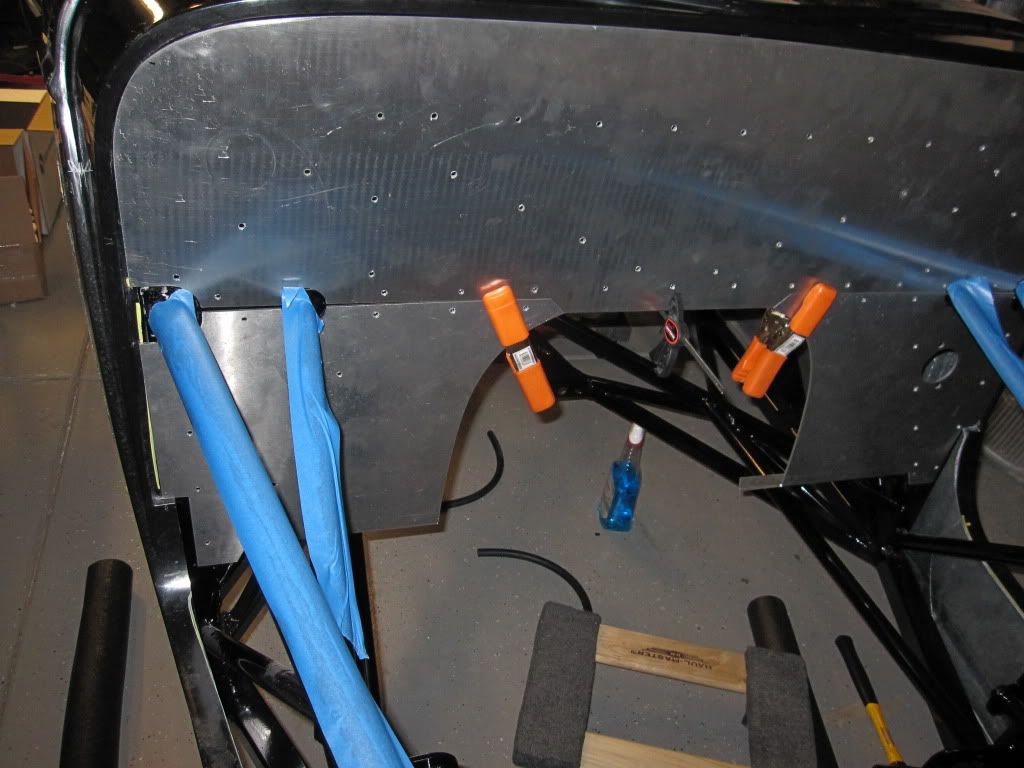
    This one is easy compared to the other stuff....that is...if you have a nice little bench-belt sander handy. I had to trim the laser cut edges at multiple joints to get around the welds in the frame in the foot box area and the far outsides of the firewall where it meets the body. I had to take them off about 6 times on the lowers to get it right. Then, I used my large bench sander to take off at least 1/8" off the top of the firewall like most of you hear only mine was on the passenger side?


  8. #8
    Senior Member ehansen007's Avatar
    Join Date
    Mar 2011
    Location
    Aliso Viejo, CA
    Posts
    1,625
    Post Thanks / Like
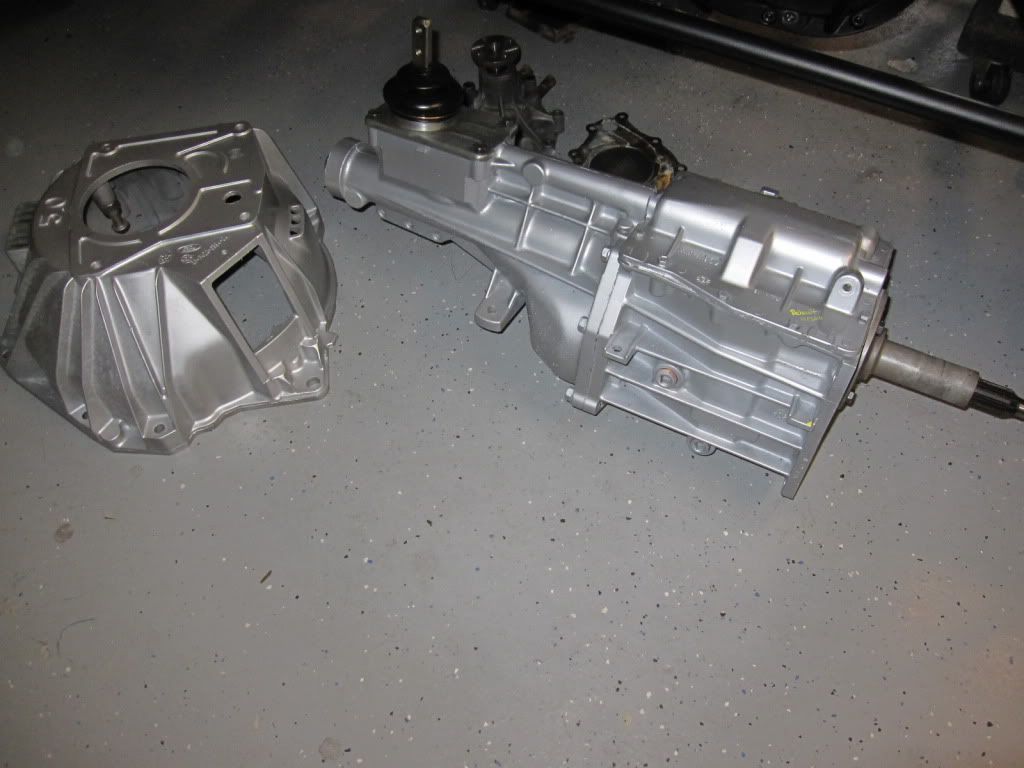
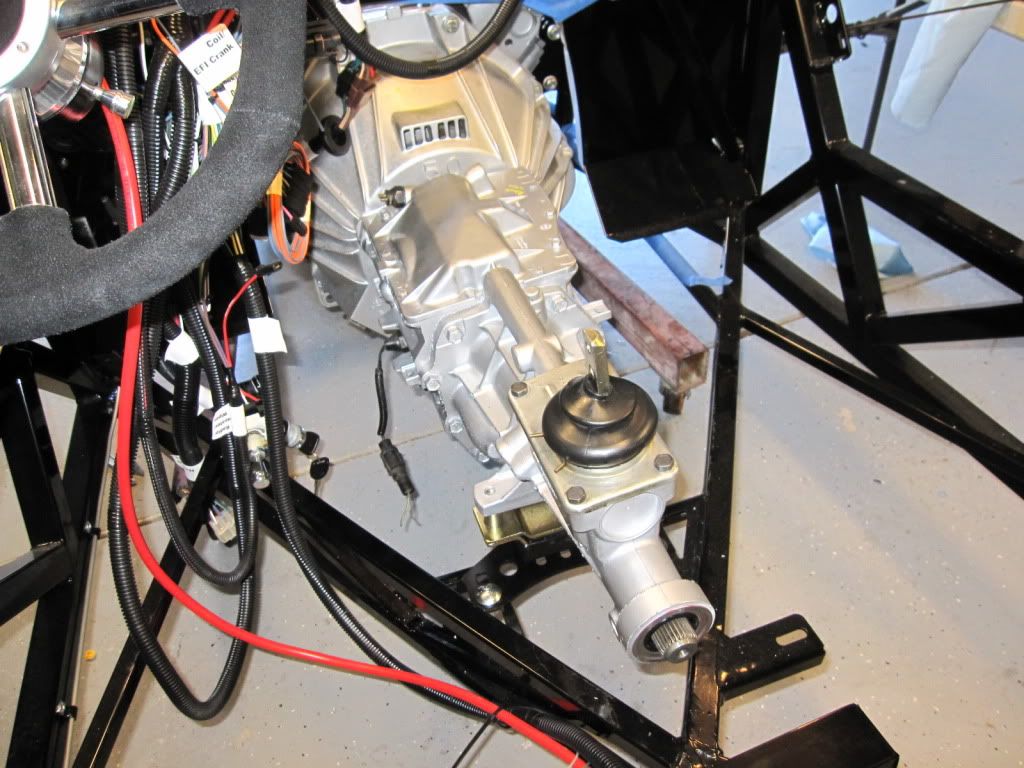
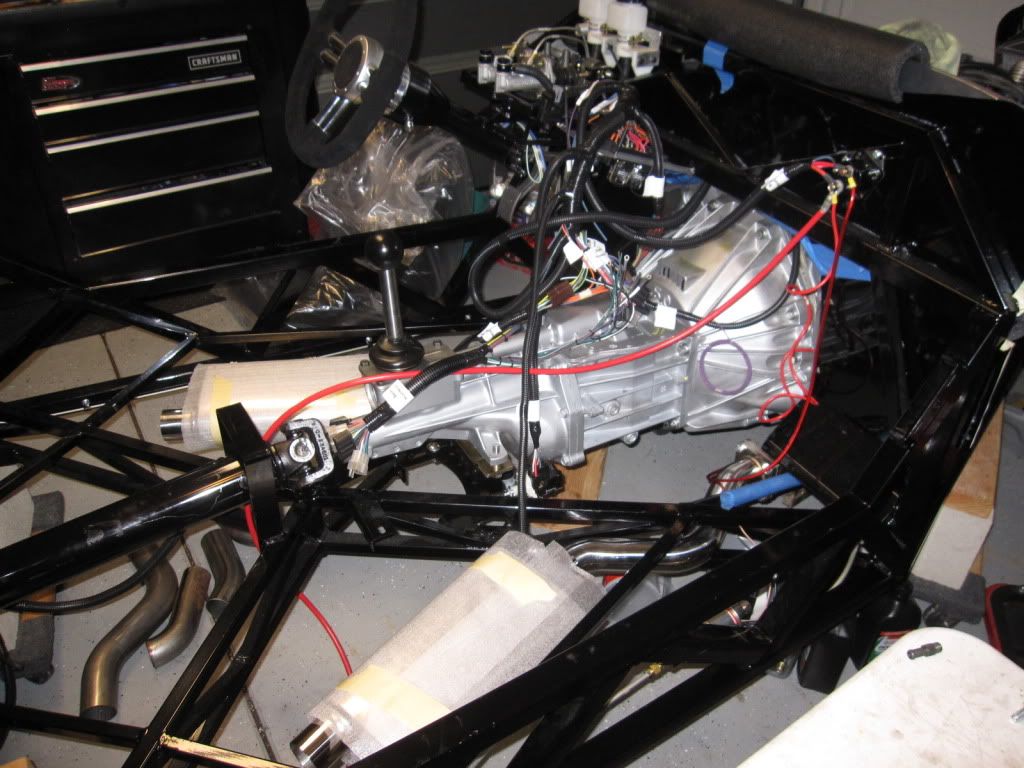
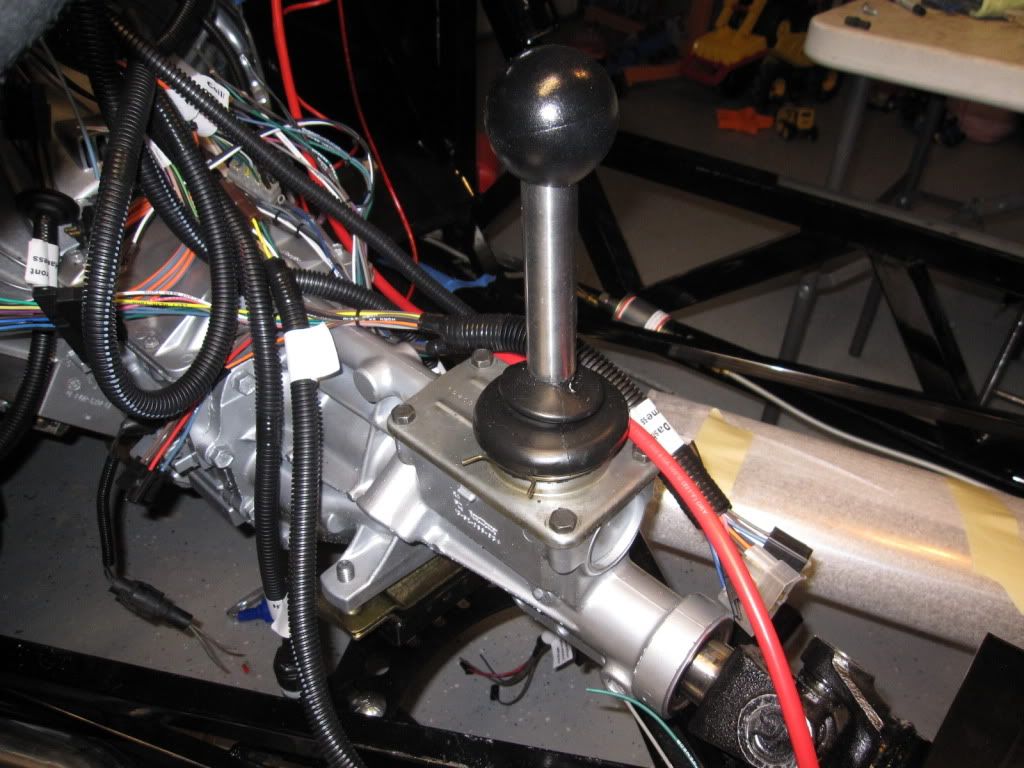
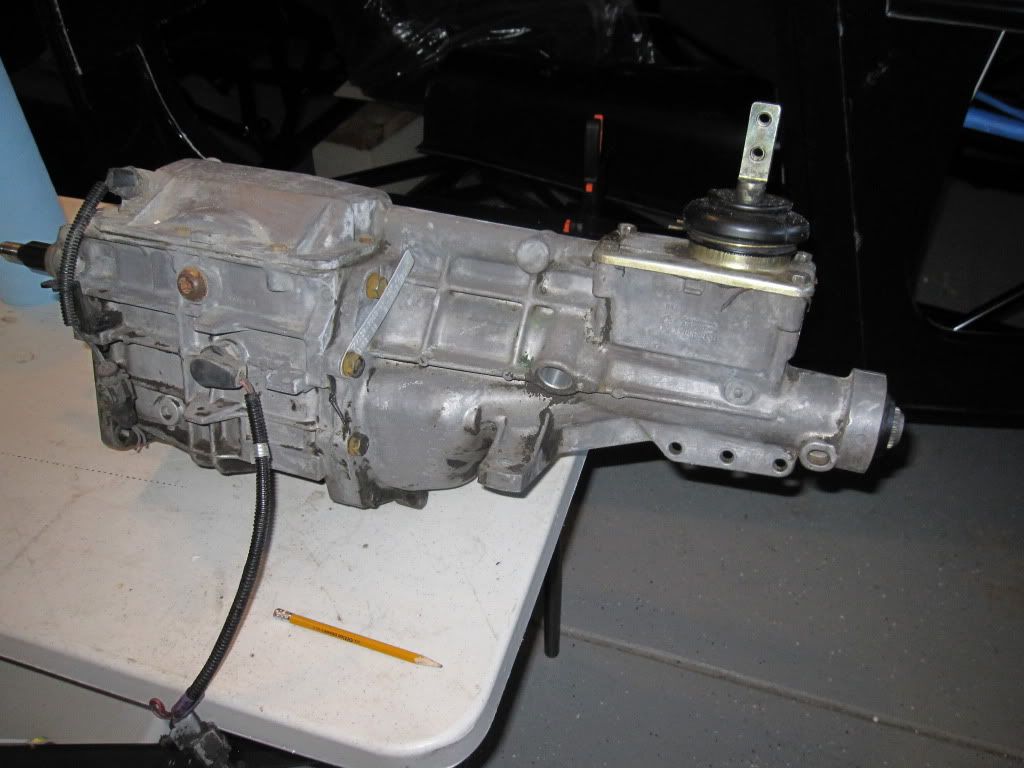
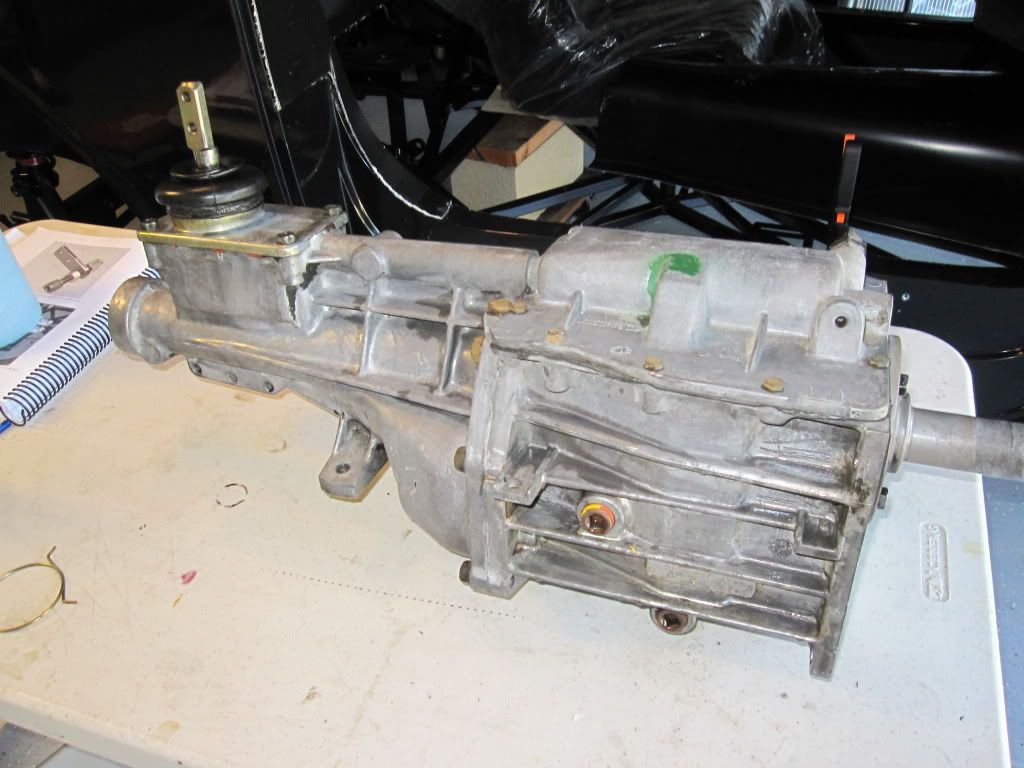
    Picked up a T5 in good shape for $200. Brought her back and gave her a quick flea bath and she's as good as new! On the outside that is. I plan on opening her up to see how she looks on the inside. It's out of a wreck so at least I know there was nothing wrong with it when it came out. The guy said it has 90K miles.


  9. #9
    Senior Member ehansen007's Avatar
    Join Date
    Mar 2011
    Location
    Aliso Viejo, CA
    Posts
    1,625
    Post Thanks / Like
    I'm doing a combo of gloss and flat black throughout so I did the Firewall in gloss PC. It's very reflective!


    I also put in the steering column and my son helped with the wheel. I do have a horn button on this new wheel but I'm unsure has to how to hook it up. I connected the spring loaded wire into the wheel but I know I have to probably ground the black wire coming out of the column to make it work?


    Factory five shipped only one steering coupling so I installed it into the firewall. Still waiting for the lower one. I had to shorten this steering rod to get it fit. Did anyone else have to shorten theirs? I took like 1" off.


  10. #10
    Senior Member ehansen007's Avatar
    Join Date
    Mar 2011
    Location
    Aliso Viejo, CA
    Posts
    1,625
    Post Thanks / Like
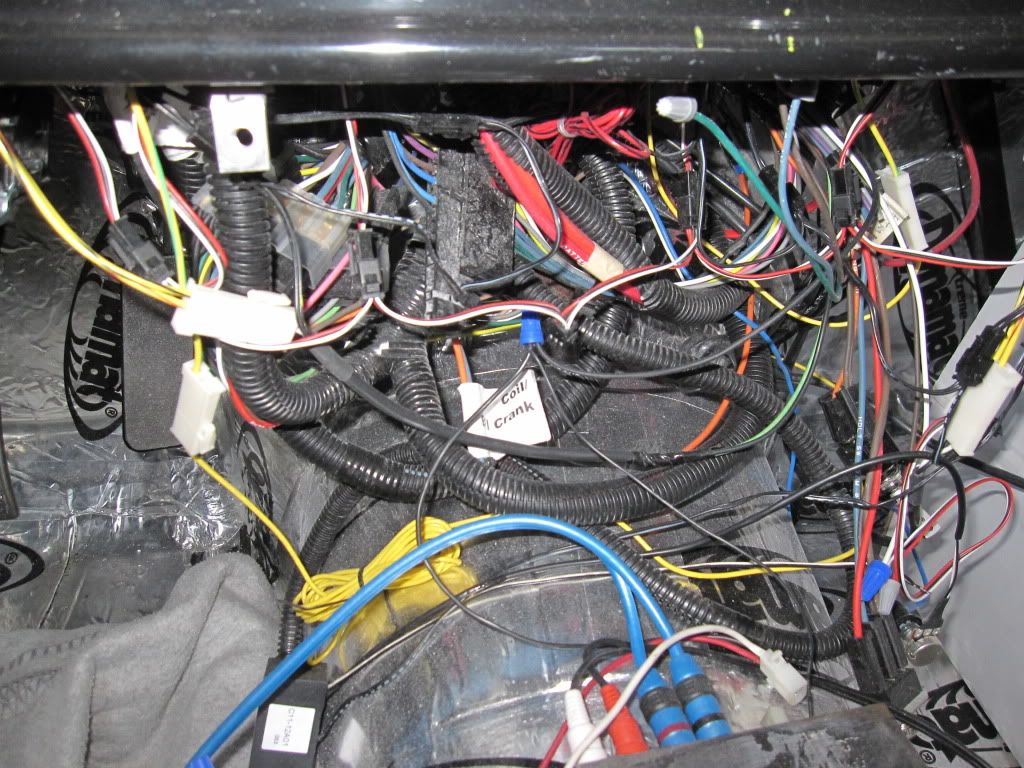
    Factory Five/Russ Francis does a nice job of making this plug and play although it's a lot of wire. The instructions are a bit fuzzy but they do the trick.


  11. #11
    Senior Member ehansen007's Avatar
    Join Date
    Mar 2011
    Location
    Aliso Viejo, CA
    Posts
    1,625
    Post Thanks / Like
    Picked up this little pearl from a wrecking yard for $500. It's a 90 Lincoln Mark whatever and it's got 109K on it. These engines are kind of hard to find right now and most are pretty rusted and beat up. This one was immaculate compared to the others and it started right up and ran great. It sounds like the drunk who crashed her kept it in very good shape. Anywho, I'm now wondering what to do with it. I plan on getting all the essentials first like stand rotation water pump, belt system, manifold, carb, and maybe a dress up kit for the valve covers and air cleaner. Nothing too elaborate. The goal is to get her in the car and running without tearing her completely down. She runs fine and if I put some nice heads or cam in and she goes I'll tear her down then.

    Any suggestions? What would you do? :001_smile: I do have one question. Is that yellowing at the end cooling ports typical of anything or is it normal? Seems like it would just be coolant and errosion.


  12. #12
    Senior Member ehansen007's Avatar
    Join Date
    Mar 2011
    Location
    Aliso Viejo, CA
    Posts
    1,625
    Post Thanks / Like


  13. #13
    Senior Member ehansen007's Avatar
    Join Date
    Mar 2011
    Location
    Aliso Viejo, CA
    Posts
    1,625
    Post Thanks / Like
    This was a fun project cleaning this up. Luckily it wasn't too bad but I have gone through a lot of prep and paint to get it here. I still dont' have the manifold, carb, pulley setup, starter, etc but hey, I'm putting her in the car so I can start building again!

    What a difference 5 days makes.


    Headers from CR performance.


    Tranny is rebuilt using a Hanlon kit and their DVD. Man I hope it works!


  14. #14
    Senior Member ehansen007's Avatar
    Join Date
    Mar 2011
    Location
    Aliso Viejo, CA
    Posts
    1,625
    Post Thanks / Like
    The whole thing went in like butter. It was a bit tight and I can't imagine the 4.6 guys putting in the motor! The most helpful element of the whole install was having the floor jack under the tranny and rolling the whole thing back into place. I had to flip the tranny bracket around to get it to work compared to the manual.


    Even my little guy got in on the action. Three generations building one car. He loves it.


  15. #15
    Senior Member ehansen007's Avatar
    Join Date
    Mar 2011
    Location
    Aliso Viejo, CA
    Posts
    1,625
    Post Thanks / Like
    Been working hard getting the engine together. I ordered a Holley Street Avenger 570 refurb off ebay for a good price. I also got a spacer so it sits up a bit and pushes the air scoop through the hood. not sure if I will have to rejet it with the increased plenum volume so we'll check the plugs and see. I've mocked up a small alternator bracket and my buddy is machining it so I'm anxious to get it back. I'm also waiting on a Gilmer belt drive setup for xmas and an HEI distributor to finish her off. Yesterday was a fun day where I got my Shotgun air scoop and that thing is huge but I do like it. I think it will look good just peaking out of the hood a bit. It's amazing how cheap they've gotten on ebay so I figured I'd try it out.


  16. #16
    Senior Member ehansen007's Avatar
    Join Date
    Mar 2011
    Location
    Aliso Viejo, CA
    Posts
    1,625
    Post Thanks / Like
    I'm also almost done with the fuel system. I decided on an airtex inline pump which should work well and I like the fact that I can mount where it's invisible. I also put in the Oooo-gahhh! horn and I'll probably paint the cone black to hide it.


  17. #17
    Senior Member ehansen007's Avatar
    Join Date
    Mar 2011
    Location
    Aliso Viejo, CA
    Posts
    1,625
    Post Thanks / Like
    I also ran into a bit of a snag yesterday when actuating the clutch. I noticed that the angle of the cable was whacked out and it was wearing on the plastic sleeve. I knew I had the right Clutch Fork so it turned out I have the wrong bell housing. Apparently they made it different from 94-95 and it won't work. Nice. So I've located another one on Craiglist so hopefully I can get that one. They are hard to find. I just can't believe I hot tanked it, bead blasted it and painted it and now I'll be selling it! :sneaky2:Check out my Jokers Wild shifter made from a stainless pipe and a racketball! Just for fun.


  18. #18
    Senior Member ehansen007's Avatar
    Join Date
    Mar 2011
    Location
    Aliso Viejo, CA
    Posts
    1,625
    Post Thanks / Like
    I got a new HEI distributor, Pro 5.0 shifter, and a gilmer belt drive pulley system. I'm not sure if the Gilmer is going to work out or not. I may have to find a way to shorten the crank pulley up. I also painted my shotgun scoop and mounted it. I put together a linkage for the flaps using some old RC car parts!


  19. #19
    Senior Member ehansen007's Avatar
    Join Date
    Mar 2011
    Location
    Aliso Viejo, CA
    Posts
    1,625
    Post Thanks / Like
    Well, after a lot of researching, it turns out all I needed was the Pro Comp fluid Harmonic Balancer to solve the problem. I recessed it just enough to get it behind the steering rack and still be able to get the belt on. I got the whole thing set up with some temporary spacers and it should be very close to production.


    Then there was that unfinished bracket for the Alternator......

  20. #20
    Senior Member ehansen007's Avatar
    Join Date
    Mar 2011
    Location
    Aliso Viejo, CA
    Posts
    1,625
    Post Thanks / Like
    Well, I did have some extra time on my hands to day since I had the day off so I went to work on the Alternator bracket. My custom bike days must have been coming back into my head today as I got started. I wanted to keep the "X" patter so it would look balanced so here we go. (sorry if some are sideways, photobucket is having a tough day.


  21. #21
    Senior Member ehansen007's Avatar
    Join Date
    Mar 2011
    Location
    Aliso Viejo, CA
    Posts
    1,625
    Post Thanks / Like
    Picked these temp wheels and tires up from Craiglist last night for $200! Apparently they were taken off an Altima which is funny since the are 17s in front and 18s in the back! The front tires are good but the back ones are shot but that's okay, I'll use them for some burnouts once I get her running. Seeing all the black makes me want to go with Silver wheels but I'm still not sure. I change my mind on wheels almost daily (I'm sure none of you do). It's great to get her on the ground though. Helps me make some decisions on certain things like exhaust etc. Man, these cars look so mean! I love it!


  22. #22
    Senior Member ehansen007's Avatar
    Join Date
    Mar 2011
    Location
    Aliso Viejo, CA
    Posts
    1,625
    Post Thanks / Like
    Been a while since I posted up some progress. Lately, I've been working on building my exhaust tips, a trailer hitch with a bumper, and acquiring all my stereo gear. I also got my new custom gauges from Speedhut.

    Now I just need to get some wiring done and get her started! Getting close!


  23. #23
    Senior Member ehansen007's Avatar
    Join Date
    Mar 2011
    Location
    Aliso Viejo, CA
    Posts
    1,625
    Post Thanks / Like
    Here is the bumper I just put together. It should give me some protection and it covers the hitch and gives me a license plate mount! It will also be an option if I sell any.


  24. #24
    Senior Member ehansen007's Avatar
    Join Date
    Mar 2011
    Location
    Aliso Viejo, CA
    Posts
    1,625
    Post Thanks / Like
    These are the exhaust tips or "Zoomies" as some call them. I had these powdercoated in titanium.


  25. #25
    Senior Member ehansen007's Avatar
    Join Date
    Mar 2011
    Location
    Aliso Viejo, CA
    Posts
    1,625
    Post Thanks / Like


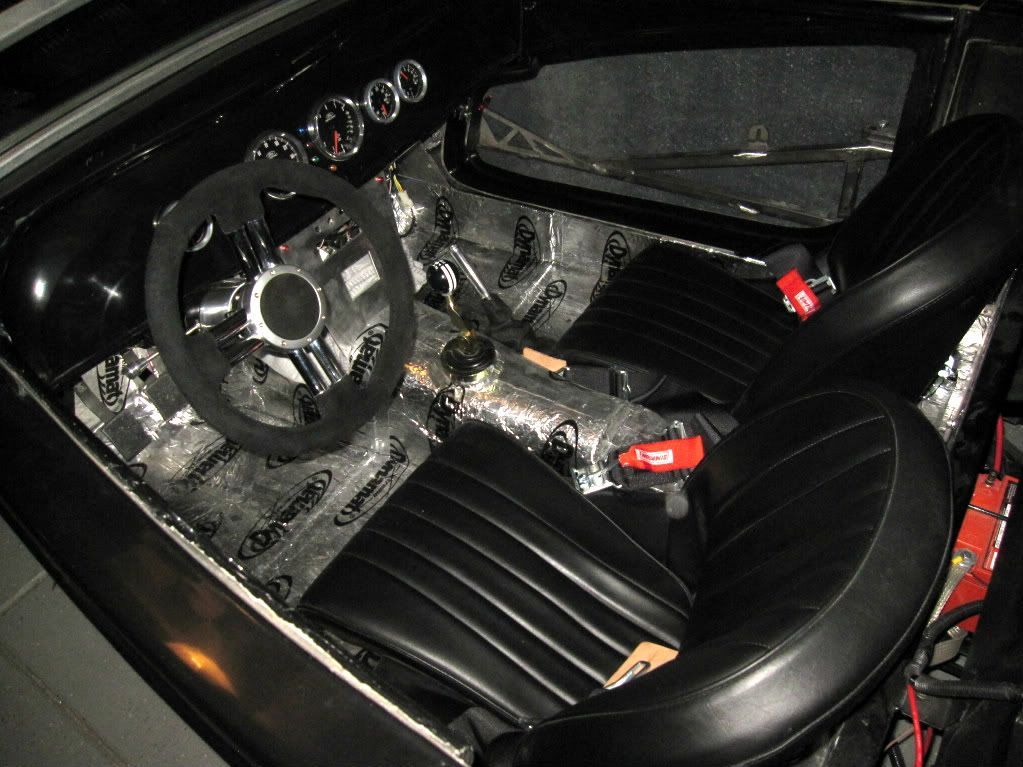
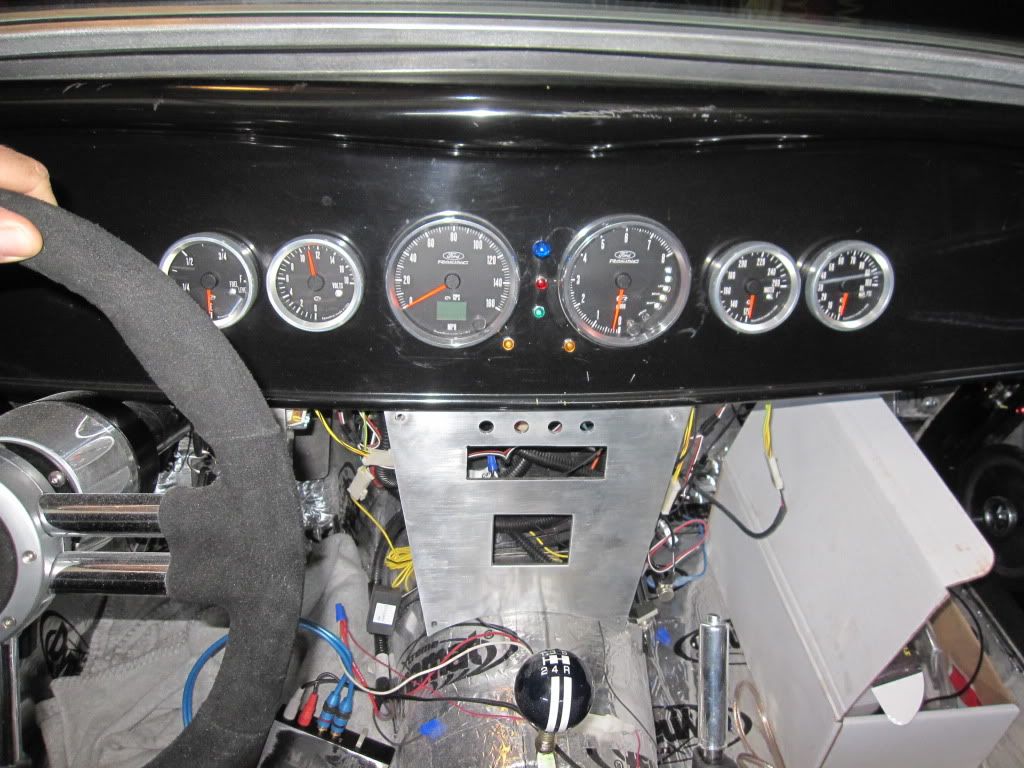
    Basic center console. I'm going to do the gauges from the center out and do an EQ and a back-up camera in the console.


  26. #26
    Senior Member ehansen007's Avatar
    Join Date
    Mar 2011
    Location
    Aliso Viejo, CA
    Posts
    1,625
    Post Thanks / Like
    Okay, here we are at the 6 month stage. In the last few weeks, I've finished up my trailer hitch and bumper (and sold a couple to happy customers), and, while at the powder coaters, had them do my shotgun scoop in wrinkle black to match my new Ford Racing Valve covers. I think it gives it a nice rough look and I sanded down the fins to match. I also picked up a one wire alternator as no one could advise on how to wire the one that came with my lincoln motor. It does need an external regulator which I wasn't going to set up so I spent the hundo and got a black one from summit. I now realize it sticks out like a sore thumb but oh well!


  27. #27
    Senior Member ehansen007's Avatar
    Join Date
    Mar 2011
    Location
    Aliso Viejo, CA
    Posts
    1,625
    Post Thanks / Like
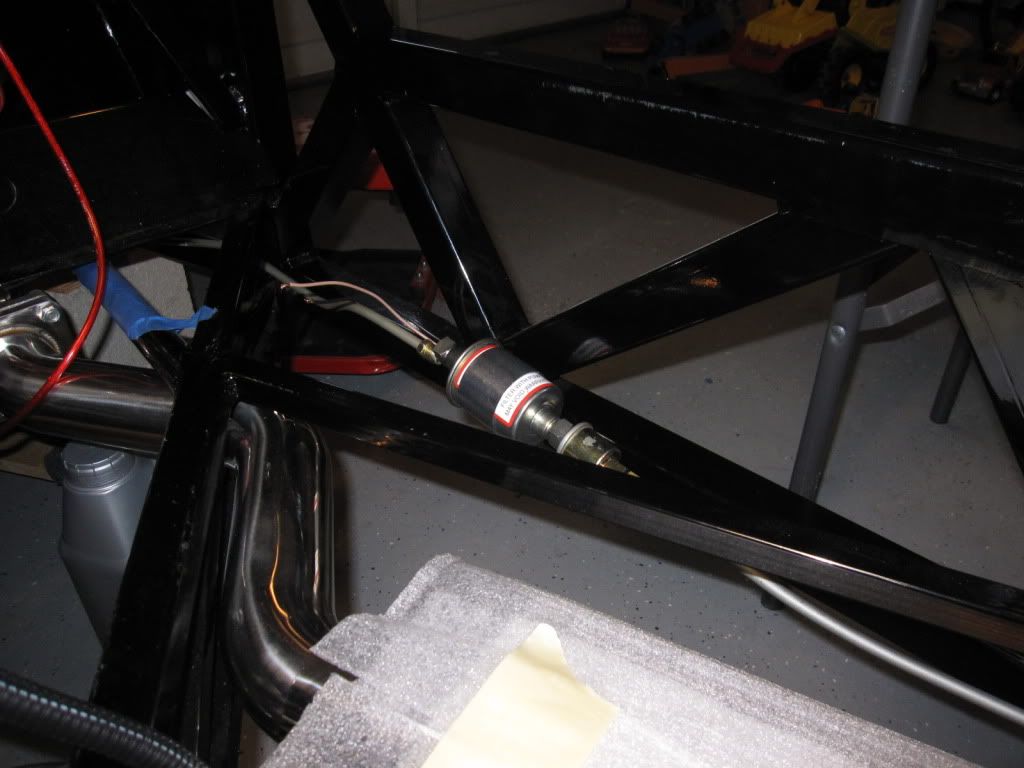
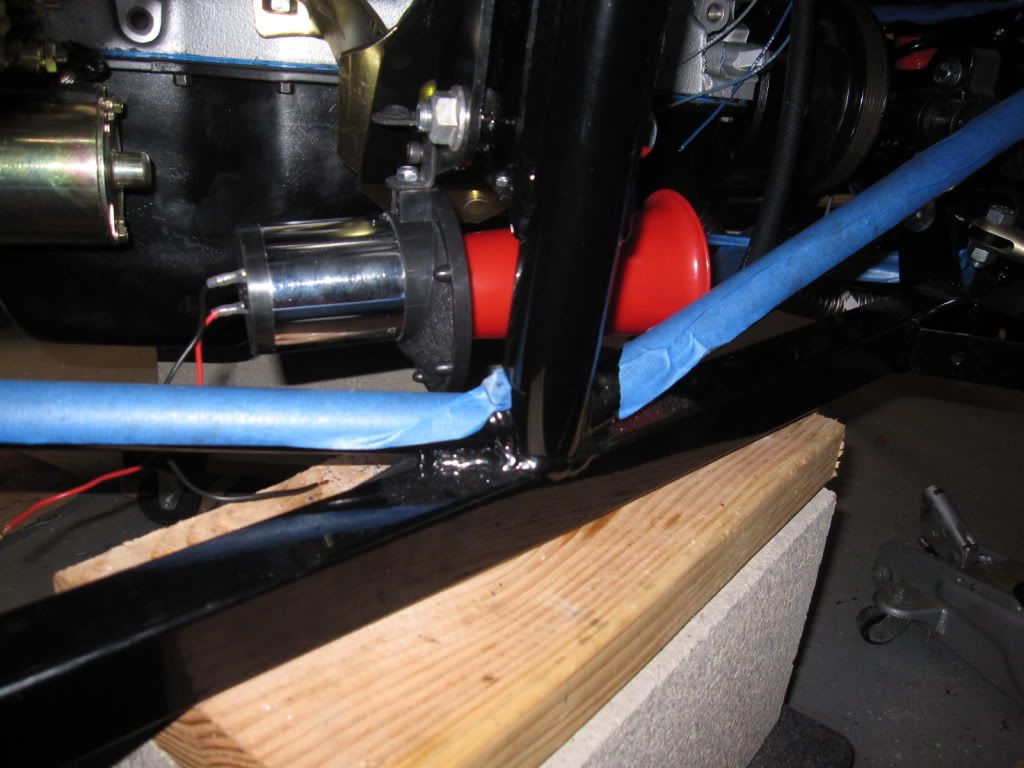
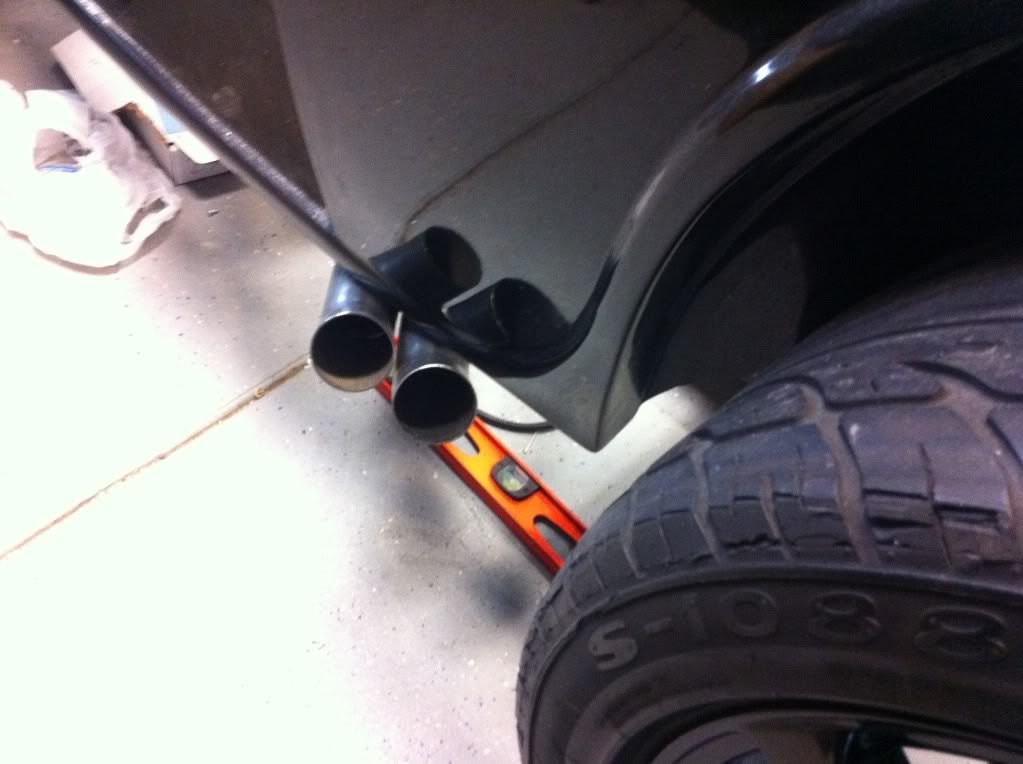
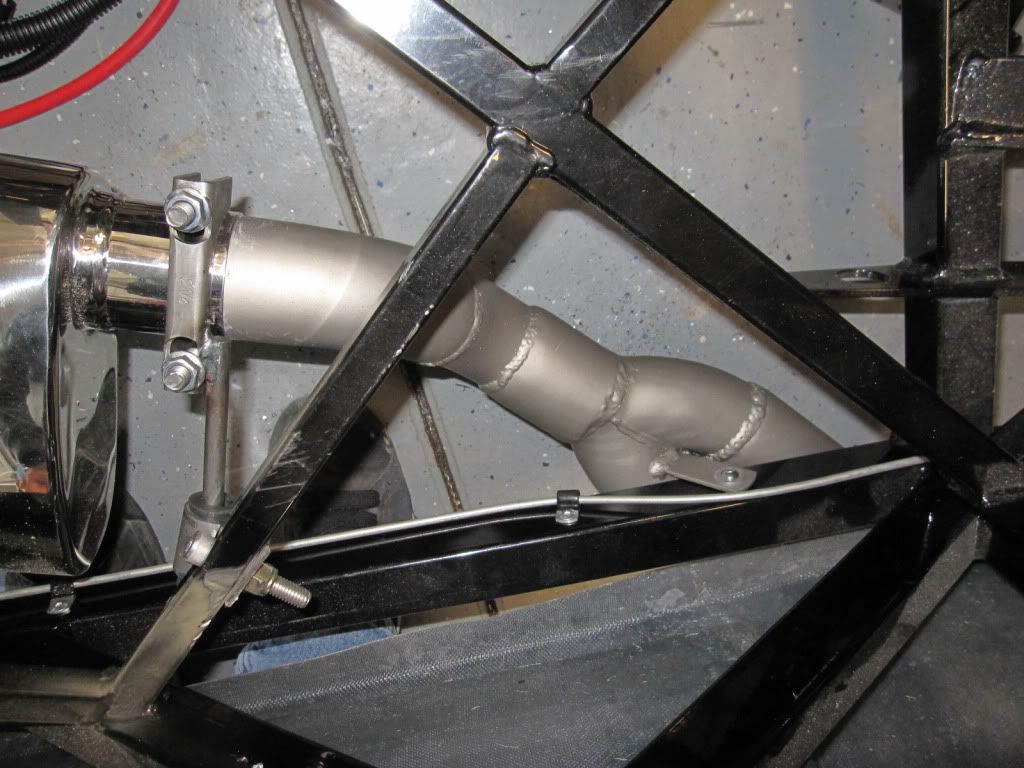
    I also installed the e-brake. Turns out I drilled down through the frame and right into the exhaust clamp I put down there so that was fun. I guess you need the stock mustang cables to hook it up. Where do I get those?


  28. #28
    Senior Member ehansen007's Avatar
    Join Date
    Mar 2011
    Location
    Aliso Viejo, CA
    Posts
    1,625
    Post Thanks / Like
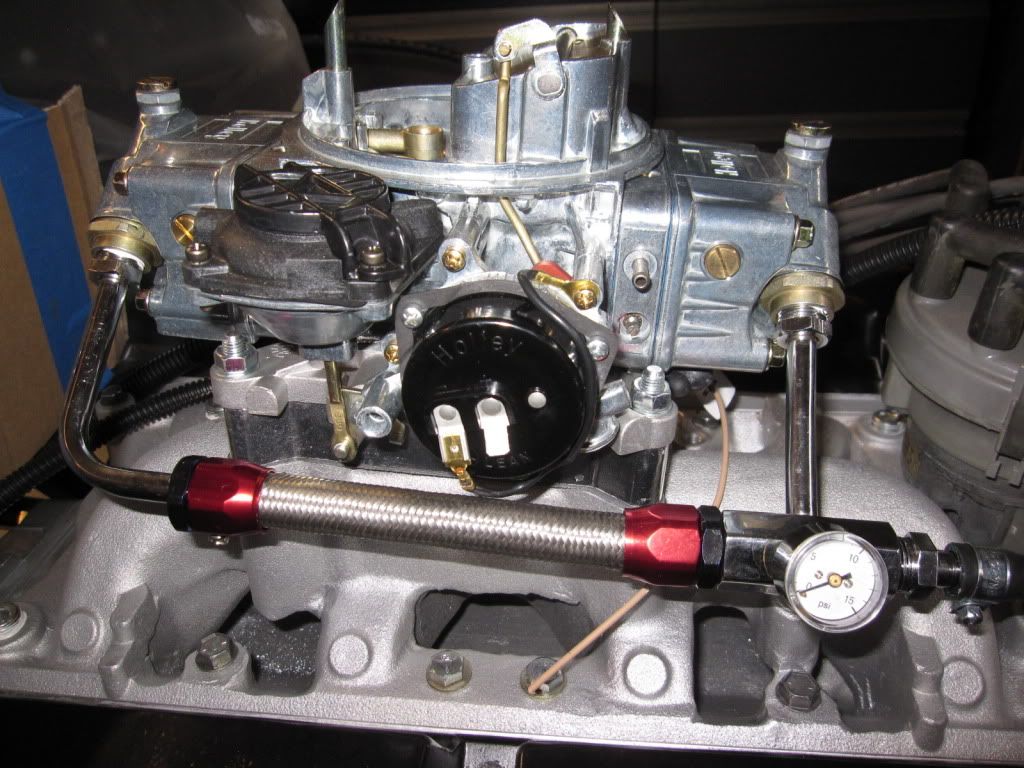
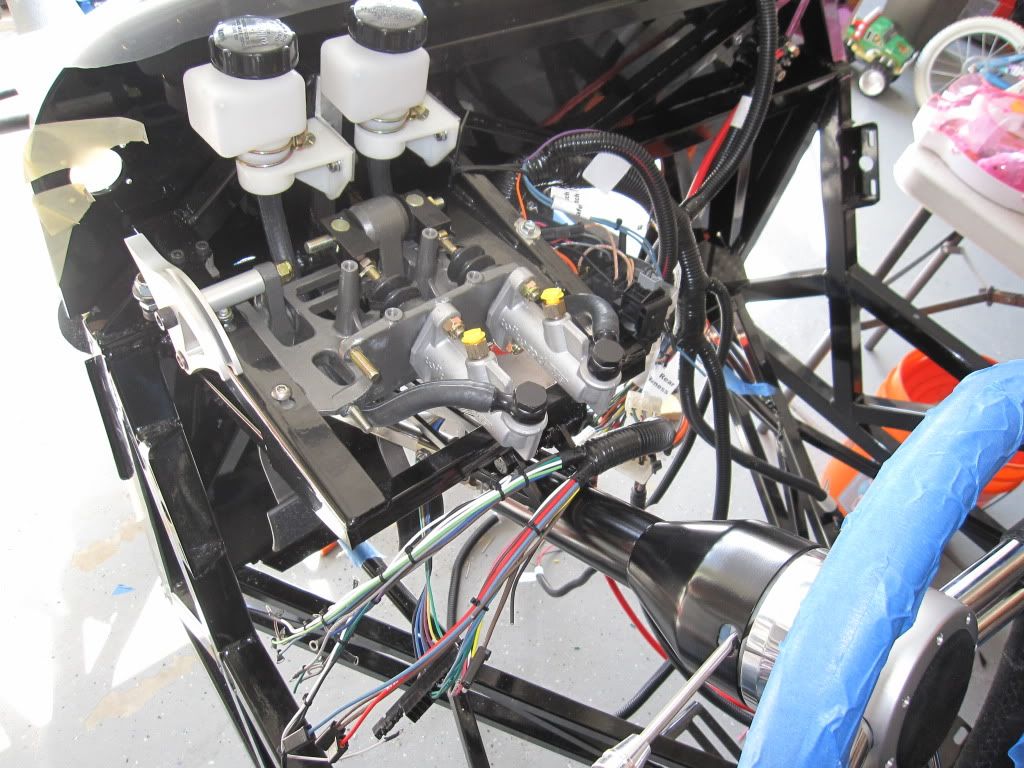
    The throttle cable is hooked up but it was a pain. I drilled my first set of holes where it was "comfortable" (according to FFR's manual) and then realized you need to put it where the arm is ABOVE the frame rail on the inside of the firewall. So I drilled another set of holes where it would actually work. Bummer! Even with it mounted in the right place, there is a lot of adjustment to get it to work smoothly with a carb hookup and avoid the "sawing effect" you can get with the angle of the cable and the "S" bend. It's working now though! I also ran some welds on the the pedal mounting bracket to strengthen based on Terry's near death experience.


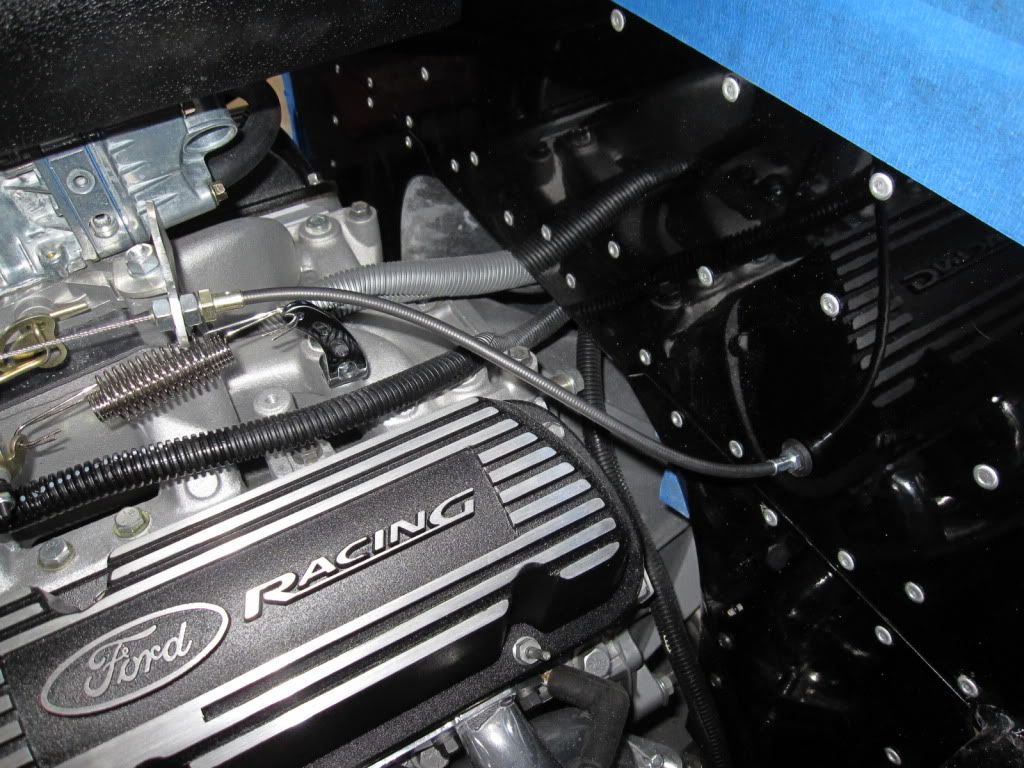
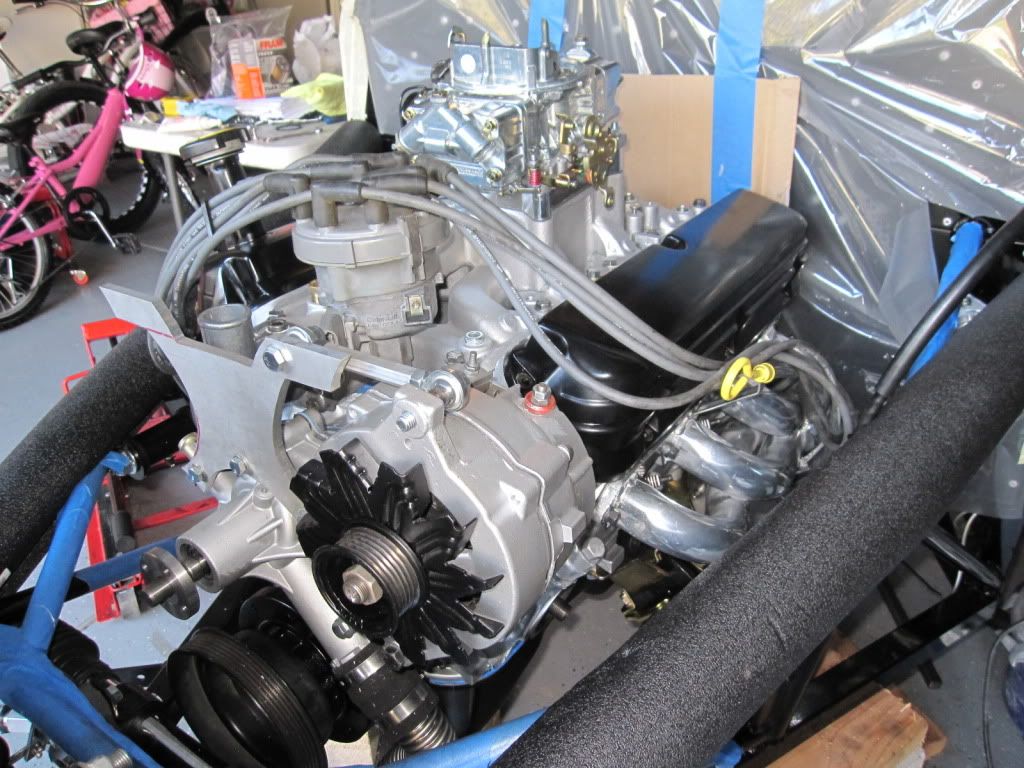
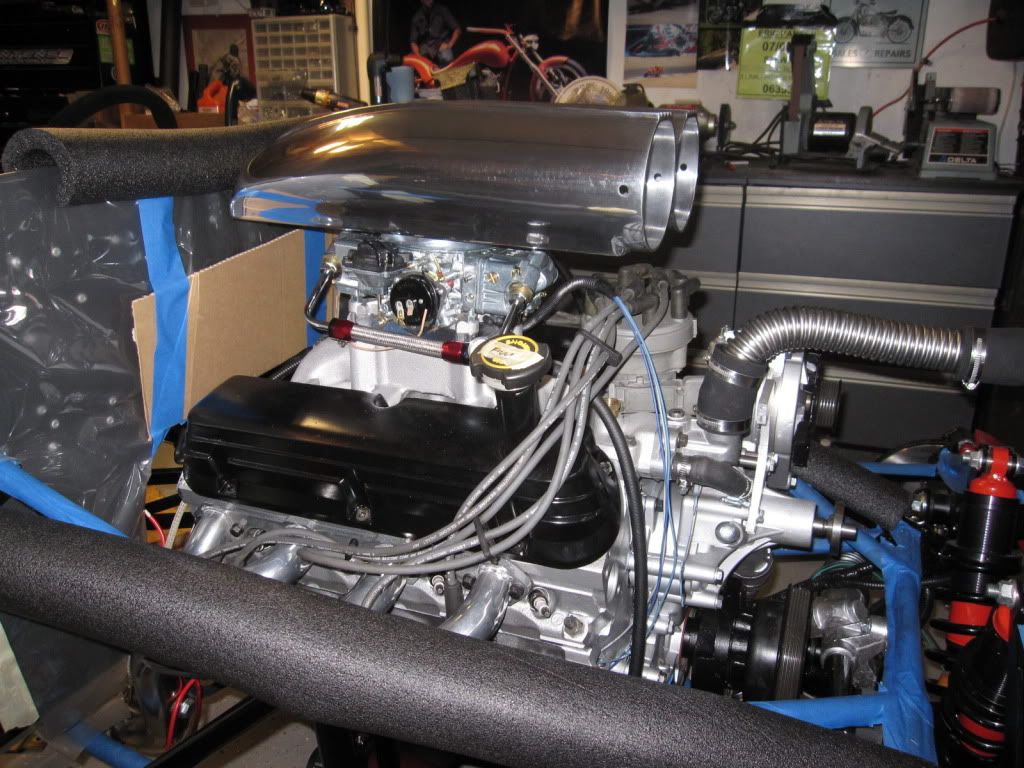
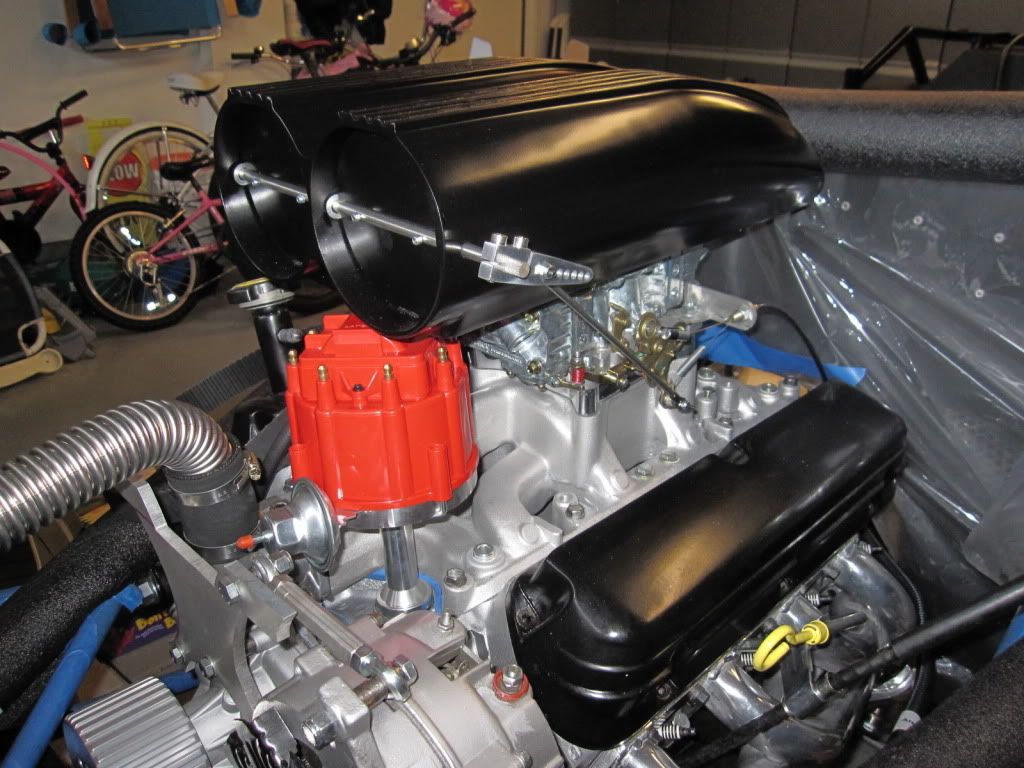
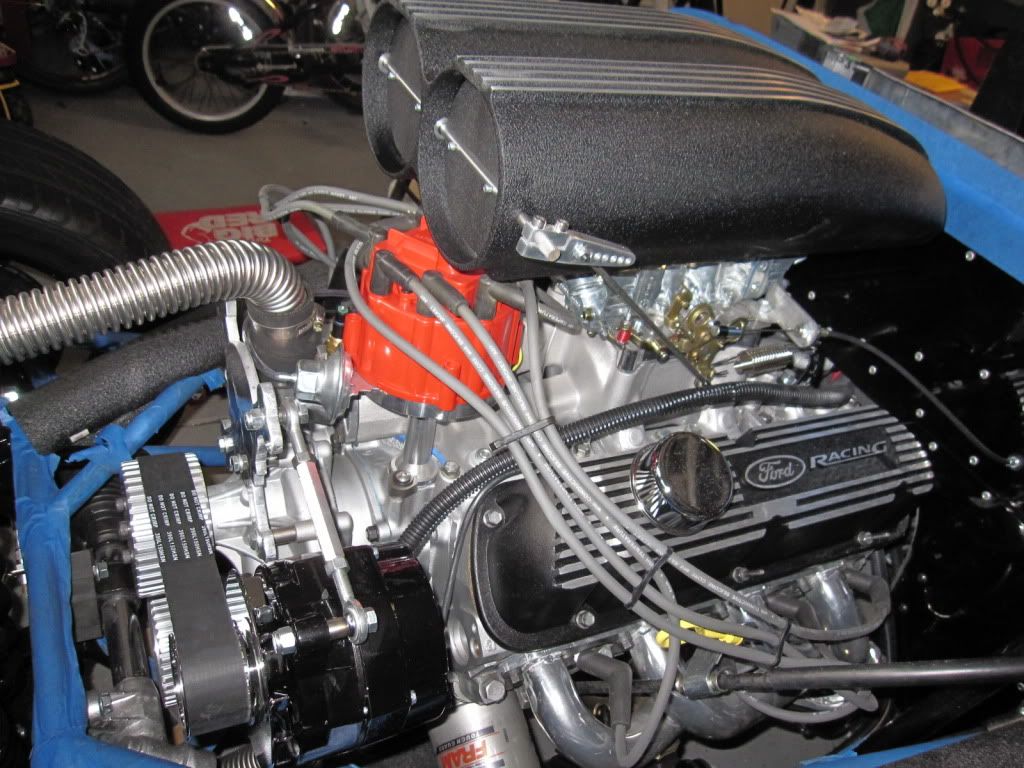
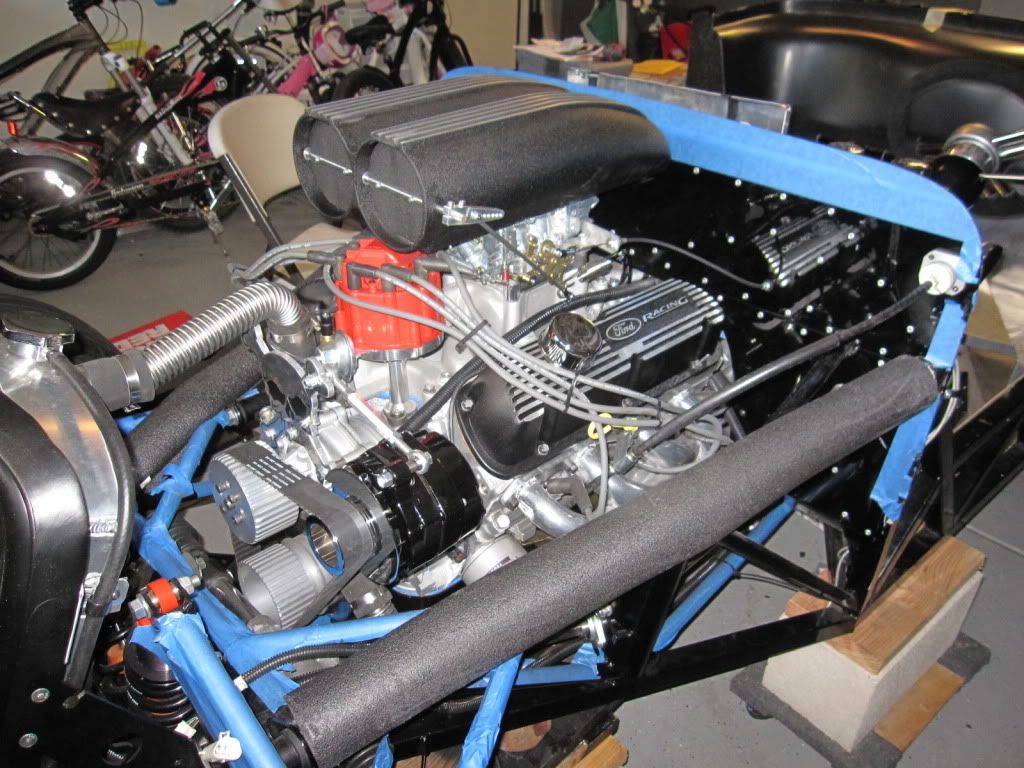
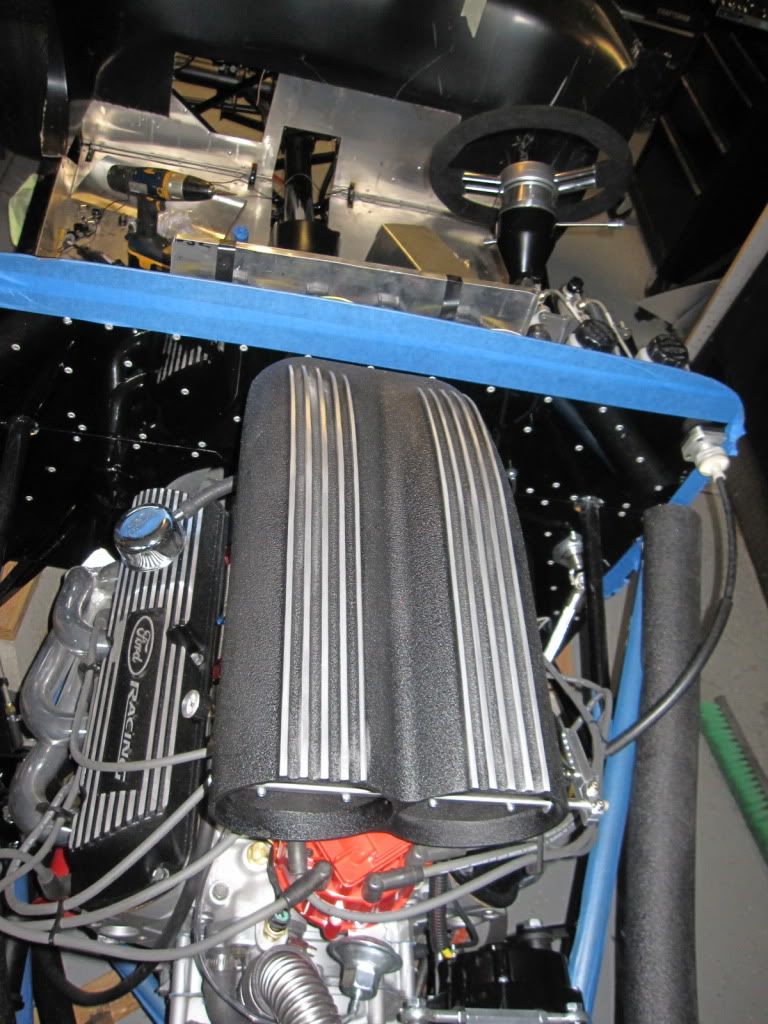
    I wired a lot of the engine with sensor wires for the new gauges, electric choke, horn, starter, etc. The nice thing about the air gap intake is that it gives you a nice place to put the wires. I don't think there will be enough heat under there compared to just outside of it, do you? If I see any issue, I'll relocate them. I covered all wires with conduit as well as a buffer.


  29. #29
    Senior Member ehansen007's Avatar
    Join Date
    Mar 2011
    Location
    Aliso Viejo, CA
    Posts
    1,625
    Post Thanks / Like
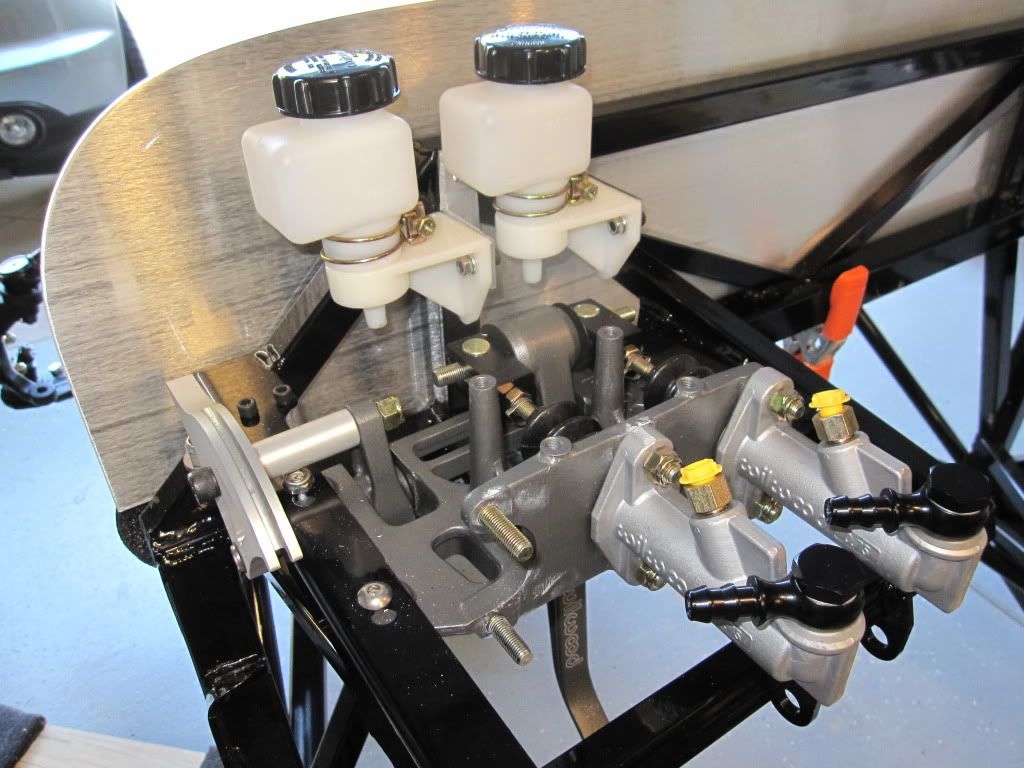
    I got some new brake lines for the front from Jegs. The 19's are the perfect length if you swap the left and right for bleeding. Speaking of bleeding. I picked up the air bleeder from Harbor Freight and man that worked great. I got them bled by myself in minutes and it was only $25!

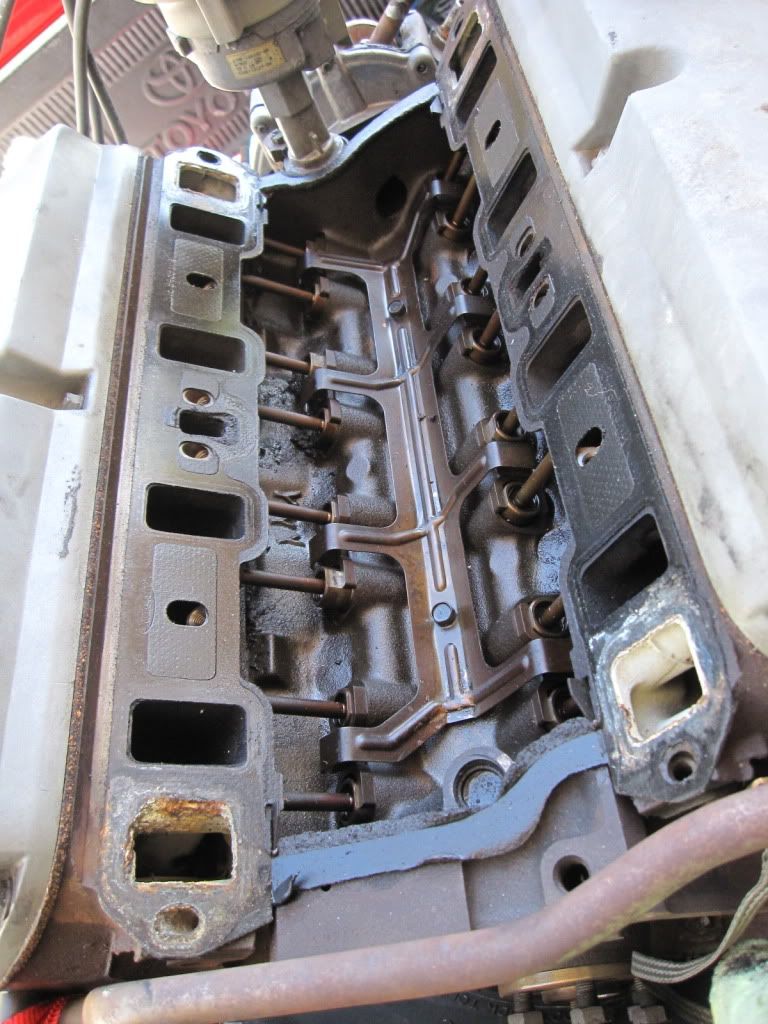
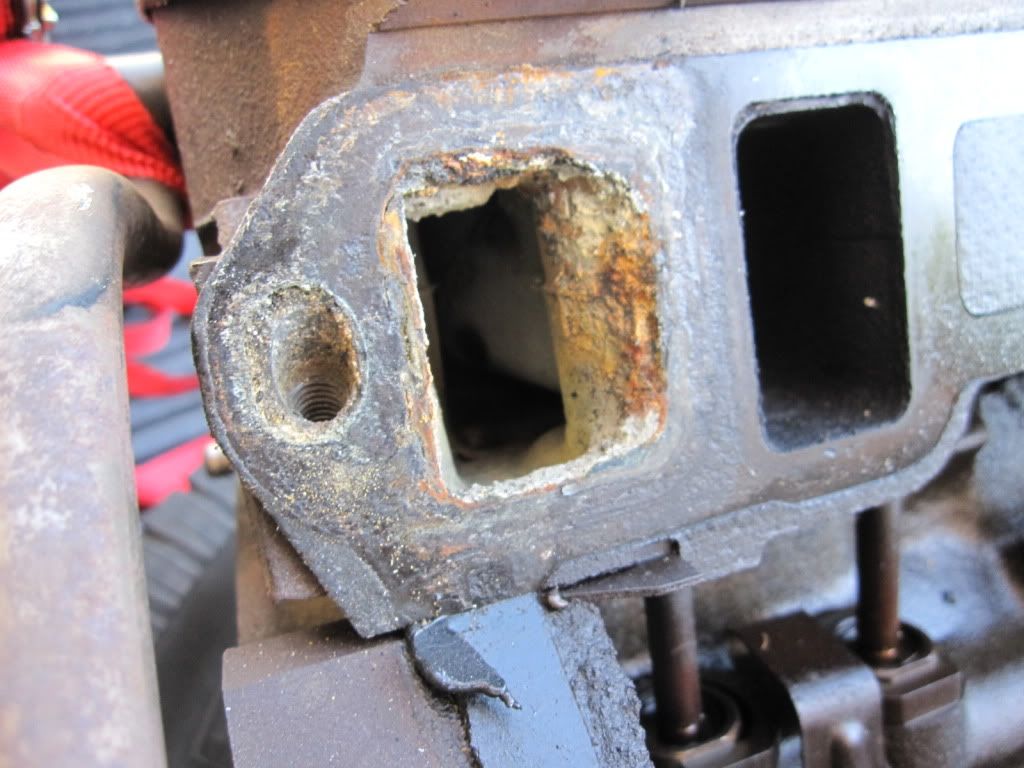
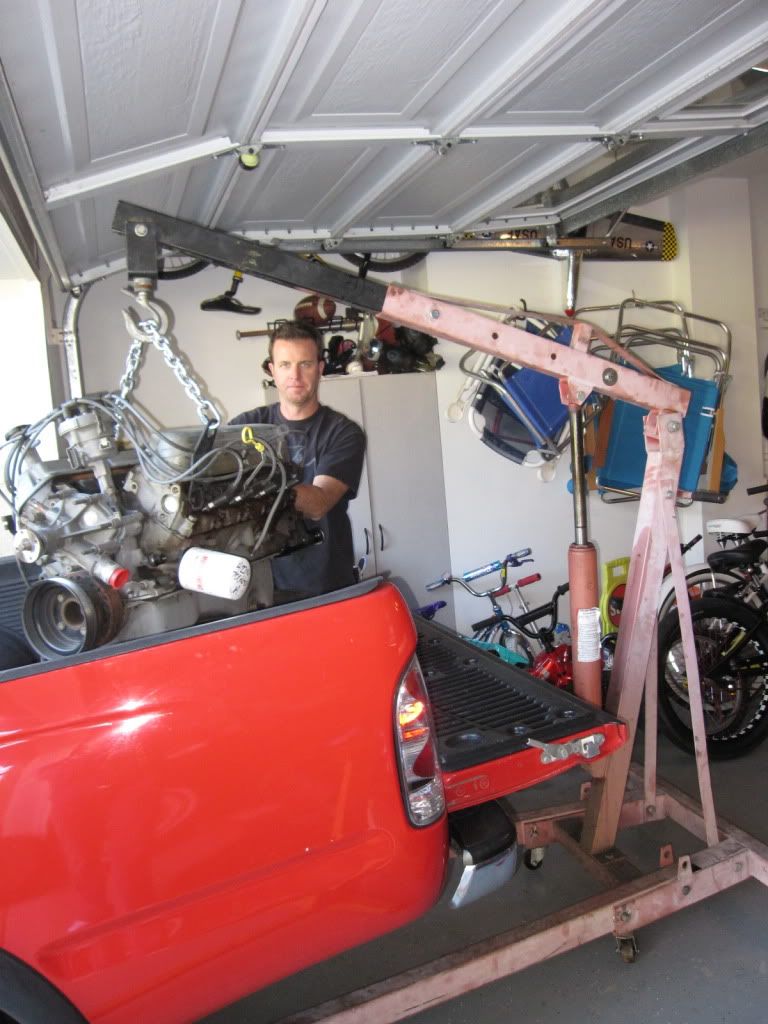
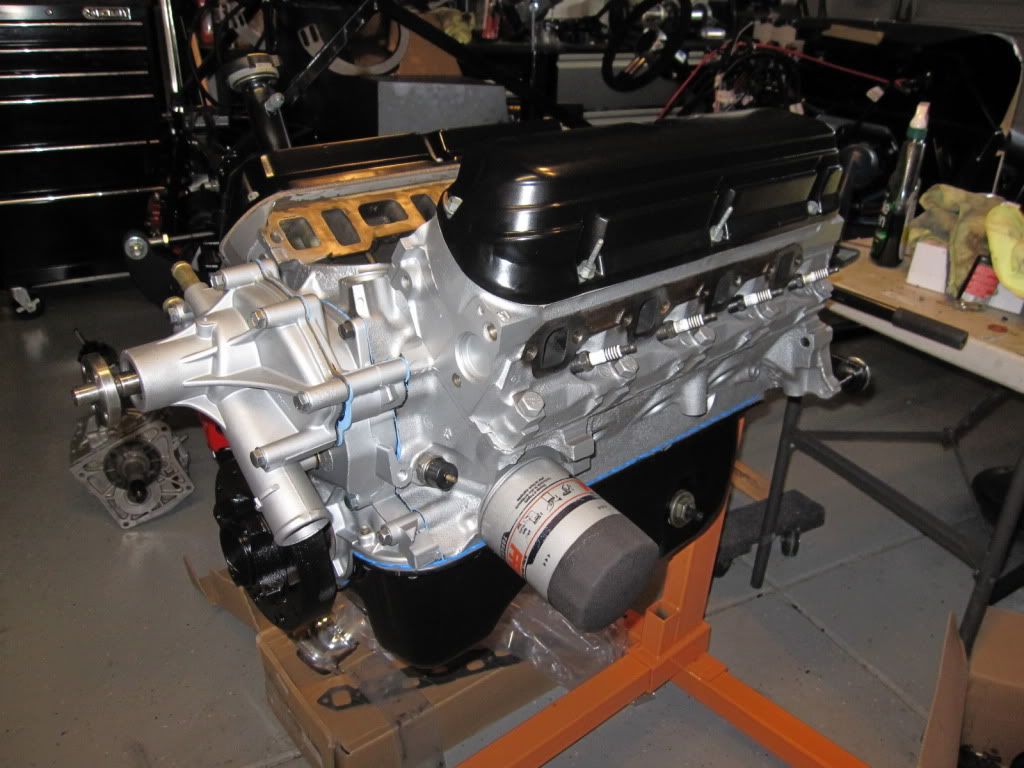
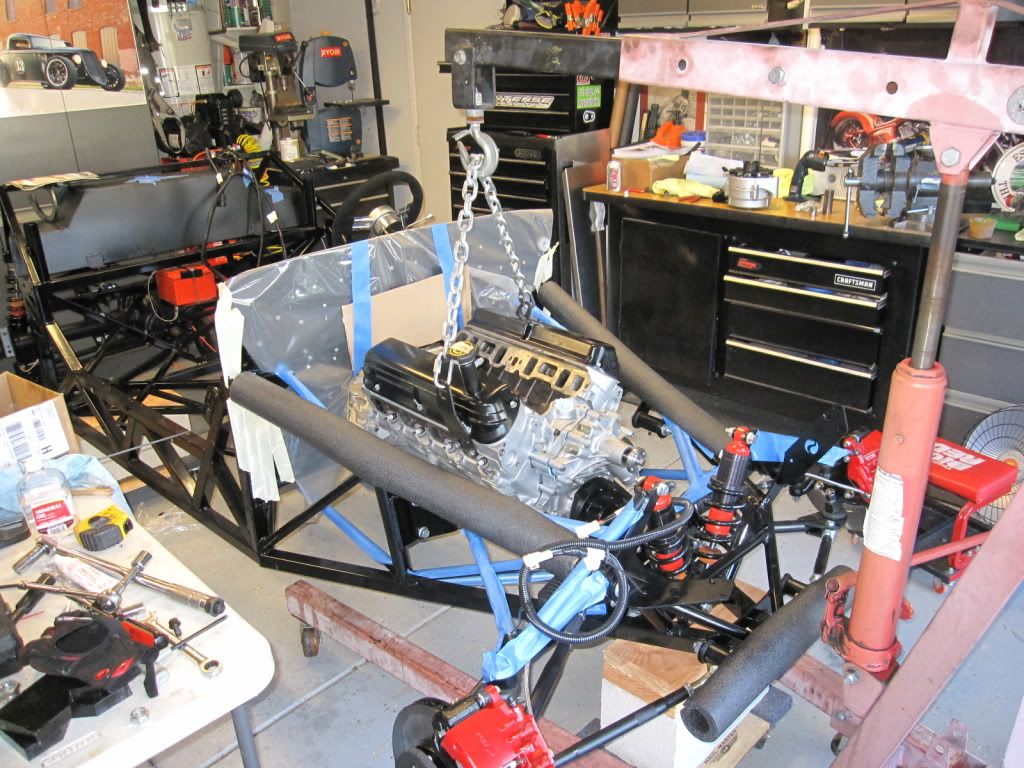
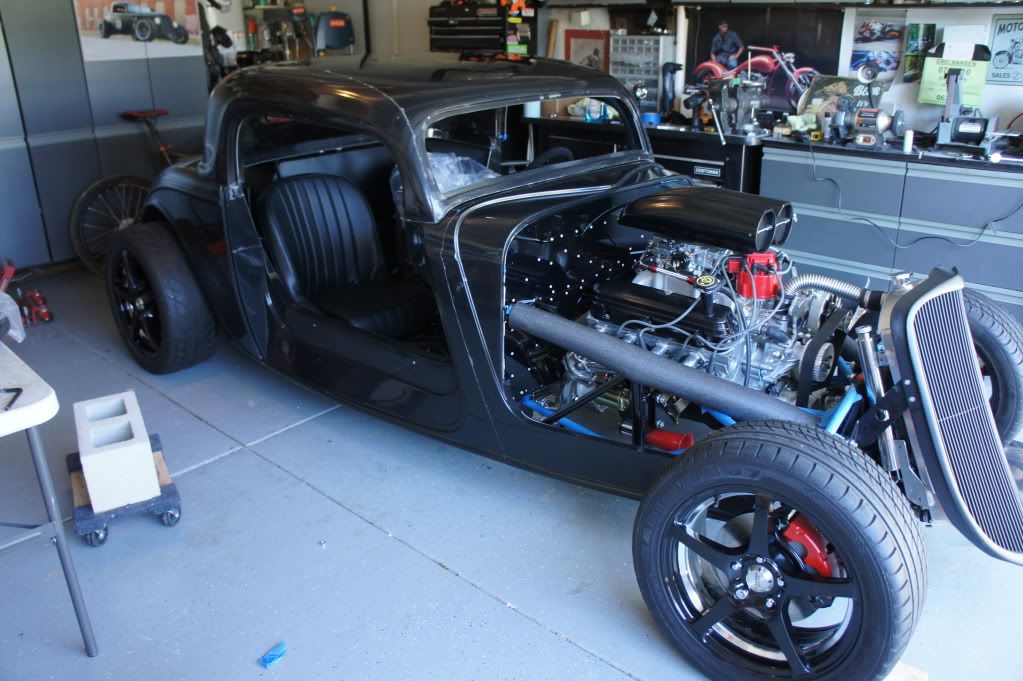
    Overall, I'm getting really close to firing the motor. I hope to get a ford expert over here to go over all the details before doing so in case it's all screwed up. I basically made a $500 motor with 90K on it look like a crate engine so I guess we'll see what we'll see. Wish me luck!

  30. #30
    Senior Member ehansen007's Avatar
    Join Date
    Mar 2011
    Location
    Aliso Viejo, CA
    Posts
    1,625
    Post Thanks / Like
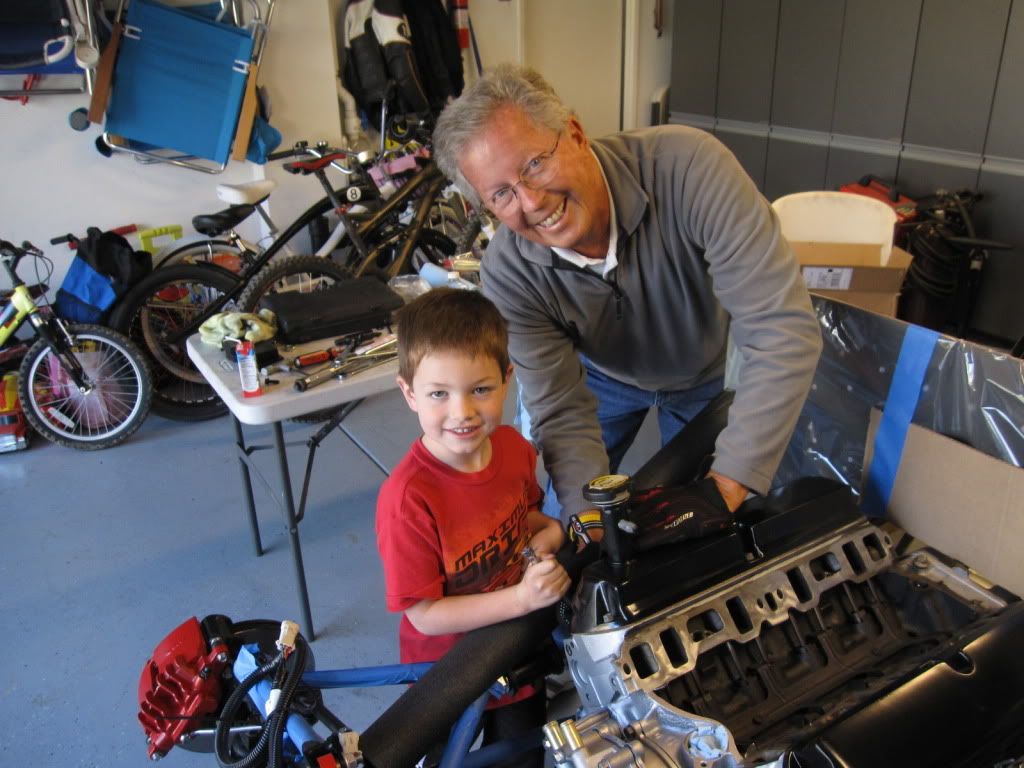
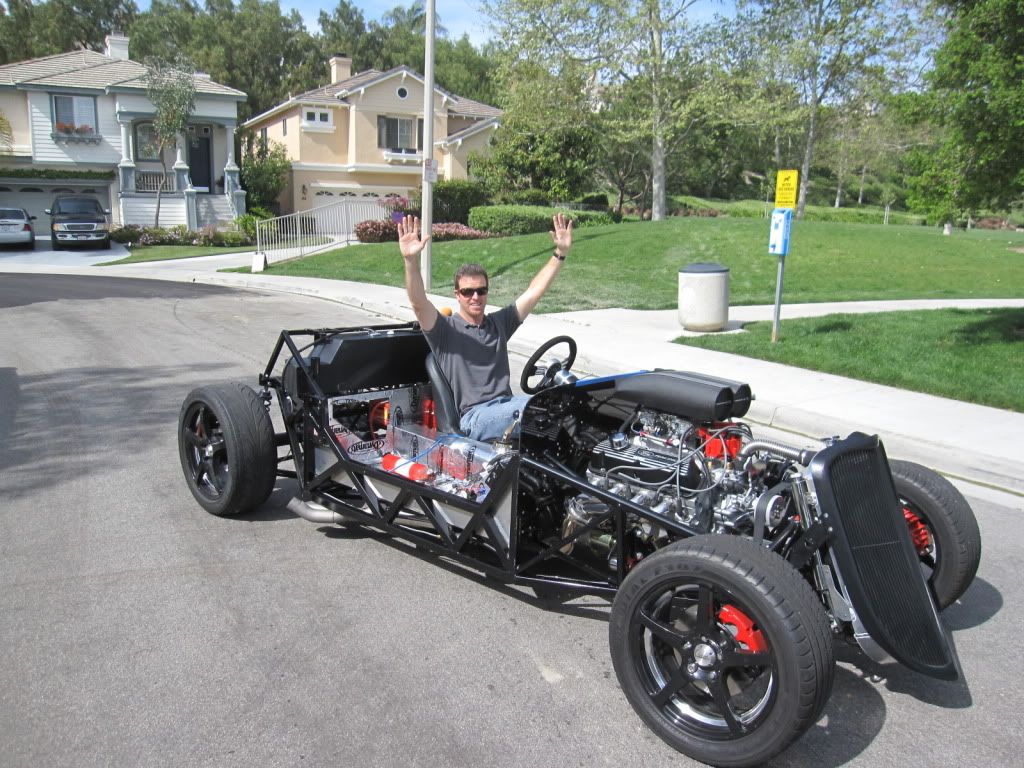
    Okay, so I've got the motor started and I had a big party for people to come and help and man did it ever. A really nice guy (xlr8tor) from San Diego drove up in his Daytona and just went to town helping me get her dialed in. Here's the video.


    She fired on the first try. We then noticed a misfire and tried rewiring the distributor which didn't work. Finally we just moved the plugs one post counterclockwise to line up with the rotor on TDC and it worked great. Now it starts so fast it's silly!

  31. #31
    Senior Member ehansen007's Avatar
    Join Date
    Mar 2011
    Location
    Aliso Viejo, CA
    Posts
    1,625
    Post Thanks / Like
    Today was a nice warm day so I decided to haul the body in the side yard and undercoat it. I decided to try the Rubberized spray and man was it easy and fast. You could do it with just two cans at $8 a piece but I used 2.5 cans. It goes on easy, looks good and stinks like tar! I hope that goes away and doesn't reveal itself on hot days as I sprayed under the dash as well. I noticed an immediate difference in the sound of the body as I picked it up and carried it. It was much more solid which should be great. Here's a pic.


  32. #32
    Senior Member ehansen007's Avatar
    Join Date
    Mar 2011
    Location
    Aliso Viejo, CA
    Posts
    1,625
    Post Thanks / Like
    I also got motivated and put the car on the ground and drove it around the block a couple of times. It seems like she really wants to steer so that must have something to do with the camber. I'll get that adjusted once I cut those lower arms like everyone else despite what factory five says. I also noticed that the front brakes have no bite. I bled them well and maybe they need to break in but man it's really bad and dangerous to have those be so poor out of the gate. I may invest in something more aggressive on the pads and rotors.

    Here she is out in the sun!


    HEEEEE HAWWWW. Look what I dun built!


  33. #33
    Senior Member ehansen007's Avatar
    Join Date
    Mar 2011
    Location
    Aliso Viejo, CA
    Posts
    1,625
    Post Thanks / Like
    Been taking a few laps around the neighborhood lately. The alignment is still way off but she runs pretty good. I also trailered her down to the Huntington Beach FF Show on Saturday and that was great! Quite a few 33's turned out.


    Apparently, Lang's green rod went to auction that night. Not sure how much it sold for though.

  34. #34
    Senior Member ehansen007's Avatar
    Join Date
    Mar 2011
    Location
    Aliso Viejo, CA
    Posts
    1,625
    Post Thanks / Like
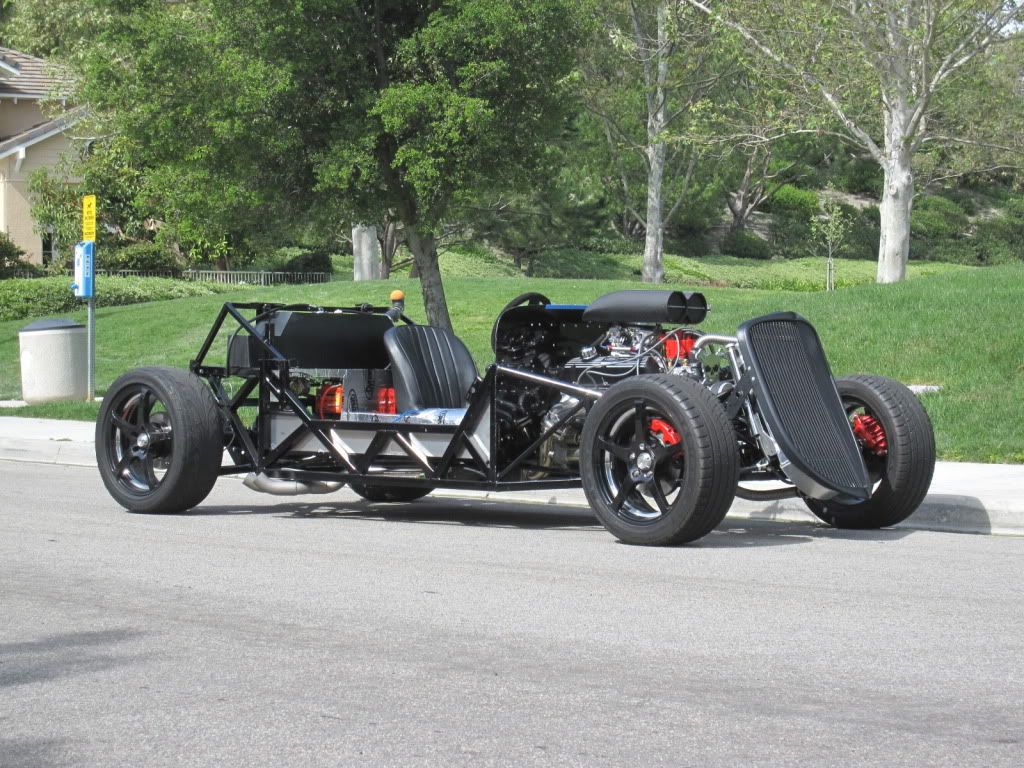
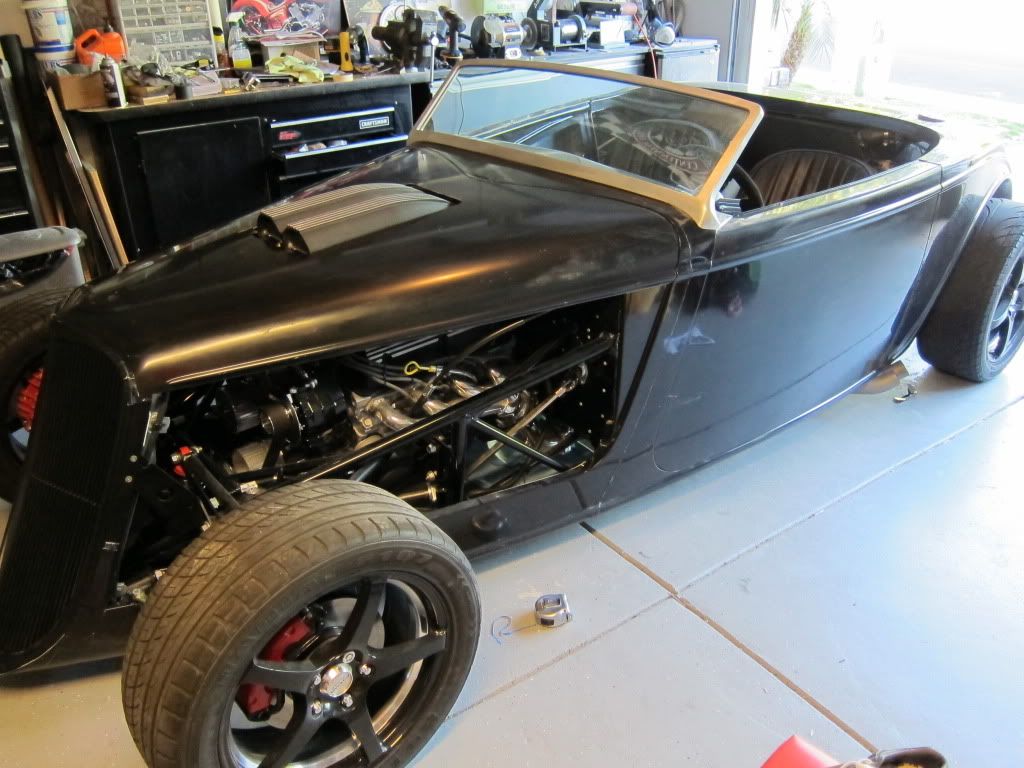
    Thanks! Although the wheels will be changed soon enough for some deep dish monsters. I will still keep these for track days possibly.

    I just got the doors on the car and posted up a video on how I did it. I also did the alignment based on rumbles specs and cut 1/2in off the steering rod, the tie rod end and the LCA. Now I have plenty of room for adjustment! It now appears to be aligned and drives very straight. It's crazy driving a car with no power steering though! Been a long time since my 69 bug in high school. Thanks again Rumbles for your write up on alignment.

  35. #35
    Senior Member ehansen007's Avatar
    Join Date
    Mar 2011
    Location
    Aliso Viejo, CA
    Posts
    1,625
    Post Thanks / Like
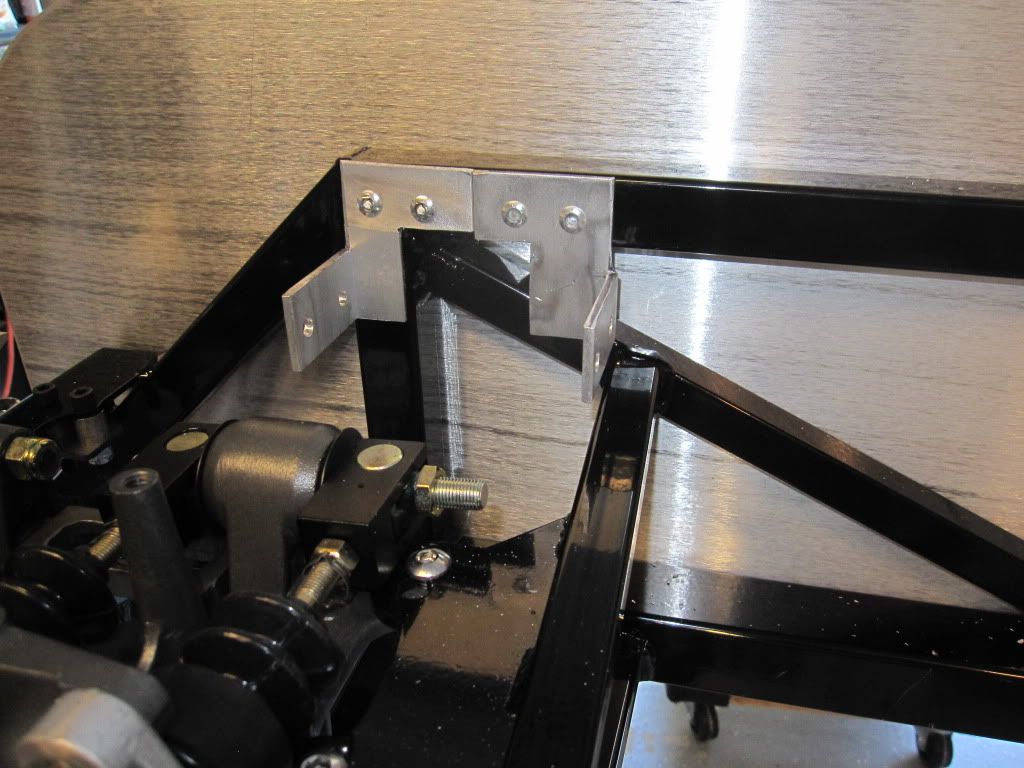
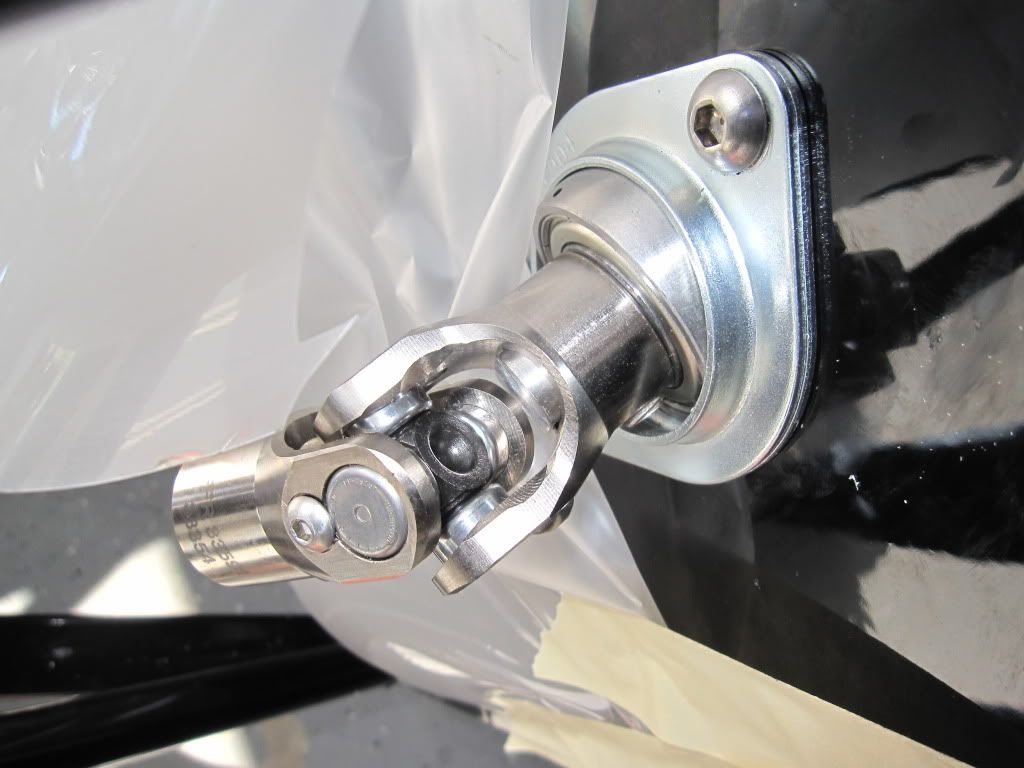
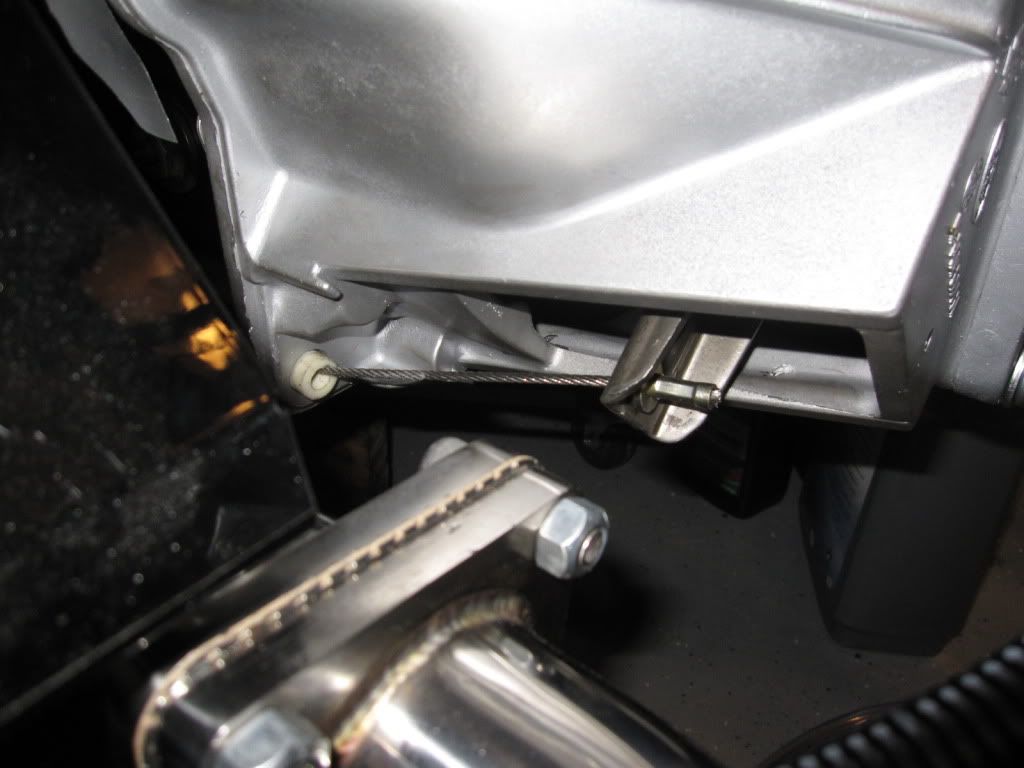
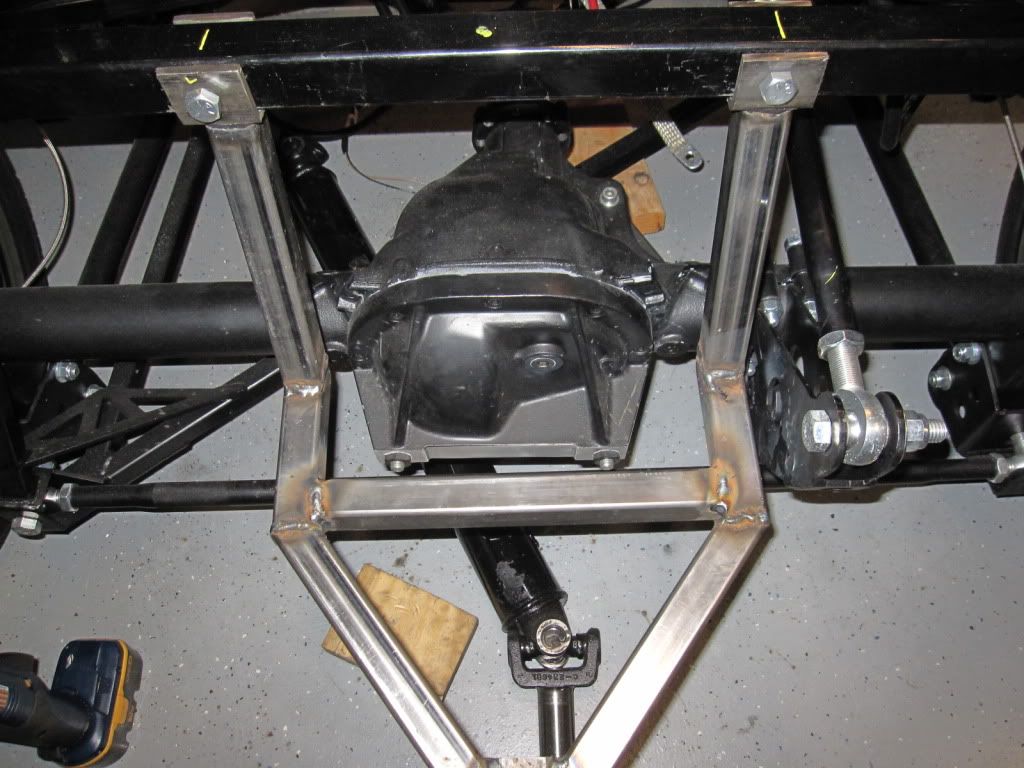
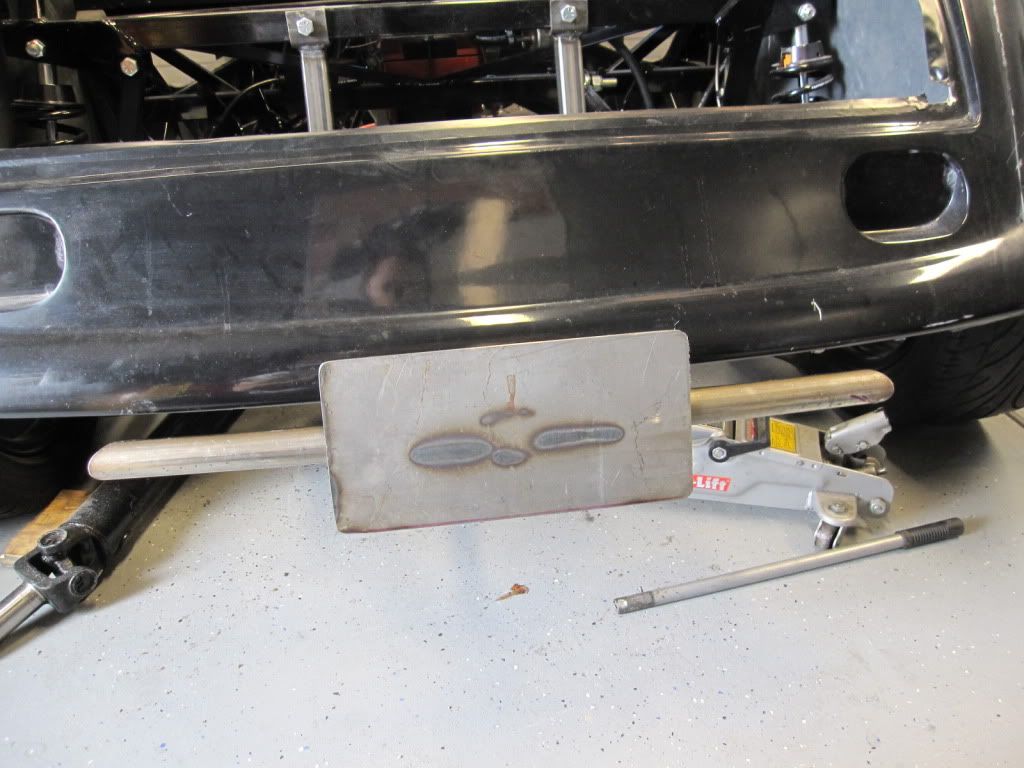
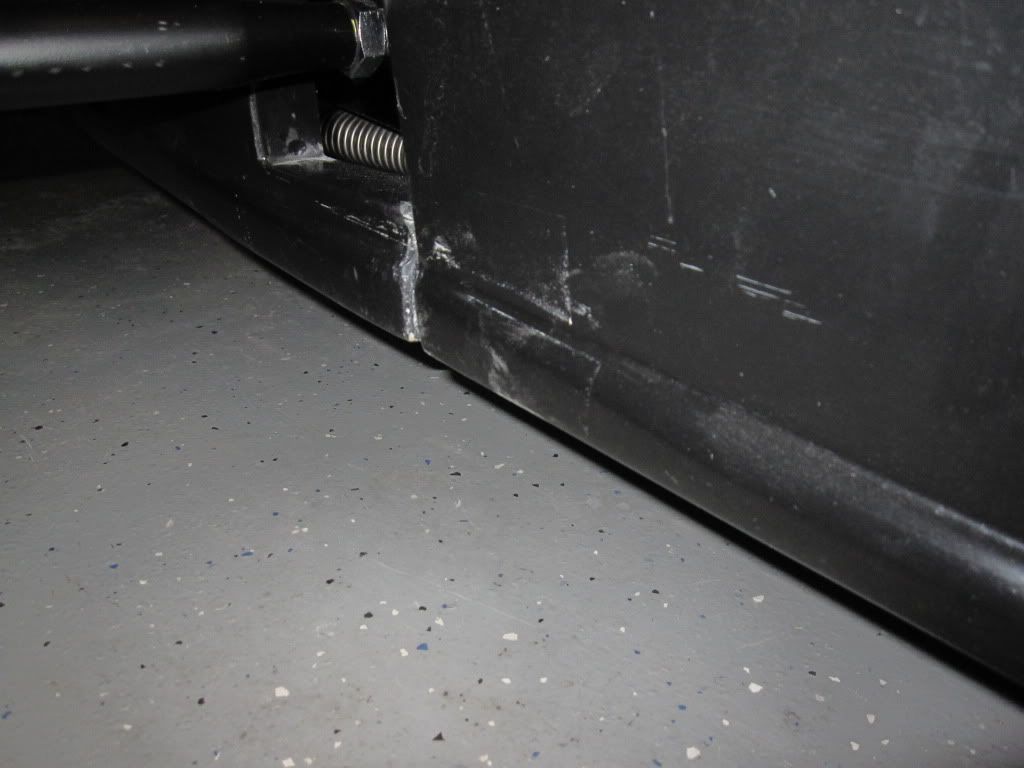
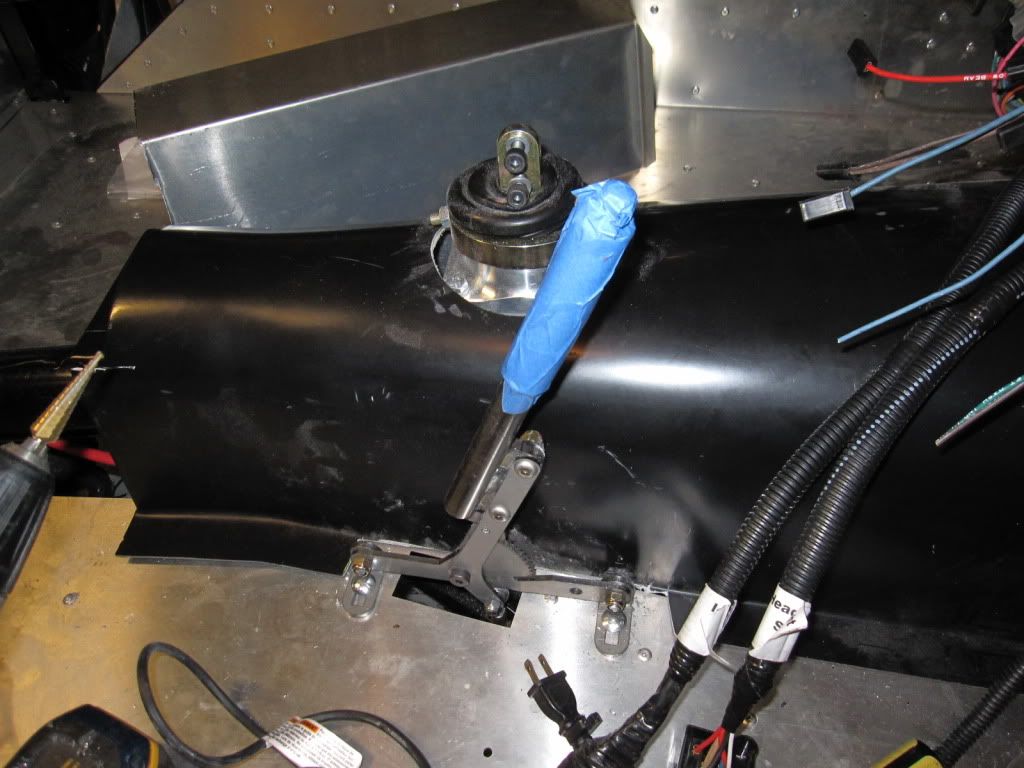
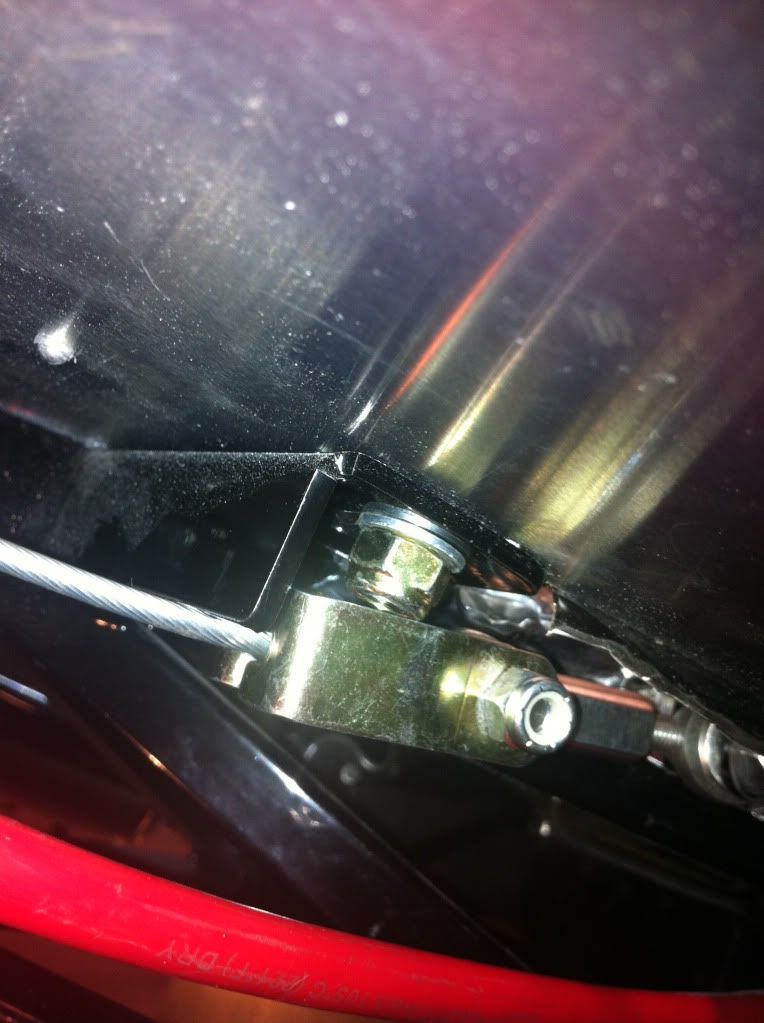
    What a PIA! The cables mentioned that should work (FOR-M-2809-A)were 2 3/4 too short (apparently from the new handle assembly). Shortening those was a real task. And I would not recommend this cable to anyone with the new ebrake handle.

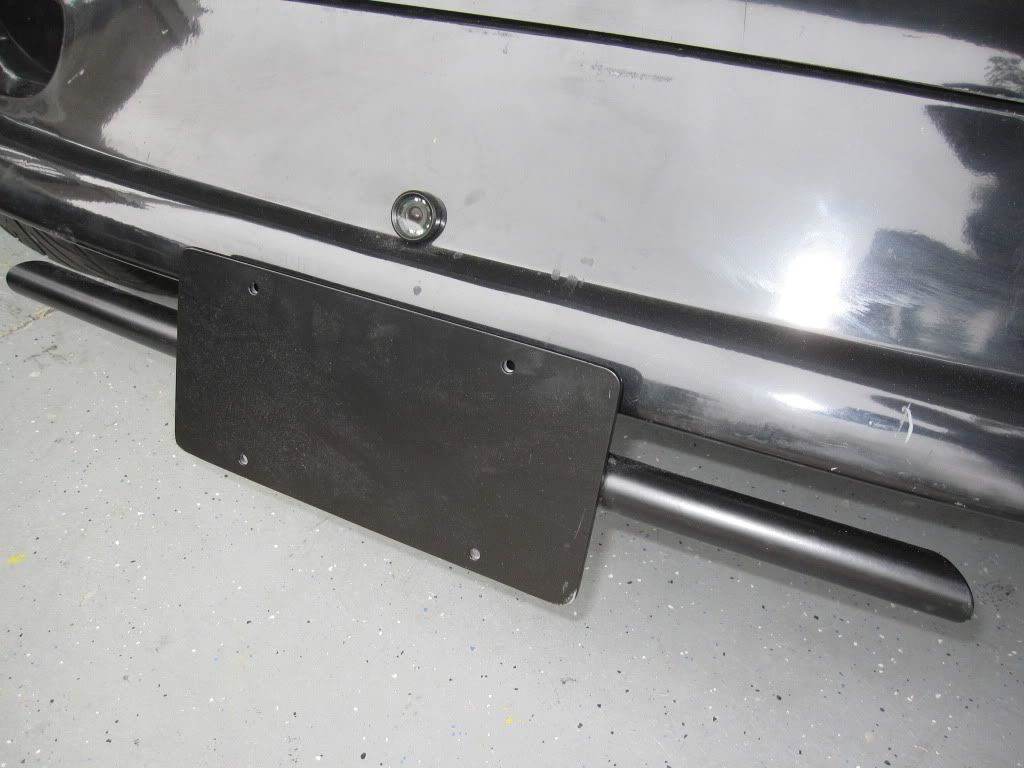
    I also have a question. Is this the way it's supposed to work? Is that flange supposed to catch the bracket a little for an extra safety catch? At first I thought I would have to grind down this bracket but then I figured maybe it's supposed to work this way? I would understand if they used angle bar here for strength of this tab but, unless I route the cables underneath that previous frame truss and not through it, it will hit this bracket no matter what.


  36. #36
    Senior Member ehansen007's Avatar
    Join Date
    Mar 2011
    Location
    Aliso Viejo, CA
    Posts
    1,625
    Post Thanks / Like
    Been busy doing a bunch of things including the door installation video and trunk. The trunk was a real pain given that it doesn't fit out of the box and you need to make sure you've solved that problem before installing the latch. If you don't, it will throw everything off. I made this mistake and I drilled and put my rivnuts in for the striker bracket too low and it hit the latch box. So, I spent two days trying to get that lined up and working right. I think it's important to NOT install the trunk floor until you've got the latch working properly. It's so much easier to align it if you can get to the latch and make sure it's working from under/below the car. Also, I found that you can reach behind from the back of the cockpit to adjust/tighten the hinges with the trunk down so you're not having to open, adjust, close, etc.

    Here is my bracing solution to get the trunk to match the curvature of the body. The broom is optional and I'm looking for a telescoping version so I can actually fit it into the trunk.


  37. #37
    Senior Member ehansen007's Avatar
    Join Date
    Mar 2011
    Location
    Aliso Viejo, CA
    Posts
    1,625
    Post Thanks / Like
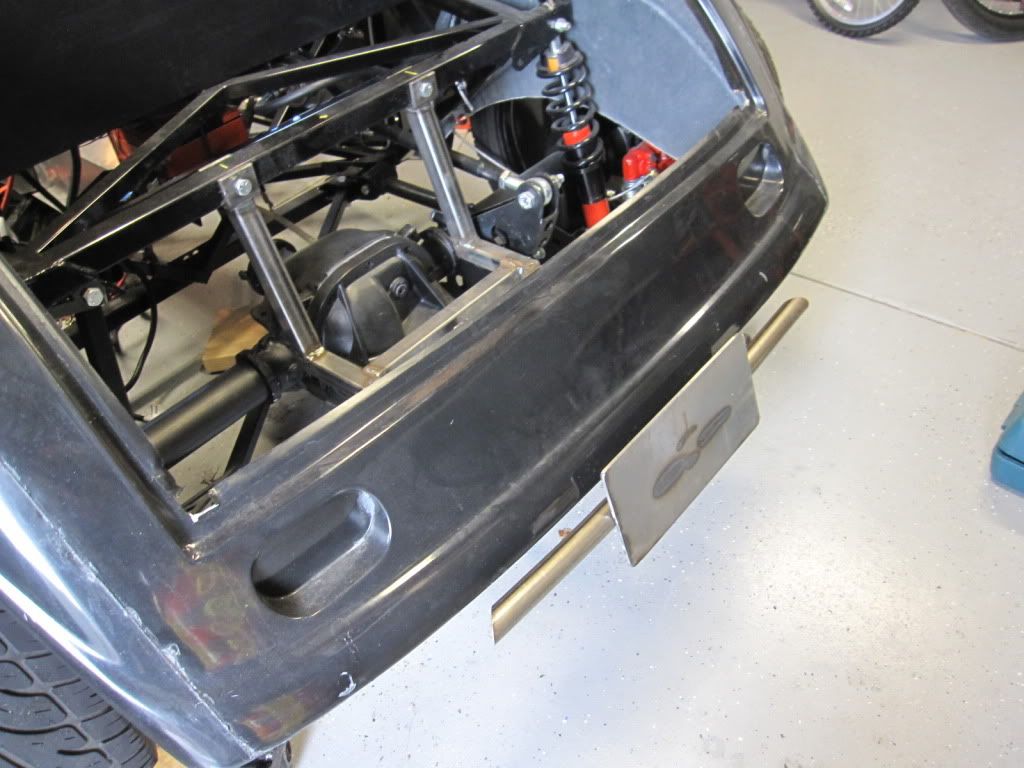
    So I'm thinking I'm going to absolutely attack the wiring in this harness as the next undertaking when I take the body off for paint. Everything is together and working but it's a mess and I've seen some nice wiring jobs out there. I'm thinking some wiring blocks would do the trick. Any advice would be good. I've also created this little center console to hold my switches (Brights, Fan, Fuel, and Backup Cam), EQ, and backup camera screen (bottom). I also plan on putting in a start stop switch but I haven't decided on the location.


  38. #38
    Senior Member ehansen007's Avatar
    Join Date
    Mar 2011
    Location
    Aliso Viejo, CA
    Posts
    1,625
    Post Thanks / Like
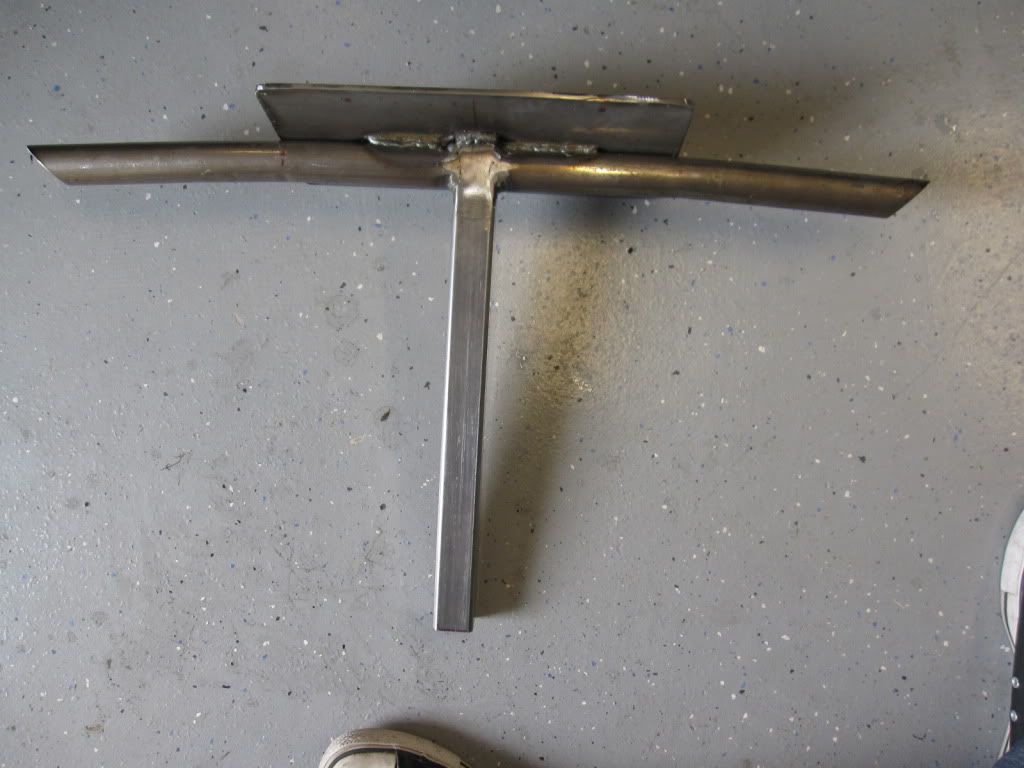
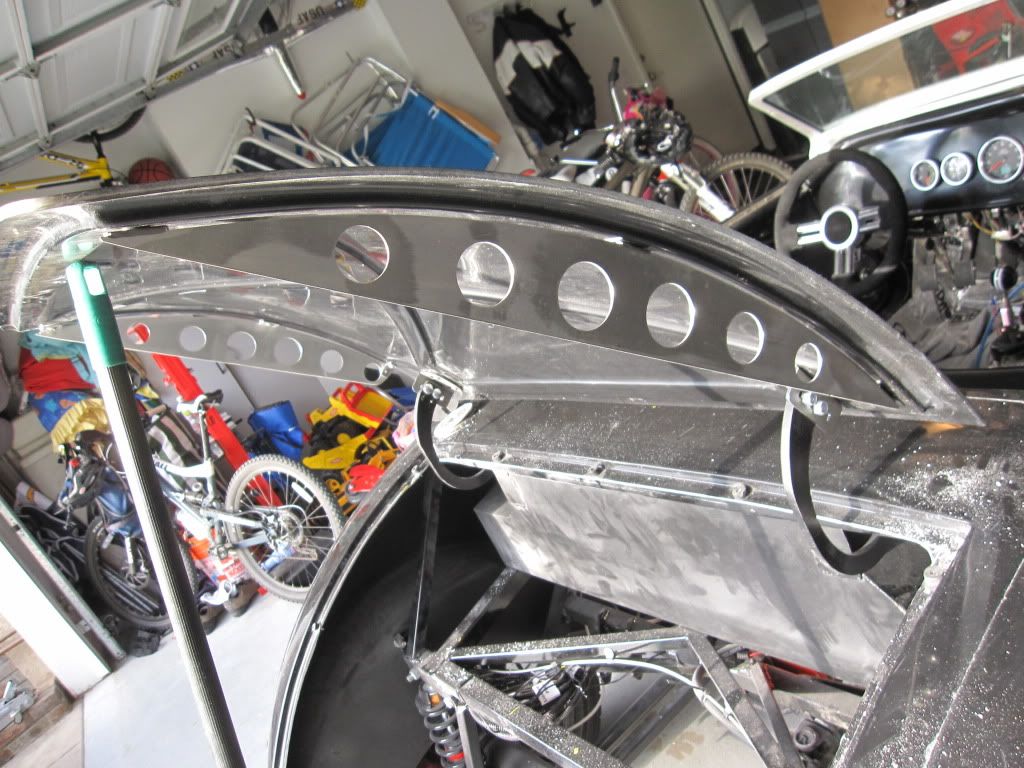
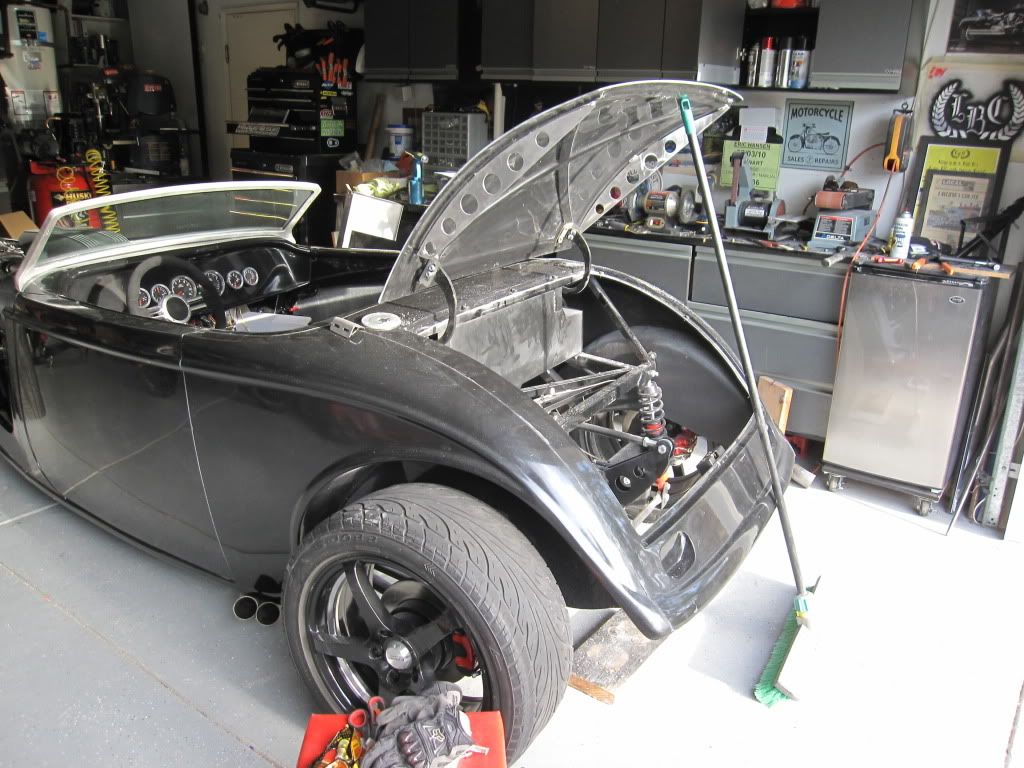
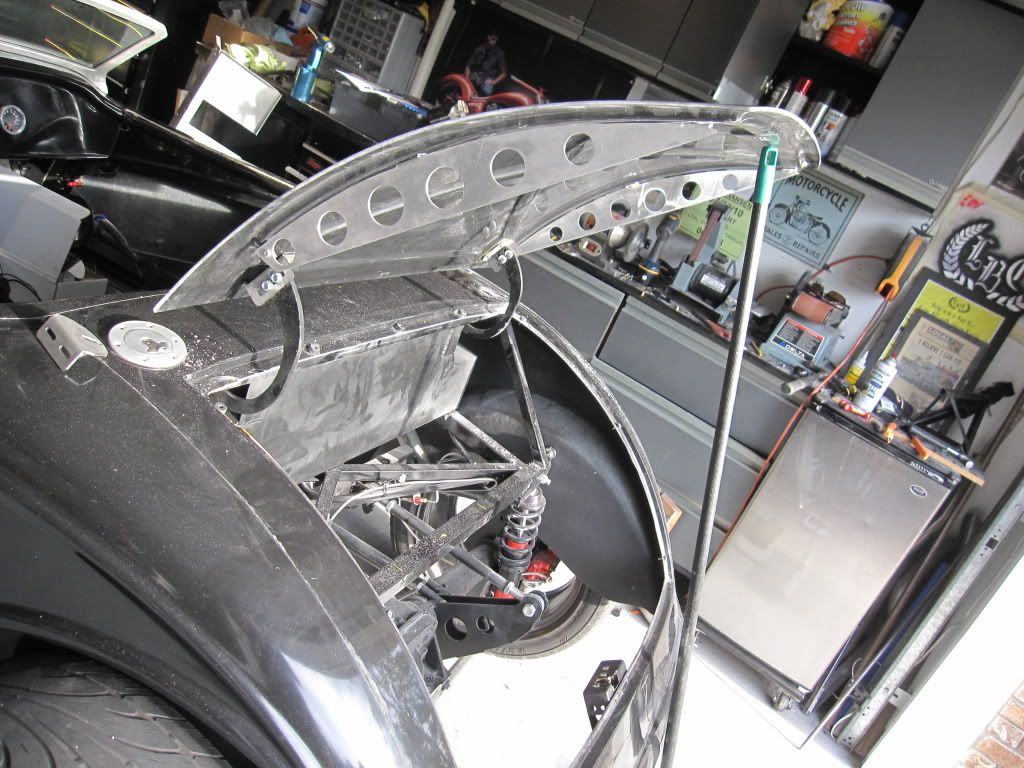
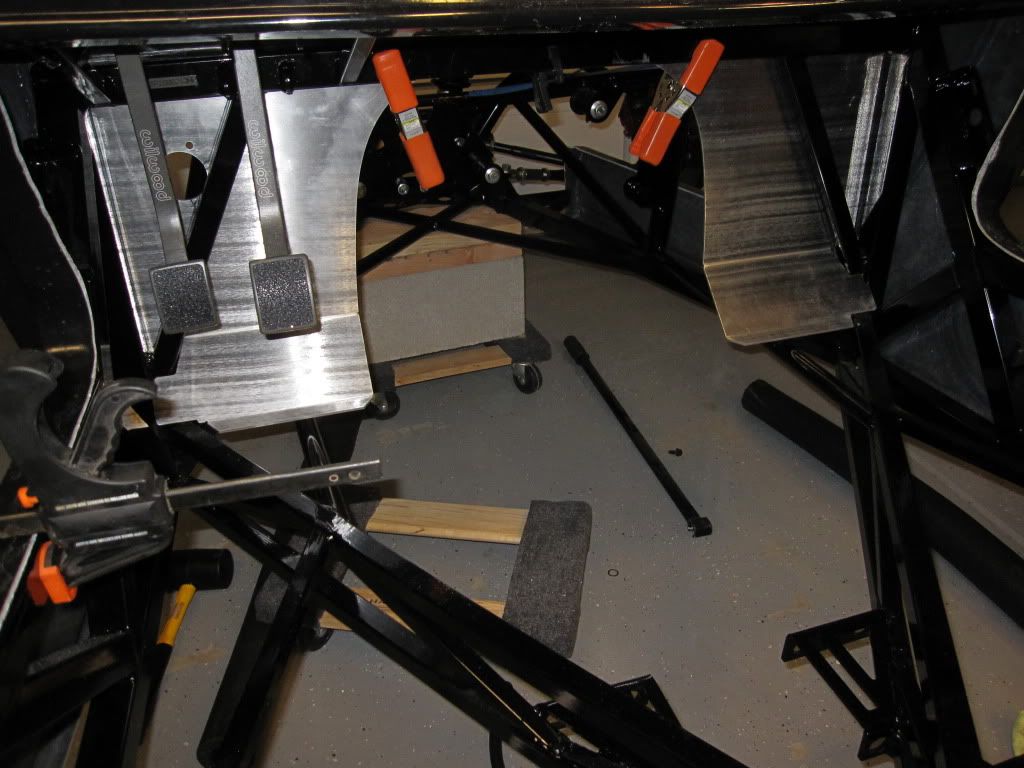
    The trunk "formers" (as I believe they are called in the aircraft world a.k.a wing ribs) were just made from aluminum sheet. Instead of trying to bend angle stock, I just used my little bandsaw (a jigsaw would work too) and cut the shape and added tabs a the top and bent them over. I'm going to redo them and possibly have them hardened with a dimpler.

  39. #39
    Senior Member ehansen007's Avatar
    Join Date
    Mar 2011
    Location
    Aliso Viejo, CA
    Posts
    1,625
    Post Thanks / Like
    I finished doing the hole in the hood for the scoop. I think it peeks out just enough to break up the hood line will still allowing me to run the flapper mechanism under the hood. What do you think?


  40. #40
    Senior Member ehansen007's Avatar
    Join Date
    Mar 2011
    Location
    Aliso Viejo, CA
    Posts
    1,625
    Post Thanks / Like
    Rear camera added! I'm hoping this works well for when have the top on and need to back up. Also, I'm hoping it will work well as a rear view mirror since I will have it on all the time. It's more of a fisheye but at least I can see in my blindspots on my 3/4. We'll see I guess. I haven't hooked it up yet.


    I also got my nose cone on and that was a challenge with the body being as tweaked as it is. It doesn't meet up perfectly so I'm hoping I'll find some adjustment there. I was tapping the bolt hole on the grill when the tap snapped off on one side! I managed to get it out without having to take the grill off (thank god)


    Here's the interior thus far. I mounted the seat belts and have been taking people for short trips up and down the block and this thing really hauls butt with just a stock 302! I don't know how you guys manage to keep traction with those strokers! But it must be insane.


Page 1 of 2 12 LastLast

Posting Permissions

  • You may not post new threads
  • You may not post replies
  • You may not post attachments
  • You may not edit your posts
  •  

FFMetal

Visit our community sponsor